

Page 1
LH280 Quick Start Guide
Installing without a headset icon on your phone
Flip to the other side if your phone has a headset icon
1
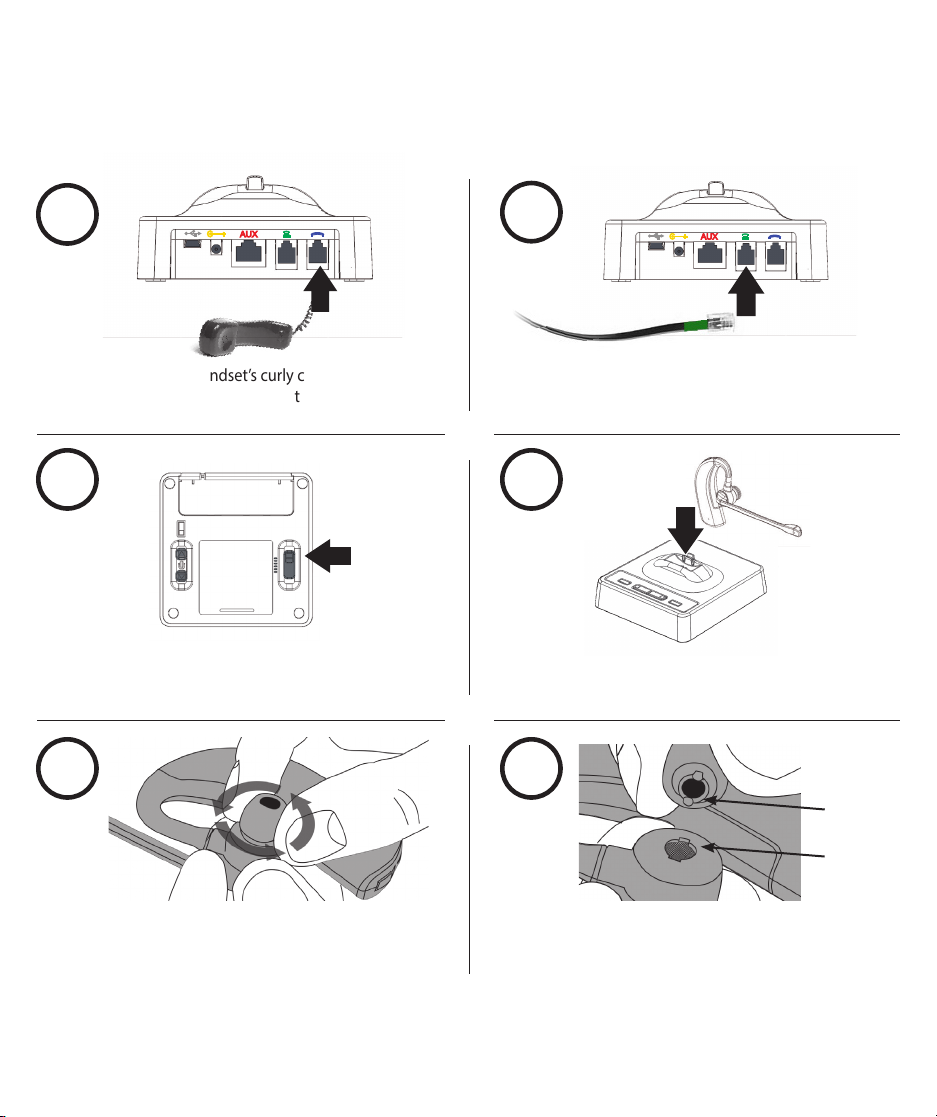
Unplug the telephone handset’s curly cord from the
phone base and plug into the Handset Port on the LH280
3
Make sure the Compatibility Switch is set correctly (most
phones use setting 1). You can always call us to get the
correct setting for your phone model
5
2
Plug one end of the telephone connector cord (green cord)
into the Handset Jack of your phone. Plug the other end into
the Telephone Connector Port (TEL Port) on the LH280 base
4
Plug in the base with the included AC adaptor. Install
the battery into the headset and place in the base. Let it
charge for 4 hours
6
To replace the eartip, rst grasp the existing eartip rmly and
rotate counterclockwise to remove
Questions? Just want to see if your speaking volume is loud and clear? We’re happy to help!
Call us at 1-800-432-3738, Monday through Friday 6am–4:30pm Pacic Time, for FREE lifetime support
To install the new eartip, insert it into the opening in the
headset, being sure to align the tabs on the eartip with
the notches in the opening. Rotate clockwise to tighten
tab
notch
Page 2
LH280 Quick Start Guide
Installing with a headset icon on your phone
Flip to the other side if your phone doesn’t have a headset icon
1
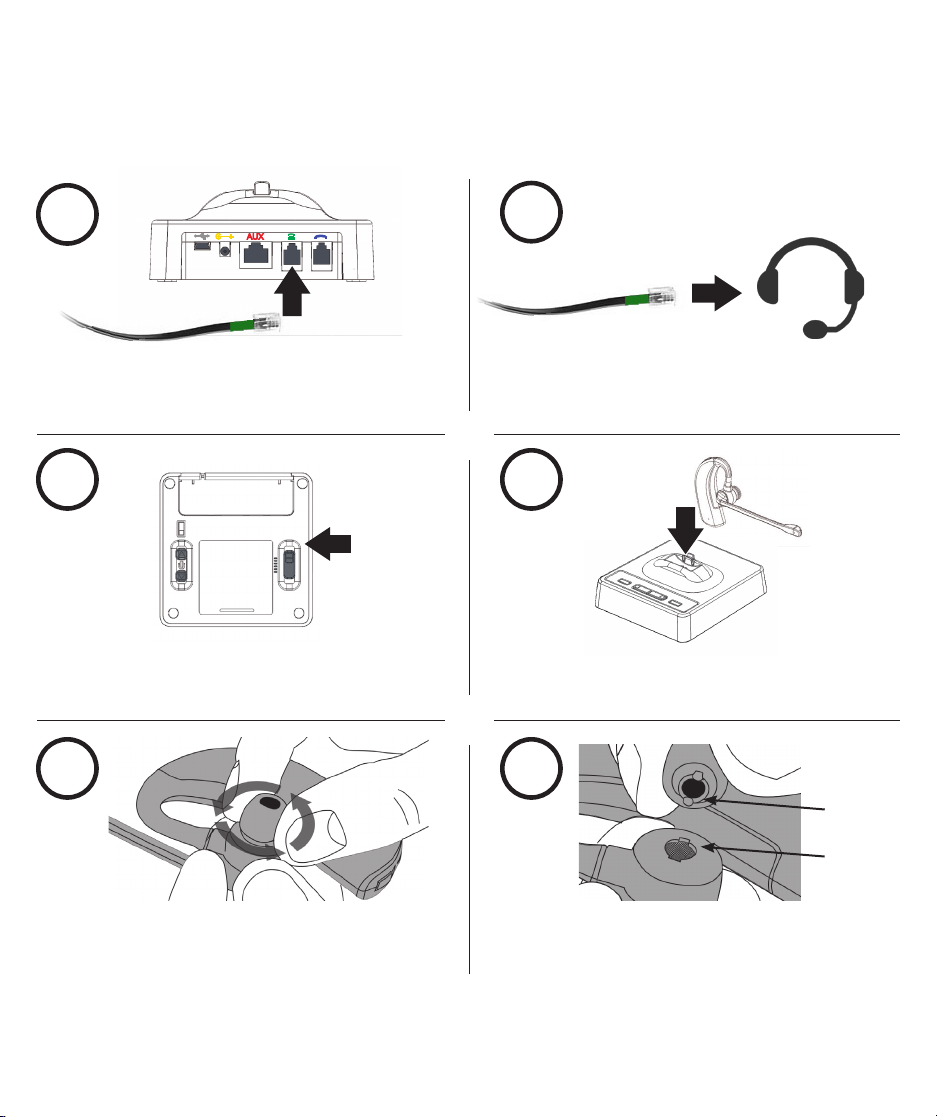
Plug one end of the telephone connector cord (green cord)
into the Handset Jack of your phone. Plug the other end into
the Telephone Connector Port (TEL Port) on the LH280 base
3
Make sure the Compatibility Switch is set correctly (most
phones use setting 1). You can always call us to get the
correct setting for your phone model
5
2
Plug the other end of the telephone cord into the
Headset Jack of your phone
4
Plug in the base with the included AC adaptor. Install
the battery into the headset and place in the base. Let it
charge for 4 hours
6
To replace the eartip, rst grasp the existing eartip rmly and
rotate counterclockwise to remove
Questions? Just want to see if your speaking volume is loud and clear? We’re happy to help!
Call us at 1-800-432-3738, Monday through Friday 6am–4:30pm Pacic Time, for FREE lifetime support
To install the new eartip, insert it into the opening in the
headset, being sure to align the tabs on the eartip with
the notches in the opening. Rotate clockwise to tighten
tab
notch
 Loading...