

Page 1
Leigh VRS Vacuum
& Router Support
Instructions for
Installation and Use
VRSD24
fits 24" D4R, D4, D3, D1258R,
and D1258 Jigs
VRS24
fits Super 24 Jig
VRS18
fits Super 18 Jig
VRS12
fits Super 12 Jig
VRS16
fits D1600 Jig
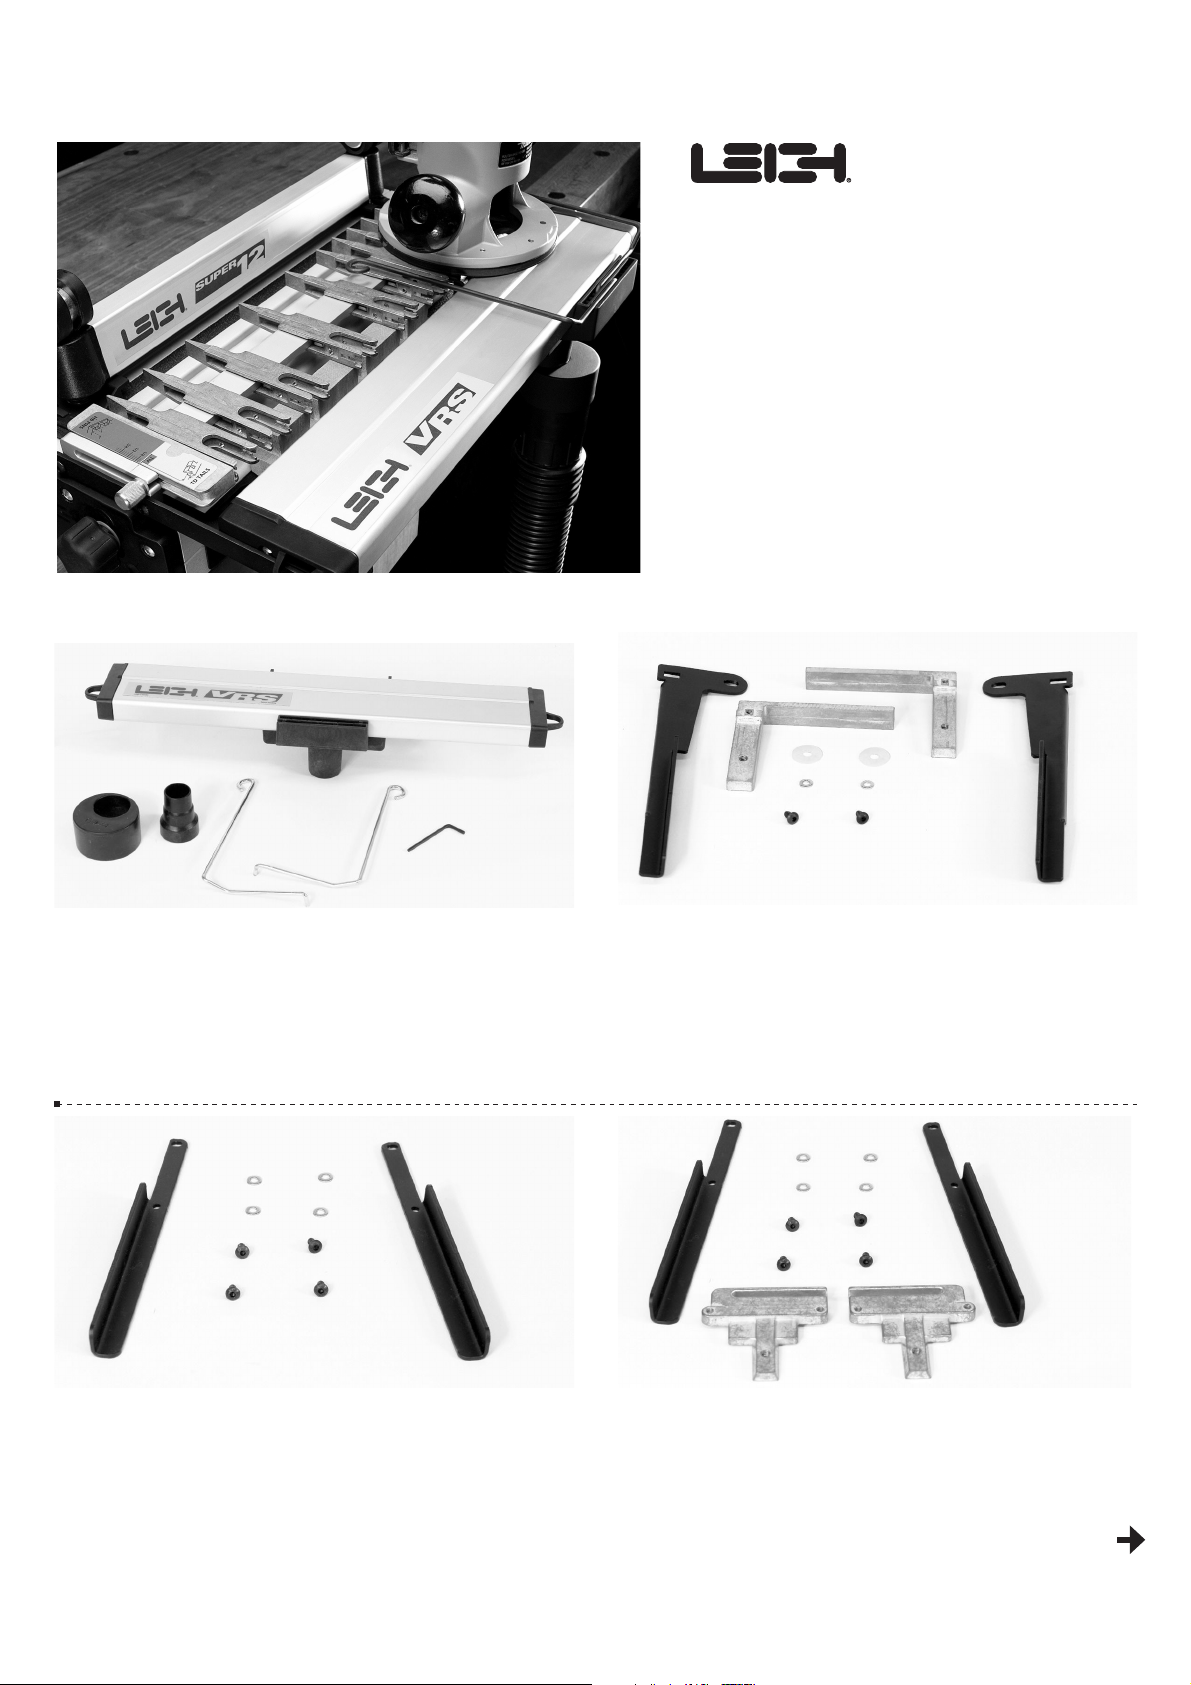
1. Every VRS includes:
1. One extruded aluminum body and ABS collector
2. One pair of router follower rails
3. One large hose adaptor
4. One small hose adaptor
5. One hex key
6. Plus parts in figures 2, 3, or 4 depending on your model.
3. Jig models Super12, Super18 and Super24:
1. One pair of steel VRS brackets
2. Four mounting screws and washers
4. Jig model D1600:
1. One pair of modified finger assy support brackets
2. One pair of steel VRS brackets
3. Four mounting screws and washers
2. Jig models D4R, D4, D3, D1258R and D1258:
1. One pair short finger assy support brackets
2. One pair of steel VRS brackets
3. Two mounting screws and washers
4. Two nylon washers
Note: The short support brackets can be used for all dovetailing, finger joint
and Isoloc joint template routing
continued
What comes out of the box:
Page 2
Instructions for In stallation an d UseLEI GH VR S VACU UM & RO UTER SU PP O RT
2
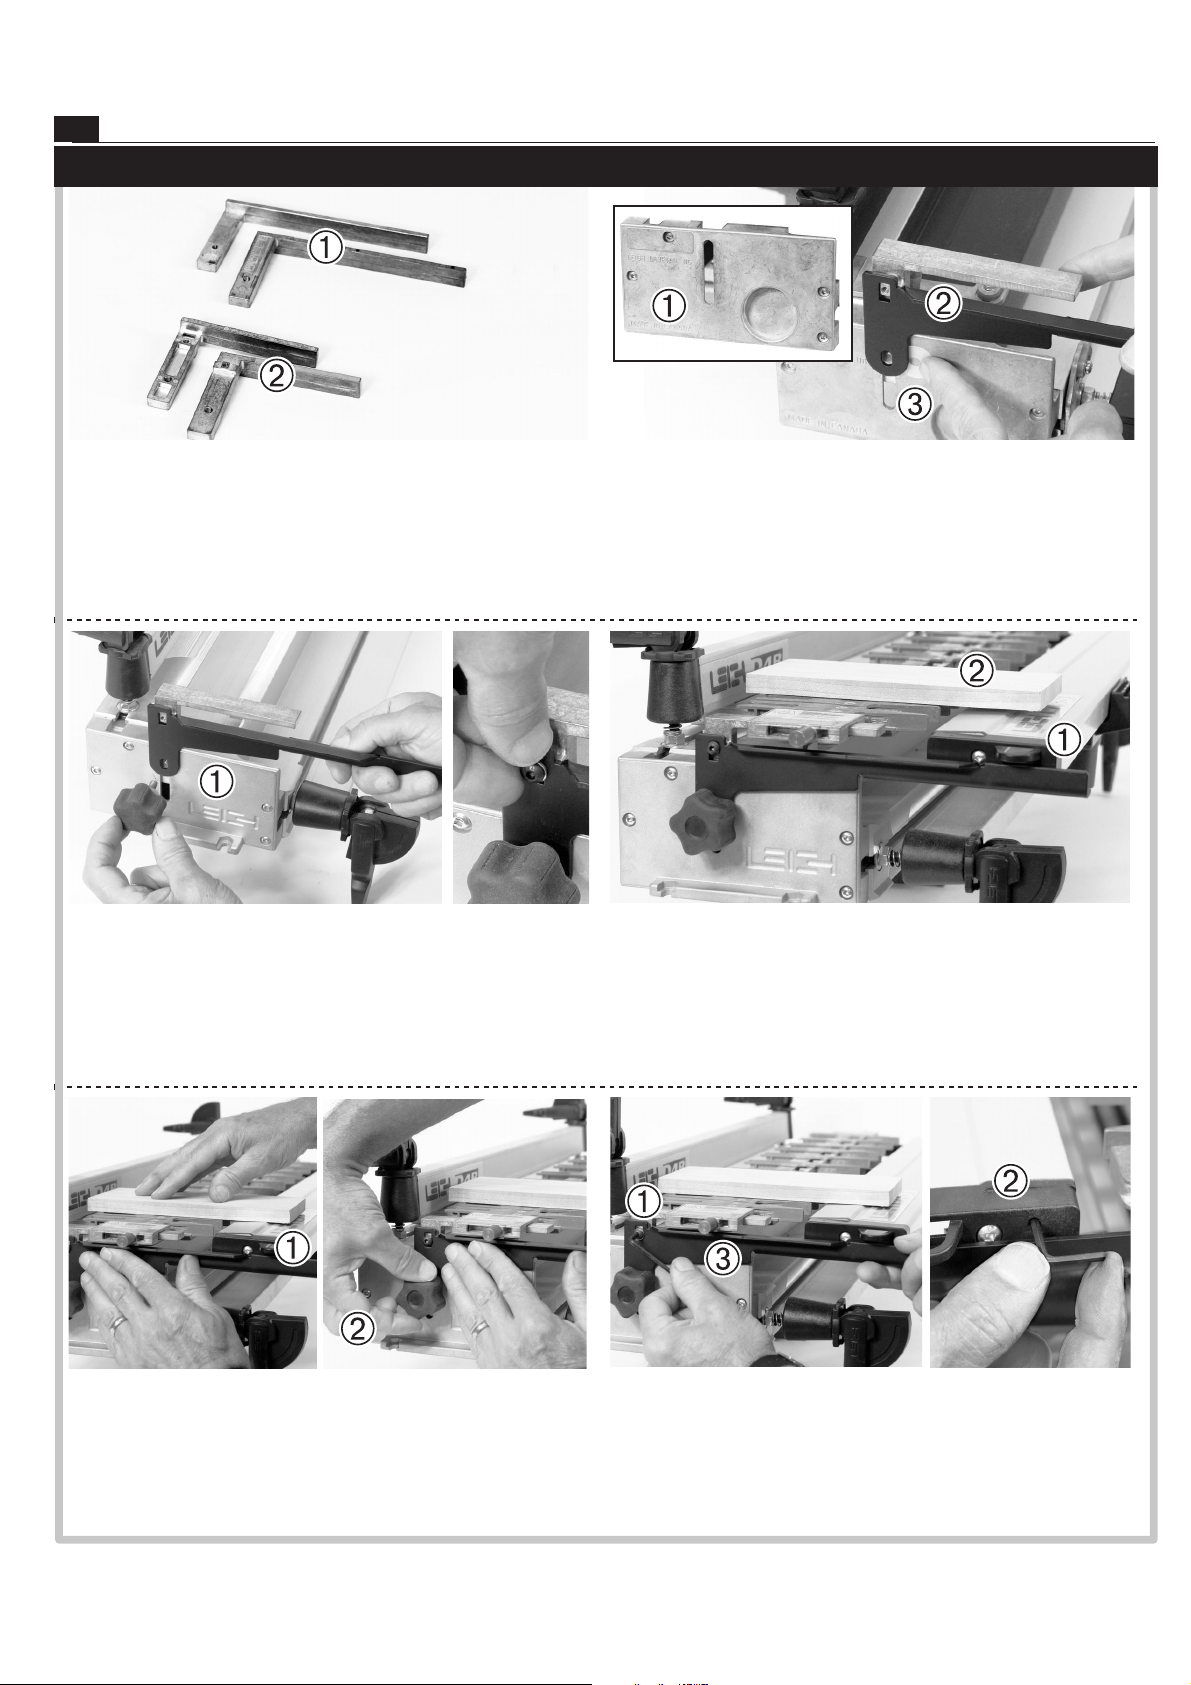
7. If the end housings look like this , it's a D4R or late model
D4 jig, and the nylon washers should not be used. Install the two
10-24 button head screws and washers finger tight only.
9. Loosen the support bracket knobs and while holding the board
down flush on the finger assembly, raise one steel bracket until the
top of the extrusion touches the underside of the board
.
Now tighten the knob at that end
.
Repeat at the other end. Double check and re-adjust both ends
as necessary until the two top surfaces are level.
8. With the jig finger assembly mounted and lowered onto its
support board; install the VRS onto the steel brackets
. Lay a
piece of flat board on the finger assembly and extending out over
the top of the VRS extrusion
.
5. Mounting to D4R, D4; 24"D3, D1258R, D1258
First, remove the existing support brackets
.
You will be installing the new short brackets
that came with
your VRSD24.
6. If the end housings of your jig look like this
, then before
attaching the steel brackets
, slide one of the new nylon washers
between the end housing and the steel bracket
as you thread
in the bracket knob.
INSTALLING D24" SERIES VRS
10. Now firmly tighten the two button head screws .
The hex key stows in the right hand end of the VRS
.
After installation, when raising and lowering the combined VRS
& finger assembly, always take the weight at the inner end of the
brackets
, not at the VRS ends. Note: The VRS height may need
to be reset when using Isoloc or Finger Joint Templates.
Page 3
3
Instructions for In stallation an d UseLEI GH VR S VACU UM & RO UTER SU PP O RT
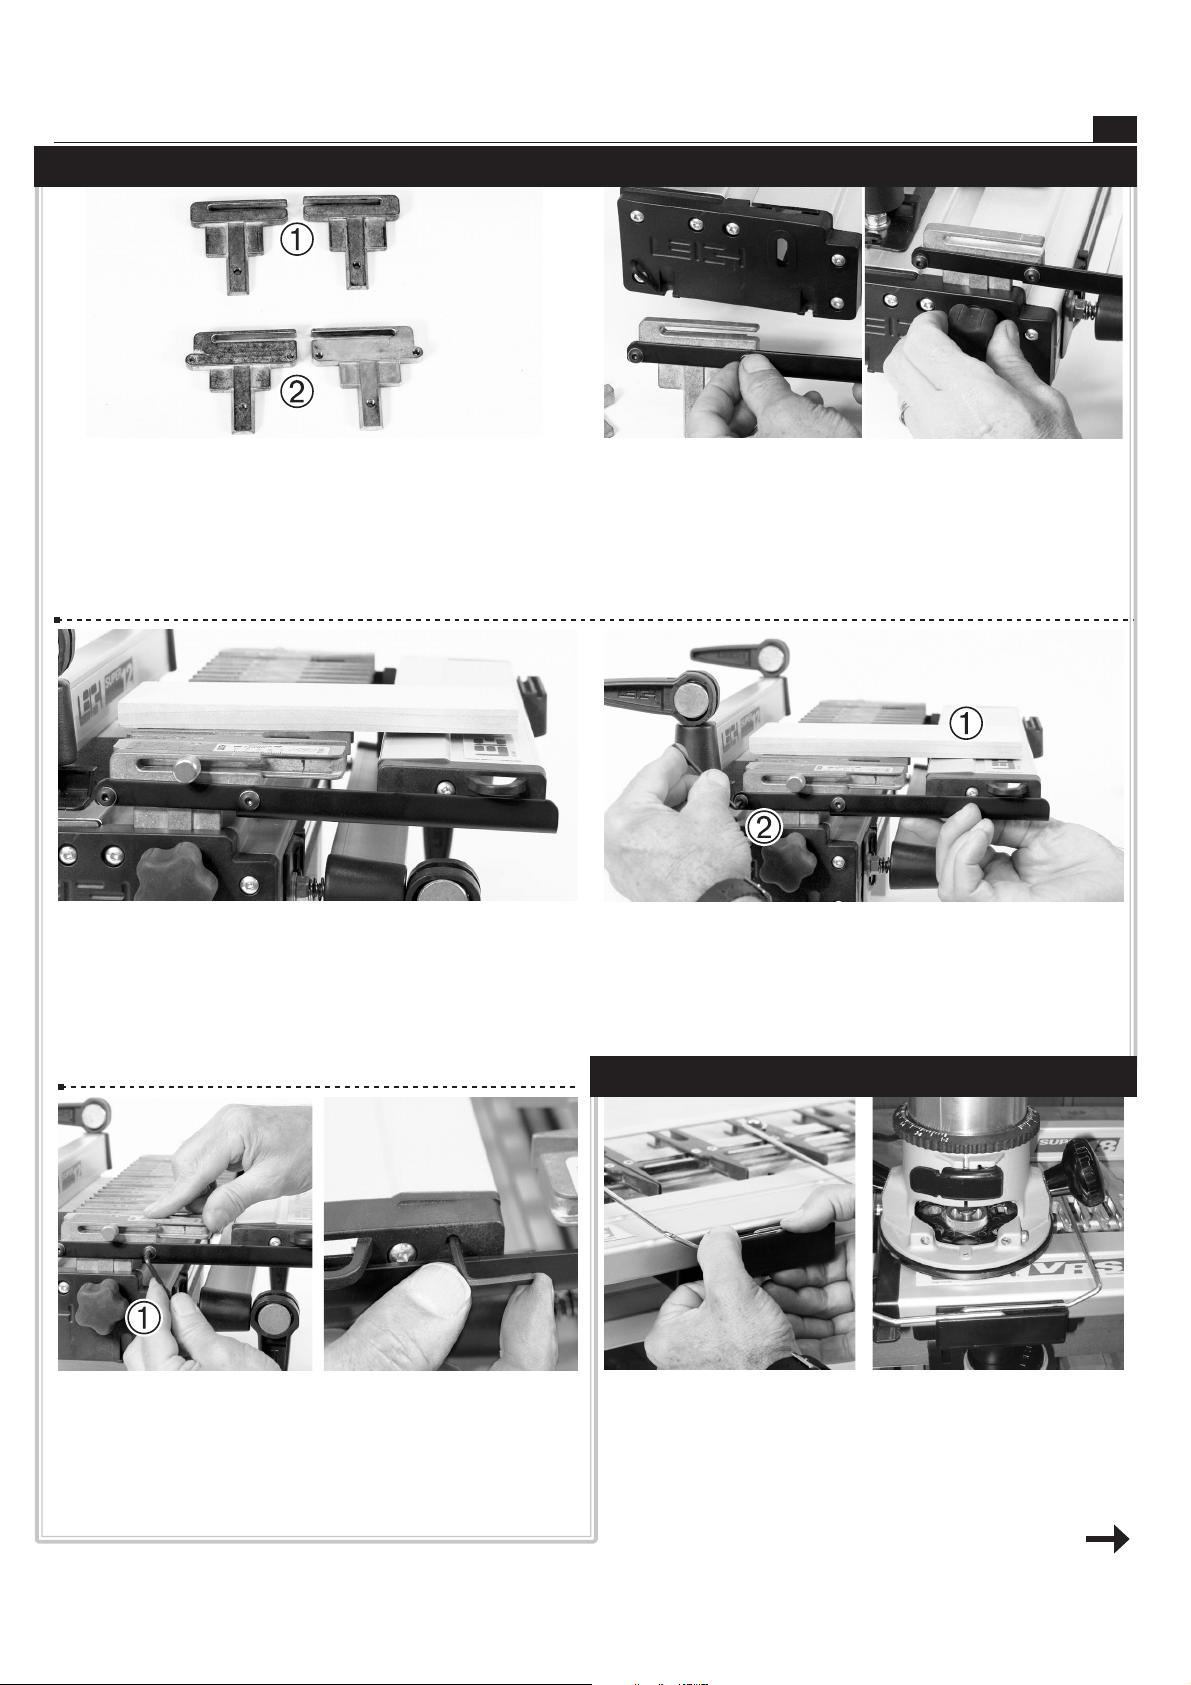
13. Mount the finger assembly and lower it onto its support
board. Install the VRS onto the steel brackets and lay a flat board
on the finger assembly, extending out over the top of the VRS
extrusion.
14. Raise one steel bracket until the top of the extrusion touches
the underside of the board
then tighten the rear screw at that
end with the provided hex key
.
Repeat at the other end. Double check and re-adjust both ends
as necessary until the two top surfaces are level.
11.
D1600 Owners: first remove the existing cast support
brackets
. You will be using the new type that came with
your VRS16.
Super Jigs already have this new type bracket
.
12. Attach the pair of steel VRS support brackets to the cast finger support brackets (with the horizontal surfaces inwards) using
the four 10-24 button head screws and washers, but just finger
tighten only.
Fit the assembled brackets to both ends of the jig.
16. Install the two router follower rails by placing the wire ends
into the selected holes as far as possible; then using thumb and
index finger, squeeze and “snap” the arm down into the end of the
slot. Position the wire brackets to allow routing of the work piece
outer edges. Efficient waste collection does not require centring
the router bit in the collector.
INSTALLING SUPERJIG & D1600 VRS
USING THE VRS
continued
15. Now firmly tighten the other two button head screws
.
The hex key stows in the right hand end of the VRS.
Page 4
Instructions for In stallation an d UseLEI GH VR S VACU UM & RO UTER SU PP O RT
4
6410
5330
5320
5360 5310 5345
5240
5230
Extrusion:
D24 5424
D1600 5216
S12 5212
S18 5218
S24 5224
7145
5040
371
5300
Magnets
5315
Magnet
Discs
6199
5270
5325
5260
5390
5380
5555
Instructions
6410
6199
8060
8050
5290
5280
555
Ins
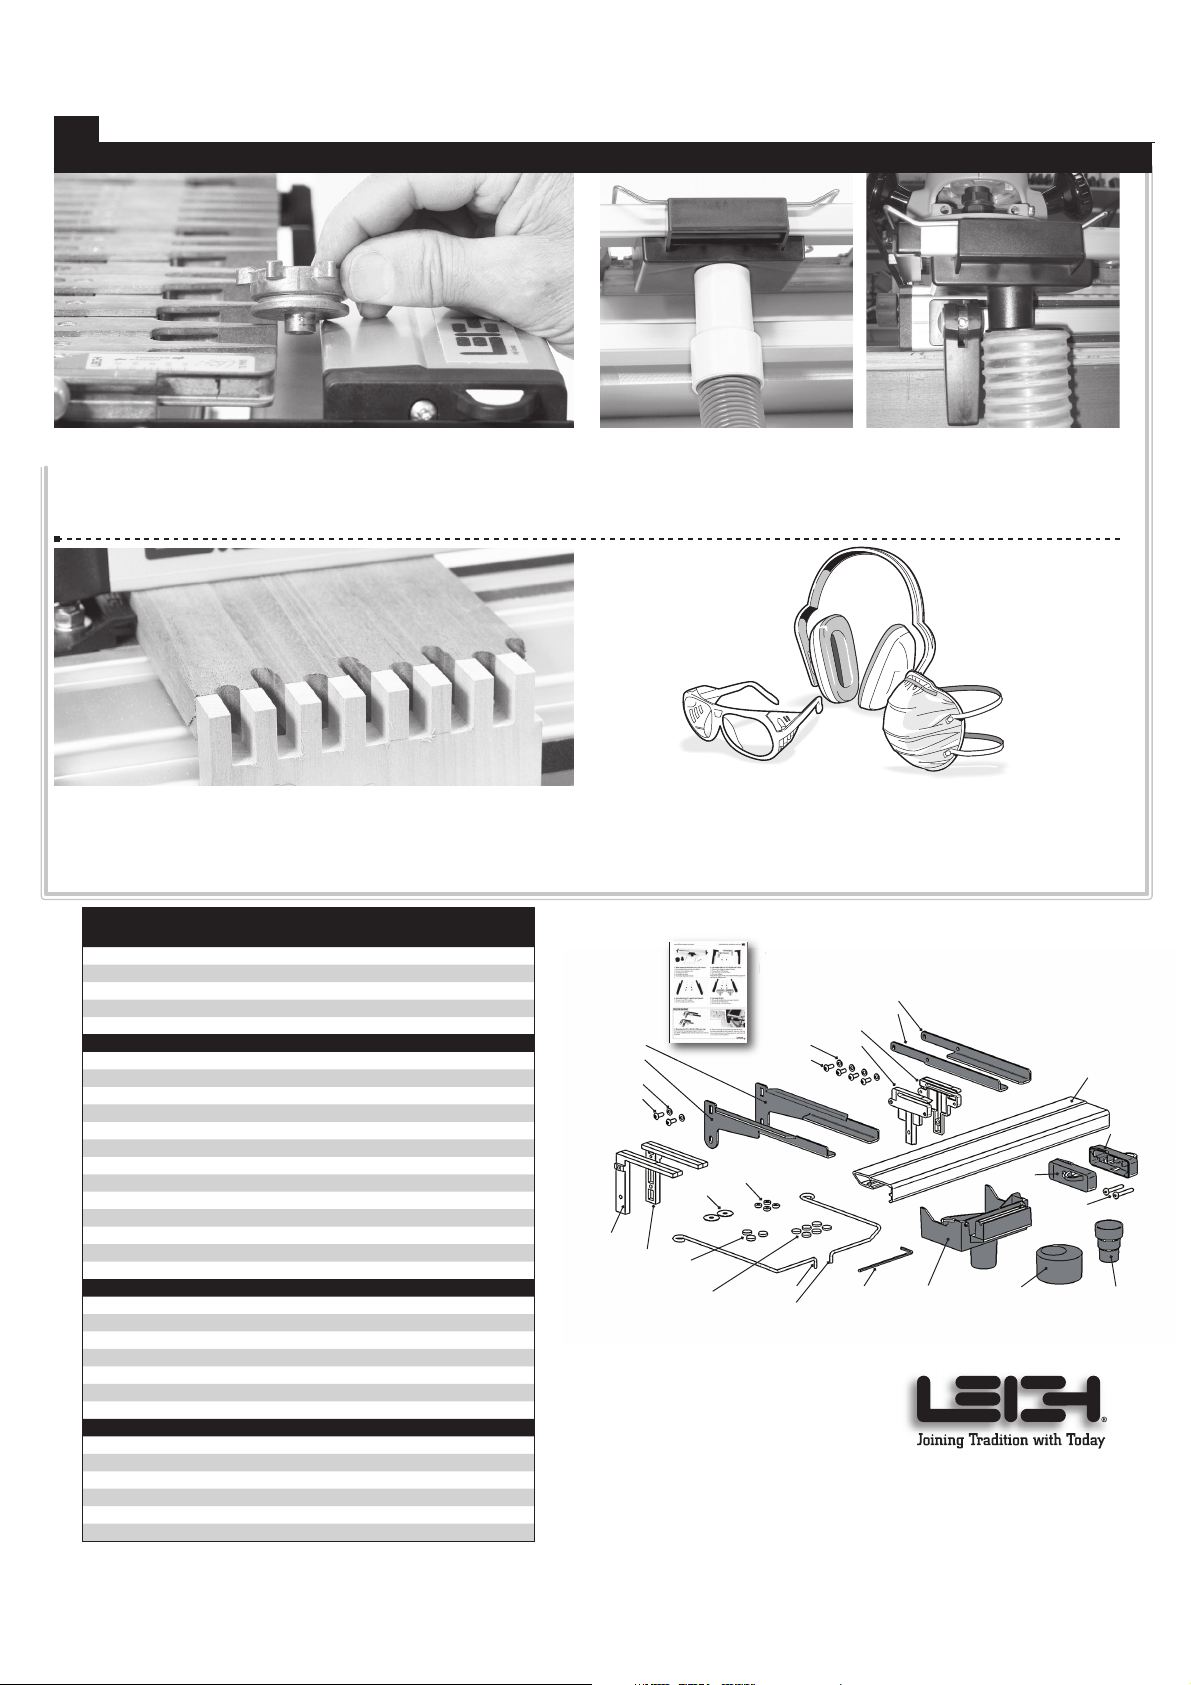
17. Adjust the VRS forward position to allow a gap between the
extrusion and tips of the jig guide fingers (or template) that is
greater than the guidebush diameter used.
20. Safety
The VRS provides highly efficient dust and chip
pick-up but like all shop dust collection systems, it cannot be
100% efficient. So to further protect your health, please use an
approved breathing mask. Remember eye and ear protection.
19. For maximum efficiency, always back-up vertically mounted
work pieces with a backer board. This not only prevents chips and
dust exiting the rear of the board, it also aids in preventing tear
out from the rear of the work piece.
18. Attach the shop vacuum hose direct to the collector nozzle
or use one of the two hose adaptors supplied. Keeping the front
clamps vertical and turning the large hose adaptor away from the
clamp allows full router travel.
USING THE VRS cont'd
© 2007 Leigh Industries Ltd. All rights reserved.
No part of this publication may be reproduced, stored
in a retrieval system, or transmitted in any form or
by any means, electronic, mechanical, recording, or
otherwise, without the prio r written permission of
Leigh Industries Ltd. 01/09
LEIG H IN DUST RI ES LTD.
Manufacturers of Precision
Woodworking Tools
V R S P A R T S L I S T Ordering: quote Jig-VRS model, part #, description, quantity
Part # Quant Part Description
5216 1 VRS Extrusion for the VRS16
5212 1 VRS Extrusion for the VRS12
5218 1 VRS Extrusion for the VRS18
5224 1 VRS Extrusion for the VRS24
5424 1 VRS Extrusion for the VRS D24.
ALL MODELS
5230 1 VRS RH End Cap c/w magnet, keeper discs & screw
5240 1 VRS LH End Cap c/w magnet, keeper discs & screw
7145 2 End Cap Screw - 10 x 1 1/4” (self tapping)
5300 3 Rare Earth Magnets
5310 1 Collector
5315 6 Magnet Keeper Discs
5325 4 Nylon Collector Rollers
5320 1 RH Router Follower Rail
5330 1 LH Router Follower Rail
5040 1 Small Hose Adaptor
5345 1 Large Hose Adaptor
5360 1 Hex Key 1/8”
5555 1 Instruction/parts sheet
D SERIES JIGS
371 2 Support Bracket Knob, Nylon Washer
5260 1 Jig Support Bracket RH
5270 1 Jig Support Bracket LH
5380 1 VRS Steel Bracket RH (Black)
5390 1 VRS Steel Bracket LH (Black)
6199 2 VRS Bracket Washers #10
6410 2 VRS Bracket Screws 10-24 x 3/8” Hex-Soc Button Hd
SUPERJIG and D1600
5280 1 VRS Steel Bracket RH (black)
5290 1 VRS Steel Bracket LH (black)
6199 4 VRS Bracket Washers #10
6410 4 VRS Bracket Screws 10-24 x 3/8” Hex-Soc Button Hd
8050 1 Jig Support Bracket RH
8060 1 Jig Support Bracket LH
 Loading...