

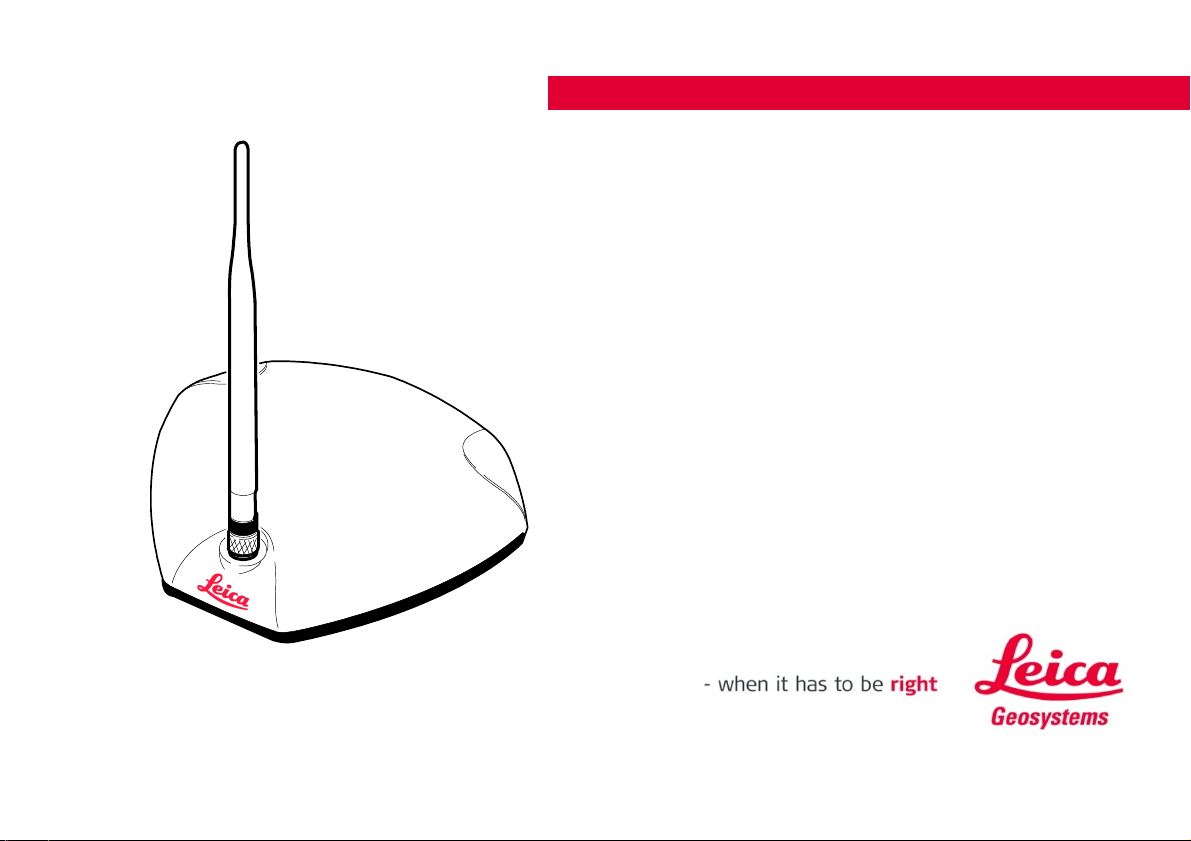
Leica GeoPRO antenna
Installation guide
Version 1.0
English

Leica GeoPRO antenna – Installation Guide 2
Table of contents
Leica GeoPRO Antenna Installation ................................................................................................. 3
1
2 Redeeming a System Option Voucher .............................................................................................. 7
3 Entering a Feature Unlock Code ...................................................................................................... 9
1 Leica GeoPRO Antenna Installation
This manual contains instructions for installing and setting up the product to operate with
a Leica mojo3D. Read carefully though this manual before starting the installation. As
this product is used solely with the Leica mojo3D it is mandatory to observe the safety
directions and instructions contained in the corresponding user manual.
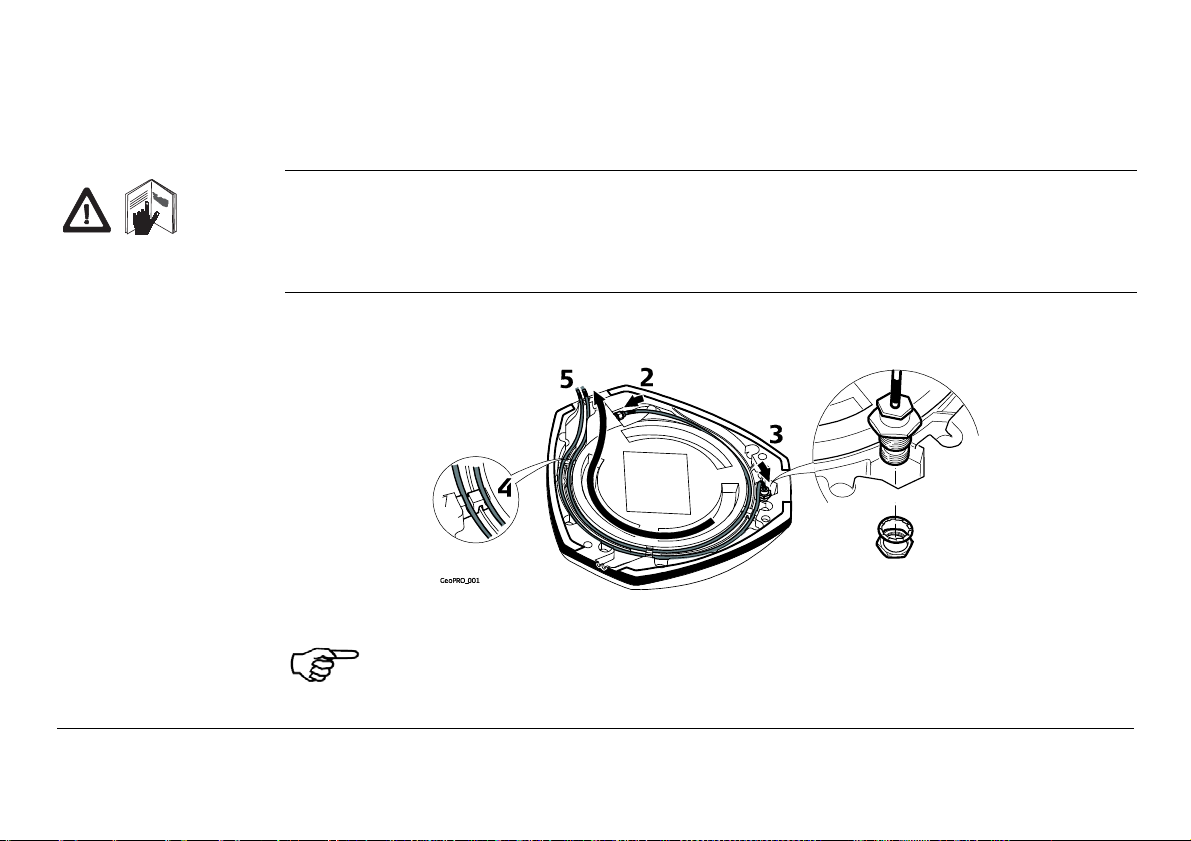
Prepare the GeoPRO
antenna
2. Connect the cable with the small connector to the GeoPRO antenna.
Leica GeoPRO antenna – Installation Guide
1. Clean the cab roof to prepare for the installation of the antenna. Approved cleaning
products are denatured alcohol and Windex® glass cleaner.
Start all antenna cable connections by hand before using the wrench to
tighten. Do not over tighten the cable connections. Run the threads to the
end and tighten only 1/8 turn more.
3

Leica GeoPRO antenna – Installation Guide 4
3. Insert the thread of the whip antenna cable as shown, bring on the washer and fix
with the nut.
4. Run the cables through the circular slot provided on the bottom side of the cover.
Align each cable with the slot and push it into the slot using the antenna cable
grommets and antenna cable supports provided.
5. You have several options for how you want the
cables to exit the antenna cover. Choose
whatever works best for your application.
6. Install the whip antenna on the GeoPRO antenna.
Keep in mind that the whip antenna should
be mounted on the GeoPRO antenna to
buckle backwards if needed.

GeoPRO antenna
position
Mount the GeoPRO
antenna
1. Use the supplied cleaning wipes to clean the installation area.
2. Remove the protective strip on the double-sided tape.
The GeoPRO antenna should be mounted on the vehicle roof:
• on the centre line of the implement, which may not necessarily be the centre of
the vehicles roof
• as far forward as possible on the flat level part of the roof
• not obstructed by exhausts, flashing lights or any other objects
Leica GeoPRO antenna – Installation Guide
5

Leica GeoPRO antenna – Installation Guide 6
Be careful removing the backing tape from the sticking blocks. Make sure that
you only peel off the tape and do not rip the adhesive from the backing tape.
3. Mount the GeoPRO antenna on the vehicle roof.
4. Connect the blue GPS antenna cable to the blue
Keep in mind that the GeoPRO antenna should mount with the whip antenna in
the forward position.
connector on the rear of the mojo3D display.
5. Connect the purple cell modem antenna cable to
the purple connector on the rear of the mojo3D
display.
• The cables must not be cut, kinked or bent tightly, as their performance will be
degraded and system failure may result.
• Cables should be routed neatly back to the mojo3D.
• The antenna must be mounted horizontally and not on an angle to ensure best signal
reception possible.

2 Redeeming a System Option Voucher
General information
Redeem voucher To redeem a system option voucher, carry out the following steps:
Leica GeoPRO antenna – Installation Guide
If the Leica GeoPRO antenna was purchased as a bundle with GLONASS the kit will include
a voucher. To enable the GLONASS option on the mojo3D, enter the voucher code on
http://www.virtualwrench.com/redeem along with the serial number of the mojo3D. A
device specific code will be generated which can be entered onto the mojo3D to unlock
the feature.
1. Record the device serial number which can be found
on the back on the mojo3D.
The serial number is the six digit article
number with a dot followed by the serial. E.g.
777533.000001
7

Leica GeoPRO antenna – Installation Guide 8
2. Visit http://www.virtualwrench.com/redeem and follow the instructions on screen.
3. On successful completion a feature unlock code will be provided. This unlock code is
unique to the device with the serial number entered.
• Connect the mojo3D to Virtual Wrench to automatically download the
unlock code and enable the feature.
OR
• Enter the unlock code directly onto the mojo3D to manually enable the
feature.

3
Entering a Feature Unlock Code
Feature unlock,
step-by-step
Leica GeoPRO antenna – Installation Guide
To unlock a feature, carry out the following steps:
1. On the main navigation screen, tap the settings button.
On the flyout menu, tap the feature settings button. The features
2.
status screen appears, with a list of features and their availabilitylocked or unlocked.
3.
To activate a new feature, tap the enter new code button. Use the
on-screen keyboard to enter the new code.
Tap to save the settings and return to the main navigation screen.
4.
9

Original text
Leica Geosystems AG
Heinrich-Wild-Strasse
CH-9435 Heerbrugg
Switzerland
Phone: +41 71 727 31 31
www.leica-geosystems.com
788998-1.0.0en
© 2011 Leica Geosystems AC, Heerbrugg, Switzerland
 Loading...