

LEI TX6969 User Manual

261-9696.fm Page 1 Friday, May 7, 2004 6:40 PM
MODEL # TX6969
Desktop Solutions
with Game Pad
5 LED Mode Indicators on Receiver —
in
dicates data transmit, ID number Reset,
Number Lock, Caps Lock, and Scroll Lock
fu
nctions status.
INTRODUCTION
Thank you for buying the Telemax
Desktop Solutions with Game Pad.
This wireless mouse, keyboard and game
pad system is fully compatible with
Windows 98SE, 2000, ME, XP.
Your Desktop Solutions with Game Pad
systemʼs features include:
RF Receiver — handles three RF wireless
input devices — wireless keyboard,
mouse, and game pad.
4096 Channel ID Number Selections —
lets you select different channel ID numbers
to prevent any possible Radio Frequency
interruption and allow more users at the
same time in a limited space.
One-Touch Popular Multimedia
Function Keys — allows one touch
operation for Mute, Volume up, Volume
do
wn, Previous-track, Next-track, Stop,
Play and Pause functions.
One-Touch Windows Office Applications Keys — allows one touch access
to Office programs such as Excel, Word,
Power Point and Outlook.
Optical Mouse Sensing Technology —
senses mouse movement precisely and
smoothly, with no moving parts to clean or
rep
lace.
Mouse Scroll Wheel — lets you scroll and
select quickly and easily, helping you work
wit
h long documents.
80
0 CPI (Counts per Inch) Resolution —
you can easily use the mouse with a
monitor that supports 1024 x 768
re
solution and up, letting you move your
mouse fluidly across higher resolution
monitors.
Supp
lied Driver CD — provides various
customized functions for operation with
Internet and Windows.
PC Game Pad — provides 10 function
buttons and 2 action-triggers.
Advanced Power Saving Mouse —
op
tical mouse LED lamp goes out
tomatically to save battery life if the
au
mouse is not used for a certain period.
One-Touch Internet Keys — allows one
touch access to Internet functions such as
My Favorite, Search, E-mail and Refresh.
261-9696.fm Page 2 Friday, May 7, 2004 6:40 PM
PACKAGE CONTENTS
• Wireless Office Keyboard
• Wireless Optical Mouse
•Wireless PC Game Pad
•USB Receiver
•Driver CD
• This User’s Manual
SYSTEM REQUIREMENT
• Windows 98SE/ME/2000/XP
• IBM compatible computer with one
available USB port
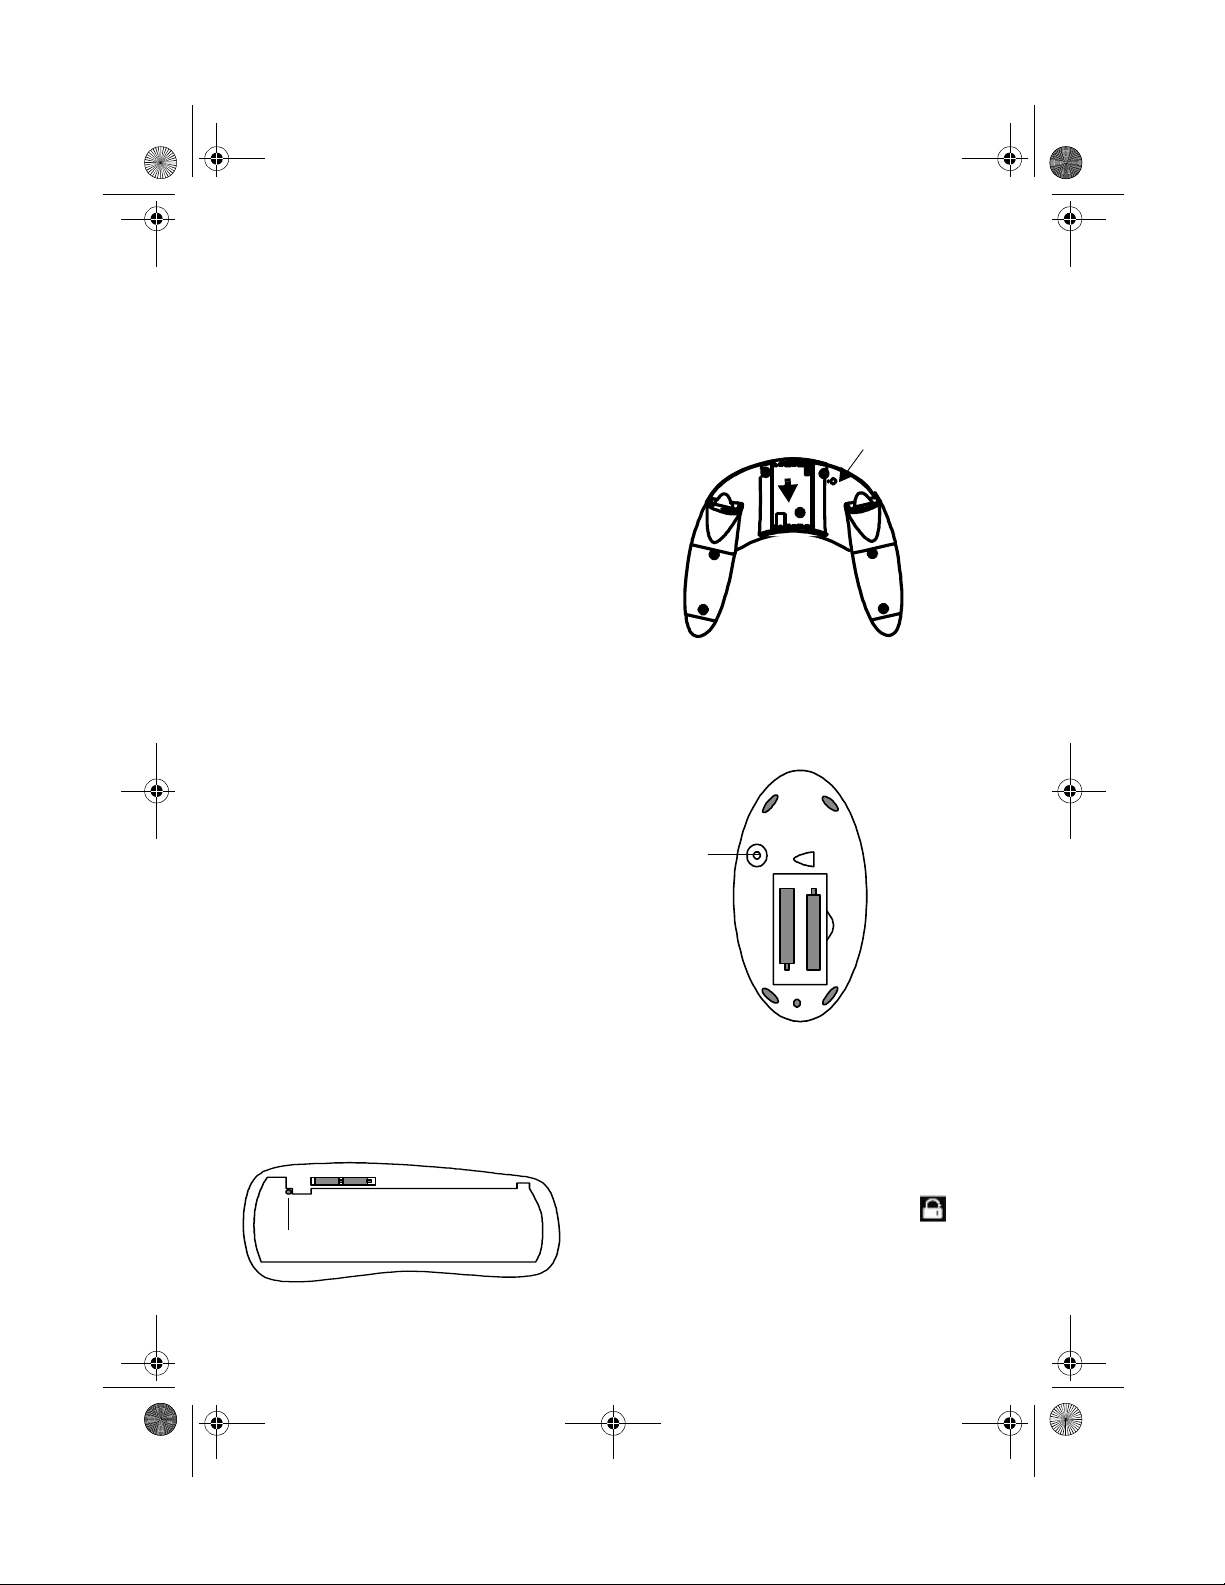
INSTALLING BATTERIES
Install the batteries — two AA for
mouse, two AAA f o r keyboard and three AAA
for game pad. Make sure that the positive (+)
and negative (–) ends of each battery match
the polarity indicators inside the battery
housing.
Note: Please set up ID code each time you
reinstall the batteries. Please refer to
“Setting Identification Code” on page 3.
Game Pad
Push the battery compartment cover down in
arrow direction.
Setup Button
RF Optical Mouse
Setup
Button
+
+
Connecting the Receiver
Office XP Keyboard
-
Setup Button
2
1. Plug the RF receiver’s USB plug into an
available USB port on your computer.
+
2. Follow the on-screen instructions to
complete installing receiver. The
LED lights.

261-9696.fm Page 3 Friday, May 7, 2004 6:40 PM
Setup
Button
USB Plug
You are now ready to set the identification
code for the Wireless Desktop system to
establish a communication link with the
receiver.
DRIVER INSTALLATION
Windows 2000
1. Load the supplied driver CD. Driver
installation menu displays.
2. Click Windows 2000, then follow the onscreen instructions to complete
installing the driver.
3. After installing the driver, restart your
computer and an icon displays
on the Windows task bar.
Windows XP
1. Load the supplied driver CD. Driver
installation menu displays.
2. Click Windows XP, then follow the onscreen instructions to complete
installing the driver.
3. After installing the driver, restart your
computer and a mouse icon
displays on the Windows task bar.
Windows 98SE/ME
1.
Load the supplied driver CD. Driver
installation menu displays.
2.
Click Windows 98SE/ME, then follow the onscreen instructions to complete installing
driver.
After installing driver, restart your computer
3.
and an icon displays on the
Windows task bar.
Setting Identification Code
After your computer detects the USB
receiver and the driver software is installed,
you must set the ID code between the
receiver and Keyboard as well as between
the receiver and the mouse/game pad as
follows before you can use them.
Setting ID between Wireless
Keyboard and Receiver
1. Press the setup button on the
receiver again. The ID LED
turns off.
2. Place the keyboard facing the receiver
then press the SETUP key on the
bottom of the keyboard.
3
 Loading...