

Page 1

LEHNER
SuperVario
®
Operating instructions with
replacement parts list
Control unit LAS 3
Software from version 2.5 onwards
Status: April 2012
Serial number: .................................................................
Software version: ...............................................................
Translation of the original operating manual
Page 2

Operating manual
LEHNER Agrar GmbH
Häuslesäcker 5-9
D-89198 Westerstetten
Tel.: +49 7348 959 622
Fax: +49 7348 959 640
www.lehner.eu
info@lehner.eu
It is not permitted for this document to be distributed or reproduced, or for
its content to be utilised and disseminated unless these activities have been
expressly allowed.
Contraventions shall result in an obligation to provide compensation for
damages. All rights reserved with regard to patent claims or submission of
design or utility patents.
2
Page 3

Operating manualTable of contents
Table of contents
1. What you should know .......................................................5
1.1 Foreword .................................................................................... 5
1.2 About this operating manual ....................................................... 5
1.3 Intended use ............................................................................... 6
1.4 Warranty ..................................................................................... 6
1.5 About your safety ....................................................................... 7
2. Commissioning the SuperVario® .......................................8
2.1 Mounting the frame .................................................................... 8
2.2 Electrical connection .................................................................. 8
2.3 Mounting the SuperVario
2.4 Mounting the control panel ....................................................... 10
®....................................................................................................... 9
3. Operating the SuperVario® ...............................................12
3.1 Controls on the control panel ................................................... 12
3.2 The display ...............................................................................13
3.3 Switching on / off ...................................................................... 14
3.4 Setting the speed ..................................................................... 15
3.5 Setting the slide opening .......................................................... 16
3.6 Opening/closing the slide .........................................................16
3.7 Performing the slide reference run ........................................... 16
3.8 Setting the spreading width ...................................................... 17
3.9 Setting the agitator ...................................................................18
3.10 Empty indicator .........................................................................18
3.11 Adapting the empty indicator to the motor output ..................... 19
3
Page 4

Operating manual Table of contents
4. Settings and displays .......................................................21
4.1 Making settings ........................................................................ 21
4.2 Language ................................................................................. 21
4.3 Selecting the empty indicator ...................................................22
4.4 Setting the EHR signal .............................................................22
4.5 Setting the EHR cycle .............................................................. 23
4.6 Setting the empty indicator ....................................................... 23
4.7 Displaying the spreader type .................................................... 24
4.8 Spreader number ..................................................................... 24
4.9 Displaying the motor ................................................................. 24
4.10 Headland manager (optional accessory) .................................. 24
4.11 Checks ..................................................................................... 26
4.12 Spreading width and turning procedure ................................... 26
4.13 Setting the auto-dose (optional accessory) .............................. 28
®
4.14 Operating SuperVario
in automatic mode ...............................30
5. Maintenance and cleaning ...............................................33
5.1 Service ..................................................................................... 33
5.2 Cleaning ................................................................................... 34
6. Appendix ...........................................................................35
6.1 EC Declaration of conformity .................................................... 35
6.2 Identifi cation ............................................................................. 37
6.3 Distribution box reference list ................................................... 38
6.4 Troubleshooting ........................................................................ 39
6.5 Replacement parts ................................................................... 40
6.6 Spreading charts ...................................................................... 42
4
Page 5
Operating manual What you should know
1. What you should know
1.1 Foreword
Congratulations on your decision to purchase this product. We are grateful
that you have placed your trust in us. With the SuperVario®, you have acquired
a high-quality and innovative product.
Thanks to its advanced design, meticulous material selection, state-of-the art
manufacturing techniques and the conscientious work of our employees, this
equipment meets all effi ciency, quality, reliability and value requirements.
Maintaining and servicing in accordance with the operating manual ensures
the safety of the device and maintains the value of your SuperVario
®
.
1.2 About this operating manual
This operating manual forms part of the SuperVario® and must always be
readily available. All persons who work with the SuperVario® must read and
follow the operating manual.
They will learn about the technical details and how to control the machine and
optimise its performance.
Warning notices
Warning notices in this operating manual are identifi ed as follows:
Danger!
Warning of immediate danger. Non-observance of
appropriate measures may result in death and severe
personal injury or serious damage to property.
Warning!
Warning of possible danger. Death, severe personal
injury or serious damage to property are possible.
Caution!
Warning of possible dangerous situations. Slight
personal injury or damage to property are possible.
5
Page 6
Operating manual What you should know
1.3 Intended use
The SuperVario
®
is used exclusively for spreading granules and seeds.
1.4 Warranty
We offer a 24 month warranty on the SuperVario
Caution!
Faulty or incorrectly sized plugs and cables can lead
to malfunctions. Only use original plugs and cables, or
ones approved by the manufacturer.
Any changes to cable or plug connections without factory approval automatically will automatically invalidate the warranty. Motors may not be opened or
dismantled.
Warranty repairs must be coordinated with the manufacturer before any work
is started.
For replacement parts, additional expenses are automatically charged for any
changes made to cables and plugs by the customer. Replacement parts are to
be returned carriage paid.
Rusted bearings are not subject to the manufacturer's warranty.
Prior to assembly:
Check your SuperVario
®
upon receipt for any damage caused in transit. Such
damage must be reported to the manufacturer within 24 hours of receipt.
®
.
6
Page 7

Operating manual What you should know
1.5 About your safety
• Read this operating manual through carefully before use and follow the
instructions. Always keep these instructions at the point of use.
• Observe the accident prevention regulations, safety and operating
regulations and the regulations for environmental protection.
• Observe all applicable standards and guidelines.
• When travelling on public roads and streets, follow the legal rules of the
road.
• Observe the safety instructions.
• Immediately resolve any safety-related defi ciencies.
• Keep out of the spreading zone. Make sure that no other persons enter
in the spreading zone.
• Do not reach into the hopper during operation.
• Follow the safety guidelines on the package insert when spreading
granules.
• Wear protective closing, in particular universal protective gloves, fi lling
with slug pellets or baits. Only fi ll as many pellets or baits as needed in
the short term. Return any remaining product to the original packaging.
Ensure that the product does not enter the environment in an
uncontrolled manner.
• Observe the following points when spreading slug pellets:
The device should only be mounted on the front of carrier vehicles with
a closed cabin.
Windows should remain closed.
Care should be taken that air intake into the cabin is always fi ltered. The
operator must check that the fi lter is working.
• Do not undertake any repairs, maintenance or cleaning procedures on
the SuperVario
• Comply with the regulations of the spreading material manufacturer.
• It is essential to comply with the instructions of the spreading material
manufacturer in question.
• LEHNER Agrar GmbH does not accept any liability for storage and use
of the spreading material.
®
when the mains plug is connected.
7
Page 8

Operating manual Commissioning the SuperVario®
2. Commissioning the SuperVario
®
2.1 Mounting the frame
The SuperVario
used.
Mounting holes have been provided on the back of the frame.
Please refer to the spreading charts for the delivery height (1.00 - 1.30 m).
The SuperVario
vehicle, ATV or soil cultivation implement. Because a full hopper makes the
SuperVario
brackets is to be checked.
®
can be screwed on directly or an auxiliary bracket can be
®
can be attached on the front or rear of a tractor, off-road
®
considerably heavier, the load capacity of side walls and other
2.2 Electrical connection
Technical data
Operating voltage 12 to 15 V
Fuse 25 A
Motor output 180 W
Speed range 200 to 3000 rpm
Current draw
Bosch motor
Operating temperature -10 to +70 °C
Storage temperature -30 to +70 °C
Weight of SuperVario
®
70/110/170 31.5/33/35 kg
Start up to 25 A, normal operation
up to 18 A
Any changes to cable or plug connections without factory approval will
automatically invalidate the entire warranty. Changes to cables are are
automatically charged in the event of repair.
You must consult with the manufacturer before carrying out any cable
extensions.
Power loss must be taken into account when extending cables. A poor power
supply may prevent you from achieving the desired speed. This could also
lead to intermittent complete failure.
8
Page 9
Operating manual Commissioning the SuperVario®
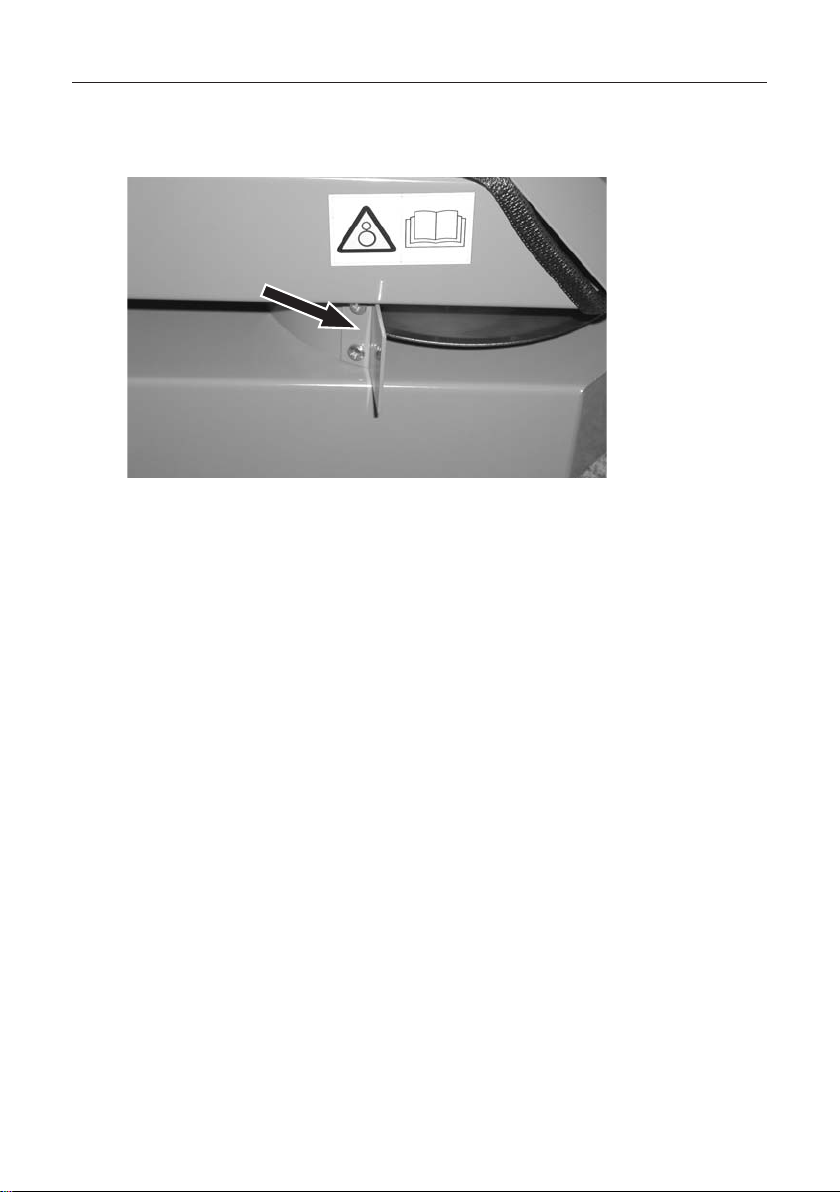
2.3 Mounting the SuperVario
®
1. Check whether the hopper fi ts well in the hopper platform.
2. Using screws, attach the included baffl e plate (arrow) perpendicular to
the spreader.
3. Check that the SuperVario
®
is securely attached.
9
Page 10
Operating manual Commissioning the SuperVario®
2.4 Mounting the control panel
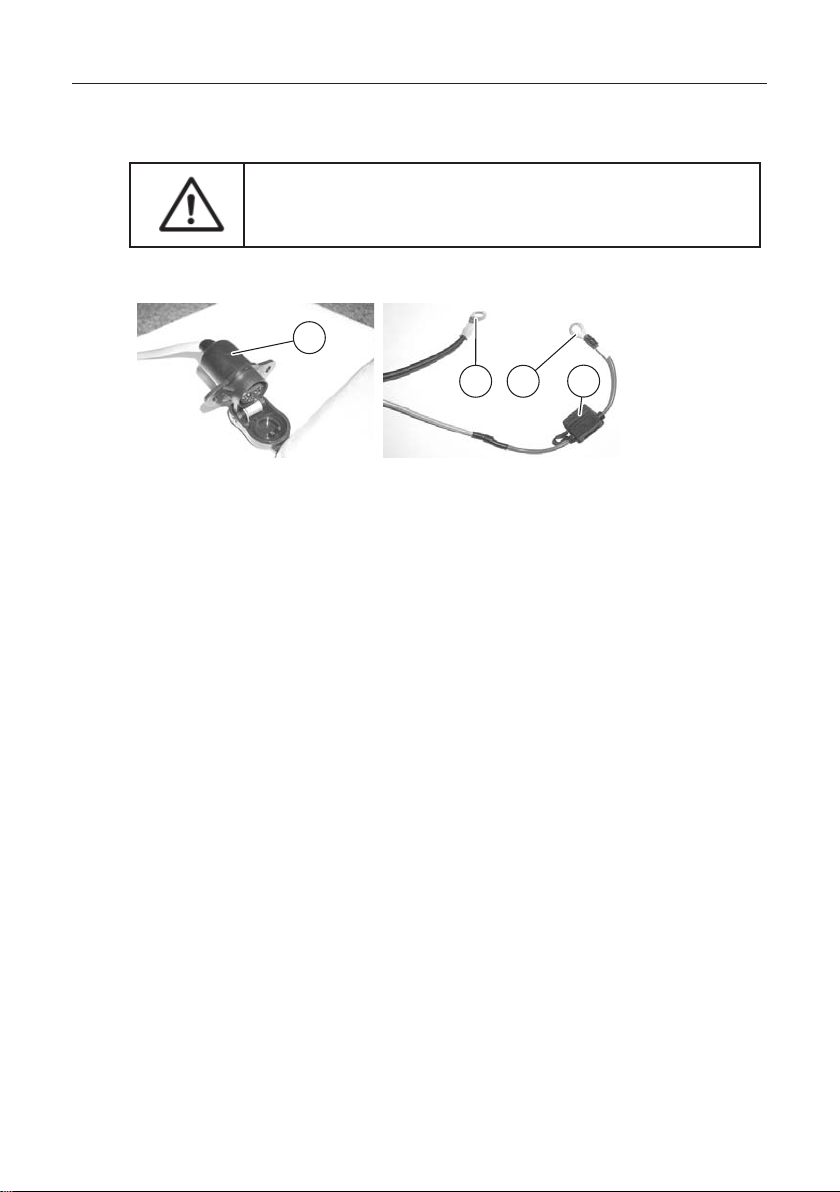
Caution!
Ensure that the cable is not routed over any sharp
edges.
1
2 3
1. Mount the support for the control panel in the vehicle cabin.
2. Always use the supplied battery cable even if there is a socket, because
our battery cable is 4 mm².
Connect connection 2 to the negative terminal of the battery (not to
the bodywork).
Connect connection 3 (with fuse 4) to the positive terminal of the
battery. Place the cable end with socket into the carrier vehicle.
3. Plug the spreader cable into the 16-pin socket of the control panel.
Your device is now ready to operate.
4
10
Page 11

Operating manual Operating the SuperVario®
3. Operating the SuperVario
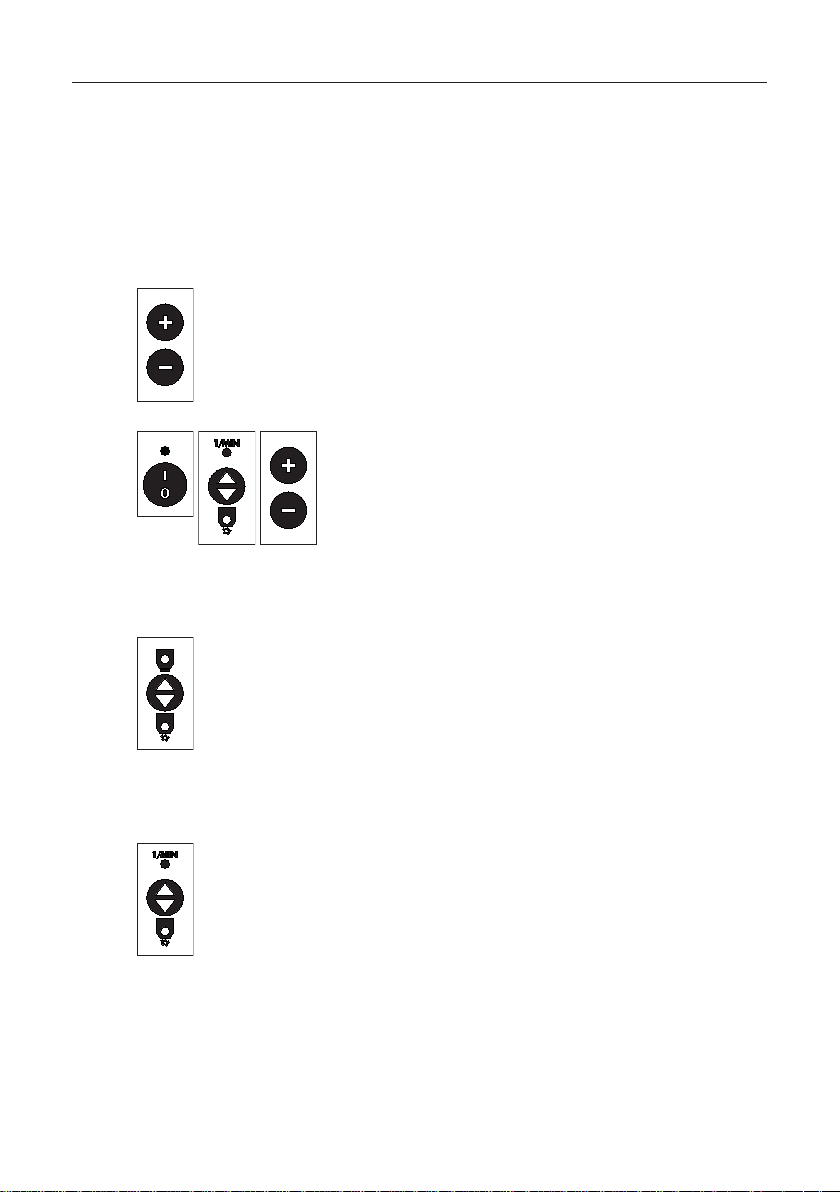
3.1 Controls on the control panel
®
1. On/off switch
2. Display
3. Open and close slide
Slide open: green LED lights up
Slide closed: yellow LED lights up
4. Empty indicator
5. Switch to change between speed and slide
6. Adjusting the speed or slide
7. Preparation of headland manager (VGM)
12
Page 12

3.2 The display
1 2
1. Arrow denotes the active line
2. Spreading disc speed
3. OK symbol for open slide
4. Slide opening
Disc blockage
Slide not open
Operating manual Operating the SuperVario®
34
Error messages, see also chapter "6.4 Troubleshooting" on page 39.
13
Page 13
Operating manual Operating the SuperVario®
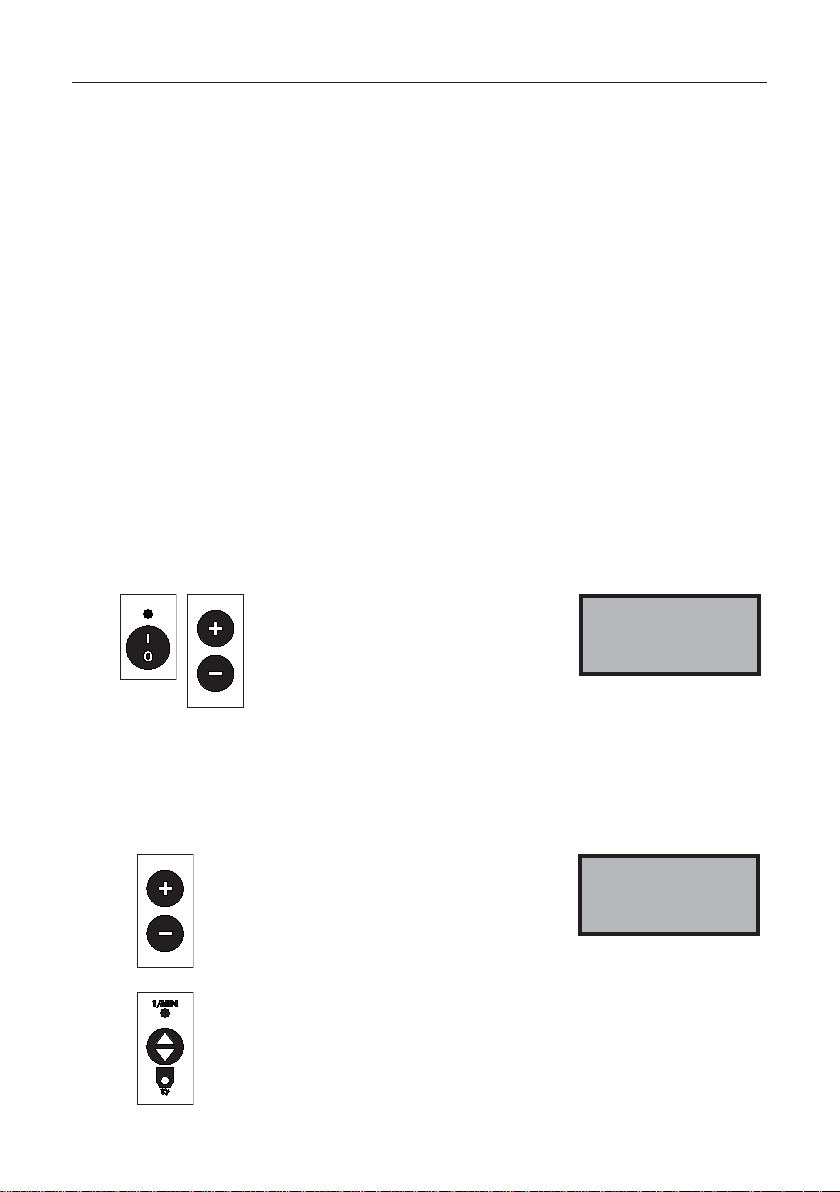
3.3 Switching on / off
Danger!
The drive motor starts immediately when switching
on. Make sure that no-one is in the danger area when
switching on.
Press the button.
The spreading disc speed and slide
opening are displayed. The slide is
> RPM 200
Slide 29
always closed when switching on the
drive motor.
If this message is displayed, a cable is damaged
or a plug disconnected.
> RPM 200
Spr. connection
Low temperatures can cause the empty indicator to respond slowly.
Checking the setting:
1. Allow the spreader to run for about 1 minute with the slide closed.
2. If the slide is now opened, the empty indicator must respond after about
5 seconds.
3. If this is not the case, adjust the empty indicator by 5% in the negative
range, see chapter "4.6 Setting the empty indicator" on page 23.
Autostart
If the motor is diffi cult to start due to heavy loads, start the motor up to
10 times in alternating motor directions. If the agitator does not break free
as a result, the motor is automatically switched off. The following message
is shown in the display: Disc blockage.
14
Danger!
Never open the hopper and never touch the spreading
disc when the drive motor is running.
Switch off the drive motor and make sure that the motor
has stopped before you open the hopper or touch the
spreading disc.
Page 14
Clearing the blockage:
1. Switch off the motor.
2. Manually turn the spreading disc or empty the hopper.
3.4 Setting the speed
Operating manual Operating the SuperVario®
Press the button if necessary to select
the speed,
the arrow points to the fi rst line in the
> RPM 200
Slide 29
display.
Press the + or - button to set the speed.
The speed can be infi nitely varied from 200 - 3000 rpm.
Refer to the spreading charts for the required speed.
The display shows the set speed for 10 seconds; only then
is the actual speed displayed.
15
Page 15
Operating manual Operating the SuperVario®
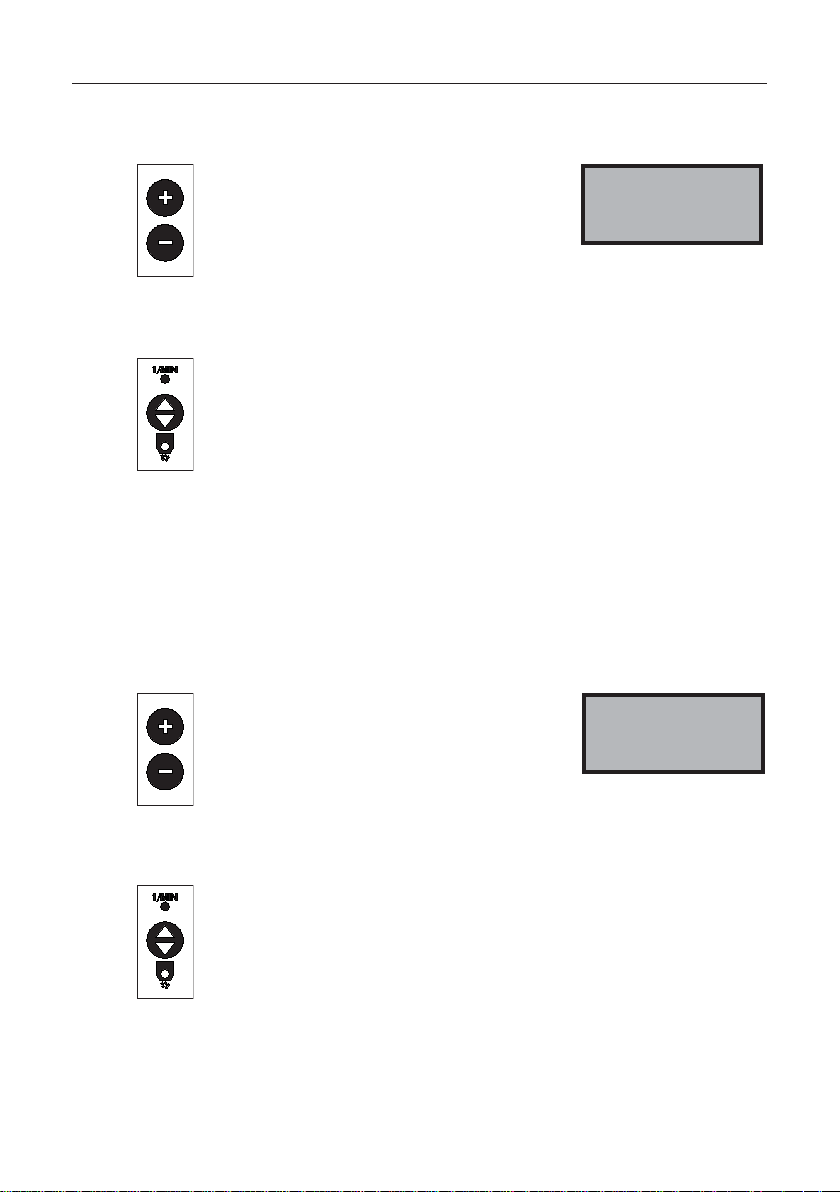
3.5 Setting the slide opening
If necessary, press the button to select
the slide; the arrow points to the second
line in the display.
Press the + or - button to set the slide
opening.
Refer to the spreading charts for the
required slide opening.
Speed 200
> Slide 29
3.6 Opening/closing the slide
Press the button to open or close the
slide.
Slide open: green LED lights up
Slide closed: yellow LED lights up
> RPM 200
Slide 29 ok
Slide monitoring
If the slide does not reach the specifi ed position within 10 seconds, the
spreader switches off.
The following message is shown in the display:
Slide not open or Slide not closed. 5 warning signals also sound.
For troubleshooting, see chapter "6.4 Troubleshooting" on page 39.
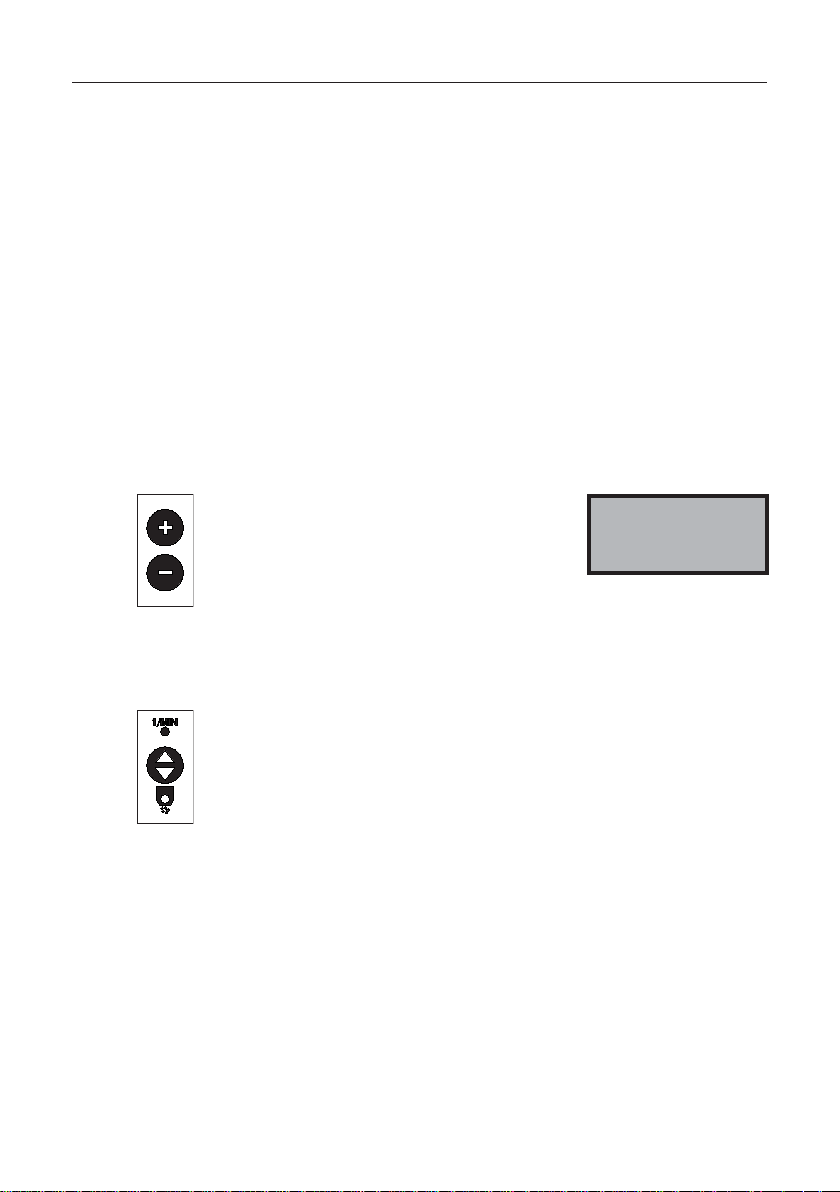
3.7 Performing the slide reference run
The slide motor and control panel are adjusted to one another at the factory.
The setting can be lost over time or when replacing the control panel.
16
Page 16

Operating manual Operating the SuperVario®
Switch off the machine.
Press and hold the button for switching
between speed and slide and the + button to
The slide performs its reference run.
The display shows the upper value as approx. 240 and the lower value as
approx. 40. Switch machine off at the main switch so that the values are
stored. If a slide reference run cannot be performed, the following message
fl ashes on the display: Slide not calib.
Check the mechanical clearance of the slide and attempt the reference run
again.
switch the machine on.
Keep all three buttons pressed for
about 3 seconds.
3.8 Setting the spreading width
The spreading width depends on the nature of the spreading material and
the speed of the spreading disc. The more coarse the spreading material, the
larger the possible spreading width.
1. Set the speed according to the spreading chart.
2. Set the casting shovels according to the spreading chart.
17
Page 17
Operating manual Operating the SuperVario®
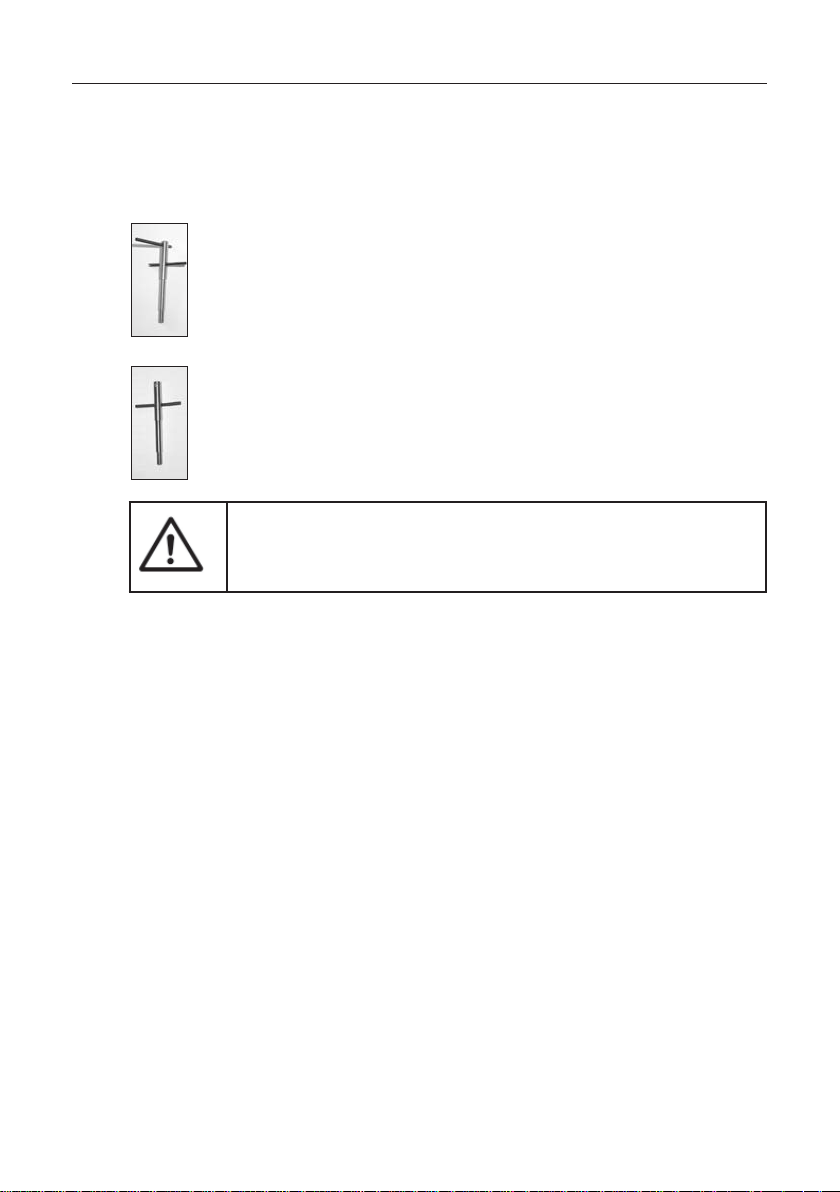
3.9 Setting the agitator
Because grasses, in contrast to seeds with a grain structure, have very poor
fl ow properties, the agitator must be adjusted accordingly.
Setting for grasses:
Upper stirring shaft on one side
Lower stirring shaft at a ratio of 2/3 t 1/3
Setting for remaining products:
Upper stirring shaft removed
Lower stirring shaft at a ratio of 1 to 1
Danger!
Do not adjust the stirring shafts if the agitator is installed,
which otherwise could lead to bearing failure on the motor.
1. Remove the hopper.
2. Firmly hold the spreading disc and loosen the agitator by turning to the
right.
Important: Left-hand thread!
3. Install the stirring shaft appropriately.
3.10 Empty indicator
The empty indicator shows when the spreading material in the hopper drops
below a particular fi ll level.
The "Hopper empty" message fl ashes for about 5 seconds on the display.
At the same time, 8 warning signals sound and the red LED on the empty
indicator fl ashes.
To switch off the empty indicator again, briefl y close the slide or switch off the
spreader.
18
Page 18
Operating manual Operating the SuperVario®
3.11 Adapting the empty indicator to the motor output
Note:
Only make adjustments if the empty indicator setting was unsuccessful, see
"4.6 Setting the empty indicator" on page 23.
Empty the hopper.
Then, in the main menu, use the + and - buttons to set the
empty indicator to zero.
Press and hold down the button for switching
between speed and slide and the - button to
switch the machine on.
Set the spreading disc motor to 2400 rpm.
Keep the Open/close button pressed for about 5
seconds.
The display now changes to the Bosch disc motor (TLB).
Press the button for changing between speed
and slide (1x). The display shows the actual idling
speed output (LL) and idling speed output table
(LLT) values.
Press the - button 1x to reset the stored values.
Press the + button 1x to transfer the LL value to the
LLT.
This means the empty indicator has been
readjusted.
19
Page 19

Operating manual Operating the SuperVario®
Press the + button to confi rm; the actual idling
speed output (LL) is transferred to the idling speed
output table (LLT) in three numbers.
This means the empty indicator has been
readjusted.
20
Page 20
Operating manual Settings and displays
4. Settings and displays
The control element can be used to make the following settings:
Language
Empty indicator selection
EHR signal
EHR cycle
Empty indicator setting
Spreader type
Spreader number
Motor selection
4.1 Making settings
Switch off the machine.
4.2 Language
Press the + and - buttons at the
same time and hold them until
the machine switches on.
Keep all three buttons pressed
for about 3 seconds.
The language selection is
displayed.
Press the + or - button to set the
language.
Press toggle switch: Setting saved,
next menu item or press main switch:
Setting saved and machine switches
off.
Language 0
English
Language 0
English
21
Page 21
Operating manual Settings and displays
4.3 Selecting the empty indicator
Press the + or - button to select the
empty indicator.
From spreading disc resistance
Empty indicator 1
One disc
via agitator motor with soft agitator
and external empty indicator - not
programmed or empty indicator
switched off.
Press toggle switch: Setting saved,
next menu item or press main switch:
Setting saved and machine switched
off.
4.4 Setting the EHR signal
When the spreader is equipped with the headland manager accessory, the
hydraulic signal of the tractor can be detected. This signal is output when
lifting or lowering.
The spreader factory setting is for the signal to be output when lifting. If the
tractor outputs the signal when lowering, you can adjust the spreader.
Press the + or - button to set the
EHR signal.
EHR signal for lifting:
EHR signal 0
High active
22
High active is displayed.
EHR signal for lowering: Low active
is displayed.
Press toggle switch: Setting saved,
next menu item or press main switch:
Setting saved and machine switches
off.
Page 22
Operating manual Settings and displays
4.5 Setting the EHR cycle
In the headland manager (optional accessory), you can set how often the slide
should open and close depending on the lifting and lowering of the hydraulics.
The EHR cycle can be set to max. 10 times.
4.6 Setting the empty indicator
Depending on the requirement and spreading material, the empty indicator
can be set to respond earlier or later.
Each of the values can be set between -50 and +50.
Note:
Depending on the spreading material or material humidity, the remainder level
may vary somewhat.
Press the + or - button to set the
corresponding value.
Factory setting is 0.
+ values: Switching on and off if the fi ll
level is relatively high.
- values: Switching on and off if the fi ll
level is relatively low.
Press toggle switch: Setting saved,
next menu item or press main switch:
Setting saved and machine switches
off.
Setting 0
Empty indicator ON
23
Page 23

Operating manual Settings and displays
4.7 Displaying the spreader type
The control unit is intended for a variety of spreaders.
The SuperVario
can be operated with this control panel.
®
is programmed at the factory. Various LEHNER spreaders
Press toggle switch: Setting saved,
next menu item or press main switch:
Setting saved and machine switches
Spreader type 0
SuperVario
off.
4.8 Spreader number
This option is only activated in the duo control unit (optional accessory).
4.9 Displaying the motor
The SuperVario
The control unit is programmed at the factory and adjusted to the installed
motor. Thi setting cannot be changed.
®
can be equipped with 2 different drive motors.
4.10 Headland manager (optional accessory)
If the headland manager is connected, an * is
displayed at the end of the second line.
The headland manager automatically opens the slide when the hydraulics are
lowered, and automatically closes it when the hydraulics are lifted.
Speed 200*
Slide 29
The slide can be opened and closed manually at any time using the control
panel.
When starting work with the headland manager, the slide must fi rst be
opened manually.
The signal can be detected by a 7-pin socket or a sensor signal.
24
Page 24

Operating manual Settings and displays
7-pin socket
1. Connect the connecting cable of the control panel to the 7-pin signal
socket of the tractor.
2. Set the EHR signal of the spreader depending on whether the tractor
emits the hydraulic signal when lifting or lowering.
Sensor signal
1
1
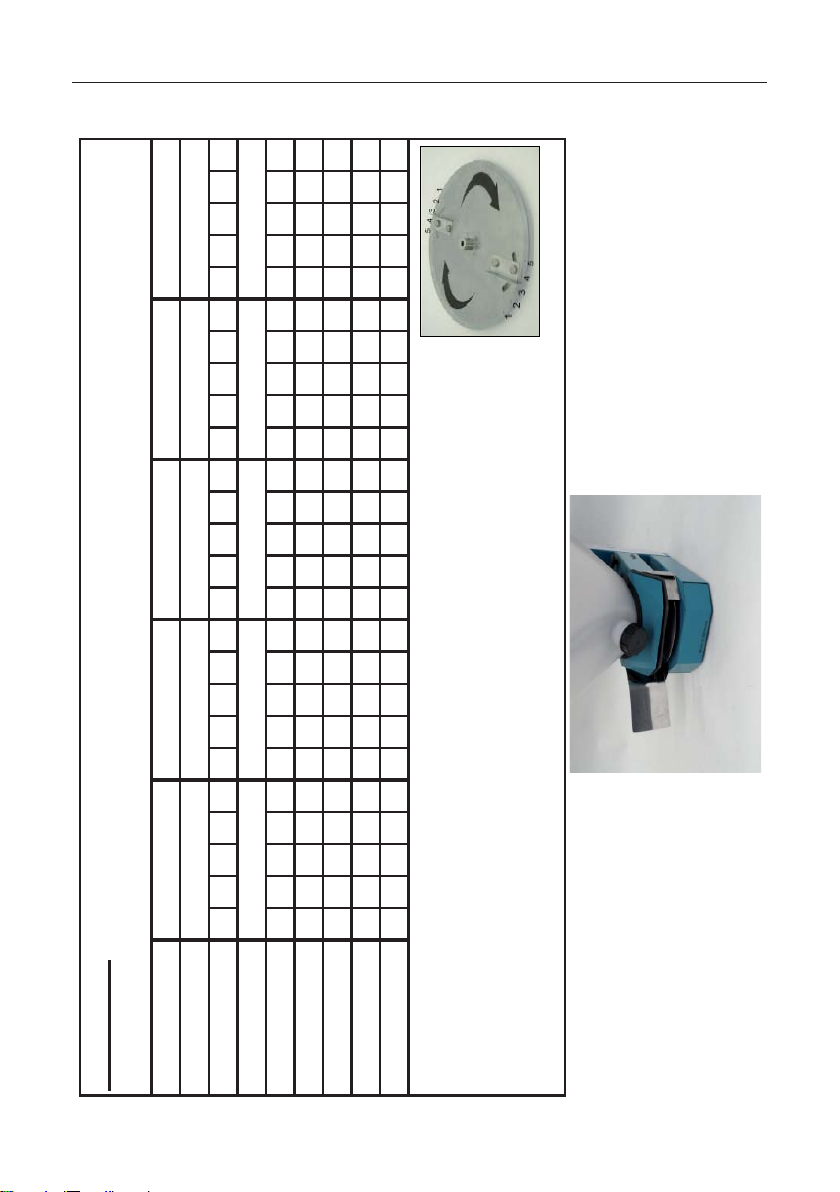
1. Mount the sensor in the joint section of the lower link.
2. Mount the magnetic encoder to the lower link.
3. Set the position of the sensor and the magnetic encoder.
Maximum distance 10 mm.
Hydraulics lowered:
Sensor not in fi eld of magnetic encoder.
Hydraulics at the height where the slide should close or open:
Sensor just reaches fi eld of magnetic encoder.
Hydraulics lifted:
Sensor must still be in fi eld of magnetic encoder.
When the hydraulics are lifted, the sensor must not leave the fi eld of
the magnetic encoder, as otherwise the slide will open again.
Please note that the contact surfaces 1 of the sensor are only located on the
left and right sides.
25
Page 25

Operating manual Settings and displays
4.11 Checks
Voltage check
In order to check the operating voltage (in V), the spreader must be on and the
hopper fi lled.
Press the button for 5 seconds.
The operating voltage is displayed for
8 seconds.
Factory recommendation min. 12.6 V.
Performance check
The motor is adjusted at the factory. No changes are permitted, since otherwise
the drive and control parameters would no longer match.
To check the performance data, the spreader must be on.
V oltage 14.0 V
Keep the button pressed.
The following information is displayed:
TLB 23.4W 201
91R 3.4V 6.9A
Line 1: Current drive motor,
power consumption in watts and
precise speed.
Line 2: R value for factory-internal
data, the motor voltage in volts, the
current consumption of the motor in
ampere.
4.12 Spreading width and turning procedure
Reference values for the spreading widths of individual spreading materials
can be found in the attached spreading charts.
If you turn the spreader, please note that spreading material continues to
roll on fi rm surfaces, while on the fi eld it falls directly into the surface soil.
In addition, the fl ow quantities differ from the testing values due to different
vibrations during fi eld use.
26
Page 26

Operating manual Settings and displays
Turning
1. Put the spreader in the box or put the box over the spreader to catch
the spreading material.
2. Set the speed of the spreading disc, the speed must be the speed used
in practice, due to the suction effect.
3. Weigh out the ejected spreading material at various slide positions until
the suitable slide position is determined.
Determining the spreading width
1. Spread on a fi rm surface.
2. Sweep up and weigh the spreading material.
Formulae
Output rate in kg/min x 600
= Speed in km/h
Output amount in kg/ha x spreading width in m
Output rate in kg/min x 600
Speed in km/h x spreading width in m
Output amount in kg/ha x speed in km/h x spreading width in m
600
= Output amount in kg/ha
= Output rate in kg/min
27
Page 27

Operating manual Settings and displays
4.13 Setting the auto-dose (optional accessory)
AUTO
Press the buttons.
The speed of the spreading disc and
the slide opening are displayed.
> Speed 200
Slide 29
The slide is always closed when
switching on the drive motor.
Press the button.
The spreading material, the spreading width and the output
kg/ha are displayed.
Press the button, the spreading material designation
"fl ashes".
Press the + or - button to change spreading material (e.g.
from yellow mustard to Metarex).
While the 7-pin plug or GPS receiver are not plugged in, the
full spreading material name is displayed.
Press the button to confi rm the choice of spreading material.
28
Spreading width "fl ashes".
Press the + or - button to set the spreading width.
Page 28
Operating manual Settings and displays
Press the button to confi rm the choice of spreading width.
Output kg/ha "fl ashes".
Press the + or - button to set the output amount.
Press the button to confi rm the output kg/ha.
The control panel is programmed for automatic operation.
The set spreading material, the spreading width and the
output kg/ha are displayed.
AUTO
Hold the button down for at least 5 sec.
The quantity adaptation is displayed in %.
Here, you can change the output amount yourself if you fi nd
there is too much or too little.
Press the button.
Speed impulse - - - 1/m is displayed.
Press the + or - button to set the impulses per metre that are
emitted by the tractor (further information can be found in
the tractor's operating manual).
29
Page 29
Operating manual Settings and displays
Press the button.
The quantity adaptation is displayed in %.
AUTO
The set spreading material, the spreading width and the
output kg/ha are displayed.
The speed impulses per metre are set.
The control unit is ready to start.
In GPS mode, no impulse setting is required.
The spreading value stored in the spreading chart can be changed
temporarily.
Set the quantity adaptation.
Press the button.
AUTO
Press the button for around 5
seconds.
Quantity adaptation
0%
Press the + button to increase the
spreading value by up to 50%
Press the - button to decrease the
spreading value by up to 50%
AUTO
Press the button to return to operating
mode.
Press the button.
AUTO
The quantity adaptation has been stored. The quantity
adaptation remains stored until the spreading material is
switched or changed in the display.
4.14 Operating SuperVario® in automatic mode
Connect the speed signal (GPS receiver or 7-pin signal socket).
The stored table value continues to appear in the display. The quantity
adaptation in % is executed automatically from the control panel.
30
Page 30
Operating manual Settings and displays
AUTO
Press the button.
The speed of the 'spreading disc and
the slide opening ar displayed.
> Speed 200
Slide 29
The slide is always closed when
switching on the drive motor.
Press the button.
The set spreading material, the spreading width and the
output kg/ha are displayed.
If a speed signal is connected, the speed travelled at is also
displayed along with the spreading material.
Press the button to open the slide.
With the vehicle stationary, set off within 5 seconds,
otherwise the message "Slide not open" appears.
If the slide is open, the message
"Open" and the relevant slide opening,
e.g. "Open 46" appear; the speed
OPEN 46 5.9km/h
15.0 m 25.0 kg/ha
travelled at is also displayed.
If the speed travelled at is higher than
the value stored in the spreading
chart in the control unit, the message
"Too fast" appears in the display.
Only the maximum speed stored in
the spreading chart is included in the
calculation, not the speed actually
being travelled at.
OPEN 120 33.2km/h
T oo fast
31
Page 31

Operating manual Settings and displays
If the speed travelled at is lower than
the value stored in the spreading
chart in the control unit, the message
Yellow mustard 2 km
T oo slow
"Too slow" appears in the display.
The minimum speed stored in the
spreading chart is included in the
calculation, not the speed actually
being travelled at.
At a travel speed of less than 3 km/h,
the software does not work and the
message "Slide not open" appears.
Slide not open
Once the vehicle stops and sets off
again, the button "Slide open" must be
pressed again to make the slide open.
When working with the headland
manager (VGM), this operation is not
required.
At the present time, our spreading charts are designed for
a maximum speed of 44 km/h, depending on the spreading
material. At speeds faster than 44 km/h, the error message
"Too fast" appears, depending on the spreading material.
32
Note
A total of 12 spreading charts can be stored in the control
panel. This setting can only be made at the factory.
Spreading charts can of course be exchanged
(see section "6.6 Spreading charts" on page 42).
Page 32

Operating manual Maintenance and cleaning
5. Maintenance and cleaning
5.1 Service
The dosing device and slide should be inspected and cleaned from time to
time.
In particular, spreading material with a high dust content can cause the slide
unit to clog.
3
3
1. Remove screws 1 on the right and left.
2. Remove the hopper 2.
3. Remove screws 3.
4. Remove the cover plate 6.
5. Firmly hold the spreading disc and loosen the agitator 5 by turning to
the right.
Important: Left-hand thread!
6. Remove nuts 4.
7. Dismantle the hopper platform and pull the dosage slide out from the top.
8. Clean the slide unit with a broom or compressed air.
For corrosive spreading material such as silage, regularly remove and clean
the motor, and fi ll the shaft end with grease or copper compound.
33
Page 33

Operating manual Maintenance and cleaning
5.2 Cleaning
The hopper can be almost completely emptied by means of the residue
discharge.
1. Unscrew the hopper.
2. Clean spreader and hopper with a broom.
34
Page 34

6. Appendix
6.1 EC Declaration of conformity
EC Declaration of conformity
in accordance with the EC Machinery Directive 2006/42/EC, app. II,
Manufacturer:
LEHNER Agrar GmbH
Häuslesäcker 5-9
89198 Westerstetten
Person resident in the Community who is entitled to assemble the
relevant technical documents:
Jürgen Beck-Graf
LEHNER Agrar GmbH
Häuslesäcker 5-9
89198 Westerstetten
Description and identifi cation of the machine:
®
Product: SuperVario
Type: 70/110/170
Function: The SuperVario
seeds for grasses and intermediate crops such as mustard, phacelia,
fodder radish and turnip rape. It is produced in three sizes. These differ
in the hopper capacity; 70, 110 and 170 litres. There is a stirring shaft on
the spreading disc that projects into the hopper. This keeps the spreading
material mobile in the area of the application opening. The application
rate and the rotation speed of the spreading disc are infi nitely variably
controlled from the operator's cabin via the control panel. Optionally, a
separate motor drives a slowly rotating agitator which can
be installed horizontally (soft agitator).
®
is a spreader for spreading slug pellets and
Operating manual Appendix
1.A
35
Page 35

Operating manual Appendix
It is expressly declared that the machine is in accordance with all
relevant provisions of the following EC Directives:
2006/42/EC
2004/108/EC
Source of the harmonised standard applied acc. to Article 7, para. 2:
EN ISO 12100-2:2003-11
EN ISO 14121-1:2007
EN 50498:2010
EN ISO 14982:2009
Source of the other technical standards and specifi cations applied:
EN ISO 12100-1:2003-11 Safety of Machinery – Basic concepts;
EC Machinery Directive 2006/42/EC
(Electromagnetic Compatibility) Directive
2004/108/EC of the European Parliament
and Council dated 15
December 2004 on the harmonisation of
legal regulations in the member states
regarding electromagnetic compatibility
and replacing Directive 89/336/EEC
Safety of Machinery – Basic concepts;
general principles for design – Part 2
Technical principles
Safety of Machinery – Risk assessment –
Part 1: Principles (ISO14121-1:2007)
Electromagnetic compatibility - Product
family standard for electronic
equipment subsequently installed in
vehicles
Electromagnetic compatibility - Agricultural
and forestry machinery
general principles for design – Part 1:
Basic terminology, methodology
36
Westerstetten, 12.04.2009
Place, date
Signature
Helmut Lehner
CEO
Page 36

6.2 Identifi cation
The serial number of the spreader is
applied to the rear of the frame.
Note the serial number in this operating
manual so that it is readily available for
inquiries.
Operating manual Appendix
The hardware and software versions are
briefl y displayed when the control panel
is switched on.
Note the software version in this
operating manual so that it is readily
available for inquiries.
LEHNER GmbH
LAS3 V2.5
SuperVario
37
Page 37

Operating manual Appendix
6.3 Distribution box reference list
38
Page 38

6.4 Troubleshooting
r
Operating manual Appendix
Status: 04/2012
Dismantle upper stirring shaft
Upper stirring shaft installed / power supply Place lower stirring shaft in centre
Check the agitator, check the stirring shaft, see the "Setting the agitator" chapter
Check the electrical power supply, see the "Mounting the control panel" chapte
Clean the slide, see the "Cleaning" chapter
Very strong vibrations and resulting settling Order and install "load relief roof" accessory
of the material
Foreign bodies in the agitator, load too great or
power supply too weak
Spreading material or dirt is jammed between the slide plates
Check slide for contamination, or perform reference
Check the agitator, check the stirring shaft, see the "Setting the agitator" chapter
Material may be excessively compacted Possibly restart spreader
See the "Performing the slide reference run" chapter
run; see Slide reference run,
Cable not plugged in, motor defective
Adjust the empty indicator, see chapter "4.6 Adjusting the empty indicator" on page 23.
If this does not resolve the problem, please carry out the procedure described in point
"3.11 Adapting the empty indicator to the motor output" on page 19.
Control panel plug not connected to spreader Check plug connections, cables, socket and pins
or cable damage/voltage dip
Check plug connections, cables, socket and pins.
Distance from sensor to magnetic encoder too great Check the left/right distance from the sensor, max. 10 mm
connected to the slide motor.
Troubleshooting LEHNER SuperVario®
Problem Cause Resolution
Nothing appears on the display after switching on Polarity reversed or fuse has blown Check connections and fuses
The following information should help you resolve minor problems yourself. You are welcome to call us as needed. We are glad to help.
Spreading disc does not reach set speed
Agitator does not turn over Foreign bodies in the agitator Empty hopper and check for foreign bodies
Slide jams
Display shows: Slide not open Slide could not reach correct position when opening
Display shows: Slide not closed Slide could not reach correct position when closing Check slide mechanism for foreign bodies or perform the reference run
Slide does not open although no error Mechanical damage to slide mechanism Check slide motor and transfer mechanism
Display shows: Disc blockage Spreading disc does not turn; switches off after 10 attempts
message is displayed.
Display shows: Spr. Connection
Empty indicator does not respond Empty indicator is set too low
Headland manager closes the slide when draining Signal incorrectly applied Rotate the signal, see the "Setting the EHR signal" chapter
the hydraulics and opens when lifting
Display shows 8888 or letters Control panel fault Control panel must be replaced
Headland manager does not always close
Slide fault Plug from control panel not connected to spreader. Plug not
39
Page 39

Operating manual Appendix
6.5 Replacement parts
40
Page 40

A
r
A
c
A
c
c
r
t
Status 04/2012
Operating manual Appendix
Designation Quantity
Steel frame
1
Dosage slide, bottom "white"
2
U disc
3
djusting washe
4
Slide
5
Double spherical bearings with ball stud
6
Slide motor
7
Fixing bracket for slide motor
8
Dosage slide, top in V
9
Hopper platform
10
Hopper seal
11
Hopper bracket
12
Star-knob screw M8x14 mm
13
Bosch drive motor
14
Motor mounts
15
Hexagon socket set screw
16
Spreading dis
17
Casting shovel
18
Stirring shaft
19
gitator with left-hand thread
20
Sealing dis
21
Stabilisation dis
22
Edge guard without padding
23
Edge guard with padding
24
Cover plate
25
Edge guard with padding for hoppe
26
Discharge cover
27
Hopper 70 / 110 / 170 litres
28
Sealing cap
29
Star grip nut M6
30
Base plate
31
Baffle plate
32
Battery cable with bracke
33
Cable set 6 m (no diagram)
34
Control panel (no diagram)
35
Operating manual with spreading charts
36
LEHNER
1 80356
1 80281
3
1
1
1
1
1
1
1
1
1
4
1
3
1
1
2
2
1
1
1
1
1
1
1
1
1
1
2
1
1
1
1
1
1
Article no.
-
80234
73213
80379
81393
81394
80265
81395
80342
73214
80177
-
80472
81396
80376
73215
80268
-
81397
80393
81075 / 81076 / 81077
80107
73216
80606
81398
72154
80658
80645
80174
41
Page 41

Operating manual Appendix
1820221921252124272227
t
8
k
/h
2629332730383035423141
20
kg/ha
2629332730383035423141
600 RPM
980 RPM 600
RPM
980
RPM
RPM RPM
g
5
8
3
3139
3438
8
573
10
kg/ha
2528312731393438573247
the
universal
spreader
the
slide
setting
up
to
50
is
the
same
and
only
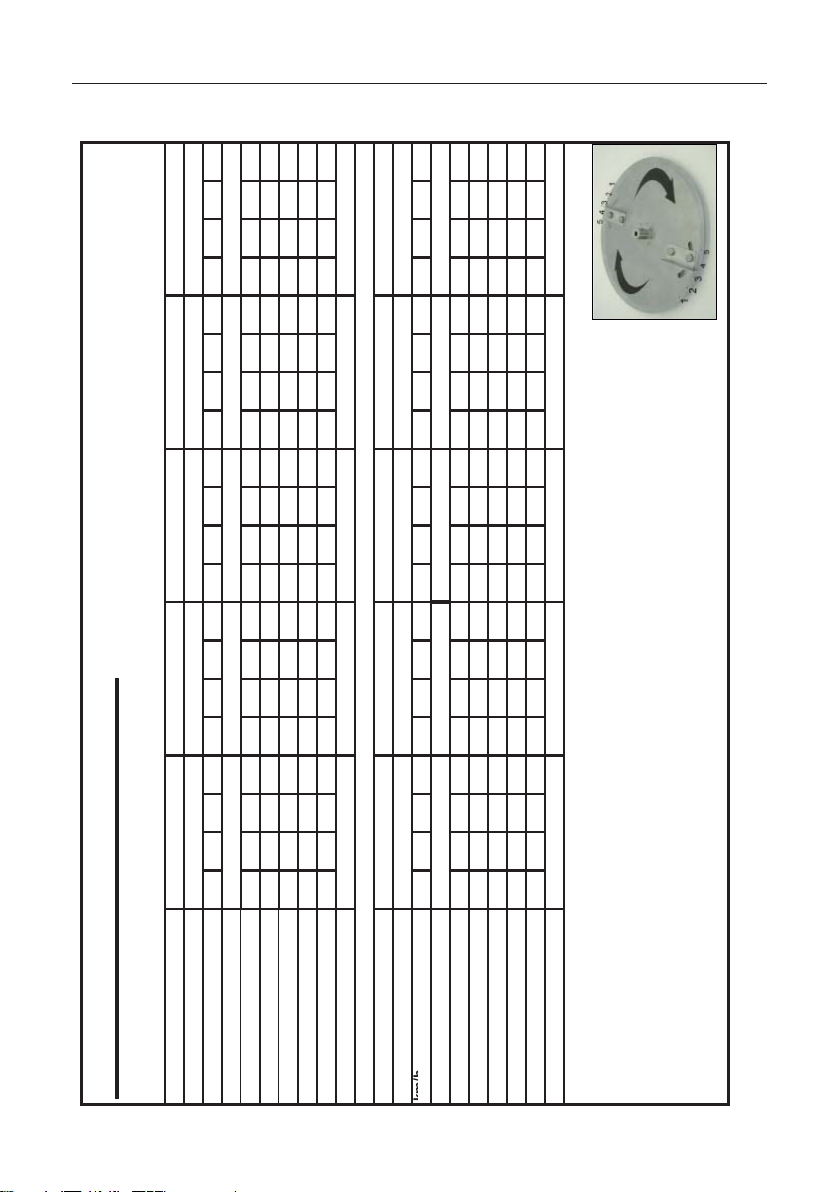
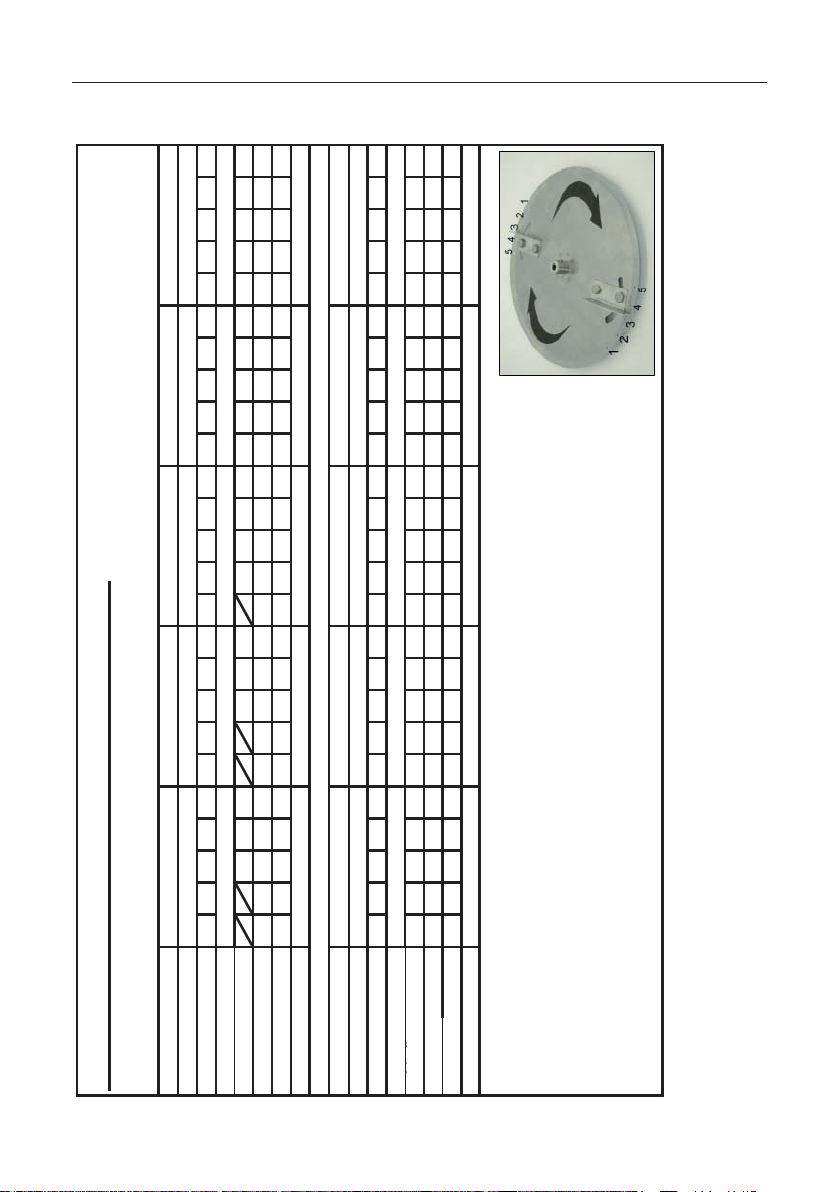
6.6 Spreading charts
47
2
LEHNER SuperVario®
4
427
1
Status: 08/2005 Check settings with field samples.
2.5 m 3.00 m 4.00 m 4.70 m
300 RPM 350 RPM 400 RPM 460 RPM
6 8 10 12 6 8 10 12 6 8 10 12 6 8 10 12
18 20 22 24 19 21 23 25 21 24 26 27 22 25 27 28
19 22 24 26 20 24 26 27 23 26 28 30 24 27 29 31
21 24 26 28 22 26 27 29 25 28 30 32 26 29 31 35
23 26 28 31 25 27 29 32 27 30 33 37 28 31 35 39
6.00 m 9.00 m 12.00 m 15.00 m
28 33 37 40 29 35 39 42 32 39 44 48 35 41 47 51
a
g
Spreading chart, yellow mustard
Delivery height: 1.00 m
Spreading width
RPM
km/h
Slide opening:
a
at 10 kg/ha
at 12 kg/ha
at 15 kg/ha
at 25 kg/ha
Spreading width
2
6 8 10 12 6 8 10 12 8 10 15 20 8 10 15 20
2
23 26 28 29 25 28 31 35 30 34 43 50 29 32 41 49
/ha
km/h
Slide opening:
at 8 kg/ha
at 10 k
27 30 35 37 29 34 39 43 38 43 53 65 36 40 54 67
30 34 38 43 33 39 44 48 43 48 62 76 40 47 63 82
34 40 45 49 39 45 54 58 50 59 76 91 49 58 82
at 12 kg/ha
at 15 kg/ha
at 20 kg/ha
38 45 50 54 44 50 60 66 59 67 87 58 70 100
at 25 kg/ha
LEHNER
,
,
Position of casting shovels: Hole 5
At low delivery heights, the speed of the disc must be increased.
The pull of the spreading disc increases as the speed increases.
needs to be shifted by one decimal place. E.g. 41 is changed to 4.1
From 50 onwards, the slide unit of the SuperVario is somewhat larger, because it is pear-shaped.
42
Page 42
Spreading width
3m4m5m
Spreading
width
Slide opening:
3
m
5
m
m
4
m
5
m
Slide
opening
at 12 kg/ha
131521231616231519231820262127
30
t
12
k
/h
131521231616231519231820262127
30
Status: 07/2002
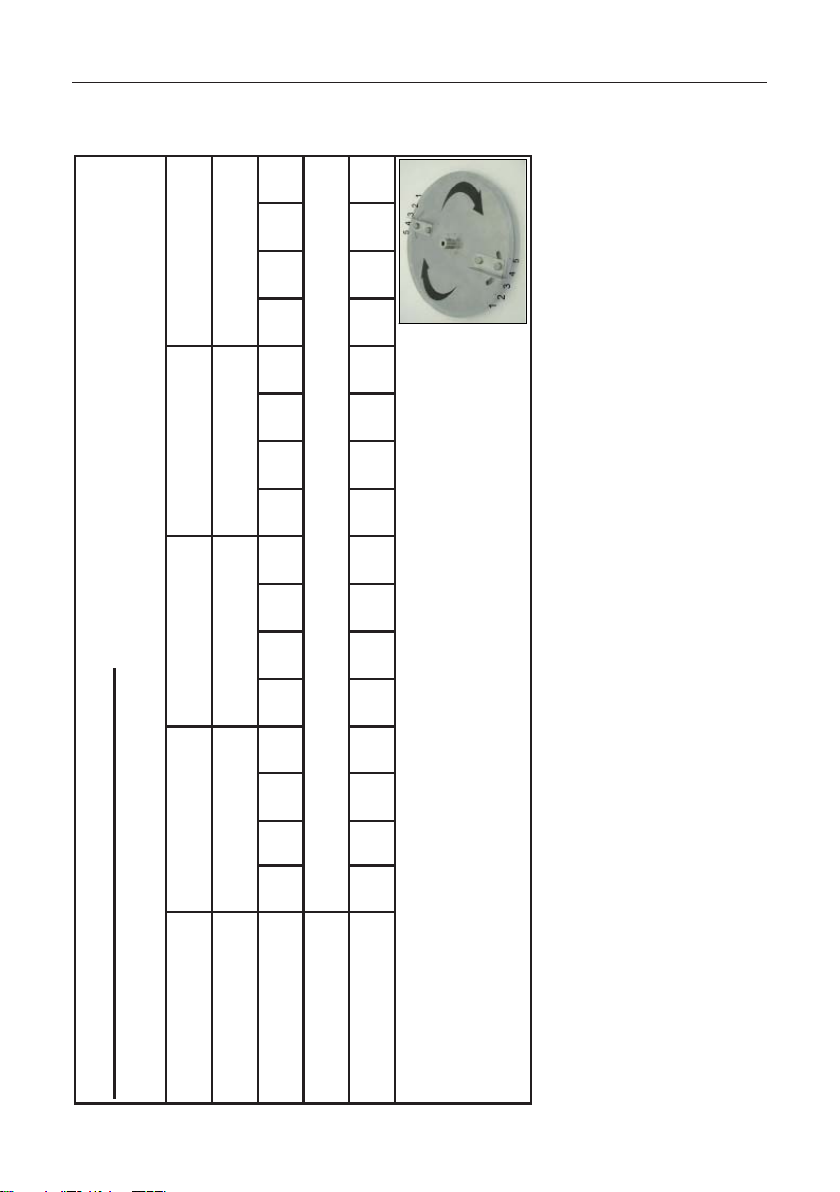
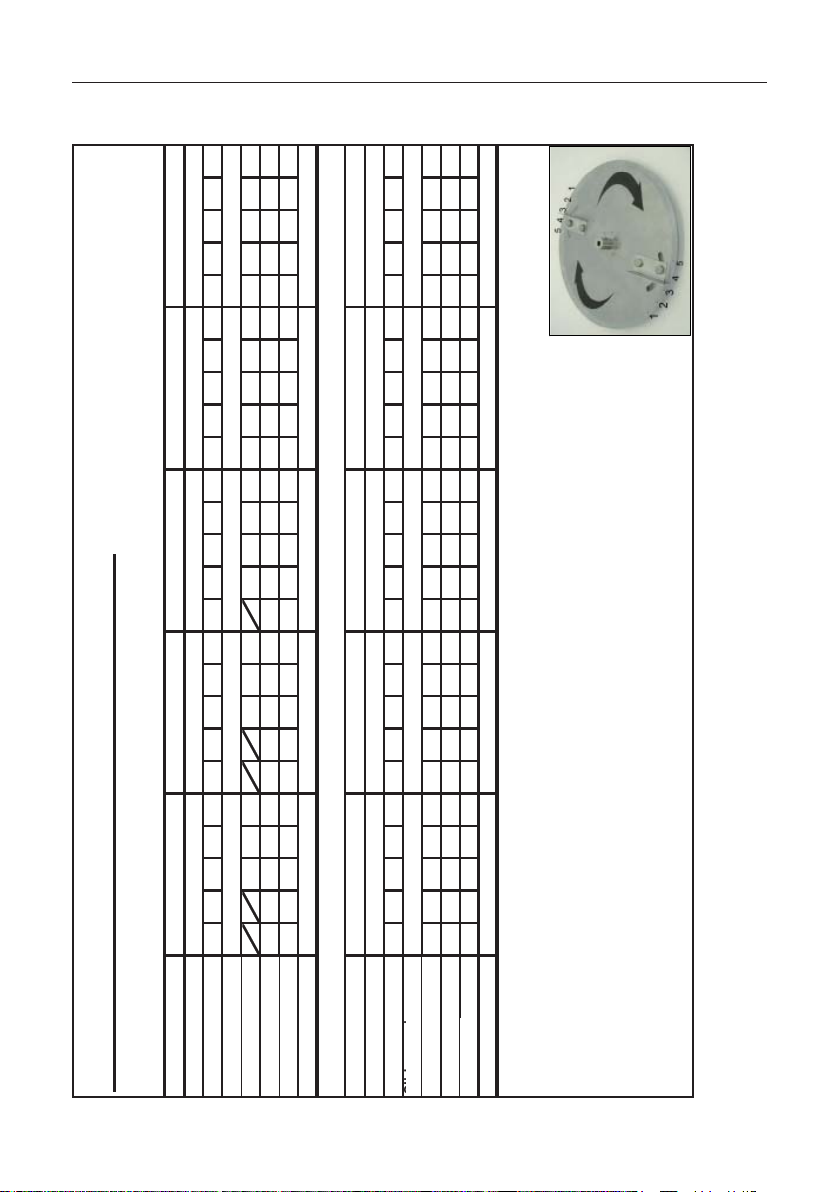
Position of casting shovels: Hole 5
Status:
07/2002
I th i l d th lid tti i th d l
Position
of
casting
shovels:
Hole
5
g
y
©LEHNER
2500 RPM
2300 RPM
LEHNER SuperVario®
2000 RPM
Operating manual Appendix
.
1700 RPM
is the same, and onl
1400 RPM
9 101215171011121618111214171914161820221719212325
:
One-sided spreading chart, yellow mustard ©
RPM
Delivery height: 1.00 m
km/h 4 6 8 10 12 4 6 8 10 12 4 6 8 10 12 4 6 8 10 12 4 6 8 10 12
a
g
at 8 kg/ha
at 10 kg/ha 11 12 14 18 20 11 13 15 19 21 12 14 16 20 22 16 18 20 22 24 19 22 24 27 28
a
at 15 kg/ha 16 17 20 24 26 17 18 22 25 27 18 21 23 26 29 20 22 24 26 28 23 26 30 33 35
at 20 kg/ha 18 21 23 26 28 19 22 24 27 29 24 24 25 29 32 22 24 26 28 30 25 28 33 36 38
It is essential to check the lateral distribution with a field test.
Mount the boundary spreading device so that spreading takes place in the direction of rotation of the spreading disc.
Not the other way around!
In the universal spreader, the slide settin
Note: A special adjustable deflector plate "ploughing right" is required for this! Article 72181
needs to be shifted by one decimal place. E.g. 45 is changed to 4.5
43
Page 43

Operating manual Appendix
/
6810126810126
12
LEHNER SuperVario®
Status: 08/2005 Check settings with field samples.
6 8 10 12 6 8 10 12 6 8 10 12 6 8 10 12
23 25 26 28 24 26 28 30 25 27 29 31 26 28 31 35
24 26 28 30 25 28 30 33 26 29 32 35 27 30 35 37
26 28 30 33 27 30 34 37 28 31 36 39 30 35 38 41
28 31 35 38 30 34 38 42 31 37 40 44 34 39 43 47
30 35 38 42 34 38 42 46 36 40 45 48 38 43 47 51
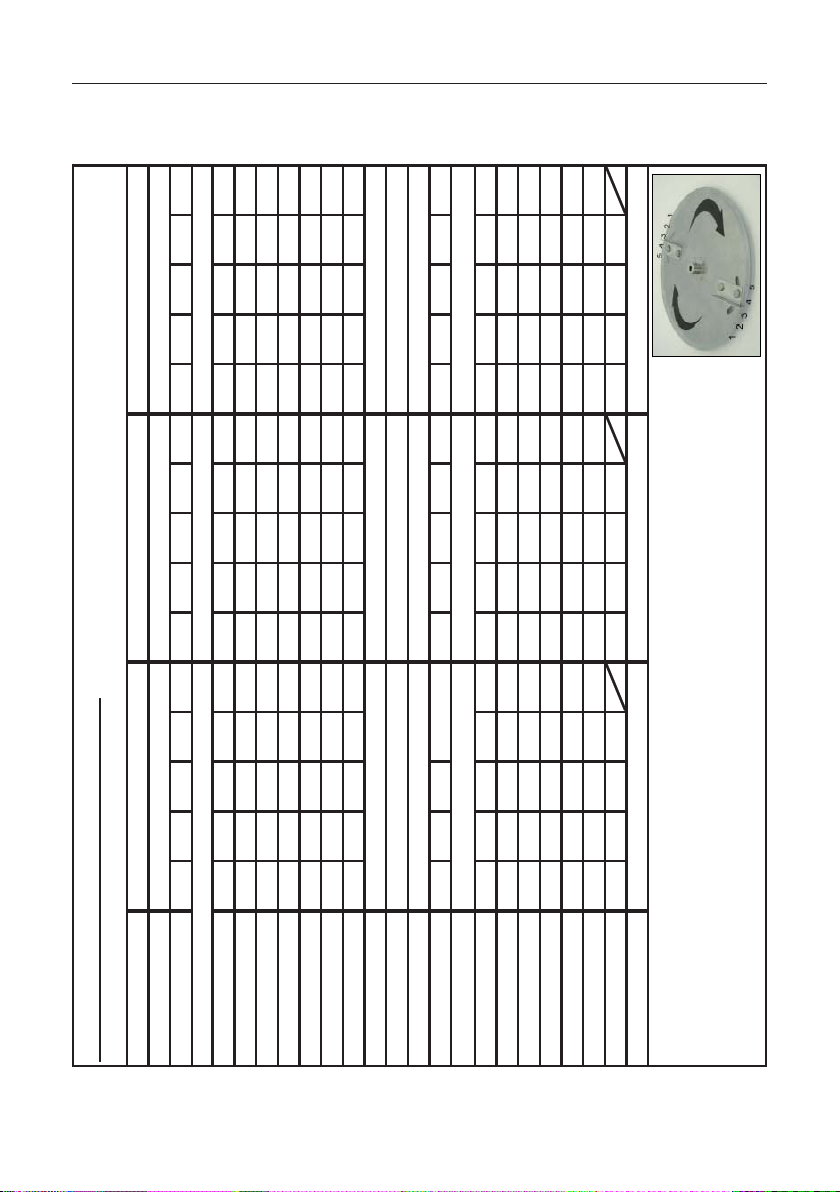
Spreading chart, fodder radish
Delivery height: 1.00 m
Spreading width 2.5 m 3 m 3.4 m 4.00 m
RPM 200 RPM 250 RPM 300 RPM 340 RPM
km/h
Slide opening:
at 10 kg/ha
at 12 kg/ha
at 15 kg/ha
at 20 kg/ha
at 25 kg/ha
Spreading width 5.00 m 6.00 m 12.00 m 17.00 m
RPM 370 RPM 460 RPM 930 RPM 2300 RPM
6 8 10 12 6 8 10 12 6 8 10 12 6 8 10 12
28 31 34 37 29 32 35 38 35 42 46 50 32 38 43 47
30 33 37 40 31 34 38 45 40 45 50 55 36 42 47 51
Slide opening:
at 10 kg/ha
km/h
at 12 kg/ha
32 37 41 45 34 38 45 48 44 50 57 60 40 47 53 59
38 43 47 51 39 46 50 56 50 58 69 75 47 56 66 74
41 47 53 59 45 50 57 66 56 69 78 87 54 66 80 90
at 15 kg/ha
at 20 kg/ha
at 25 kg/ha
Position of casting shovels: Hole 5
The pull of the spreading disc increases as the speed increases. © LEHNER
At low delivery heights, the speed of the disc must be increased.
In the universal spreader, the slide setting up to 50 is the same, and only
needs to be shifted by one decimal place. E.g. 41 is changed to 4.1
From 50 onwards, the slide unit of the SuperVario is somewhat larger, because it is pear-shaped.
44
Page 44

Operating manual Appendix
lateral
distribution
is
uneven
adjust
casting
shovels
5
10.0 m
LEHNER SuperVario®
© LEHNER
.
,
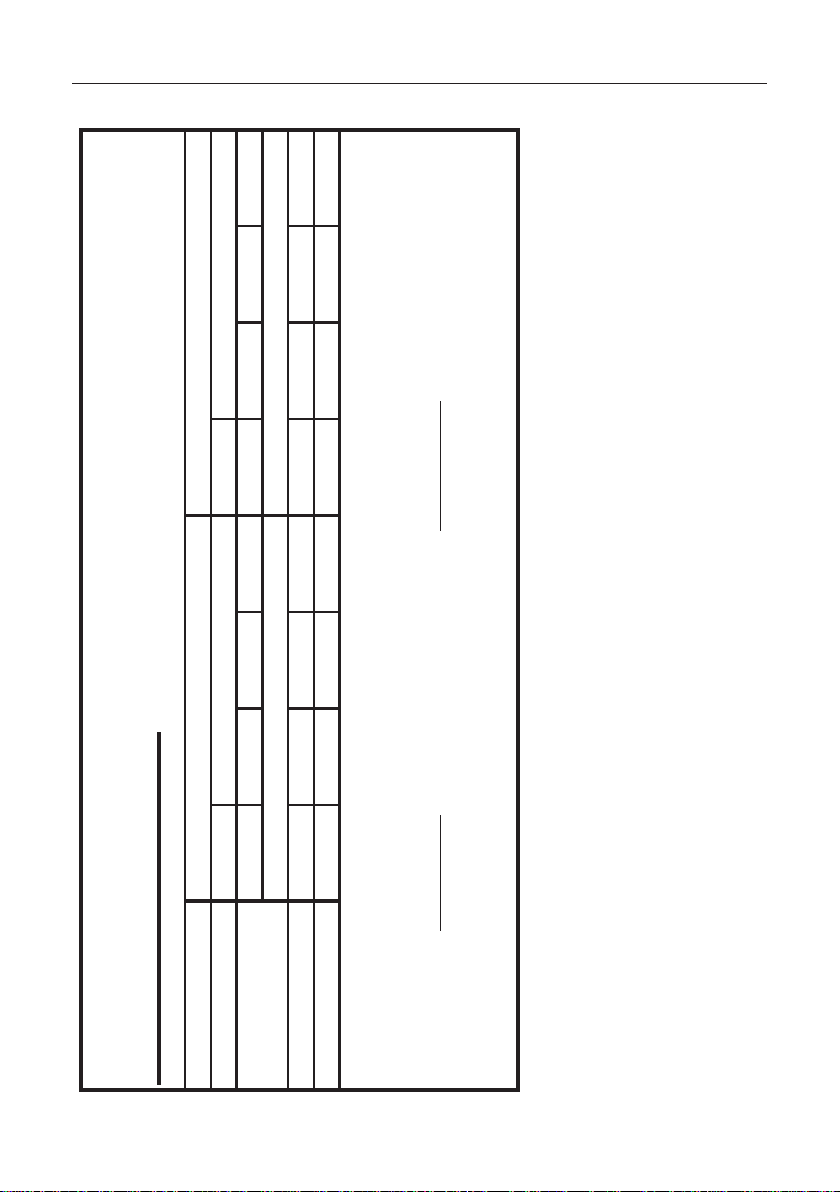
2.5 m 3.0 m 4.0 m 5.0 m 6.0 m
450 RPM 500 RPM 600 RPM 700 RPM 850 RPM 2500 RPM
6 8 10 12 6 8 10 12 6 8 10 12 6 8 10 12 6 8 10 12 8 10 15 20
Spreading chart, phacelia
Delivery height: 1 m
RPM
Spreading width
km/h
Slide opening:
17 20 22 24 17 20 22 24 20 23 26 31 24 26 31 37 26 29 35 44 30 32 38 55
at 10 kg/ha
At low delivery heights, the speed of the disc must be increased.
Please note that the spreading widths of 5.00 and 6.00 metres have not been tested.
These values have been calculated mathematically.
Please check the settings with a field test.
Important: A special phacelia spreading disc is required for this! Article 8057
45
Page 45
Operating manual Appendix
10126812681081012610
12
/h
©
®
Hole 4Hole 4.5 Hole 4.5 Hole 4.5 Hole 4
LEHNER SuperVario
Recommended output: 20 kg/ha Check settings with field samples.
6 8 10 12 6 8 10 12 6 8 10 12 6 8 10 12 6 8 10 12
14 19 21 22 18 21 22 26 22 23 26 28 23 26 27 30 24 27 29 32
21 22 23 25 22 24 25 28 24 26 28 30 25 28 30 32 26 30 32 35
23 24 26 28 24 27 29 30 26 28 31 33 27 30 33 36 30 33 36 39
26 27 28 30 27 28 32 33 29 31 34 37 31 34 38 41 33 36 41 44
28 29 30 33 30 31 34 35 32 34 37 41 33 37 42 45 34 39 45 47
Spreading chart, red clover
Delivery height: 1.00 m
Spreading width 2.5 m 3 m 4 m 5 m 6 m
RPM 250 RPM 300 RPM 400 RPM 500 RPM 700 RPM
km/h
Slide opening:
at 10 kg/ha
at 12 kg/ha
at 15 kg/ha
at 20 kg/ha
at 25 kg/ha
Position of casting shovels
Spreading width 7 m 8 m 9 m 12 m 15 m
RPM 1300 RPM 1500 RPM 1700 RPM 2300 RPM 2500 RPM
6 8 10 12 6 8 10 12 6 8 10 12 6 8 10 12 6 8 10 12
22 25 27 30 23 26 28 32 24 27 30 34 25 28 33 36 26 32 34 38
24 28 30 33 25 29 32 35 26 31 34 36 27 33 36 39 31 34 38 42
m
Slide opening:
at 10 kg/ha
at 12 kg/ha
28 30 32 37 29 31 34 37 30 33 36 42 32 36 40 45 34 38 45 48
at 15 kg/ha
Hole 3.5 Hole 3 Hole 3 Hole 3 Hole 3
31 34 39 44 33 36 42 46 35 38 44 51 36 41 46 52 38 45 49 57
33 39 44 47 34 41 46 50 37 44 51 54 40 45 53 57 45 49 57 69
At lower delivery heights, the speed of the disc must be increased.
at 20 kg/ha
at 25 kg/ha
Position of casting shovels
If lateral distribution is uneven, adjust casting shovels. In the universal spreader, the slide setting
up to 50 is the same, and only needs to be shifted by one decimal place. E.g. 41 is changed to 4.1.
LEHNER Status: 08/2005
The opening is larger in the SuperVario® from opening 50 onwards.
The speed may decrease at the upper spreading width. Please shorten stirring shaft by half.
46
Page 46
LEHNER SuperVario®
Check settings with field samples.
©LEHNER
Operating manual Appendix
2.5 m 3.0 m 6.0 m 12.0 m
500 RPM 600 RPM 1000 RPM 2100 RPM
6 8 10 12 6 8 10 12 6 8 10 12 6 8 10 12
Spreading chart, white clover
Spreading width
RPM
Delivery height: 1.00 m
km/h
10 12 14 16 12 14 16 18 13 15 18 20 16 19 21 23
at 10 kg/ha
Slide opening:
Position of casting shovels: Hole 5
At lower delivery heights, the speed of the disc must be increased.
If lateral distribution is uneven, adjust casting shovels.
In the universal spreader, the slide setting is the same, and only needs to be
shifted by one decimal place. E.g. 41 is changed to 4.1
47
Page 47
Operating manual Appendix
®
v
v
f
©
R
Hole 5
LEHNER SuperVario
LEHNE
2.00 m 2.50 m 3.00 m
300 RPM 400 RPM 800 RPM
6 8 10 12 15 6 8 10 12 15 6 8 10 12 15
Hole 5 Hole 5
4.00 m 5.00 m 6.00 m
1200 RPM 1650 RPM 2000 RPM
56 58 59 61 63 57 59 61 62 64 46 50 52 54 56
58 60 62 64 67 60 62 63 65 68 50 53 55 57 59
61 64 67 69 72 62 64 67 70 72 54 56 59 61 62
65 69 72 74 76 65 70 72 74 77 58 61 63 65 68
69 72 75 76 78 71 73 75 78 80 61 64 67 70 71
72 75 77 78 80 72 75 78 81 83 63 66 70 72 74
76 78 80 85 88 74 81 84 87 89 69 72 75 77 81
6 8 10 12 15 6 8 10 12 15 6 8 10 12 15
43 46 50 52 55 37 39 42 44 48 34 35 37 39 44
47 51 54 56 59 40 43 46 51 53 39 40 42 44 50
51 55 59 63 67 44 49 53 56 68 45 46 50 52 57
57 62 67 71 76 51 56 67 72 75 52 53 58 62 66
63 68 75 77 79 56 70 73 77 81 60 61 65 68 76
Hole 4 Hole 4 Hole 3
67 75 77 79 84 68 73 77 81 84 65 66 69 76 80
77 80 86 98 76 82 85 100 77 78 82 87
the spreading disc increases as the speed increases.
Spreading chart, grassland mixture
Spreading width
RPM
km/h
Slide opening:
5 kg/ha
7 kg/ha
10 kg/ha
15 kg/ha
20 kg/ha
25 kg/ha
40 kg/ha
Spreading width
RPM
km/h
Slide opening:
5 kg/ha
7 kg/ha
10 kg/ha
15 kg/ha
20 kg/ha
25 kg/ha
30% ryegrass, 18% timothy, 21% meadow fescue, 9% orchard grass, 13% Kentucky bluegrass , 9% white clover
Position of casting sho
40 kg/ha
Position of casting sho
48
Delivery height: 1.00 m Status: 03/2005
Check settings with field samples.
If lateral distribution is uneven, adjust casting shovels.
The flow properties of grass seed are greatly affected by external
influences such as water content - humidity. Please note!
The pull o
Page 48

LEHNER SuperVario®
Check settings with field samples.
Operating manual Appendix
© LEHNER
LEHNER SuperVario®
6 8 10 12 6 8 10 12 6 8 10 12
48 52 56 59 38 40 43 45 44 45 46 48
53 57 60 62 45 56 60 65 55 56 57 58
Spreading chart, Welsh ryegrass
Spreading width 2.50 m 4.00 m 6.00 m
RPM 500 RPM 1200 RPM 2000 RPM
km/h
at 15 kg/ha
Delivery height: 1.00 m
at 25 kg/ha
Slide opening:
Position of casting shovels: Hole 5
The flow properties of grass seed are greatly affected by external
influences such as water content - humidity. Please note!
The pull of the spreading disc increases as the speed increases.
In the universal spreader, the slide setting is the same, and only needs to be
shifted by one decimal place. E.g. 41 is changed to 4.1
© LEHNER
Check settings with field samples.
6 8 10 12 6 8 10 12 6 8 10
48 51 57 59 39 43 52 55 38 40 45
52 55 70 82 50 53 66 72 60 75 82
Spreading chart, German ryegrass
Spreading width 2.50 m 4.00 m 6.00 m
RPM 500 RPM 1200 RPM 2000 RPM
km/h
at 15 kg/ha
Delivery height: 1.00 m
at 25 kg/ha
Slide opening:
Position of casting shovels: Hole 5
The flow properties of grass seed are greatly affected by external
influences such as water content - humidity. Please note!
The pull of the spreading disc increases as the speed increases.
In the universal spreader, the slide setting is the same, and only needs to be
shifted by one decimal place. E.g. 41 is changed to 4.1
49
Page 49

Operating manual Appendix
,
p
g
,
p
p
From
50
onwards,
the
slide
unit
of
the
SuperVario
is
somewhat
larger,
because
it
is
pear shaped.
6 8 10 12 6 8 10 12 6 8 10 12 6 8 10 12
RPM 200 RPM 250 RPM 300 RPM 850 RPM
km/h
Slide opening:
40 41 39 40 41 43
40 41 40 41 43 41 43 44 46
5 kg/ha
7 kg/ha
40 41 41 43 40 42 45 46 43 46 47 49
40 43 45 42 45 47 43 46 48 50 46 48 50 53
40 43 46 48 42 46 49 51 46 49 52 56 48 51 55 59
10 kg/ha
15 kg/ha
20 kg/ha
43 46 48 51 45 48 52 56 48 52 58 63 50 55 59 65
48 52 59 66 51 57 65 72 57 65 75 82 58 67 74 85
25 kg/ha
40 kg/ha
Position of casting shovels Hole 3 Hole 3.5 Hole 3.5 Hole 4.5
LEHNER SuperVario®
Status: 08/2005 Check settings with field samples.
MG 500 coated seed
Delivery height: 1.00 m
Spreading width 2.5 m 3 m 4 m 5 m
Spreading width 6 m 8 m 9 m 10 m
RPM 1600 RPM 2000 RPM 2250 RPM 2500 RPM
6 8 10 12 6 8 10 12 6 8 10 12 6 8 10 12
39 40 42 44 38 42 46 47 39 45 50 52 38 45 47 49
km/h
Slide opening:
5 kg/ha
7 kg/ha
43 44 45 47 43 47 49 52 46 51 53 55 45 48 51 60
45 46 48 50 48 51 54 61 52 55 59 62 50 56 61 63
10 kg/ha
48 50 51 56 52 62 65 71 56 63 69 74 60 63 70 76
53 57 60 62 61 69 73 78 63 71 80 83 63 73 78 84
58 59 64 68 66 73 80 88 69 80 84 85 70 78 85 88
15 kg/ha
20 kg/ha
25 kg/ha
ed.
ear-sha
because it is
er
erVario is somewhat lar
69 70 77 87 77 90 94 98 83 91 96 99 84 89 98
40 kg/ha
Position of casting shovels Hole 5 Hole 4.5 Hole 4.5 Hole 4
If lateral distribution is uneven, adjust casting shovels.
The flow properties of grass seed are greatly affected by external © LEHNER
influences such as water content - humidity. Please note!
the slide unit of the Su
The pull of the spreading disc increases as the speed increases.
In the universal spreader, the slide setting up to 50 is the same, and only
needs to be shifted by one decimal place. E.g. 41 is changed to 4.1
From 50 onwards
50
Page 50

LEHNER SuperVario®
Position of casting shovels: Hole 5
Position
of
casting
shovels:
Hole
5
Check settings with field samples.
Operating manual Appendix
2.50 m 4.00 m 6.00 m
500 RPM 1200 RPM 2100 RPM
6 8 10 12 6 8 10 12 6 8 10
Spreading chart, annual ryegrass
Spreading width
RPM
Delivery height: 1.00 m
km/h
41 46 50 53 43 48 50 61 47 49 52
47 53 56 59 49 56 62 72 58 60 68
at 15 kg/ha
Slide opening:
at 25 kg/ha
The pull of the spreading disc increases as the speed increases.
In the universal spreader, the slide setting is the same, and only needs to be
The flow properties of grass seed are greatly affected by external
influences such as water content - humidity. Please note!
shifted by one decimal place. E.g. 41 is changed to 4.1
51
Page 51

Operating manual Appendix
©
R
LEHNE
Status: 07/2006
68106810
49 53 56 40 41 43
56 67 67 46 49 55
70 74 78 62 69 77
Spreading chart, grass DSV G5 Permanent pasture © LEHNER SuperVario®
52
Spreading width 2 m 5 m Note
RPM 450 RPM 1600 RPM
km/h
at 5 kg/ha
at 10 kg/ha
Check settings with field samples.
Slide opening:
at 25 kg/ha
Delivery height: 1.00 m
Position of casting shovels: Hole 5
If lateral distribution is uneven, adjust casting shovels.
The flow properties of grass seed are greatly affected by external
influences such as water content - humidity. Please note!
Please note that when a spreading width of 2 m is selected, the grass seed does not run on well due to the pull.
The pull of the spreading disc increases as the speed increases.
Page 52

LEHNER SuperVario®
s
3 kg/ha
192022242023251819
24
3
kg/ha
192022242023251819
24
s
Operating manual Appendix
© LEHNER
17 17 18 17 18 19
4.00 m 6.00 m 8.00 m
magnesium carbonate, 0.2% Se selenium
200 RPM 420 RPM 550 RPM
3
17 18 19 17 18 20 21 17 18 19 21 23
Hole 3 Hole 3 Hole 3
9.00 m 12.00 m 15.00 m
650 RPM 800 RPM 1150 RPM
17 18 19 21 17 18 20 21 23 18 19 21 23 25
6 8 10 12 15 6 8 10 12 15 6 8 10 12 15
calcium carbonate, 5% Mg CO
3
Spreading chart, Dino Selenium
Spreading width
RPM
km/h
Slide opening:
70% Ca CO
2 kg/ha
3 kg/ha
4 kg/ha
17 18 19 21 23 18 20 21 23 25 19 22 23 25 27
18 19 22 24 25 21 23 24 26 28 23 24 27 28 32
5 kg/ha
7 kg/ha
Position of casting shovel
6 8 10 12 15 6 8 10 12 15 6 8 10 12 15
Spreading width
RPM
km/h
Slide opening:
17 18 19 20 17 18 19 20 21 17 19 20 21
2 kg/ha
Hole 3 Hole 3 Hole 3
19 20 22 24 26 20 21 23 25 27 20 23 25 26 29
20 23 24 26 28 21 24 26 27 30 22 25 28 29 32
24 25 28 29 33 25 27 29 32 36 25 27 31 35 39
4 kg/ha
5 kg/ha
7 kg/ha
Delivery height: 1.00 m Status: 01/2006
Position of casting shovel
Check settings with field samples.
If lateral distribution is uneven, adjust casting shovels.
The flow properties of the product are greatly affected by external
influences such as water content - humidity. Please note!
Position of stirring shafts: Do not install the upper stirring shaft, lower at 2/3 to 1/3
53
Page 53
Operating manual Appendix
©LEHNER
Status: 05/2002
LEHNER SuperVario®
23462346
Spreading chart
Bonsilage Schaumann
Spreading width 1.7 m 3.70 m
RPM 300 RPM 2200 RPM
km/h
54
85 85 85 85 85 85 85 85
215 145 108 72 100 67 50 34
Slide opening:
gr/m²
Delivery height: 1.00 m
Position of casting shovels: Hole 5
Special feature: Boundary spreading device is required as additional equipment, otherwise one-sided spreading pattern. (too much material in direction of rotation)
in the driving direction with front mounting causes even lateral distribution with this material.
Boundary spreading device mounted on the right
Important: After each use, thoroughly clean the spreader with water, and regularly grease the drive motor at the shaft output.
In the universal spreader, the slide setting up to 50 is the same, and only needs to be shifted by one decimal place E.g. 85 is changed to 8.5.
From 50 onwards, the flow rate in the SuperVario® is greater.
Page 54

LEHNER SuperVario®
©
Operating manual Appendix
LEHNER
1.50m 2 m 4 m
300 RPM 650 RPM 2600 RPM
234623462346
Spreading chart
Eurosil maize microgranulate (Timac)
Spreading width
RPM
km/h
85 85 85 85 85 85 85 85 85 85 85 85
180 120 90 60 130 90 65 45 65 45 32 22
Space for
gr/m²
own values:
Slide opening:
in the driving direction with front mounting causes even lateral distribution with this material.
Delivery height: 1.00 m
Position of casting shovels: Hole 5
Important: Thoroughly clean the spreader with water after each use. Regularly remove the motor and grease it at the shaft output.
Special feature: "Eurosil baffle plate" is required as an additional device, otherwise one-sided spreading pattern. (too much material in direction of rotation)
Status: 05/2002
Plate mounted on the right
55
Page 55

Operating manual Appendix
)
y
LEHNER
Status: 05/2002
LEHNER SuperVario®
234623462346
85 85 85 85 85 85 85 85 85 85 85 85
180 120 90 60 142 95 71 47 80 52 40 105
Spreading chart
Eurosil 70 microgranulate (Timac)
Spreading width 1.50m 2 m 4 m
RPM 300 RPM 500 RPM 2200 RPM
56
km/h
Space for
Slide opening:
own values:
gr/m²
Delivery height: 1.00 m
Feature: "Eurosil baffle plate" is required as an additional device, otherwise one-sided spreading pattern. (too much material in direction of rotation
Plate mounted on the right in the driving direction with front mounting, causes even lateral distribution with this material.
Position of casting shovels: Hole 5
Important: After each use, thoroughly clean the spreader with water, and regularly grease the shaft output.
In the universal spreader, the slide setting is the same, and onl
needs to be shifted by one decimal place. E.g. 85 is changed to 8.5
Page 56

®
6810152010152010
15
/h
g
g
g
y
g
g
g
y
g
y
y
g
g
g
Operating manual Appendix
LEHNER SuperVario
©LEHNER
.
Check settings with field samples.
Status: 08/2005
out of the midpoint
htl
er, because it is pear-shaped.
ed to 4.1
. 41 is chan
3 m4 m6 m9 m10 m
30 31 32 33 28 31 32 33 34 29 32 33 34 35 30 33 35 36 38 32 34 36 40 46
6 8 10 12 15 6 8 10 12 15 6 8 10 12 15 6 8 10 12 15 6 8 10 15 20
30 33 35 37 38 31 34 36 39 42 33 35 37 41 43 35 39 41 44 49 36 41 44 52 60
32 37 38 39 41 35 40 42 44 46 38 41 44 46 48 42 44 48 51 54 44 47 51 59 71
35 39 40 42 43 38 43 45 47 49 42 45 47 49 53 45 49 50 53 58 48 53 55 63 81
41 45 49 53 59 48 53 58 63 70 56 57 61 66 73 63 71 79 86 97 65 75 82 100
Hole 5 Hole 5 Hole 4 Hole 5 Hole 5
12 m 15 m 18 m 21 m 24 m
Hole 5 Hole 5 Hole 4 Hole 5 Hole 5
6 8 10 15 20 6 8 10 15 20 6 8 10 15 20 6 8 10 15 20 6 8 10 15 20
33 35 37 42 47 34 36 38 43 48 35 37 39 44 49 36 38 41 45 50 37 39 44 47 51
37 42 46 54 62 38 43 48 55 63 40 44 49 57 65 41 45 50 58 66 43 47 51 59
45 50 54 64 75 46 51 55 67 78 47 52 57 70 81 48 53 58 71 83 49 55 63
49 56 59 68 85 50 57 63 74 88 51 59 65 79 93 52 60 66 84 55 63
68 79 86 69 81 90 74 86 97 59 68 75 61 71
hts, the speed of the disc must be increased.
widths, wind speed should be noted to avoid incorrect spreadin
hei
up to 50 is the same, and onl
disc, 2 means sli
one decimal place. E.
e spreadin
Spreading chart, Ratron rodenticide
Delivery height: 1.30 m
Spreading width
Speed 250 RPM 300 RPM 500 RPM 850 RPM 1000 RPM
km/h
Slide opening:
at 3 kg/ha
at 6 kg/ha
at 9 kg/ha
at 12 kg/ha
at 25 kg/ha
Position of casting shovels
m
Spreading width
Speed 1200 RPM 1700 RPM 1900 RPM 2400 RPM 2650 RPM
Slide opening:
at 3 kg/ha
at 6 kg/ha
at 9 kg/ha
at 12 kg/ha
If lateral distribution is uneven, adjust casting shovels.
For lar
If there is no scale on the spreadin
at 25 kg/ha
Position of casting shovels
At lower deliver
From 50 onwards, the slide unit of the SuperVario is somewhat lar
needs to be shifted b
in the direction of rotation. 3 means the middle of the slot.
In the universal spreader, the slide settin
57
Page 57

Operating manual Appendix
e
at 3 kg/ha23242629333034232528302831362425
29
36
t
3
k
/h
e
©
®
LEHNER SuperVario
Check settings with field samples.
Mesurol
Hole 2.5Hole 2.5 Hole 2.5 Hole 2.5 Hole 2.5
LEHNER
Status: 08/2003
Hole 3 Hole 3 Hole 3 Hole 3 Hole 3
6 8 10 12 15 6 8 10 12 15 6 8 10 12 15 6 8 10 12 15 8 10 12 15 20
Speed 300 RPM 400 RPM 500 RPM 750 RPM 850 RPM
km/h
Slide opening:
21 23 25 27 20 22 24 26 28 20 23 24 27 28 21 23 24 26 28 22 23 25 28 33
21 23 25 27 29 21 23 26 28 29 21 24 27 28 30 22 24 27 30 31 25 26 28 31 36
at 3 kg/ha
at 5 kg/ha
Position of casting shov
12 m 15 m 18 m 21 m 24 m
8 10121520 8 10121520 8 10121520 8 10121520 8 10121520
23 24 26 29 33 23 25 28 30 34 23 25 28 30 35 23 25 28 31 36 24 25 29 32 36
a
g
Speed 1000 RPM 1800 RPM 2300 RPM 2500 RPM 2700 RPM
km/h
Slide opening:
a
Spreading width
26 27 28 31 39 27 30 32 37 41 28 31 34 39 42 28 32 36 41 43 30 33 37 44 45
For large spreading widths, note wind speed to avoid incorrect spreading.
At lower delivery heights, the speed of the disc must be increased.
If lateral distribution is uneven, adjust casting shovels.
If there is no scale on the spreading disc, 2 means slightly out of the midpoint
in the direction of rotation. 3 means the middle of the slot.
In the universal spreader, the slide setting is the same, and only
needs to be shifted by one decimal place. E.g. 41 is changed to 4.1
at 5 kg/ha
Position of casting shov
The speed may decrease at the upper spreading width. Please shorten stirring shaft by half.
3 m4 m6 m9 m10 m
Spreading chart, Mesurol slug pellets
Delivery height: 1.30 m
Spreading width
58
Page 58
Operating manual Appendix
e
t3k /h
2531342629323530333630323630323438
3
/
e
g
g
g
y
g
g
g
y
g
y
y
g
g
g
®
Hole 2.5Hole 2.5 Hole 2.5 Hole 2.5 Hole 2.5
40 43 51 35 38 42 45 53
LEHNER SuperVario
Check settings with field samples.
22 24 26 23 24 27 22 24 25 28 22 23 25 26 29 24 26 27 30 31
3 m4 m6 m9 m10 m
6 8 10 12 15 6 8 10 12 15 6 8 10 12 15 6 8 10 12 15 8 10 12 15 20
23 24 25 27 29 24 25 26 28 30 25 26 27 28 31 26 27 28 29 32 27 28 29 33 34
25 26 27 29 31 26 27 28 31 33 27 28 29 32 34 28 29 30 32 35 30 31 34 36 37
12 m 15 m 18 m 21 m 24 m
8 10 12 15 20 8 10 12 15 20 8 10 12 15 20 8 10 12 15 20 8 10 12 15 20
25 27 28 31 34 26 28 29 32 35 27 29 30 33 36 28 30 32 36 38 30 32 34 38 41
28 29 32 33 36 28 30 33 34 38 30 31 35 36 39 31 32 36 37 42 33 34 38 42 45
.
out of the midpoint
LEHNER
er, because it is pear-shaped
Status: 11/2004
ed to 4.1
htl
. 41 is chan
up to 50 is the same, and onl
disc, 2 means sli
Hole 2 Hole 2 Hole 2 Hole 2 Hole 2
31 32 35 40 42 32 33 37 41 43 33 34 39 42 46 34 35
hts, the speed of the disc must be increased. ©
widths, wind speed should be noted to avoid incorrect spreadin
one decimal place. E.
hei
e spreadin
For lar
If lateral distribution is uneven, adjust casting shovels.
If there is no scale on the spreadin
at 7 kg/ha
At lower deliver
Position of casting shov
needs to be shifted b
in the direction of rotation. 3 means the middle of the slot.
In the universal spreader, the slide settin
From 50 onwards, the slide unit of the SuperVario is somewhat lar
59
Speed 1000 RPM 1700 RPM 2500 RPM 2650 RPM 2800 RPM
km/h
Slide opening:
ha
kg
at
at 5 kg/ha
Spreading chart, METAREX slug pellets
Delivery height: 1.30 m
Spreading width
Speed 250 RPM 350 RPM 400 RPM 600 RPM 750 RPM
km/h
Slide opening:
at 3 kg/ha
at 5 kg/ha
at 7 kg/ha
Spreading width
Position of casting shov
Page 59

Operating manual Appendix
s
k/h6102068101581520610206810
15
/
s
g
g
g
y
g
5
g
g
y
g
y
y
g
g
g
®
Hole 5Hole 5 Hole 5 Hole 4 Hole 5
LEHNER SuperVario
©LEHNER
.
Check settings with field samples.
Status: 08/200
out of the midpoint
er, because it is pear-shaped.
ed to 4.1
htl
. 41 is chan
up to 50 is the same, and onl
disc, 2 means sli
6 8 10 12 15 6 8 10 12 15 6 8 10 12 15 6 8 10 12 15 6 8 10 15 20
30 31 32 33 28 31 32 33 34 29 32 33 34 35 30 33 35 36 38 32 34 36 40 46
30 33 35 37 38 31 34 36 39 42 33 35 37 41 43 35 39 41 44 49 36 41 44 52 60
32 37 38 39 41 35 40 42 44 46 38 41 44 46 48 42 44 48 51 54 44 47 51 59 71
35 39 40 42 43 38 43 45 47 49 42 45 47 49 53 45 49 50 53 58 48 53 55 63 81
41 45 49 53 59 48 53 58 63 70 56 57 61 66 73 63 71 79 86 97 65 75 82 100
3 m4 m6 m9 m10 m
12 m 15 m 18 m 21 m 24 m
6 8 10 15 20 6 8 10 15 20 6 8 10 15 20 6 8 10 15 20 6 8 10 15 20
33 35 37 42 47 34 36 38 43 48 35 37 39 44 49 36 38 41 45 50 37 39 44 47 51
37 42 46 54 62 38 43 48 55 63 40 44 49 57 65 41 45 50 58 66 43 47 51 59
45 50 54 64 75 46 51 55 67 78 47 52 57 70 81 48 53 58 71 83 49 55 63
49 56 59 68 85 50 57 63 74 88 51 59 65 79 93 52 60 66 84 55 63
Hole 5 Hole 5 Hole 4 Hole 5 Hole 5
68 79 86 69 81 90 74 86 97 59 68 75 61 71
hts, the speed of the disc must be increased.
widths, wind speed should be noted to avoid incorrect spreadin
one decimal place. E.
hei
Spreading chart, Ferramol slug pellets
Delivery height: 1.30 m
Spreading width
Speed 250 RPM 300 RPM 500 RPM 850 RPM 1000 RPM
km/h
Slide opening:
at 3 kg/ha
at 6 kg/ha
at 9 kg/ha
at 12 kg/ha
at 25 kg/ha
Position of casting shovel
h
Spreading width
Speed 1200 RPM 1700 RPM 1900 RPM 2400 RPM 2650 RPM
km
Slide opening:
at 3 kg/ha
at 6 kg/ha
at 9 kg/ha
at 12 kg/ha
e spreadin
in the direction of rotation. 3 means the middle of the slot.
At lower deliver
If lateral distribution is uneven, adjust casting shovels.
For lar
at 25 kg/ha
Position of casting shovel
If there is no scale on the spreadin
In the universal spreader, the slide settin
From 50 onwards, the slide unit of the SuperVario is somewhat lar
needs to be shifted b
60
Page 60
Operating manual Appendix
v
i
v
®
LEHNER SuperVario
Check settings with field samples.
Hole 2.5Hole 2.5 Hole 2.5 Hole 2.5 Hole 2.5
46 49 57 41 44 48 51 59
LEHNER
Status: 08/2005
23 24 26 24 25 28 24 26 27 30 25 26 28 29 32 28 30 31 34 35
3 m 4 m 6 m 9 m 10 m
6 8 10 12 15 6 8 10 12 15 6 8 10 12 15 6 8 10 12 15 6 8 10 12 15
23 24 25 27 29 25 26 27 29 31 27 28 29 30 33 29 30 31 32 35 31 32 33 37 38
25 26 27 29 31 27 28 29 32 34 29 30 31 34 36 31 32 33 35 38 34 35 38 40 41
Spreading chart, Clartex blue slug pellets
Delivery height: 1.30 m
Spreading width
Speed 250 RPM 350 RPM 400 RPM 600 RPM 750 RPM
km/h
Slide opening:
at 3 kg/ha
at 5 kg/ha
at 7 kg/ha
12 m 15 m 18 m 21 m 24 m
8 10 12 15 20 8 10 12 15 20 8 10 12 15 20 8 10 12 15 20 8 10 12 15 20
ng:
e open
Spreading width
Speed 1000 RPM 1700 RPM 2500 RPM 2650 RPM 2800 RPM
Position of casting sho
km/h
Hole 2 Hole 2 Hole 2 Hole 2 Hole 2
29 31 32 35 38 30 32 33 36 39 31 33 34 37 40 34 36 38 42 44 36 38 40 44 47
32 33 36 37 40 33 34 37 38 42 34 35 39 40 43 37 38 42 43 48 39 40 44 48 51
35 36 39 44 46 36 37 41 45 48 37 38 43 46 50 40 41
at 3 kg/ha
at 5 kg/ha
at 7 kg/ha
Position of casting sho
For large spreading widths, wind speed should be noted to avoid incorrect spreading.
At lower delivery heights, the speed of the disc must be increased.
If lateral distribution is uneven, adjust casting shovels.
In the universal spreader, the slide setting up to 50 is the same, and only
needs to be shifted by one decimal place. E.g. 41 is changed to 4.1
From 50 onwards, the slide unit of the SuperVario is somewhat larger, because it is pear-shaped.
61
Page 61
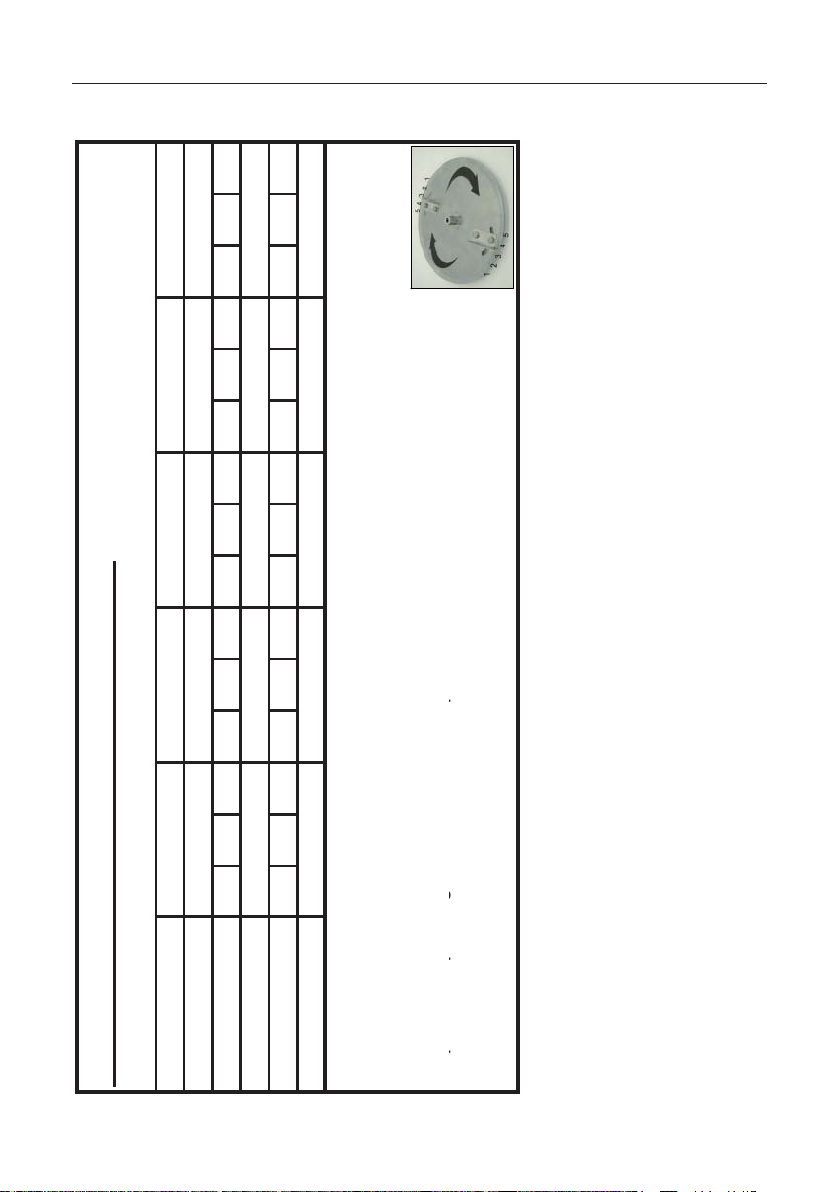
Operating manual Appendix
s
®
Note
LEHNER SuperVario
LEHNER
12 m 15 m 20 m 24 m
10 15 20 10 15 20 10 15 20 10 15 20
Spreading chart, Spiess slug pellets
Delivery height: 1.30 m
Spreading width
Speed 1200 RPM 1800 RPM 2700 RPM 2900 RPM
km/h
Hole 3 Hole 3 Hole 3 Hole 3
21 34 36 23 30 37 23 31 37 27 34 38
Slide opening:
at 4 kg/ha
Position of casting shovel
For large spreading widths, note wind speed to avoid incorrect spreading.
At lower delivery heights, the speed of the disc must be increased.
If lateral distribution is uneven, adjust casting shovels.
The speed may decrease at the upper spreading width. Please shorten stirring shaft by half.
The pull of the spreading disc increases as the speed increases.
In the universal spreader, the slide setting is the same, and only
needs to be shifted by one decimal place. E.g. 41 is changed to 4.1
62
Page 62
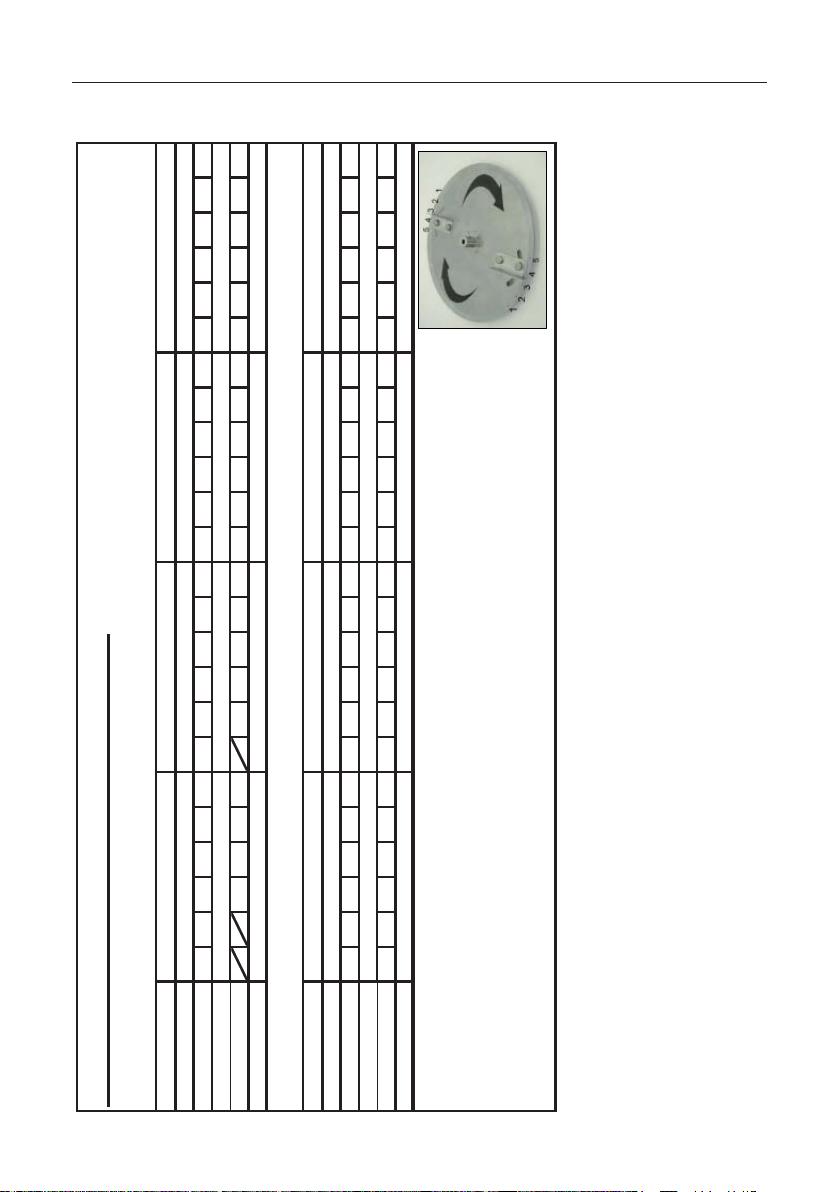
Operating manual Appendix
o
Piti f ti h
Hl 4
Hl 4
Hl 4
Hl 4
o
g
g
g
y
g
g
y
y
©
®
LEHNER SuperVario
RPM
920
RPM
550
RPM
3000
RPM
1900
Check settings with field samples.
RPM
450
RPM
1350
one decimal place.
.
needs to be shifted b
LEHNER
Status: 08/2005
is the same, and onl
RPM
350
3 m4 m6 m9 m
6 8 10 12 15 20 6 8 10 12 15 20 6 8 10 12 15 20 6 8 10 12 15 20
10 m 12 m 15 m 21 m
RPM
1000
Hole 3 Hole 4 Hole 4 Hole 4
23 24 25 26 23 25 26 27 28 24 26 27 28 29 32 24 27 28 29 31 34
Hole 4 Hole 4 Hole 4 Hole 4
6 8 10 12 15 20 6 8 10 12 15 20 6 8 10 12 15 20 6 8 10 12 15 20
25 28 29 31 33 38 24 27 29 30 33 38 24 27 29 30 33 37 24 26 29 31 34 39
hts, the speed of the disc must be increased.
widths, wind speed should be noted to avoid incorrect spreadin
hei
Spreading chart, DELICIA slug pellets
Delivery height: 1.30 m
Spreading width
RPM
km/h
Slide opening
at 3 kg/ha
Spreading width
RPM
Position of casting sh
km/h
Slide opening
e spreadin
For lar
If lateral distribution is uneven, adjust casting shovels.
at 3 kg/ha
At lower deliver
Position of casting sh
E.g. 41 is changed to 4.1
In the universal spreader, the slide settin
63
Page 63
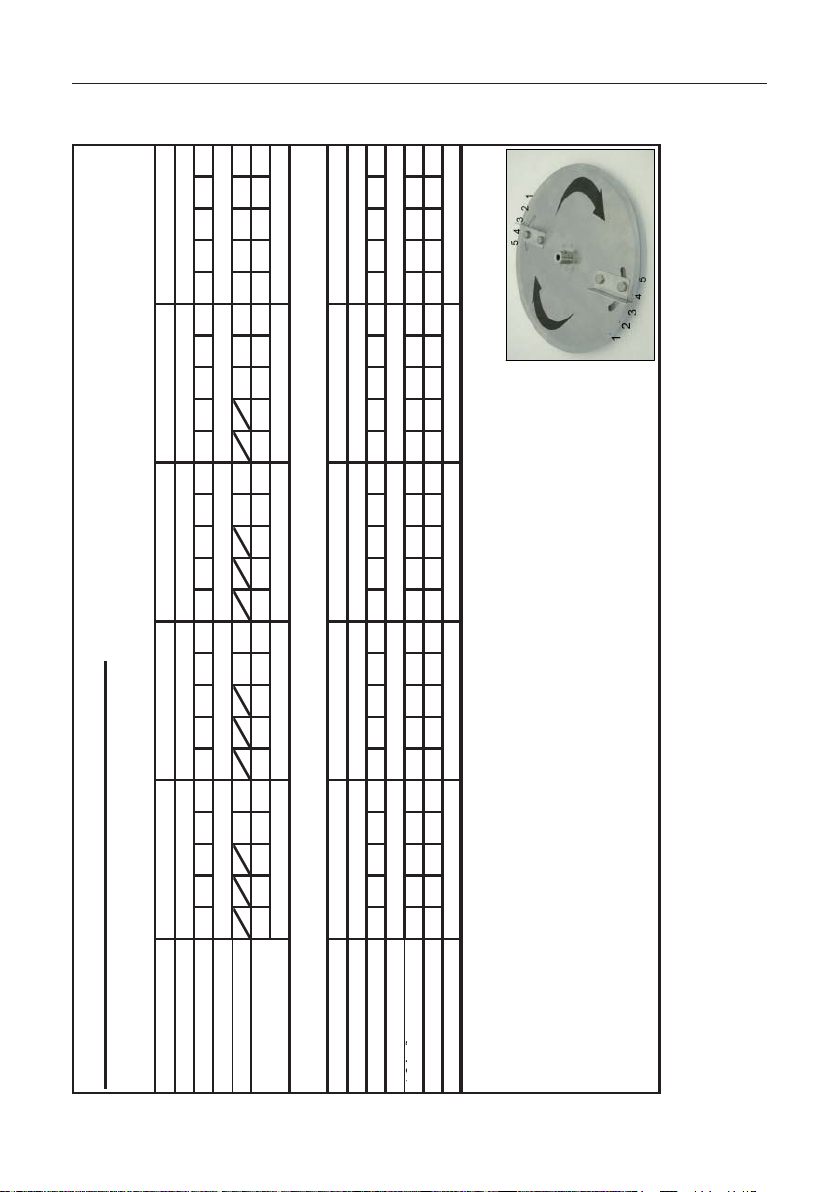
Operating manual Appendix
s
at 3 kg/ha2632362733372834382935393040
t
3
k
/h
s
y
g
®
LEHNER SuperVario
Check settings with field samples.
Hole 4.5Hole 5 Hole 4.5 Hole 4.5 Hole 5
LEHNER
Status: 07/2006
24 25 25 26 26 27 24 27 30 24 25 28 31 34
Hole 4 Hole 4.5 Hole 4.5 Hole 4.5 Hole 4.5
3 m4 m6 m9 m10 m
6 8 10 12 15 6 8 10 12 15 6 8 10 12 15 6 8 10 12 15 8 10 12 15 20
24 25 27 29 31 25 28 29 30 33 26 29 30 31 34 28 30 33 36 39 31 34 37 40 44
12 m 15 m 18 m 21 m 24 m
8 10 12 15 20 8 10 12 15 20 8 10 12 15 20 8 10 12 15 20 8 10 12 15 20
25 26 29 32 36 26 27 30 33 37 27 28 31 34 38 28 29 32 35 39 29 30 33 36 40
32 36 38 42 45 33 37 39 43 46 34 38 40 44 47 35 39 42 45 49 36 40 43 46 50
hts, the speed of the disc must be increased.
hei
Speed 1350 RPM 1800 RPM 2250 RPM 2400 RPM 2650 RPM
km/h
Slide opening:
a
g
a
For large spreading widths, wind speed should be noted to avoid incorrect spreading.
at 6 kg/ha
At lower deliver
Position of casting shovel
If lateral distribution is uneven, adjust casting shovels.
If there is no scale on the spreading disc, 2 means slightly out of the midpoint
in the direction of rotation. 3 means the middle of the slot.
In the universal spreader, the slide setting up to 50 is the same, and only
needs to be shifted by one decimal place. E.g. 41 is changed to 4.1
From 50 onwards, the slide unit of the SuperVario is somewhat larger, because it is pear-shaped
Spreading chart, FCS slug pellets
64
Delivery height: 1.30 m
Spreading width
Speed 300 RPM 350 RPM 750 RPM 1100 RPM 1200 RPM
km/h
Slide opening:
at 3 kg/ha
at 6 kg/ha
Position of casting shovel
Spreading width
Page 64

Operating manual Appendix
h
2427302324303423273023243034232730
t
3
k
/h
h
®
LEHNER SuperVario
Check settings with field samples.
Hole 4.5Hole 5 Hole 4.5 Hole 4.5 Hole 5
LEHNER
Status: 07/2008
23 24 24 25 25 26 23 26 29 23 24 27 30 33
Hole 4 Hole 4.5 Hole 4.5 Hole 4.5 Hole 4.5
3 m4 m6 m9 m10 m
6 8 10 12 15 6 8 10 12 15 6 8 10 12 15 6 8 10 12 15 8 10 12 15 20
23 24 26 28 30 24 27 28 29 32 25 28 29 30 33 27 29 32 35 38 30 33 36 39 43
Spreading chart, Arinex slug pellets
Delivery height: 1.30 m
Spreading width
Speed 300 RPM 350 RPM 750 RPM 1100 RPM 1200 RPM
km/h
Slide opening:
at 3 kg/ha
at 6 kg/ha
12 m 15 m 18 m 21 m 24 m
8 10121520 8 10121520 8 10121520 8 10121520 8 10121520
Spreading width
Speed 1350 RPM 1800 RPM 2250 RPM 2400 RPM 2650 RPM
Position of casting s
km/h
23 24 27 30 34 23 24 27 30 34 23 24 27 30 34 23 24 27 30 34 23 24 27 30 34
30 34 36 40 43 30 34 36 40 43 30 34 36 40 43 30 34 37 40 44 30 34 37 40 44
a
g
at 6 kg/ha
Slide opening:
a
Position of casting s
For large spreading widths, note wind speed to avoid incorrect spreading.
At lower delivery heights, the speed of the disc must be increased.
If lateral distribution is uneven, adjust casting shovels.
If there is no scale on the spreading disc, 2 means slightly out of the midpoint
in the direction of rotation. 3 means the middle of the slot.
In the universal spreader, the slide setting is the same, and only
needs to be shifted by one decimal place. E.g. 41 is changed to 4.1
The speed may decrease at the upper spreading width. Please shorten stirring shaft by half.
65
Page 65

Operating manual Appendix
o
2528313526323625263226
2733272831
34
38
t
3
k
/h
o
©
®
LEHNER SuperVario
Check settings with field samples.
Hole 4.5Hole 5 Hole 4.5 Hole 4.5 Hole 5
LEHNER
Status: 07/2008
23 24 24 25 25 26 23 26 29 23 24 27 30 33
Hole 4 Hole 4.5 Hole 4.5 Hole 4.5 Hole 4.5
3 m4 m6 m9 m10 m
6 8 10 12 15 6 8 10 12 15 6 8 10 12 15 6 8 10 12 15 8 10 12 15 20
23 24 26 28 30 24 27 28 29 32 25 28 29 30 33 27 29 32 35 38 30 33 36 39 43
Spreading chart, NaTrox slug pellets
Delivery height: 1.30 m
Spreading width
Speed 300 RPM 350 RPM 750 RPM 1100 RPM 1200 RPM
km/h
Slide opening:
at 3 kg/ha
at 6 kg/ha
66
12 m 15 m 18 m 21 m 24 m
8 10121520 8 10121520 8 10121520 8 10121520 8 10121520
Spreading width
Speed 1350 RPM 1800 RPM 2250 RPM 2400 RPM 2650 RPM
Position of casting sh
km/h
24 25 28 31 35 25 26 29 32 36 25 26 29 32 36 26 27 30 33 37 27 28 31 34 38
31 35 37 41 44 32 36 38 42 45 32 36 38 42 45 33 37 40 43 47 34 38 41 44 48
a
g
at 6 kg/ha
Slide opening:
a
Position of casting sh
For large spreading widths, note wind speed to avoid incorrect spreading.
At lower delivery heights, the speed of the disc must be increased.
If lateral distribution is uneven, adjust casting shovels.
If there is no scale on the spreading disc, 2 means slightly out of the midpoint
in the direction of rotation. 3 means the middle of the slot.
In the universal spreader, the slide setting is the same, and only
needs to be shifted by one decimal place. E.g. 41 is changed to 4.1
The speed may decrease at the upper spreading width. Please shorten stirring shaft by half.
Page 66

Operating manual Appendix
v
at 5 kg/ha3642272832384531353943493236
41
45
53
at
5
kg/ha
364227283238453135394349323641
45
53
v
g
g
g
y
g
g
®
Hole 3.5Hole 4.5 Hole 4.5 Hole 4.5 Hole 3.5
LEHNER SuperVario
©LEHNER
Check settings with field samples.
.
Status: 09/2009
3 m 4 m 6 m 9 m 10 m
6 8 10 12 15 6 8 10 12 15 6 8 10 12 15 6 8 10 12 15 6 8 10 15 20
15 17 18 20 21 18 20 23 24 26 19 21 24 25 27 23 24 26 30 33 24 25 29 34 39
Spreading chart, Sluxx
Delivery height: 1.30 m
Spreading width
Speed 350 RPM 450 RPM 650 RPM 1000 RPM 1200 RPM
km/h
Slide opening:
at 5 kg/ha
at 7 kg/ha
12 m15 m18 m21 m24 m
18 20 21 22 23 22 24 25 26 28 23 25 26 27 29 26 28 31 33 36 27 29 32 37 41
Spreading width
Speed 1350 RPM 1550 RPM 1900 RPM 2650 RPM 3000 RPM
Position of casting sho
6 8 10 12 15 6 8 10 12 15 6 8 10 12 15 6 8 10 12 15 6 8 10 15 20
km/h
Slide opening:
Hole 4.5 Hole 4.5 Hole 4.5 Hole 4.5 Hole 4.5
28 31 33 37 43 29 32 34 39 45 31 34 37 43 52 43 46 50 55 63 45 48 53 58 68
at 7 kg/ha
Position of casting sho
disc increases as the speed increases.
hts, the speed of the disc must be increased.
widths, wind speed should be noted to avoid incorrect spreadin
hei
e spreadin
At lower deliver
If lateral distribution is uneven, adjust casting shovels.
The speed may decrease at the upper spreading width. Please shorten stirring shaft by half.
For lar
The pull of the spreadin
67
Page 67

Operating manual Appendix
o
g
6
30
3236
6
33
5
30
323
0
3
kg/ha
26303236242633
253032
34
40
o
©
44
®
LEHNER SuperVario
Check settings with field samples.
Hole 3Hole 3 Hole 3 Hole 3 Hole 3
2
24 2
LEHNER
24 2
Status: 05/2009
23 24 25 23 24 25 26 25 27 29 32 34 22 24 26 31 33 24 25 30 32 35
3 m4 m6 m9 m10 m
6 8 10 12 15 6 8 10 12 15 6 8 10 12 15 6 8 10 12 15 6 8 10 12 15
Spreading chart, Patrol MetaPads
Delivery height: 1.30 m
Spreading width
Speed 350 RPM 450 RPM 550 RPM 1000 RPM 1200 RPM
km/h
Slide opening:
at 4 kg/ha
12 m 15 m 18 m 21 m 24 m
8 10121520 8 10121520 8 10121520 8 10121520 8 10121520
Spreading width
Speed 1400 RPM 2000 RPM 2600 RPM 2900 RPM 3000 RPM
Position of casting sh
km/h
Slide opening:
Hole 3 Hole 3 Hole 3 Hole 3 Hole 3
25 31 33 36 39 26 31 33 36 39 28 31 32 36 40 29 31 33 36 42 30 33 35 40 48
/ha
at 3 k
at 4 kg/ha
Position of casting sh
68
For large spreading widths, note wind speed to avoid incorrect spreading.
At lower delivery heights, the speed of the disc must be increased.
If lateral distribution is uneven, adjust casting shovels.
The speed may decrease at the upper spreading width. Please shorten stirring shaft by half.
The pull of the spreading disc increases as the speed increases.
In the universal spreader, the slide setting is the same, and only
needs to be shifted by one decimal place. E.g. 41 is changed to 4.1
Page 68

a
© LEHNER
Operating manual Appendix
LEHNER SuperVario®
18 19 17 19 20 17 19 21 23 18 20 23 24
Status: 08/2005 Check settings with field samples.
2.5 m 3.00 m 4.00 m 4.70 m
300 RPM 350 RPM 400 RPM 460 RPM
6 8 10 12 6 8 10 12 6 8 10 12 6 8 10 12
Spreading chart, oilseed r
Delivery height: 1.00 m
Spreading width
RPM
km/h
20 21 19 21 23 19 22 24 26 20 23 26 27
17 19 22 23 18 21 23 26 21 24 26 28 23 26 28 29
19 21 23 24 20 23 25 28 23 26 28 30 24 28 30 31
Slide opening:
at 6 kg/ha
at 8 kg/ha
at 10 kg/ha
at 12 kg/ha
6.00 m 9.00 m 12.00 m 15.00 m
600 RPM 980 RPM 1300 RPM 2300 RPM
6 8 10 12 6 8 10 12 8 10 15 20 8 10 15 20
20 23 26 28 24 27 29 32 30 33 42
Spreading width
RPM
km/h
Slide opening:
at 6 kg/ha
at 8 kg/ha
23 26 28 30 27 29 31 34 32 38 50
26 28 30 32 29 31 33 36 34 43 58
at 10 kg/ha
28 30 32 34 31 33 35 48 36 48 66
At low delivery heights, the speed of the disc must be increased.
In the universal spreader, the slide setting up to 50 is the same, and only
needs to be shifted by one decimal place. E.g. 41 is changed to 4.1
at 12 kg/ha
Position of casting shovels: 2.0 to 2.5
From 50 onwards, the slide unit of the SuperVario is somewhat larger, because it is pear-shaped.
69
Page 69

Operating manual Appendix
s
Hl 3
Hl 3
Hl 3
s
g
g
g
y
g
©
®
9 m6 m4 m3 m
LEHNER SuperVario
Check settings with field samples.
Status: 08/2011
Hole 3
Hole 3Hole 3
Hole 3
21 m
2600 RPM
15 m
2000 RPM
12 m
15000 RPM
Hole 3Hole 3 Hole 3 Hole 3
LEHNER
.
350 RPM 450 RPM 500 RPM 900 RPM
19 21 23 25 28 19 21 23 24 26 29 20 22 24 25 27 30 20 24 25 26 28 31
6 8 10 12 15 20 6 8 10 12 15 20 6 8 10 12 15 20 6 8 10 12 15 20
10 m
1000 RPM
6 8 10 12 15 20 6 8 10 12 15 20 6 8 10 12 15 20 6 8 10 12 15 20
21 22 24 25 29 32 21 23 25 26 29 33 22 22 26 27 30 35 23 24 27 30 33 38
hts, the speed of the disc must be increased.
widths, wind speed should be noted to avoid incorrect spreadin
hei
Spreading chart, Mollustop
Delivery height: 1.30 m
Spreading width
RPM
km/h
Slide opening
at 3 kg/ha
Spreading width
RPM
Position of casting shovel
km/h
70
Slide opening
e spreadin
For lar
If lateral distribution is uneven, adjust casting shovels.
The speed may decrease at the upper spreading width. Please shorten stirring shaft by half.
at 3 kg/ha
At lower deliver
Position of casting shovel
In the universal spreader, the slide setting is the same, and only needs to be shifted by one decimal place.
E.g. 41 is changed to 4.1
Important: This spreading chart has not yet been field-tested.
Page 70

®
d
Hole 2
Hole 2
Hole 2
Hole 2
Hole 2
LEHNER SuperVario
Hole 2
Status 05/2003
©LEHNER
Operating manual Appendix
Fodder radish
Wing position (wings from left to right)
4507 1828607081
6505 1628607383
2.0 m
2.5 m
8005 1326647584
1050 3 13 26 64 76 85
1150 1 11 26 64 78 88
4.7 m
5.0 m
6.0 m
Please refer to the spreading chart for fodder radish to find the slide opening
Check settings with a field test.
71
2007 1828607081
RPM Wing 1 Wing 2 Wing 3 Wing 4 Wing 5 Wing 6 Casting shovels
1.5 m
Guide plate setting values
Spreading wi
Delivery height 1 m
Page 71

Operating manual Appendix
©
R
settings
with
a
field
test
©LEHNER
Hole 1
Hole 1
Hole 1
Hole 2.5
Hole 1
LEHNE
Status 05/2003
LEHNER SuperVario®
Grasses
Wing position (wings from left to right)
300 10 19 27 61 70 79
1600 9 17 26 61 73 81
1800 6 16 26 61 73 84
1100 10 19 27 61 71 80
2 m
3 m
1 m
1.5 m
Guide plate setting values
Spreading width RPM Wing 1 Wing 2 Wing 3 Wing 4 Wing 5 Wing 6 Casting shovels
Delivery height 1 m
72
4 m
.
2150 1 12 26 61 78 88
Please refer to the spreading chart for grasses to find the slide opening
Page 72

d
Hole 1
60m
1550
11121
79
Hole 3
6
0
1550
11121
79
H
l
3
Hole 1
Hole 1
Hole 1
Hole 1
Hole 3
Hole 3
LEHNER SuperVario®
e
o
Status 04/2003
©LEHNER
Operating manual Appendix
Yellow mustard
Wing position (wings from left to right)
2009 2030607081
3007 1727637383
3001 1121697989
5501 1121697989
2.5 m
3.0 m
7505 1121697985
1150 1 11 21 69 79 89
1200 1 11 21 69 79 89
4.0 m
4.7 m
5.0 m
m
.
RPM Wing 1 Wing 2 Wing 3 Wing 4 Wing 5 Wing 6 Casting shovels
2.0 m
1.5 m
Guide plate setting values
Spreading wi
Delivery height 1 m
Please refer to the spreading chart for yellow mustard to find the slide opening
Check settings with a field test.
73
 Loading...