

LEGRAND Wattstopper, Wattstopper LMPX-600, Wattstopper LMPX-600-1, Wattstopper LMPX-600-4 Series Manual
Wattstopper
To
Top View
8ft
0
8ft
8ft
16ft
16ft
0
6’ 10ft 27ft 60ft
Top View
16ft
20ft
Top View:
®
DLM Wireless PIR Corner Mount Occupancy Sensor with IPv6/
Bluetooth® Low Energy Technology
No: 27366 – 5/19 rev. 3a
Quick Start Guide • Guide de démarrage rapide • Guía de inicio rápido
Catalog Numbers • Numéros de Catalogue • Números de Catálogo: LMPX-600, LMPX-600-1, LMPX-600-4
Country of Origin: Made in China • Pays d’origine: Fabriqué en Chine • País de origen: Hecho en China
SPECIFICATIONS
Power Supply .......................... Battery powered, CR123A Lithium Ion, 3 VDC
Once paired to an LMRC-611 wireless room
controller or LMBC-650 wireless bridge,
this unit is set for Plug n’ Go operation,
adjustment via the DLM Conguration App
is recommended to meet the local energy
code where installed.
The DLM Wireless corner mount sensor is a wireless
battery powered PIR occupancy sensor intended for
operation with wireless room controllers or bridges.
Once paired to a wireless room controller or bridge,
it detects and monitors the presence of motion to
determine if lights should be on or off.
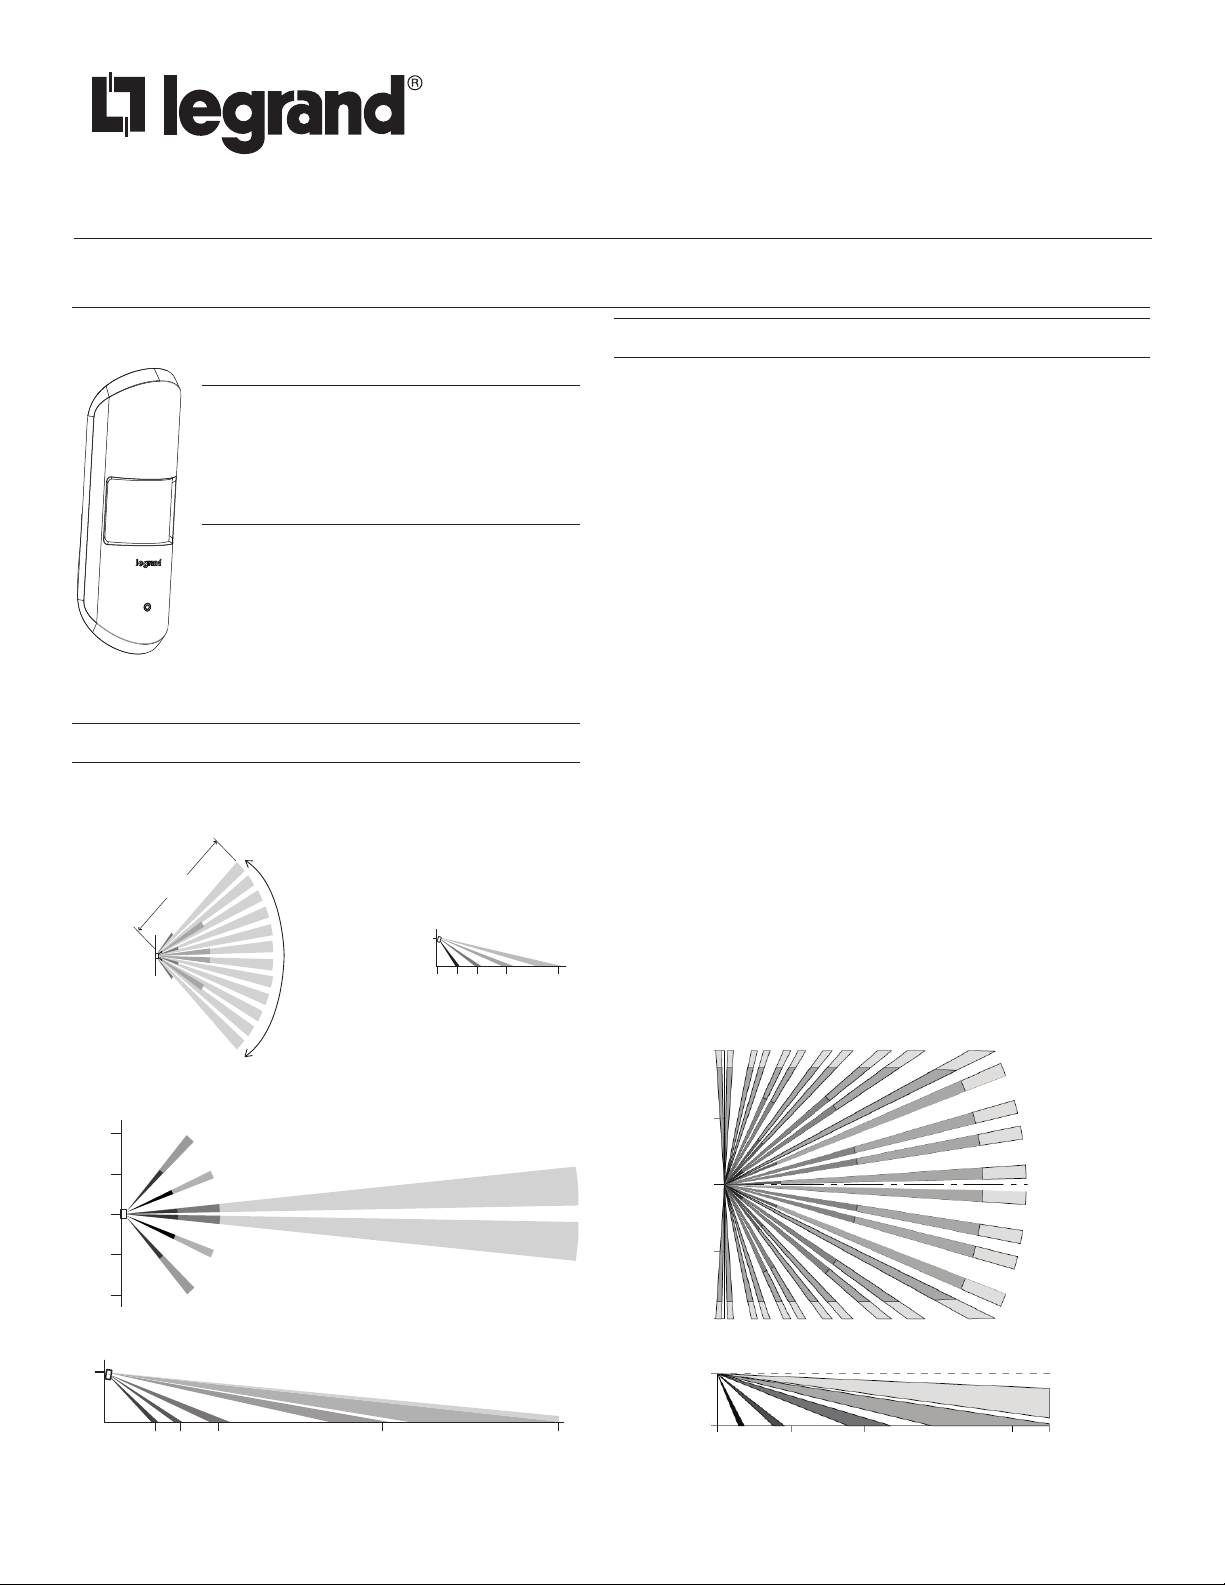
COVERAGE PATTERNS
Coverages shown are maximum and represent half-step walking
motion.
60’
8’
07’ 12’ 25’ 60’
p view
100°
Side view
Connection to DLM Network ... Wireless via LMRC-611MCC room controllers
Lens Types
LMPX-600 .........................................................................Wide Angle
LMPX-600-1 .................................................................... Long Range
LMPX-600-4 ............................................................ Extra Wide Angle
Wireless Hardware
Radios: ................................................................ Two IEEE 802.15.4
Frequency: ............................................................................. 2.4Ghz
Antennas: ................................ IPv6 Mesh and Bluetooth low energy
Wireless Standards
Radio 1: ......................................................... IPv6 Mesh (6LoWPAN)
Range: .......................................................................up to 60 ft.
Radio 2: ............................................................ Bluetooth low energy
Range: .......................................................................up to 30 ft.
Wireless Encryption
AES-128 bit symmetric key, randomly generated per PAN
Shared via secured DTLS only
Environment ............................................................... For Indoor Use Only
Operating Temperature ...............................32° to 104°F (0° to 40°C)
Storage Temperature .................................23° to 140°F (-5° to 60°C)
Relative Humidity .....................................5 to 95% (non condensing)
Compliance/Regulatory
FCC, RoHS,
Bluetooth certified
UL and cUL listed (E101196)
Patent Pending
LMPX-600, wide angle lens
16ft
8ft
0
8ft
16ft
Side View
LMPX-600-1, long range lens
20ft
10ft
0
10ft
Side View
8ft
0 10ft 20ft 30ft 40ft 45ft
LMPX-600-4, extra wide angle lens
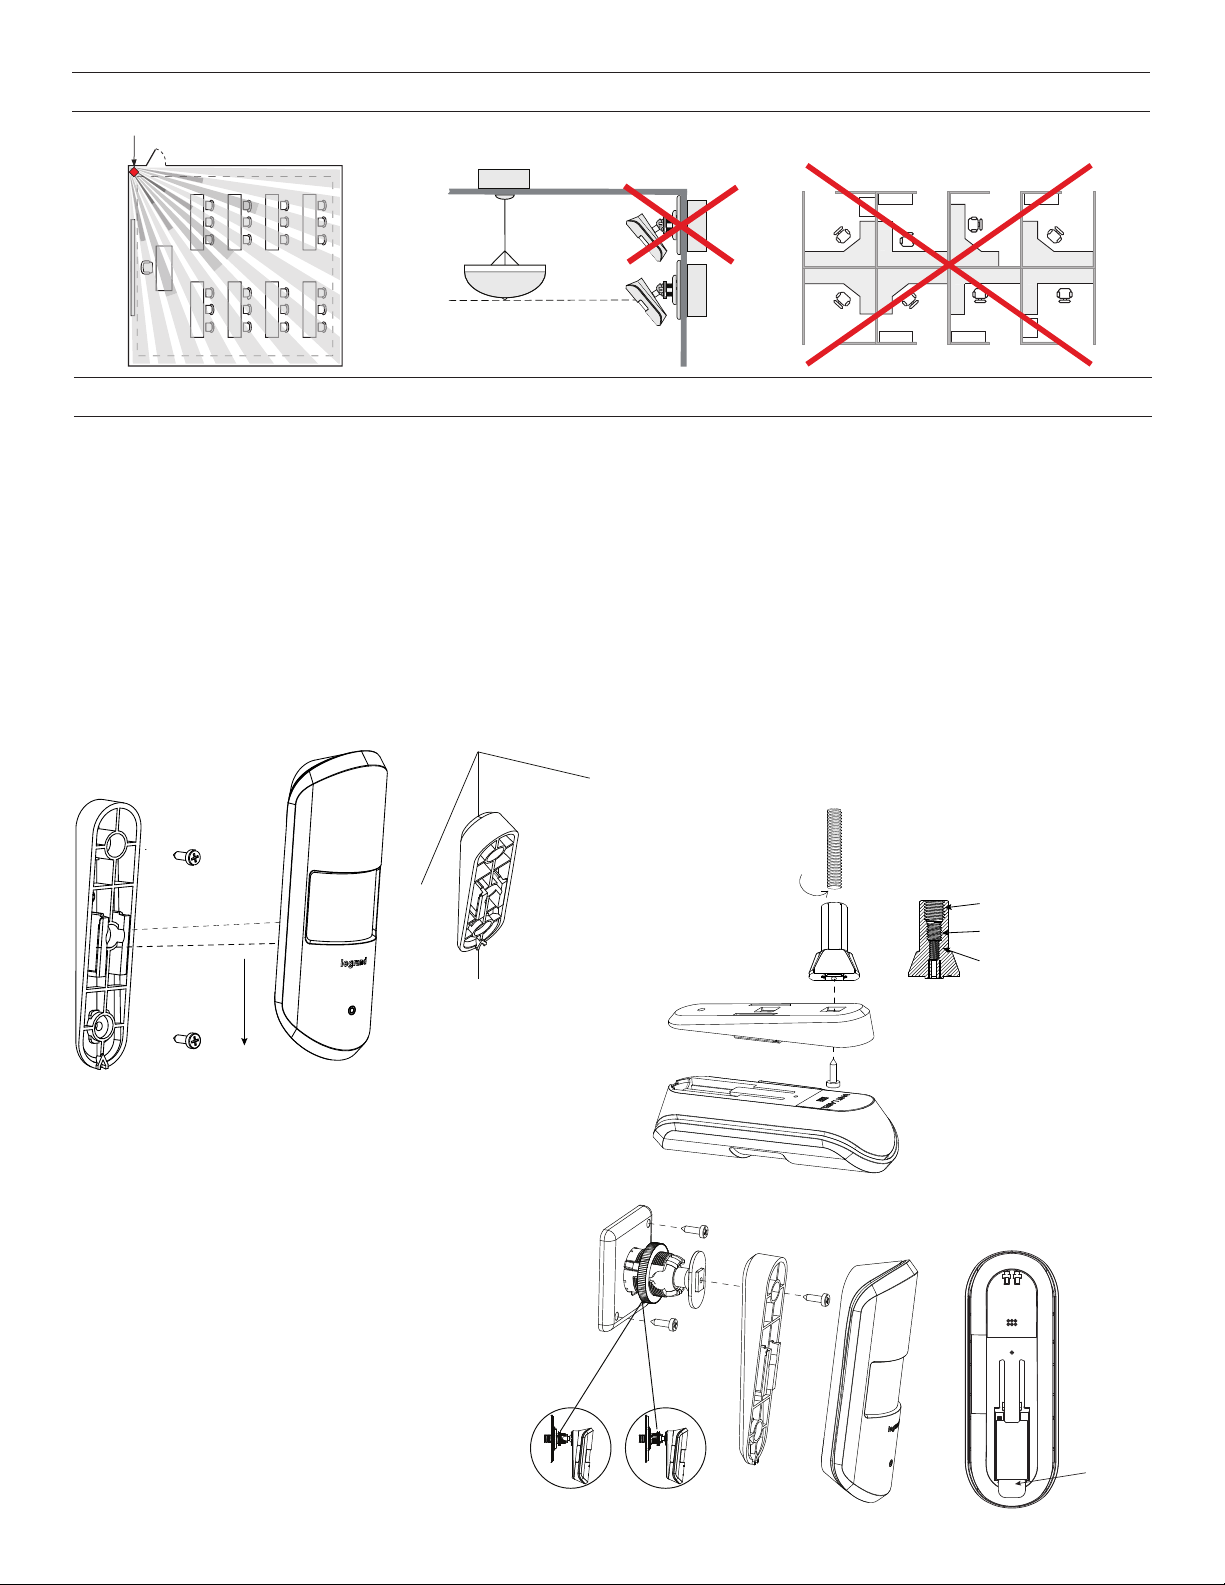
SENSOR PLACEMENT
Sensor
'
Ceiling
30'
30
Sensor
MOUNTING
The LMPX-600 can be mounted using one of these methods:
• Mounted to a wall or corner using the included mounting wedge.
• Mounted directly to a wall, using the included ball mount
• Mounted to a j-box within a wall, using the included ball mount and ball mount plate
• Mounted to a ceiling, using the included ball mount and ball mount plate
• Mounted to a hanging threaded rod, for open ceiling environments, using the included threaded rod adapter
Ceiling Mount
1. Attach the mounting wedge to the ceiling with the two
included 1” mounting screws.
2. Align the slots of the bracket to the ribs on the
back of the LMPX-600. Then slide the LMPX-600
downward onto the mounting wedge.
Beveled edges on plate allow
for mounting into a corner
NOTE: If mounting to a wall or corner using the mounting wedge,
the top of the wedge should be at least 1 1/2” below the
ceiling to allow the sensor room to slide down onto the
mounting plate.
Ball Mount to Wall
1. Attach the ball mount swivel bracket to the wall
with the two included 1” mounting screws.
2. Attach the mounting wedge to the mount end of
the ball joint, using the included 10mm screw.
3. Align the slots of the bracket to the ribs on the
back of the LMPX-600. Then slide the LMPX-600
onto the mounting plate.
4. Push snug ring towards plate to adjust sensor
angle, then pull snug ring back towards sensor to
lock in place.
Threaded Rod Mount
The threaded rod adapter can mount to a 3/8”-16, 1/4”-20, or
1/2”-13 hanging threaded rod.
1. Screw the adapter onto the rod.
2. Attach the mounting wedge to the adapter using the
included 10mm screw.
3. Align the slots of the bracket to the ribs on the back of the
LMPX-600. Then slide the LMPX-600 onto the mounting
wedge.
Threaded Rod Size
3/8"-16, 1/4"-20,
or 1/2”-13
Threaded hole - 1/2"-13
Threaded hole - 3/8"-16
Threaded hole - 1/4"-20
Mounting Bracket
NOTE: Pull protective battery
tab before installation
to power the sensor.
Pull Tab
Unlocked Locked
2
 Loading...