

Page 1
Evolution Series
Legrand/Wiremold electrical systems conform to and should be properly
grounded in compliance with requirements of the current National
Electrical Code or codes administered by local authorities.
All electrical products may present a possible shock or fire
hazard if improperly installed or used. Legrand/Wiremold electrical
products may bear the mark of a Nationally Recognized Testing
Laboratory (NRTL) and should be installed in conformance with current
local and/or the National Electrical Code.
Floor Box Terrazzo/Concrete Trim Ring
I N S T A L L A T I O N I N S T R U C T I O N S
Installation Instruction No.: 1 009 439R1 – Updated October 2011
PRODUCTS COVERED:
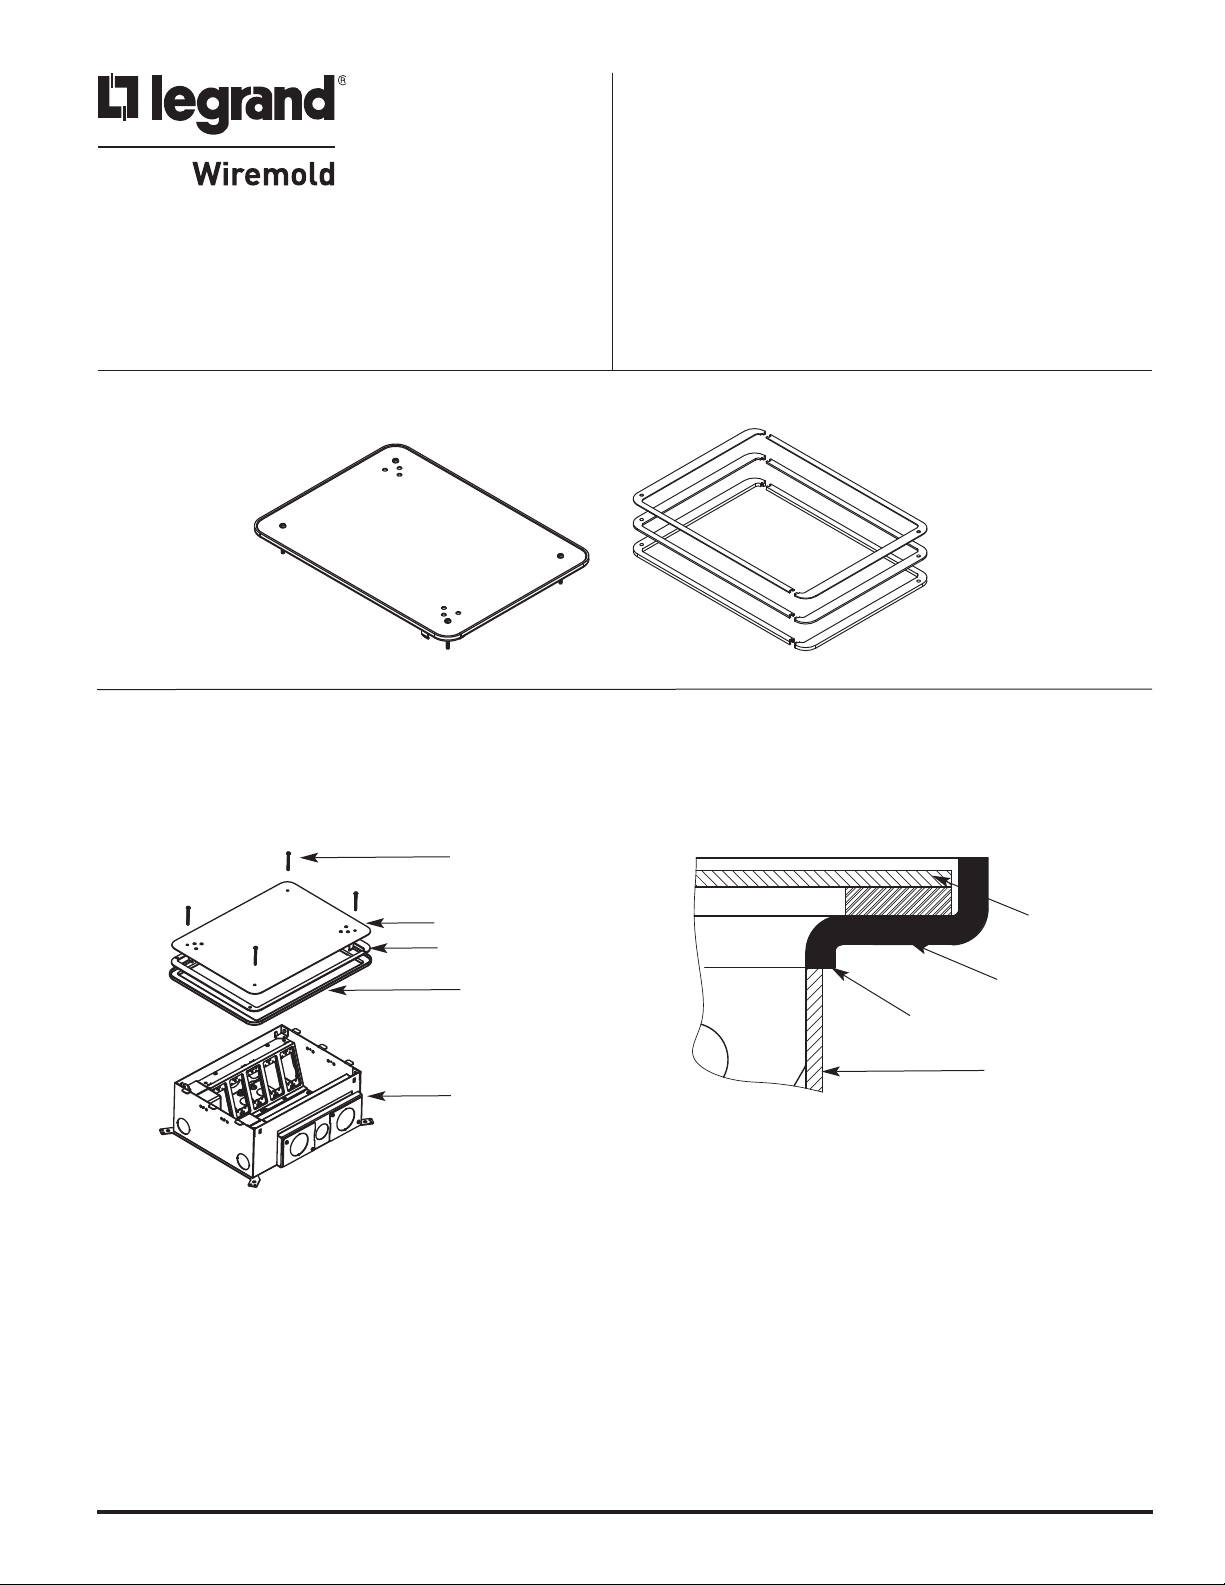
EFB610-CTR
CONCRETE PRE-POUR ATTACHMENT METHOD:
1. EFB610-CTR installation: place Evolution floor box
according to box installation instructions. Attach terrazzo
trim ring and terrazzo mudcap to the floor box with the
four provided screws as shown.
Screws
EFB610-TS
IMPORTANT: Please read all instructions
before beginning.
1a. EFB610-CTR concrete pre-pour installation:
installation view of trim ring, mudcap, and floor box.
Mudcap
Mudcap Spacer
Terrazzo Trim Ring
Box Assembly
for Concrete
Mudcap
Terrazzo Trim Ring
See Taping note below
Box Assembly
NOTE: Taping of seams created between the trim
ring and box assembly will decrease the
ingress of concrete.
Page 2
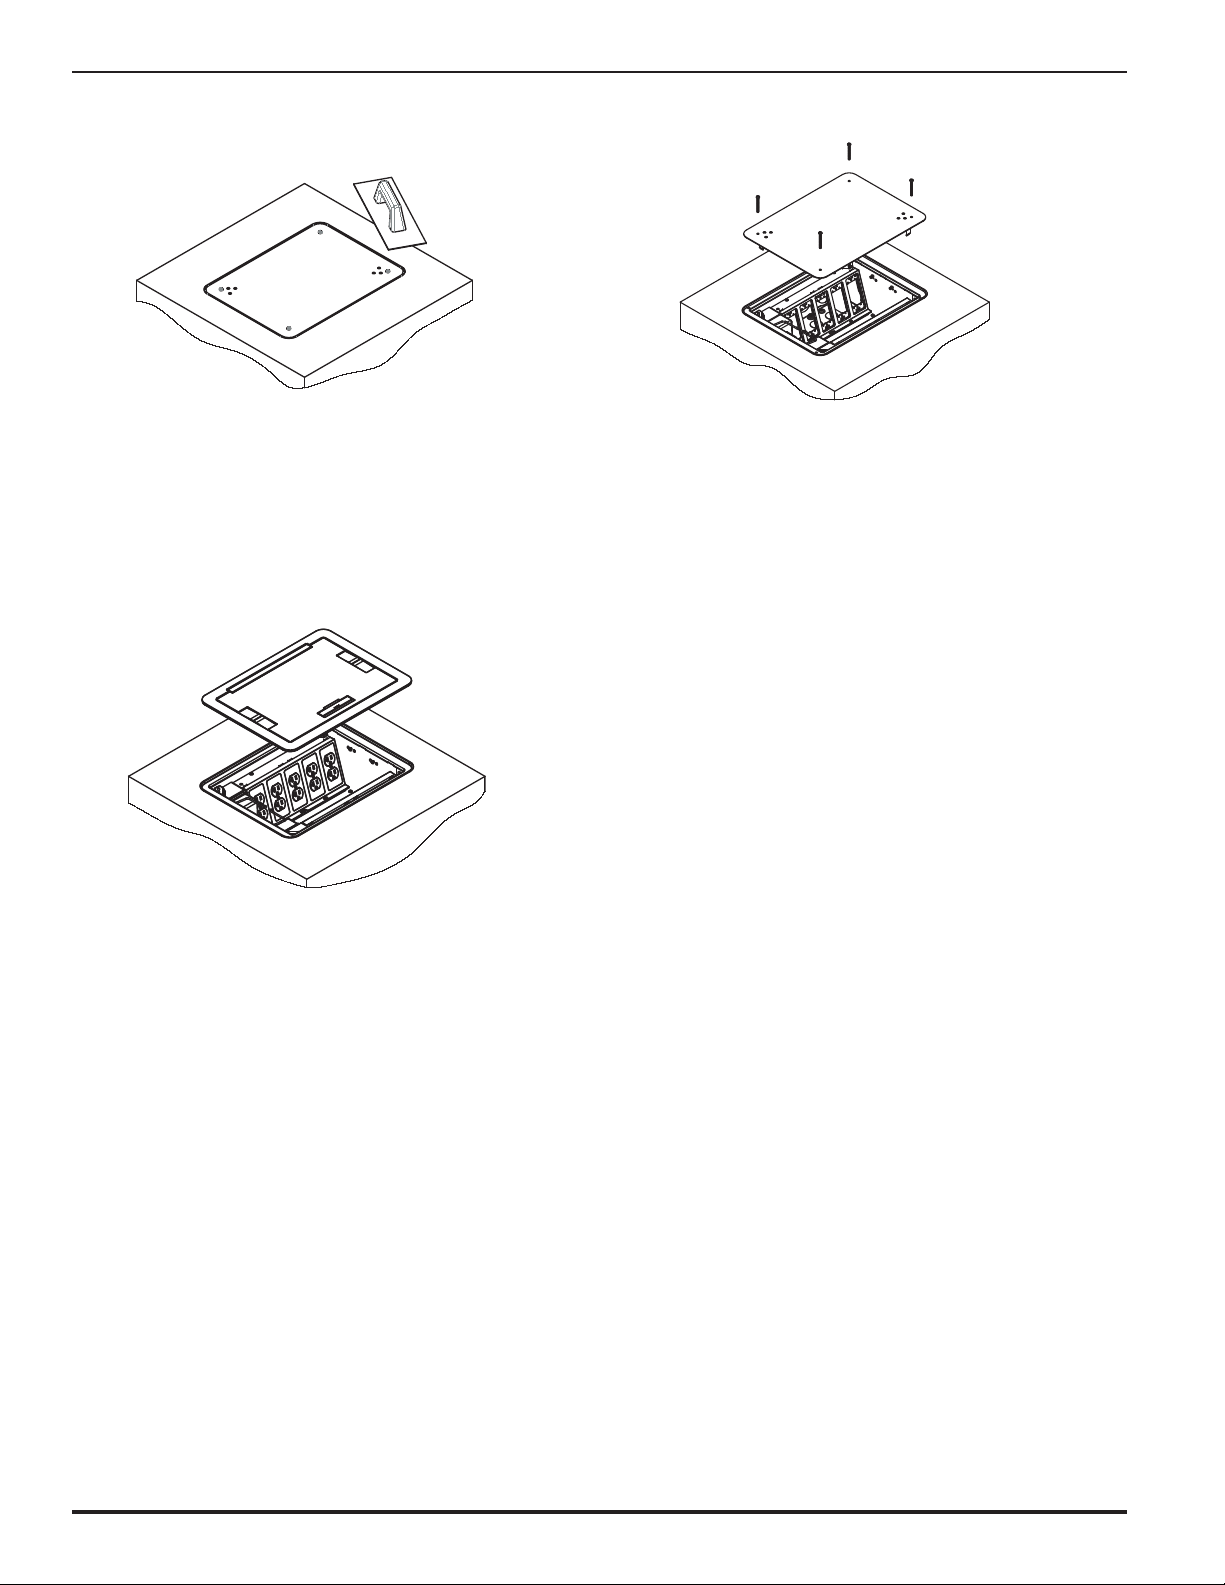
2a. Concrete pour: Screed the concrete flush with the top
of the mudcap.
2b. Mudcap removal: Remove mudcap from box.
2c. Preparation: Before installing cover, remove any
concrete or preset that has made it’s way onto the trim
flange. Test fit cover onto trim flange to ensure that no
debris is keeping it from laying flush with the top edge of
the trim ring.
NOTE: Plastic trim ring stays in concrete.
Do not remove.
Page 3

POST CONCRETE/PRE-TERRAZZO POUR
ATTACHMENT METHOD:
. Preparation: Before installing trim flange and/or
1
spacers, repair any cracks or chips around the preset or
floor box opening using a suitable grout or repair
compound.
2a. EFB610-CTR terrazzo pre-pour installation: Installation view of trim ring, mudcap,
floor box, and spacers as needed to match terrazzo pour depths of 3/8" (9.5mm), 1/2"
[12.7mm] or 5/8" [15.9mm].
FB610-CTR
E
FB610-TS
E
Use Tile Spacers
(
s needed.)
a
Terrazzo Pour
3/8" [9.5mm]
Concrete
1/8" [3.2mm]
Spacer
Terrazzo Pour
1/2" [12.7mm]
Concrete
2b. Mudcap removal: Remove mudcap from box.
1/4" [6.4mm]
Spacer
Terrazzo Pour
5/8" [15.9mm]
Concrete
2c. . Preparation: Before installing cover, remove any
terrazzo material that has made it’s way onto the trim
flange. Test fit cover onto trim flange to ensure that no
debris is keeping it from laying flush with the top edge of
the trim ring.
Page 4

TILE FLOOR ATTACHMENT METHOD USING ACTIVATION COVER AND SPACERS ONLY
3. Preparation: Before installing activation cover and/or
spacers, repair any cracks or chips around the preset or
floor box opening using a suitable grout or repair
compound. Cover flange is 3/16" [4.8mm].
• Use 1/16" [1.6mm] spacer for 1/4" [6.5mm] tile
nstallation
i
• Use 1/16" [1.6mm] and 1/8" [3.2mm] spacers for 3/8"
[9.5mm] tile installation
• Use 1/16" [1.6mm] and 1/4" [6.5mm] spacers for 1/2"
[12.7mm] tile installation
1/4" Tile & Concrete Install 3/8" Tile & Concrete Install 1/2" Tile & Concrete Install
/8" [9.5mm]
3
Tile
Concrete
Cover
1/4" [6.5mm]
Spacer
1/16" [1.6mm]
Spacer
1/2" [12.7mm]
Concrete
Cover
1/16" [1.6mm]
Spacer
1/4" [6.4mm]
Concrete
Tile
Cover
1/8" [3.2mm]
Spacer
1/16" [1.6mm]
Spacer
Tile
4. Grout: Use grout and/or silicone caulk between edges of
flange and tile.
WIREMOLD
U.S. and International:
60 Woodlawn Street • West Hartford, CT 06110
1-800-621-0049 • FAX 860-232-2062 • Outside U.S.: 860-233-6251
Canada:
570 Applewood Crescent • Vaughan, Ontario L4K 4B4
1-800-723-5175 • FAX 905-738-9721
© Copyright 2011 Legrand/Wiremold All Rights Reserved
1 009 439R1 1011
 Loading...