

Page 1
1. Introduction
The Mounting Plates are to be used with various Ademco Group control panels. The Mounting Plates are for
installation of the Ademco control panel into the OnQ 14”, 28” and 42” Tri-rail or Flat-rail Service Center
Enclosures. The enclosures are UL listed as “Household Fire and Burglary Warning System Control Unit
Enclosures”, reference File Number S7106.
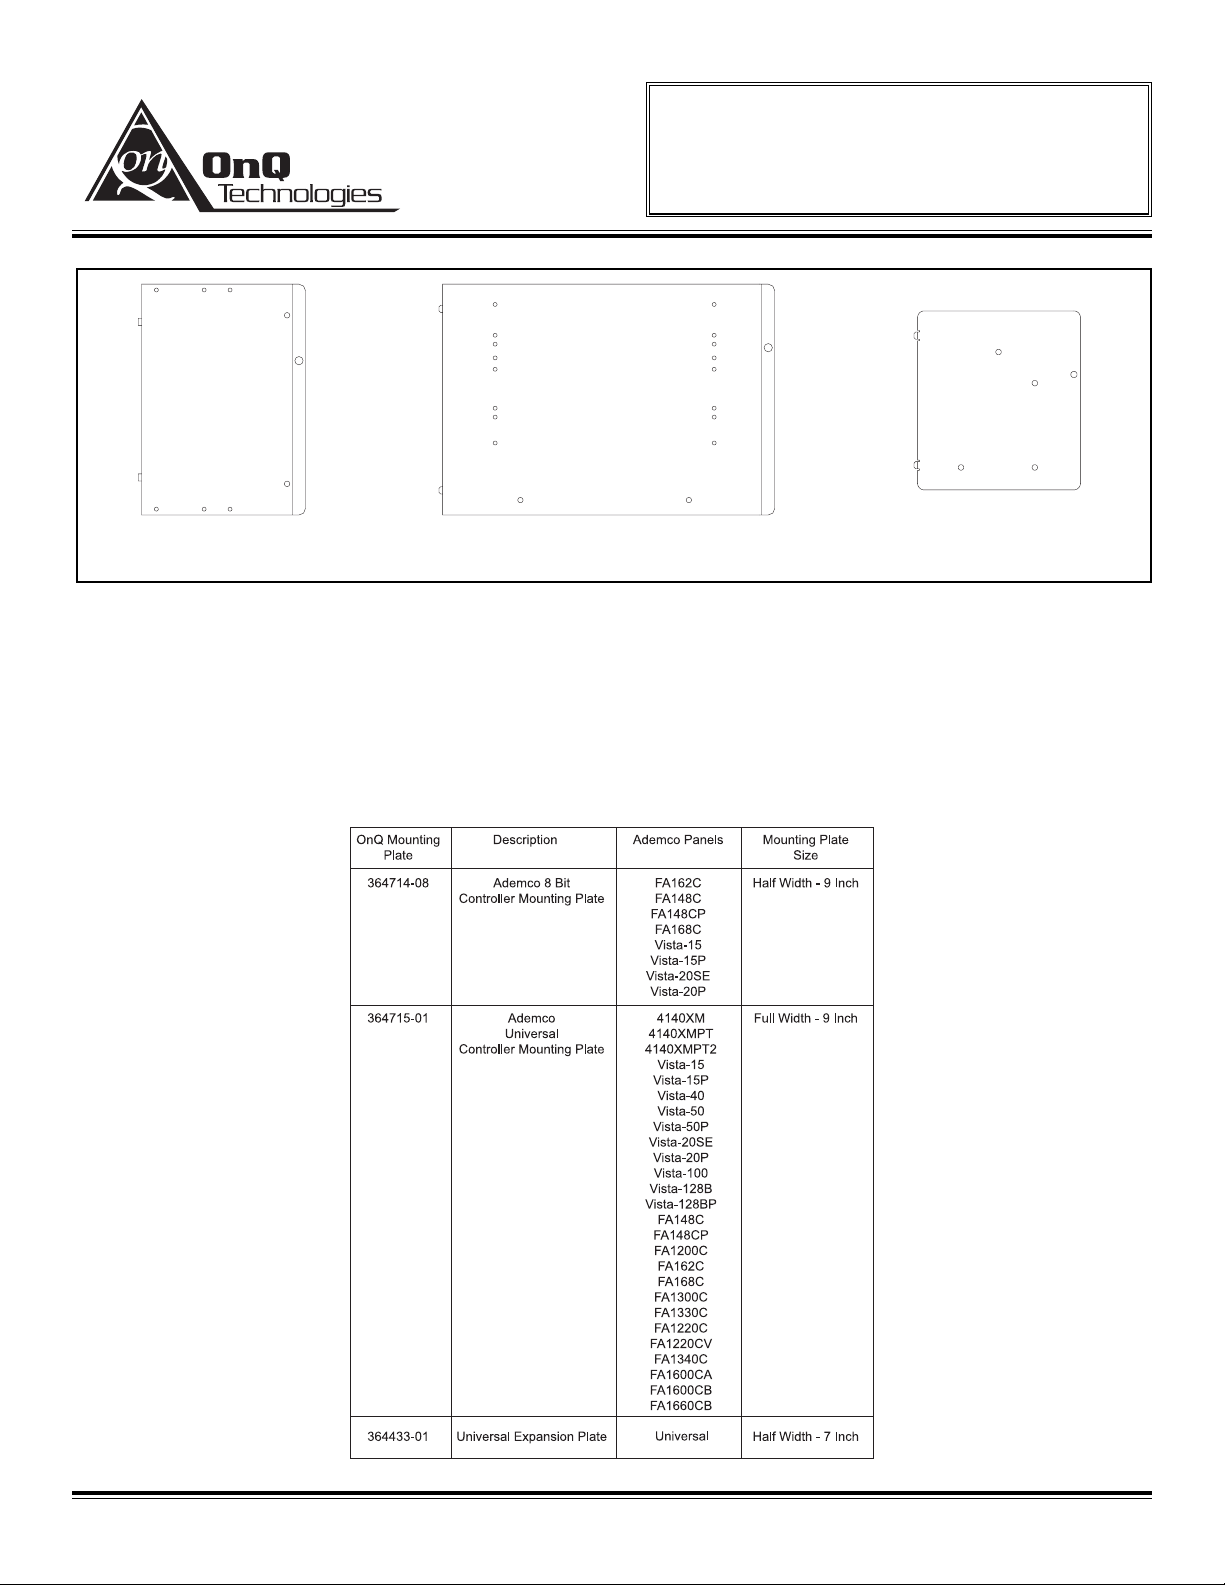
2. Descriptions
The Mounting Plates allow Ademco control panels to be utilized in an OnQ Structured Wiring System.
Reference chart below:
OnQ Technologies, Inc.
P.O. Box 60907
Harrisburg, PA 17106-0907
800-321-2343
www.onqtech.com
Installation/Instruction Sheet
OnQ ADEMCO Group
Mounting Plates
IS-0255 Rev. O
IS-0255 Rev. O Page 1 of 2
Ref. P/N 363605-88
8 Bit Plate
H = 8.9”
Universal Plate
H = 8.9”
Universal Plate
H = 6.9”
Page 2
3. Installation
A. Enclosure Selection and Location
1) Select an enclosure size based on the panel size and other planned applications. Allow space for
power supply, battery and cable management.
2) Enclosure location must be consistent with panel environmental constraints and security installation
practices and requirements.
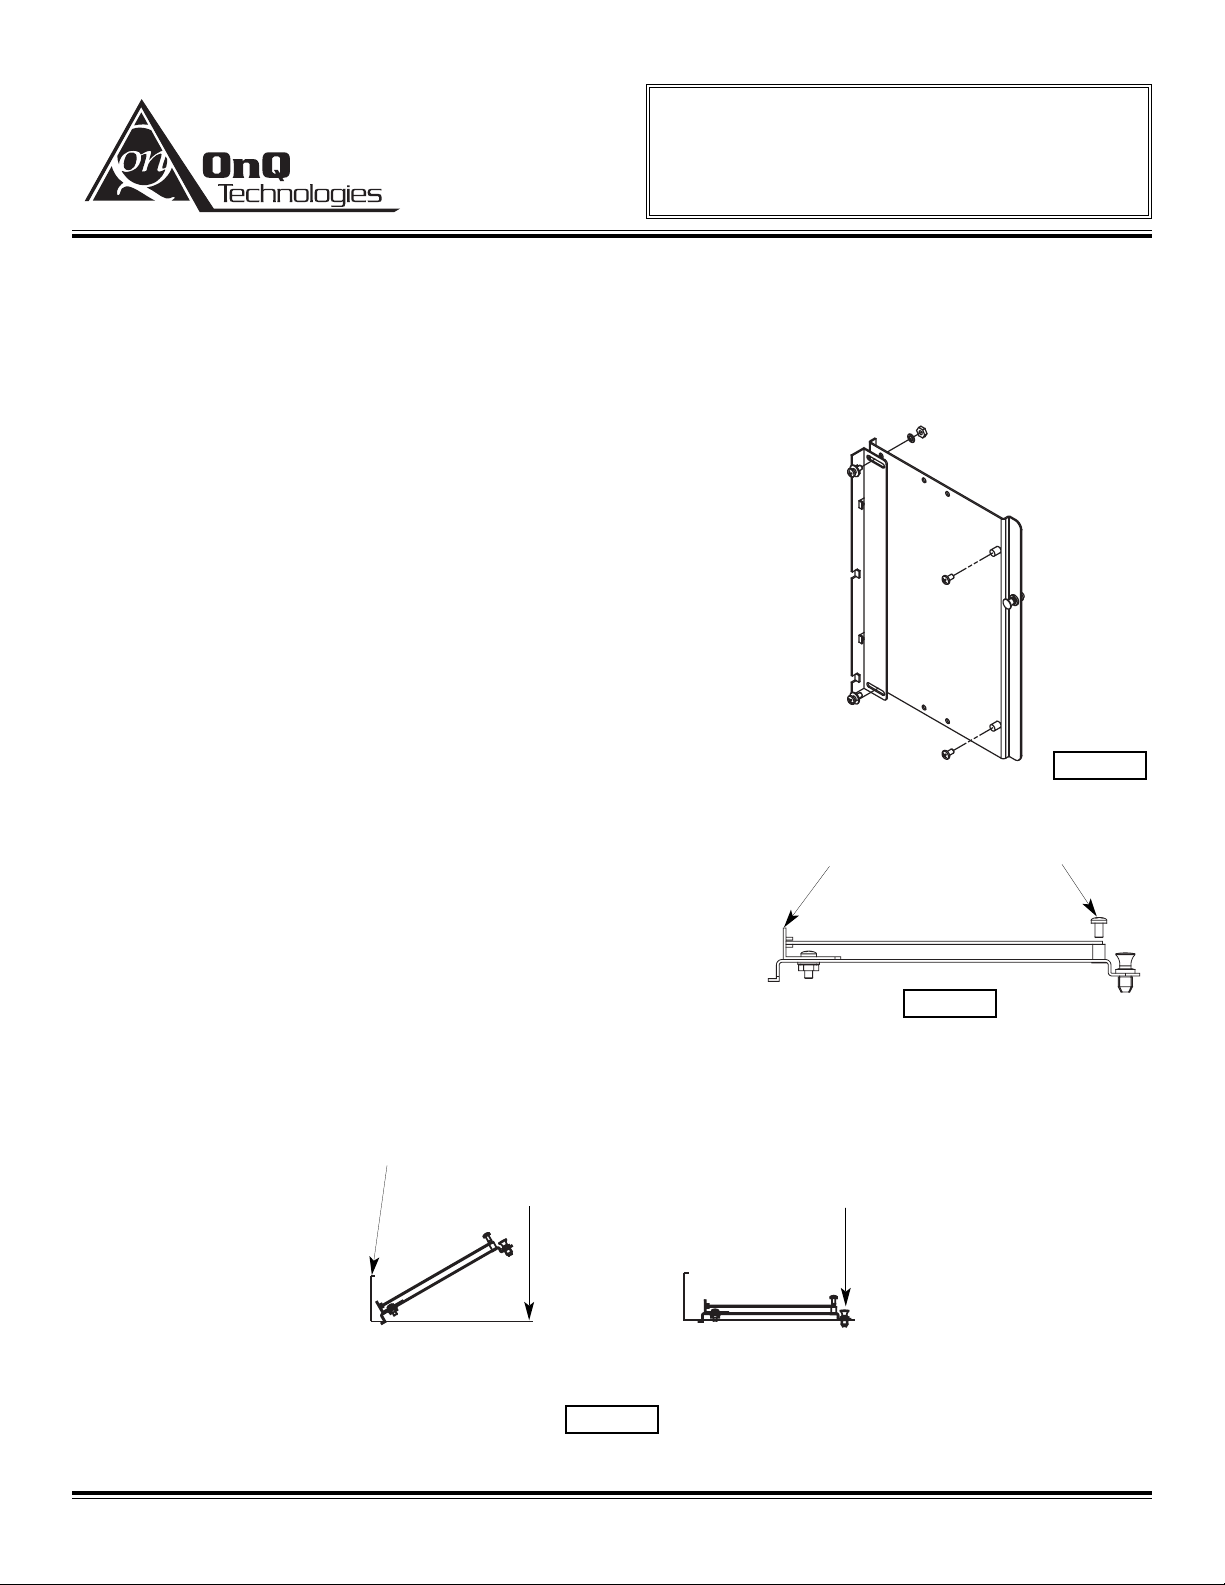
B. Controller Panel Mounting
1) Handle controller panel with normal care for PCB
assemblies. Observe and follow any anti-static warnings.
2) Assemble mounting plate as shown using the appropriate
hole pattern for the controller panel you are installing.
Refer to Figure 3.
3) Position the controller panel over the mounting plate with
the plate mounting tabs to the left and plunger to the right.
Insert the left side of the board into the “Support Bracket”
as shown and align the controller panel mounting holes
(right side) with the threaded holes on the right side. Insert
screws to secure the controller panel to the mounting plate.
Refer to Figure 4.
C. Mounting in Enclosure - Refer to Figure 5.
1) Select position in enclosure. Allow room for battery and
cable management.
2) Align tabs on assembly with slots on rail of enclosure.
3) Rotate the assembly and insert fasteners on assembly into
corresponding holes on rail of enclosure. (Plunger must be
in the pulled out position for fastener to engage hole).
4) Push plunger in to lock module in place. Pull on assembly
to ensure assembly is locked properly in lace.
D. Security System Installation
Complete Panel installation by following security
panel instructions.
OnQ Technologies, Inc.
P.O. Box 60907
Harrisburg, PA 17106-0907
800-321-2343
www.onqtech.com
Installation/Instruction Sheet
OnQ ADEMCO Group
Mounting Plates
IS-0255 Rev. O
IS-0255 Rev. O Page 2 of 2
Ref. P/N 363605-88
Figure 5
Figure 3
Figure 4
Support Bracket
Screws
Push Down
Latch Plunger
Insert Tabs
in Rail
Rotate and Insert
Latch Grommet
 Loading...