

Page 1
constructive.
TM
® LEGO, the LEGO logo and the LEGO Brick are registered trademarks of the LEGO Group.
© 1998 The LEGO Group and Intelligent Games Ltd.
Manufactured in the E.U.
IB2G-LOC3
Instruction manual
Instruction manual
Take the fast train to computer fun
Take the fast train to computer fun
™
™
Page 2
3
3
Hello and welcome to LEGO LOCO! I’m the Station Master and
I’m here to help make sure that all the LEGO trains run on time and
the Minifigure passengers are happy.
As a trainee Station Master it’s up to you to design your own railway
layouts and build a bustling LEGO World, to help you I’ve given you this
cool LEGO LOCO Guide.
If you need my help whilst you’re playing you can also click
on this button in the Toybox for a quick run through how to
do things!
LEGO LOCO is all about building and running the best train set that you
can imagine, on your computer! You can make your own tracks and
towns with lots of different LEGO elements… and then watch them
come to life!
Switches and points allow you to control all of your trains as they travel
from station to station, whisking your LEGO Minifigures around the town
that you have built for them. Your creation will grow as you add to it,
and there will be plenty of surprises along the way as you uncover
hidden events and new and exciting elements.
3 Welcome
4 Installing LEGO LOCO
5 Starting the game
6 How to play with LEGO LOCO
The Toybox
Trays
Eraser
Load/Save
Advanced Options
Starting Trains
Altering Points, switches etc.
Zoomboxes
Magnifying Glass
Picking up minifigs
Commanding minifigs
Command Mode
16 Postcards
Post Office
Receiving and Saving Postcards
Deleting Postcards
Postcard Album
Postcard Editor
22 Game Modes
Single User
International Postcards
National Mode
Screen Saver
34 Easter Eggs
35 Credits
35 Copyright
35 Epilepsy Warning
Contents
Contents
Welcome
Welcome
3
3
Page 3

Before you can run LEGO LOCO on your PC you will need to copy some
things from the CD-ROM, don’t worry, we’ve made it easy for you...
Auto Run - Make sure that Windows 95 has started and then insert the
LEGO LOCO CD-ROM. The installer program should automatically run. It
will ask you a few questions about how you would prefer the copying
to take place, you can simply click the NEXT button and let the program
decide for you. This program will then set up everything you need to run
LEGO LOCO.
You will need to have DirectX installed on your computer. If you are
unsure it is safest to reply YES when asked in the installation if you want
to install DirectX.
On some rare occasions the Auto Run program may not start
automatically. If this happens you can start the program yourself.
• From the Windows 95 desktop double click the left mouse button on
the "My Computer" icon, this will bring up a window that displays all
of your drives, including your CD Drive.
• Right click on the CD Drive Icon (this is normally Drive D, but may be
different on your computer). This will bring up a list of options (see
the Windows 95 instruction manual), from this list choose EXPLORE.
• Once you have clicked EXPLORE the window will show the contents of
the CD. From this list double click the icon that says SETUP.EXE with the
left mouse button.
Installing LEGO LOCO Starting LOCO
Installing LEGO LOCO
To start LEGO LOCO click on START in the bottom left corner of your
screen, point to PROGRAMS, point to LEGO Media and then click ‘LEGO
LOCO’.
When LOCO starts you will see a short introduction video.
Press any key on the keyboard, or click any mouse button to enter the
LOCO World.
You will now see the Start Screen.
Clicking the button with the picture of one Station
Master, and then confirming your choice by clicking the
tick, will start the single user mode.
Clicking the button with the picture of two Station
Masters will start the multi-user mode. This will be
discussed later in Section 6), National Mode (page 22).
Clicking the button showing the picture of the door on
this screen will quit LOCO.
Once you have made your selection and pressed the OK ‘tick’ LOCO will
load. As soon as the progress bar has finished animating, LOCO has finished
loading. Press any key on the keyboard, or click any mouse button. A
default layout will be loaded, you can then play with and alter this layout.
Starting LOCO
5
5
4
4
Page 4
When playing with LEGO LOCO there are two ‘modes’. When the Toybox
is open LOCO is in ‘Edit’ mode. You can place elements, move or delete
existing ones and alter your layout. When the Toybox is closed LOCO is
in ‘Play’ mode. The layout you have created will come to life and you
can play with all the exciting things in your new world.
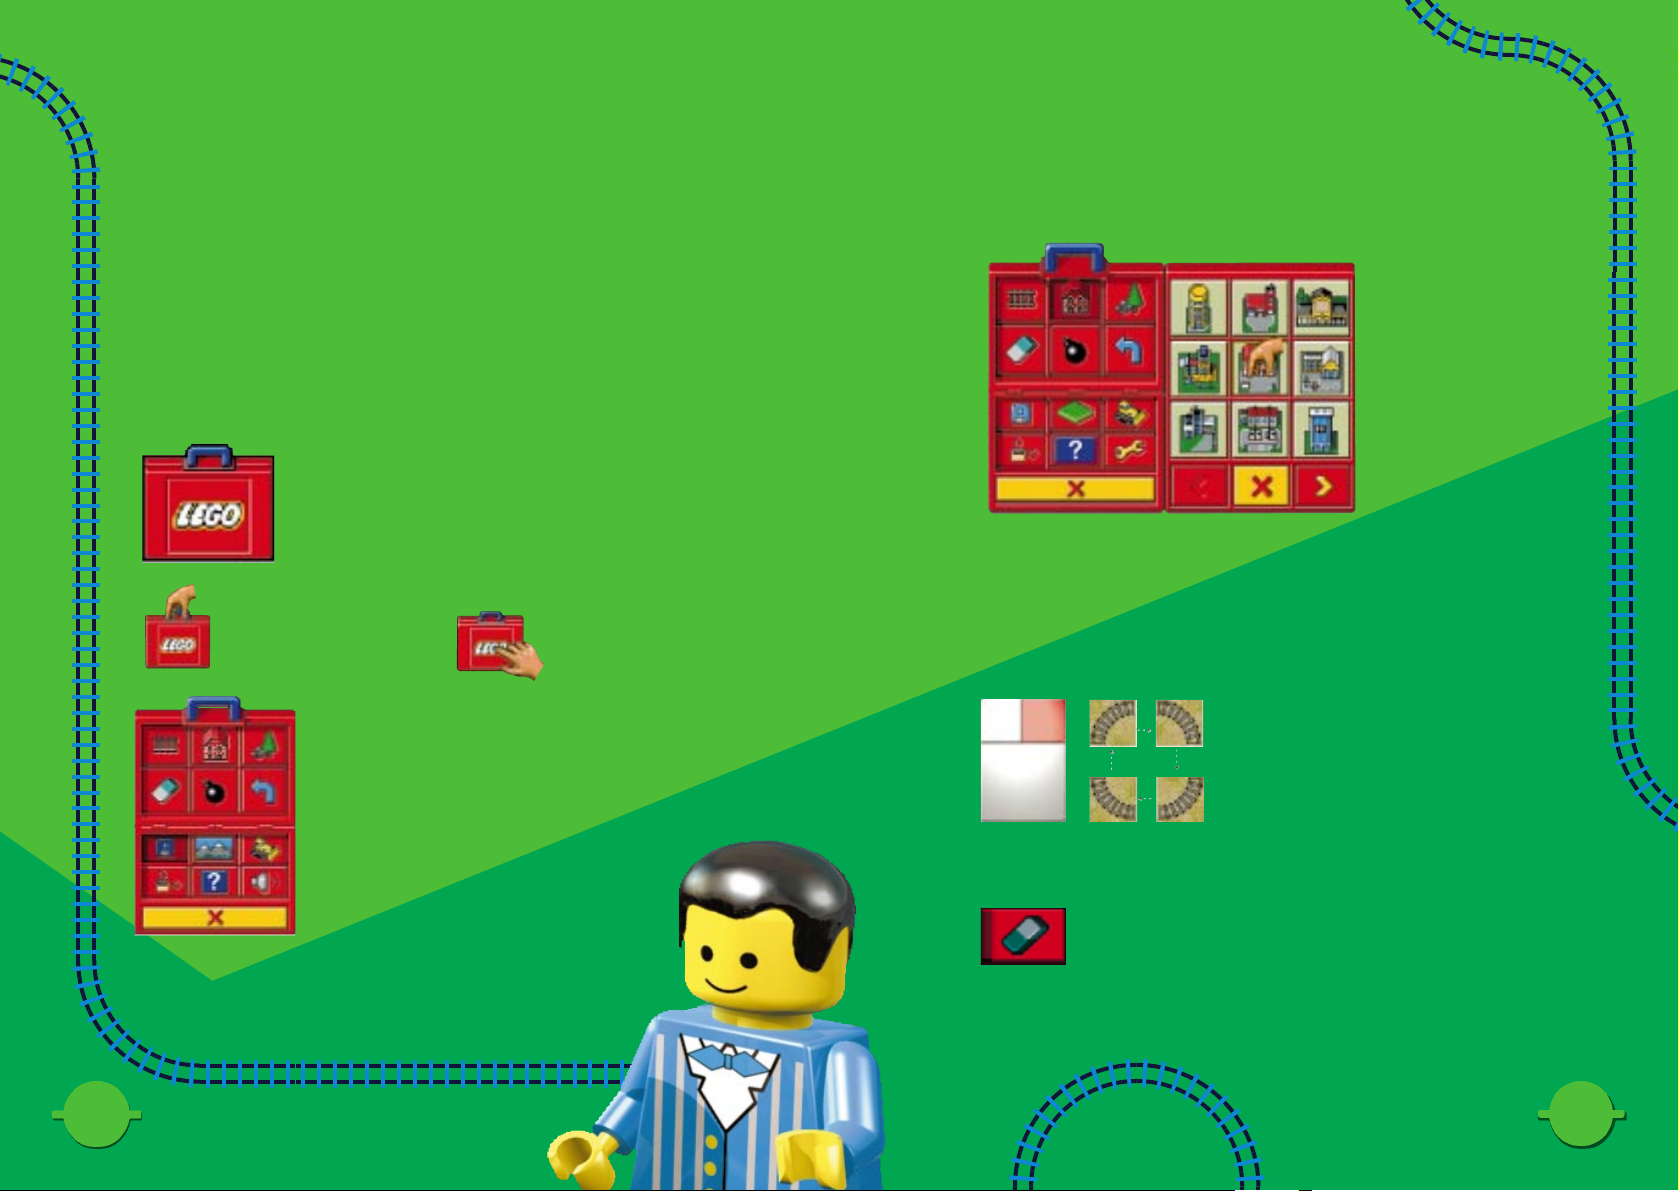
The Toybox
In the top left quarter of the screen you will see your
LEGO Toybox. This Toybox holds everything that you
need to create your world.
Inside the Toybox are several buttons, the top half of
the Toybox has buttons that allow you to access
everything you need to build your layout. Left
Clicking on one of these buttons (Buildings, Scenery,
Track) opens a tray showing you everything that you
may use of that type.
Left Click anywhere
else on the Toybox
to open it.
Left Click on the Toybox’s
blue handle to pick it up and
move it around, click again
to put it down.
How to play with LEGO LOCO
How to play with LEGO LOCO
Trays
To place one of these pieces, click on the piece in the tray to pick it up,
you can now position the piece anywhere that you like on the screen. Click
the mouse button again to place the piece!
NOTE: Tunnels can only be placed at the edge of the screen.
Click the Right Mouse Button to rotate the piece.
Eraser
You can remove things that you don’t like with your eraser!
7
7
6
6
Page 5
How to play with LEGO LOCO
How to play with LEGO LOCO
How to play with LEGO LOCO
How to play with LEGO LOCO
9
9
8
8
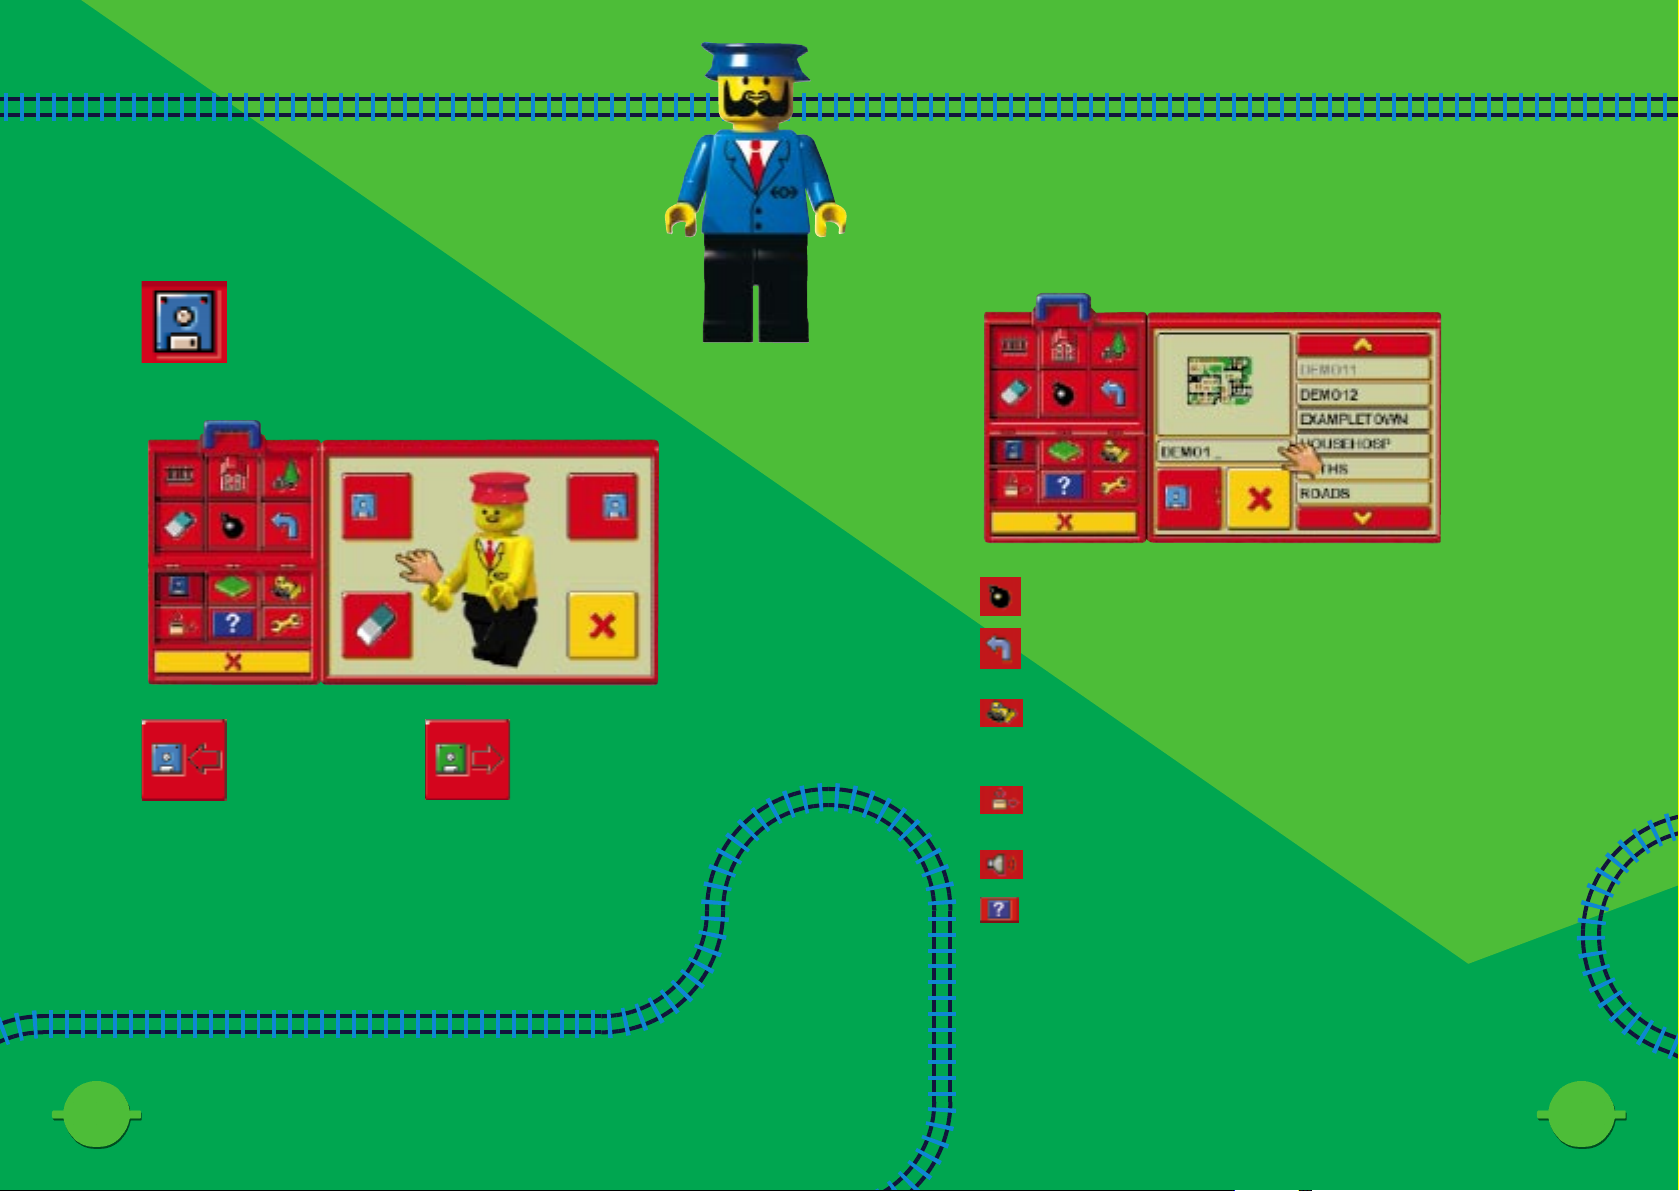
Load / Save
Click the Disk
Button to either
Load or Save the
current layout.
You will then see this.
When Saving, type in the name you wish to call your
layout and press the disk button once more.
Bomb. This will delete all the elements on the screen.
Undo (blue arrow) This will undo all the changes that
you made from the last time you opened the toybox
Auto delete (the bulldozer) When pressed this button will allow
you to automatically place an element over (therefore deleting) an
existing element.
Resize (yellow window folder) pressing this button will place the
product into windowed mode.
Sound on/off (speaker button)
The Question Mark button will run the Tutorial.
This button lets you
save your layout.
This button lets you
load in an old layout.
Page 6
How to play with LEGO LOCO
How to play with LEGO LOCO
How to play with LEGO LOCO
How to play with LEGO LOCO
11
11
10
10
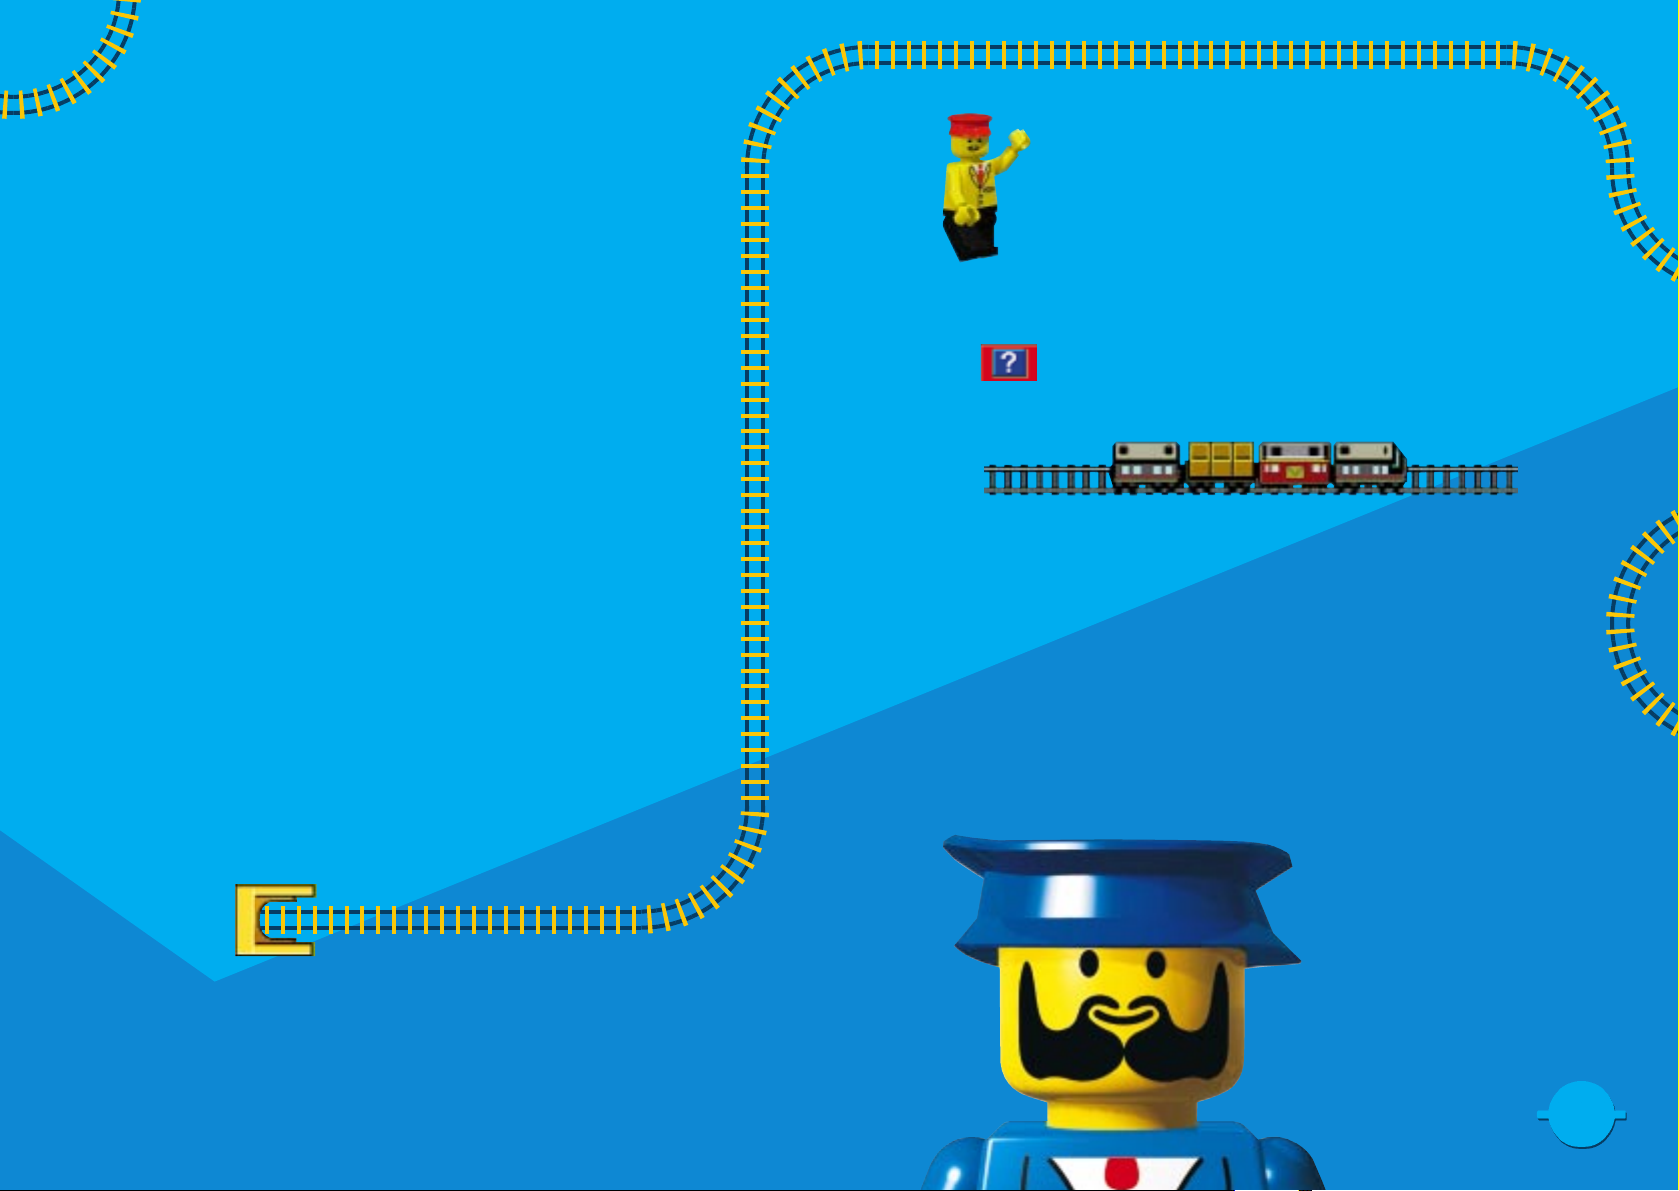
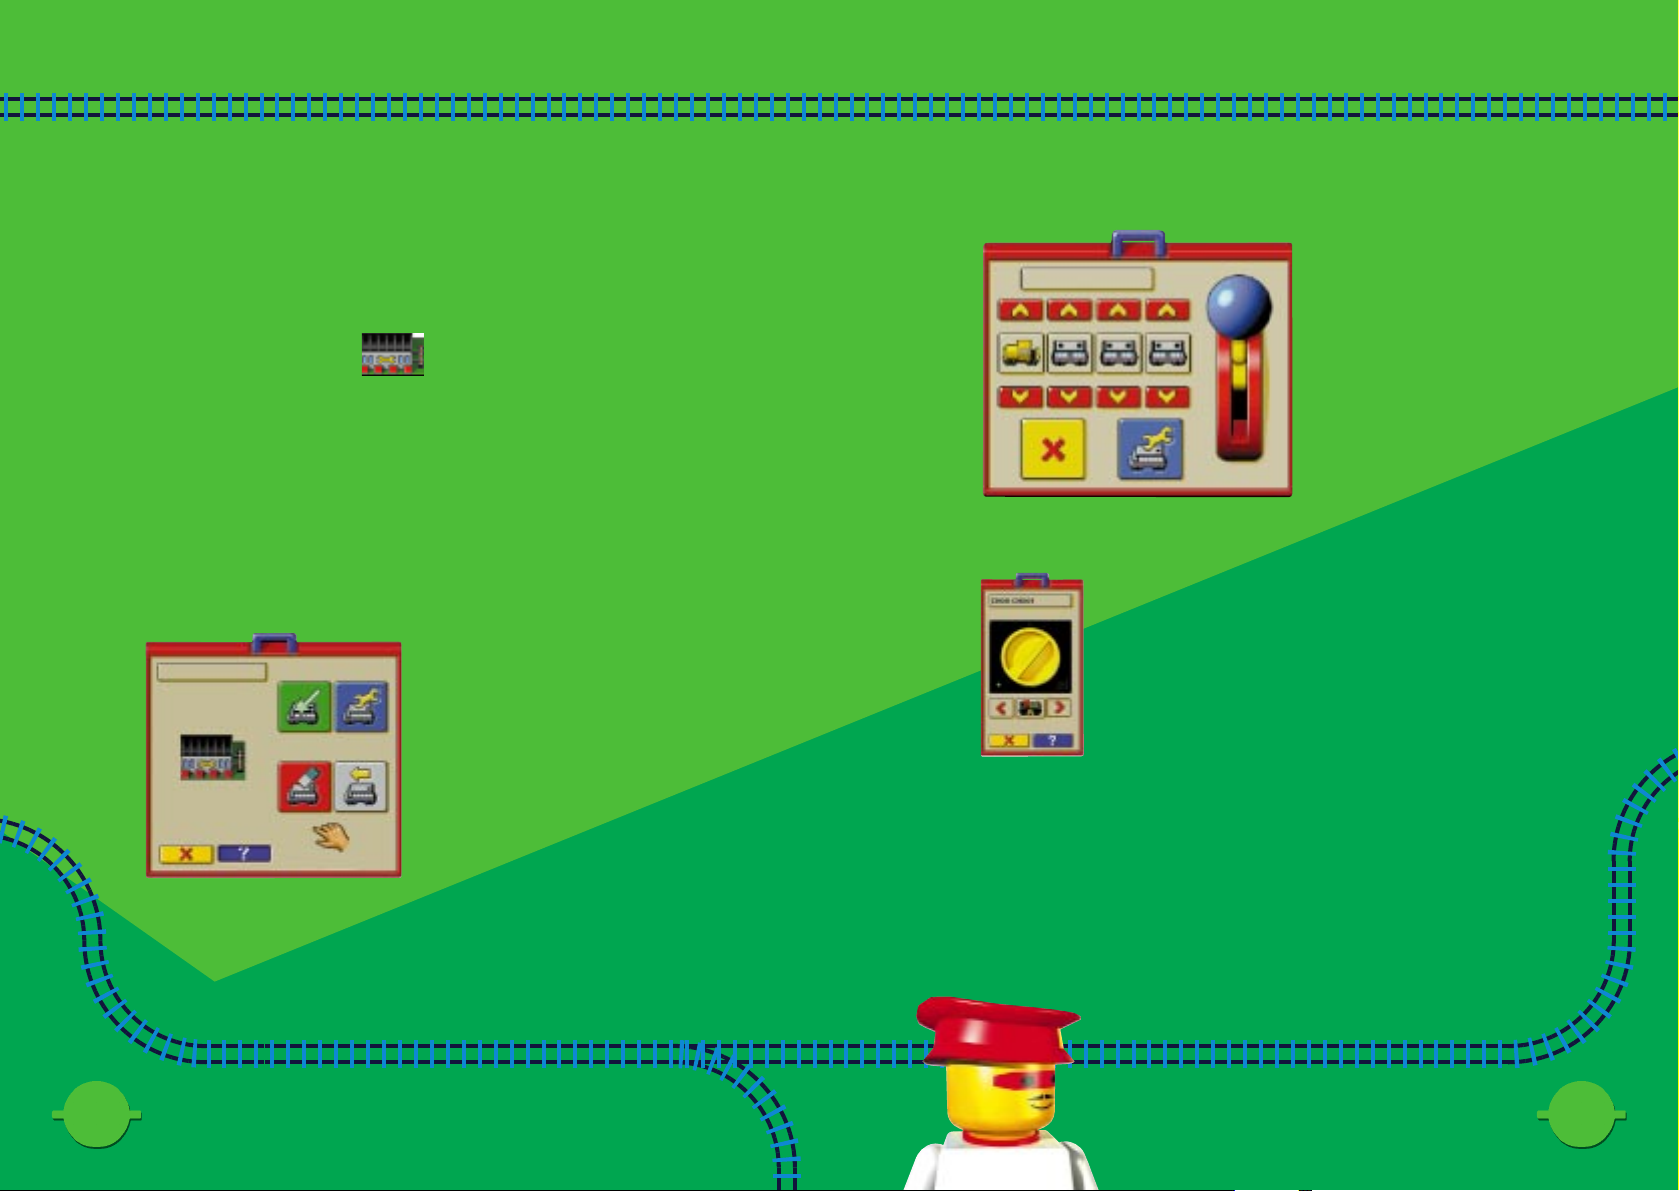
Starting Trains
There are certain buildings that must be placed before you can play with
various parts of your world. One of these is the Depot! The Depot lets
you build and alter trains.
The Toybox must be closed before you can play with your layout. If the
Toybox is open your train and LEGO Minifigures will disappear. Close the
Toybox to bring everything to life!
Start your trains from the depot. There are two ways to start a train, either
click the Left Mouse Button on a depot to create a train with a selection of
a random engine and carriages, or...
Right Click on the Depot to bring up the Zoombox (See later section for
more information on Zoomboxes).
Clicking the Right Mouse Button over a train will bring up its Zoombox
(See later section for more information on Zoomboxes).
Clicking on the question mark will bring up a list of all the people on board
your train.
The box at the top shows the train’s name. You can call it anything you like,
this one is called ‘ChooChoo 1"
There are two ways you can
decide what your train will
look like.
Pull the Blue Lever to create
a random train.
You can click on the up and
down arrows to choose a
specific engine or carriage.
The train zoom box contains the speed controller. Just like
real LEGO trains. The red arrow buttons below control the
train’s speed. You can Stop, Start, Reverse and alter the
train’s speed with these buttons or by clicking on the big
yellow controller.
The Eraser Button will delete a train
from your world. The train must be in
the depot if you want to delete it!
The Blue Button will let you alter the
carriages attached to a train in your
world. The train must be in the depot
if you want to edit it!
The Green Button will take you to a screen
where you can create a new train.
Page 7

How to play with LEGO LOCO
How to play with LEGO LOCO
How to play with LEGO LOCO
How to play with LEGO LOCO
13
13
12
12
Altering Points, switches etc.
Click the left mouse button on a signal to change it.
Red stops the train, Green lets it pass and Blue reverses the train’s direction.
Left Click on a point to open and close it. Using points and switches,
you control your train, telling it to go wherever you want.
Zoomboxes
Many different LEGO LOCO things have special Zoomboxes. You can use
Zoomboxes to control lots of different things.
If you click the Right Mouse Button on an object a Zoombox will appear.
Try it, see what you can find!
Magnifying Glass
You can view information about the people by right clicking on them.
Clicking the Blue question mark you can see their name
and a big picture of them. You can even change their names!
Click the X to close the Magnifying glass.
All other elements (buildings, scenery, trains etc) have Zoomboxes.
= STOP! = GO! = REVERSE!
Page 8

How to play with LEGO LOCO
How to play with LEGO LOCO
15
15
14
14
Picking up minifigs
You can pick up minifigs by Clicking and holding down the Left Mouse
button on them, release the button to drop them.
Commanding minifigs – Command Mode
You can command minifigs to attempt to reach any place on the layout,
click the left mouse button once on them, a spark will confirm that the
minifig is now waiting your command. The finger on your hand cursor will
change to an arrow.
Click anywhere on the screen, to order your minifig to go there. The minifig
will now attempt to reach this position.
Click anywhere on the screen to tell your minifig where to visit. Remember
that minifigs prefer to walk on proper paths.
Page 9

17
17
16
16
To send a postcard you must make sure that you have a working Post Office.
There are two types of post that you can send.
• Internet post (to friends and other users running LEGO LOCO)
(details on page 22 “international postcards” )
• Mystery post. To Santa, Nessie, the Mayor etc.
Although your PC does not need to be connected to the Internet to send
and receive Mystery postcards, both types of mail require you to have a
working mail route within your LEGO LOCO layout.
To send mail you must place a post office on a train track. Trains pulling a mail
carriage must be able to get from the post office to a tunnel.
Post Office
The Post Office contains everything you need to
write, design, store and send postcards to your
friends.
Left Click on the Post Office. Here you will find the
postman at his desk. You can click on the items
around him to access everything related to the Post
Office.
There is a book on the desk that will take you to your postcard album (to
store your postcards), a ‘Pen And Pencil Pot’ to take you to the postcard
editor (to create or edit postcards) and a rubbish bin (drop postcards in this
to delete them).
Receiving and Saving Postcards
A pile of postcards next to the postman means that you have received
postcards from somebody!
You can click on this pile of postcards to view them. The postman will hold
each one up individually for you as you click on the pile.
You can see the reverse text side of each card by clicking the ‘flip’
button.
All cards can be sent to your Postcard Album for safekeeping. Simply click
on the card, your cursor will change into a minipostcard, now click on the Postcard Album sitting on
the desk. This card will now be saved into the Album.
In the same way you can send a card to the editor, instead
of clicking on the Album click on the Pen and Pencil Pot.
In the same way as placing a card in the Postcard Album,
you can delete a postcard. Click on the postcard and drag it
into the Rubbish Bin.
Postcards
Postcards
Page 10

Postcards
Postcards
Postcards
Postcards
19
19
18
18
Postcard Album
The Postcard Album is where you can store all of your favourite Postcards.
• They are filed alphabetically under the sender’s name.
• Click on one of the coloured Alphabetical tabs to jump through the
pages.
• Click on the left and right arrows to turn over the page.
• Click on the ‘Flip’ icon to see the reverse of the card.
The cards can be dragged to the editor or Post Office in the usual way:
1. Click on the card to pick it up, the cursor will change to show a miniature
Postcard.
2. Now click on any of the buttons to send the Postcard to their destination
(e.g. Rubbish Bin, Postcard Editor or Post Office).
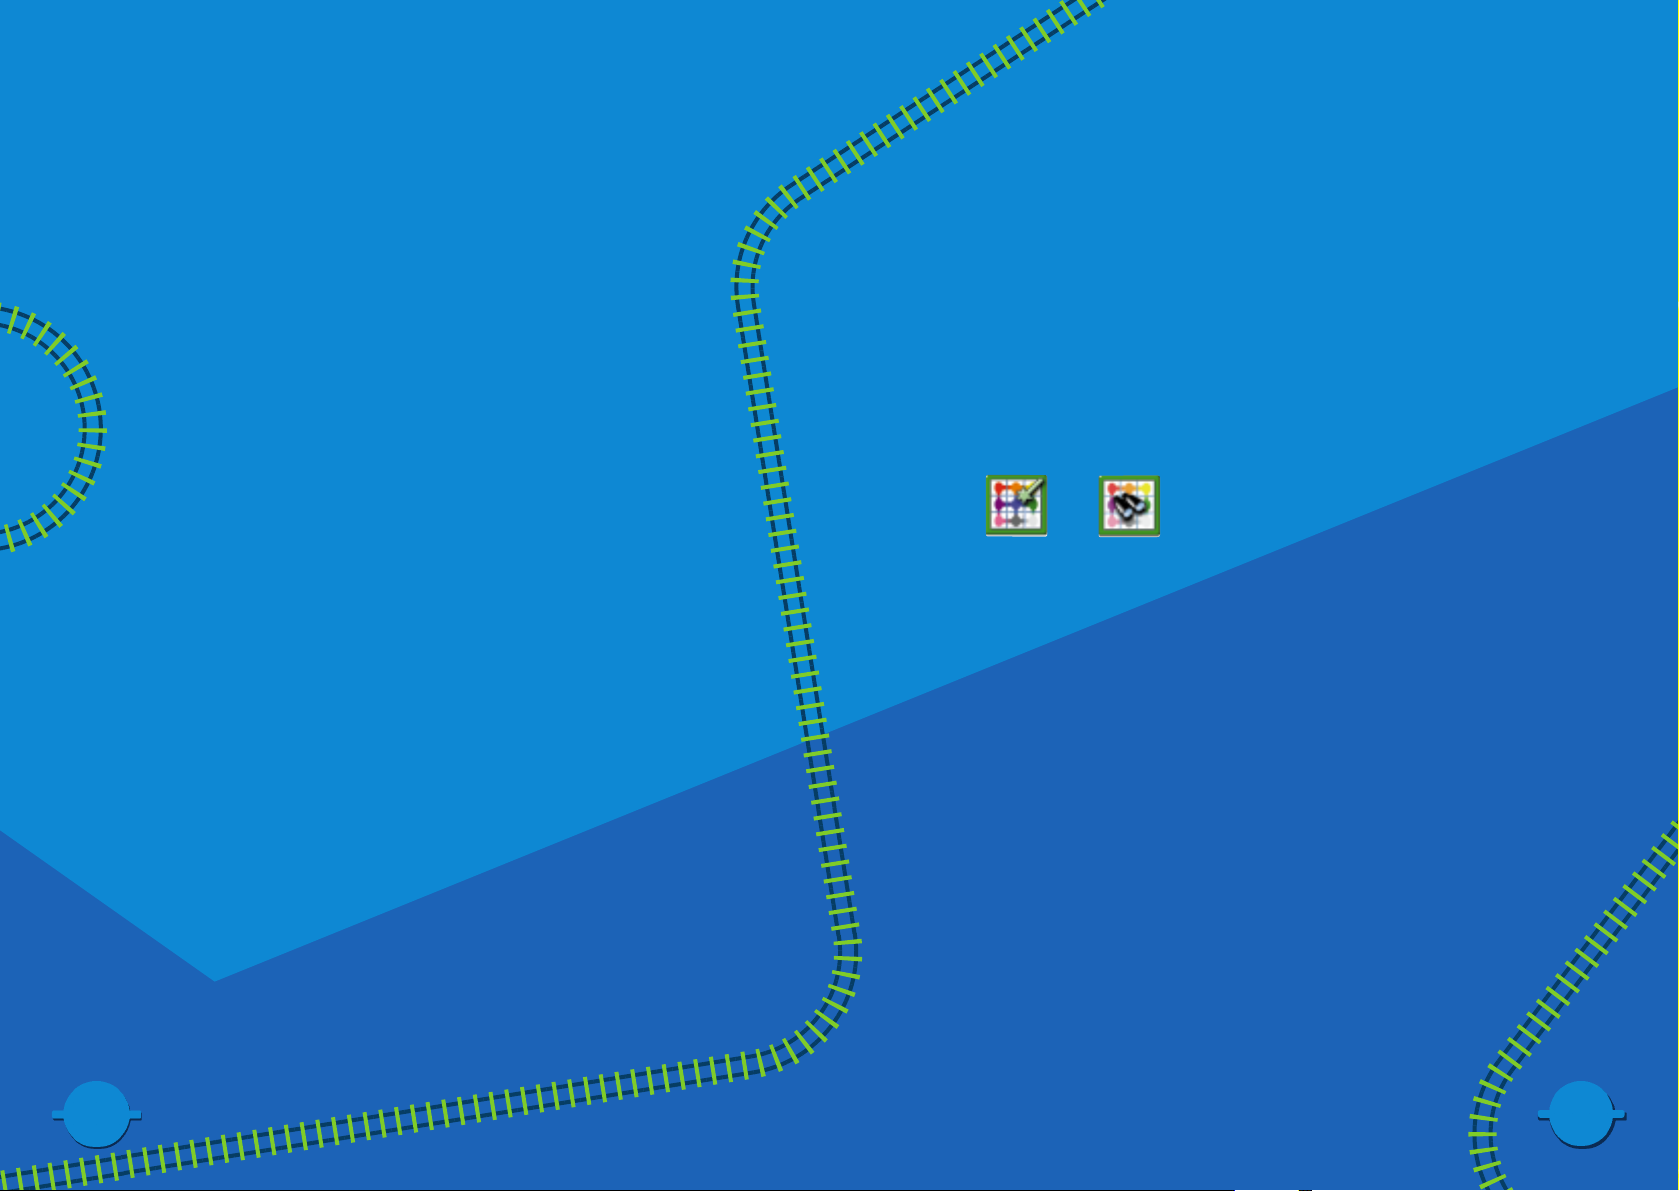
Postcard Editor
The Postcard Editor is where you can create new postcards, write
messages, change existing postcards and attach files.
Editing Postcards
On the left hand side of the screen is a stack of drawers, each of
which contains a ‘set’ of clipart that can be placed on the picture
side of the postcard.
Click on a drawer to view the set of clipart. The art will scroll in on
the conveyor belt.
To select a piece of clipart just click on it. This can now be placed
anywhere on the front of the Postcard.
Click the Right Mouse Button to de-select any piece of clipart, the cursor
will now change back to the hand.
Some clipart may have different colours. The buttons below the conveyor
belt will swap between the available clipart colours, or sub-sets.
The colour of the Postcard’s background can be altered by mixing paint.
Three pipes hanging above the Postcard will mix different amounts of Red,
Yellow and Blue paint onto the background.
Page 11

21
21
20
20
Click the Left Mouse Button on one of the mixers to increase the amount of
colour, click the Right Mouse Button to decrease the amount of colour.
There is a selection of ten Bottles next to the drawers, these contain some
pre-set colours, Left click on one of these to instantly fill the background of
the Postcard with that colour.
To write a message, add a stamp and address the postcard you
must flip over to the text side of the Postcard. Click on the flip
icon.
Postage Stamps on the Conveyor Belt are just for decoration, you do not
have to place one for the postcard to work.
Click on the left hand side of the Postcard to write a message.
Click on the Right hand side to
Address the Postcard, a list will
show all of the available people
that can receive a Postcard.
If you address a card to ‘SwapShop@WWW’ you can send it via Modem
to the LEGO LOCO Post Office, where it will be forwarded to another
LOCO user, who could live anywhere! Pretty soon you may receive
Postcards from people all around the world! PLEASE NOTE You must have
a Modem connected to the Internet for this to work.
It is possible to attach small files to the postcard, and then
send them to a friend (only when using a LAN and direct
TCP/IP Internet connection). Click on the Paperclip Button to
attach a file.
This will bring up a Windows style Browse window, from here you can
Browse through your drives to find the file you wish to attach.
Posting Your Card
Once the card has been addressed (see previous), you can post your
card. Either Click on the Mailbox, or left click on the Postcard (picture side,
or on the ‘From’ area on the text side) and drag the Postcard cursor over
the Mailbox and click the Left Mouse Button.
Remember a train with a mail carriage attached must visit your Post Office if
you want to send and receive any postcards.
Postcards
Postcards
Postcards
Postcards
Page 12
Single User
In single user mode (choosing the Single Station Master button on the start
screen) you will be able to create your own layout and help your mini-figs
travel around that layout.
By placing blue tunnels you can send Postcards to several LOCO characters,
(e.g. The Professor). A train carrying a card addressed to one of these
characters will leave through the Blue Tunnel and deliver a card to them…
who knows, they may even send you a reply!
International Postcards
If you have a MODEM and an Internet connection you can send random
postcards in Single User Mode to other LEGO LOCO users around the
world. Remember, for any train to leave your computer you must have
placed a Blue International Tunnel.
Trains carrying Postcards will leave your layout and travel to the LEGO LOCO
International Post Office Sorting Computer, from here it will travel around the
world to who knows where. If you are lucky you may receive a Postcard
from someone from another country!
To send a postcard please ensure that your modem is switched on and
that you have connected to the Internet. Now start LEGO LOCO and
design your card. Address your card to ‘SwapShop@WWW’ (from the
pop down list) and make sure a postal train takes it out of a Blue Tunnel.
National Mode
In National Mode, up to nine people can connect to a huge LEGO LOCO
layout. Each individual can take control of a certain part of the National
Map, and can build layouts as normal.
Game Modes
Game Modes
The cool thing about National Mode is that you can send trains and e-mails
and attachments to anyone connected to your session.
Starting a multi-user session
From the start screen choose the button with the Two Station Master heads.
You will now be given the choice to Host a session or Join an existing
session. Click on the appropriate button and then press the Green Tick to
Go.
You will now be asked which Network Protocol you require, TCP/IP or IPX. If
you are unsure consult your Network Administrator.
If you are hosting you will be asked to choose a layout. Different layouts
allow different numbers of users to play.
If you are joining, a list of all the available sessions will appear on the right
hand side of the Map Board. Select one of the available sessions.
You will now be asked to choose the area you will control, simply click on
the desired area. You will not be able to choose an area that another user
has already selected. Player’s names appear in the layout as areas are
chosen.
Click the Green Tick to go.
23
23
22
22
Page 13

25
25
24
24
In Game
When in multi-user National Mode (connected via a LAN) you can view a
Global Map view of all the layouts in the session. Right click on the Tunnels
or Stations.
You will now see a screen with mini-thumbnail images of the entire layout.
If you move the cursor over the individual areas you can see who owns
each layout. As you pass over each area the appropriate sections to the
right of the board will highlight.
The trains will appear as coloured circles (matching those next to people’s
names). In this case LEE’s trains will appear red and MAD DAWG’s trains will
be green. You can watch the trains as they make their way around the
National Train Network.
Press the yellow briefcase with the red ‘X’ button to exit back to your
desktop.
Screen Saver
LEGO LOCO can also be used as a screen saver! You can design your own
layouts that will run when the screen saver starts up.
1. From within Windows, click the Right Mouse Button on the Windows
Desktop.
2. You will now see a Menu, from this list choose ‘Properties’.
3. From the Properties, choose the Screen Saver tab.
4. From this page bring up the drop-down list and choose LEGO LOCO.
5. Click on the ‘Settings Button’.
6. You will now see a LEGO LOCO Setup Box. You can either choose to
have a random layout chosen, or specify your favourite layout.
Game Modes
Game Modes
Game Modes
Game Modes
Page 14

Postcards – In-depth Instructions
Postcards – In-depth Instructions
There should be a BAG visible in the outgoing mail area of the window, this
shows that your postcard is waiting for a train.
Exit to the LOCO desktop.
Create a train "With A Mail Carriage" (do this by right clicking on a train
depot)
Ensure the train passes your post office and then route it to the blue tunnel
you previously placed.
You can check that it has picked up the postcard by right clicking on the
post office again and the outgoing bag should have disappeared
When the train enters the blue tunnel the postcard will be sent to the
Internet server for processing.
If the LOCO desktop fails to contact the Internet server it will place a
YELLOW postcard in your post office and the post office will animate to
attract your attention. The postcard will have text indicating that there was a
network error.
If the server is successfully contacted a new train will enter your desktop
from the blue tunnel this will be carrying a returned postcard. You should
route this train to your post office in order to unload the postcard.
In due course your original train will return, without any postcards on
board.
When the new train exits your desktop through a blue tunnel it will be
deleted.
If you send one postcard to the server it will return one, send two and it
returns two, send three and it returns three, etc.
27
27
26
26
A
To play with LOCO, single Player,
making use of the Internet Server
The required version of DirectX 6 will be installed by the LOCO
Installer. Ensure that you have Winsock Installed (you can achieve this by
installing an Internet Browser)
Make the connection to your Internet service provider
NOTE: this must not be firewall protected
Start LOCO
Select single player and then click the tick button
When LEGO LOCO is running, open the Toybox track tray and select a BLUE
tunnel (this has a picture of two heads on the side). Lay the tunnel down at
the side of the LEGO LOCO screen.
Connect the tunnel with track.
Select and place a Post Office building (this is in the track section of the
Toybox).
Close the Toybox.
Right click on the Post Office this will take you to the ‘Mail Sort’ window.
Select the Pen Pot on the desk to take you to the Paint Factory Window.
Create a postcard, address it to ‘Anyone’, this is the address for connecting
to the LEGO LOCO postcard server.
Pick up the postcard and drop it in the letterbox.
Click on the letterbox again to go to the mail sort window.
Page 15

29
29
28
28
To Play with LOCO, single or Multiplayer,
making use of Easter cards.
To use this mode YOU DO NOT HAVE TO BE CONNECTED TO THE INTERNET
Place a Blue tunnel.
Create a postcard.
Address it to an Easter Egg Character (e.g. Santa)
Load it onto a train with a mail carriage
Route the train through a blue tunnel
A new train should return carrying a reply from Santa
Route this train to your post office so that it can unload itself
When the new train leaves your desktop through a blue tunnel it will be
deleted
In due course your original train should be returned from the blue tunnel
having been unloaded by Santa’s little helpers.
To play with LOCO, with
a friend, over an IPX LAN
DirectX 6 will be installed by the LOCO Installer.
Start LOCO and select Multi-player (2 LEGO Minifigures button)
Selecting multi-player reveals two additional buttons - ‘Host’ and ‘Join’
Decide which of the users will host the game.
The host selects the ‘Host’ button and the other player selects the ‘Join’
button
Click on the tick button to proceed.
If this is your first use of the multi-player option a network option screen will
now be displayed.
Select IPX.
Select OK/’Tick’.
On the HOST machine a ‘host setting up game’ screen is now displayed.
Wait until the Green tick is visible (this is the game setting itself up).
You may then select which of the layouts you wish to use from the list on
the right hand side of the window.
The application automatically selects the first layout for you.
Select which area of the layout you wish to play in by clicking in the central
area of the screen.
If your friend is proceeding you will see their name in this area as well.
When you are happy to proceed, select the green tick button.
On the JOINING machine a ‘searching for games’ screen is now displayed.
B
C
Postcards – In-depth Instructions
Postcards – In-depth Instructions
Postcards – In-depth Instructions
Postcards – In-depth Instructions
Page 16

31
31
30
30
A list of available games will be displayed on the right hand side of the
screen and you will be automatically joined to the first game in the list.
When the green tick is displayed you may select where in the available
areas you wish to play. It is a good idea to choose to play in an area that is
alongside your friend’s choice.
When ready to proceed select the green tick.
Note: If you select the green tick before the host and the host then
decides not to proceed you will automatically become the host
machine.
When the LEGO LOCO desktop is displayed you will see BLUE tunnels on
some or all sides of your desktop layout. These cannot be deleted and
represent connections to other players in the game.
Press the ‘P’ button or use the MAP button in the toy box to view a map
showing all players, their names, train positions and a reduced view of their
desktop.
In the map screen holding your cursor over another area highlights the
players name and causes their trains to flash - showing where in the overall
layout they are.
Note: Areas which do not yet have a player, are modelled by the
game using default layouts and trains can run in these areas.
To get your trains to return to your desktop use the RECALL train button on
the map window.
When a player signs off all their trains are deleted, no matter where they
are.
To send a postcard to another player:
1. Create it in the paint factory.
2. Address it to that player (click on the TO area of the postcard and a list
of available players is displayed).
3. If you wish to send an attachment click the attachment (paper clip)
button and add the file as the last action you take before posting the
card.
4. Drop it in the letterbox.
Create a train with a mail carriage, route it past your post office and then
through the blue tunnel nearest the player you have addressed the card to.
To receive a postcard from another player:
1. Wait for their train to arrive.
2. Route it to your post office.
3. Right click on the post office and the incoming card is displayed.
4. You may then either delete the card or drop it in your post album to
save it.
5. If the card has an attachment (indicated by a paper clip on the card)
you can save the attachment by clicking on the paper clip. Note that
attachments cannot be stored in the album and will be deleted from
cards if you do not process them whilst in the post office window.
Postcards – In-depth Instructions
Postcards – In-depth Instructions
Postcards – In-depth Instructions
Postcards – In-depth Instructions
Page 17

33
33
32
32
Postcards – In-depth Instructions
Postcards – In-depth Instructions
Postcards – In-depth Instructions
Postcards – In-depth Instructions
D
E
F
To play with LOCO, with a friend,
over a TCP/IP LAN
DirectX 6 will be installed by the LOCO Installer.
Find out the host player’s IP ADDRESS (you can do this using the WINIPCFG
command from the Win95 start menu RUN option)
The Host player should select the TCP/IP network option (if the network
options screen is not displayed select the spanner button on the
joining/hosting network game screen).
The JOINING player must select TCP/IP and input the host players IP address
in the IP input area, which is displayed when TCP/IP is selected.
To play with LOCO, with a friend,
using TCP/IP on the Internet
DirectX 6 will be installed by the LOCO Installer. Ensure that you have a
Winsock Installed (you can achieve this by installing an Internet Browser)
Make the connection to your Internet service provider
NOTE: this must not be firewall protected
Connect to the Internet before starting LOCO.
Find out the host players IP ADDRESS (you can do this using the WINIPCFG
command from the Win95 start menu RUN option, note that this can
change each time you connect to the Internet).
The Host player should select the TCP/IP network option (if the network
options screen is not displayed select the spanner button on the
joining/hosting network game screen).
The JOINING player must select TCP/IP and input the host players IP address
in the IP input area, which is displayed when TCP/IP is selected.
General Notes
LOCO uses DirectX 6 which implements guaranteed messaging
for IPX networks.
When using DirectX6, ALL PLAYERS MUST BE ON THE SAME VERSION.
Page 18

3
3
Credits
LEGO Media International
Producer Rob Smith
Localisation Manager Cara McMullan
QA Manager Tony Miller
QA Testing Josh Collins, Scott Mackintosh, Tom Gillo, Dave Upchurch, Cara
McMullan, Rob Smith, Michelle Richmond, Paul Wilson
Full Motion Video Full Fat Productions
Intelligent Games
Executive Producer Matthew Stibbe
Director of Development Kevin Shrapnell
Team Leader Dee Jarvis
Programmers Simon Evers
Bruce Heather
Suzanne Maddison
Philip Veale
Daniel Wheeler
Artists Kees Gajentaan
Dee Jarvis
Assistant Producer Lee Morse
Testers Dan Bailie
Jamie Ferguson
Malcolm Lamont
Andy Spanswick
Sound Recording Audio Interactive
Richard Joseph
Voice Talent David Holt
Eve Karpf
Additional thanks to Laurence Scotford, Mark Livingstone, Caroline, Stu, Rob, Thomas, Hanne
Copyright
© Intelligent Games 1998. All Rights Reserved
Epilepsy Warning
Please read before using any video game or allowing your children to use it.
Some people are liable to have an epileptic seizure or loss of consciousness when exposed to
flashing lights or certain normal conditions of everyday life. Such persons could risk a seizure
while watching televised images or while playing certain video games, and this can occur even if
there have been no previous medical problems or experience of epilepsy.
If you or a member of your family has ever shown epileptic symptoms (seizure or loss of
consciousness) when exposed to flickering lights, consult your doctor before playing.
Parents should supervise their children’s use of video games. If you or your children experience
any of the following symptoms – dizziness, altered vision, eye or muscle twitches, loss of
consciousness, disorientation, involuntary movements or convulsions – discontinue use
immediately and consult your doctor.
PLEASE TAKE THE FOLLOWING GENERAL PRECAUTIONS WHEN PLAYING VIDEO GAMES
Do not sit too close to the television screen; position yourself with the linking cable at full stretch.
Play video games preferably on a small screen. Do not play if you are tired or have not had much
sleep. Make sure that the room in which you are playing is well lit. Rest for 10-15 minutes per
hour while playing video games.
Easter Eggs
35
35
34
34
There are many special hidden events that you can discover and elements
to place on your layout in LEGO LOCO. Some will happen only at certain
times, others you will only be able to discover by building your LEGO
LOCO world carefully. Some are easy to find, some will take a lot of
experimenting. We have called these EASTER EGGS.
Have you seen the Rainbow? How about the Loch Ness Monster or the
Super Station Master?
Have you found more Easter Eggs than your friends?
Why not send a postcard to us at LEGO telling us of your discoveries? (See
International Postcards in this manual)
Try visiting the LEGO web site at http://www.lego.com/.
Easter Eggs
 Loading...