

Assembly Instru
ction
490-89
10 CRIB DRAWER
Page
1of5
Thank you for purchasing this quality product. Be sure to check all packing material carefully for small parts that
may have come loose inside the carton during shipment
I
MPORTANT SAFETY INSTRUCTIONS
:Please carefully read all instructions
before ass
embling the drawer box kit
Use only vendor’s supplied hardware to assemble. Usi
ng unauthorized hardware could j
eopardize the
structural integrity of the item.
For your safety and ease, assembly by two or more adults is recommended.
Keep instructions for
future use
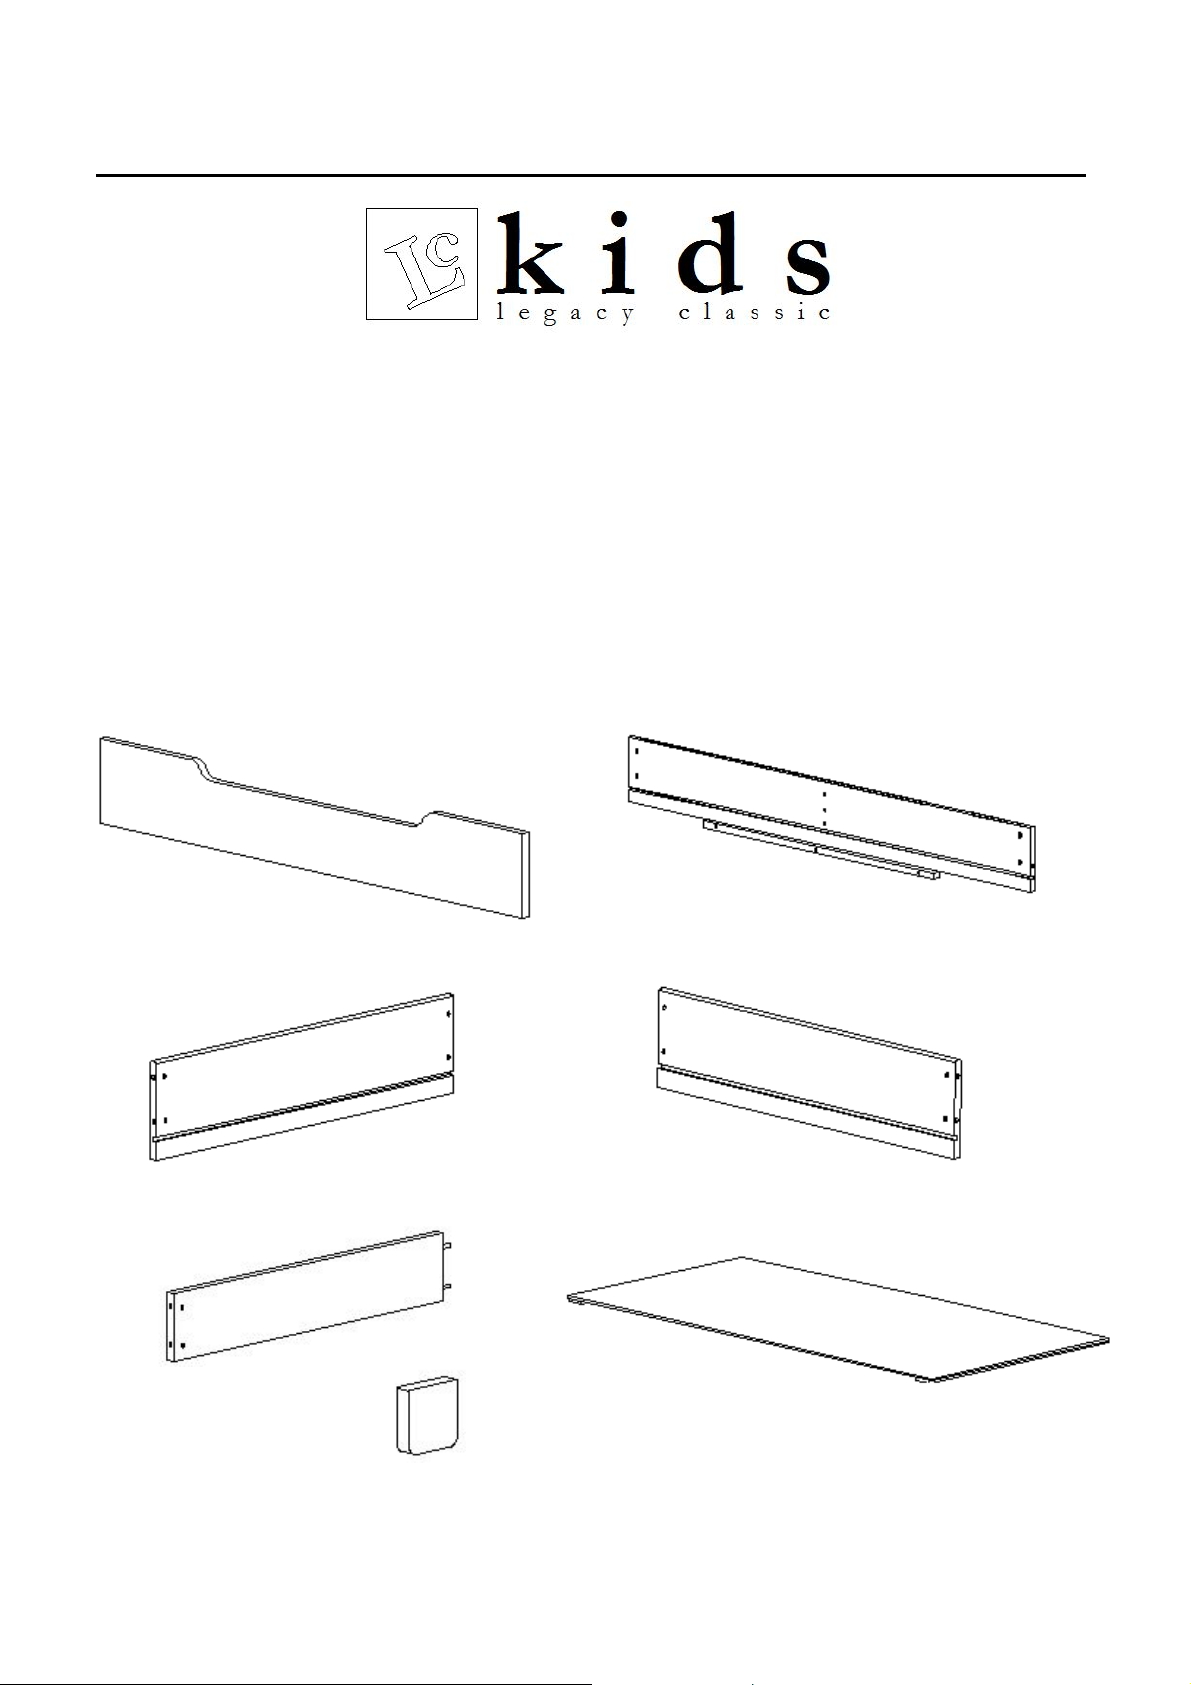
PARTS INCLUDED
:
(A)
Front panel
–
1pc
(B) Back panel
-1pc
(C) L
eft Side Panel
-1pc
(D) Right Side Panel
-1pc
(E) Divider Panel
-1pc
(F) Bottom Panel
-1pc
(G)
Drawer Stops
-2pc
s
Assembly Instru
ction
490-89
10 CRIB DRAWER
Page
2of5
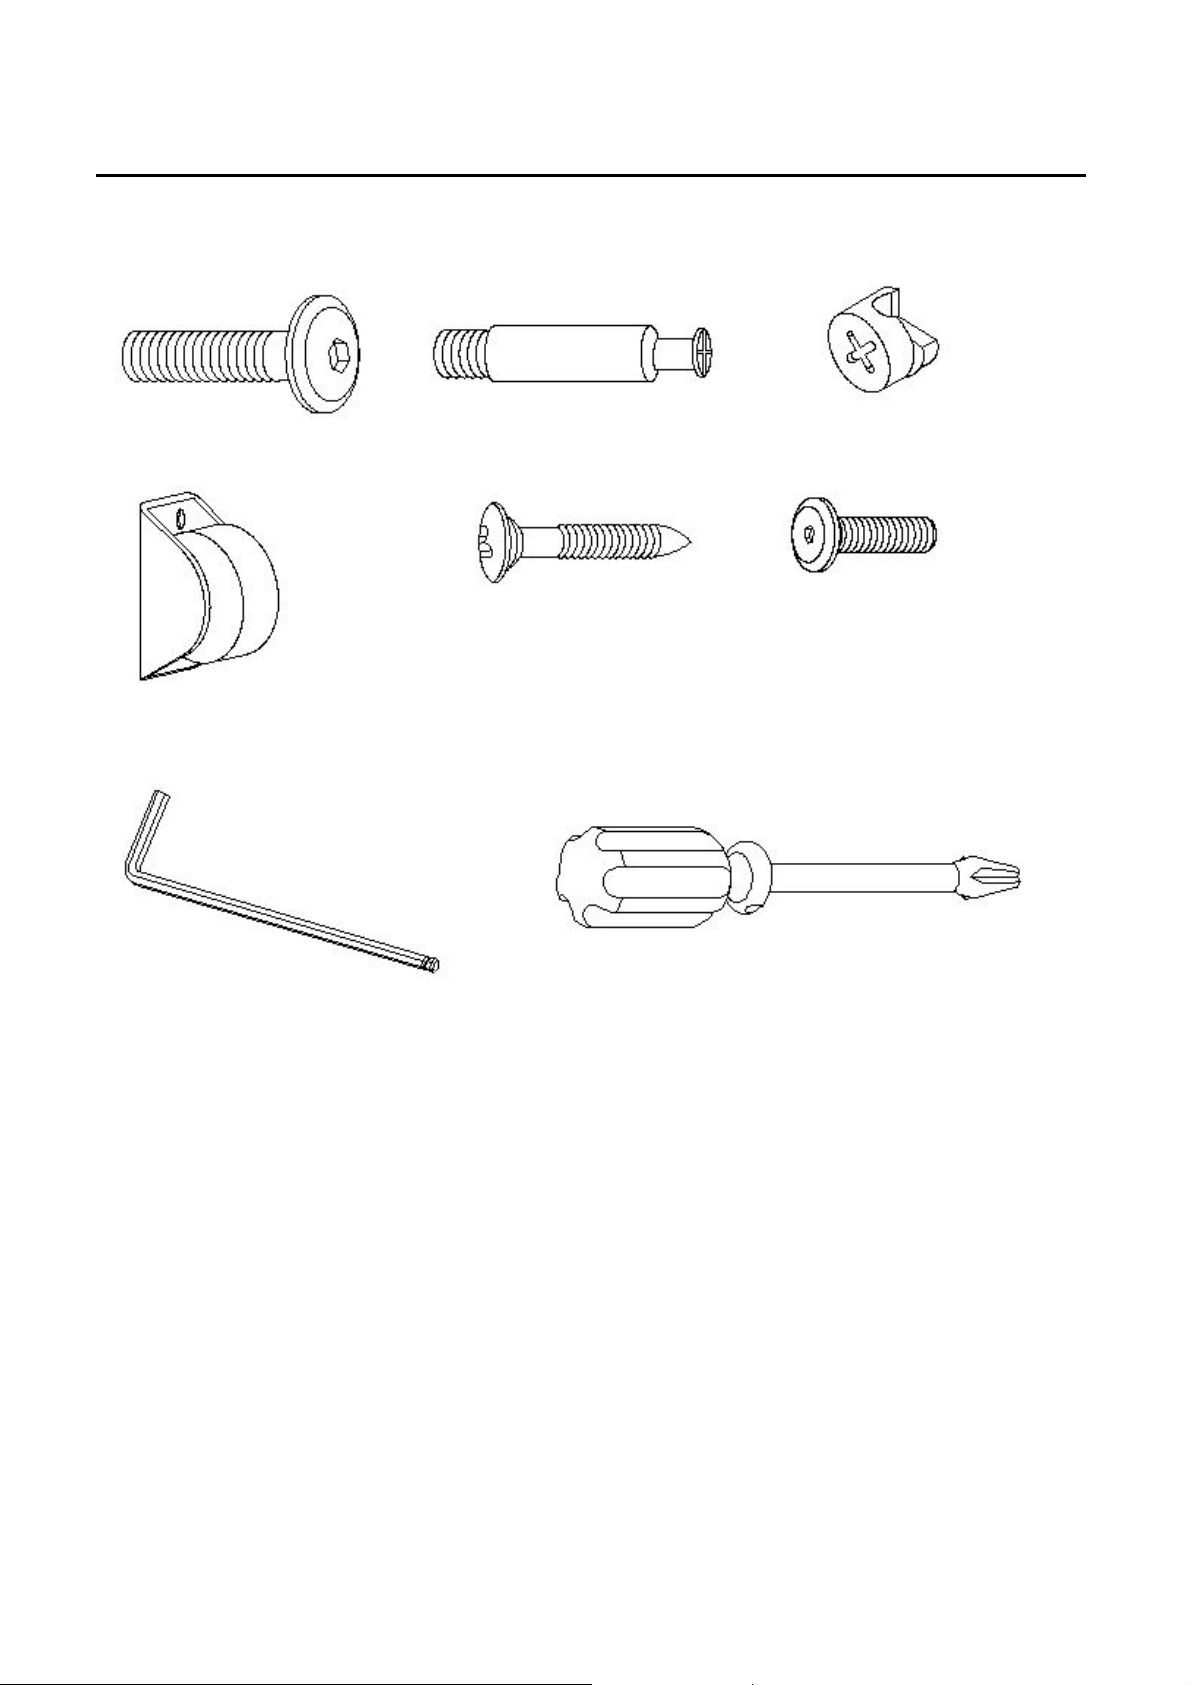
HARDWARE ENCLOSED:
(H
) Hex bolt screw
s
: M6 x
20–2pcs(K)
Caster
–4pcs
TOOLS REQUIRED:
(M)
Hex Allen Wrench with Ball
tip-1pc (
I
ncluded)
Phillips Screwdriver (not included)
PRE-ASSEMBLY:
Remove all parts and hardware from the box and lay out on a clear carpeted or scratch
-
free work surface,
as this will a
void damaging parts during assembly. The shipping box provides an ideal work surface.
Do not dispose of any packaging or contents of the shipping carton until assembly is completed to avoid
accidentally discarding small parts or hardware.
Use the parts an
d hardware lists above to identify and separate each of the pieces included.
The illustrations provided allow for easier assembly when used in conjunction with the assembly
instructions.
The use of power tools for assembly is not recommended. Power tools
can damage hardware or split
wood.
ASSEMBLY INSTRUCTIONS:
1.
Lay out all the parts and hardware. Make sure the quantity of each
is
correct
2.
Install
the
Cam B
olts into the
hole of the
Front
Side
(A)
, the
Right
Side(D)
and the
Left S
idepanel
(C).
(See
Fig
1)
(I) Cam bolt
-10pc
s
(J
) Cam nut
-10pc
s
(L) Wooden Screw
-8pcs(N) Hex bolt
screw
s
M6 x 20
-4pc
s

Assembly Instru
ction
490-89
10 CRIB DRAWER
Page
3of5
3.
Slide the
Bottom panel
(F)
onto the groove of the Left Side Panel (C), Right Side Panel (D)
and
Back panel
(B).Connect these
panels together with
CamNut(J) u
sing
Screwdriver
to
tighten.
(See Fig 2)
4.
Asse
mblethe end of Divider (E) into the Back Panel with Bolt (H) using Allen key (M).
5.
Assemble the
Front Side Panel (A)
into the Left Side Panel (C)
,
the
Right Side Panel (D)
and the Divider
(E)
with
same
Cam Nut (J)
using Screwdriver
to tighten
.
(See Fig 3)
Fig(1)Fig(2
)

Assembly Instru
ction
490-89
10 CRIB DRAWER
Page
4of5
6.
Turn the whole unit back side up and insert
the same Bolts (H) through the
Bottom
Side Panel (
F
) into the
Divider panel. Also, install the
C
aster
(K)
into the Bottom panel (F)
with W
oodenscrew (L) using
S
crewdriver.
Tight
en all connections. Assembly is complete
.
(See Fig
4)7.
Push the whole unit under Crib
or Toddler B
ed
/Daybed
. Assembl
e
the D
rawer stops
(G)with Bolt (N) using
Hex Allen Wrench
(M) to
the back of the conversion
kit
rail
/ Crib rai
l
(see Fig 5).This will prevent the
Crib
drawer
from rolling past the bed
Fig(3)Fig(4
)

Assembly Instru
ction
490-89
10 CRIB DRAWER
Page
5of5
NOTE
: This Crib drawer could also be used on a Convertible Crib or Toddler bed
CARE INSTRUCTIONS
:
Dust often using a clean, sof
t, dry lint
-
free cloth.
Blot spills immediately, and wipe with a clean, damp, cloth.
We do not recommend the use of chemical cleansers, abrasives, or furniture polish on our lacquered
finish.
If the crib is to be stored, store in cool dry place and caref
ully package all original hardware to protect from
loss or damage.
Check fasteners periodically for tightness.
DO NOT over tighten.
This may cause distortion or breakage.
Parents should ensure a safe environment for the child by checking regularly, before
placing the child in
the product, that every component is properly and securely in place.
THANK YOU FOR YOUR PURCHASE.
www.legacyclassickids.com
High Point, NC. 336 449
–
4600
Fig(5)
 Loading...