

Owners Manual For The
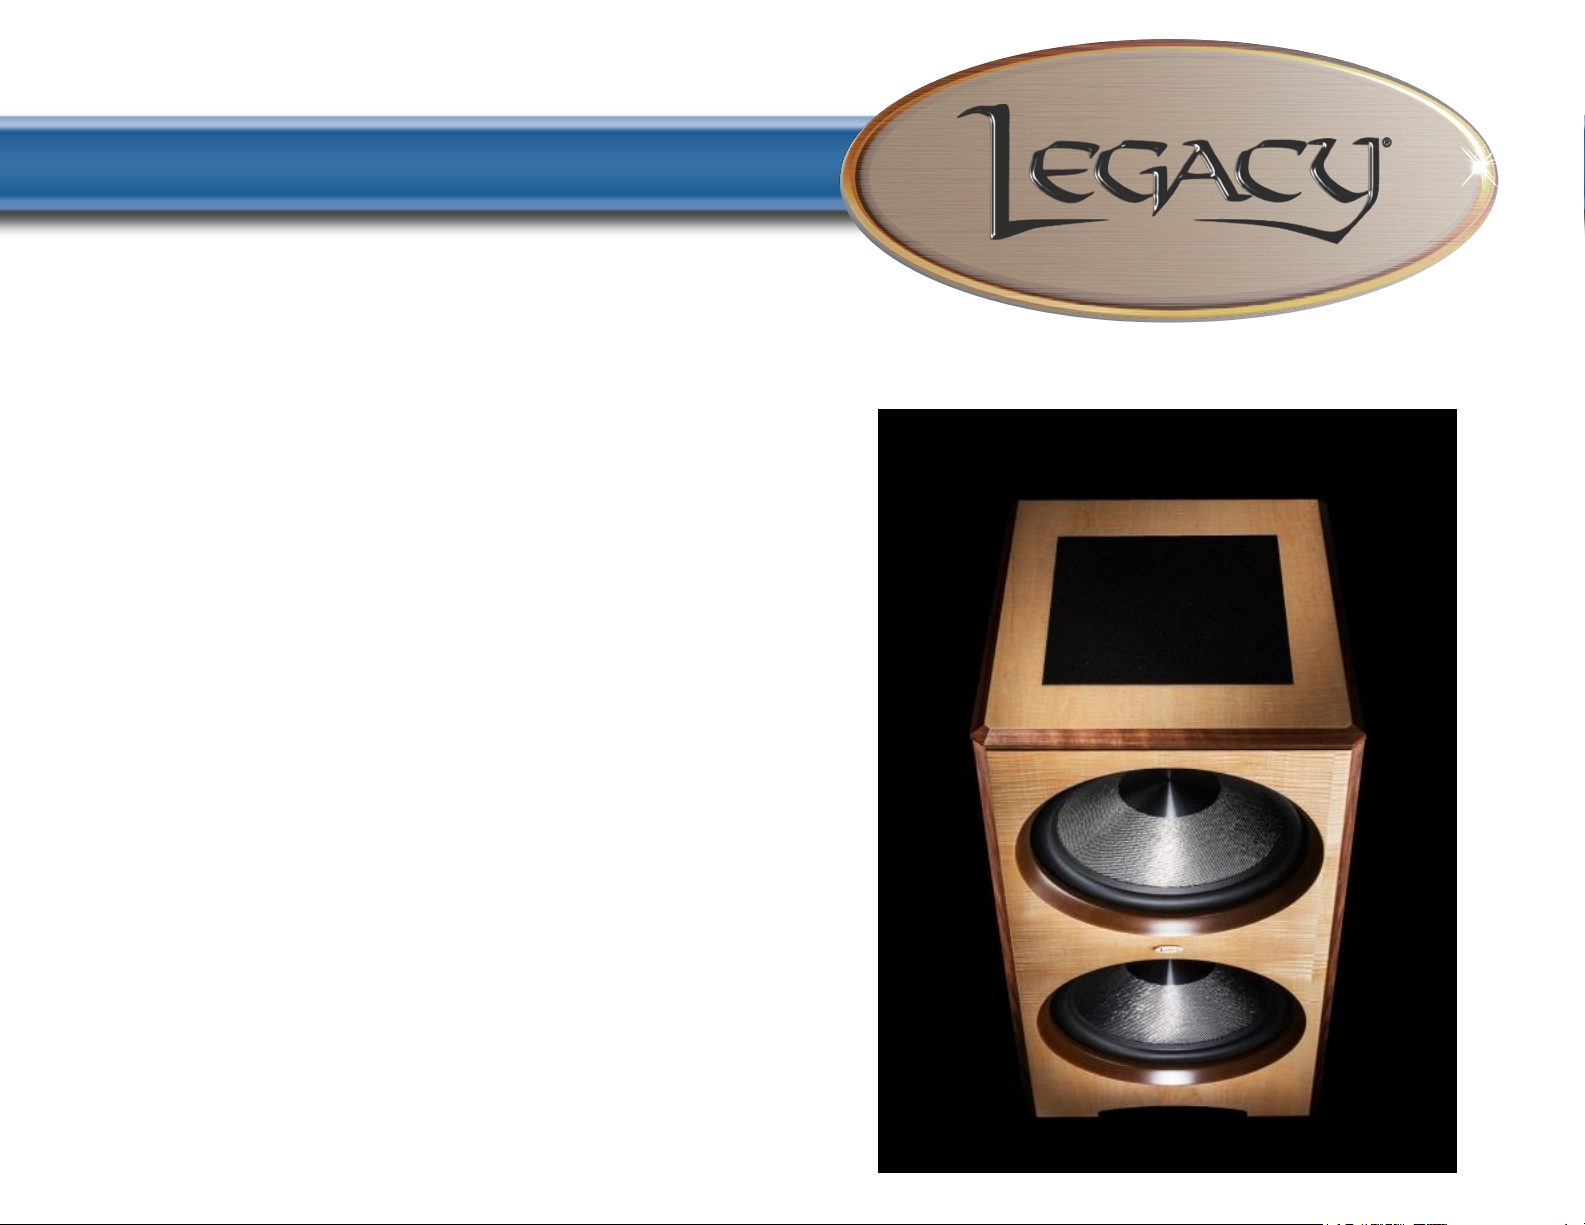
Goliath XD
Subwoofer System

Table of Contents
Registration
Page
Owners Record 3
The Cabinetry / Our Commitment 4
Warranty 5
Setup
Unpacking Your Speakers 6
Speaker Placement 7-8
Speaker Connections 9-11
Wave Launch Processor 12-20
Fine Tuning 21
Technology
Designer’s Notes 22
Specifications
23
2

Owners Record
The serial number is located on the rear of the unit. Record this
number in the space provided below. Refer to this when calling your
dealer regarding this product.
Model: Goliath XD
Serial No: _________________________
Date of purchase: ___________________
Thank you for selecting a Legacy Loudspeaker System. These handcrafted instruments will provide you with many years of listening enjoyment.
3

The Cabinetry / Our Commitment
Handcrafted
Beneath the surface of Goliath XD’s elegant exterior lies rigid MDF
construction. Interlocking joinery maximizes the strength of the cabinet
parts. Polyester fiberfill is selected for internal damping. A sharp rap on
the enclosure will leave you with little more than bruised knuckles.
Each cabinet is impeccably finished on all exposed surfaces with select
veneers. The exquisite finish is hand-rubbed several times to assure a
patina at home with the most elegant decor.
Our Commitment
A great deal of forethought, love and satisfaction is instilled in each piece
of Legacy workmanship. We take pride in getting to know many of our
customers on a first name basis.
Your purchase of this product is backed by the renowned “Legacy
Satisfaction Guarantee”.
4

Warranty
Legacy Audio supports its customers and products with pride. We cheerfully warrant our loudspeaker products we manufacture from defects in materials and workmanship for a period of seven
(7) years. Electronic components such as internal amplifiers and digital processors are covered for
three (3)years. Please register your product with Legacy Audio. Should you require service Legacy
will require a proof of purchase in order to honor the warranty - so please keep your receipt.
• The warranty applies to the original owner and is not transferable.
• The warranty applies to products purchased from an “Authorized Legacy Dealer”.
• The warranty on active components such as digital processors or internal amplifiers is limited to three
(3) years of coverage.
• The warranty on dealer stock will extend for a maximum of two years from invoice.
The warranty does not cover transportation costs of product to or from the customer, distributor or
dealer, or related shipping damage.
Exclusions from Warranty
The following situations or conditions are not covered by the Legacy Audio warranty:
• Accidental damage, electrical abuse or associated equipment failure.
• Use inconsistent with recommended operating instructions and specifications
• Damage caused by modification or unauthorized service
• Costs associated with the removal and reinstallation of defective products. Consequential damage to
other products.
• Normal wear such as fading of finishes due to sunlight.
5

Unpacking Your Speakers
Your new speaker system has been very carefully packaged to insure
that it travels to you safely. Each speaker is protected by a doublewall outer carton with heavy V-board corner protectors. Molded foam
end caps are used to protect the elegant cabinetry, and a plastic liner
is provided as waterproofing. Please save this packing for future
transportation. If cartons become damaged or misplaced, new ones
can be purchased from Legacy Audio.
6

Speaker Placement
Since the human ear is rather poor at localizing radiation frequencies
below 125 Hz, good results may be obtained in a variety of room
placements.
Low frequency reinforcement occurs whenever woofers are placed near
room boundaries. The distance from the walls, floor and ceiling
correspond to the wavelengths of the frequencies, which will reflect in
phase and thus reinforce bass output. Therefore, the actual dimensions of
your listening room play a definite role in what ultimately arrives at your
ear. In fact, rooms tend to have their own set of favored frequencies.
We can calculate what the most strongly reinforced frequencies in a room
will be by the formula shown below:
Resonant Frequency = (1130 ft/sec) / (ft. between boundaries x 2)
For example, a room with an 8 ft. ceiling height has a strong resonance at:
(1130 ft/sec.) / (8 ft. x 2) = 71 Hz.
7

Speaker Placement
Now, while such reinforcement might actually be beneficial at very low
frequencies, a way to minimize excitation of these resonances is to place
your subwoofer asymmetrically relative to room boundaries. For instance, if
the subwoofer is 2 ft from one corner wall, then place it 1.5 ft to 3 ft from
the other.
Placing the subwoofer in a corner will reduce the radiation angle and thus
increase efficiency. It will also excite the maximum number of room modes
and decrease distortion.
A best case scenario is to actually use two subwoofers, one to each side
of the listener. The subs should be placed 90° out of phase with each
other. This improves spaciousness and bass uniformity, with a reduction in
room level peaks.
8

Speaker Connections
Once you’ve found a place in your room, the next step is connecting the Goliath XD to your
existing system.
Option 1: Connecting one or two Goliath XD using LFE output
If you are utilizing Goliath XD as the dedicated LFE channel for a surround system, connect the
LFE output from your surround processor to the XLR input 3 of your Xilica processor. Connect an
XLR cable from the Xilica processor output 1 to the XLR input on the rear of the Goliath XD
subwoofer.
If you will be connecting a second
Goliath XD to your LFE channel,
connect an XLR cable from the
Xilica processor output 5 to the XLR
input on the rear of the right Goliath
XD subwoofer.
9

Speaker Connections
Option 2: Connecting one or two Goliath XD for use with Legacy
Helix, Whisper, or Aeris
If using the Goliath XD to augment the bass performance of a Legacy Audio
speaker system begin by connecting the left preamplifier output to XLR
input 1 on the Xilica processor (and input 3 if using a splitter). Next connect
the right preamplifier output to XLR input 2 on the Xilica processor (and
input 4 if using a splitter).
Connect an XLR cable from output 4 of the Xilica processor to the back
of the Goliath XD subwoofer.
If you are using a second Goliath XD subwoofer, connect an XLR cable
from output 8 of the Xilica processor to the back of the right Goliath XD
subwoofer for stereo subwoofer performance.
10

Speaker Connections
Powering Up Goliath XD
1. Power Cable: The supplied power cable will plug into the socket on the back terminal
plate of the unit.
NOTE: Try to plug into the same AC circuit as the rest of your audio system, as this will avoid
hum from ground loops.
2. Power Up: In the rear of the subwoofer is the power switch. Push the switch upward to
turn the unit on.
NOTE :
Power up the Xilica processor before the Goliath XD subwoofer to avoid sending
unnecessary transients through the subwoofer.
11

Wave La
un
ch Process
or
The hi
essor is powered
pr
gh definition Digital Wavelaunch Processor
eamp,
power amplifier, and
Selecting the Program
1. Press the
2. Scroll
3. Press
4. Press
Users are welcome to load
mended
MENU left a
through
enter
enter again to confirm selection. The
that any
on. Factory setti
rro
w
the
programs using the job wheel
to select
changes
the
program
the included
be saved as Program 6 or higher to avoid overwriting
ngs
are ‘plug
speakers should
of choice
software
hosts a
and pla
be as shown on previous pages.
program
and learn
LEGACY
y’,
and do not require
will
now load.
to make individual adjustments
custom algorithm which automatically loads when the proc-
a
computer
the factory settings.
to utilize. Connections between the
as desired.
However it is recom-
12

Wave La
un
ch Process
or
D
ownloading and Insta
DownloadingFro
Visit www.LegacyAudio.com, and navigate to the Goliath XD Subwoofer product page. Click
on the details tab, and click "How to Control Legacy Speakers"
Insta
lling
- Double
software
lling the XConsole software
mLegacy Audio
click
on the install file
and follow the on–
screen instructions
to install
the
13

Wave La
The
XP
unch Proce
processor
will
ssor
allow
you
to make adjustments to your system from a laptop compute
from your listener position.
Connecting Your Computer with the XP-4080 Processor
- Connecting will require
same cable that a USB printer would
http://
www.radioshack.com/product/index.jsp?productId=
- Once the cable is connected,
“No” for now.
- You now must
access
use, but typically it is
and then “Device Manager” This will bring
should then find a device called “Silicon Labs
number
will
change
a long USB Device cable. These can be found at most electronic or big box
use. This
16 ft cable is available at Radio Shack.
start the XConsole software.
the Windows Device Manager. This
found in
the Control Panel. Then
click
up a list, find “Ports (COM &
CP210x USB to
on
all
computers,
but take note of this number.
3584358&filterName=Length&filterValue=
It
will
ask “Do you want to
processes
can vary depending on the version of Windows i
connect
on “System.” On the tabs across the top,
UART Bridg
LPT)”
e” with a
and
click
the plus (+)
COM
number listed next to it.
16-20+ft.
to the device
stores.
It is the
?”, answer
click “Hardwar
next to it.
Yo
u
This
r
n
e
”
CONTINUED
ON NEXT PAGE
14

Wave La
- Go back to the XConsole software. At
dialog box. Select the
you that you must
-
Restart
- You should
Room Equalization
Before making
Parametric filters allo
are amplitude
unit, which
widened
or na
Simpler graphic filters
ings.
the XConsole software. This time,
now be
adjustments with
(boost or cut), center
stands
for Q factor. The amplitude of each band can be controlled, and the
rrowed.
un
w you to control
ch Process
COM
port
number
restart
are fixed in frequency
the
software
connected
your
frequency (pitch) and bandwidth (tonal range). Bandwidth is typically labeled
to the device
processor, a basic understanding
the
o
r
the top of the
you obtained
for your
three primary
and bandwidth, so the music
changes
when it
and ready to use.
screen
from the device manger
to take effect.
asked “Do you want to
parameters
click
“Setup” then “Port Connections” This bring up a ne
and
click “OK.” The
connect
of parametric
of a useful band-pass filter.
spectrum is divided into uniform third-octave spac-
and graphic equalization is needed.
to the device
center frequency
These parameters
software
?”, answer “Yes”.
"Q" on
can be shifted, a
w
will warn
the
nd
15

Wave La
unch Proce
ssor
Making Adjustments
with Wavelaunch Processor
After insta
lling the included
software, connect
Launch
the XConsole software.
the
processor
to the
computer via a USB cable.
In the Device List, click
on the device
When asked
that is connected. This will launch the
if
you want to
16
connect
to the device,
program
click yes.
that is currently on the processor.

Wave La
unch Proce
ssor
In the Device List, click
on the device
that is connected. This will launch the
The preset shown on the left is for 1 or 2 Goliath XD
being fed a mono or LFE signal.
A
djustments
Sub L" and "Out 5 Sub R" when using a second
subwoofer.
program
that is currently on the processor.
to the
processor
can be made to “Out 1
The preset shown on the right is for 2 Goliath XD within a Whisper
XD system.
A
djustments
LSub" and "Out 8 RSub"
to the
processor
can be made to “Out 4:
17

Wave La
unch Proce
ssor
Making
a boost with the parametric EQ
crease
Q of 6.551. A larger Q affects a narrow range of frequencies, while a smaller
adjust gain,
In this example, we have selected Parametric EQ 2 (PEQ2) by clicking in its box, which will
Once highlighted, locate
or
decrease
frequency
rows, at the
bottom
the blue
the gain,
and Q by clicking in the corresponding box. Once highlighted, locate
of the interface.
boxes with up and down arrows, at the
frequency
and Q of the selected parametric EQ. This column shows a 4.00 dB boost at 41 Hz with
These arrows are used to increase or
18
bottom
Q affects a
decrease
of the interface.
turn red to indicate your selection.
These arrows are used to in
broader
the blue
the gain,
range of frequencies. We ca
boxes with up and down ar-
frequency
and Q settings.
a
n

Wave La
unch Proce
ssor
Making a cut with the graphic EQ
lighted, locate
After a
In this example, we have selected Graphic EQ 8 by clicking in its box which will
the blue
crease
the gain
djusti
of the selected graphic EQ. This column shows a 4.00 dB cut at 100 Hz. Only gain is adjustable in
ng,
you may close the window,
boxes with up and down arrows, at the
EQ section
because graphic equalizers have a fixed
and make adjustments to other connected Legacy subs and speakers.
19
bottom
of the interface.
turn red to indicate your selection.
These arrows are used to increase or de
frequency
and Q.
Once high-
the graphic
-

Wave La
unch Proce
ssor
Adjusting using the
Adjustments
You
can select
frequency, while dragging to the right increases the frequency.
made to both the parametric
them by clicking
EQ plot
on their
number,
and graphic
and dragging
EQ are reflected in
Recommendations
Boosts
Boosting and cutting with a smaller
dull recording.
greater
than 6 dB can result in ringing, driver overload, or mechanical buzzing.
Q
will
affect a broad range of frequencies, and can be helpful for brightening an otherwis
Boosting and cutting with a large Q
will
affect a narrow range of frequencies, and is useful for making precise adjustments.
For the Ambitious: Technical measurements
We highly
of your
phone and a
http://
recommend
system. While
soundcard with microphone
www.hometheatershack.com/roomeq/
free
measurement software,
we obviously
cannot provide the technical support
preamp
Room EQ Wizard. This software allows you to
and you are off and running.
the graph occupying
up to boost, and down to cut. Dragging
the upper portion
for this software,
all
one
of the screen.
to the left decreases the
measure
needs is
the in
room response
a calibrated micro-
e
20

Fine Tuning
Adjusting Goliath XD
Gain: This will allow you to adjust the volume level played by the subwoofer. It only controls
the subwoofer level, not the level of any of the other loudspeakers in the system. Be sure to
adjust the Gain in the row corresponding to your subwoofer.
Filter: Clicking this button allows you to access the EQ capabilities of the subwoofer. The
crossover point and slope can also be adjusted on the right via the X-Hi/LPF section. Follow
the instructions on the previous pages for making adjustments.
Polarity: This control is essential in the proper setup of your subwoofer. If not set up
properly, your main speakers and subwoofer can actually work against each other. If
operating out-of- phase the subwoofer and mains will cancel, creating nulls at some
frequencies (primarily upper bass).What is desirable is to have the subwoofer and the mains
operating in phase, relative to the primary listening position. Here is an effective method of
accomplishing this:
While seated at your listening position, click the Polarity button on your subwoofer output.
Using pink noise or a 50-60 Hz test tone, listen for the strongest output. Next, play music
program material and optimize the level and polarity settings, adjusting for the smoothest
output.
21

Designer’s Notes
•Goliath XD is a carefully engineered subwoofer, capable of integrating with the fin-
est speakers.
• Unlike many woofers that suffer from overshoot, Goliath XD applies a special EMF
countering circuit, which increases power handling and radically reduces low frequency distortion.
• An enormous stacked magnet structure is custom fabricated to provide excellent
sensitivity. This unit is bolted in compression to secure nearly 80 lbs. of motor structure.
• Two separate high current 500 watt amplifiers (1,000 watts total) maintain control
of Goliath XD’s multiple 15” sub-bass pistons.
(From Bill Dudleston)
• The subwoofer alleviates the deep bass demands from compact satellite speakers,
thus preventing low frequency strain due to long excursion.
• TheXilica processor allows for precise control over Level, Crossover Frequency
and Phase, allowing Goliath XD to integrate precisely into your system.
22

Specifications
System Type: Mutually coupled, dynamically stabalized
Subwoofer: (2)15” Silver/Graphite/Rohacell composite
Radiator: (2) 15” mass loaded, bottom & rear firing
Low Frequency Alignment: 8t
Internal Amplification: (2) 500 Watt ultra efficient CE®Power modules
Frequency Response: 12-150 Hz +/- 2 dB, Includes 24 bit processor
Impedance: 10K
Phase Adjustment: Continuous time adjustment
Blend EQ: 16 parametric bands
Max SPL: 130 dB @ 1m
diaphragm
h Order/Back EMF Canceling
Low Pass Filter Slope: Linkwitz-Riley 6/12/24/48 dB per octave
Crossover: 30 Hz-200 Hz
Inputs: XLR
Dimensions (H x W x D): 18.125” X 40.125” X 19.125”
Weight Per Cabinet: 190 pounds
23

CE Declaration of Conformity
Legacy Audio
3023 E. Sangamon Ave.
Springfield, IL 62702 USA
800-283-4644
States that this product is in conformity with the
with the essential requirements and other relevant
provisions of:
Low Voltage Directive 2006/95/EC
EMC Directive 2004/108/EC
WEEE Compliance
Product Disposal—
Certain international, national
and/or local laws and/or
regulations may apply regarding
the disposal of this product. For
further detailed information,
please contact the retailer where
you purchased this product or
the Legacy Audio Distributor in
your country. A listing of Legacy
Audio Distributors can be found
on the Legacy Audio website
www.legacyaudio.com
or by contacting Legacy Audio
at: 3023 E. Sangamon Ave.,
Springfield, IL 62702,
USA—Phone: +1 217 544-3178.
24

Notes:
25

©2014 Legacy Audio
3023 E Sangamon Ave.
Springfield, IL 62702
Phone: 800-283-4644
Fax: 217-544-1483
26
 Loading...