

Page 1

MODEL: ITVS-200B
Music Center with Bluetooth
Important Safety Instructions ......................................................................................................................... 2
Product Overview .......................................................................................................................................... 3
Setup / Basic Operation ................................................................................................................................ 7
Listening to a Vinyl Record ............................................................................................................................ 7
Listening to a CD ........................................................................................................................................... 8
Listening to the FM Radio ............................................................................................................................. 9
Listening to an External Audio Device (AUX Mode) ...................................................................................... 9
Listening to an External Audio Device (BT Mode) ......................................................................................... 9
Listening to a Cassette Tape ....................................................................................................................... 10
Maintenance / Proper Handling ................................................................................................................... 10
Specifications ................................................................................................................ .............................. 12
Troubleshooting Guide ................................................................................................................................ 13
FCC Statement ............................................................................................................................................ 15
1
Page 2

CAUTION
RISK OF ELECTRIC SHOCK
DO NOT OPEN
AVERTISSEMENT:
RISQUE DE CHOC ÉLECTRIQUE – NE PAS OUVRIR.
- This lightning flash with arrowhead symbol within an equilateral triangle is intended to alert the user to the
presence of non-insulated “dangerous voltage” within the product’s enclosure that may be of sufficient magnitude
to constitute a risk of electric shock.
- Warning: To reduce the risk of electric shock, do not remove cover (or back) as there are no user-serviceable parts
inside. Refer servicing to qualified personnel.
- The exclamation point within an equilateral triangle is intended to alert the user to the presence of important
operating and maintenance instructions in the literature accompanying the appliance.
CAUTION: To reduce the risk of fire or electric shock, do not expose this appliance to rain or moisture.
WARNING: To prevent electric shock, do not use this (polarized) plug with an extension cord, receptacle
or other outlet unless the blades can be fully inserted to prevent blade exposure
WARNING: Invisible laser radiation when open and interlock failed or defeated. Avoid direct
exposure to laser beam.
PRODUCT COMPLIES WITH DHHS RULE 21 CFR SUBCHAPTER J IN EFFECT AT DATE
OF MANUFACTURE
This equipment is a Class II or double insulated electrical appliance. It has been designed in
such a way that it does not require a safety connection to electrical earth.
Important Safety Instructions
1. Read these instructions – All the safety and operating instructions should be read before this product
is operated.
2. Keep these instructions- T he sa fety and operating instructions s ho uld be retained for future referen ce.
3. Heed all warnings – All warnings on the appliance and in the operating instructions should be adhered
to.
4. Follow all instructions – All operating and use instructions should be followed.
5. Do not use this apparatus near water – The ap pliance should not be used near water or moisture – fo r
example, in a wet basement or near a swimming pool, and the like.
6. Clean only with dry cloth.
7. Do not block any ventilation openings. Install in accordance with the manufacturer’s instructions.
8. Do not install near any heat sources such as radiations, heat registers, stoves, or other apparatus
(including amplifiers) that produce heat.
9. Do not defeat the safety purpose of the polarized or grounding plug. A polarized plug has two blades
with one wider than the other. A grounding plug has two blades and a third grounding prong. The wide
blade or the third prong is provided for your safety. If the provided plug does not fit into your outlet,
consult an electrician for replacement of the obs ole te outlet.
10. Protect the power cord from being walked on or pinched particularly at the
plugs, convenience receptacles, and at the point where they exit from the
apparatus.
11. Only use attachments/accessories specified by the manufacturer.
12. Use only with the cart, stand, tripod, bracket, or table specified by the
manufacturer, or s old w ith the apparatus. When a cart or rack is used, use
caution when moving the cart/apparatus combination to avoid injury from
tip-over.
13. Unplug the apparatus during lighting storms or when unused for long periods of time.
14. Refer all servicing to quali fied pe rsonnel. Serv icing is requi red w hen t he app arat us has bee n damage d
in any way, such as power supply cord or plug is damaged, liquid has been spilled or objects have
2
Page 3

fallen into the apparatus has been exposed to rain or moisture, does not operate normally, or has
been dropped.
15.
-This lightning flash with arrowhead symbol within an equilateral triangle is intended to alert the user to the
presence of non-insulated “dangerous voltage” within the product’s enclosure that may be of sufficient
magnitude to constitute a risk of electric shock.
-Warning: To reduce the risk of electric shock, do not remove cover (or back) as there are no
user-serviceable part s insi de. Refer servicing to qualified personnel .
-The exclamation point within and equilateral triangle is intended to alert the user to the presence of
important operating and maintenance instructions in the literature accompanying the appliance.
16.
This equipment is a Class Ⅱ or double insulated electrical appliance. It has been designed in such a way
that it does not require a safety connection to electrical earth.
17. The mains plug is used as disconnect device, the disconnect device shall remain readily operable.
18. To reduce the risk of fire or electric shock, do not expose this apparatus to rain or moisture. The
apparatus shall not be exposed to dripping or splashing and that no objects filled with liquids, such as
vases, shall not be placed on apparatus.
19. The use of the equipment in moderate climate.
ACCESSORIES INCLUDED
• RCA LINE OUT CABLE
• INSTRUCTION MANUAL
• WARRANTY (BACK OF MANUAL)
• 45 RPM ADAPTER
Product Overview
Front View
3
Page 4

1. POWER Push to turn the unit on or off.
2. “PHONO, CD, AUX, FM/ ” SELECTION KNOB Rotate to select your desire function.
“FM”, “ ” SLIDE SWITCH Slide to select listens to FM or Bluetooth.
3.
4. 3.5mm AUX IN JACK Connect your external source to the AUX IN jack.
5. PLAY INDICATOR Illuminates when CD is playing.
6. ST/BT INDICATOR Blue light flash when the unit is waiting for getting paired. Blue light stay lit
when the external device is connected to the unit. Red light illuminates the station received is
under stereo playing.
7. PROGRAM INDICATOR Illuminates the program playback is set.
8. REPEAT INDICATOR Red light stay lit illuminates all tracks repeat. Red light flash when single
track is repeating.
(Note: This indicator only works in CD mode.)
9. LED DISPLAY
10. TUNING DIAL POINTER
11. STEREO SPEAKERS
12. STOP Press to stop playback or cancel the program setting.
13. PLAY/PAUSE Press to start playback, press again to pause.
(Note: This button only works in CD, Bluetooth mode.)
14. OPEN/CLOSE In CD mode, use to open and close the disc tray.
15. DISC TRAY
16. “VOLUME” KNOB Turn to adjust volume.
17/18. NEXT/PREVIOUS TRACK
& FF/REWIND
In CD Mode, press once to skip to the next/previous track. Press and hold to fast forward/rewind.
(Note: This button will not work in PHONO, FM, AUX mode)
19. “PROGRAM” Press to set the program playback.
(Note: This indicator only works in CD mode.)
20. “REAPEAT” Press to select the repeat mode.
(Note: This indicator only works in CD mode.)
21. RADIO TUNER KNOB In FM mode, turn to tune in a station.
22. 3.5mm EARPHONE JACK
Accepts headphone/earphone plugs.
Left side View
23. CASSETTE FF & EJECT Press halfway to fast forward, press all the way to end and eject
the tape.
4
Page 5

Rear View
24. FM wire antenna
While tuned to a station in FM mode, extend the wire and reposition to adjust for best reception.
25. LINE OUT jacks
For amplifier device with RCA auxiliary input sockets, insert the white and red plugs on the RCA
cable into the unit. Insert the opposite end into the amplifier device. Be sure to connect the white
plug to the white jack and the red plug to the red jack.
26. AC Power Cord
Connect the AC plugs into a wall outlet.
You’re strongly recommended that this product should be operated only from the type of power
source indicated on the marking label.
Parts of the Turntable
A. Turntable.
B. Safety Screw (for transport) Before using the unit, turn the screw clockwise using a coin or
screwdriver.
Important: When you transport the unit, turn the screw counterclockwise to secure the turntable.
The silver screw on the back of the turntable is a balancer for both the turntable as well as for
the tone arm.
5
Page 6

C. Speed Selector.
D. Tone Arm holder.
E. Tone Arm.
Before use, completely loosen the fixed rope on the tone arm and lift the tone
arm up.
F. STYLUS
G. 45 RPM adaptor.
6
Page 7
Setup / Basic Operation
Setup
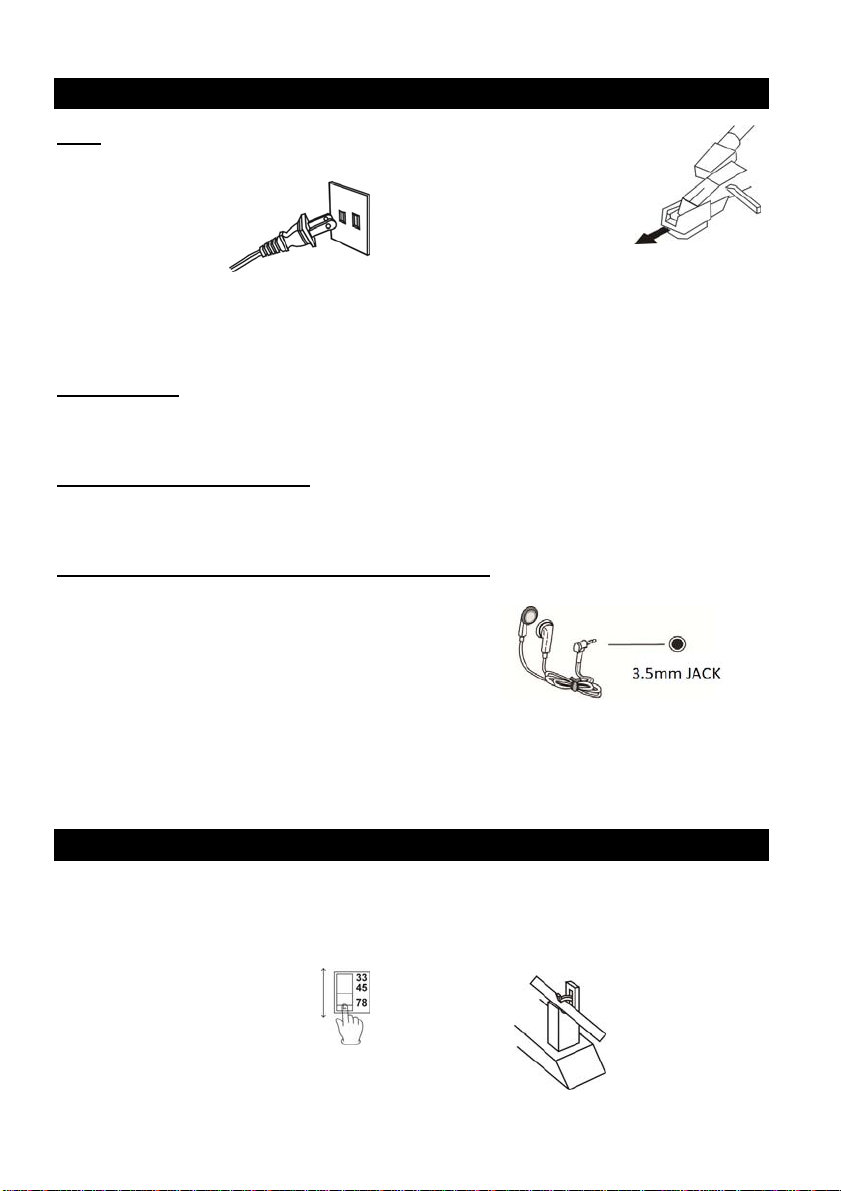
1. Remove white protective needle cover by gently pulling towards front of unit.
2. Remove any packaging materials from the unit.
3. Connect the AC power cord
to a wall outlet.
Note:
-You’re strongly recommended that this product should be operated only from the type of power
source indicated on the marking label.
-To prevent interference, avoid bundling audio signal cables together with the AC power cord.
Basic Operation
1. Push the POWER button to turn the unit on.
2. Select the source by rotate the selection knob ( PHONO/AUX/CD/FM/ BT).
3. Rotate the VOLUME knob to adjust to the desired sound level.
Listening through RCA LINE OUT
For amplifier device listening, first reduce the volume level to minimum. Insert the white and red
plugs on the RCA cable into the unit, then insert the opposite end into the amplifier device. Be sure to
connect the white plug to the white jack and the red plug to the red jack.
Listening through Earphones/Headphones (not included)
For private listening, first reduce the volume level to minimum.
Insert your headphones’ plug into the 3.5mm jack, then
adjust the volume up by turning the VOLUME knob.
Note: The speakers will automatically be deactivated while
headphones are plugged in.
CONDENSATION WARNING:
When the unit is moved from a cold or warm place, or is used following a sudden temperature change, there is the
danger that water vapor in the air may condense on the unit, preventing proper operation. In such cases, leave
the unit for 1-2 hours after plugging it into an AC outlet to allow it to stabilize at the temperature of its surroundings.
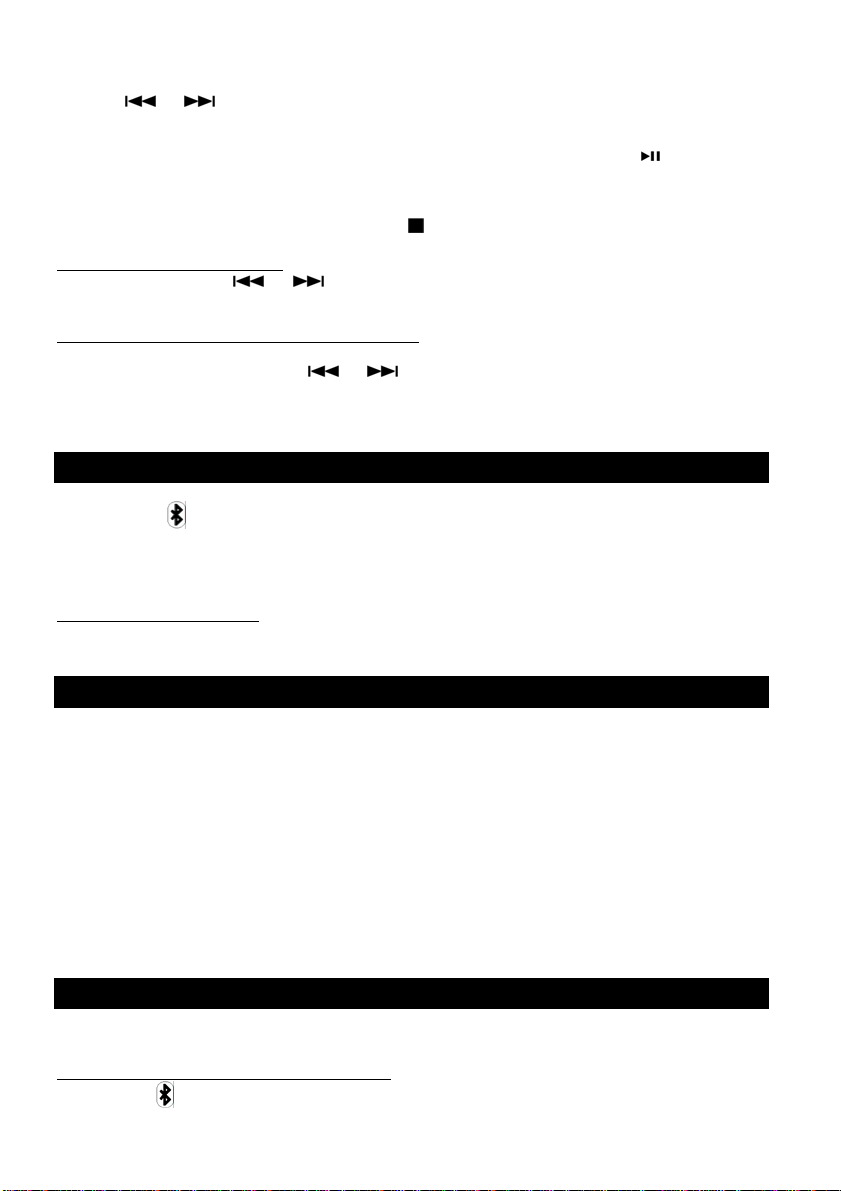
Listening to a Vinyl Record
1. Select “PHONO” function.
2. Gently open the top cover.
Note: Be careful not to pinch your finger when opening/closing the top cover.
3. Place a vinyl record on the turntable. When playing a 45 RPM record, use the included adaptor.
4. Select the appropriate speed (4).
5. Remove the tone arm-rest holder to release the tone arm.
6. Move the tone arm gently to the edge of the record (or the starting point of a track).
7
Page 8

The turntable will begin to turn.
7. When the record reaches its end, tone arm will stop at the center of the record and you must lift
and return the tone arm to the tone arm rest manually. Lock the tone arm-rest holder to protect
the tone arm.
Important:
- Closing the top cover will help prevent dust from settling on the turntable.
- Always relock the tone arm clip before transporting the unit.
- Do not place anything on top of the turntable cover, especially while playing a record.
Listening to a CD
1. Select “CD” function.
(Note: When no disc is set, “no” will appear on the display.)
2. Press the OPEN/CLOSE button
(Note: This button only works in CD mode.)
3. Place a disc on the tray with the printed label face up.
4. Press the OPEN/CLOSE button
5. Press the PLAY/PAUSE button (
(Note: The CD playback will start automatically.)
6. To temporarily pause playback, press the PLAY/PAUSE button (
7. To skip tracks forward or backward, press the corresponding skip button (
Pressing
to the beginning of the previous track.
8. To fast forward / rewind within a track, press and hold down the corresponding skip button until
the desired position is reached.
9. To stop playback, press the STOP
Important:
- Never place more than one disc on the tray.
- The disc must be placed in the center of the disc tray. An incorrectly loaded disc can
permanently damage the tray door mechanism.
- Do not push the CD tray – always use the OPEN/CLOSE button.
- It takes a moment for the unit to load a disc, during which all buttons will be temporarily
deactivated.
Repeat Playback
Each time the REPEAT button is pressed, the repeat mode will cycle through the following options:
REPEAT 1(Repeat one track)
The repeat indicator will flash and the current track will be played repeatedly. If you press the (
or
) button to select another track, the track you select will be played repeatedly.
REPEAT ALL (Repeat the entire CD)
The repeat indicator will stay lit and the entire CD will be played repeatedly.
Notes:
- Repeat playback works with CD discs only.
Programmed Playback
Up to 20 tracks can be programmed to play in the desired order.
Notes:
- Programmed playback works with CD discs only.
1. Select “CD” mode, then load a CD.
once will restart the current track. Pressing twice in succession will return
to close the tray.
) to begin playback.
). Press again to resume.
or ).
button
8
Page 9
2. While the CD is stopped, press the PROGRAM button.
3. “PROGRAM” indicator lights up and “01” blinks on the display.
4. Press (
5. Press the PROGRAM button again to set the next program track, “02” appears and blinks..
Repeat steps 4 thru 5 to program the additional tracks.
6. When the selection of track numbers has been finished, press the PLAY button (
program playback.
(Note: when all 20 program tracks are set, you press PROGRAM button and “FU” will appears on the
display)
7. To cancel the program mode, press the STOP (
To check the programmed order
In the stop mode, press (
programmed.
To add a track to the end of the programmed order:
In the stop mode, press the PROGRAM button.
Select a track number by pressing (
The current track will be added to the end of the program.
or ) to select a track number.
) to start
) till the program indicator won’t light.
or ) repeatedly to show the track numbers that have been
or ), then press the PROGRAM button.
Listening to the FM Radio
1. Select “FM/
2. Slide the slide switch on “FM”.
3. Tune to the desired station using the Radio Tuner Knob.
Note: In FM Mode, the “ST/BT” indicator lights up red when tuning in the stereo reception station.
Adjusting for Best Reception
FM broadcast: Extend and reposition the FM antenna.
” mode.
Listening to an External Audio Device (AUX Mode)
In AUX (auxiliary) mode, this unit can play audio from an external audio source (iPod, MP3 Player,
Portable CD Player, etc.)
There is a AUX IN jack on the front side of the unit. When connecting a device that has a headphone
jack, use the cable with 3.5mm plugs on either end with the front AUX IN jack.
1. Plug one end of the AUX IN cable (not included) into the AUX IN jack.
2. Plug the other end of the cable into the headphone jack of the external audio source.
NOTE: All operations are only available on your external device.
Important: If the front AUX IN and rear RCA LINE OUT are connected at the same time, only the
front AUX IN will be active.
Listening to an External Audio Device (BT Mode)
In BT (Bluetooth) mode, this unit can enjoy music from external devices which have a built‐in
Bluetooth feature.
GETTING CONNECTED USING BLUETOOTH
1. Select “FM/
” mode.
9
Page 10

2. Slide the slide switch on “ ” and the ST/BT indicator will flash blue.
3. Set the Bluetooth function of your external device when the apparatus is on.
4. Set to search Bluetooth device on your external device.
NOTE: The effective distance between your external device and this apparatus is 10 meters.
4. Wait for a while then find the “Wooden Music Center” on the paired devices list on your external
device and press “Wooden Music Center”.
If sometimes A window will ask you a password. Fill in “0000” then press “OK” on your external
device.
5. A few seconds later your Bluetooth connection is success and the blue indicator stay lit.
NOTE: Fast forward / rewind is only available on your external device.
Listening to a Cassette Tape
1. Load an audio cassette tape into the unit (located on the left side of the unit). Playback will
automatically begin.
2. Press button halfway to Fast Forward the tape.
Press button lightly and playback will resume.
3. Press button completely down to end playback and eject tape.
NOTE: When loading in a cassette tape, the SELECTION knob is not work and all other modes are
not work.
Maintenance / Proper Handling
Compact Disc Handling
• Always place the disc on the disc tray with the label side facing upw ard (comp act di scs can be pl ay ed/recorded
only on one side)
• To remove a disc from its storage case, press down on the center of the case and lift the disc
upward, holding it carefully by its edges.
• To clean a disc, wipe the surface from the center hole outward towards the outer edge with a soft, dry cloth.
• Never use such chemicals as record spray, antistatic sprays or fluid, benzine or thinner to clean discs; they will
irreparably damage the disc’s plastic surface.
• Discs should be returned to their cases after use to protect from dust and scratches.
• Do not expose discs to direct sunlight, high humidity, or high temperature for extended periods of time.
• Printable CD-R and CD-RW discs are not recommended, as the l abel side may become sticky and damage the
unit.
• Use a soft oil-based felt-tipped pen to write information on the label side. Never use a ball-point or hard-tipped
pen, as doing so may damage the recorded side.
• Do not use irregularly-shaped CDs (octagonal, heart shaped, business card size, etc),
as they will damage the unit.
• Read all precautions supplied with any CD-R or CD-RW disc
• Never handle a disc with dirty fingers.
• Never insert a disc that has a crack on the surface.
Handling Vinyl Records
• Do not touch the record’s grooves. Only handle records by the edges or the label with clean hands. Touching
the record surface will cause your record’s quality to deteriorate.
• To clean a record, use a soft anti-static cloth to gently wipe the record surface.
• Keep records in their protective sleeves when not in use.
• Always store records upright on their edges
• Avoid placing records in direct sunlight, close to a heat source (radiators, stoves, etc.), or in a location subject
to vibration, excessive dust, heat, cold or moisture.
General Care
• When removing the power plug from the wall outlet, always pull directly on the plug.
• To keep the laser pickup clean, do not touch it, and do not forget to close the disc tray.
Never pull the cord.
10
Page 11
• Do not attempt to clean the unit with chemical solvents as this might damage the finish.
• For cleaning, only use a clean, dry cloth.
• In order to shut off the power to this product completely, unplug the power cord from the
wall outlet. Be sure to unplug the unit if you do not intend to use it for an extended period
of time.
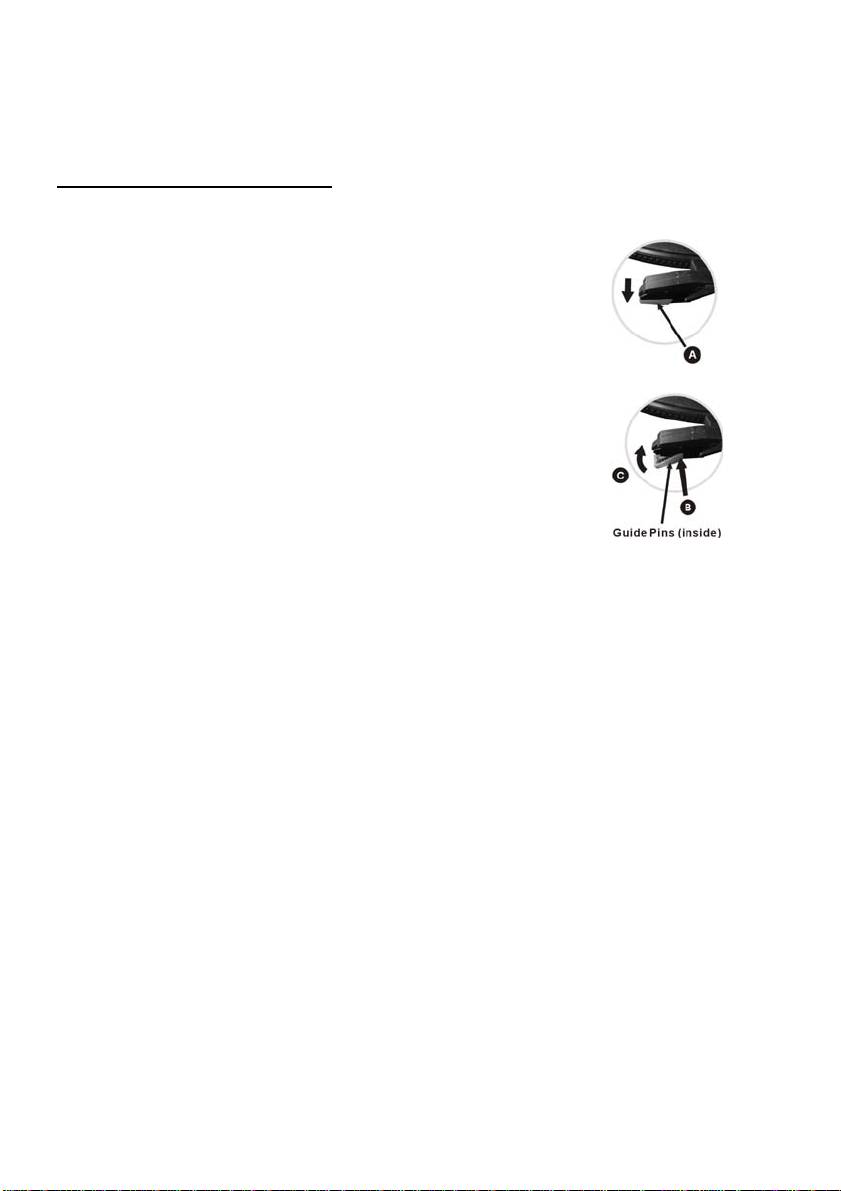
How to Replace the Turntable Stylus
The stylus should last about 50 hours under normal use. However, it is recommenced that the stylus
be replaced as soon as you notice a change in sound quality. Prolonged use of a worn-out stylus
may damage the record. The highest speed of 78 RPM records would wear
out the stylus more quickly.
Removing the old stylus:
1. Set a screwdriver at the tip of the stylus and push downward (A).
2. Remove the stylus by pulling it simultaneously downward and forward.
Installing a new stylus:
1. Hold the front tip of the stylus and insert its rear edge (B) first.
2. Push the stylus upwards (C) until the tip locks into place.
Caution:
z Do not bend the stylus.
z Do not touch the needle to avoid injury your hand.
z Turn off the unit’s power before you replace the stylus.
z Keep out of reach of children.
11
Page 12

Specifications
GENERAL
Power Requirements
Power Consumption
Dimensions (W x H x D)
Weight 7 kg. (approx.)
AMPLIFIER
Output Power
Frequency Response
SPEAKER SYSTEM
Type
Impedance
Output Power Max. 6W
FM Radio
Range
CD PLAYER
Frequency Response
Signal-to-Noise Ratio
CASSETTE PLAYER
Track System
Tape Speed
Wow and Flutter 0.4% (WRMS)
Frequency Response
RECORD PLAYER
Motor
Drive System
Speeds 33-1/3rpm, 45 rpm and 78 rpm
S/N Ratio
Cartridge Type
Stylus 402-M208-165
BLUETOOTH
Bluetooth Version
Bluetooth Profiles A2DP, AVRCP
Bluetooth Frequency range
Operating Distance
AC 120 V~ 60 Hz
30W
460 x 255 x 340mm (approx.)
5 W + 5 W
60 to 20, 000 Hz
2-way
8 ohms
88 to 108 MHz
60 to 20, 000 Hz +/-4 dB
55 dB (IEC-A)
4 Track, 2 channel stereo
4.8 cm/sec
125 to 6300 Hz +/-6 dB
DC servo motor
Belt Drive
More than 50 dB
Ceramic Stereo Cartridge
Bluetooth V2.1
2.402GHz-2.480GHz
10 meters
12
Page 13

Troubleshooting Guide
Symptom Possible Cause Solution
• Unit will not power on. • Unit is unplugged. • Connect the unit to the AC
• No sound output from
speakers.
• The volume level is set too low.
• The input selector does not
match the playback source.
• Noise/Distortion in
sound output.
GENERAL
• Unit fails to respond. • It might result from external
• The unit is too close to a TV set
or another interfering device.
factors such as ESD
(Electro-static discharge).
• The tape does not play. • The cassette tape is not
inserted properly.
TAPE
• Cannot listen to any
station, or signal
appears weak.
• The tape has reached the end.
• The station is not tuned-in
properly.
• A TV set is being used nearby
and is interfering with the radio
reception.
• The sound is distorted. • The antenna is not oriented
FM RADIO
• CD stops immediately
after starting, or unit
pauses or stops during
play.
• No sound. • The CD player is paused. • Press the PLAY/PAUSE
• CD playback is noisy, or
playback stops or skips.
properly.
• The CD is inserted upside
down.
• The CD is dusty or dirty or there
is condensation on the CD.
• The CD is scratched, damaged
or warped.
• The disc is very dirty.
power supply.
• Adjust the volume.
• Select the correct input
source.
• Turn off the TV or other
appliance, and relocate
the unit.
• Disconnect the power cord
and external audio device.
Re-plug the power cord
after one minute.
• Insert the cassette tape
correctly.
• Flip the cassette.
• Properly tune-in the
desired station.
• Turn-off the interfering TV
set.
• Re-orient the antenna until
reception improves.
• Insert the CD with the
printed side right-side up.
• Carefully clean and dry the
CD.
button.
• Replace CD with an
undamaged one.
• Carefully clean the CD.
• CD tray will not open. • AM/FM mode is selected. • Select AUX, PHONO, CD,
CD PLAYER
• Buttons are not
functioning correctly.
• Decline in turntable
• The unit is processing
information (“--- Busy” is
displayed)
• The unit needs to be restarted
• The turntable stylus is worn out • Replace the stylus.
or TAPE mode.
• Wait until the unit finishes
processing.
• Turn the unit off, then on
again.
audio performance
PHONO
• No sound output with
external audio device
plugged into rear AUX
AUX
in jack.
• Both AUX in jacks (front and
rear) are plugged.
• Unplug the front AUX in
Jack.
13
Page 14

• No sound • The unit is not switch to
Bluetooth mode
• Your device’s and/or the unit’s
volume not turn up.
• Your device is too far from the
unit or there’re some obstacle
between your device and the
unit
Bluetooth
• Sound is garbled • Your device’s and/or the unit’s
volume not adjust properly.
• Unable to pair with a
Bluetooth device
• Your device doesn’t have
Bluetooth connectivity.
• The Bluetooth pairing is not
successful
For further assistance with your product, call Innovative Technology at
TOLL FREE# 1-877-ITECH-97 (1-877-483-2497).
• Ensure the unit is switched
to Aux/ BT mode.
• Move your Bluetooth
device closer to unit
• Turn up the volume on
your portable device
and/or the unit.
• Turn off your Bluetooth
device and unit then power
them both back on
• Turn down the volume on
your device/phone and the
unit
• Confirm that your device is
Bluetooth compatible.
• Repair the unit and device
again.
14
Page 15

FCC Statement
This equipment has been tested a n d fo un d to comply with the limits for a C la ss B d i gital device, pursuant to
Part 15 of the FCC Rules. These limits are designed to provide reasonable protection against harmful
interference in a residential installation. This equipment generates uses and can radiate radio frequency
energy and, if not installed and used in accordance with the instructions, may cause harm ful interference to
radio communications. However, there is no guarantee that interference will not occur in a particular
installation. If this equipment does cause harmful interference to radio or television reception, which can be
determined by turning the equipment off and on, the user is encouraged to try to correct the interference by
one of the following measures:
- Reorient or relocate the receiving antenna.
- Increase the separation between the equipment and receiver.
- Connect the equipment into an outlet on a circuit different from that
to which the receiver is connected.
- Consult the dealer or an experienced radio/TV technician for help.
This device complies with Part 15 of the F CC R ules. O per ati on is subje ct to t he follow ing tw o c onditi on s: (1 )
This device may not cause harmfu l in te rf er en ce, an d (2 ) t his de vic e mu st acc e pt any int er fe ren ce r ec eive d,
including interference that may cause undesired operation.
Any changes or modifications not expressly approved by the party responsible for compliance could void
the user's authority to operate this equipment.
CALIFORNIA PROP 65 WARNING
"WARNING" This pro duct co ntai ns c hemicals k nown to the State of Califo rnia to ca use b irth def ect s or ot her
reproductive harm. For mo re information on these regulation s and a list of chemica ls, log on the follo wing
website address :
http://www.oehha.ca.gov/prop65.html
15
Page 16

Innovative Technology Electronics Corp.
Limited Warranty: 90 Days Labor, One Year Parts
Innovative Technology Electronics Corp. (IT) warrants the product to be free from “Defects” in
materials under normal use for a period of “One Year” from the date of the original purchase. The
Warranty is “Not” transferable. IT agrees, within the initial “90 Day” period, to repair or replace the
product if it is determined to be defective at “No Charge”. It is further agreed that IT will cover the cost
to repair or replace damaged “Parts” only for a total period of “One Year” from the date of the original
purchase. The warranty does not cover cosmetic damage, antennas, AC cords, cabinets, headbands,
ear-pads, or damage due to line power surges, connection to improper voltage supply or settings,
misuse, mishandling, accident, acts of God or attempted repair by an unauthorized service agent.
To obtain service, the purchaser MUST present an original sales receipt / proof of purchase.
Please contact us at www.ithomeproducts.com to request an RMA (Return Material
Authorization) number to return products for service or replacement. Returns without an
RMA number on the package will be refused and returned to sender. Upon receipt of the returning
item and our full inspection (IT) may issue a replacement to customer for the same item or of one that
has equivalent value and features. To return an item, supply full name, return address, phone
number, item purchased, receipt of purchase and reason for return to obtain RMA number.
All returns must be in the original packaging or reasonable substitute to prevent damage.
Customer “Must” include full name, shipping address and telephone number inside of package. No
return will be shipped back to a PO Box or APO address.
Please include your check or money order in the amount of
• USD$5.00 for items $10.00 to $39.99 (Price Paid Per Unit)
• USD$10.00 for items $40.00 to $99.99. (Price Paid Per Unit)
• USD$16.00, for items $100.00 and up. (Price Paid Per Unit)
• Shipping fees are non-refundable
to be payable to Innovative Technology Electronics Corp.(for handling and return
shipping charges) (IT) will not be responsible for delays or unprocessed claims resulting
from a purchaser’s failure to provide any / all of the necessary information.
Send all inquiries or RMA request via our website www.ithomeproducts.com/support.
Innovative Technology Electronics Corp.
1 Channel Drive
Port Washington, NY 11050
Toll free: 1-877-483-2497
Website for support: www.ithomeproducts.com/support
There are no express warranties except as listed above.
REPAIR OR REPLACEMENT AS PROVIDED UNDER THIS WARRANTY IS THE EXCLUSIVE
REMEDY OF THE CUSTOMER, (IT) SHALL NOT BE LIABLE FOR ANY INCIDENTAL OR
CONSEQUENTIAL DAMAGES FOR BREACH OF ANY EXPRESS OR IMPLIED WARRANTY ON
THIS PRODUCT EXCEPT TO THE EXTENT PROHIBITED BY APPLICABLE LAW. ANY IMPLIED
WARRANTY OF MERCHANTABILITY OR FITNESS FOR A PARTICULAR PURPOSE ON THIS
PRODUCT IS LIMITED IN DURATION TO THE DURATION OF THIS WARRANTY.
Some states do not allow the exclusion or limitation of incidental or consequential damages, or
limitations on how long an implied warranty lasts, so the above exclusions or limitations may not
apply to you. This warranty gives you specific legal rights and you may also have other rights, which
vary from state to state.
16
Page 17

200B140600E
17
 Loading...