

Page 1

User Guide
Multi-protocol Gateway
User guide
V1.1
Copyright © 2018 leedarson I
Page 2

TABLE OF CONTENTS
1. Introduce ................................................................................................................................... 1
2. Gateway Speciality .................................................................................................................... 1
3. PACKING ACCESSORIES ............................................................................................................. 2
4. GATEWAY INSTRUCTION ........................................................................................................... 2
5. GATEWAY USER GUIDE .............................................................................................................. 4
5.1 NETWORK MAP ................................................................................................................... 4
5.2 HARDWARE CONNECTION .................................................................................................. 4
5.3 DOWNLOAD APP ................................................................................................................. 5
5.4 GATEWAY JOIN IN NETWORK .............................................................................................. 5
5.5 DEVICE JOIN IN THE NETWORK ........................................................................................... 7
5.6 CREATE SCENE ..................................................................................................................... 8
6. Compliance Information ........................................................................................................... 9
7. Attention ................................................................................................................................. 10
Copyright © 2018 leedarson II
Page 3
User Guide
1. INTRODUCE
Leedarson Multi-protocol Gateway is a Z-WAVE controller and Zigbee coordinator, it supprts ZLL,
ZHA, Zigbee 3.0 and Z-wave protocol. This product provide standard Ethernet interface, ZigBee
network and Z-wave network can be connected to the LAN or the Internet, the user can easily
control any product based on the ZigBee and Z-wave protocol through a variety of mobile
intelligent terminal. All non-battery operated nodes within the network will act as repeaters
regardless of vendor to increase reliability of the network. it’s safe and reliable wireless data
transmission.
2. GATEWAY SPECIALITY
1) Support ZigBee ( ZHA, ZLL, 3.0) Protocol (2.4GHz , 50m)
Wi-Fi 2.4G (2.4GHz, 50m)
2) Z-WAVE radio frequency:
908.42MHz (US)
3) Z-WAVE Range: More than 100m outdoors
About 30m indoors (dependingon building materials)
4) Communication range up to 50 meters (Line of sight).
5) Connect nodes up to 50, just right for smart home application.
Copyright © 2018 leedarson 1
Page 4

NAME
Quantity
Remark
GATEWAY
1PC
Power Adapter
1PC
Ethernet cable
1PC
Gateway User Manual
1PC
6) Plug and play by RJ45 Ethernet port or WiFi.
7) Styling design、simple、neat, power cable and Ethernet cable are connected inside case.
8) Dimensions: 110mm*110mm*31mm
9) indoor use only
10) Operating temperature: 0℃~40℃
11) Storage Temperature: -20℃~60℃
12) Operating Humidity: 20%~85%
13) Storage Humidity: 5%~95%
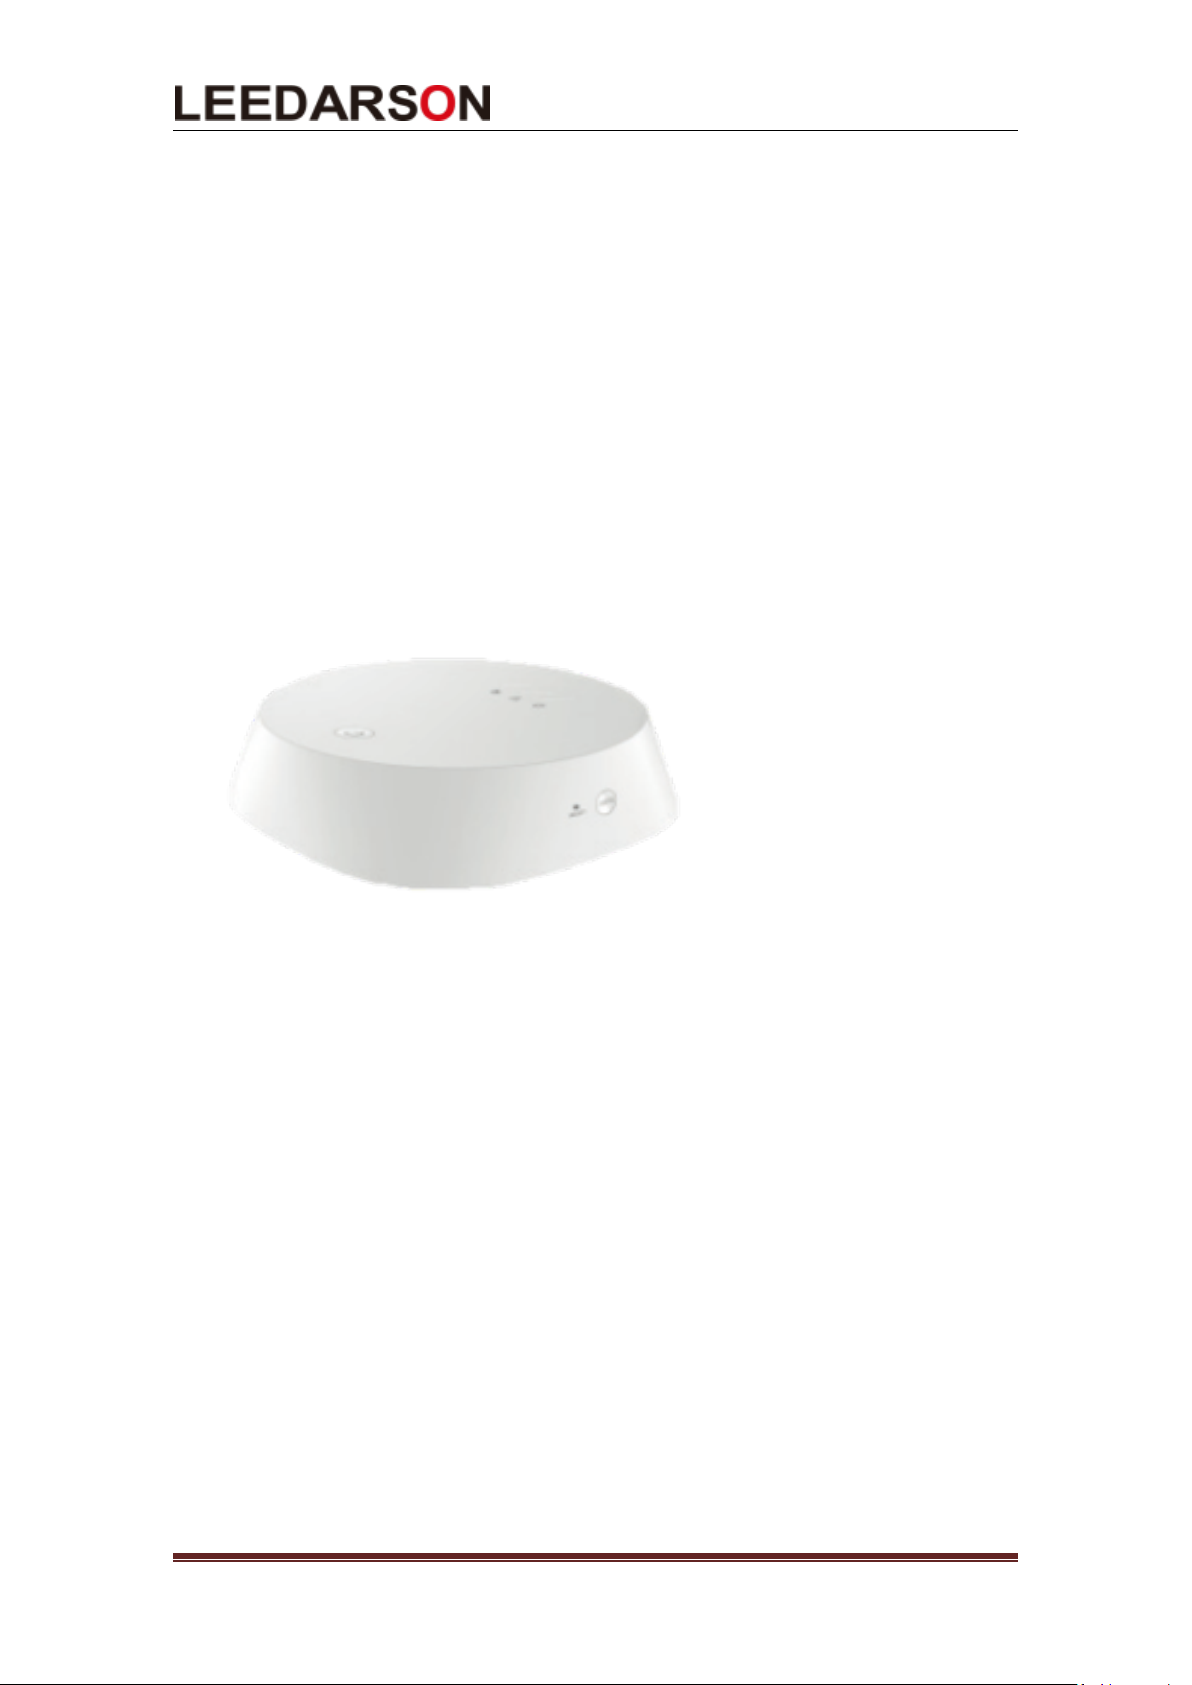
3. PACKING ACCESSORIES
4. GATEWAY INSTRUCTION
2
Page 5

1
LEDS
LED States
2
Power LED
On
Off
Flash
3
Power on
Power off
NO
4
WAN LED
On
Off
Flash
5
Network
connected, No
data
communication
Network
disconnection,
no data
communication
Network
connected, data
communication
6
LAN LED
On
Off
Flash
7
Network
connected, No
data
communication
Network
disconnection,
no data
communication
Network
connected, data
communication
RESET KEY: Press reset key to clean up all setting parameter. After reset, you need
connect gateway to router and launch searching to add devices to gateway.
WPS KEY:
POWER KEY: Press power key to power on/off the gateway.
POWER LED: Power indicator, blinking during the gateway searching time.
LAN LED: LAN indicator, turn on upon connecting to router successfully.
WAN LED: WAN indicator, turn on upon connecting to cloud service.
Power Adapter Port: Connect to the power adapter.
RJ45 Ethernet port:Connect to router by Ethernet CAT. 5E cable.
Gateway Funciton LED Status
3
Page 6

Gateway
APP
Devices
TCP/IP
TCP/IP
5. GATEWAY USER GUIDE
5.1 NETWORK MAP
5.2 HARDWARE CONNECTION
Step 1: Please open the gateway upper cover. Connect the power adapter to power
port. Connect the RJ45 cable from router to Gateway RJ45 port
Step 2: Turn on power of both router and gateway. (press the power key to turn on
the power, if you need to rebuilt the network , reset the Gateway)
Step3: Gateway will get connection to router upon receiving IP assignment from router
automatically.
Step4: Connect your smartphone to the same WiFi with the gateway. Make sure your
smartphone and the gateway in the same network.
4
Page 7

5.3 DOWNLOAD APP
1) Scan the QR code :
IOS QR code
2) Download the APP:
5.4 GATEWAY JOIN IN NETWORK
Step 1: Run the APP and press “Try it” on the bottom of screen.
5
Page 8

Step 2: Press the manual on the top left corner, click “Manage Device”.
Step 3: Chose your Gateway MAC address, the gateway joining the network successfully.
6
Page 9

5.5 DEVICE JOIN IN THE NETWORK
Step 1: Click “+” and “Add Device”.
Step2: chose add smart lighting to search smart lamps.
7
Page 10

Step 3: add the lamps successfully, presse and hold the lighting icon to set the lighting.
5.6 CREATE SCENE
Step1: Click “+” and “Add Scene”.
8
Page 11

Step 2: add the scene successfully, presse and hold the scene icon to set the scene.
6. COMPLIANCE INFORMATION
FCC ID: 2AB2Q6AAGWZBH0
This device complies with Part 15 of the FCC Rules. Operation is subject to the following two
conditions: (1) this device may not cause harmful interference, and (2) this device must accept any
interference received, including interference that may cause undesired operation.
FCC Caution:
Changes or modifications not expressly approved by the part responsible for compliance could
void the user's authority to operate the equipment.
FCC RF Radiation Exposure Statement Caution: This Transmitter must be installed to provide a
separation distance of at least 20 cm from all persons.
FCC Statement:
This equipment has been tested and found to comply with the limits for a Class B digital device,
pursuant to part 15 of the FCC Rules. These limits are designed to provide reasonable protection
against harmful interference in a residential installation. This equipment generates, uses and can
9
Page 12

radiate radio frequency energy and, if not installed and used in accordance with the instructions,
may cause harmful interference to radio communications. However, there is no guarantee that
interference will not occur in a particular installation. If this equipment does cause harmful
interference to radio or television reception, which can be determined by turning the equipment
off and on, the user is encouraged to try to correct the interference by one or more of the
following measures:
Reorient or relocate the receiving antenna.
Increase the separation between the equipment and receiver.
Connect the equipment into an outlet on a circuit different from that to which the receiver is
connected.
Consult the dealer or an experienced radio/TV technician for help.
7. ATTENTION
1. If the Gateway needs to be cleaned, remove power and use a soft cloth with a little alcohol
and wipe down the device.
2. This product is just for indoor use only.
3. Product can be included and operated in any Z-Wave network with other Z-Wave certified
devices from other manufacturers and/or other applications. All non-battery operated
nodes within the network will act as repeaters regardless of vendor to increase reliability
of the network.
4. If you want your product to be a security device that use secure/encrypted message to
communicate in a Z-Wave network, then a security enabled Z-Wave controller is needed.
10
 Loading...