

Page 1

Instruction Manual
Provided By
http://www.MyBinding.com
http://www.MyBindingBlog.com
Ledco
Signmaster 44"
Laminator
Page 2

READ ALL PRECAUTIONS & INSTRUCTIONS
CAREFULLY BEFORE OPERATING LAMINATOR
Setup
Instruction
Operation
Lamination
Maintenance
SIG N MASTER 44
LAMINATOR
TH E RM AL A N D PR ESSURE SEN SITIVE
R O LL LAMIN AT OR
OPERATION MANUA L
JUNE 2002
Page 3

IMPORTANT: Remember that you cannot use heat lamination on thermal paper,
such as typical fax paper, because it is activated by heat and will turn black. Be
careful about laminating anything that will be affected by heat. For example, the
colors in crayon drawings may run together or be smeared, especially if the
crayon layer is heavy. Light crayon drawings may not be affected, but test an
expendable sample of any item that may not laminate well.
Remove paper clips and staples because they can damage the rubber rollers.
Do not laminate one-of-a-kind documents unless you are sure of your laminating
skills and can afford to damage or ruin the document.
Do not laminate valuable items such as stamps, baseball cards, autographs, or
other collectibles because the value of such items can be destroyed by
lamination. Collectors generally value these items only in their original state.
IMPORTANT: Éviter de plastifier du papier thermosensible, comme le papier de
télécopieur, pusqu’ll noircira sous l’effet de la chaleur, et enlever les trombones
et les agrafes gul risquent d’endommager les rouleaux de caoutchouc. Prendre
certaines précautions avant de plastifier des articles susceptibles de réagir à la
chaleur comme les dessins au pastel dont les couleurs baver et se mélanger,
surtout si la couche de pastel est épaisse. Les pastels en couche mince peuvent
ne pas réagir, mais, en cas de doute, il est préférable de faire un essai avec un
échantillon perdu.
Ne pas plastifier les documents importants dont il n’existe qu’un seul exemplaire,
à moins de bien malitriser la technique de plastification.
Ne pas plastifier non plus les articles de collection comme les trimbres, les cartes
de baseball, les autographes ou autres, qui peuvent perdre leur valeur pour les
collectionneurs s’ils ne sont plus dans leur état d’origine.
IMPORTANTE: Recuerde que no puede laminar papel térmico, tal como el
papel de fax tipico, ya que es activado por el calor y se tornará negro. Retire
también cualquier sujeta-papeles o grapa, puesto que pueden danar los rodillos
de goma. Evite laminar cosas sensibles al calor, por ejemplo, los colores de
dibujos hechos en lápiz de pastel pueden no ser afectados, pero ensaye con
alguna muestra descartable, en los ìtemes que podrían no laminarse bien.
No lamine ningún documento único, a no ser que esté muy seguro de sus
habilidades de laminador y pueda permitirse arruinar el documento.
No lamine artículos de valor, como estampillas, tarjetas de béisbol, autógrafos,
u otros coleccionables, ya que su valor puede ser destruido por la laminación.
En general, las coleccionistas valoran este tipo de artículo en su estado original.
1
Page 4

SIG N M ASTER 44
TABLE OF CON TEN TS
1-1 SAFETY PRECA UTI ONS
1-2 Unpacking and inventory
2 -1 INTRODUC TION
2-2 Warranty
2-3 Principles of operation
2-4 Features and benefits
2-5 Option
2-6 Definition of terms
2-7 Specifications
3 -1 IN S T A L L A T IO N & O P E R A T IO N
3-2 Threading the laminator with PSA film
3-3 Application notes for PSA laminating & mounting
3-4 Application notes for Durafilm pouch laminating
4 -1 P R E V E N T IN G A N D S O L V IN G P R O B L E M S
5-1 MAI NTENANCE
5-2 General cleaning
5-3 Cleaning the rubber rollers
5-4 Lubrication
2
Page 5

1 -1 S A F E T Y P R E C AU T IO N S
DO NO T O PERATE TH IS MAC H INE UNT IL Y OU H AV E READ AND FULLY
U N D E R S T O O D T H E F O L L O W IN G S A F E T Y P R E C A U T IO N S .
1. Never opera te this machine wi tho ut re mi nd i ng yo ur sel f that a l amina tor
is a powerful and poten tially dangerous tool. If misused, used careless ly,
or us ed with out observing the rules of safe op eration, very s erious inju ry
can result.
2. Never operate this machine without all guards, housings, safety shields,
stop swit c hes or ot her saf ety devic e s in plac e a nd full y ope ra t i onal.
3. Never operate this machine unless you have been fully trained and have
rece iv ed and und er sto o d all oper a tin g in structio ns. M a k e sure y o u k no w
how the machine works and how it is controlled.
4. Never o per a te this mac hine if it is not wo r king pro per l y or if you notice
any abnormality in its performance.
5 . N eve r ta m p er with, rew ire, or byp as s a n y con tr ol or s afety d ev ice on th is
machine.
6. Always keep all parts of your body clear of the rollers when the power is
on.
7. Never attempt to clean the laminating rollers when the power is on.
8. Never remove the machine housing or attempt any kind of maintenance
without di sconnec ting powe r to t he unit.
9. Always be sure all persons are clear of the machine before advancing or
reversing the pressure rollers, especially when multiple operators or
observers are present.
1 0. N ever w ear loos e clothin g, ties , jewelry o r any item which could be
caught in the rollers or machinery when operating the machine. Operators
with long hair must put their hair up before running the machine.
11. Always keep your hands clear of any slitter mechanism or blade except
when the power is off and you intend to adjust the mechanism or change a
blade.
NOTICE TO EMPLOYER: A copy of these safety precau tions must be g iv en to all
operators, set-up personnel, maintenance people, and supervisors of this
m achine. A cop y sh ould also be hung on the m achine readily acces sible and
visible to the operator. Additional copies are available upon request.
IMPORTA NT: W h er e a langu age ba r r ier or insufficient schooling wo uld prevent a
person from reading and understanding these safety precautions, you should
either tr an sla te thi s info rmati o n o r h av e it re ad o r inte r p re ted to th e p er s o n, and
get assurance that it is understood.
3
Page 6

1 -2 U N P A C K IN G A N D IN V E N T O R Y
The laminator arrives fully assembled, except some parts may be packed off the
machine to avoid shipping damage. Upon arrival, inspect the unit thoroughly
using the packing list. Please follow these steps to correct any problem with your
shipment. Ledco, Inc. cannot accept any responsibility for damage or loss unless
you notify us within ten days of receipt of shipment and follow these procedures:
BREAKAGE OR DAMA GE
It is imperative that any shipping damage be reported and a claim filed with the
delivering carrier immediately upon receipt of damaged shipment. Procedures
for reporting damage depend on the method of shipment. Please note damage
on bill of lading.
FREIGH T, EXPRESS, o r TRUC K D ELIV ERY
According to the contract terms and conditions of the carrier, the responsibility of
the shipper ends at the time and place of shipment. The carrier then assumes
full responsibility for the shipment.
1. Notify Ledco IM M ED IA TE LY .
2. Hold damaged goods with container and packing for inspection by the
examining agent. Ledco will arrange the inspection if shipment was prepay and
add. If collect, per your carrier, notify carrier and call Ledco.
DO NOT RETURN ANY GOOD S TO LEDC O PRIOR TO INSPECTION AND
AUTHORIZATION BY LEDCO.
3. For prepay and add shipments submit a copy of the inspector’s report to
Ledco. Ledco will file the claim with the carrier and replace your machinery if
necessary. You will be credited for the damaged machinery when the claim is
processed.
SHORTAGE
1. Check the packing list notations. The apparent shortage may have been
marked as an intentional short-shipped (back-ordered) item.
2. Re-inspect the container and packing material, particularly for smaller
items.
3. Make certain that the item was not removed by unauthorized personnel
prior to complete unpacking and inventory.
4. Call us and send immediate, written notification of the shortage.
I NCORRECT SHIPMENT
1. If the material you receive does not correspond with your order, notify
Ledco immediately. Include the order number and item(s).
2. Hold items until return instructions are received.
RETURNS: DO NOT RETURN DAMAGED OR INCORRECT ITEMS
UNTIL YOU HAVE RECEIVED SHIPPING INSTRUCTIONS AND
AN AUTHORIZATION NUMBER FROM LEDCO.
4
Page 7

2 -1 INTRODUC TION
The SIGNMASTER 44 is designed to provide quality lamination of a wide range
of papers and materials up to ½ inch thick using film up to 10 mil thick. Common
applications include:
• transfer tape applications
• vinyl application to sign blanks
• mounting and overlaminating using thermal mounting pouches
• one sided over lamination using pressure sensitive films
• lamination of inkjet prints and other prints produced on printers using other
technologies
Slitter attachment is optional.
To assure th e best pe r for ma nce fro m yo ur new laminat o r , pl ease fo llo w the
safety, installation, operation, and maintenance instructions in this manual.
Rea d th e ma n u a l b efo r e u sing the la min a tor . Keep manu al w ith ma ch ine,
and peri odica lly revie w. Warranty a nd part s informati on included within.
We take this opportunity to thank you for selecting the SIGNMASTER 44
laminator and to assure you of our commitment to your satisfaction with our
products.
As you unpack your new laminator, please complete the following information.
Always have this information ready when calling.
Dealer Where Purchased____________________________________________
Installation Date_____________________ Serial # _______________________
(located at the back of the laminator, next to the power connector)
WARNING: High temperatures are present and care should be exercised to
prevent burns to hands and arms when operating the laminator. The
laminator should not be operated without the Plexiglas safety shield.
MISE EN GARDE: Ne pas utiliser la machine à plastifier sans son écran
protecteur en plexiglass.
ADVERTENCIA: No utilice el plastificado sin tener el protector de
plexiglass en su lugar.
Ledco, Inc. • 4265 North Main Street • Hemlock, NY 14466
Fax 585-367-2978 • Phone 585-367-2392
Web: www.ledcoinc.com E-mail: ledco@ledcoinc.com
5
Page 8

2-2 WARRANTY
This laminator is guaranteed against defects in material and workmanship for a period of
two years after date of shipment. Defective parts will be replaced without cost within the
warranty period, provided the laminator has not been abused, altered or operated
contrary to instructions. Ledco, Inc. shall not be liable for any alternations or repairs
except those made with its written consent.
This obligation under warranty shall not extend to the following:
• The adjustment or replacement of parts which are the normal responsibility of the
owner. For example, rubber rollers, scratched or chipped paint, loose fasteners, or
other items that show wear under normal use; i.e. “normal wear parts.”
• Normal operating adjustments to heat, speed, tension, etc.
• Parts that are not manufactured by Ledco, Inc. If these items are warranted by the
individual manufacturer, their warranty is passed on to the original purchaser. Ledco,
Inc. does not incur any obligation or liability as a result of the warranties which are
the sole responsibility of the appropriate individual manufacturer.
Any laminator, which proves defective during the warranty period, may be returned to
Ledco, Inc. unless it is decided that the necessary repairs can be made during a service
call. Notice of the defect should be submitted in writing or by phone to the dealer or to
Ledco before any steps are taken to repair or return the machine. tel: 585-367-2392
fax: 585-367-2978
If the machine is returned, the following should accompany it.
• Customer name, address and phone number
• Written particulars regarding the malfunction
• Date of Installation
• Serial number of the machine.
• A ll re tur ns must h a v e a r etur n author i z ation n umb e r o n the o u tsid e o f th e
shi pp i ng c o ntainer .
Send all returned equipment freight PREPAID to:
L ed co , In c., 4 2 65 N o rth M ai n S tr eet, H em lo ck , N Y 1 4 4 66
If your machine needs servicing after the warranty has expired please contact your
dealer. Ledco, Inc. does offer technical support if your dealer is unable to assist.
This warranty is expressly in lieu of all other warranties expressed or implied, including
the warranties of Merchantability and Fitness For Use and of all other obligation or
liabilities of Ledco, Inc., and said company neither assumes nor authorizes any other
person to assume it for any other obligation or liability in connection with the sale of this
laminator except as provided for above.
Further, this warranty will not apply to any machine or part thereof which has been
damaged as a result of an accident, shipping, abuse, misuse, or neglect of the machine.
The warranty is also void if the laminator has been altered or repaired by any other than
an authorized repair facility or dealer. If you have any questions about this warranty,
contact Ledco. Phone: 585-367-2392 Fax: 585-367-2978
•
6
Page 9

2 -3 P R IN C IP L E S O F O P E R A T IO N
The SIGNMASTER44 thermal roll laminator automates the application of transfer
tape, and other pressure-sensitive adhesive (PSA) tapes, films or thermal
mounting pouches. SIGNMASTER 44 conveniently & easily applies transfer tape
to weeded vinyl, transfer-taped vinyl to sign blanks, and will apply clear PSA
overlaminates to finished signs or promotional materials and doubles as a pouch
laminator. SIGNMASTER 44 laminators are ideal for mounting applications and
can accept substrates up to ½ inch thick.
Designed for sign and graphics applications, SIGNMASTER 44 machines are
used in many settings, including sign shops, photo-finishing labs, reprographics
shops and manufacturing plants.
When signage is ruined during the taping or application process, the cost of recutting, re-weeding, and reapplying will usually take all the profit out of a job.
Whether it’s transfer tape, vinyl, sandblast or acid resist tape, pre-masks,
adhesive film, clear polyester, or other pressure-sensitive material, an
SIGNMASTER 44 applicator will put it down effortlessly with no bubbles or
wrinkles.
Using an SIGNMASTER 44 is much easier than doing the same work by hand.
Fast and versatile, it requires little instruction for you to be up and running.
Supply roll tension is controlled with knobs. SIGNMASTER 44’s are forgiving.
They will apply most materials under a wide range of speeds and pressure or
tension settings.
The SIGNMASTER 44 is a heavy-duty commercial laminator designed for the
most rigorous and demanding jobs and workloads.
7
Page 10

2 -4 F E A T U R E S & B E N E F IT S
Your new machine has many standard features and accompanying benefits that
set it apart from other laminators:
• A r elease liner take-up with an adjustable clutch, takes up the release liner
found on most pressure-sensitive films.
• Roller bearings, alloy construction and high quality motors insure a long an d
trouble-free life for these machines.
• A variable speed motor control allows operators to apply different materials
to different substrates. A preset 3-function switch allows operation in variable
speed mode, a preset film speed mode and a preset pouch speed mode.
• The feed tray is non-ferrous, so magnetic materials may be applied.
• The supply roll tension knobs are important, because without some supply
roll tension, most films and tapes will wrinkle during application.
• A reverse drive swit ch makes it simple to back material out of the laminating
rollers or correct material wrap-around.
• A fo ot pe da l is a standard feature that frees hands to align and feed work.
• A sta nd is included with the machine.
• A safety shield with electronic interlock prevents operation of the machine if
the guard and the feed tray are not in place, protecting operators and other
employees.
• Two safety stop buttons on both sides of the machine will automatically
stop the machine when the operator pushes them in.
• Manufactured in the U SA means quality, better service and faster parts
availability.
• Co rrect an d ev en lam ination p res s ur e is ensured by rubber rolls that are
spring-loaded and preset. The pressure is easy to adjust if required when
performing routine maintenance.
8
Page 11

2-5 OPTION
• Slitter attachment cuts material on the supply roll for application to narrower
substrates, for multiple-up production or for striping.
9
Page 12

2 -6 D E F IN IT IO N O F T E R M S
• PSA stands for pressure-sensitive adhesive, used for cold mounting of
images and for cold application of vinyl and clear overlaminates.
• Vinyl is the base or outer protective layer of many cold/PSA overlaminates.
• Acrylic is the type of adhesive most often used on vinyl and other types of
cold films.
• Substrate literally means under-layer. It can refer to material we print on, or
it can refer to the board we use to mount an image
• A web is the unwinding width of plastic coming off a supply roll, or the
continuous flow of laminate coming out the back of the laminator.
• The nip is the line where the two laminating rollers meet and lamination takes
place.
Overlaminate mounting is achieved by positioning the document to be
•
laminated on a board under film cover, insert sealed edge of board into
laminator. Allow material to cool. If masked, peel off white protective masking
and trim as desired.
Pouch laminat ing is achieved by using sled board with label side up. Center
•
document inside of film pouch, position pouch under the hold-down strip on
sled. Feed pouch into laminator, allow to cool. If masked, peel off white
protective masking.
• Mounting is achieved by positioning document to be mounted on treated dull
surface of board. Cover document with release sheet and feed into laminator.
Allow material to cool before removing release sheet.
10
Page 13

2-7 SPE CIFICATIONS
Max. lamination width 44”
Variable speed 1-25fpm
Laminating roller diameter 3.1250”
Supply roll core size 3"
Recommended film thickness 1 mil and up
Max laminating thickness ½”
Dimensions 64L 34W 51H
Shipping dimensions 71L 42W 51H
Weight/shipping weight 550/700
Motor 1/4 HP DC
Electrical 110V
15 amps
1500watts
(specifications are subject to change without notice)
11
Page 14

3 -1 IN S T A L L A T IO N A N D O P E R A T IO N
With the laminator positioned on an unobstructed, level surface, perform the
following check before putting the laminator into service.
1. Install supply roll mandrels and the release liner take-up mandrel into their
respective positions as shown in the familiarization illustrations.
2. Swing the safety shield down.
3. Check both EMERGENCY STOP BUTTONS. They should be in the up
position. If buttons are depressed, turn clockwise slightly until they pop up. In
event of any emergency depress the stop button closest to operator to stop
machine.
4. Engage the feed tray into the slots of the feed table mounting brackets located
at mid level on the insides of both side panels and gently push the tray until it
seats.
5. Connect the power cord to a suitable power source which conforms to the
specified power requirements of the unit.
6. Place forward/reverse switch into forward position. Place mode selector into
drive switch mode. Place function switch into variable position. Turn drive switch
on and gradually rotate the speed control knob clockwise and observe the
lamination drive rollers to see that they are moving.
IMPORTANT: RETURN THE SPEED CONTROL KNOB T O Z ERO!
8. Place the drive switch in the OFF position. Place forward/reverse switch in
reverse position, you will need to pause between positions. Turn the drive
switch ON and increase the speed by turning the speed control knob
clockwise. The rolls will now rotate in the opposite direction. This feature will
allow the operator to correct “wrap around” conditions.
9. To test foot switch pedal operation, place mode selector switch into foot
switch mode with forward/reverse switch in forward position and function
switch in variable position. Depress foot switch and gradually increase speed
control knob until rubber rollers move. Release foot pedal switch and rolls will
stop moving. Depress foot pedal again and rolls will move.
10. To test function switch operation, the forward/reverse switch should be in
forward position, the drive switch should be on and mode selection switch
should be in drive switch position. When the function switch is in variable
position the speed control knob controls the speed of rubber roll rotation.
When the function switch is in film position the rubber rollers will move at a
12
Page 15
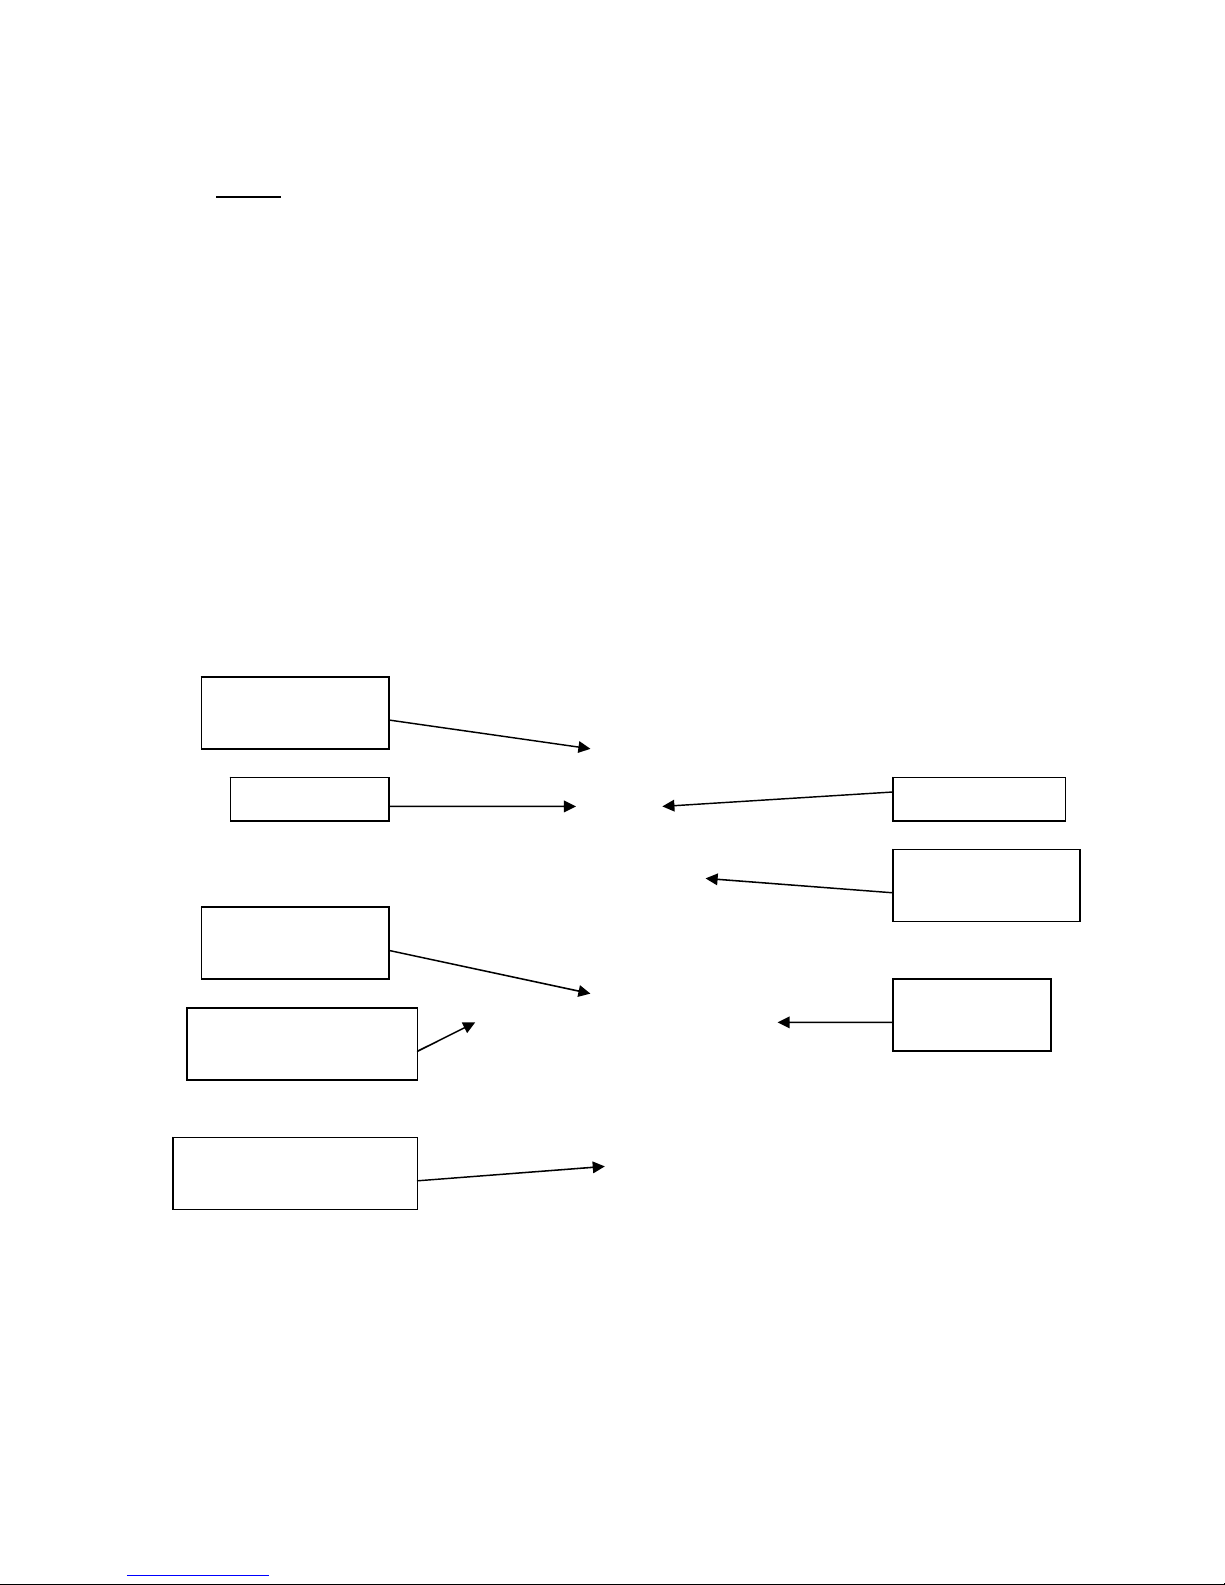
preset speed intended for film laminating. When the function switch is in
pouch position the rubber rolls will move at a preset speed designed for
pouch laminating.
11. The SIGNMASTER 44 is designed with a heated rubber roll. To operate the
heat controller, depress the on/off heat button and observe that the
temperature display lights indicate present temperature of heat roll. To set
the temperature, briefly depress red button under the temperature display and
temperature set point will appear. To increase temperature setting while set
point is displayed, depress and hold red button until desired point is reached.
To decrease temperature setting while temperature set point is displayed,
depress and hold blue button under temperature display until desired set
point is reached. In each case, approximately five seconds after release of
red or blue button, temperature display will revert to actual temperature of
rubber roll. Display will increase or decrease until new setting is reached. To
change the temperature reading from Fahrenheit to Centigrade depress and
hold blue button approximately five seconds until display reads degrees F or
C. The reading will change back and forth by gently tapping blue button.
TEMPERATURE
DISPLAY
RED BUTTON
MOTOR SPEED
CONTROL
FORWARD/REVERSE
SWITCH
FUNCTION SELECTOR
SWITCH
BLUE BUTTON
HEAT CONTROL
SWITCH
MAIN DRIVE
SWITCH
13
Page 16

3 -2 TH READ ING TH E LAM INA TO R WITH PSA FILM
SAFETY NOTI CE: Always disco nnect powe r from source befor e threading
laminator to prevent accidental injury to operator.
APP LICATION OF OVERL AMINATE S:
1. Remove the supply roll mandrel and the feed tray. The supply roll mandrel is
now ready to accept loading of the PSA (pressure sensitive adhesive) material.
Slide a roll of film onto the top supply roll mandrel, turning the roll slightly to slide
the gripper inside the core. Center the roll. Make sure the adhesive side of the
film is facing upwards.
2. Center the roll on the mandrel and place the mandrel in the top brackets. This
is a job best done with two people, even if the roll of film is not very heavy. With
a person holding each end of the mandrel, it is easy to put both notch fittings into
their respective brackets. Make sure they are both fully seated. Attempting to
load the PSA material on the laminator by yourself may result in a back strain or
other injury.
3. For easier threading use a scrap paper leader or release paper from the
bottom supply roll, preferably the same width or wider than the PSA you are
applying. Open laminating rollers and slide the paper through, leaving just
enough paper to tack onto the leading edge of your PSA material.
14
Page 17

4. Make sure when using a PSA with a liner, that the film has been threaded
underneath the top idler bar (see threading diagram). Separate the liner from the
adhesive part of the film and tape the liner to the 3” core mounted on your
release liner take-up.
5. Close the laminating rollers and lower the safety shield. Lock the feed table in
place.
6. Reconnect power to the laminator.
7. Place the forward/reverse switch in the forward position. Turn the speed
control to the zero position. Turn the drive switch ON. Adjust supply roll tension
and release liner take-up tension as needed.
If a wraparound occurs place the drive switch in the OFF position and turn the
speed control to zero. Place the forward/reverse switch in the reverse position.
Turn the drive switch on slowly and increase the speed. The operator will need
to alternately reverse, pull, reverse, pull, reverse, pull until the film is free of the
wraparound. Use the reverse jog sparingly as too much reverse can create a
“reverse wraparound”.
C A UTION : Th e l amin a tor is d esig n ed to b e ru n w ith th e o p er ato r d ir ectl y
facing th e co n trol p an el an d feed tray , n ot at an ang le or from the side o f
th e ma ch in e . Fo r o p er ato r s a fety , T HE SA F E TY S HIELD M UST B E IN
POSITION WHEN T HE MAC HINE IS ON, or WHEN THE DRIVE SWITCH
IS IN THE FORW ARD POS ITION.
M ISE EN GA RG E: La m ach in e a p las tifier es t con cu e p o u r q u e l’utilisteur
se place directement en face du plateau d’alimentation et des commandes.
De p lus, p our assurer la secu rite de l’utilisateur, l’ec r a n protec teur doi t et r e
rele ve de facon a recouvrir le sabor chauffant superieur lorsque la machine
est sous tension (on) ou que l’interrupteur-moteur est en position de
marche avant (forward).
ADVERTENCIA: El plastificador está disenade para funcionar con el
op erad o r estan d o d irectamen te en fren te del p anel d e man d o y la b a n d eja
de alimentacion, y no a un angulo, o desde un costado de la maquina. Para
mayor sequridad del operador, el protector de seguridad debe estar en su
lugar cuando la maquina está
a encendida, o cuando el interruptor de mando está hacia adelante.
15
Page 18

3-3 APPLICAT ION NO TES FOR PSA LAMINATIN G AND
MOUNTING
LAM IN ATIO N :
With the SIGNMASTER 44 laminator now properly threaded with film, it is now
ready for continuous and/or interrupted lamination duty.
The quality of the finished lamination depends on several factors, such as: film
quality, substrate, items to be laminated, lamination pressure, and correct
feeding technique. To assure the highest quality lamination possible, some
degree of experimentation is required. The following are some helpful hints:
• To remove wrinkles during initial threading and set up, TURN OFF THE
MACHINE, open the laminating rollers. Gently pull the film and backing
release paper at the exit point until all wrinkles are removed. Close the
laminating rollers as film is being pulled taut over the rollers. This will
conserve more material than trying to run the wrinkles out with the laminator.
• When using release paper to prevent adhesive buildup on the rollers be sure
to closely match the widths of paper and film.
• When using smaller (widthwise) substrates it becomes most practical to set
up and laminate these subjects as near the center of the roll as possible.
• Films for protecting images printed on vinyl should be made of vinyl
themselves so that the flexibility of the vinyl substrate is not impaired.
Polyester films are not recommended over vinyl because of their stiffness.
• When laminating only one side, you must not allow exposed adhesive to go
into the machine. Make sure the material being coated is at least as wide as
the roll of film. If material being laminated is narrower than the film, be sure to
run release paper off of the bottom supply roll. (see options) When not using
release paper be sure to overlap sheets of scrap paper under the film, leaving
no exposed adhesive. Eliminating exposed adhesive will decrease chances
of creating a wraparound.
SU PP LY ROLL TEN S IO N :
A small amount of tension is needed for most jobs. Too little tension and too
much tension can both cause wrinkling. The right amount of tension is the least
amount that will do the job.
Most tapes and pressure sensitive films do not require a great deal of roll
pressure. Roll pressure is set at the factory and rarely needs adjustment.
16
Page 19

Balance of roll pressure across the rollers is more important than the actual PSI
for most applications. Low-tack products such as transfer tape (also called premask or application tape) do not require high pressure as much as they require a
certain amount of time between the laminating rollers (also called dwell time).
Many transfer tapes will not stick well if applied at top speed. Your tape suppliers
can provide high-tack transfer tapes that are much more suitable for use in the
laminators. The common transfer tapes are very low-tack so that they will be
forgiving enough to allow application by hand with a squeegee.
High-tack films, vinyl and tapes can be applied at higher speeds because they do
not require as much dwell time.
2. APPLI CATION OF TRANSFER TAPE SIGNAGE TO A SUBSTRATE:
The SIGNMASTER 44 will accept rigid substrates up to 1/2 inch thick. This
allows the versatility that you need to accomplish various mounting applications
where use of a thicker substrate is required, such as applying vinyl to sign
blanks.
The vinyl signage should be placed on the substrate (signboard), release liner
side down and aligned the way it is to appear on the substrate. Create a “hinge”
by taping the leading edge of your transfer-taped signage to the substrate. Peel
back two inches of your release liner and slide the positioned end of the board
into the laminator, holding the taped graphic up with one hand. Using your free
hand, gently pull away the release liner as the machine pulls the substrate
through.
With the vinyl adhesive exposed it is imperative that the operator keep the vinyl
suspended above the substrate until the point of application (nip rollers). If the
graphic were to touch before being laminated, there is a greater risk of trapping
air bubbles or wrinkles.
Slowly start the laminator and pull the release liner off the signage as the
machine pulls the substrate through. Remove the liner slowly. The release liner
will come off easiest if it is pulled away at a 90 degree or greater angle from the
signage. Slowly remove the separated release liner from the graphic, keeping
the vinyl suspended until the point of application. Hold up the taped signage with
one hand and be ready to pull away the release liner with the other. Slowly start
the laminator and pull the release liner off the signage as the machine pulls the
substrate through.
If the signage is held straight up (90-degree angle to the feed tray) from the point
where it curls under the safety shield, the release liner can easily be separated
from the signage at this point. The safety shield serves as a kind of guide for
removing the release liner in this application. Holding the signage straight up
against the bottom of the safety shield as the machine pulls the material into the
17
Page 20

rollers also keeps the vinyl adhesive off the substrate until it reaches the rollers,
insuring a bubble-free application.
3. COLD MOUNTING:
The SIGNMASTER 44 can be used to apply adhesive to mounting boards such
as foam core. Substrates can also be purchased pre-coated with pressuresensitive adhesive and a release liner. Cold adhesives adhere better and are
more reliable than dry mount (hot) adhesives when it comes to the various
plastics, coated papers, and coated mounting boards often used in digital
imaging.
Most rolls of adhesive have a single release liner. When threading the laminator
the release liner should be facing the top roller. When laminating only one side,
you must NOT allow exposed adhesive to go into the machine. Make sure the
material being coated is at lease as wide as the roll of film. Overlap the pieces or
use scrap paper underneath them in order to prevent the adhesive from coming
in contact with the rollers.
Thread the machine by putting a large piece of scrap paper or cardboard through
the open rollers. Stick the adhesive to this threading card, close the rollers, and
begin to laminate. Keep feeding scrap paper so that the adhesive does not start
a wraparound on the rollers.
Adjust the unwind tension to remove any wrinkles from the material. Do not use
any more tension than needed or you may stretch the material.
Begin to feed the mounting boards, butting each up against the one ahead. Cut
the boards apart with a utility knife at the back end. Once your boards are
coated, or if you buy them pre-coated, you are ready to mount any graphic.
There are many methods for sizing and trimming, but most operators pick a
board slightly bigger than the graphic and trim board and graphic together after
mounting.
Peel back about two inches of the release liner on one end of the board. Create
a “hinge” by using this exposed adhesive to position the graphic on the board.
Slide the positioned end of the board into the laminator, holding the graphic up
with one hand. Pull off the release liner before it goes into the nip. Pick up the
mounted item at the back of the machine. Trim away the unwanted portions of
the graphic and the board at the same time.
18
Page 21

3-4 APPLICATION NOTES FOR DURAFILM POUCH
LAMINATING
Your SIGNMASTER 44 laminator will perform three functions. It will:
1) Mount graphics to Foam Board
2) Mount and laminate graphics to Foam Board
3) Laminate graphics in pouches
All three instructions are on the following pages,
19
Page 22

IN ST RUCTIO N SH EET
DURAFILM MOUNTING
The DURAFILM MOUNTING BOARDS are constructed of 3/16” foam board with
a heat-activated adhesive on the laminating side of the board.
When ready to mount, please follow these easy steps:
1. Turn on your machine by pressing the Drive switch.
2. Set temperature at 300F. (See instructions on page 13.)
3. Set function selection at Pouch position.
4. Allow the machine to heat for approximately 30-45 minutes or until machine
shows 300F on temperature display.
5. Check item to be mounted and mounting board, to make sure there are no
foreign particles on the surface.
6. Place mounting board on flat surface and place item to be mounted on the
adhesive side of board. Make sure item is square to edges of board.
7. Tack item to board using a heat seal iron or glue stick. Tack only the front
two corners of the item. (Heat seal irons and glue sticks are available
through Graphic Laminating.)
8. Place release sheet over entire surface (silic on side down) with the four inch
(4”) flap over the lead edge of the board. This prevents adhesive from
adhering to the rubber roll. See diagram below.
9. Insert board into laminator, tacked edge FIRST.
10. The item will be mounted at a speed of one foot per minute.
11. Remove board from laminator as soon as it is ejected from machine.
12. Lay on flat surface until cool to touch.
20
Page 23

INSTRUCTION S HEET
D U R AFILM MO U N T IN G & LAM IN AT IN G
Graphic Laminating’s DURAFILM MOUNTING & LAMINATING BOARDS are
constructed of 3/16"”foam board with a heat-activated adhesive on the laminating
side of the board. The laminating film on the mounting/laminating pouch is
available in Gloss, Satin, Velvet (matte), and Crystal.
1. Turn on your machine by pressing the Drive switch.
2. Set temperature at 300F. (See instructions on Page 13.)
3. Set function selector dial at Pouch position.
4. Allow the machine to heat for approximately 30-45 minutes or until machine
shows 300F on temperature display.
5. Check the item to be mounted and laminated to make sure there are no
foreign particles on the surface.
6. Place the laminating pouch on a flat surface and insert the item to be
mounted and laminated between the film and board, again checking for
foreign particles. Make sure the item is square to the edges of the board.
7. Insert the board into the laminator, sealed edge first, making sure the film
stays flat on the item to be mounted and laminated.
8. The board will go through the laminator at the speed of one foot per minute.
9. Remove the board as soon as it is ejected from the machine and lay it on a
flat surface until it cools. (If masked, peel off the white protective masking.)
10. Trim to desired size.
11. For further information, please call Graphic Laminating at 800-345-5300.
21
Page 24

INSTRUCTION S HEET
DURA FILM POUCH LAM INATING
DURAFILM POUCHES and SLEDS are available from Graphic Laminating (800345-5300). Pouch laminating utilizes a pouch of film and a board that carries the
film through the laminator keeping it flat and smooth. This board is called a sled.
Match the size of the pouch to the size of the sled per the chart listed below.
POUC H SIZE SLED SIZE
9” X 12” 21” X 28”
12” X 18” 21” X 28”
19” X 25” 21” X 28”
25” X 37” 27” X 40”
37” X 49” 40” X 52”
When ready to laminate, please follow these easy steps.
1. Turn on your machine by pressing the Drive switch.
2. Set heat dial at 300F. (See instructions on Page 13.)
3. Set function selector at Pouch position.
4. Allow the machine to heat for approximately 30-45 minutes or until machine
shows 300F on temperature display.
5. Check the sled to make sure there are no foreign particles on the surface.
6. Center the document to be laminated inside of the laminate pouch.
7. Position the sled (board) labe l si de up.
8. Place pouch on the side of the sled with “this Side Up” label. Place sealed
edge of pouch under hold down strip on pouch sled.
9. Insert the hold down s trip edge of the sled (sealed end of the pouch) into the
laminator making sure the sled is square to the laminating rollers.
10. Remove the sled as soon as it exits the laminator. BE CARE FUL NOT TO
TOUCH THE P OUCH UN T IL IT IS C O OL.
11. CAUTI ON: If you are not getting a lamination to the back side of the graphic
after the above process has been completed, turn the pouch over and repeat
the lamination. This should give you a good bond to both sides of graphic
and help to eliminate any curling in the sheet.
22
Page 25

4 -1 P R E V E N T IN G A N D S O L V IN G P R O B L E M S
Please read this section before you have a problem
PROBLEM: Laminated images are curling up or down.
SOLUTION: Excessive supply roll tension causes the laminated image to curl
up. This curl can be strong enough to prevent the item from hanging straight. It
can even pull a mounted image off the substrate.
PROBLEM: Laminated images are exhibiting opposite corner curl.
SOLUTION: See the above solution and reduce supply roll tension. Opposite
corner curl comes from stretching the film too much.
PROBLEM: No power is getting to the laminator.
SOLUTION: Make sure there is power at the electrical outlet being used, and
make sure both ends of the power cord are firmly engaged. The motor fuse (3
amp) and the heat system fuse (1.5 amp) are located on the back right housing,
but dead outlets and loose power cord connections are the most common causes
of this problem.
PROBLEM: Tenting of the film on the image.
SOLUTION: This has nothing to do with the film or the laminator. It’s caused by
various contaminates on the surface of the image. Use cotton gloves or a tack
rag as appropriate to clean your image just before it is laminated. If your system
is not in a fairly clean environment close off the area and filter the air or... move
the system.
Supply roll tensioning systems dependent on friction between the cardboard film
core and the supply roll mandrel and/or tension collars can also create dust in the
environment.
PROBLEM: The laminated material seems to have a pitted surface or irregular
surface that does not match the texture of the paper being coated.
SOLUTION: This is usually caused by adhesive build-up or dirt on the rubber
rollers, but may be caused by debris stuck to the rollers, such as a piece of
paper. Inspect the rubber rollers and if they need cleaning refer to section 5-3.
Irregularities in the surface of the film can also be caused by cuts or other
damage to the rubber rollers.
23
Page 26

PROBLEM: Bubbles or wrinkles in the laminate, accompanied by movement of
the supply roll from side to side (applies to laminators which use a clutch for
supply roll tension).
SOLUTION: Cause of the problem is insufficient supply roll tension caused by
the film core slipping on the supply roll mandrel. Increasing the clutch tension
doesn’t help, because the roll is turning with the mandrel. Depending on the
design of the laminator, the supply roll lock mechanism has failed or the supply
roll was put into the film core backwards.
PROBLEM: A defect in the lamination which repeats at the same interval each
time.
SOLUTION: Look at the laminating roller on the side where the defect is
appearing. This problem is usually caused by a cut or gouge in the roller, or by
something stuck to the roller. A piece of paper, a small bit of wood or metal, or a
hunk of adhesive are frequently the culprits.
Clean the rollers of the laminator each time you change film, and at least once a
day. Carefully educate your operators how to treat the laminator. Make sure
they are trained to keep knives and other sharp objects away from the rollers.
PROBLEM: Film gets wrapped around the laminating rollers.
SOLUTION: This mess is most often caused by violating the most inflexible law
of laminating: Do not allow exposed adhesive to go into the rollers. Adhesive
may stick to the rollers, or it may build up on the rollers to cause a wrap-around
later.
When laminating one-side, keep your items wider than the film and keep them
overlapping each other. The operator should run a web of paper under the web
of film whenever the item being laminated is narrower than the film. The operator
should run sheets of scrap paper or plastic under the web of film as he/she set
up. Adjust the machine, and do your laminating. There should be an unbroken
stream of material under the adhesive as it goes into the nip.
If adhesive does get on the rollers, clean it off before continuing to work.
UNPLUG THE MACHINE FIRST !! Use a hard rubber eraser or a moistened
white Scotch Brite pad to clean the adhesive off the roller. Then wipe the roller
down with a clean cloth and some Windex. NEVER try to clean the rollers while
they are turning. Clean one section of the rollers at a time while the laminator is
turned off. We supply a cleaner designed to clean both PSA and thermal
adhesives. Contact our parent company, Graphic Laminating, at 800-345-5300
to order.
24
Page 27

PROBLEM: Wrinkling of one side of the web or skewing of images as they are
laminated indicates that perhaps the pressure on one side of the laminating or
pull rollers is greater than on the other.
SOLUTION: Skewed, wrinkled images are most often generated by skewed
trimming or skewed feeding. If the leading edge of an image is not trimmed at
right angles, the nip will catch one side before the other. Unless the paper is
fairly heavy and stiff, the item will most likely be ruined. The same thing will
happen if the operator feeds an item in with the leading edge not parallel to the
nip.
If trimming or feeding are not problems, check to make sure the roll tension is
balance. Make sure the rollers are fully closed. Make sure they are in the locked
position. Consult your laminator vendor if the problem persists.
PROBLEM: Myriad small bubbles of air caught between the image and the film,
known as silvering.
SOLUTION: Silvering is often seen when laminating with cold films. With many
cold films, this silvering will go away in a day or two as the adhesive penetrates
and pushes the air through the back of the sheet. You may also use heat on the
top laminating roll. Set temperature at 120F. (See temperature control
instructions on Page 13.) This should help eliminate any silvering.
25
Page 28

5-1 MAI NTENANCE
D A N G ER : Alw ays u s e extreme cau tion wh en per form in g main tenan ce o n
your machine! A lway s mak e su r e the machine is unplu gged and that there
is NO p o w e r t o th e ma ch i n e w hen w o r k i n g o n o r cl ea ning a n y p a r t o f the
unit.
Use e xtreme c a ut i on t o a voi d pi nc h poi nt s at t he ni p of rubber r ol l er s.
N E V E R have ru bber rollers turning w hile performing m aintenance to yo ur
machine.
N EVER wear loos e cloth ing, ties or jewelry (wh ich may become entan gled
in gears or rubber rolle rs) while perf orming maintenance on your machine.
MISE EN GARDE: La prudence est de mise lorsque l’on effectue l’entretien
de cette machine.
S’assurer que le cordon d’alimentation est débranché et que la machine est
mise hors tension avant de toucher à des pièces internes.
Tenir les doigts et les objets loin des roulequx de caoutchouc. Ne jamais
faire tourner les rouleaux pendant l’entretien de la machine.
Ne jamais porter de vetements amples, de cravate ou de bijoux, etc. (ces
articles peuvent etra happés par les engrenages ou les roulequx de
caoutchouc).
ADVERTENCIA: sea extremadamente cuidadoso siempre que realice
tareas de mantenimiento en su maquina.
Aseqúrese siempre que la máquina está desenchufada y que no hay
NINGUNA energia aplicada a la misma mientras esté trabajando con partes
internas de la máquina.
Tenga sumo cuidado en evitar puntos de constricción en las pasadas de
los rodillos de goma. Nunca tenga los rodillos de goma en movimiento
mientras realiza trabajos de mantenimiento en su máquina.
Nunca vista ropa suelta, corbata o joyas (que peuden ser atrapadas por
engrenajes o rodillos de goma) mientras está realizando trabajos de
mantenimiento en la máquina
26
Page 29

5-2 GENERAL CLEANING
Cleaning the laminator daily or weekly will help prevent dirt or adhesive build-up
on the rubber rollers and will improve the performance of the unit.
5 -3 CL E A N IN G T H E R U B B E R R O L L E R S
The laminating rollers need regular cleaning. Turn off the master power switch
and unplug the machine.
Clean the rubber rollers with a mildly abrasive cleaning pad such as a white
Scotch Brite pad which may be purchased in the household section of your
grocery store (the green pads are too abrasive). Use mildly soapy water to clean
the rollers. Rub firmly but do not scrub the rollers vigorously as this might mar
the surface. Do not use sharp metal objects or steel wool as these will also mar
the rollers. Our parent company, Graphic Laminating, can supply a cleaning kit
designed to clean the rolls while cold. To order call 800-345-5300.
5-4 L U BRICATION
Drive chain: The drive chain and sprockets should receive a light coat of gear
lube or heavy grease (lithium preferably) after each 1000 hours of operation.
27
Page 30

NOTES ______________________________________________
_
_______________________________________________________
_
_______________________________________________________
_
_______________________________________________________
_
_______________________________________________________
_
________________________________________________________________
_
________________________________________________________________
_
________________________________________________________________
_
________________________________________________________________
_
________________________________________________________________
_
________________________________________________________________
_
________________________________________________________________
_
________________________________________________________________
_
________________________________________________________________
_
________________________________________________________________
_
________________________________________________________________
_
________________________________________________________________
_
________________________________________________________________
_
________________________________________________________________
_
________________________________________________________________
_
________________________________________________________________
_
________________________________________________________________
_
________________________________________________________________
28
 Loading...