

Page 1
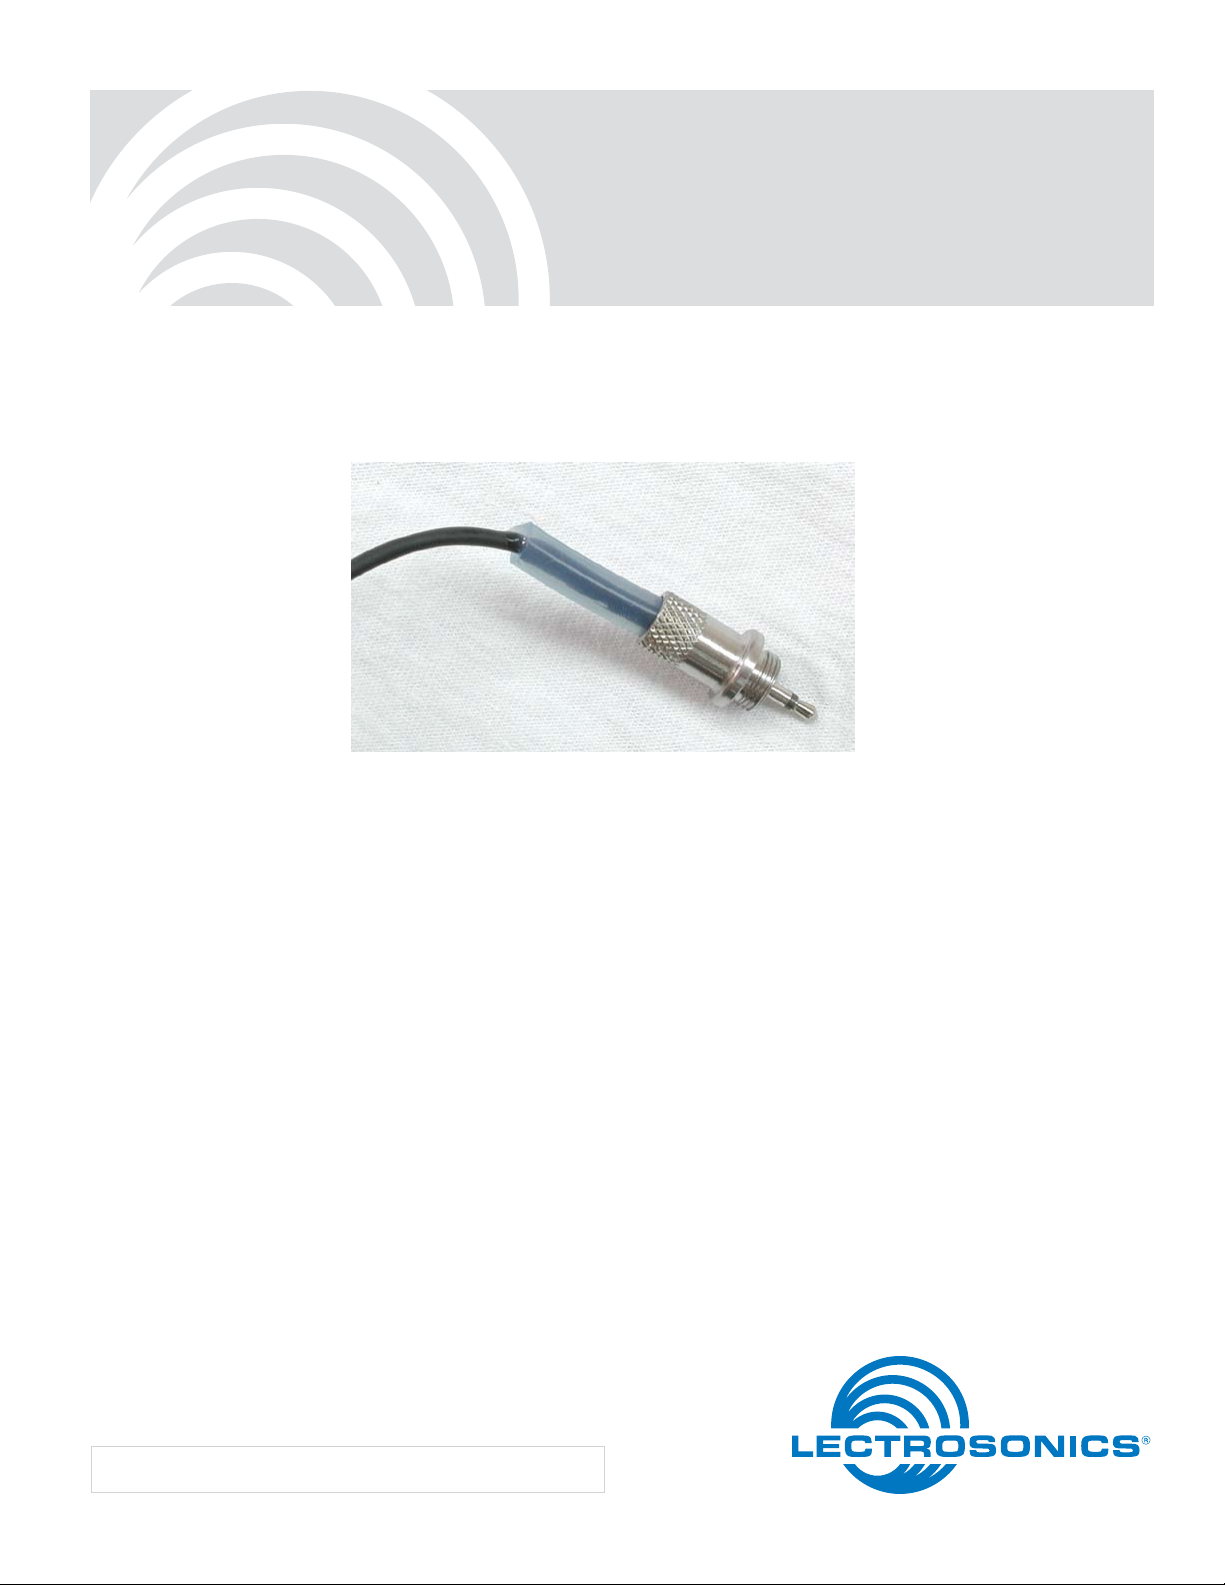
WPMC-3
WPMC-10
Watertight Microphone Plug Kit
ASSEMBLY INSTRUCTIONS
Fill in for your records:
Purchase Date:
Rio Rancho, NM, USA
www.lectrosonics.com
Page 2

WPMC-3 / WPMC-10
2
LECTROSONICS, INC.
Page 3

Watertight Microphone Plug Kit
Table of Contents
Safety Warnings ......................................................................................................................................................................................4
Solder ....................................................................................................................................................................................................4
Alcohol ..................................................................................................................................................................................................4
Silicon Sealant ......................................................................................................................................................................................4
Introduction .............................................................................................................................................................................................5
3 Piece Waterproof Connector Kit Contents .........................................................................................................................................5
10 Piece Waterproof Connector Kit Contents .......................................................................................................................................5
Additional Tools and Supplies ...............................................................................................................................................................5
Two-Wire Microphone Assembly Procedure ........................................................................................................................................6
Three-Wire Microphone Assembly Procedure .....................................................................................................................................7
Comments On Three Wire Microphones ...............................................................................................................................................7
Final Assembly Procedure.....................................................................................................................................................................8
Service and Repair ...............................................................................................................................................................................14
Returning Units for Repair ..................................................................................................................................................................14
Limited One Year Warranty................................................................................................................................................... Back Cover
Rio Rancho, NM
3
Page 4

WPMC-3 / WPMC-10
Safety Warnings
Solder
a) When soldering, protect yourself and others. Read,
understand and follow the manufacturer’s instructions, Material Safety Data Sheets (MSDS) and
these workplace safety practices:
b) Use local fans to keep fumes and gasses from your
breathing area.
c) Wear safety glasses or a face shield.
d) Do not eat in work area.
e) Wash hands thoroughly before eating or smoking.
Alcohol
When cleaning with alcohol, protect yourself and others.
Read, understand and follow the manufacturer’s instructions, Material & Safety Data Sheets (MSDS) and
these workplace safety practices:
a) Flammable — keep away from fire or heat sources.
b) Use only in well ventilated area.
c) Wear Latex gloves.
d) Wear safety glasses or face shield.
Silicon Sealant
When working with silicone sealant, protect yourself
and others. Read, understand and follow the manufacturer’s instructions, Material & Safety Data Sheets
(MSDS) and these workplace safety practices:
a) Use only in well ventilated area.
b) Wear cloth gloves.
c) Wear safety glasses or face shield.
d) Caution — Wearers of contact lenses must not
handle their contact lenses until all sealant has
been cleaned from hands and fingertips.
4
LECTROSONICS, INC.
Page 5

Introduction
Watertight Microphone Plug Kit
This manual covers the assembly of the watertight connectors on the microphones for the Lectrosonics waterresistant wireless transmitters. It is very important that
these procedures be followed exactly to ensure a watertight seal at the microphone connector. A good seal will
prevent any moisture from entering the transmitter and
possibly causing corrosion of the internal parts.
CAUTION: If the transmitter is wet (either due
to immersion or high levels of perspiration),
BEFORE opening any covers or connectors,
carefully blot the transmitter dry with a clean
paper towel or cloth. Remove all moisture.
After opening any connector or cover,
carefully blot up any remaining moisture that
may have remained around the seal. THIS IS
IMPORTANT! DO NOT CLOSE ANY COVER
OR CONNECTOR BEFORE MAKING CERTAIN
THERE IS NO MOISTURE IN OR NEAR THE
OPENING. After use, it is important to store
the transmitter in a dry place with all access
doors and connectors opened to allow any
internal humidity to evaporate. Specifically,
open the battery door, the frequency cover
plate and fully unscrew and remove the
microphone connector before storing. Do NOT
store wet and do NOT store sealed. If moisture
is sealed inside the unit it has nowhere to go
other than to chemically react with and destroy
components and the printed circuit board.
3 Piece Waterproof Connector Kit Contents
In the 3 piece waterproof connector kit (Part #WPMC-3)
you should find:
1. 5 ea silicone tubing, 1”long (Part #35680)
2. 5 ea submini phone plug (0.100”) without shell (Part
#21540, SwitchCraft 850 type)
3. 3 ea stainless steel shell (Part #26481)
4. 10 ea red silicone “O” ring (Part #35750)
5. 3 ea plastic dispensers (Part #56113)
6. 6 ea gray nozzles for dispensers (Part #56114)
7. Tube of flowable silicone sealant (Dow Corning
#734) (Part #32376)
8. Material Safety Data Sheets (MSDS)
10 Piece Waterproof Connector Kit Contents
In the 10 piece waterproof connector kit (Part #WPMC-
10) you should find:
1. 15 ea silicone tubing, 1”long (Part #35680)
2. 15 ea submini phone plug (0.100”) without shell
(Lectro #21540, SwitchCraft 850 type)
3. 10 ea stainless steel shell (Part #26481)
4. 30 ea red silicone “O” ring (Part #35750)
5. 7 ea plastic dispensers (Part #56113)
6. 15 ea gray nozzles for dispensers (Part #56114)
7. 1 tube of flowable silicone sealant (Dow Corning
#734) (Part #32376)
8. Material Safety Data Sheets (MSDS)
Additional Tools and Supplies
You will also need a small soldering iron, needle nose
pliers, good wire cutters and wire strippers. Isopropyl
alcohol or alcohol wipes to clean the parts will be necessary if the parts have become oily or dirty. If the mic
wire is tight in the silicone tubing, a drop of isopropyl
alcohol makes a good lubricant that will evaporate completely after assembly. Ensure that the isopropyl alcohol
you use is clean and does not contain oils. We use a
generic medical grade alcohol that is labeled “Isopropyl
Alcohol 91%” and is certified to be oil free.
Rio Rancho, NM
5
Page 6

WPMC-3 / WPMC-10
Two-Wire Microphone Assembly Procedure
The following procedure pertains to a typical two-wire
electret microphone. For non-standard microphones,
contact Lectrosonics Customer Service:
1. Using a pair of scissors or a utility knife, cut a one
inch length from the clear silicon tubing. Ensure the
cuts are clean and square.
2. Cut the cable of your microphone to the length you
prefer (recommended length is approximately 40
inches).
3. Insert the cable through the tubing and then the
plug shell.
Note: If necessary, dip both the cut piece of
silicone tubing and the end of the microphone
cable in alcohol to lubricate them.
4. Strip the outer insulation of the cable back approximately 1/4”.
5. Comb the braid or shield wires to one side and twist
together.
6. Strip the audio wire back approximately 1/8”.
7. Insert the twisted shield wire through the hole in the
strain relief of the plug. Solder and
trim. (See Figure 1.)
8. Solder the audio wire to the plug.
9. Crimp the strain relief over the cable and insulation.
(See Figure 2.)
10. Test the microphone for proper operation and gain.
Strain Relief
Figure 2 - All connections soldered and crimped
Note: It is highly suggested that you test the
microphone before proceeding any further. It will
be much harder to repair connections once the
connector is waterproofed.
11. Screw the plug into the plug cover and tighten. (Put
a broad rubber band around the sleeve of the plug
to protect the sleeve from the needle nose serrations.)
IMPORTANT: At this point, go to the Final
Assembly Procedure on Page 8 to finish the
assembly.
Audio Wire
Braided Shield
(Not Shown)
Hole in Strain Relief
(Not Shown)
Figure 1. Shield Wire Soldered
Plug Cover
Audio Wire
Plug
6
LECTROSONICS, INC.
Page 7

Watertight Microphone Plug Kit
Three-Wire Microphone Assembly Procedure
The following procedure pertains to a typical three-wire
electret microphone. For non-standard microphones,
contact Lectrosonics Customer Service:
1. Using a pair of scissors or a utility knife, cut a one
inch length from the clear silicon tubing. Ensure the
cuts are clean and square.
2. Cut the cable of your microphone to the length you
prefer (recommended length is approximately 40
inches).
3. Insert the cable through the tubing and then the
plug shell.
Note: If necessary, dip both the cut piece of
silicone tubing and the end of the microphone
cable in alcohol to lubricate them.
4. Strip the outer insulation of the cable back approximately 1/4”.
5. Comb the braid or shield wires to one side and twist
together.
Strip the Bias wire (Drain) back about 1/8”.
6.
7. Insert the twisted shield wire through the hole in the
strain relief of the plug. Solder and
trim. (See Figure 1.)
8. Solder the Bias (Drain) wire to the plug.
10. Crimp the strain relief over the cable and insulation.
If the Source (Audio) wire is not needed, bend it
around and crimp with cable and insulation. (See
Figure 2.)
Strain Relief
Source (Audio) Wire
(See “Comments on Three-
Wire Microphones”)
Figure 2 - All connections soldered and crimped
Bias (Drain) Wire
Braided Shield
(Not Shown)
10. Screw the plug into the plug cover and tighten. (Put
a broad rubber band around the sleeve of the plug
to protect the sleeve from the needle nose serrations.)
IMPORTANT: At this point, go to the Final
Assembly Procedure on Page 8 to finish the
assembly.
Plug Cover
Bias (Drain)
Plug
Ground (Shield)
(Not Shown)
Source (Audio)
Figure 1. Shield Wire Soldered
9. Test the microphone for proper operation and gain.
(See “Comments on Three-wire Microphones” before proceding past this step.)
Warning: It is highly suggested that you test
the microphone before proceeding any further.
It will be much harder to repair connections
once the connector is waterproofed. Also,
read “Comments on Three-Wire Microphones”
before proceeding to next step.
Comments On Three Wire Microphones
Three wire microphones cannot be used directly with
the MM series transmitters. They must be slightly
modified to make them act as if they are two wire mics.
Three wire mics have a ground lead, a source (or
audio) lead and a drain (or drain) lead. The source and
the drain refer to connections to a Field Effect Transistor (FET) in the microphone capsule. Either the source
or drain can provide an audio signal. In fact, a two-wire
electret mic is just a three-wire mic with the source
lead removed from the user’s access. For any electret
microphone, the internal FET must have a resistor from
source to ground. Usually, the manufacturer builds this
into the capsule but not always. You may need to add
this resistor. Simply try soldering up the Drain (Bias)
lead to the plug center pin and the Ground (Shield) to
the connector strain relief. If this gives you good mic
level, then use it. If the level is very low or inaudible, add
a 1/8 Watt resistor between the Source (Audio) lead
and ground. We will be happy to mail you a few, if you
can’t find any locally. A good starting value is 1k to 2k
Ohms. The smaller the resistor; the higher the gain. If
you have questions, call Lectrosonics Customer Service
for assistance.
Rio Rancho, NM
7
Page 8

WPMC-3 / WPMC-10
Final Assembly Procedure
This procedure applies to both 2-wire and 3-wire microphones:
1. Locate the tube of RTV and the RTV dispenser
(Part #56113). (It looks like a syringe without a
needle).
2. Replace the light blue cap on the RTV dispenser
with one of the gray nozzles (Part #56114), then
remove the plunger and set it aside.
3. Remove the top of the tube of RTV, reverse it and
pierce the metalic seal at the top of the tube.
4. Squeeze approximately 1/2 inch of RTV from the
tube into the RTV dispenser. Replace the cap on
the tube of RTV and set it aside.
5. Replace the plunger in the RTV dispenser. While
pointing the nozzle upward, gently push the plunger
into the RTV dispenser until any excess air is
squeezed out.
6. Using the RTV dispenser, fill the plug cover with
flowable silicone sealant (see Figure 1) to approximately halfway between the plug strain relief and
the top of the plug cover (1/16” from the top). Allow
the RTV settle for a few minutes and then slide the
tubing down into the plug cover as far as it will go.
Wipe off any excess sealant that may be forced out
of the plug shell with a paper towel.
7. Insert the nozzle of the dispenser deep into the
top of the tubing and fill the tubing with RTV. (See
Figures 2 & 3.)
8. Hang the cable so the connector dangles freely
straight down to cure for at least 8 hours (overnight
is better). This will ensure a watertight bond between the sealant, cable, cover and silicone tubing.
9. Lubricate an
O-ring (Part
#35750) with
a petroleumbased jelly or
white grease
and install in
the groove of
the plug cover.
Do not use a
silicone-based
grease as
silicone oils
Figure 4 - Location O-Ring grove
will attack the
O-ring material. (See Figure 4.)
O-ring groove
Figure 1 - Filling the Plug Cover with RTV
Figure 2 - Injecting the sealant deep into the tubing
Caution: For efficiency, you may be tempted
to install the O-ring at the beginning of this
procedure. DO NOT DO THIS! If you install
the O-Ring before the RTV sealant has the
opportunity to cure thoroughly, you run the
risk of the RTV sealant bonding to the O-ring
since it is also silicone. The O-ring must be
free to move to seal properly.
10. The assembly is now finished and ready for use.
8
Figure 3 - Pulling the nozzle out as the tubing fills with sealant
LECTROSONICS, INC.
Page 9

Watertight Microphone Plug Kit
Rio Rancho, NM
9
Page 10

WPMC-3 / WPMC-10
DOW CORNING CORPORATION
Material Safety Data Sheet
Page: 1 of 7
DOW CORNING(R) 734 FLOWABLE SEALANT, CLEAR
1. IDENTIFICATION OF THE SUBSTANCE AND OF THE COMPANY
Dow Corning Corporation
South Saginaw Road
Midland, Michigan 48686
24 Hour Emergency Telephone:
Customer Service:
Product Disposal Information:
CHEMTREC:
(989) 496-5900
(989) 496-6000
(989) 496-6315
(800) 424-9300
MSDS No.: 01907506 Revision Date: 2001/10/17
Generic Description: Silicone elastomer
Physical Form: Viscous Liquid
Color: Colorless
Odor: Acetic acid odor
NFPA Profile: Health 2 Flammability 2 Instability/Reactivity 0
Note: NFPA = National Fire Protection Association
2. OSHA HAZARDOUS COMPONENTS
CAS Number Wt % Component Name
17689-77-9 3.0 - 7.0 Ethyltriacetoxysilane
4253-34-3 1.0 - 5.0 Methyltriacetoxysilane
541-02-6 <1.0 Decamethylcyclopentasiloxane
556-67-2 <1.0 Octamethylcyclotetrasiloxane
108-24-7 <=0.1 Acetic anhydride
64-19-7 <=0.1 Acetic acid
The above components are hazardous as defined in 29 CFR 1910.1200.
3. EFFECTS OF OVEREXPOSURE
Acute Effects
Eye: Direct contact may cause moderate irritation.
Skin: May cause moderate irritation.
Inhalation: Irritates respiratory passages very slightly.
Oral: Low ingestion hazard in normal use.
Prolonged/Repeated Exposure Effects
Skin: No known applicable information.
DOW CORNING CORPORATION
Material Safety Data Sheet
Page: 2 of 7
DOW CORNING(R) 734 FLOWABLE SEALANT, CLEAR
Inhalation:
No known applicable information.
Oral: No known applicable information.
Signs and Symptoms of Overexposure
No known applicable information.
Medical Conditions Aggravated by Exposure
No known applicable information.
The above l isted potential effects of overexposure are based on actual data, results of studies performed upon similar
compositions, component data a nd/or expert review of the product. Please refer to Section 11 for the detailed toxicology
information.
4. FIRST AID MEASURES
Eye: Immediately flush with water for 15 minutes. Get medical attention.
Skin: Remove from skin and wash thoroughly with soap and water or waterless cleanser.
Get medical attention if irritation or other ill effects develop or persist.
Inhalation: No first aid should be needed.
Oral: No first aid should be needed.
Comments: Treat according to person's condition and specifics of exposure.
5. FIRE FIGHTING MEASURES
Flash Point: 188.6 °F / 87 °C (Closed Cup)
Autoignition
Temperature:
Not determined.
Flammability Limits in Air: Not determined.
Extinguishing Media: On large fires use dry chemical, foam or water spray. On small fires use carbon dioxide
(CO2), dry chemical or water spray. W ater can be used to cool fire exposed containers.
Fire Fighting Measures: Self-contained breathing apparatus and protective clothing should be worn in fighting
large fires involving chemicals. Determine the need to evacuate or isolate the area
according to your local emergency plan. Use water spray to keep fire exposed
containers cool.
Unusual Fire Hazards: None.
Hazardous Decomposition Products
Thermal breakdown of this product during fire or very high heat conditions may evolve the following hazardous
decomposition products: Carbon oxides and traces of incompletely burned carbon compounds. Silicon dioxide.
Formaldehyde.
LECTROSONICS, INC.
10
Page 11

Watertight Microphone Plug Kit
DOW CORNING CORPORATION
Material Safety Data Sheet
Page: 4 of 7
DOW CORNING(R) 734 FLOWABLE SEALANT, CLEAR
Skin: Wash at mealtime and end of shift. Contaminated clothing and shoes should be
removed as soon as practical and thoroughly cleaned before reuse. Chemical
protective gloves are recommended.
Suitable Gloves: Silver Shield(R). 4H(R).
Inhalation: No respiratory protection should be needed.
Suitable Respirator: None should be needed.
Personal Protective Equipment for Spills
Eyes: Use proper protection - safety glasses as a minimum.
Skin: Wash at mealtime and end of shift. Contaminated clothing and shoes should be
removed as soon as practical and thoroughly cleaned before reuse. Chemical
protective gloves are recommended.
Inhalation/Suitable
Respirator:
No respiratory protection should be needed.
Precautionary Measures: Avoid eye contact. Avoid skin contact. Use reasonable care.
Comments: Product evolves acetic acid (HOAc) when exposed to water or humid air. Provide
ventilation during use to control HOAc within exposure guidelines or use respiratory
protection.
Note: These precautions are for room temperature handling. Use at elevated temperature or aerosol/spray applications may
require added precautions.
9. PHYSICAL AND CHEMICAL PROPERTIES
Physical Form: Viscous Liquid
Color: Colorless
Odor: Acetic acid odor
Specific Gravity @ 25°C: 1.03
Viscosity: 350 cSt
Freezing/Melting Point: Not determined.
Boiling Point: > 35C/95F
Vapor Pressure @ 25°C: Not determined.
Vapor Density: Not determined.
Solubility in Water: Not determined.
pH: Not determined.
Volatile Content: < 5 %
Note: The above information is not intended for use in pr e paring product specifications. Contact Dow Corning before writing
specifications.
10. STABILITY AND REACTIVITY
Chemical Stability: Stable.
DOW CORNING CORPORATION
Material Safety Data Sheet
Page: 3 of 7
DOW CORNING(R) 734 FLOWABLE SEALANT, CLEAR
6. ACCIDENTAL RELEASE MEASURES
Containment/Clean up: Determine whether to evacuate or isolate the area according to your local emergency
plan. Observe all personal protection equipment recommendations described in
Sections 5 and 8. For large spills, provide diking or other appropriate containment to
keep material from spreading. If diked material can be pumped, store recovered
material in appropriate container. Clean up remaining materials from spill with suitable
absorbant. Clean area as appropriate since some silicone materials, even in small
quantities, may present a slip hazard. Final cleaning may require use of steam,
solvents or detergents. Dispose of saturated absorbant or cleaning materials
appropriately, since spontaneous heating may occur. Local, state and federal laws and
regulations may apply to releases and disposal of this material, as well as those
materials and items employed in the cleanup of releases. You will need to determine
which federal, state and local laws and regulations are applicable. Sections 13 and 15
of this MSDS provide information regarding certain federal and state requirements.
Note: See section 8 for Personal Protective Equipment for Spills. Call Dow Corning Corporation, (989) 496-5900,
if additional information is required.
7. HANDLING AND STORAGE
Use with adequate ventilation. Product evolves acetic acid (HOAc) when exposed to water or humid air. Provide
ventilation during use to control HOAc within exposure guidelines or use respiratory protection. Avoid eye contact.
Avoid skin contact.
Static electricity will accumulate and may ignite vapors. Prevent a possible fire hazard by bonding and grounding
or inert gas purge. Keep container closed and away from heat, sparks, and flame. Keep container closed and
store away from water or moisture.
8. EXPOSURE CONTROLS / PERSONAL PROTECTION
Component Exposure Limits
CAS Number Com ponent Name Exposure Limits
17689-77-9 Ethyltriacetoxysilane See acetic acid comments.
4253-34-3 Methyltriacetoxysilane See acetic acid comments.
Acetic acid is formed upon contact with water or humid air. Provide adequate ventilation to control exposures
within guidelines of OSHA PEL: TWA 10 ppm and ACGIH TLV: TWA 10 ppm, STEL 15 ppm.
Engineering Controls
Local Ventilation: None should be needed.
General Ventilation: Recommended.
Personal Protective Equipment for Routine Handling
Eyes: Use proper protection - safety glasses as a minimum.
Rio Rancho, NM
11
Page 12

WPMC-3 / WPMC-10
DOW CORNING CORPORATION
Material Safety Data Sheet
Page: 5 of 7
DOW CORNING(R) 734 FLOWABLE SEALANT, CLEAR
Hazardous
Polymerization:
Hazardous polymerization will not occur.
Conditions to Avoid: None.
Materials to Avoid: Oxidizing material can cause a reaction. Water, moisture, or humid air can cause
hazardous vapors to form as described in Section 8.
11. TOXICOLOGICAL INFORMATION
Special Hazard Information on Components
No known applicable information.
12. ECOLOGICAL INFORMATION
Environmental Fate and Distribution
Complete information is not yet available.
Environmental Effects
Complete information is not yet available.
Fate and Effects in Waste Water Treatment Plants
Complete information is not yet available.
Ecotoxicity Classification Criteria
Hazard Parameters (LC50 or EC50) High Medium Low
Acute Aquatic Toxicity (mg/L) <=1 >1 and <=100 >100
Acute Terrestrial Toxicity <=100 >100 and <= 2000 >2000
This table is adapted from "Environmental Toxicology and Risk Assessment", ASTM STP 1179, p.34, 1993.
This table can be used to classify the ec otoxicity of this product when ecotoxicity data is listed above. Please read the other information
presented in the section concerning the overall ecological safety of this material.
13. DISPOSAL CONSIDERATIONS
RCRA Hazard Class (40 CFR 261)
When a decision is made to discard this material, as received, is it classified as a hazardous waste? No
State or local laws may impose additional regulatory requirements regarding disposal.
Call Dow Corning Corporate Environmental Management, (989) 496-6315, if additional information is required.
14. TRANSPORT INFORMATION
DOT Road Shipment Information (49 CFR 172.101)
DOW CORNING CORPORATION
Material Safety Data Sheet
Page: 6 of 7
DOW CORNING(R) 734 FLOWABLE SEALANT, CLEAR
Proper Shipping Name: COMBUSTIBLE LIQUID, N.O.S.
Hazard Technical Name: ACETOXYSILANE
Hazard Class: COMBUSTIBLE LIQUID
UN/NA Number: NA1993
Packing Group: III
Remarks: Above applies only to containers over 119 gallons or 450 liters.
Ocean Shipment (IMDG)
Not subject to IMDG code.
Air Shipment (IATA)
Not subject to IATA regulations.
Call Dow Corning Transportation, (989) 496-8577, if additional information is required.
15. REGULATORY INFORMATION
Contents of this MSDS comply with the OSHA Hazard Communication Standard 29 CFR 1910.1200.
TSCA Status: All chemical substances in this material are included on or exempted from listing on the
TSCA Inventory of Chemical Substances.
EPA SARA Title III Chemical Listings
Section 302 Extremely Hazardous Substances:
None.
Section 304 CERCLA Hazardous Substances:
None.
Section 312 Hazard Class:
Acute: Yes
Chronic: No
Fire: Yes
Pressure: No
Reactive: No
Section 313 Toxic Chemicals:
None present or none present in regulated quantities.
Supplemental State Compliance Information
California
12
LECTROSONICS, INC.
Page 13

Watertight Microphone Plug Kit
DOW CORNING CORPORATION
Material Safety Data Sheet
Page: 7 of 7
DOW CORNING(R) 734 FLOWABLE SEALANT, CLEAR
Warning: This product contains the following chemical(s) listed by the State of California under the Safe Drinking
Water and Toxic Enforcement Act of 1986 (Proposition 65) as being known to cause cancer, birth defects or
other reproductive harm.
None known.
Massachusetts
No ingredient regulated by MA Right-to-Know Law present.
New Jersey
CAS Number Wt % Component Name
70131-67-8 > 60.0 Dimethyl siloxane, hydroxy-terminated
112945-52-5 7.0 - 13.0 Amorphous fumed silica
17689-77-9 3.0 - 7.0 Eth yltriacetoxysilane
4253-34-3 1.0 - 5.0 Meth yltriacetoxysilane
Pennsylvania
CAS Number
Wt % Component Name
70131-67-8 > 60.0 Dimethyl siloxane, hydroxy-terminated
112945-52-5 7.0 - 13.0 Amorphous fumed silica
17689-77-9 3.0 - 7.0 Eth yltriacetoxysilane
16. OTHER INFORMATION
Prepared by: Dow Corning Corporation
These data are offered in good faith as typical values and not as product specifications. No warranty, either
expressed or implied, is hereby made. The recommended industrial hygiene and safe handling procedures are
believed to be generally applicable. However, each user should review these recommendations in the specific
context of the intended use and determine whether they are appropriate.
(R) indicates Registered Trademark
Rio Rancho, NM
13
Page 14

WPMC-3 / WPMC-10
Service and Repair
If your system malfunctions, you should attempt to correct or isolate the trouble before concluding that the equipment
needs repair. Make sure you have followed the setup procedure and operating instructions. Check the interconnecting cables and then go through the Troubleshooting section in this manual.
We strongly recommend that you do not try to repair the equipment yourself and do not have the local repair shop
attempt anything other than the simplest repair. If the repair is more complicated than a broken wire or loose connection, send the unit to the factory for repair and service. Don’t attempt to adjust any controls inside the units. Once
set at the factory, the various controls and trimmers do not drift with age or vibration and never require readjustment.
There are no adjustments inside that will make a malfunctioning unit start working.
LECTROSONICS’ Service Department is equipped and staffed to quickly repair your equipment. In warranty repairs
are made at no charge in accordance with the terms of the warranty. Out-of-warranty repairs are charged at a modest
flat rate plus parts and shipping. Since it takes almost as much time and effort to determine what is wrong as it does
to make the repair, there is a charge for an exact quotation. We will be happy to quote approximate charges by phone
for out-of-warranty repairs.
Returning Units for Repair
For timely service, please follow the steps below:
A. DO NOT return equipment to the factory for repair without first contacting us by email or by phone. We need
to know the nature of the problem, the model number and the serial number of the equipment. We also need a
phone number where you can be reached 8 A.M. to 4 P.M. (U.S. Mountain Standard Time).
B. After receiving your request, we will issue you a return authorization number (R.A.). This number will help speed
your repair through our receiving and repair departments. The return authorization number must be clearly shown
on the outside of the shipping container.
C. Pack the equipment carefully and ship to us, shipping costs prepaid. If necessary, we can provide you with the
proper packing materials. UPS is usually the best way to ship the units. Heavy units should be “double-boxed” for
safe transport.
D. We also strongly recommend that you insure the equipment, since we cannot be responsible for loss of or dam-
age to equipment that you ship. Of course, we insure the equipment when we ship it back to you.
Lectrosonics USA:
Mailing address: Shipping address: Telephone:
Lectrosonics, Inc. Lectrosonics, Inc. (505) 892-4501
PO Box 15900 581 Laser Rd. (800) 821-1121 Toll-free
Rio Rancho, NM 87174 Rio Rancho, NM 87124 (505) 892-6243 Fax
USA USA
Web: E-mail:
www.lectrosonics.com sales@lectrosonics.com
Lectrosonics Canada:
Mailing Address: Telephone: E-mail:
49 Spadina Avenue, (416) 596-2202 Sales: colinb@lectrosonics.com
Suite 303A (877) 753-2876 Toll-free Service: joeb@lectrosonics.com
Toronto, Ontario M5V 2J1 (877-7LECTRO)
(416) 596-6648 Fax
14
LECTROSONICS, INC.
Page 15

Watertight Microphone Plug Kit
Rio Rancho, NM
15
Page 16

581 Laser Road NE • Rio Rancho, NM 87124 USA • www.lectrosonics.com
(505) 892-4501 • (800) 821-1121 • fax (505) 892-6243 • sales@lectrosonics.com
LIMITED ONE YEAR WARRANTY
The equipment is warranted for one year from date of purchase against defects in
materials or workmanship provided it was purchased from an authorized dealer. This
warranty does not cover equipment which has been abused or damaged by careless
handling or shipping. This warranty does not apply to used or demonstrator equipment.
Should any defect develop, Lectrosonics, Inc. will, at our option, repair or replace any
defective parts without charge for either parts or labor. If Lectrosonics, Inc. cannot
correct the defect in your equipment, it will be replaced at no charge with a similar new
item. Lectrosonics, Inc. will pay for the cost of returning your equipment to you.
This warranty applies only to items returned to Lectrosonics, Inc. or an authorized
dealer, shipping costs prepaid, within one year from the date of purchase.
This Limited Warranty is governed by the laws of the State of New Mexico. It states the
entire liablility of Lectrosonics Inc. and the entire remedy of the purchaser for any
breach of warranty as outlined above. NEITHER LECTROSONICS, INC. NOR
ANYONE INVOLVED IN THE PRODUCTION OR DELIVERY OF THE EQUIPMENT
SHALL BE LIABLE FOR ANY INDIRECT, SPECIAL, PUNITIVE, CONSEQUENTIAL,
OR INCIDENTAL DAMAGES ARISING OUT OF THE USE OR INABILITY TO USE
THIS EQUIPMENT EVEN IF LECTROSONICS, INC. HAS BEEN ADVISED OF THE
POSSIBILITY OF SUCH DAMAGES. IN NO EVENT SHALL THE LIABILITY OF
LECTROSONICS, INC. EXCEED THE PURCHASE PRICE OF ANY DEFECTIVE
EQUIPMENT.
This warranty gives you specific legal rights. You may have additional legal rights which
vary from state to state.
February 13, 2007
 Loading...