

Lectric XP Owner's Manual

Lectric XP
Owner’s Manual
2019
V 1.1
www.lectricebikes.com

Table of Contents
Table of Contents 2
Warning 4
Unboxing 5
Getting Started 5
Folding and Unfolding the Bike 5
Preparing to Ride 7
Recommended Torque Values 8
Battery 9
Operating your battery 9
Keeping Your Battery Healthy 10
Charging Your Battery 11
Battery Safety 11
Operating your new eBike 12
Cockpit Tour 13
Cockpit Instruments 13
Display Control Pad 14
Your First Ride 15
Front and Rear Lights 16
Operating Safety 16
7 Speed Gear System 17
Mechanical Disc Brakes 17
LCD Display Functions 19
Display Readouts 19
Operating the LCD Display 20
Display Settings 20
Changing the Top Speed 22
Battery Capacity Display 23
Kickstand 23
Tips When Riding To Increase Range 23
Maintaining Your Bike 24
Safety 25
Warranty 26
2

Thank you for your purchase of a Lectric eBike.
We appreciate your business and we hope you thoroughly enjoy riding your new eBike.
If you need any assistance please do not hesitate to reach out to us.
Contact Information
Email: contact@lectricebikes.com
Website: lectricebikes.com
Phone: (602)-715-0907
3

Warning
Read this entire manual before assembling or using your new electric bike. Do not
modify, disassemble, or replace the original electrical components on your bike. Doing
so will invalidate your warranty and could put you in danger. Riding any kind of bike
comes along with some risks which can’t be predicted or avoided. Taking proper care of
bike components can lower the risk of sudden failure of components but can not prevent
it. These sudden failures could cause serious harm, injury, or death to the rider. If you
notice abnormalities in any component on the bike, please take it to a licensed mechanic
to be repaired or replaced immediately. Lectric eBikes LLC assumes no liability for harm,
injury, or death of the rider.
This manual is not intended as a detailed service or repair manual. Seek assistance from
your local bike shop mechanic at a reputable bike shop with all the proper certifications
and qualifications.
The Lectric XP can stand up to most rain showers without sustaining damage. However,
the bike and its mechanical and electrical components are not waterproof. We do not
recommend storing or using the bike is wet conditions if it is not absolutely necessary.
The warranty for the Lectric XP does not cover water damage.
For technical assistance or warranty claims contact Lectric eBikes at (602)-715-0907 or email at
contact@lectricebikes.com.
4
Unboxing
Getting Started
Congratulations on your purchase of a brand new Lectric XP eBike! Your bike comes in the box
100% assembled. The instructions that follow are intended to serve as a guide in unboxing and
getting familiar with your new bike. The bike may require adjustments upon being received and
unboxed, as shipping can sometimes be bumpy. We recommend seeking professional help
from a licensed bicycle mechanic who can then help with future maintenance and repair.
What’s in the box:
1. Lectric XP eBike
2. Lectric XP eBike charger
3. 2 Battery keys
4. Assembly tools
5. Manufacturer manuals
Before riding your bike, remove everything from the box and make sure everything listed above
is present. If anything is missing or damaged contact Lectric eBikes immediately for assistance.
For video instructions on how to unfold your bike visit our youtube page: Lectric eBikes.
Folding and Unfolding the Bike
The Lectric XP comes to you fully assembled so all you have to do is ensure everything is
properly secured, unfold the bike, and then you can get riding! The Lectric XP folds in the center
of the frame as well as at the handlebars.
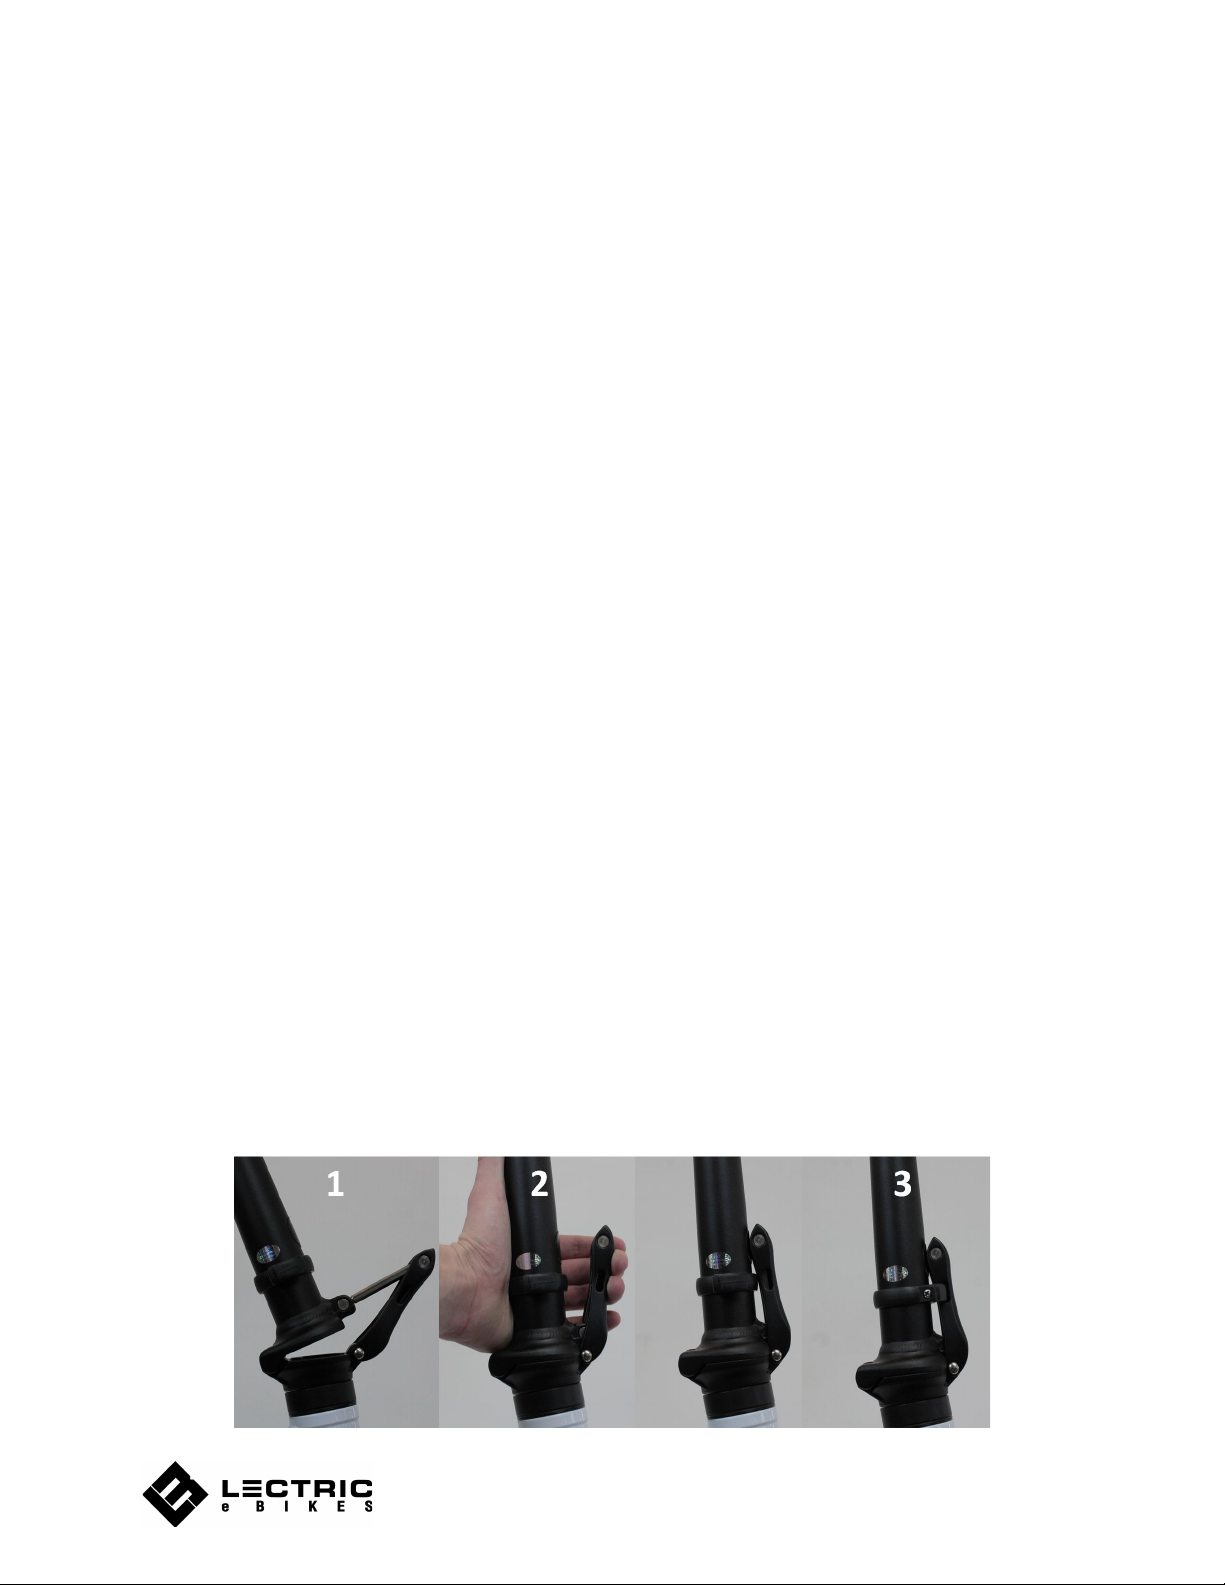
Handlebars
1. To unfold the bike, start with the handlebar clasp.
2. Pull the handlebars to their upright position and push the clasp down firmly.
3. Once the safety clasp is locked, move the safety pin sideways so it is inserted into the
clasp locking it in place.
5

Frame
1. To unfold the bike frame grab the handlebar stem and rear end of the bike while
standing near where the battery is exposed. Lift the bike slightly off the ground and
swing the bike to its closed position.
2. Push down on the clasp firmly until it locks into position.
3. To unlock the bike frame slide the switch to the right as shown below, then pull the latch
open.
6
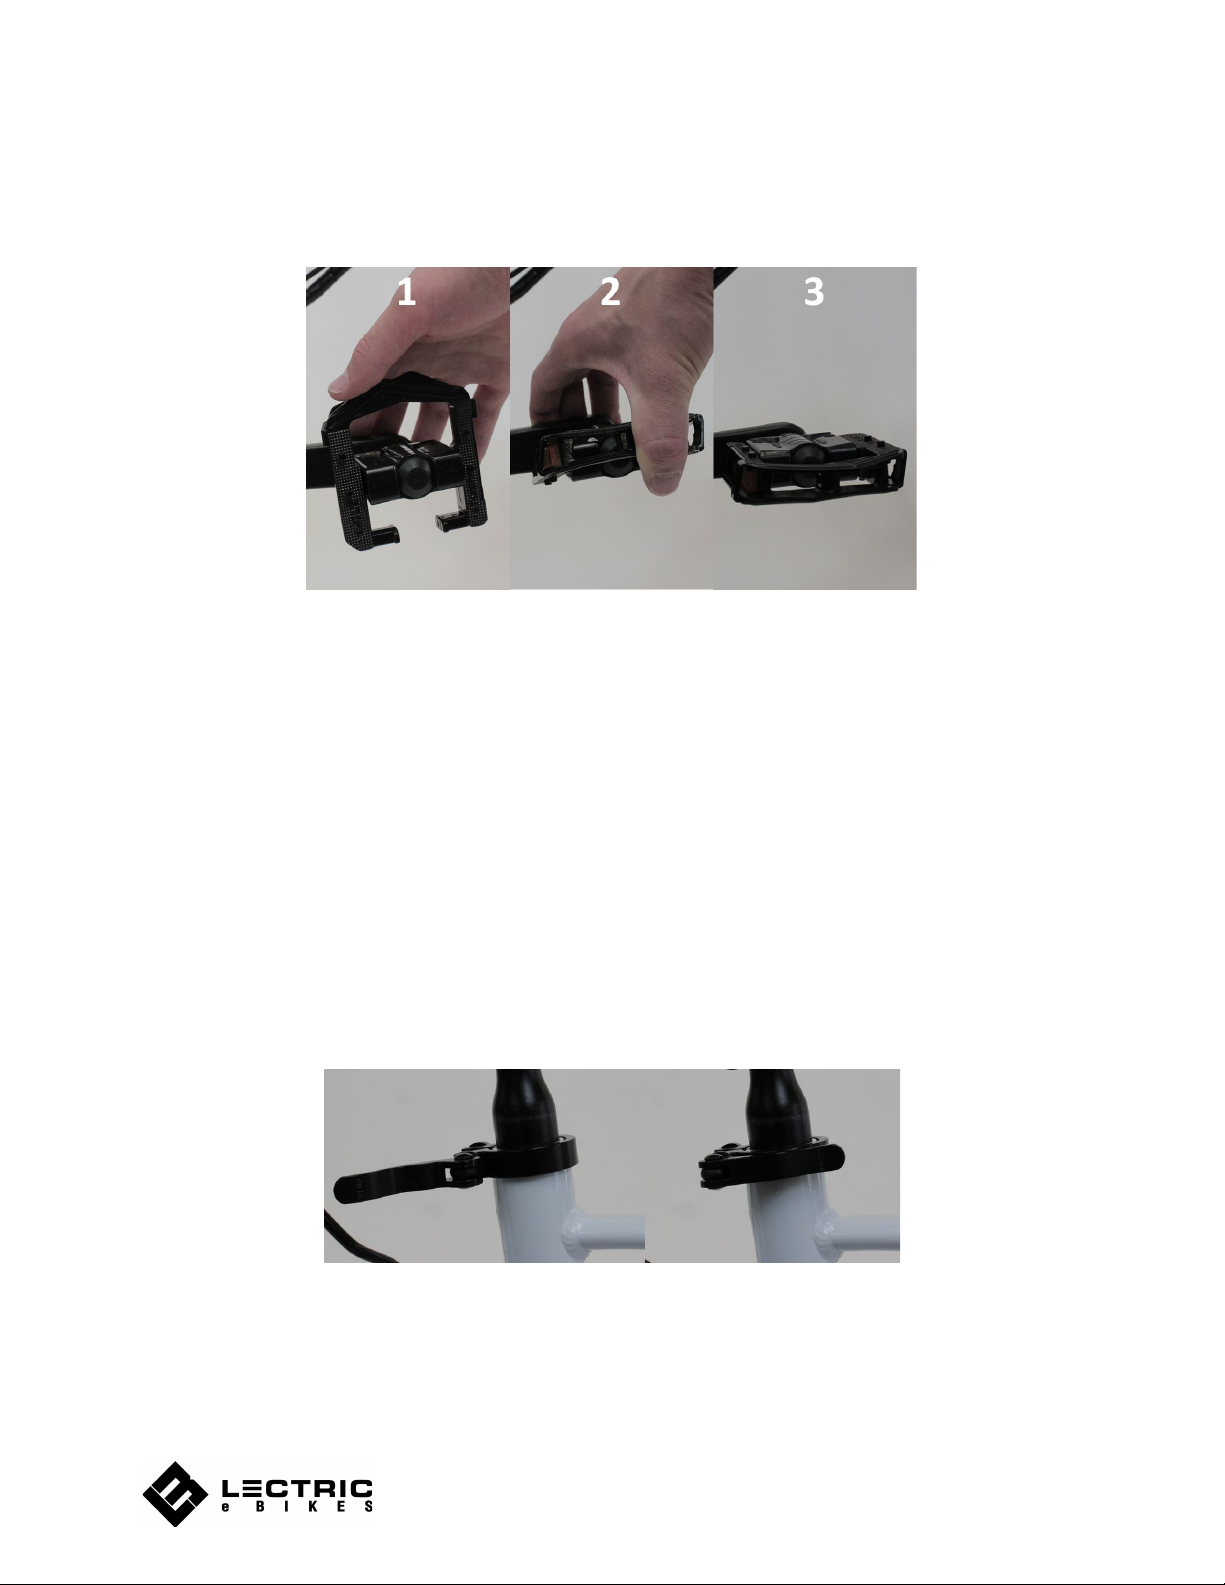
Pedals
1. To unfold the pedals push down slightly and move the pedal outwards.
2. Continue pushing down while lowering it into its unfolded position.
3. Ensure you hear the pedal lock into place once in the unfolded position.
Preparing to Ride
● Ensure all components are properly secured before riding otherwise serious harm
or death could occur. This includes but is not limited to: pedals, handlebars,
handlebar clamp, cranks, seat, and seatpost clamp.
● Make sure you can’t twist the seat or stem out of alignment by hand.
● Check to see if your saddle is positioned at the proper height. Sit on the saddle facing
forward and place the ball of your foot on the pedal at its lowest point. Your leg should
be mostly straight at this point with a slight bend at the knee. You should be able to
pedal the bike without overextending your leg when the pedal is at its lowest point. Your
legs may be overextended where it causes your hips to move side to side which means
the seat must be lowered.
● To adjust your seat up or down, unlatch the seatpost clamp. Move the seat to the
desired height and close the seatpost clamp. The open and closed positions of the
seatpost clamp are shown below (open position on left, closed position on right).
● If you need to adjust the angle of your seat, loosen the nuts on both sides of the seat,
move the seat to the desired angle, then tighten the nuts. The nut’s location is shown
below.
7

● Ensure all cables and connectors at the front of the bike are securely connected or
certain components may not work including the front light, the motor inhibitor switches,
LCD display, and throttle. The motor inhibitor switches shut the motor off as soon as the
rider hits the brakes. If these switches are not operational it will take longer to slow
down which in some riding situations could cause injury or death to the rider.
Recommended Torque Values
It is recommended that fasteners be tightened to the manufacturer's specification found below:
Part
Required Torque (N*m)
Hub
35-44
Reflector
4-5
Disc mounting bolts
6-8
Brake Lever
2-3
Rear Derailleur
8-10
Seatpost
15-17
Saddle
18-19
Pedals
35
Bottom Bracket Parts
38-44
Headset Parts
30-34
Stem
5-6
Handlebars
4
8

Battery
Operating your battery
Your bike comes with a 48V 10.4Ah lithium ion battery with LG cells. Key operating features of
the battery can be found below:
1. Your bike’s battery comes with a set of keys that are used to turn it ON/OFF as well keep
it LOCKED/UNLOCKED to the frame. Each battery has a unique set of keys.
2. The battery has 3 positions: UNLOCKED, OFF, and ON. These positions are shown and
marked below.
3. When your battery is in the UNLOCKED position, you will be able to remove it from the
frame and the power will not be active.
9
 Loading...