

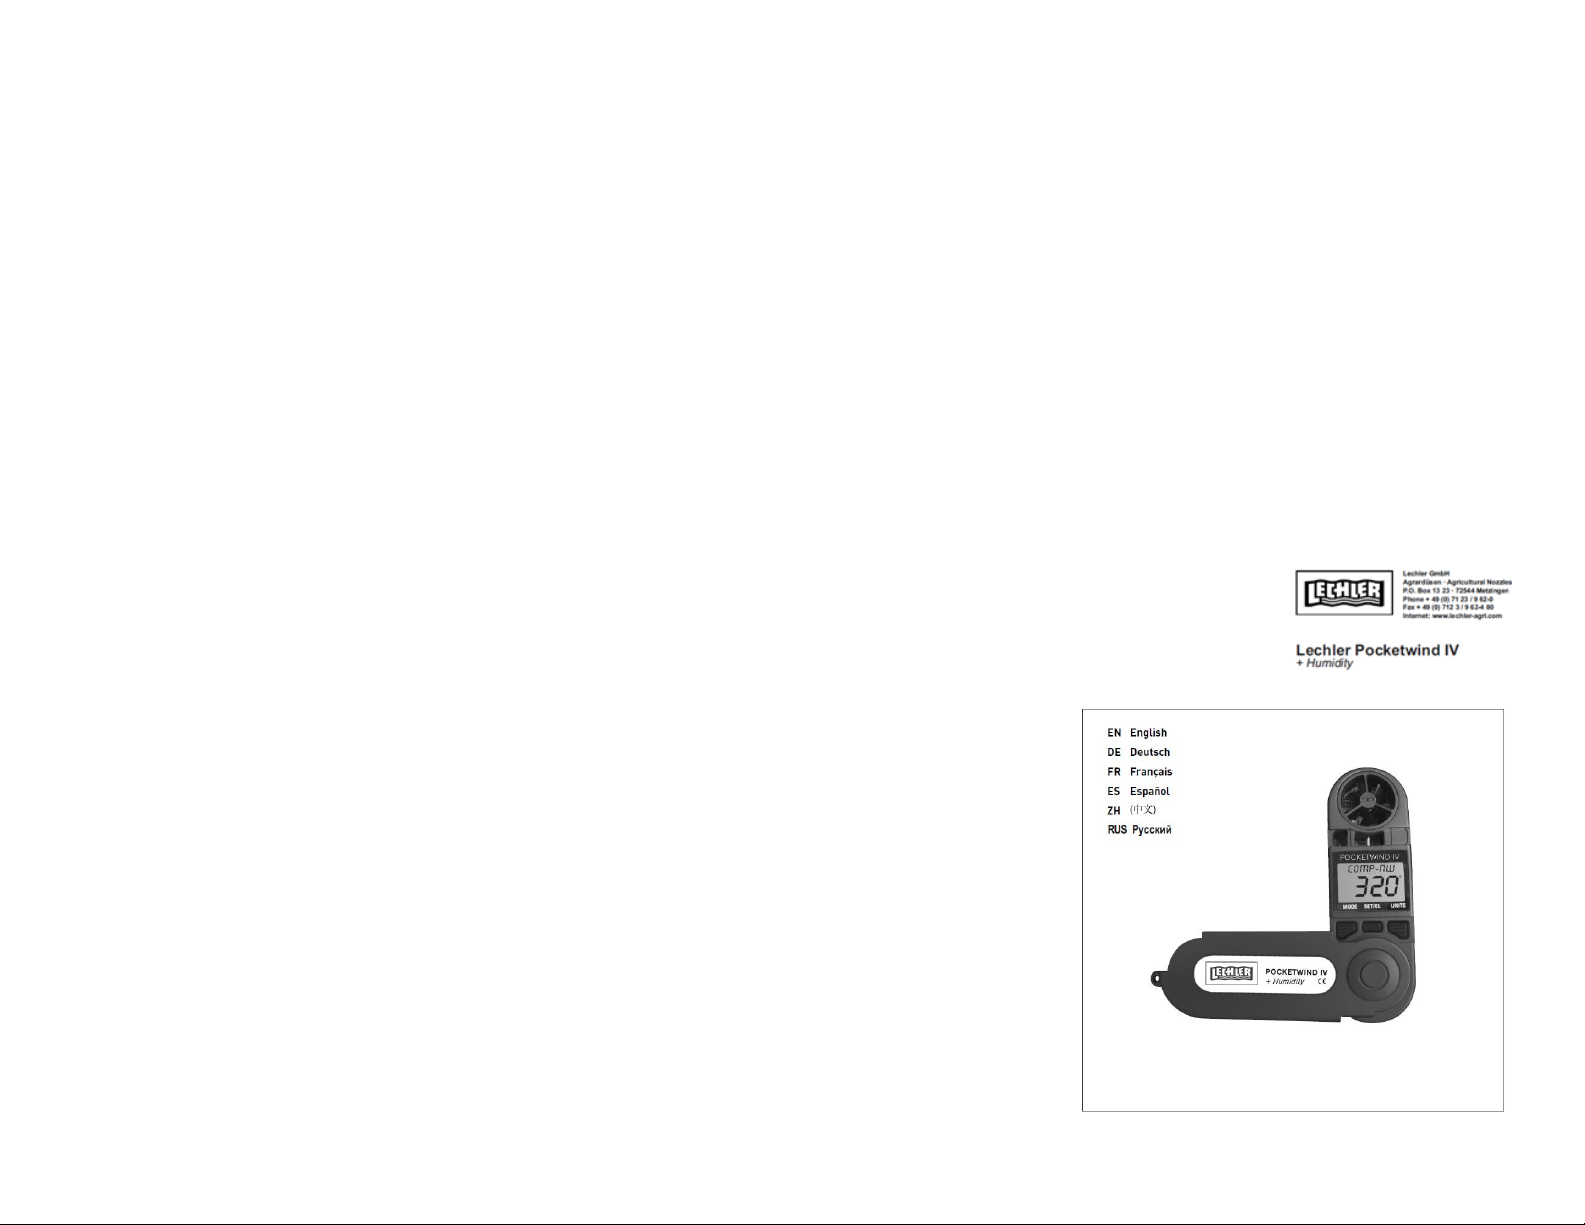
Lechler Pocketwind IV User Manual
Bedienungsanleitung / Manual
Version 05/2018
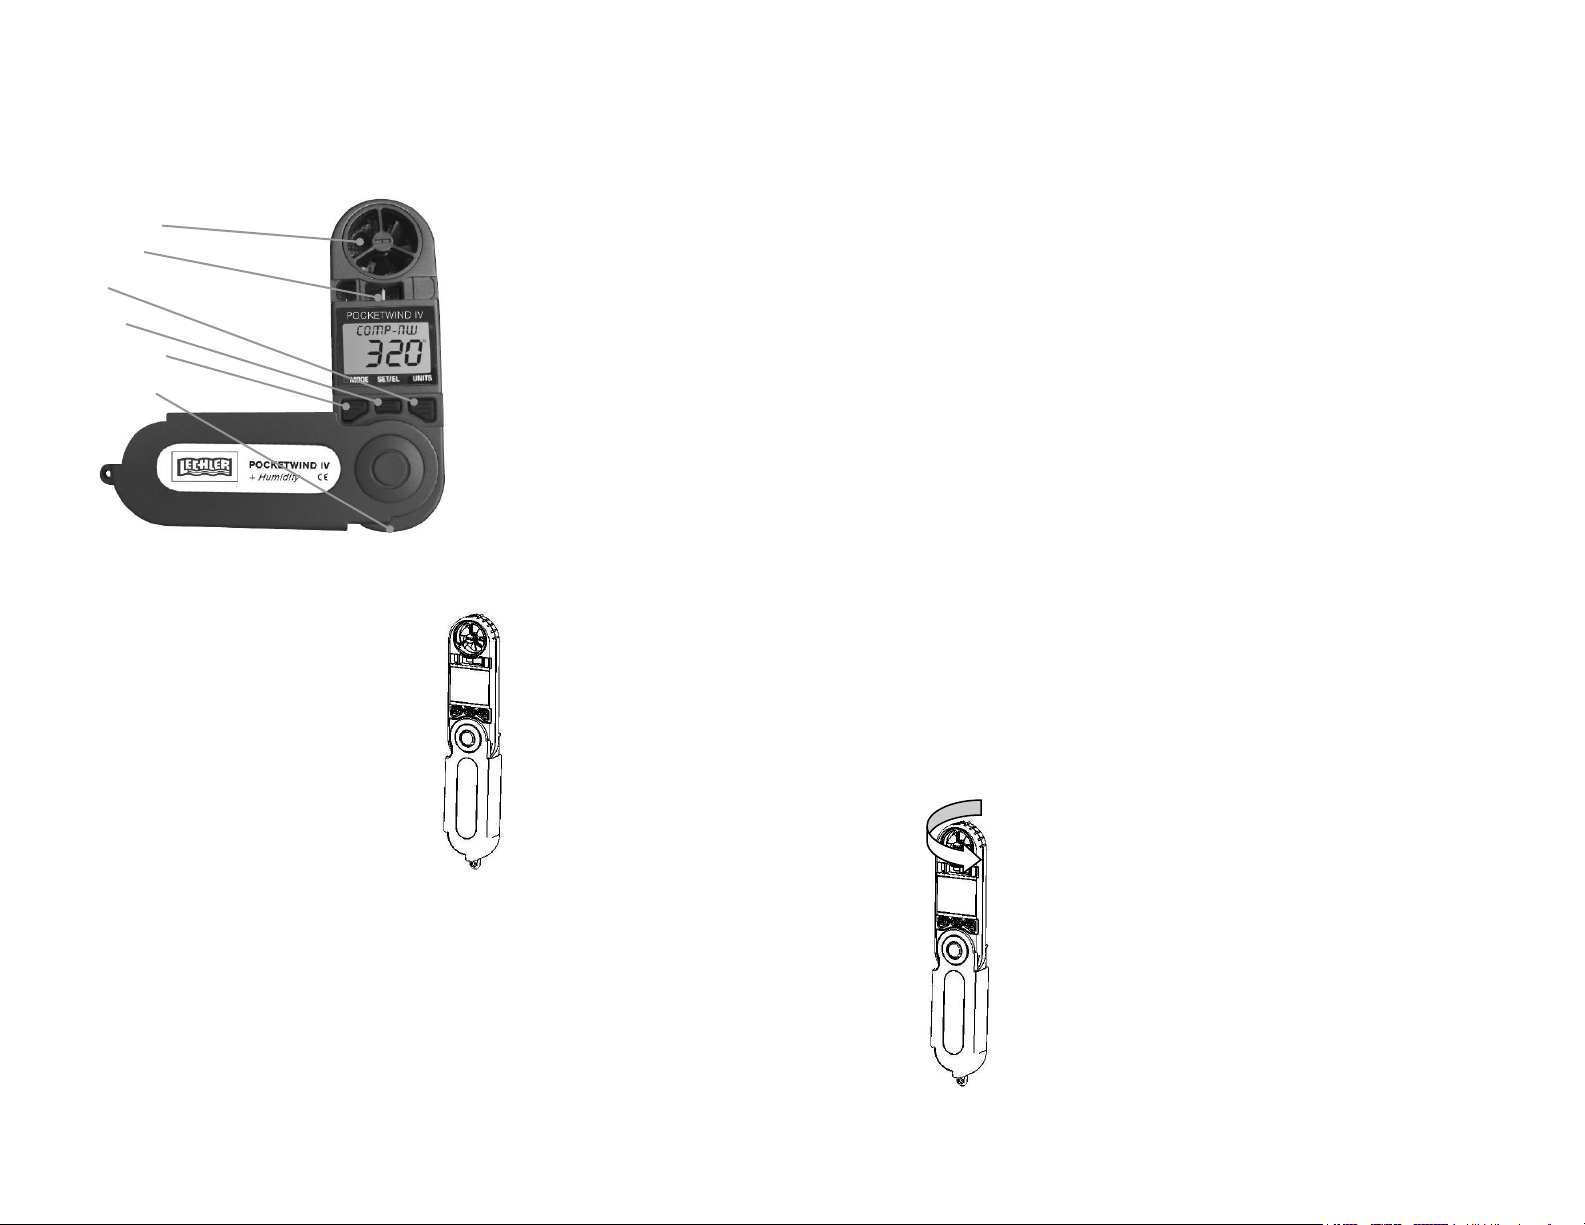
POCKETWIND IV
Wind Impeller
Wind Vane
Units
Set / EL
Mode, On / Off
Tripod Fitting
+ Humidity
User Manual (Version 05/18)
Getting Started
Open your POCKETWIND IV to 180o as
shown. If using a tripod, open your
POCKETWIND IV to a 90o angle as shown
above to access the tripod fitting.
To turn the unit on or off, press and hold
Mode key for about 3 sec. You can turn off
the unit at any mode. If the unit is idle for 5
minutes, it will auto shut down to preserve
battery life.
When taking wind measurements by hand,
make sure to keep the POCKETWIND IV at
arm’s length from the body with the display facing
towards you so the wind will enter the wind impeller
through the rear. Use the wind vane to orient the wind
meter so you are on the wind’s axis. This will give
you the most accurate measurement.
CAUTION: The POCKETWIND IV is very accurate at
low and mid-range air speeds. Consistent use at very
high speeds, such as from a fast-moving car, will
damage the impeller’s bearing and reduce its
accuracy.
Using the wind meter functions
When the unit is turned on for the first time, the default
mode is wind speed. Going to other modes or features
is simply done by pressing the Mode button.
Pressing Units key at any mode, except Compass and
Humidity, changes the unit to your preferred
measurement unit. Sequence of units of measurement
is shown below.
Sequence for POCKETWIND IV
Wind Speed – displays real time wind speed
Max. Wind Speed – displays the max. wind speed
Avg. Wind Speed – displays 10-sec average
Compass
Temperature
Wind Chill
Humidity (Sensor is self-calibrating)
Wet Bulb
Dew Point
Comfort Index
Delta T (Temperature)
Max. / Avg. / Wind Speed
MPH---->KMPH---->MPS---->FPM---->BF---->KNT
Temp./ Wind Chill/ Wet Bulb/ Dew Point/ Comfort
Index/ Delta T
0
F---->0C
Compass Calibration
If necessary, to correct for the presence of
ferrous metals, the compass can be
calibrated. Go to compass mode press
and hold SET/EL key till display shows
“COMPASS CAL” (blinking). Turn the unit
in a vertical position as shown. Turn the
unit around twice, 15 sec per turn, as
shown. After completing the 2 turns press
SET/EL key to confirm calibration. If the
display shows “END” the calibration is
successful. If the display shows “ERR”
redo the calibration process.
Digital Wind Direction
Point the POCKETWIND IV directly into the wind and
select Compass mode. The edge of the wind vane will
point directly towards you. Wind direction is displayed
digitally and in compass points.
The compass feature can also compute the cross and
head/tail wind. Point the meter in the direction of
travel or target and get a steady compass reading.
Press and hold Units key until MARK stops blinking.
Release Units key and point the meter into the wind
until you have a steady compass reading. Press and
hold Units key until MARK stops blinking. The meter
will display cross wind and to view head wind press
the Units Key. The computed cross and head/tail
wind may indicate a minus (–) sign. The minus (–)
sign will indicate the wind is coming from the back,
while no sign will indicate that the wind is coming from
the front. To exit, press Mode.
Setting the Comfort Index™
Accuweather.com® Comfort Index™ is the effect of
temperature, relative humidity, wind speed & sun
intensity on the human body. You can adjust the
formula based on sun intensity. The solar factor has a
range of 0 to 3.0 with a default setting of 1.5 (medium
sun intensity). Example: Full sun = 3.0; Heavy clouds
= 0. To change, press and hold SET/EL key. Press
Units key to adjust the current value of the solar
factor and press SET/EL to confirm and exit the
setting mode.
Replacing the Battery
The unit uses a CR2032 Lithium battery. Turn the unit
to the back. Use a coin to turn battery cover as
indicated by the arrow. Insert the battery with the
printed side facing you and close the battery door.
The POCKETWIND IV conforms to the following
standards (CE):
* EN 61326-1:2006
EN 55011:2007 +A2:2007
EN 61000-4-2:1995 +A1:1999 +A2:2001
EN 61000-4-3:2006
The meter complies with the essential protection
requirements of Directive 2004/108/EC.
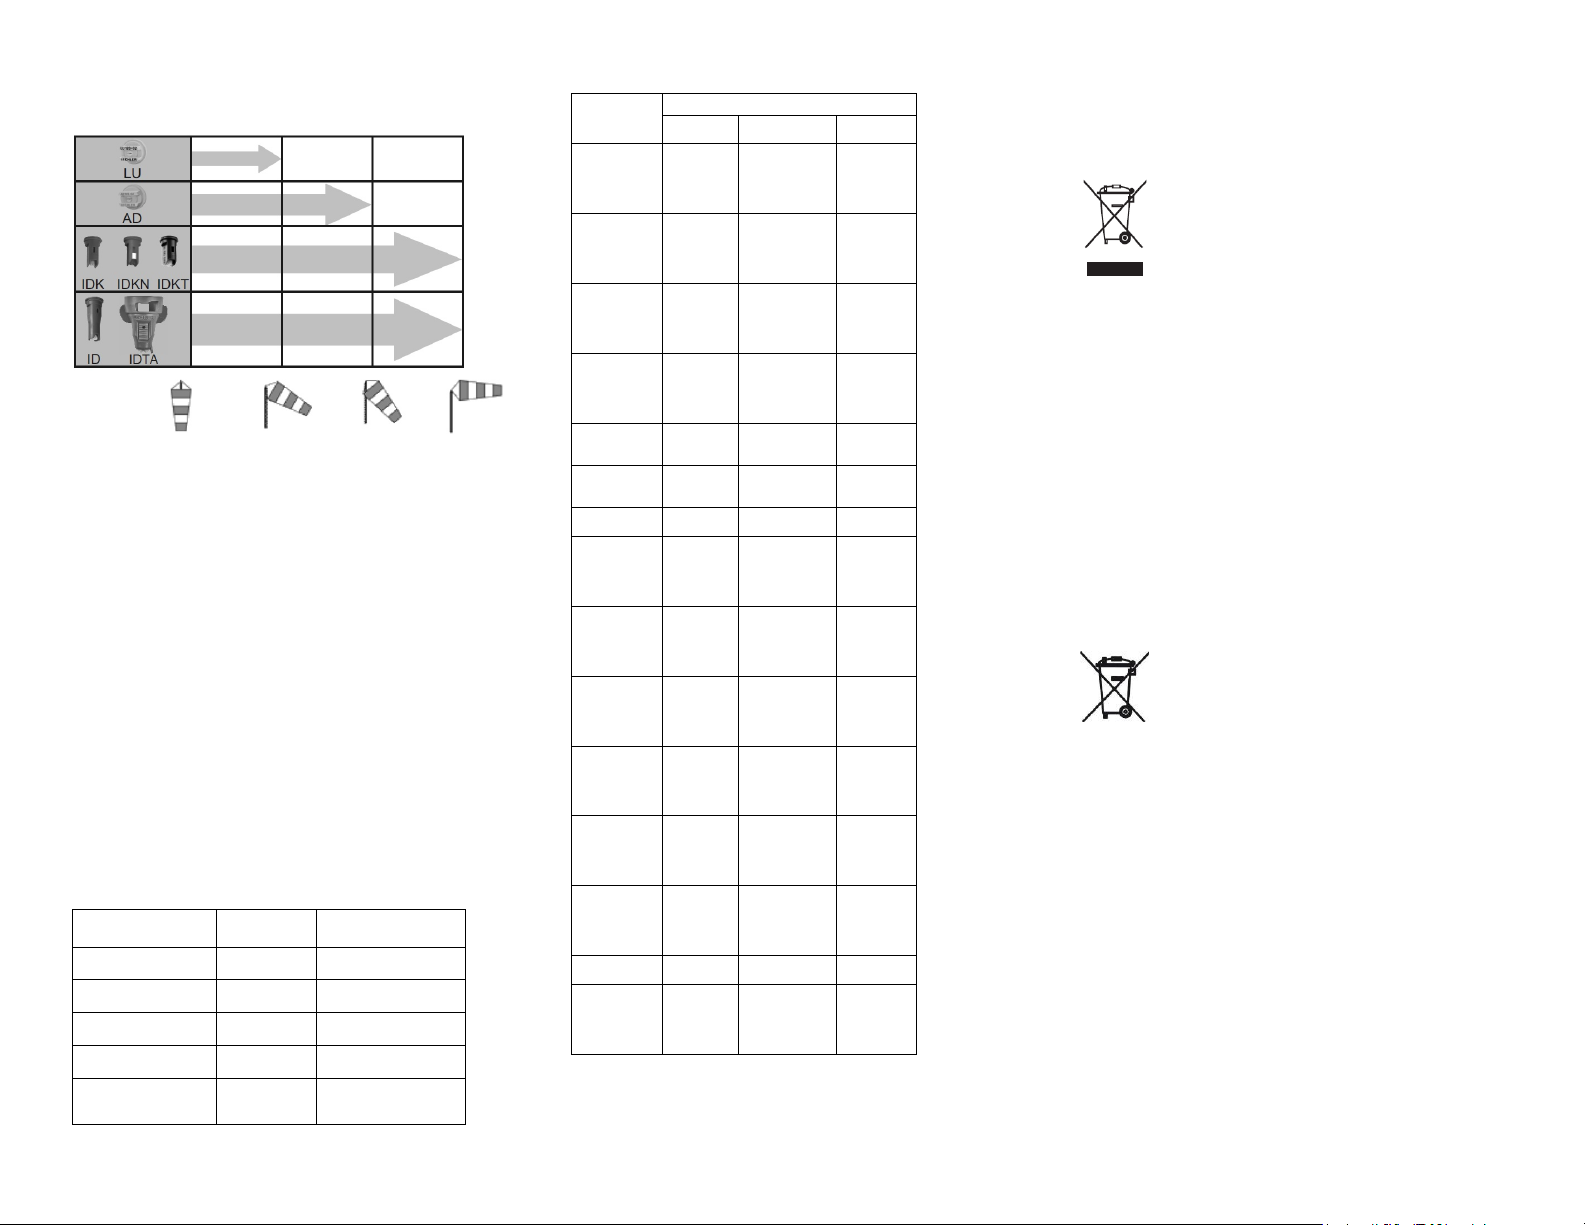
Recommended duty limits for LU, AD and
Measurement
Range
Accuracy
Wind Speed
0,4 – 40 m/s
± 3%
Temperature, Wind Chill
-20 – 60°C
± 1°C
Digital Compass
0° - 360°
± 2°
Relative Humidity
0 – 100% RH
± 3% RH
Wet Bulb, Dew Point
-45° - 125°C
& 0 – 100% RH
± 2°C
Mode
Keys
Mode/ On/
Off
SET/ EL
Units
Wind Speed
Change
mode
(Hold to turn
power ON/
OFF)
---------------
Change
Units
Max. Wind
Speed
Change
mode
(Hold to turn
power ON/
OFF)
---------------
Change
Units
Avg. Wind
Speed
Change
mode
(Hold to turn
power ON/
OFF)
---------------
Change
Units
Compass
Change
mode
(Hold to turn
power ON/
OFF)
Hold to enter
Compass
Calibration
Hold to mark
direction
Crosswind
Exit to
compass
Hold to enter
Compass
Calibration
Headwind
Headwind
Exit to
compass
Hold to enter
Compass
Calibration
Crosswind
Compass
Calibration
---------------
Exit to compass
---------------
Temperature
Change
mode
(Hold to turn
power ON/
OFF)
---------------
Change
Units
Wind Chill
Change
mode
(Hold to turn
power ON/
OFF)
---------------
Change
Units
Humidity
Change
mode
(Hold to turn
power ON/
OFF)
---------------
---------------
Wet Bulb
Change
mode
(Hold to turn
power ON/
OFF)
---------------
Change
Units
Dew Point
Change
mode
(Hold to turn
power ON/
OFF)
---------------
Change
Units
Comfort Index
Change
mode
(Hold to turn
power ON/
OFF)
Hold to enter
Solar Factor
Setting
Change
Units
Solar Factor
Setting
---------------
Exit to Comfort
Index
Advance
adjust
Delta T
Change
mode
(Hold to turn
power ON/
OFF)
---------------
Change
Units
ID/IDTA//IDK/IDKN/IDKT flat fan nozzles as a
function of wind speed:
Rule of thumb:
The higher the wind speed, the larger the nozzle size
in combination with minimal pressure is
recommended. The day curve of wind speeds should
be considered when spray application is planned.
Typically, the lowest wind can be expected in the
evening, overnight and early in the morning.
Delta T
Delta T is becoming one of the most important
standard indicators for acceptable spray conditions
referring to evaporation rate and droplet lifetime. It is
the agricultural term for wet bulb depression and
combines temperature and relative humidity. When
delta T is high, the evaporative potential is high and
droplet survival is lowered for smaller droplets. When
applying pesticides, Delta T should ideally be between
2 and 8 and not greater than 10 for coarse droplet
spray applications such as with ID/IDTA and
IDK/IDKN/IDKT nozzles.
Specifications
Key Function Matrix
Correct disposal of this product
(Waste Electrical & Electronic Equipment)
(Applicable in the European Union and other
European countries with separate collection systems)
This marking shown on the product or its
literature, indicates that it should not be
disposed with other household wastes at
the end of its working life.
To prevent possible harm to the
environment or human health from uncontrolled waste
disposal, please separate this from other types of
wastes and recycle it responsibly to promote the
sustainable reuse of material resources.
Household users should contact either the retailer
where they purchased this product, or their local
government office, for details of where and how they
can take this item for environmentally safe recycling.
Business users should contact their supplier and
check the terms and conditions of the purchase
contract. This product should not be mixed with other
commercial wastes for disposal.
Correct disposal of batteries in this product
(Applicable in the European Union and other
European countries with separate battery return
systems.)
This marking on the battery, manual or
packaging indicates that the batteries in
this product should not be disposed of with
other household waste at the end of their
working life. Where marked, the chemical symbols
Hg, Cd or Pb indicate that the battery contains
mercury, cadmium or lead above the reference levels
in EC Directive 2006/66. If batteries are not properly
disposed of, these substances can cause harm to
human health or the environment.
To protect natural resources and to promote material
reuse, please separate batteries from other types of
waste and recycle them through your local, free
battery return system.
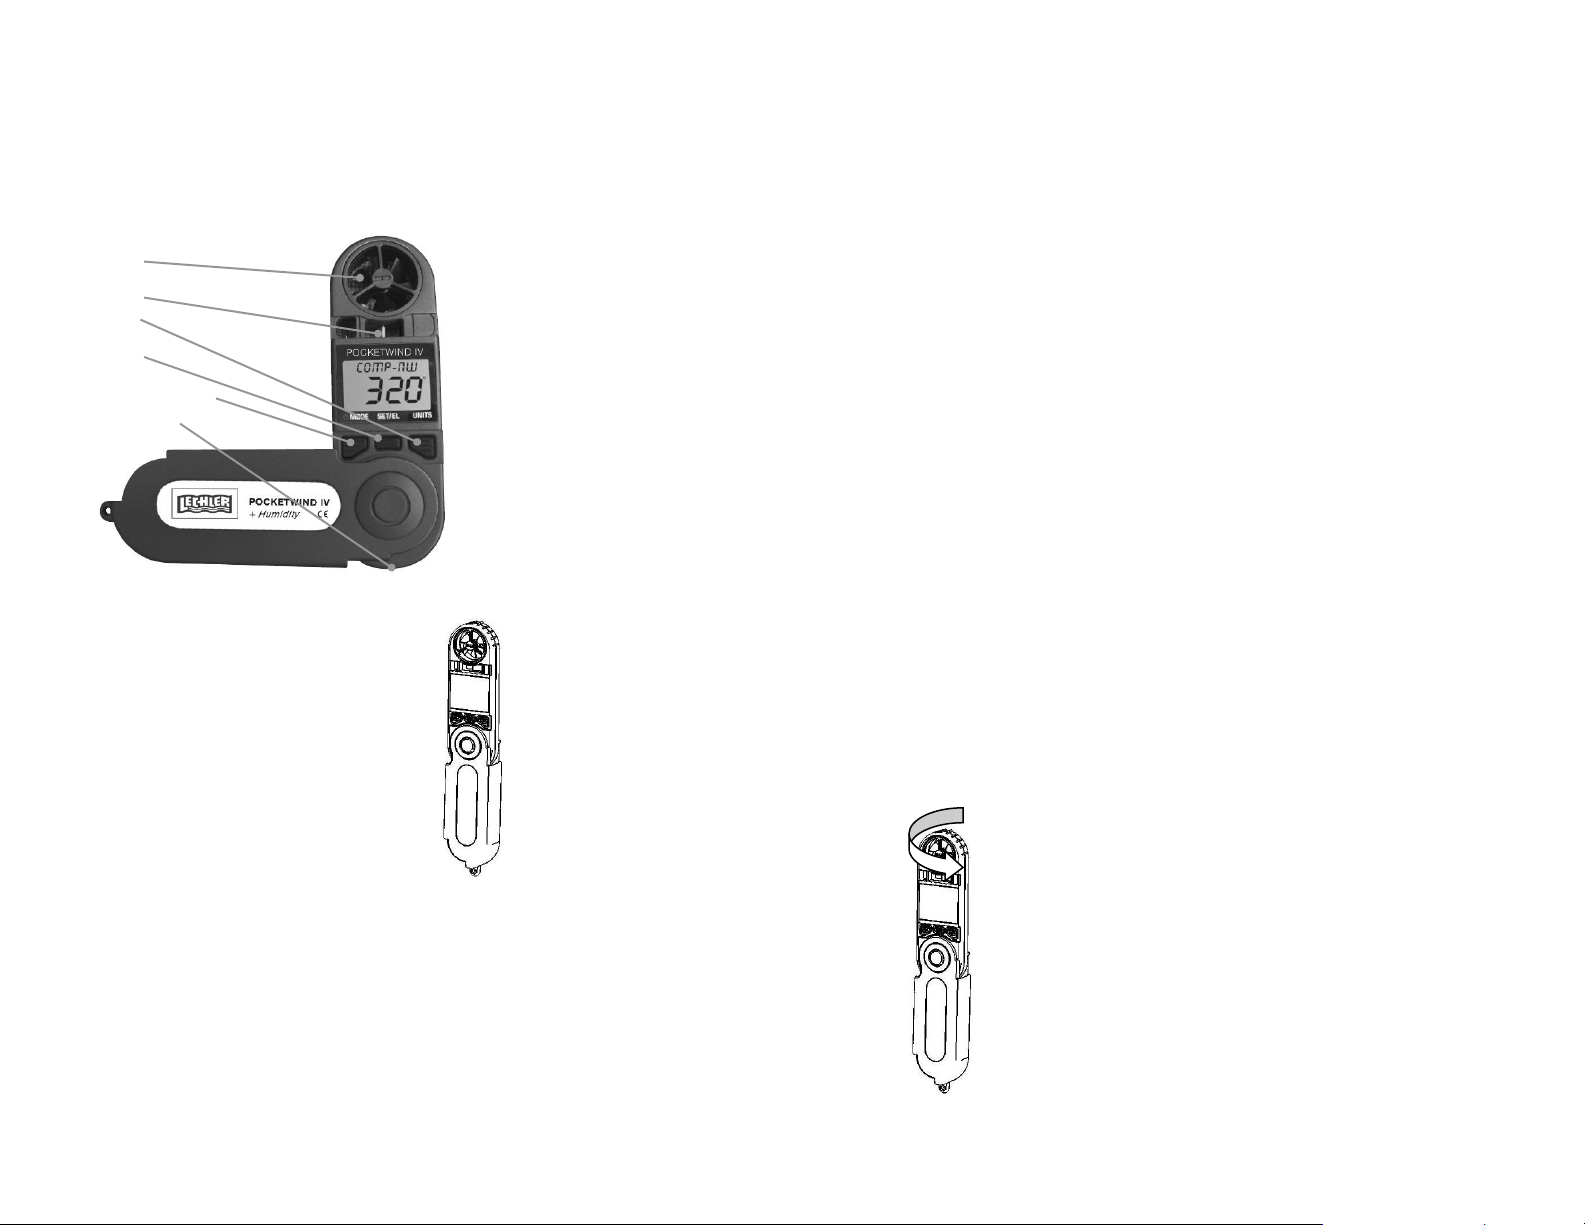
Flügelrad
Windfahne
Units (Einheiten)
Set / EL
Mode (Betriebsmodus Ein / Aus)
Anschluss Stativ
POCKETWIND IV
+ Humidity
Bedienungsanleitung (Version 05/18)
Vorbereitung zur Messung
Den POCKETWIND IV auf 180° wie angezeigt
Öffnen. Soll der Windmesser auf einem Stativ
montiert werden, Gehäuse nur um 90°
Aufklappen. Der Stativanschluss ist frei
zugänglich.
Der POCKETWIND IV wird ein- oder
ausgeschaltet, indem die Mode Taste für ca. 3
Sekunden gedrückt gehalten wird. In jedem
Modus lässt sich der Windmesser ausschalten.
Zum Schutz der Batterie erfolgt eine
automatische Abschaltung nach ca. 5 Minuten
Nichtbenutzung.
Wenn Windmessungen manuell vorgenommen
werden, den POCKETWIND IV eine Armlänge vom Körper
weg halten und das Display in Richtung des Benutzers
richten. Der Wind kann somit von hinten durch das Flügelrad
blasen. Die genaueste Messung erhält man, indem die
Windfahne parallel zum Gehäuse des POCKETWIND IV
steht.
VORSICHT: Der POCKETWIND IV ist bei niedrigen und
mittleren Luftgeschwindigkeiten sehr genau. Ständiger
Gebrauch bei sehr hohen Luftgeschwindigkeiten, zum
Beispiel Messungen aus einem schnell fahrenden Auto
heraus, wird das Lager des Flügelrades auf Dauer
beschädigen und die Messgenauigkeit verringern. Siehe
unten Informationen zum Ersetzen des Flügelrades.
Benutzen der Windmessfunktionen
Beim Einschalten oder Reset des POCKETWIND IV
erscheint im Display standardmäßig die Anzeige
Windgeschwindigkeit. Zu anderen Einstellungen oder
Funktionen gelangt man durch Drücken der Mode Taste. Mit
der Units Taste lassen sich die Maßeinheiten - außer im
Kompass- und Feuchtigkeitsmodus - auswählen. Die
Reihenfolge des Messmodus wird nachfolgend beschrieben.
Reihenfolge für den POCKETWIND IV
Windgeschwindigkeit – zeigt die Echtzeit-
Windgeschwindigkeit an
Max. Windgeschwindigkeit – zeigt die maximale
Windgeschwindigkeit an
Durchschnittliche Windgeschwindigkeit – zeigt 10-Sek.
Durchschnitt an
Kompass
Temperatur
Windauskühlungsfaktor
Feuchtigkeit (Sensor stellt sich selbst ein)
Feuchttemperatur (Temperatur am
Verdunstungsthermometer)
Taupunkt
Komfort-Index
Delta T (Temperatur)
Max. / Avg. / Wind Speed
(Max. / Durchschnittl. / Windgeschwindigkeit)
MPH---->KMPH---->MPS---->FPM---->BF---->KNT
(Meilen/h--->km/h--->Meter/sec--->Feet /min--->Beaufort---->Knoten)
Temperatur / Windauskühlungsfaktor /
Feuchttemperatur / Taupunkt / Komfort Index / Delta T
Temperatur
°F---->°C
(°Fahrenheit---->°Celsius)
Kompasskalibrierung
Die Kalibrierung der Kompassfunktion kann
erforderlich werden, wenn z. B. die
Ablenkung des Kompasses durch
eisenhaltige Metalle zu korrigieren ist. Dabei
im Kompassmodus die Set/ EL-Taste
drücken und halten, bis die Anzeige“
COMPASS CAL” angezeigt wird (blinkt auf).
Dann den POCKETWIND IV zweimal um die
eigene Achse langsam drehen – 15
Sekunden pro Umdrehung (siehe Bild). Nach
den zwei Umdrehungen, die Set/ EL-Taste
erneut drücken. Erscheint im Display die
Anzeige „END”, war die Kalibrierung
erfolgreich. Bei Anzeige von „ERR”, ist der
Kalibrierungsprozess zu wiederholen.
Digitale Windrichtung
Den POCKETWIND IV direkt in den Wind halten und den
Kompass-Modus wählen. Die Spitze der Windfahne sollte in
Richtung des Benutzers zeigen. Die Windrichtung wird im
Digitalformat und in Kompasspunkten angegeben.
Die Kompassfunktion ermöglicht auch die Berechnung des
Seiten-, Gegen- und Rückenwindes. Dazu den
POCKETWIND IV in Windrichtung oder in Richtung Ziel
ausrichten. Als nächstes die Units Taste drücken und
halten, bis die Anzeige „MARK“ zu blinken aufhört. Danach
die Units Taste loslassen und den POCKETWIND IV
weiterhin im Wind in der gewählten Position halten, bis eine
gleichbleibende Kompassanzeige im Display erscheint. Die
Units Taste wieder drücken und halten, bis die Anzeige
„MARK“ aufhört zu blinken. Der POCKETWIND IV zeigt als
erstes den Seitenwind an. Durch weiteres Drücken der Units
Taste wird der Gegenwind angezeigt.
Der kalkulierte Seiten- und Gegen-/Rückenwind kann durch
ein (–) Zeichen“ angegeben werden. Das Minuszeichen gibt
an, dass der Wind von hinten kommt; kein Vorzeichen weist
darauf hin, dass der Wind von vorne kommt. Um den
Betriebsmodus zu beenden, die Mode Taste drücken.
Einstellen des Comfort-Indexes™
Der Accuweather.com® Comfort Index™ kalkuliert die
Wirkung von Temperatur, relativer Feuchtigkeit,
Windgeschwindigkeit und Sonnenintensität auf den
menschlichen Körper. Je nach Sonnenintensität lässt sich
die Berechnungsformel anpassen. Der Sonnenfaktor reicht
von 0 bis 3.0 mit einer Standardeinstellung von 1.5 (mittlere
Sonnenintensität).
Zum Beispiel:
Volle Sonneneinstrahlung = 3,0;
starke Bewölkung = 0.
Um die Einstellung zu ändern, ist die Set/ EL Taste zu
drücken und zu halten. Danach die Units Taste drücken und
den momentanen Wert der Sonnenintensität anpassen. Den
Wert durch Drücken der Set/ EL Taste bestätigen und den
Einstellungsmodus verlassen.
Ersetzen der Batterie
Erscheint im Display auf der linken Seite das Symbol
für die Batterie, ist diese fast leer und muss ersetzt
werden. Die Messgenauigkeit wird beeinträchtigt!
Der POCKETWIND IV benötigt eine CR2032 Lithium
Batterie. Auf der Rückseite des Windmessers den
Batteriedeckel mit z. B. einer Münze in Pfeilrichtung
drehen und öffnen. Neue Batterie so einsetzen, dass
die bedruckte Seite in Richtung des Benutzers zeigt.
Den Batteriedeckel in umgekehrter Reihenfolge
wieder schließen.
 Loading...