

Page 1
D7 SERVICE ADVICE
M-08-IS-0D7
Revision 1
25th November 2013 Page 1 of 2
The D7 valve is manufactured from quality materials and has been engineered to ensure a long life
in arduous marine environments. In the unlikely event that you experience problems with this
product you may find the following notes helpful.
If the problem is Leakage read section 1, if it is Breakage read section 2.
Section 1 - LEAKAGE
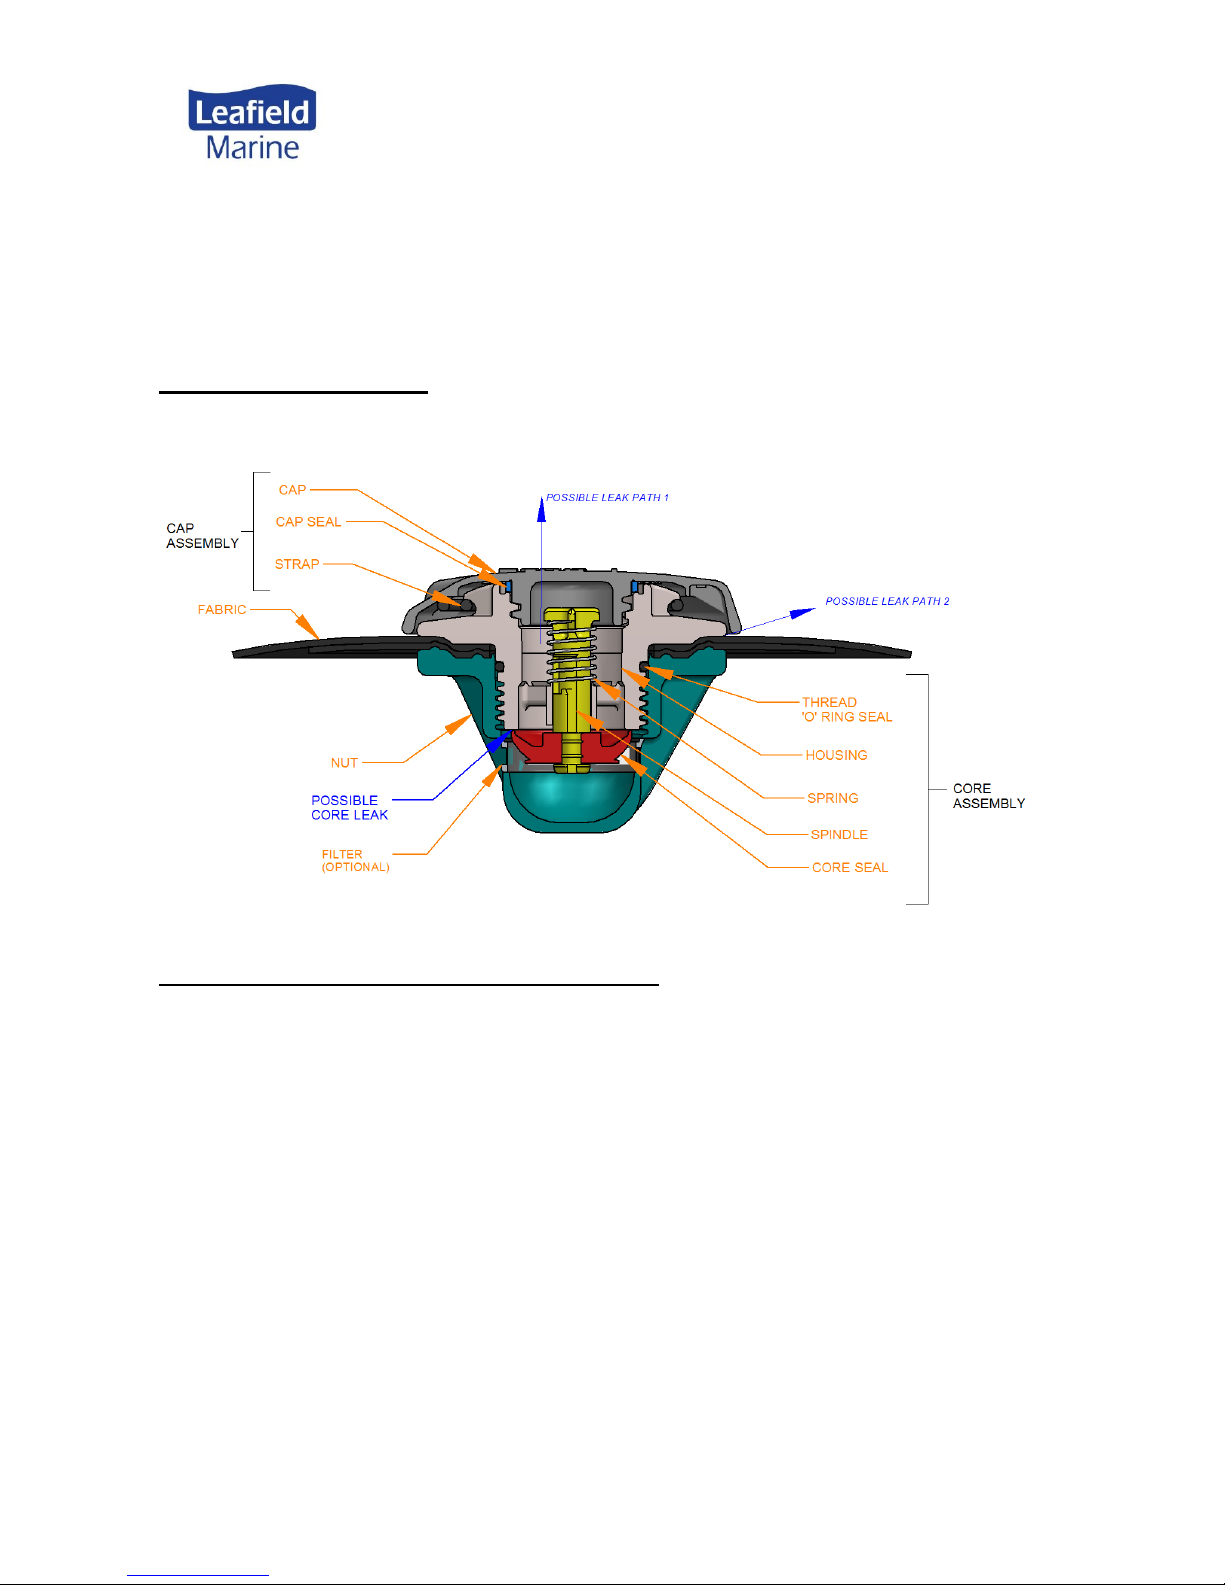
First identify where the leak is coming from- see diagram below.
(a) Leakage Path 1 (from the Core Assembly).
This problem can be temporarily overcome by fitting the cap, as this is a secondary seal. To
permanently fix the problem, carry out the following operations: -
(i) With the buoyancy tube deflated and the valve in the closed position, remove the Cap, then
fill the valve with some warm soapy water. Open the valve by pushing the Spindle down and
turning anti-clockwise. Allow the water to drain through. Rinse through with plain water. Recheck the valve for air tightness.
(ii) If the leakage persists, use service tool C16605 with the buoyancy deflated and unscrew the
core of the valve by turning it anti-clockwise. Check the rubber seal on the valve core for dirt
or damage. Check that the sealing face on the plastic core is clean and undamaged.
(iii) Refit the valve and tighten as tightly as you can using hand pressure on the tool. Inflate the
buoyancy tube and check for air tightness. We recommend that after around 24 hours the
valve should be retightened to ensure it has fully seated. If the leakage persists contact your
local repair shop.
Page 2
D7 SERVICE ADVICE
M-08-IS-0D7
Revision 1
25th November 2013 Page 2 of 2
(b) Leakage Path 2 (from the edge of the Valve).
(i) Using tool C16605, ensure that the valve is as tight as possible with hand pressure only.
(ii) If the leak persists, unscrew the valve core and remove. Remove the core and inspect the
thread ‘O’ ring seal and the condition surface of fabric around the hole where the flange of
the valve contacts the fabric.
(iii) If the thread ‘O’ ring seal or core seal are damaged they must be replaced using the
appropriate seal kit.
Section 2 - BREAKAGE
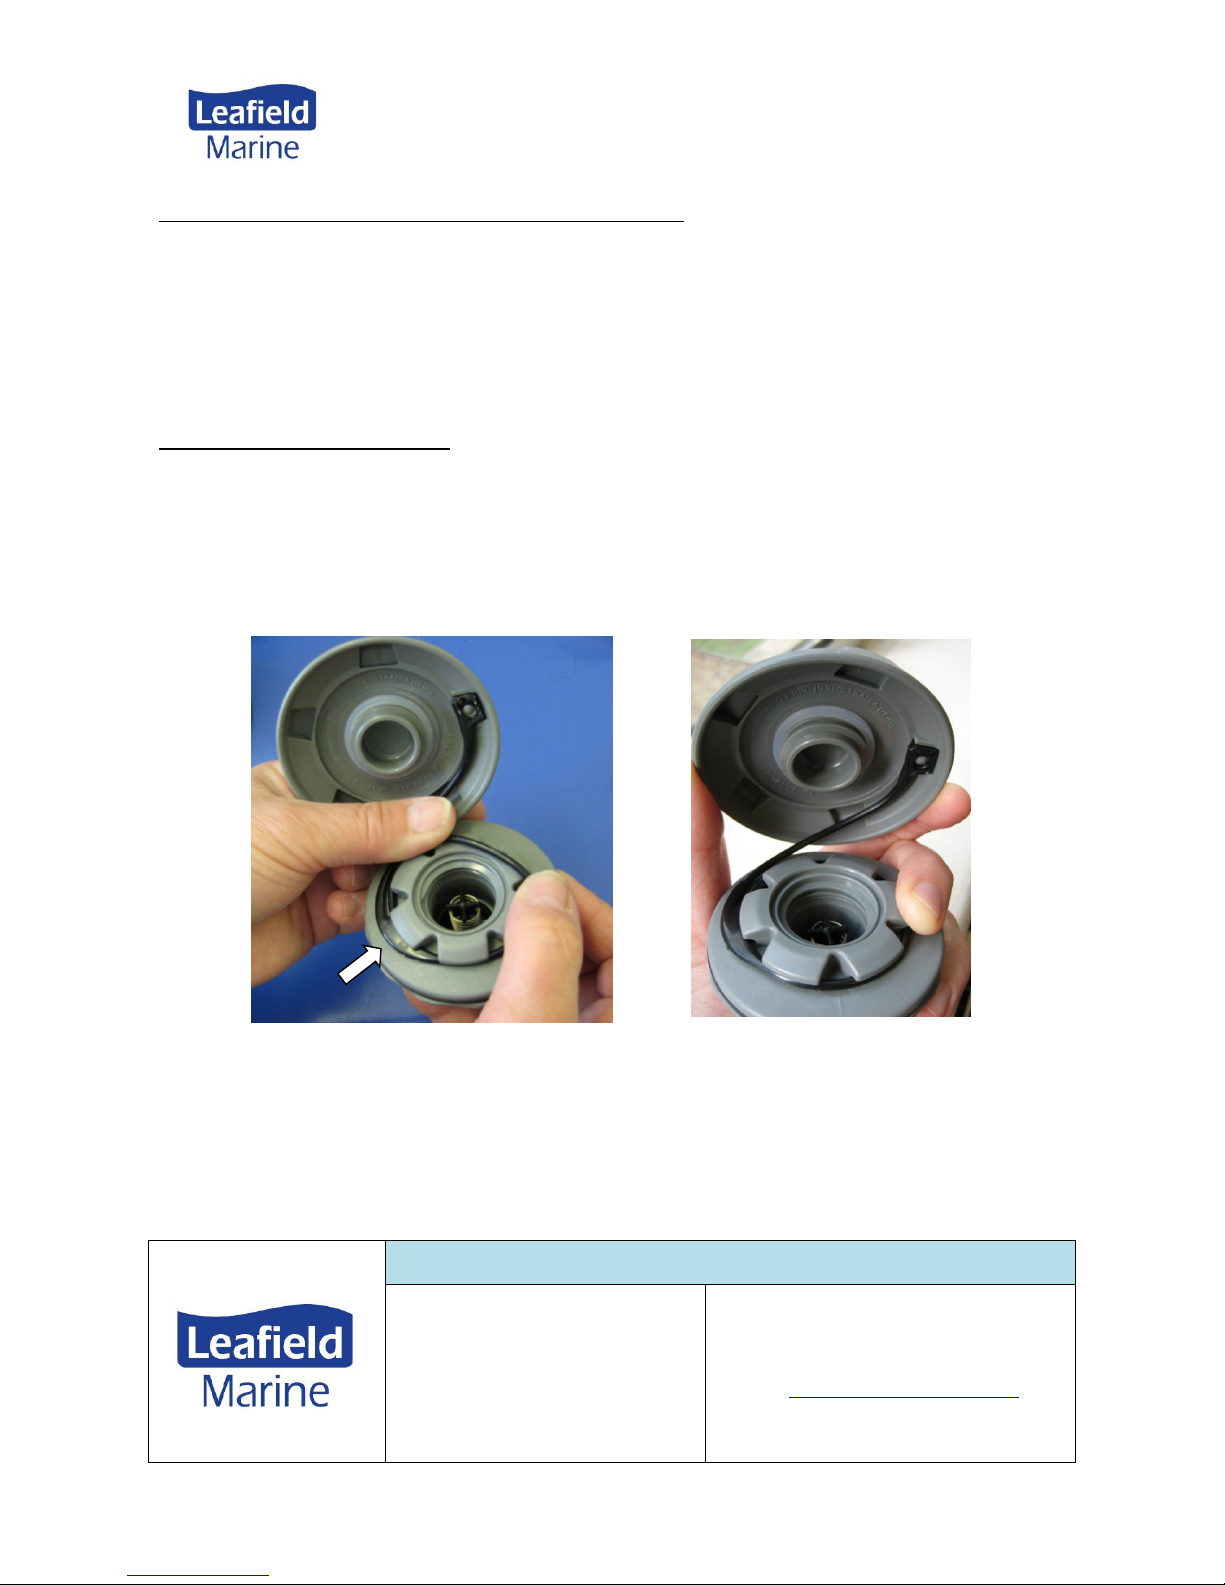
(i) If the cap has been broken or the strap damaged, a new Cap/strap assembly can be
obtained from your spares supplier. The loop securing the cap to the valve can be cut using
a knife- being careful not to damage you or the raft fabric. The new loop can then be
pushed over the retaining features (start with the thickest part of the strap) and will clip into
place securing the cap firmly. Make sure the strap is the right way up before fitting, so there
are no twists in the strap when you screw the cap on.
(ii) If the core of the valve is broken it can be replaced. See the previous section for information
on how to remove and refit it.
We hope your repair went well and our products go on to give you long and reliable service. If you
have any comments concerning our products or these sheets please feed them back to us via your
local spares supplier. We are always trying to improve our service and products; feedback helps us
to do this.
Contact Details
Leafield Marine Ltd.
Unit 2, Atworth Business Park,
Bath Road,
Atworth,
Wiltshire
United Kingdom
SN12 8SB
Tel: +44 (0)1225 899550
Fax: +44 (0)1225 709587
Email: [email protected]
Website: www. leafieldmarine.co.uk
 Loading...