

Page 1
22
17
16
12
3
7
23
23
M1
19
18
20
24
1
9
2
10
5
6
8
3
20
13
12
2323
M1
19
17
7
15
LW 35205
WWW.LEADWARRIOR.COM [email protected] COPYRIGHT 2014
LEADWARRIOR
HISTORICAL MINIATURE
Ebay: LEADWARRIOR
INFO@LEADWARRIOR.COM
WWW.LEADWARRIOR.COM
LW 35205
During WWII, Germany was in a fuel shortage. Oil
imports were largely blocked, and what oil was
available was used for aviation and tank fuel.
Germany had a lot of coal, but no oil deposits, so
German ingenuity turned to gasification of coal to
make synthetic fuel. To run cars without using their
precious oil, the German military and many civilians
tried a method of running a car by burning wood.
Porsche had introduced such a fuel systems as the
conversion sets for VolksWagen cars, designated
as Types 230, 239 and 283. While there is some
uncertainty in the references, it is believed that the
Type 230 was to be used for the Type 87 KDF-body
cars, while the Types 239 and 283 were for the
Type 82 Kubelwagens.
These conversion sets included gas generator,
gas reservoir, carburetor modi ficati on and
additional plumbing to convey, filter, and meter the
gas.The gas generator was an airtight vessel into
which was introduced a charge of wood or coal.
Heat was applied to the fuel tank externally to
initiate a self-sustaining gasification of the fuel in
an oxygen deprived environment.
31 RESIN PARTS
1/35 CONVERSION KIT
for TAMIYA VW Kubelwagen
GAS-GENERATOR
CARGO
The resulting wood-gas (Holzgas) was piped
to the reservoir, and then to the engine
carburetor. Wood-gas modified vehicles were
therefore a "dual fuel" vehicle in that a selfsustaining gassification of the wood or coal
required another fuel to start the process.
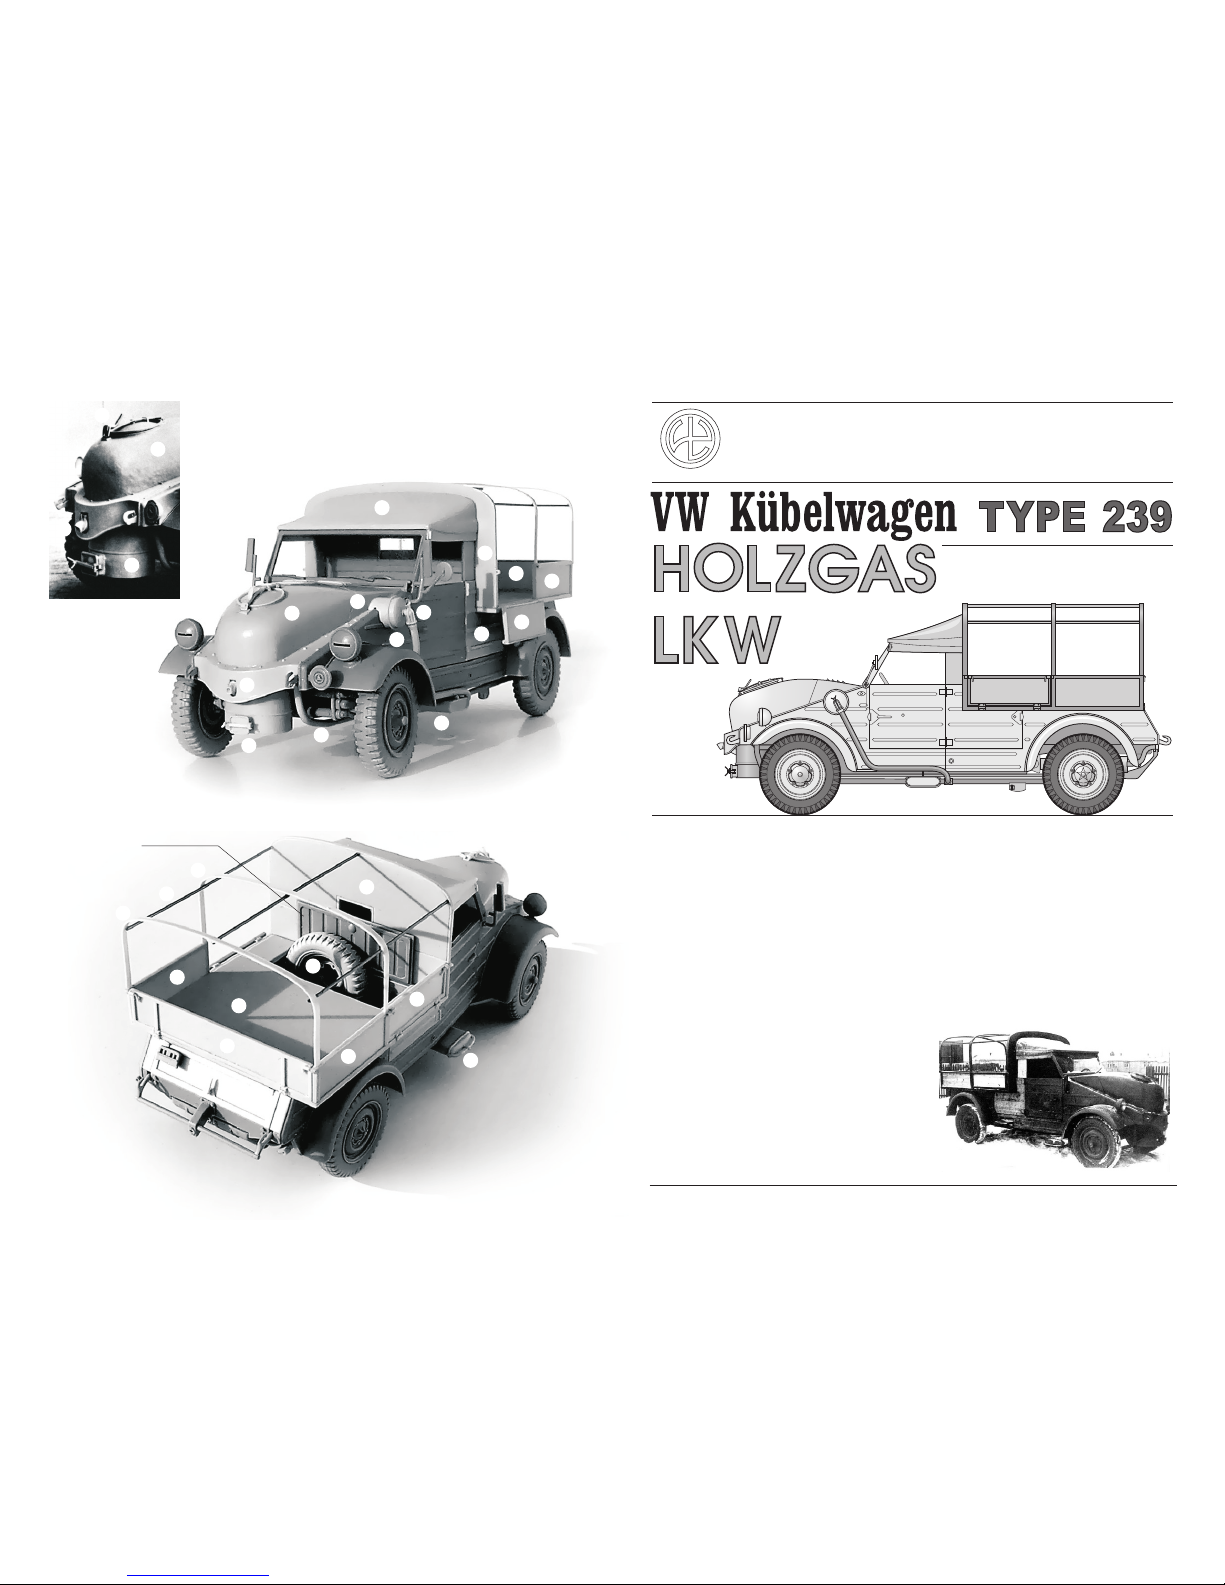
This kit presents gas-burning (Holzbrenners)
VW Kubelwagen Type 239 (or 283, according
to other sources). Also, it includes the LKW
conversion of the vehicle body, which provided
the flatbed cargo platform in place of the rear
seats.
9
7
2
1
Tamiya part A2
in opened or closed
position optionaly
Page 2
1
2
3
4
6
5
7
8
9
10
10
11
12
13
16
15
14
17
18
19
20
20
21 22
23
23
24
M1
13
16
12
M1
M1
M1
23
23
17
19
18
20
20
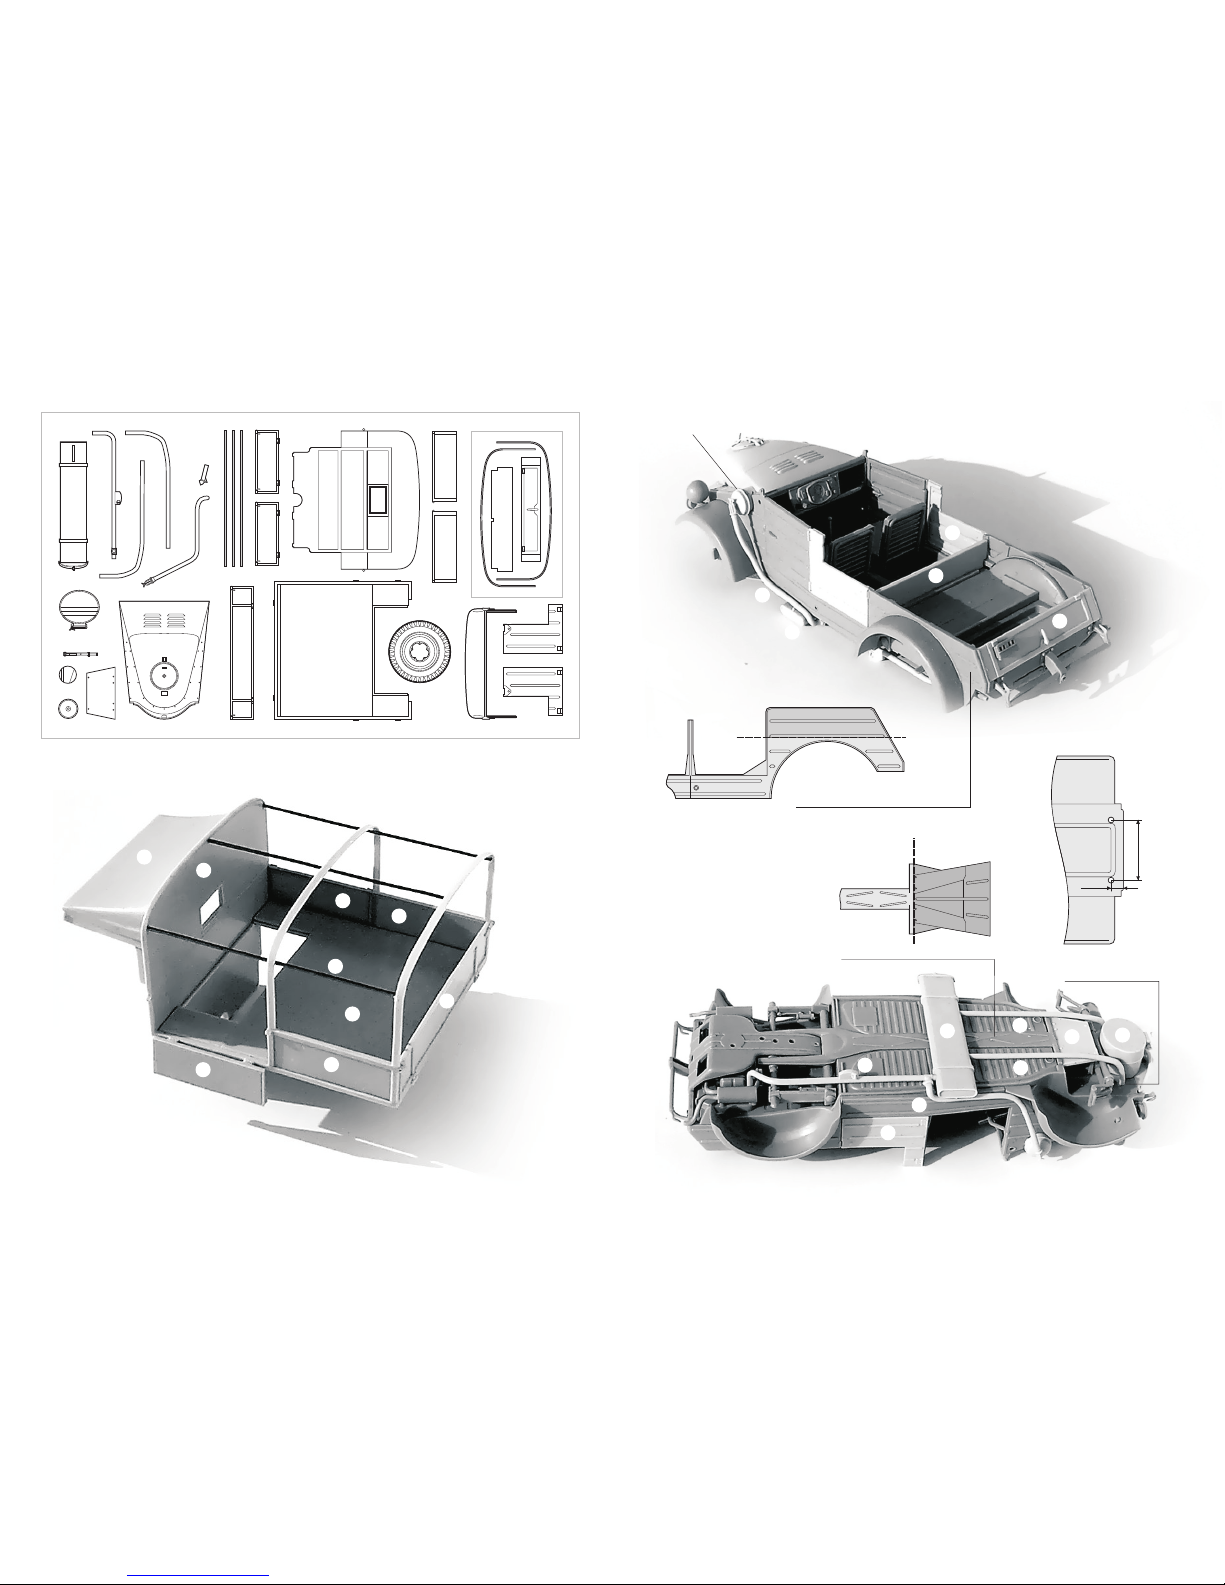
Parts 17 and 20 could
be positioned opened
or closed optionaly
15
14
21
22
1
75 + 6
8
3
Cut body sides (Tamiya parts A11 and A12)
to level with the resin parts 14 and 15.
3
4
2
8
11
15
10
10
Cut off the front portion of the Tamiya part A9.
5 + 6
Tamiya part A9
Tamiya kit’s
chassis
3 mm
14,6 mm
Drill two holes D=1,4 mm
in the Tamiya chassis
for resin parts 10
 Loading...