

Leadtek Mini Bluetooth GPS 9553
Quick Installation Guide

Table of Contents
Hardware Description ......................................................... 1
Battery/Power Recharge...................................................... 2
Safety Instructions ............................................................... 3
Features ................................................................................ 4
Package Contents ................................................................ 5
Installing Navigator Software for Pocket PC ...................... 6
Hardware Installation ......................... ............................... 10
Testing Leadtek GPS 9553 ................................................. 14
Appendix A. Limited Warranty ........................................... 18
Appendix B. Cautions ......................................................... 19
Appendix C. GPS FAQ .............. ......................................... 23
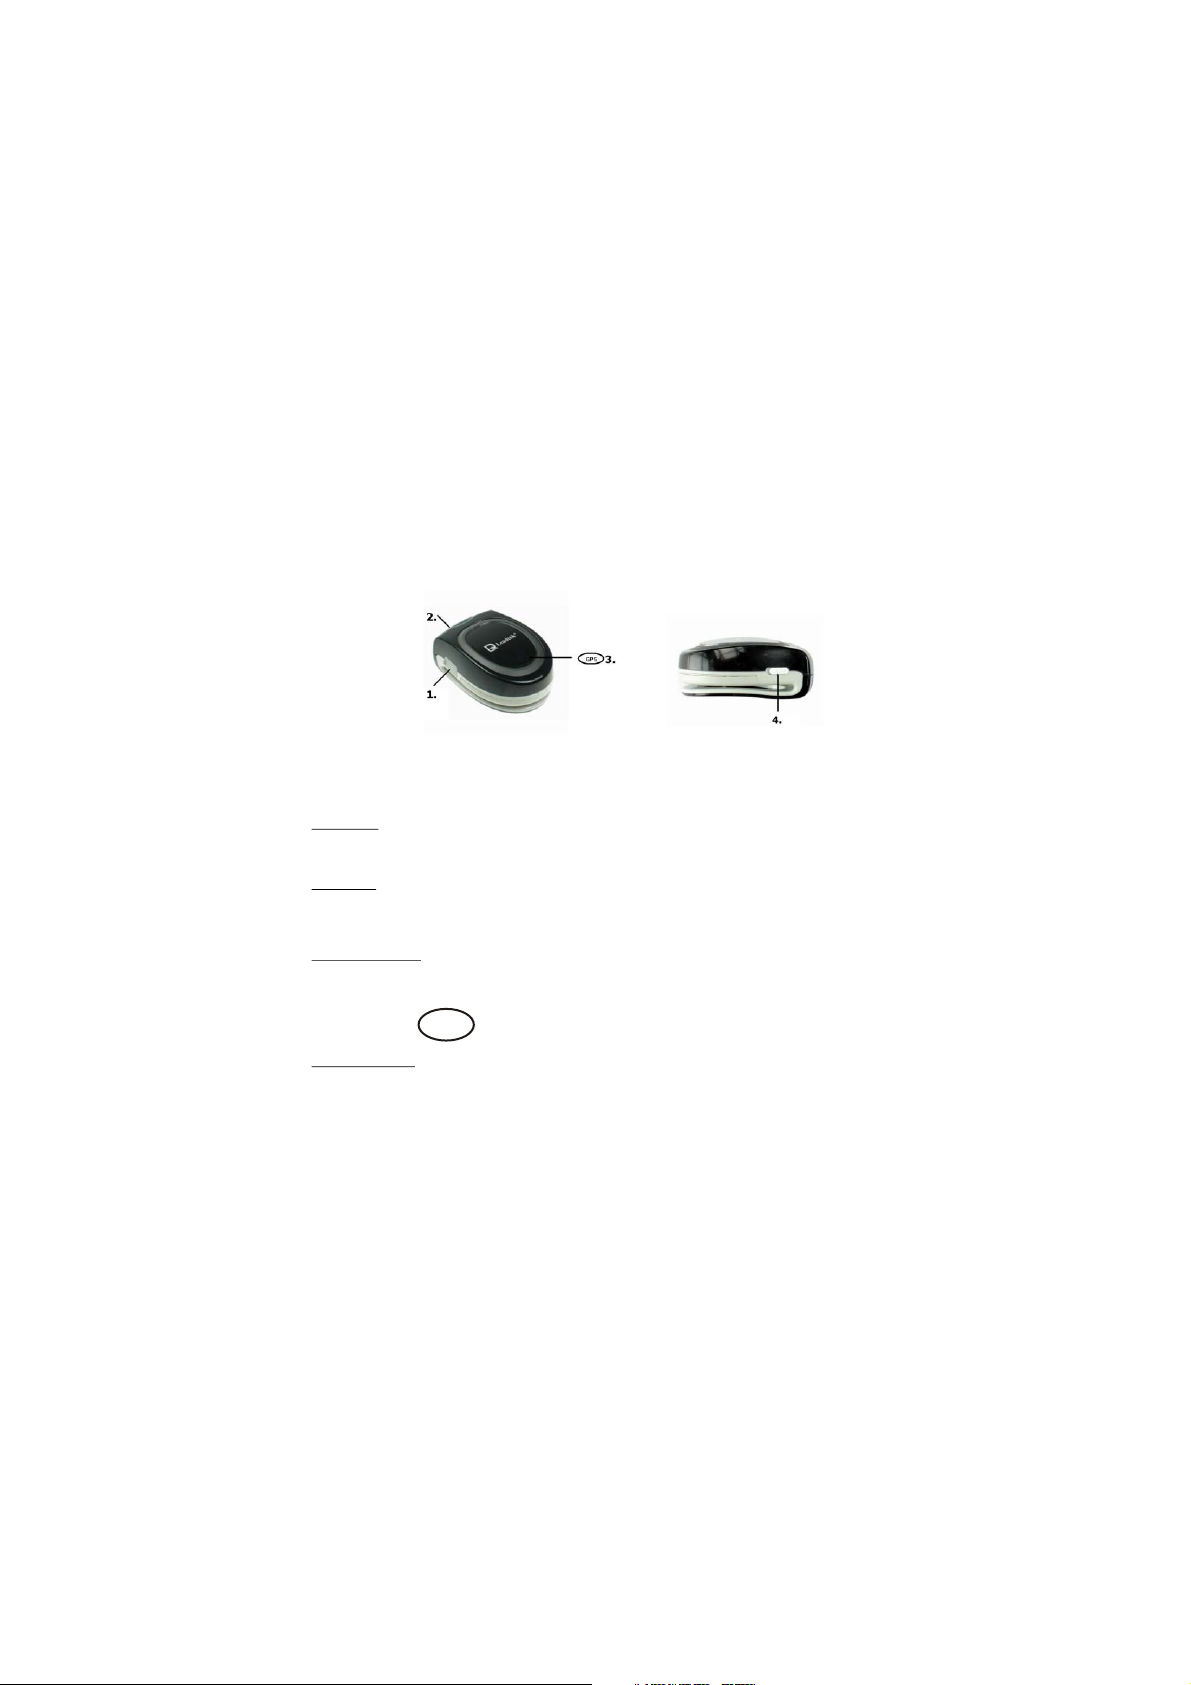
Hardware Description
1. Power supply connector
2. Bluetooth power LED indicator.
Power Off
The LED light is off.
Power On
The LED light flashes and awaits for connection.
Blue power LED
It indicates that the GPS is currently in use.
3. Descriptions on Indicator
Recharge Status
A red LED light is shown while GPS is in recharge status.
After recharging is completed the LED light is turned off.
GPS
1

Shortage of Power supply
A flashing red LED light indicates a shortage of power supply.
GPS Positioning status
During GPS positioning a flashing green LED light is shown.
* When there is a shortage of power supply during GPS positioning, both red and green
LED light will flash.
4. Power On/Off
On Off
Battery/Power Recharge
lease recharge the lithium battery before use.
Connect the battery charger to the GPS power supply connector.
For details on LED indicators during recharge status, please refer to sections on Hardware
description.
Note:
The USB power cable that comes with this product can be used to connect to PC for recharge
purposes, with the exception of Leadtek BT GPS 9553 which includes a non- standard USB cable,
that will interfere with the normal GPS functionality during recharge status. Use a car or travel
recharge kit instead.
2

Safety Instructions
Thank you for your purchase of Leadtek's Mini Bluetooth GPS 9553 products. This manual
provides a detailed guidance on Leadtek's GPS products. Please read through the following
instructions carefully. Be aware that any violation of rules can cause possible danger or offend
against the law.
Be aware on appropriate traffic safety
For safety reasons please do not operate the product while driving.
Switch off the product while boarding the plane
In order to avoid interrupting the on board communication system, please switch off the
product before boarding the plane. Please adhere to the rule accordingly.
Switch off the product whenever it's necessary
Please follow the switch-off instructions strictly.
Proper use of products
Please follow the correct procedure when using the product.
Accessories
Please use the original accessory to avoid damage to the products.
Proper service and maintenance
Please note that unauthorized service to the product will forfeit the product warranty.
Connections with other equipments.
For connections with other
Avoid connection between incompatible products.
When starting the car please do not connect the GPS power cable to the lighter on the car
since strong voltage might cause damage to the products.
equipments please consult the relevant instruction booklet.
3

Features
Latest SiRF StarIII chipset
12 channels "All-in-View" tracking and "SiRFxtrac" high sensitivity software
Effective distance must be within 10m of 2DRMS
Cold/Warm/Hot Start Time : 45/38/1 seconds(in open spaces)
Re-connection Time 0.1 second
Standard NMEA-0183 output
Supports Trickle Power power-saving mode
Dual power LED indicates the power status of Mini Bluetooth GPS
On/Off switches
Size 61.4(L) x 42.4(W) x 25.4(H) mm
4

Package Contents
Make sure your package contains the following
Mini Bluetooth GPS 9553 Receiver
User's guide x 1
CD-ROM x 1 (see Note 1)
USB - Mini USB connector x 1
Voltage converter (USB port) x1
Car Charger (USB port) x1
<Note 1>
Inside the CD-ROM includes the "CE Navigator" for GPS receiver evaluation, product
manual and various Leadtek GPS application software.
<Note 2>
This USB cable can only be used for power charging purpose. It cannot be used for data
transfer or as connectors.
5
Installing Navigator Software for Pocket PC
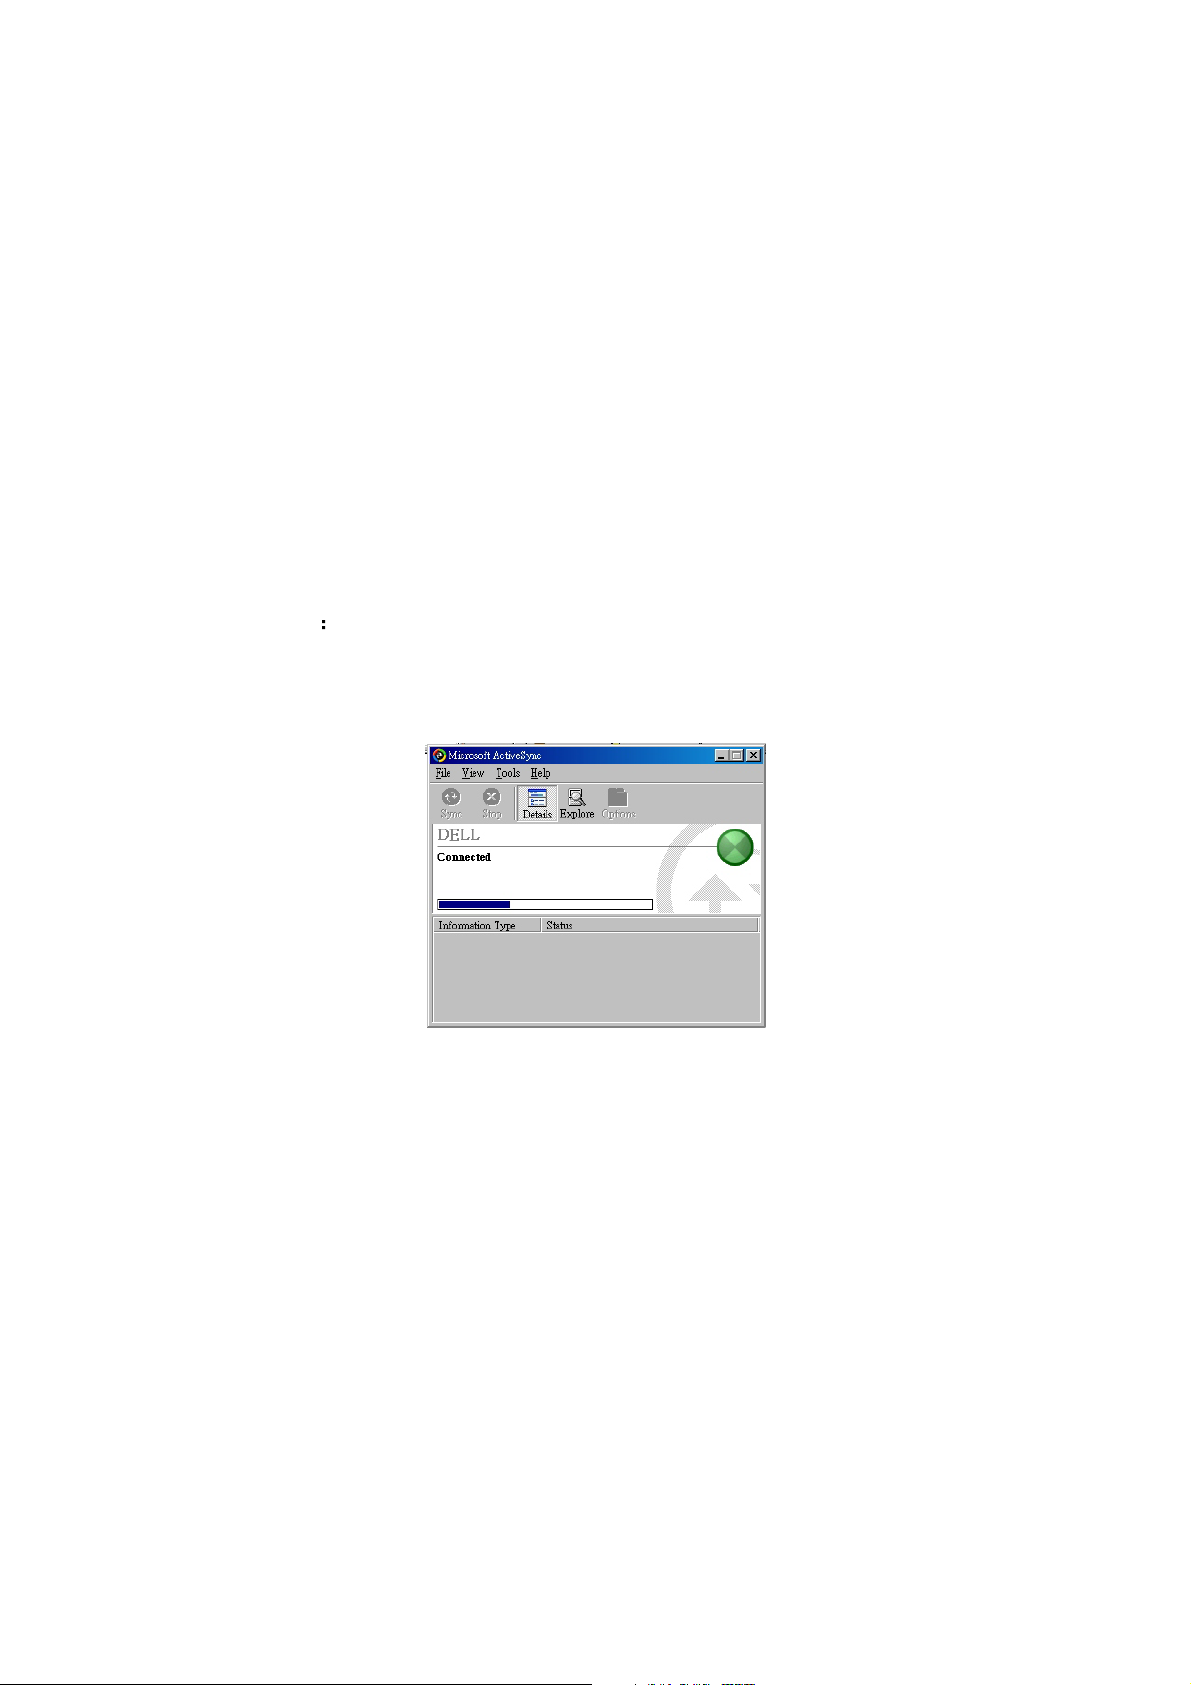
Note
Microsoft ActiveSync has to be installed and running on your computer when you want to install
Navigator.
6

Step 1
Insert the software CD-ROM in your
CD-ROM drive. The setup window
should appear as shown in the figure. If
the setup window does not appear
automatically, run install.exe on the CD.
Click "Install CE Navigator" to initialize
the installation.
Step 2
The setup program dialog box appears.
Click "Next".
7

Step 3
The dialog box for choosing the
installation Destination Location
appears. It gives the default destination
folder location. If you wish to change
the folder location, browse for a
different location. If not, click "Next".
Step 4
Now you have completed the setup for
the installation. Click "Next" to start
installing the Navigator.
8

Step 5
Installation is in progress.
Step 6
When the installation is completed, a
dialog box tells you to check your
mobile device screen to see if additional
steps are necessary to complete this
installation. Click "OK".
9

Hardware installation
After switching on Mini Bluetooth GPS 9553 receiver, please follow steps below for installation
instructions:
Step1
Create a GPS 9553 shortcut.
1. Double-click the Bluetooth icon on the right
bottom corner and select "Bluetooth Manager".
10
2. Click "New" on the bottom left corner.

3. Click "Leadtek Bluetooth GPS"
icon.
4. Select "GPS OUTPUT"
service and then click "Next".
11

12
5. Click "Finish" to complete
the operation.
6. The following screen is shown
when the operation is
completed.

Step 2
GPS bluetooth connection.
1. Click "Leadtek Bluetooth GPS:
GPS Output" icon and choose
"Connect".
2. A double-arrow on the icon indicates a
current connection between PDA and
Mini Bluetooth GPS.
13

Testing Leadtek GPS 9553
Step 1
Before testing Leadtek GPS 9553, please finish the installation of "Navigator" software on your
Pocket PC.
Step 2
Testing steps are as below. Please do it step by step.
1. Select "Navigator". 2. Start the Navigator and then click "Tools".
14

3. Click "Port Setting".
4. Choose a serial port in the PDA for the
GPS. In most PDAs it should be COM6,
click "OK" to begin GPS positioning.
15

5. The latitude longitude and position
fix status will be shown on screen.
16
6. Click "View" then select "Signal Level",
and you will see the satellites and CN
ratio list. When GPS reception condition
support 2D or 3D navigation, the satellite
icons will appear green. Meanwhile, the
device's LED light on the GPS will flash
and appear green too.

7. Click "View" and then select "Development", and
the NMEA output messages from Leadtek GPS
9553 will be displayed on the screen.
*PS: After using the navigator software, please remember to
disconnect (click "Tool" -> Disconnect) or exit to release the COM
PORT so it can be used by other navigation software.
17

Appendix A. Limited Warranty
Leadtek warrants to the original purchaser of this product that it shall be free
of defects resulting from workmanship or components for a period of one (1)
year from the date of sale. Defects covered by this warranty shall be corrected
either by repair or, at Leadtek's discretion by replacement. In the event of
replacement, the replacement unit will be warranted for the remainder of the
original one (1) year period or thirty (30) days, whichever is longer.
There are no other oral or written warranties, expressed or implied, including
but not limited to those of merchantability or fitness for a particular purpose.
This Limited Warranty is non-transferable and does not apply if the product
has been damaged by negligence, accident, abuse, misuse, modification,
misapplication, shipment to the manufacturer or service by someone other
than the Leadtek transportation charges to Leadtek are not covered by this
limited warranty. To be eligible for warranty service, a defective product must
be sent to and received by Leadtek within fifteen (15) months of the date of
sale and be accompanied with proof of purchase. Leadtek does not warrant
that this product will meet your requirements; it is your sole responsibility to
determine the suitability of this product for your purposes. Leadtek does not
warrant the compatibility of this product with your computer or related
peripherals, software.
Leadtek's sole obligation and liability under this warranty is limited to the
repair or replacement of a defective product. The manufacturer shall not; in
any event, be liable to the purchaser or any third party for any incidental or
consequential damages or liability in tort relating to this product or resulting
from its use or possession.
18

Appendix B. Cautions
The GPS system is operated by the government of the United States, which is
solely responsible for its accuracy and maintenance. Although the GPS 15H &
15L Products are precision electronic Navigation AID (NAVAID), any NAVAID
can be misused or misinterpreted, and therefore become unsafe. Use these
products at your own risk. To reduce the risk, carefully review, and all aspects
of these Technical Specifications before using the GPS 15H & 15L. When in
actual use, carefully compare indications from the GPS to all available
navigation sources including the information from other NAVAIDs, visual
sightings, chart, etc. For safety, always resolve any discrepancies before
continuing navigation.
19

Class B
The GPS 15H & 15L products comply with part 15 of the FCC interference limits
for class B digital devices FOR HOME OR OFFICE USE. These limits are
designed to provide reasonable protection against harmful interference in a
residential installation, and are more stringent than "outdoor" requirements.
Operation of this device is subject to the following conditions: (1) This device may
not cause harmful interference, and (2) this device must accept any interference
received, including interference that may cause undesired operation.
This equipment generates, uses, and can radiate radio frequency energy and, if
not installed and used in accordance with the instructions, may cause harmful
interference to radio communications. However, there is no guarantee that
interference will not occur in a particular installation. If this equipment does cause
harmful interference to radio or television reception, which can be determined by
turning the equipment off and on, the user is encouraged to try correcting the
interference by one or more of the following measures:
Reorient or relocate the receiving antenna
Increase the separation between the equipment and receiver.
Connect the equipment into an outlet on a circuit different from that to which
the receiver is connected.
Consult the dealer or an experienced radio/TV technician for help.
The GPS 15H & 15L products don't contain any user-serviceable parts.
Unauthorized repairs or modifications could result in permanent damage to the
equipment, and void your warranty and your authority to operate this device under
part 15 regulation
20

ITE is subdivided into two categories denoted class A ITE and class B ITE.
Class A ITE
Class A ITE is a category of all other ITE which satisfies the Class A ITE limits but
not the Class B ITE limits. Such equipment should not be restricted in its sale but the
following warning shall be included in the instructions for use:
Warning
This is a Class A product. In a domestc environment this product may
cause radio interference in which case the user may be required to take
adequate measures.
Class B ITE
Class B ITE is a category of apparatus which satisfies the Class B ITE disturbance
limits. Class B ITE is intended primarily for use in the domestic environment and may
include:
- equipment with no fixed place of use; for example, portable equipment powered
by built-in batteries;
- telecommunication terminal equipment powered by a telecommunication network;
- personal computers and auxiliary connected equipment.
21

Appendix C. GPS FAQ
Q: Why does the GPS positioning fail, even though the satellite signal appears to
be normal on my PDA?
A: The reason might be that the GPS has not been used for a while, and the GPS
needs to be reset. You may follow the steps below to reset for positioning with
"Cold Start" under "Navigator" application utility.
1. Tools Port Setting set the "Com Port" and "baud rate" to 4800 click
"OK".
2. Tools Command select "Cold Start" click "OK".
Q: Why does the position of the car drift around on the map even when my PDA is
properly positioned?
A: This might be caused by unstable satellite signal and weak signal resulting
from locating in heavily blocked areas, which affect the positioning of the car
onto the map.
Q: Why are there no sign of signal transmission in my map utility program and
positioning fails even though my GPS is connected?
A: This might be caused by incorrect COM Port setting. Most of the PDA map
utility programs search for GPS device, and the GPS device is not found in this
case. It is suggested that you set the COM Port settings manually instead.
23

Q: Why is the GPS device not found by the PDA map utility program after
positioning is completed by the "Navigator"?
A: "Navigator" is an application utility that users can use to test for GPS. After
using "Navigator", you have to disconnect the GPS device in order to release
the COM Port before proceeding with the positioning by your PDA map utility
program. Otherwise, the COM Port will still be occupied by Navigator , and the
PDA map utility program will not find the GPS device.
Q: Why can't I get the positioning to work with my GPS at home or areas by the
windows?
A: GPS is really used for outdoor positioning navigation, and the satellite signal is
difficult to be received at home. Especially, it takes a while to get the
positioning to work for the very first time. Therefore, positioning must be done
outdoors where satellite signal can be received.
Q: Why can't I install "Navigator" application utility on my PDA?
A: "Navigator" application utility can be installed directly on most of the PDAs.
For those PDA models that have installation problems, you can search for a file
called "Navigator.ARM.CAB" among the installation files. Copy this file to any
folder on your PDA, and install "Navigator" application utility by clicking on the
file directly.
Q: Under what circumstances do I have to perform "Cold Start"?
A: If the positioning usage time is longer than two weeks or the location of
positioning is greater than 500 km away from the previous location of
positioning, then you will need to perform "Cold Start".
24

CODE: LR9553
P/N: W0500950
Leadtek Research Inc.
International Headquarters
18th Fl., 166, Chien-Yi Rd.
Chung Ho, Taipei Hsien
Taiwan (235)
Phone: +886 (0)2 8226 5800
Fax: +886 (0)2 8226 5801
http://www.leadtek.com.tw
E-Mail: gpssales@leadtek.com.tw
United States Headquarters
46732 Lakeview Blvd.
Fremont, CA 94538
U.S.A.
Phone: +1 510 490 8076
Fax: +1 510 490 7759
http://www.leadtek.com
Europe Headquarters
Antennestraat 16 1322 AB
Almere
The Netherlands
Phone: +
31 (0)36 536 5578
Fax: +
31 (0)36 536 2215
Mini Bluetooth GPS 9553
Quick Installation Guide
Version A
October 2004

This device complies with Part 15 of the FCC Rules. Operation is subject to the
following two conditions:
(1) This device may not cause harmful interference.
(2) This device must accept any interference received, including interference that may
cause undesired operation.
Any changes or modifications (including the antennas) made to this device that are not
expressly approved by the manufacturer may void the user’ s authority to operate the
equipment.
FCC RF Radiation Exposure Statement: This equipment complies with FCC RF radiation
exposure limits set forth for an uncontrolled environment. This device and its antenna
must not be co-located or operating in conjunction with any other antenna or
transmitter.
This equipment has been tested and found to comply with the limits for a class B digital
device, pursuant to part 15 of the FCC Rules. These limits are designed to provide
reasonable protection against harmful interference in a residential installation.
This equipment generates, uses and can radiate radio frequency energy and, if not
installed and used in accordance with the instructions, may cause harmful interference
to radio communications. However, there is no guarantee that interference will not
occur in a particular installation. If this equipment does cause harmful interference to
radio or television reception, which can be determined by turning the equipment off and
on, the user is encouraged to try to correct the interference by one or more of the
following measures:
---Reorient or relocate the receiving antenna.
---Increase the separation between the equipment and receiver.
---Connect the equipment into an outlet on a circuit different from that to which the
receiver is connected.
---Consult the dealer or an experienced radio/TV technician for help.
This Transmitter must not be co-located or operating in conjunction with any other
antenna or transmitter.
This equipment complies with FCC RF radiation exposure limits set forth for an
uncontrolled environment. This equipment should be installed and operated with a
minimum distance of 20 centimeters between the radiator and your body.
Any changes or modifications(including the antennas)made to this device that are not
expressly approved by the manufacturer may void the user’ s authority to operate the
equipment.
 Loading...