

Page 1

1
Original Instructions
PETROL CHAIN SAW
LE32458-45A
Read this operator manual carefully before the first use.
Page 2

2
LIST OF MAIN PART
Page 3

3
TECHNICAL SPECIFICATIONS
Model
LE32458-45A
Equipment mobility
hand-held
Unit mass
5,4 kg
Volumes of fuel tank
550 cm³
Volumes of oil tank
260 cm³
Cutting length
450mm18''
Chain pitch
0.325” (8.255mm)
Chain gauge
0.058” (1.47mm)
Sprocket
7Teeth x 8.255 mm
Displacement:
45.8cm³
1. Rear handle
2. Throttle interlock
3. Throttle trigger
4. Primer
5. Choke knob
6. Air filter cover screw
7. Filter cover
8. Air filter
9. Spark plug
10. Front handle
11. Front hand guard brake lever
12. Spiked bumper
13. Guide bar
14. Saw chain
15. Sprocket nose
16. Retaining nut
17. Chain catcher
18. Cover
19. Cylinder fins
20. Rear hand safeguard
21. Bolts
22. a. Tension screw b. Tension
pin
23. Oiling port
24. Drive sprocket
25. Clutch
26. Silencer
27. Ignition switch
28. Chain oil tank cap
29. Fuel tank cap
30. Recoil starter handle
31. Air vents
32. Spark plug wrench
33. Screwdriver
34. Chain file
35. Fuel mixing bottle
36. Guide bar cover
Page 4

4
Max. Engine speed
12000 min-1
Clutch engagement speed
4500 min-1
Engine idling speed
3000±500 min-1
Max. chain speed
19.3m/s
Maximum shaft brake power of the
engine
1.6kW /8000min-1
A-weighted sound pressure level at
the operator position according to
ISO 22868 .
LpA: 96 dB(A) K=3,0 dB(A)
A-weighted emission sound power
level according to noise directive
2000/14/EC
LwA:110 dB(A)
Vibration emission levels according to
ISO 22867
a
front_ hv,eq
: 6,5 m/s2 K=1,5 m/s2
a
rear _hv,eq
: 6m/s2 K=1,5 m/s2
Type of the engine
1E43F-2
Net weight
5.4 kg
Noise Information
Measured sound values determined according to ISO 22868.
The noise figures quoted are emission levels and are not
necessarily safe working levels. Whilst there is a correlation
between the emission and exposure levels, this cannot be used
reliably to determine whether or not further precautions are
required. Factors that influence the actual level of exposure of
work-force include the characteristics of the work room, the other
sources of noise, etc. i.e. the number of machines and other
adjacent processes, and the length of time for which an operator
is exposed to the noise. Also the permissible exposure level can
vary from country. This information, however, will enable the user
of the machine to make a better evaluation of the hazard and risk.
Wear hearing protection
Vibration total values (triax vector sum) determined according to
ISO 22867:
Page 5

5
The vibration emission level given in this information sheet has
been measured in accordance with a standardized test given in
ISO 22867:2003 and may be used to
compare one tool with another.
It may be used for a preliminary assessment of exposure.
The declared vibration emission level represents the main
applications of the tool. However if the tool is used for different
applications, with different accessories or poorly maintained, the
vibration emission may differ. This may significantly increase the
exposure level over the total working period.
An estimation of the level of exposure to vibration should also
take into account the times when the tool is switched off or when it
is running but not actually doing the job. This may significantly
reduce the exposure level over the total working period.
Identify additional safety measures to protect the operator from
the effects of vibration such as: maintain the tool and the
accessories, keep the hands warm, organization of work patterns.
DESCRIPTION OF THE SYMBOLS
The use of symbols in this manual is intended to draw your
attention to possible risks. The safety symbols and the
explanations that accompany them must be perfectly understood.
The warnings in themselves do not remove the risks and cannot
replace correct actions for preventing accidents.
WARNING
This symbol, before a safety comment, indicates a precaution, a
warning or a danger. Ignoring this warning can lead to an accident
for yourself or for others. To limit the risk of injury, fire, or
electrocution always apply the recommendations indicated.
Page 6

6
Read the operator’s manual
Before any use, refer to the corresponding paragraph in the
present manual.
Conform to relevant safety standards.
Do not use in the rain or leave outdoors while it’s raining.
Start engine creates sparking. Sparking can ignite nearby
flammable gases.
Remove the ignition cable before all maintenance work, and read
the instructions for use.
Take care when handling fuel and lubricants!
For outdoor use only
Strictly no naked flames or smoking near the appliance!
Engines give off carbon monoxide, an odorless, colorless, poison
Page 7

7
gas.
Breathing carbon monoxide can cause nausea, fainting or death.
Danger of injury from flying parts! Always maintain a sufficiently
safe distance.
These symbols indicates the requirement of wearing ear
protection, eye protection when using the product.
Push the bubble 7 times before use to make sure the petroleum
spirit full of the oil way.
Engine- manual start
The port to refuel the chain oil.
Operate the engine switch; pull the switch to the "O" position,
immediately the engine stops.
Choke closed
Page 8
8
Choke open
The screw under the "H" stamp is The High-speed adjustment
screw.
The screw under the "L" stamp is The Slow-speed adjustment
screw.
The screw up the "T" stamp is the idle adjustment screw.
Shows the direction of the saw chain installation.
Chain oil adjuster nut.
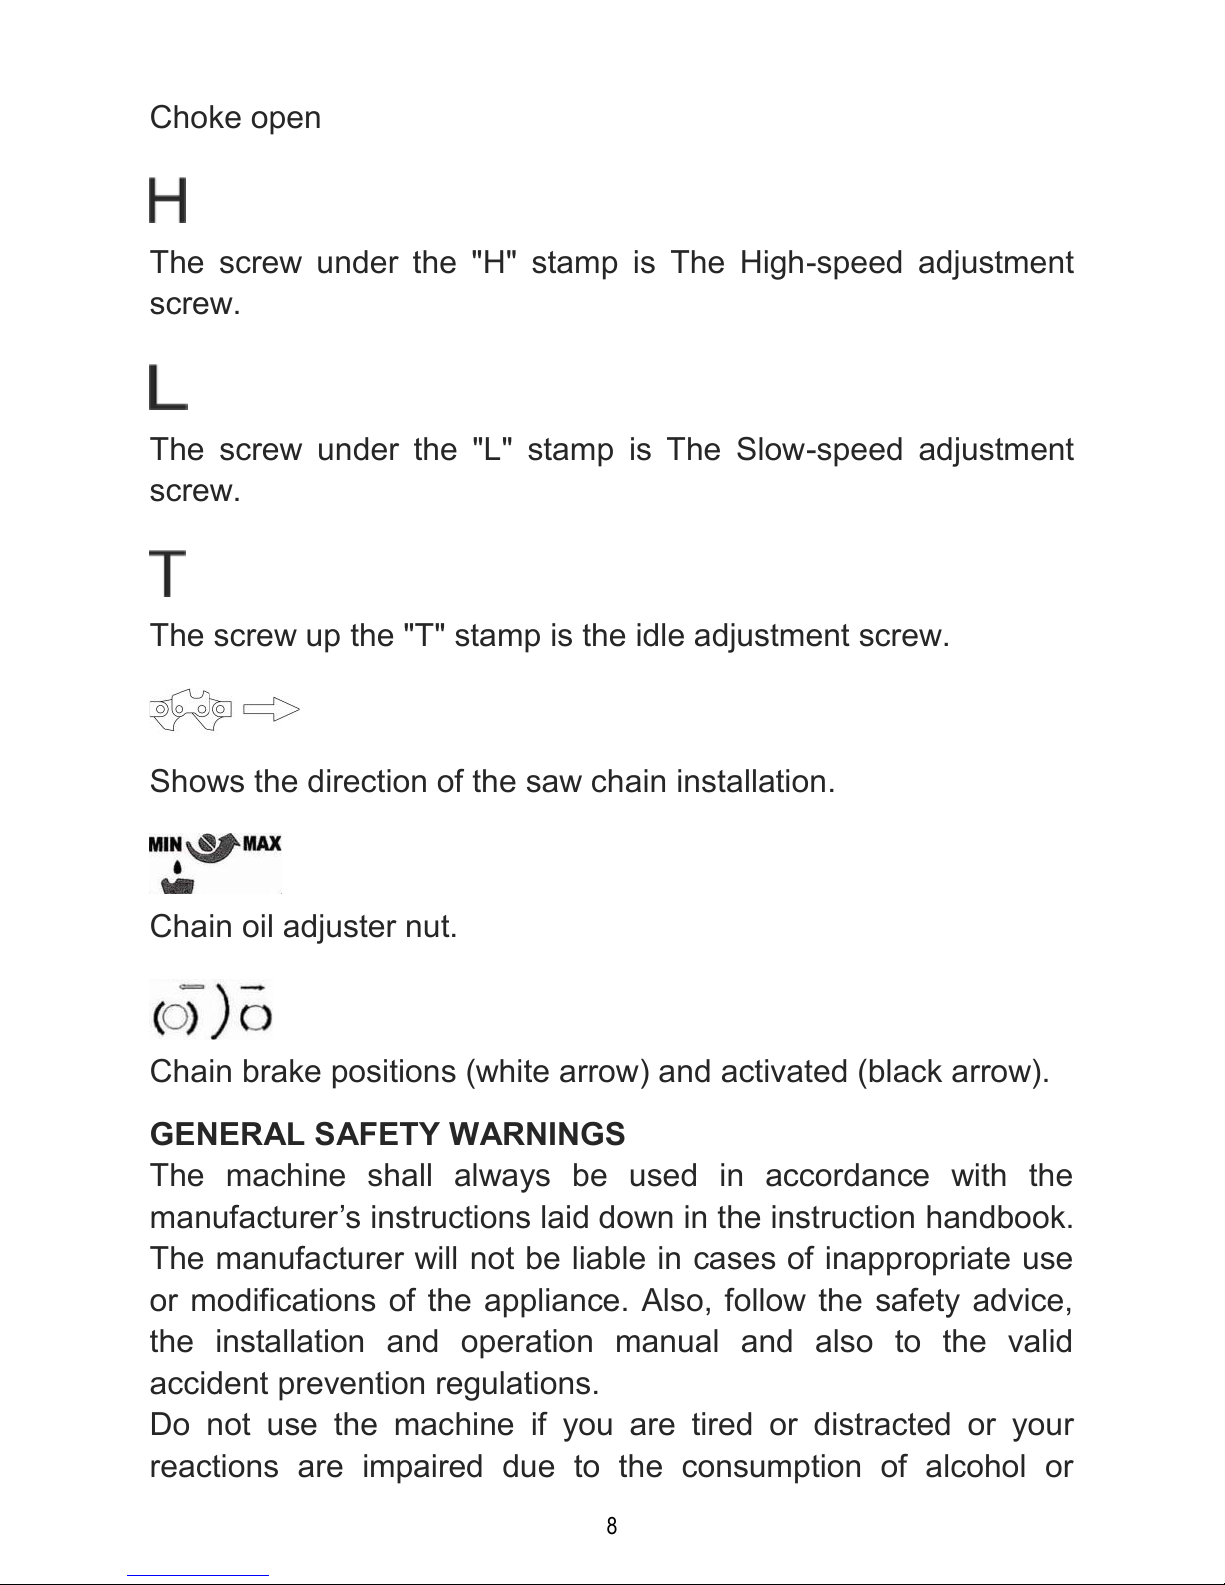
Chain brake positions (white arrow) and activated (black arrow).
GENERAL SAFETY WARNINGS
The machine shall always be used in accordance with the
manufacturer’s instructions laid down in the instruction handbook.
The manufacturer will not be liable in cases of inappropriate use
or modifications of the appliance. Also, follow the safety advice,
the installation and operation manual and also to the valid
accident prevention regulations.
Do not use the machine if you are tired or distracted or your
reactions are impaired due to the consumption of alcohol or
Page 9

9
medication. Inattention can result in serious injuries.
If you use the petrol chainsaw for lengthy periods of time, you
may suffer circulation problems caused by vibrations (white finger
disease) and noise.
It is not possible to provide precise details on the duration of use
in each case since it may differ from person to person. The
following factors may effect this phenomenon: Circulation
problems in the hands of the user, low outdoor temperatures and
lengthy periods of use. We therefore recommend that you wear
warm work gloves / ear protector and take regular breaks.
The lubrication oil mist, exhaust gases and saw dust will be
created during working, to reduce your exposure to them: work in
a well ventilated area, and work with approved safety equipment,
such as those dust masks that are specially designed to filter out
microscopic particles and mist.
Appliances with incorrect or missing parts or without a security
case are not to be operated. The service center provides you with
information concerning replacement parts.
Training
a) Read the instruction carefully. Be familiar with the controls
and proper use of the equipment.
b) Never allow children or people unfamiliar with these
instructions to use the machine. Local regulations can restrict
the age of the operator.
c) Never work while people, especially children, or pets are
nearby.
d) Keep in mind that the operator or user is responsible for
accidents or hazards occurring to other people or their
property.
e) Major repair work shall be carried out only by specifically
trained personnel.
Page 10

10
Preparation
a) WARNING-Petrol is highly flammable:
- store fuel in containers specifically designed for this purpose;
- refuel outdoors only and do not smoke while refueling;
- add fuel before starting the engine. Never remove the cap of fuel tank
or add petrol while the engine is running or when the engine is hot;
- if petrol is spilled, do not attempt to start the engine but move the
machine away from the area of spillage and avoid creating any source
of ignition until petrol vapours have dissipated;
- replace all fuel tank and container caps securely.
b) Replace faulty silencers;
c) Before using, always visually inspect to see that the tools are not worn or
damaged. Replace worn or damaged elements and bolts in sets to
preserve balance.
d) Do not smoke near the machine.
e) Do not wear loose clothing, jewellery, or similar items that could be caught
in the starter or other moving parts.
f) Never put any items into the ventilation openings. Non-observance may
lead to injury, or damage to the machine.
g) It is necessary reduction in power due to use in higher temperatures,
altitudes and humidity as below conditions.
1) Max Working Temperature: 40°C
2) Max altitudes: 1000 m
3) Max humidity: 95%
Operation
a) Do not operate the engine in a confined space where dangerous carbon
monoxide fumes can collect
b) Keep the machine free of oil, dirt and other impurities.
c) Please always place the appliance on even and stable surfaces.
d) Never operate the appliance inside buildings or in an environment without
proper ventilation. Pay attention to air flow and temperature.
e) Do not operate or store the appliance in wet or humid surroundings.
f) Ensure the sound absorber and air filter work properly. These parts serve
Page 11

11
as flame protection in case of misfire.
g) To avoid possible burn injuries, do not touch the exhaust system or other
parts that become hot during operation. Pay attention to the warnings on
the machine.
h) The engine must not be operated with excessive rotary speed. The
operation of the engine with excessive rotary speed raises the risk of injury.
Parts which affect the rotary speed must not be altered or replaced.
i) Regularly check for leakage or traces of abrasion in the fuel system, such
as porous pipes, loose or missing clamps and damage to the tank or tank
cap. Before use all defects must be repaired.
j) Work only in daylight or in good artificial light.
k) Never pick up or carry a machine while the engine is running
l) Stop the engine:
whenever you leave the machine
before refueling
m) Before checking or adjusting the machine, the ignition plug and the ignition
wire respectively must be removed to prevent accidental starting.
Maintenance and storage
a) Keep all nuts and screws tight to be sure the equipment is in safe working
condition.
b) Never store the equipment with petrol in the tank inside a building where
fumes can reach an open flame or spark.
c) Allow the engine to cool before storing in any enclosure.
d) To reduce the fire hazard, keep the engine, silencer and petrol storage
area free of vegetative material and excessive grease.
e) Replace worn or damaged parts for safety.
f) If the fuel tank has to be drained, this should be done outdoors.
g) Always clean and maintenance before storage.
h) Never disassembly the guards for cutting attachments.
i) Always store the metal elements in cool and dry place, never use rusted
chain or guide. It may cause serous injure during working.
SPECIAL SAFETY WARNINGS FOR THE TOOL
Page 12

12
Keep all parts of the body away from the saw chain when the chain saw is
operating.
Before you start the chain saw, make sure the saw chain is not
contacting anything.
A moment of inattention while operating chain saws may cause entanglement
of your clothing or body with the saw chain.
Always hold the chain saw with your right hand on the rear handle and
your left hand on the front handle. Holding the chain saw with a reversed
hand configuration increases the risk of personal injury and should never be
done.
Wear safety glasses and hearing protection. Further protective
equipment for head, hands, legs and feet is recommended. Adequate
protective clothing will reduce personal injury by flying debris or accidental
contact with the saw chain.
Do not operate a chain saw in a tree. Operation of a chain saw while up in a
tree may result in personal injury.
Always keep proper footing and operate the chain saw only when
standing on fixed, secure and level surface. Slippery or unstable surfaces
such as ladders may cause a loss of balance or control of the chain saw.
When cutting a limb that is under tension be alert for spring back. When
the tension in the wood fibres is released the spring loaded limb may strike the
operator and/or throw the chain saw out of control.
Use extreme caution when cutting brush and saplings. The slender
material may catch the saw chain and be whipped toward you or pull you off
balance.
Carry the chain saw by the front handle with the chain saw switched off
and away from your body. When transporting or storing the chain saw
always fit the guide bar cover. Proper handling of the chain saw will reduce
the likelihood of accidental contact with the moving saw chain.
Follow instructions for lubricating, chain tensioning and changing
accessories.
Improperly tensioned or lubricated chain may either break or increase the
chance for kickback.
Page 13

13
Keep handles dry, clean, and free from oil and grease. Greasy, oily handles
are slippery causing loss of control.
Cut wood only. Do not use chain saw for purposes not intended. For
example: do not use chain saw for cutting plastic, masonry or non-wood
building materials. Use of the chain saw for operations different than intended
could result in a hazardous situation.
KICKBACK SAFETY PRECAUTIONS FOR CHAIN SAW USERS
• How to read symbols and colors (Fig. 1)
Fig. 1
Warning: RED Used to warn that an unsafe procedure should not
be performed.
WARNING
1. Avoid bar nose contact
2. Beware of kick back.
3. Do not attempt to hold saw with one hand
4. Hold saw properly with both hands.
DANGER! BEWARE OF KICKBACK!
Kickback may occur when the nose or tip of the guide bar touches
an object, or when the wood closes in and pinches the saw chain
in the cut.
Tip contact in some cases may cause a lightning fast reverse
reaction, kicking the guide bar up and back towards the operator.
Page 14

14
Pinching the saw chain along the top of the guide bar may push
the guide bar rapidly back towards the operator.
Either of these reactions may cause you to lose control of the saw
which could result in serious personal injury.
Kickback is the result of tool misuse and/or incorrect operating
procedures or conditions and can be avoided by taking proper
precautions as given below:
Fig, 2A Fig. 2B
BEWARE OF: ROTATIONAL KICKBACK (Fig. 2A)
A = Kickback path
B = Kickback reaction zone
THE PUSH (PINCH KICKBACK) AND PULL REACTIONS (Fig. 2B)
A = Pull
B = Solid objects
C = Push
Maintain a firm grip, with thumbs and fingers encircling the chain saw
handles, with both hands on the saw and position your body and arm to
allow you to resist kickback forces. Kickback forces can be controlled by the
operator, if proper precautions are taken. Do not let go of the chain saw.
Do not overreach and do not cut above shoulder height. This helps prevent
unintended tip contact and enables better control of the chain saw in
unexpected situations.
Only use replacement bars and chains specified by the manufacturer.
Incorrect replacement bars and chains may cause chain breakage and/or
Page 15

15
kickback.
Follow the manufacturer’s sharpening and maintenance instructions for
the saw chain. Decreasing the depth gauge height can lead to increased
kickback.
INTENDED USE
The chain saw is intended for sawing of trees, tree trunks,
branches, wooden beams, planks, etc. Cuts can be sawed with or
across the grain. This product is not suitable for sawing mineral
materials.
ASSEMBLY
Installing guide bar and saw chain
Open the box and install the guide bar and the saw chain on the
power unit as follows.
WARNING!
The saw chain has very sharp edges. Use protective gloves for
safety.
The saw chain and bar are packed separately in the carton.
Chain and guide bar
Use only the guide bar (13) and saw chain (14) according to the
technical data of the product.
1. Set the product on a suitable flat surface.
2. Before removing, ensure the chain brake is disengaged. If in the engaged
position, pull the front hand guard/brake lever (11) backwards until it ‘clicks’
into position.
3. Use the provided spark plug wrench (32) to remove the two retaining nuts
(16) from the side of the cover (18).
4. If necessary adjust the tension pin (22b) by moving the tension screw (22a)
with the screwdriver (33) in or out until it reaches a position where the pin
can be inserted into the lower hole on the guide bar (13) (Fig. 3).
5. The guide bar (13) should be fitted with the saw chain ‘cutter’ symbol at the
top of the bar (Fig. 4).
Page 16

16
Fig.3 Fig. 4
6. Place the slot in the guide bar (13) over the two bolts (21). Push the guide
bar (13) to the left towards the sprocket (24) (behind the clutch (25)). Make
sure the tension pin (22b) is inserted into the lower hole on the guide bar
(Fig. 5).
7. Place the saw chain (14) over the sprocket (24) behind the clutch (25) and
fit around the guide bar (13). Make sure the chain is placed above the
chain catcher (17) (Fig. 6).
Fig.5 Fig. 6
8. The saw chain movement is as indicated by the arrow (Fig. 7). Make sure
the chain is properly placed over the sprocket nose (15) of the guide bar
(13).
9. Pull the guide bar (13) carefully towards the right to tighten the saw chain
(14) (Fig. 8).
Page 17

17
Fig. 7 Fig. 8
10. Refit the cover (18). Fix it with the retaining nuts (16) (Fig. 9).
Fig. 9
WARNING!
Always carry out a test run before starting work and after every
tool change! Always ensure that the tools are in good condition,
correctly mounted and able to turn freely. The trial run should be
at last 30 sec.
Adjusting chain tension
WARNING!
The saw chain has very sharp edges. Use protective gloves for
safety.
Saw chain tensioning
1) Always check the saw chain tension before use, after the first cuts and
regularly during use, approx. every five cuts. Upon initial operation, new
chains can lengthen considerably. This is normal during the break-in period
and the interval between future adjustments will lengthen quickly.
2) Lift up the tip of the guide bar (13) and keep it there as you adjust the
Page 18

18
tension (Fig. 10).
Fig. 10
3) Turn the tension screw (22a) until the chain ‘tie straps’ are just touching the
bottom edge of the guide bar (13) (Fig. 11, 12).
Fig. 11 Fig. 12
4) Lift up the tip of the guide bar (13) and tighten the rear retaining nut (16)
first followed by the front retaining nut (16) (Fig. 9).
5) By hand, pull the saw chain (14) along the top of the guide bar (13) from
one end to the other, several times. The chain should feel tight but still
move freely.
Tension test
Check the chain tension using one hand to lift the saw chain (14) against the
weight of the product. The correct chain tension is achieved when the saw
chain can be lifted by approximately 2 - 4 mm from the guide bar (13) in the
centre (Fig. 13, 14).
22a
Page 19

19
Fig. 13 Fig. 14
Adjust the tension if you find that the chain saw is too loose or tight.
WARNING!
Do not over tension the chain as this will lead to excessive wear
and will reduce the life of bar and chain. Over tensioning also
reduce the amount of cuts you should get.
OPERATION
Before use
Please always read the instruction manual carefully and check the machine
before operating.
WARNING!
Ensure that the engine has oil. When leaving the factory. This
machine has NO OIL in the engine.
Check the saw chain, never use chain that are dull, cracked or
damaged.
Make sure the handle and safety features are in good working
order. Never use a machine that lacks a part or has been modified
outside its specifications.
The enclosures must be correctly fitted and undamaged before
you start the machine.
WARNING!
Please always use quality gloves, foot, ear and eye protector.
They should with CE mark and tested according to PPE (Person
Protective Equipment) directive.
The poor equipments may reduce the protection and result in
person injure during working.
Engine fuel
WARNING!
The chain saw is fitted with a two-stroke engine; use fuel
Page 20

20
mixed with oil only.
Only fuel the machine in well-lit areas. Avoid fuel spillage. Never refuel the
machine during operation. Let the engine cool down for about two minutes
before refueling.
Refueling must not be carried out near naked flames, control lamps or spark
producing electrical equipment such as electric tools, welders or sanders.
1. Make sure the machine is turned off, by turn the ignition switch to the “off”
position.
2. Check the fuel by a visual check , remove the fuel tank cap and reviewing
the fuel level.
3. Full unleaded fuel mixed with oil from an approved fuel container into the
fuel tank, because of fuel expands, please fill the tank to the neck of tank
only.
4. Turn the fuel cap clockwise to assembly it in position.
WARNING.
Do not refill fuel while engine is running or hot.
Make sure fuel is not leaking.
Use quality two-stroke oil and make a mixture of 40 parts petrol to one
part oil only (2,5% oil mixed in fuel).
Never use two-stroke oil intended for water-cooled engines.
Never use oil intended for four-stroke engines.
A poor oil quality and/or too high oil/fuel ratio may jeopardize
function and decrease the life time of catalytic converters.
Shake the container well to obtain a correct mixture before filling
the tank.
Page 21

21
Use at least 90 octane fuel. We recommend unleaded petrol as it
leaves fewer residues inside the motor and on the ignition plug,
and prolongs the life cycle of the exhaust system. Never use old
or dirty petrol or oil/petrol mixtures. Avoid contamination with dirt
or water in the tank. Occasionally ignition knocking or clanging
can be heard with high loads. This is normal and no cause for
alarm. If ignition knocking or clanging occurs during normal loads
and with constant motor speed you should change the petrol
quality. If this does not solve the problem contact an authorized
specialist dealer.
When working at continuous high revs a higher octane rating is
recommended.
Chain Oil
Use special chain saw oil all year round.
Only oil the saw chain in well-lit areas. Avoid spillage. Never oil
the machine during operation. Let the engine cool down for about
two minutes before refilling oil.
Oil must not be carried out near naked flames, control lamps or
spark producing electrical equipment such as electric tools,
welders or sanders.
1. Make sure the machine is turned off, by turn the ignition switch to the “off”
position.
2. Check the oil by a visual check , remove the chain oil tank cap(28) and
reviewing the oil level.
3. Full oil into oil tank, because of oil expands, please fill the tank to the neck
of tank only.
4. Turn the chain oil tank cap(28) clockwise to assembly it in position.
5. Check the chain lubrication before each use.
6. Make sure the guide bar (13) and the saw chain (14) are in place when you
check the oil delivery.
7. Start the engine; keep it running at medium power and check if the chain oil
is delivered as shown in the figure (Fig. 15).
8. Adjust the chain oil flow using screwdriver (33) on the adjuster screw (Fig.
Page 22

22
16, a) of the oiler, which is on the bottom of the product.
Fig. 15 Fig. 16
WARNING.
a) Do not refill oil while engine is running or hot.
b) Make sure oil is not leaking.
Caution!
Do not use waste or regenerated oil that can cause damage to the
oil pump.
Caution!
The oil tank should become nearly empty by the time fuel is used
up. Be sure to refill the oil tank every time when refueling the saw.
Check the air filter
Check the air filter to be sure it is clean and in good condition.
Loosen the air cleaner cover screw, and remove the air filter
cover, then check the main air filter. Clean or replace the air filter
if necessary.
Starting the engine
WARNING!
The cutting attachement may start to move when the engine
is started. Make sure the attachment can not come into
contact with any object.
Page 23

23
Make sure that no unauthorised persons are in the working
area, otherwise there is a risk of serious personal injury.
1. Press the primer (4) several times until fuel begins to fill the bulb.
2. Turn the ignition switch (27) to the” ON “position.
3. To start a cold engine, Pull out the choke knob (5) to the start position.
4. During start the engine, the throttle trigger need not locked in idling position.
Don’t touch it during starting.
5. Slowly pull the starter handle until you feel it engage and then pull it
quickly. Return the starter handle gently and slowly to the original position
by hand.
Note: when the engine is started for the very first time. It will require a
number of attempts to start until the fuel has travelled from the tank to
the motor.
6. Push the choke knob to the run positon as the engine started.
7. After starting the engine, let the engine run for 2 to 3 minutes so that it
warms up before subjecting it to any load.
Under the following conditions the machine must be stop:
1. When the motor rotary speed changes
2. When sparks occur
3. When saw chain are damaged
4. In case of misfire
5. In case of high vibration
6. When flames or smoke appear
Page 24

24
7. In rain or stormy weather
Chain brake
The chain brake is a device which stops the chain instantaneously
if the chain saw recoils due to kickback.
Normally, the brake is activated automatically by inertial force. It
can also be activated manually by pushing the brake lever (Front
handle guard) down toward the front.
To release brake, pull up the front handle guard toward the front
handle till “click” sound is heard.
WARNING!
When the brake operates, release the throttle lever to slow down
the engine speed. Continuous operation with the brake engaged
will generate heat from the clutch and may cause trouble.
Be sure to check brake operation on the daily inspection.
How to confirm:
1) Turn off the engine.
2) Holding the chain saw horizontally, remove your hand from the front handle,
and let the tip of the guide bar hit a stump or a piece of wood, and check the
brake is operating. Operating level varies by bar size.
In case the brake is not effective, ask our dealer inspection and repairing.
Sawing
During cutting, please don’t keep the running speed just above
clutch engagement speed. Any prolonged use at low speed is
likely to cause premature wear of the clutch.
On the other hand, the user should not keep the engine speed in
max speed after cutting. Any prolonged use at the highest speed
is likely to reduce lifetime of engine.
Always take care to maintain a well balanced and secure position.
CAUTION!
In an emergency, stop the engine by moving the engine switch to
Page 25

25
the stop position.
If the saw chain strikes stone or other debris, stop the engine and
check whether something has been damaged and the saw chain
is still secure.
WARNING!
Before proceeding to your job, read "For Safe Operation" section
It is recommended to first practice sawing easy logs. This also
helps you get accustomed to your unit.
Always follow the safety regulations. The chain saw must only be
used for cutting wood. It is forbidden to cut other types of material.
Vibrations and kickback vary with different materials and the
requirements of the safety regulations would not be respected. Do
not use the chain saw as a lever for lifting, moving or splitting
objects. Do not lock it over fixed stands.
It is not necessary to force the saw into the cut. Apply only light
pressure while running the engine at full throttle.
Racing the engine with the chain seized in a cutaway can damage
the clutch system. When the saw chain is caught in the cut, do not
attempt to pull it out by force, but use a wedge or a lever to open
the cut.
When cutting trees and thick branches, the teeth of the spiked
bumper can be tied to the wood, prevent slippery, and easy
cutting under the focal point.
Safe chainsaw operation
BB.101 Felling a tree
When bucking and felling operations are being performed by two
or more persons at the same time, the felling operations should
be separated from the bucking operation by a distance of at least
twice the height of the tree being felled. Trees should not be felled
in a manner that would endanger any person, strike any utility line
or cause any property damage. If the tree does make contact with
any utility line, the company should be notified immediately.
Page 26

26
The chain saw operator should keep on the uphill side of the
terrain as the tree is likely to roll or slide downhill after it is felled.
An escape path should be planned and cleared as necessary
before cuts are started. The escape path should extend back and
diagonally to the rear of the expected line of fall as illustrated in
Figure BB.101.
Before felling is started, consider the natural lean of the tree, the
location of larger branches and the wind direction to judge which
way the tree will fall.
Remove dirt, stones, loose bark, nails, staples and wire from the
tree.
BB.102 Notching undercut
Make the notch 1/3 the diameter of the tree, perpendicular to the
direction of falls as illustrated in Figure BB.102. Make the lower
horizontal notching cut first. This will help to avoid pinching either
the saw chain or the guide bar when the second notch is being
made.
BB.103 Felling back cut
Make the felling back cut at least 50 mm higher than the
horizontal notching cut as illustrated in Figure BB.102. Keep the
felling back cut parallel to the horizontal notching cut. Make the
felling back cut so enough wood is left to act as a hinge. The
hinge wood keeps the tree from twisting and falling in the wrong
direction. Do not cut through the hinge.
As the felling gets close to the hinge, the tree should begin to fall.
If there is any chance that the tree may not fall in desired direction
or it may rock back and bind the saw chain, stop cutting before
the felling back cut is complete and use wedges of wood, plastic
or aluminium to open the cut and drop the tree along the desired
line of fall.
When the tree begins to fall remove the chain saw from the cut,
stop the motor, put the chain saw down, then use the retreat path
Page 27

27
planned. Be alert for overhead limbs falling and watch your
footing.
BB.104 Limbing a tree
Limbing is removing the branches from a fallen tree. When
limbing leave larger lower limbs to support the log off the ground.
Remove the small limbs in one cut as illustrated in
Figure BB.103. Branches under tension should be cut from the
bottom up to avoid binding the chain saw.
BB.105 Bucking a log
Bucking is cutting a log into lengths. It is important to make sure
your footing is firm and your weight is evenly distributed on both
feet. When possible, the log should be raised and supported by
the use of limbs, logs or chocks. Follow the simple directions for
easy cutting
When the log is supported along its entire length as illustrated in
Figure BB.104, it is cut from the top (overbuck).
When the log is supported on one end, as illustrated in Figure
BB.105, cut 1/3 the diameter from the underside (underbuck).
Then make the finished cut by overbucking to meet the first cut.
When the log is supported on both ends, as illustrated in Figure
BB.106, cut 1/3 the diameter from the top (overbuck). Then make
the finished cut by underbucking the lower 2/3 to meet the first
cut.
When bucking on a slope always stand on the uphill side of the
log, as illustrated in Figure
BB.107. When “cutting through”, to maintain complete control
release the cutting pressure near the end of the cut without
relaxing your grip on the chain saw handles. Don’t let the chain
contact the ground. After completing the cut, wait for the saw
chain to stop before you move the chain saw. Always stop the
motor before moving from tree to tree.
Page 28

28
Figure BB.101-Description of felling: escape routes
Figure BB.102-Description of felling :undercutting
Figure BB.103-Tree limbing
Figure BB.104-Log supported along the entire length
Page 29

29
Figure BB.105-Log supported one end
Figure BB.106-Log supported both ends
Page 30

30
Figure BB.107-Bucking a log
Stopping the engine
1. Reduce the engine speed and let it run with no load for a few
minutes.
2. Switch off the engine by moving the engine switch to the stop
position.
The accessory may cause an accident if it continues to turn after the engine
has stopped or after the engine switch has been released. When the unit has
stopped, check carefully that the accessory has stopped turning before putting
the unit down.
MAINTENANCE
Good maintenance is essential for safe, economical and
trouble-free operation. It will also help reduce air pollution.
The purpose of the maintenance and adjustment schedule is to
keep the machine in the best
operating condition.
Turn off the engine before performing any maintenance. If the
engine must be run, make sure the area is well ventilated. The
exhaust contains poisonous carbon monoxide gas
Please always select recommended accessories. The accessories
Page 31

31
which have not equivalent quality may damage the machine.
Please never use non approved components and remove the
safety devices after or during maintenance.
Maintenance
Daily
maintenan
ce
Weekly
maintenanc
e
Monthly
maintenan
ce
Clean the outside of the machine.
X
Check that the engine switch
works correctly.
X
Check that the saw chain do not
move when the engine is idling or
when the choke is in the start
throttle position.
X
Check that the saw chain are
undamaged and show no signs
of cracking or other damage.
Replace the saw chain if
necessary.
X
Clean the air filter. Replace if
necessary.
X
Check that nuts and screws are
tight.
X
Check that there are no fuel leaks
from the engine, tank or fuel
lines.
X
Check the chain brake is work
correctly.
X
Check the oil supply is work
correctly.
X
Page 32

32
Maintenance
Daily
maintenan
ce
Weekly
maintenanc
e
Monthly
maintenan
ce
Check the starter and starter
cord.
X
Clean the outside of the spark
plug. Remove it and check the
electrode gap. Adjust the gap to
0.6-0.7 mm or replace the spark
plug. Check that the spark plug is
fitted with a spark plug cap.
X
Clean the machine’s cooling
system.
X
Clean the outside of the
carburetor and the space around
it.
X
Clean the fuel tank.
X
Check all cables and
connections.
X
Check the clutch, clutch springs
and the clutch drum for wear.
Replace if necessary by an
authorized service workshop.
X
Replace the spark plug. Check
that the spark plug is fitted with a
spark plug cap.
X
Page 33

33
To reduce the fire hazard, clean
dirt, leaves and surplus lubricant,
etc from the muffler and engine.
X
MAINTENANCE should be
carried out at REGULAR
INTERVALS in each of the
indicated months or after a
certain number of hours of
operation (whichever comes
first). (1)
Before
use
every
time
Monthly
or after
25 hours
Every
three
months
or after
50 hours
Every six
months
or after
100 hours
Air filter
Clean
X(1)
Fuel tank and
filter
Clean
X(2)
Grease inside
gear box
Filling
X(1)
Blade
Check
(replace if
necessary)
X X
Fuel feed line
Check
(replace if
necessary)
Every three
years (2)
(1) If operated in dusty areas carry out maintenance more
frequently.
(2) A specialist technician should carry out this maintenance if the
owner does not have the appropriate tools or mechanical
knowledge.
Cleaning air filter
1. Loosen the air filter cover screw and remove the air filter cover.
2. Loose the screws fixing the dirty air filter and remove it.
3. Clean the air filter in solvent.
4. Place the filter in dry place to remove excess solvent.
Page 34

34
5. Reinstall the air filters and screws.
6. Reinstall the air filter cover, and tighten the air filter cover screw.
WARNING:
The use of petrol or combustible solvents for cleaning can cause
fire or explosion. Therefore only use soap water or
non-combustible solvent. Never operate the machine without the
air filter.
Caution!
A used air filter can never be completely cleaned.It is advisable
to replace your air filter with a new one after every 100 hours of
operation, or 6 months, whichever comes first
Changing air filter
1. Loosen the air filter cover screw and remove the air filter cover.
2. Loose the screws fixing the dirty air filter and remove it.
3. Reinstall the new air filters and screws.
4. Reinstall the air filter cover, and tighten the air filter cover screw.
Spark plug
To ensure proper engine operation, the spark plug must be properly gapped and
free of deposits.
1. Remove the spark plug cover from the housing.
2. Remove the spark plug cap.
3. Clean any dirt from around the spark plug base.
4. Use the socket spanner which provided to remove the spark plug.
5. Visually inspect the spark plug. Remove carbon deposits using a wire brush.
6. Check for discoloration on the top of the spark plug. The standard color
should be a tan color.
7. Check the spark plug gap. The acceptable gap should be between
0,6-0,7mm.
Page 35

35
8. Install /reinstall the spark plug carefully by hand.
9. Once the spark plug has been seated, tighten it with a spark plug wrench.
10. Reinstall the spark plug cap on top of the spark plug.
11. Reinstall the spark plug cover.
Cleaning
Warning: cutting edges of chain are sharp, use protective
gloves when handling chain.
1. Keep your machine clean, the outside of the machine can be cleaned using
a damp soft cloth with a mild detergent if required, never use water to clean
the machine as it may cause damage to internal parts.
2. Some maintenance products and solvents may damage the plastic parts,
these include products containing benzene, trichloroethylene, chloride or
ammonia.
3. Take special care to keep the ventilation inlets /outlets free from
obstruction. Cleaning with a soft brush followed by a compressed air jet will
usually be sufficient to ensure acceptable internal cleanliness.
4. Wear eye protection when carrying out cleaning.
Care of guide bar
Uneven bar wear causes most guide bar problems, incorrect
sharpening of chain cutter and depth gauge settings often cause
this, when bar wears unevenly, it widens guide bar groove, this
causes chain clatter ad river popping. Saw will not cut straight,
replaces guide bar if this occurs.
Inspect guide bar before sharpening chain. A worn or damaged
guide bar is unsafe. A worn or damaged guide bar will damage
chain, it will also make cutting harder.
Page 36

36
Normal guide bar maintenance
1. Remove guide bar from chain saw.
2. Remove sawdust from guide bar groove periodically. Use putty knife or wire,
3. Clean oil slots after each day of use.
4. Remove burrs from sides of guide bar. Use flat file to make side edges square.
Replace guide bar when
- bar is bent or cracked.
- Inside groove of bar is badly worn .
Chain sharpening
Warning ! always wear gloves while handling the chain
The chain requires sharpening when the chain saw does not cut
appropriately. This operation is performed as follows :
1. Extend the chain bar.
2. Fix the bar in a vice so that the chain can slide.
3. Place the file over the tooth at 35º
4. File forward only until all the worn part of the tooth has been eliminated.
5. count the file movements made on the first tooth and do the same on all
Page 37

37
the others, both right and left ,
6. After some sharpening the delimiting device on the chain will exceed the
height of the cutting teeth, file the exceeding part by means of a flat file to
round off the depth delimiting device.
7. Ensure that the chain is replaced before stretching to exceed the maximum
adjustment of the chain saw bar.
8. ‘Deep’ Filing should be performed with an
electric file, we advise to use a
repair service or a similarly qualified specialist to perform this operation.
9. Ensure that the chain slides smoothly over the bar when pulled with hands,
periodically sharpen chain and check the chain tension.
10. Bars with sprockets need frequent greasing which can be performed as
follows :
- Fill a syringe or similar device with grease for bearings.
- Each time the saw is used grease through the hole provided near the
bar tip until the grease penetrated onto the tip.
- After 3 times of sharpening the chain your self have it professionally
sharpened, this will ensure that all the teeth are even.
To avoid damage to the motor, do not keep the chain saw running if the chain is
lodged in the wood.
Empty the fuel / oil
1. Place the machine on even and stable surface. Warm up the engine for
several minutes and then stop it.
2. Loosen the fuel / oil tank cover and remove it.
3. Drain fuel / oil into a container thoroughly.
4. Press the intake pump several times until fuel begins to empty the bulb.
5. Drain fuel / oil again.
6. Reinstall the fuel / oil tank cover.
Page 38

38
REPAIRS
The machine can only be repaired by
a repair service or a
similarly qualified specialist.
STORING
Transporting the machine in a car, please empty the fuel tank completely first to
avoid the leakage.
Secure the machine during transport to prevent loss of fuel, damage or injury.
Store the machine, operating instructions and where necessary the
accessories in the original packaging. In this way you will always have all the
information and parts ready to hand.
Pack the device well or use the original packaging in order to avoid transit
damage.
Store the machine in dry and well ventilated surroundings and with the fuel tank
empty. Do not store fuel next to the machine.
TROUBLESHOOTING
Problem
Check
Condition
Cause
Solution
The
engine
stalls, is
difficult to
Fuel at the
carburetor
The fuel
does not
arrive at the
carburetor
Fuel filter blocked
Clean or replace
Fuel supply blocked
Clean or replace
Carburetor
Ask your distributor for
advice
Page 39

39
start or
does not
start
Fuel at the
cylinder
The fuel
does not
arrive at the
cylinder
Carburetor
Ask your distributor for
advice
There is fuel
in the
exhaust
The fuel mixture is
too rich
Open the throttle valve
Clean or replace the air
filter
Adjust the carburetor
Ask your distributor for
advice
Sparks at
the spark
plug
electrodes
There is no
spark
Switch in off position
Set the switch to the ON
position (Run)
Electrical problem
Ask your distributor for
advice
Locked switch
Sparks at
the spark
plug
There is no
spark
Bad spacing of the
electrodes
Adjust the gap to
0,6-0,7 mm
Electrodes
contaminated
Clean or replace
Electrodes
contaminated with
fuel
Clean or replace
Defective spark plug
Replace the spark plug
The
engine
turns, but
stalls or
does not
accelerat
e
correctly
Air filter
Dirty air filter
Fair wear and tear
Clean or replace
Fuel filter
Dirty fuel
filter
Dirt or residue in the
fuel
Replace
Fuel vent
Blocked fuel
vent
Dirt or residue in the
fuel
Clean or replace
Spark plug
Dirty or
worn spark
plug
Fair wear and tear
Clean, adjust or replace
Carburetor
Bad
adjustment
Vibration
Adjust
Page 40

40
Cooling
system
Excessive
Prolonged use in
dirty or dusty places
Clean
Spark
suppressor
Plate
cracked,
contaminate
d or
perforated
Fair wear and tear
Replace
The
engine
does not
engage
N/A
N/A
Internal engine
problem
Ask your distributor for
advice
Page 41

41
………………………………………………………………………………………………………
Conformity Declaration
The undersigned, hereby certifies that the units described below
Gasoline chain saw
Model: LE32458-45A(PN4600-9)
Power: 1.2K W
Displacement: 45.8cm³
Measured sound power level: 106 dB (A)
Guaranteed sound power level: 110dB (A)
Conformity assessment procedure concerning directive 2000/14/EC: Annex V
is in compliance with the provisions of the following Europeandirectives:
2014/30/EU "ElectroMagnetic Compatibility "
2006/42/EC "Machinery"
2000/14/EC&2005/88/EC "Noise outdoor"
97/68/EC+2011/88/EU "Emissions of pollutants "
And to the following standards:
EN ISO 11681-1: 2011
EN ISO 14982:2009
………………………………………………………………………………………………………………
Person authorised to compile the technical file:
Aurelio de Michele--Dunsch Europe SRL.,
Via dell'Artigianato n. 10 ,I-29010 GRAGNANO TREBBIENSE-ITALY
 Loading...