

Page 1
User manual
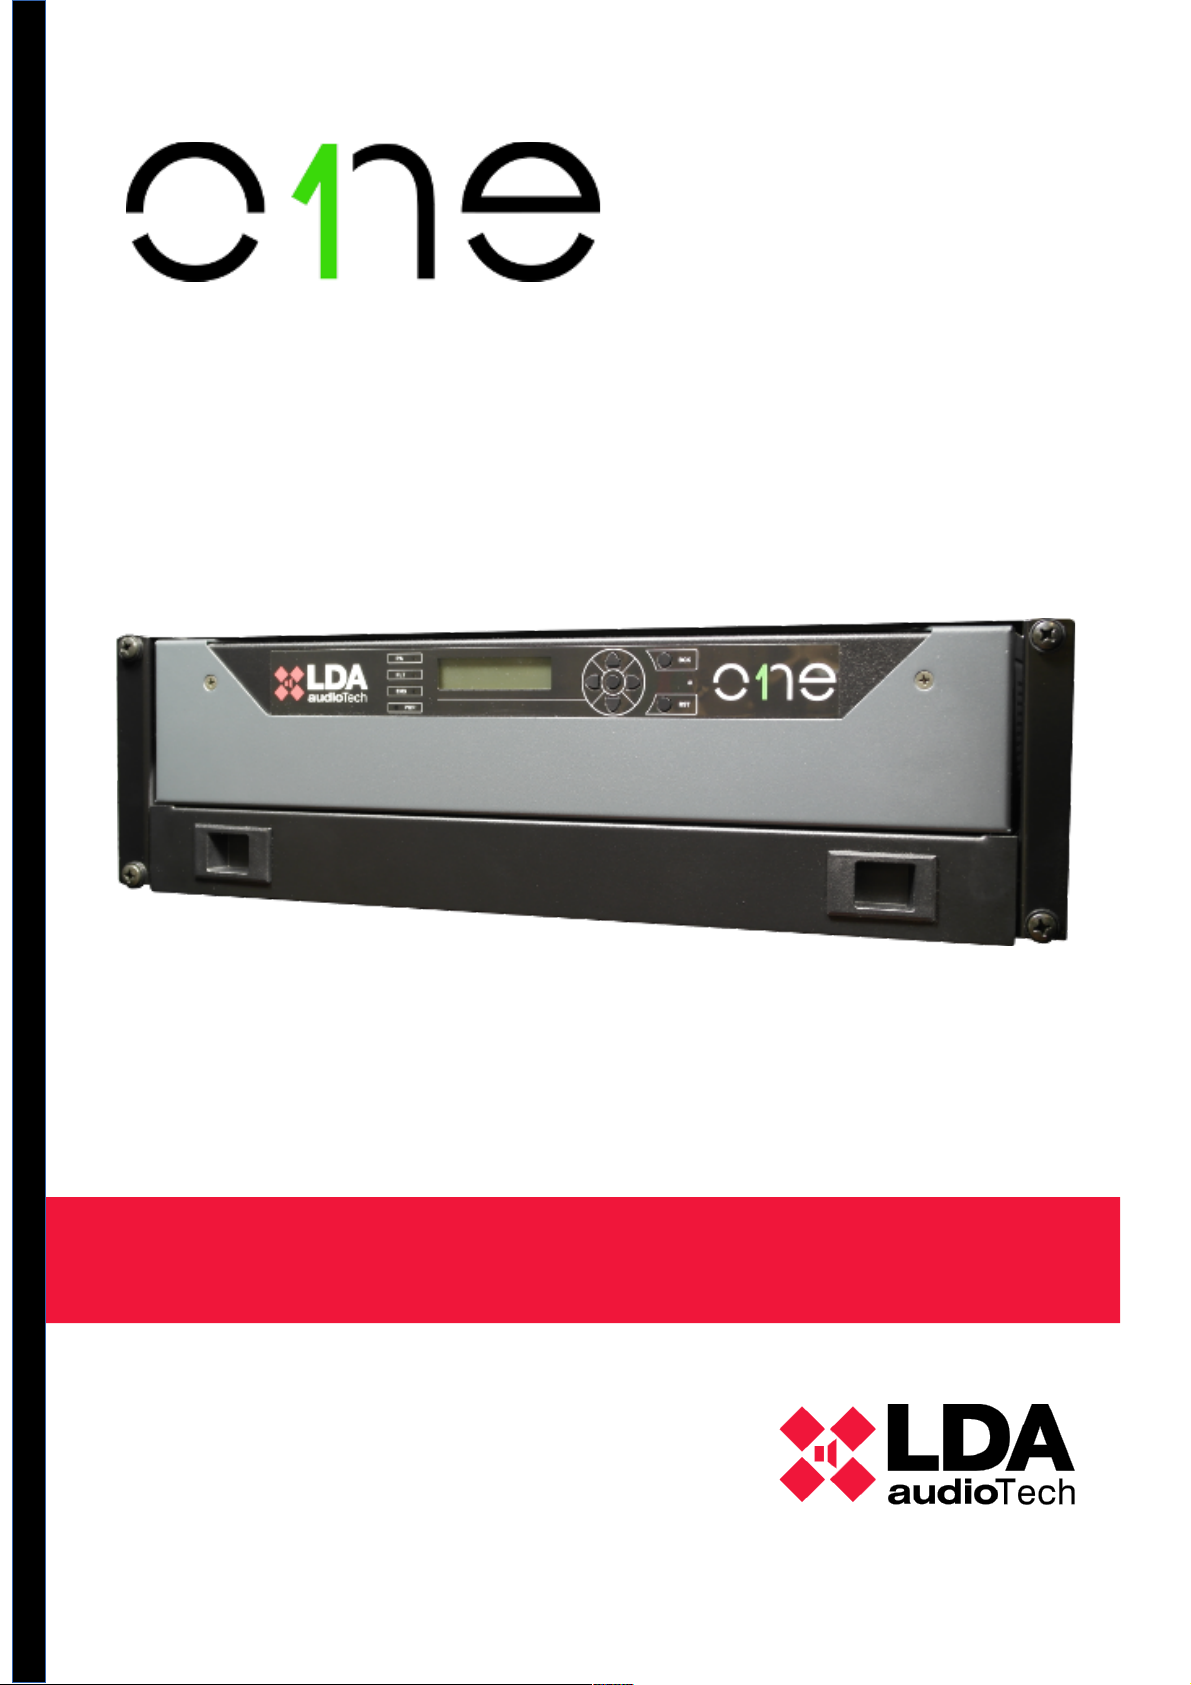
Rack mounting accesory19”ONE-500: ONE-RMA
Page 2

Index
1INTRODUCTION..................................................................................................................1
1.1General description.......................................................................................................1
2INSTALLATION...................................................................................................................2
3TECHNICAL CHARACTERISTICS.....................................................................................4
Page 3
User Manual: Rack mounting accesory19”ONE-500 ONE-RMA
1 INTRODUCTION
The mounting kit ONE-RMA allows to install a ONE-500 unit in a 19 "rack cabinet from
500 to 900 mm deep. With only 3U of height (with ONE-500, installed) it provides a solid
base of fixation for the equipment as well as making it extractable to facilitate the wiring
of the system and its subsequent maintenance.
The mounting kit ONE-RMA has two high strength steel guides that allow the unit to
be completely removed from the rack without the need to disassemble the ONE-500 unit.
It has lock handles that allow the ONE-500 unit to be integrated with the rest of the
equipment in the rack cabinet.
1.1 General description
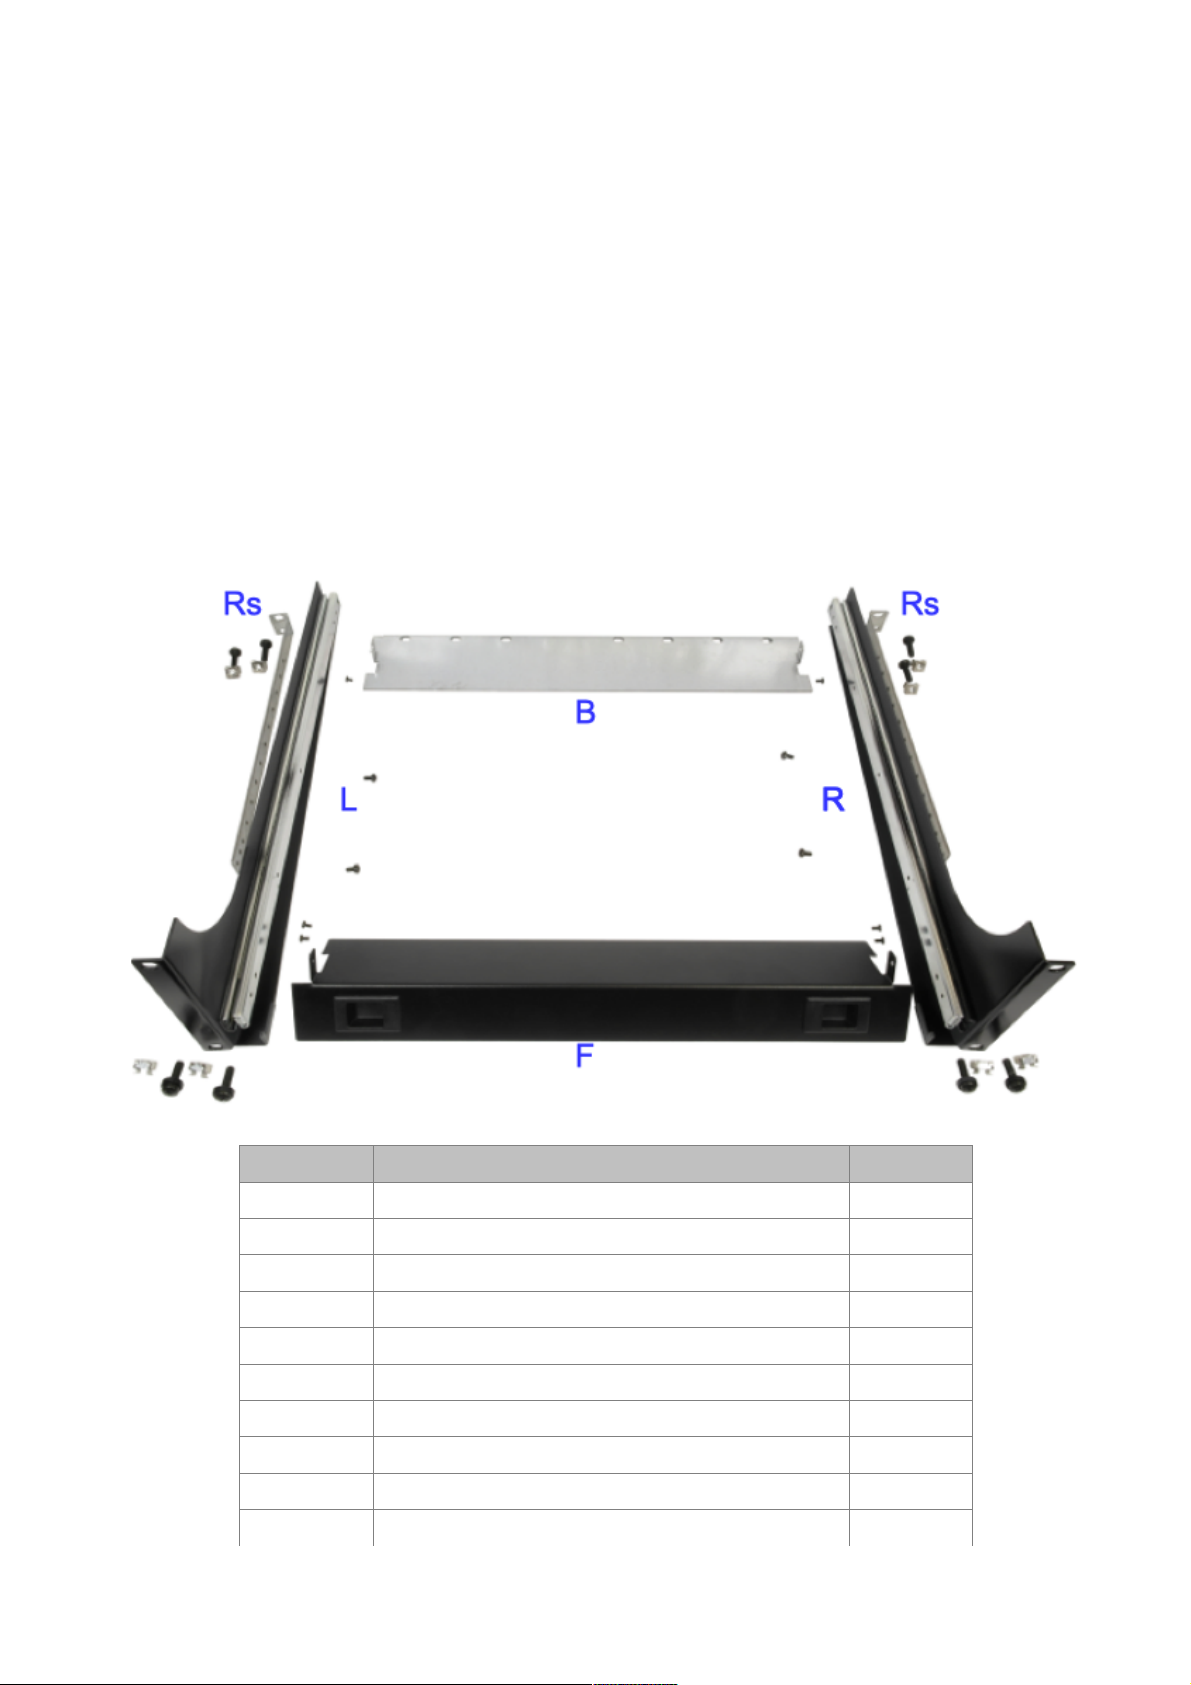
Id Description Cantidad
F Front 1
B Back 1
L Left side 1
R Right side 1
Rs Rear support 2
B3 M3 bolts 6
B4 M4 bolts 4
B6 M6 bolts 8
N6 M6 nut 8
W6 M6 Nylon washers 4
1
Page 4

2
Page 5
User Manual: Rack mounting accesory19”ONE-500 ONE-RMA
2 INSTALLATION
Step View Description
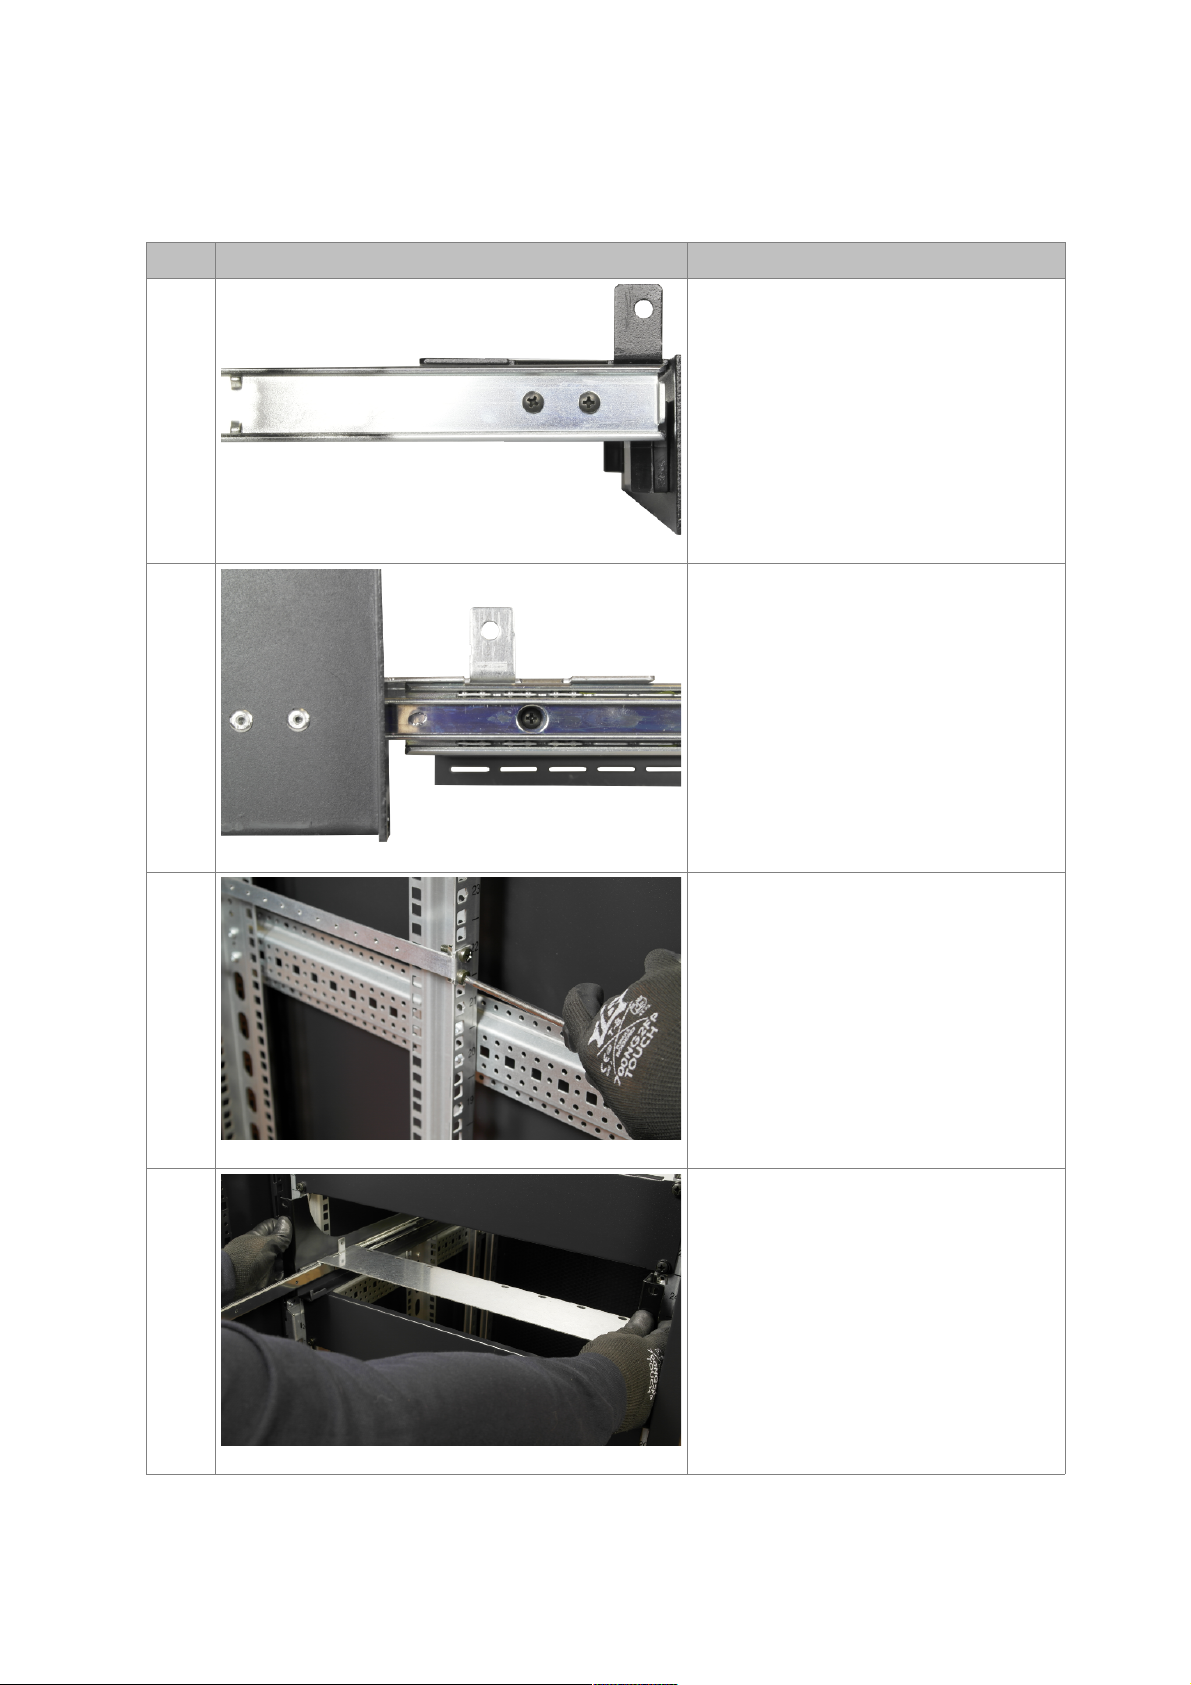
1
Joint the frontal piece (F) to the sides (L)
y (R) using 4 M3 bolts (T3)
2
Unfold the steel guide almost completely
and match the holes until the thread of
the rear piece (B) is visible. Attach the
back piece to the side pieces (L and R)
using 2 M3 bolts (B3)
3
Screw the rear supports (Rs) using 4 M6
bolts (B6) into the rear posts of the rack.
The general installation height of the
ONE-RMA support is determined by the
lower bolt of the rear supports that
coincides in height with the position of
the lower bolt on the front of the support.
4
Introduce the preassembly of points 1
and 2 in the desired rack position.
3
Page 6
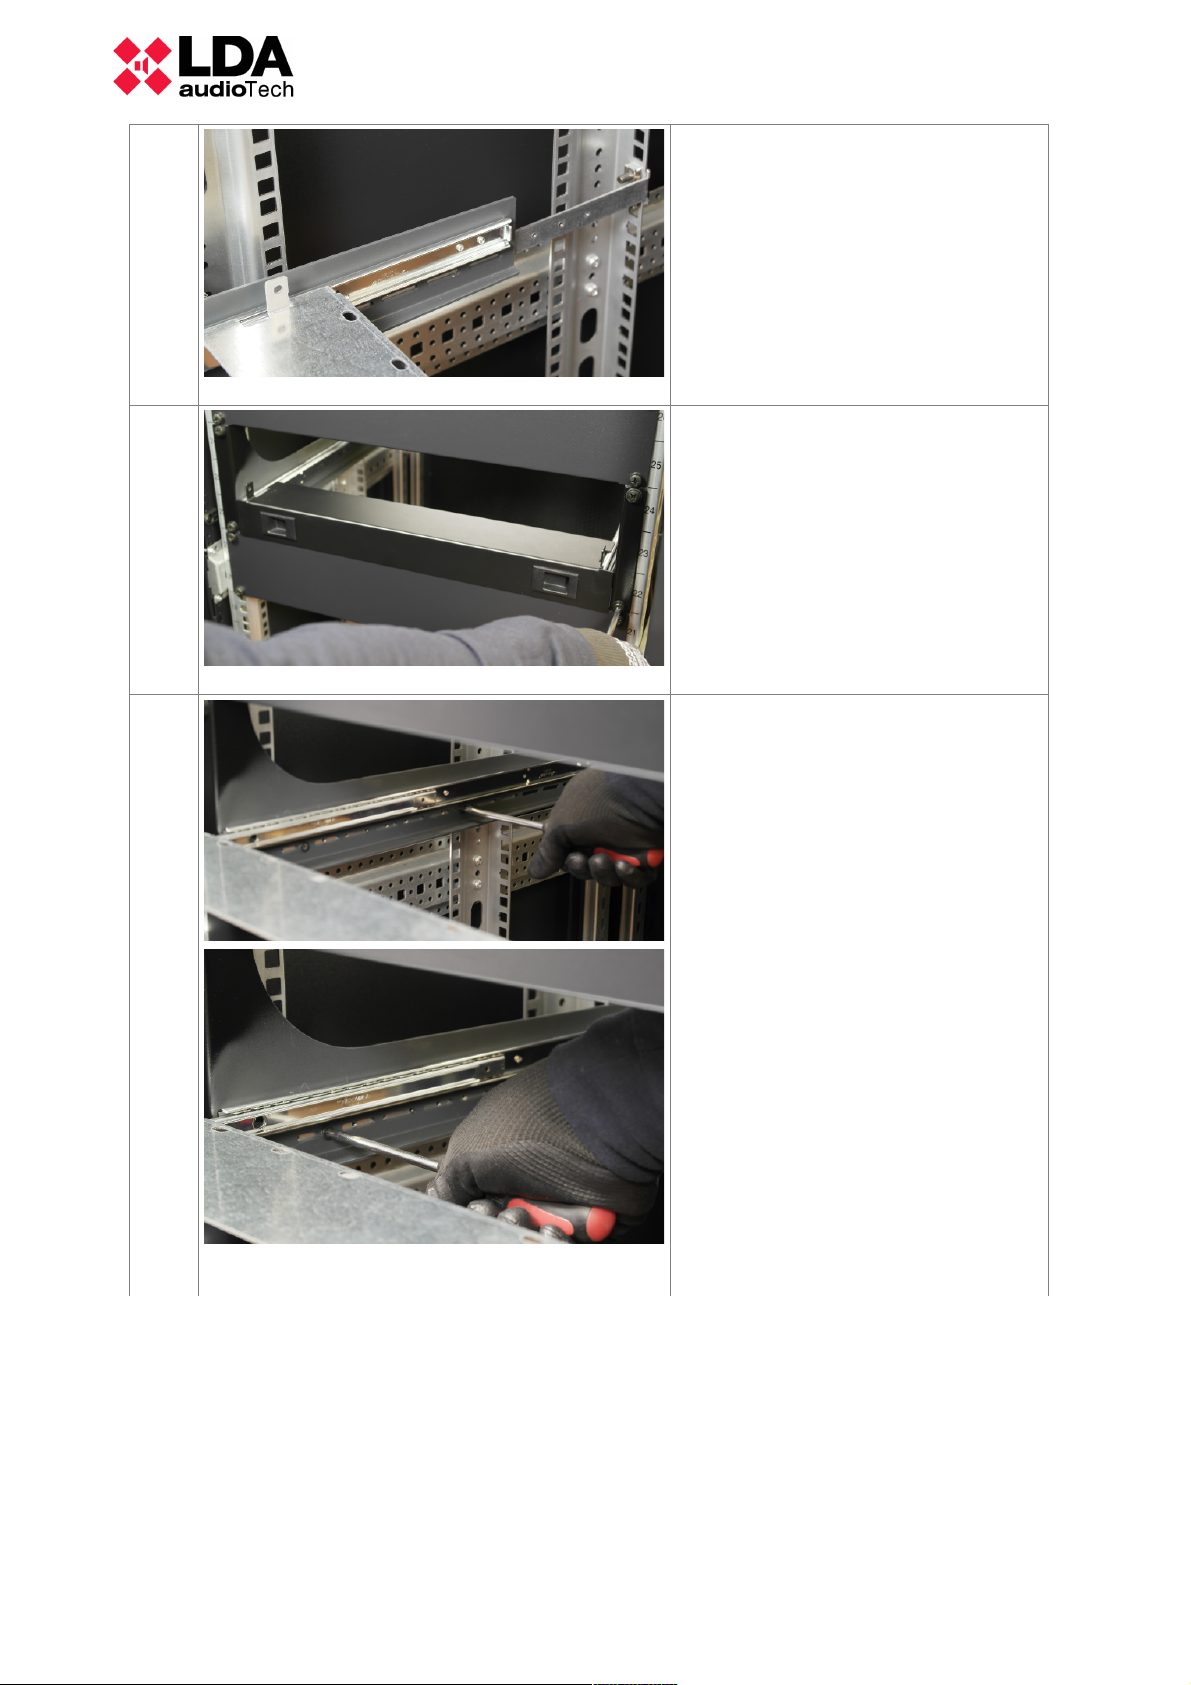
5
Check that the rear supports are in the
side of the structure assembled in steps
1 and 2
6
Screw the frontal (F) of the support ONERMA to the rack using 4 M6 bolts (B6)
and 4 nylon packing rings M6 (W6).
Remember the lower bolt must coincide
with the step 4 height.
7
Extend the support to access the sides
from inside. Through the slots, bolt the
sides (L and R) to two holes with threads
of the rear supports (Rs) using 4 M4 (B4)
bolts
4
Page 7
User Manual: Rack mounting accesory19”ONE-500 ONE-RMA
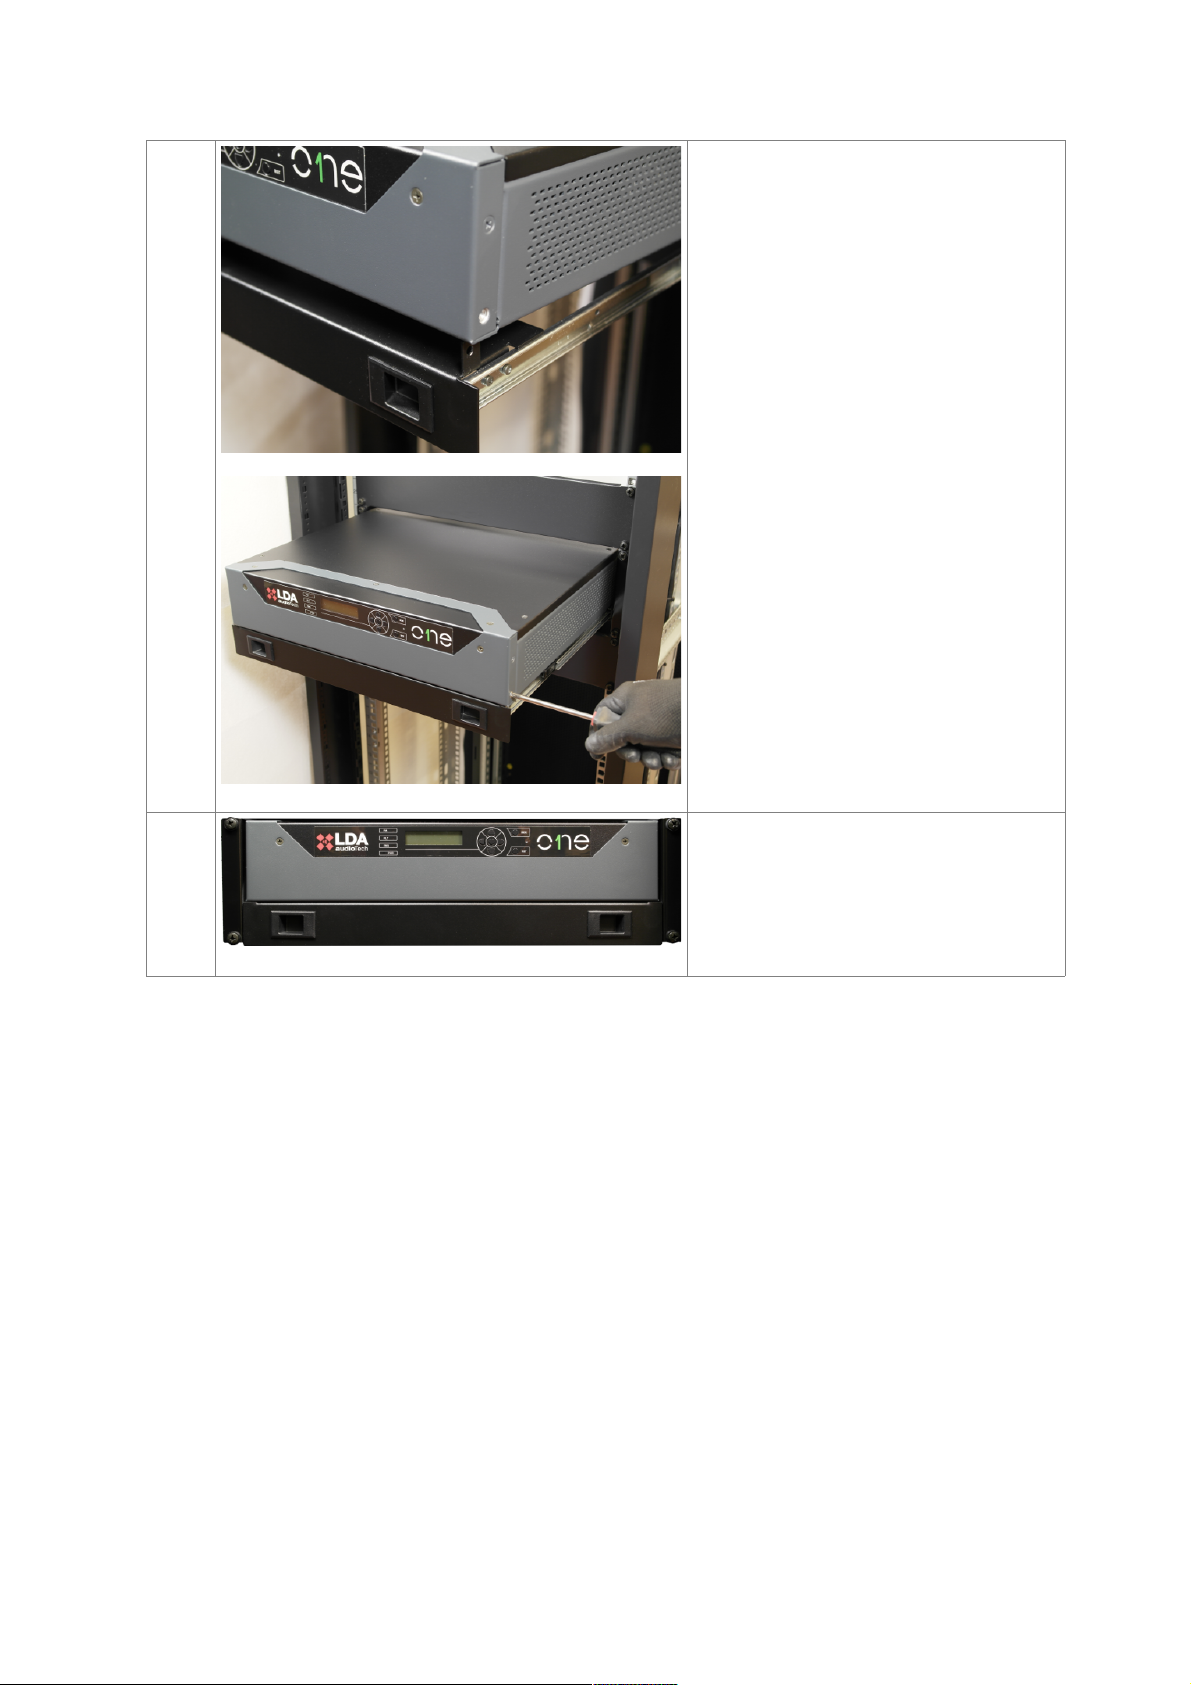
8
Prepare the ONE-500 unit for installation
on the ONE-RMA support:
1. Make sure that the front of the
equipment is correctly oriented (see user
manual ONE-500)
2. Remove the 2 bolts from the lower
front corners of ONE-500
Place the ONE-500 unit on the ONERMA support by putting the back side of
the equipment so that the vertical tabs of
the back piece (B) coincide with the slots
on the ONE-500 base.
Put the ONE-500 equipment on the
ONE-RMA support and fix them using the
supplied bolts
9
Push the assembled equipment until both
latches click.
5
Page 8

3 TECHNICAL CHARACTERISTICS
Model ONE-RMA
Material
Fe
Color
Black RAL9005
Size
3U 19” rack. Extendable bottom racks from 500 to 900mm
Tray extension
550 mm / 21.6”
Paching size
490 x 420 x 50 mm / 19.3” x 16.5” x 2”
Net weight
3.6 Kg / 7.9 lb
Total weight
3.9 Kg / 8.6 lb
6
Page 9

 Loading...