

LCI In-Frame Low Profile Slide-Out OWNER'S MANUAL

In-FrameLowProfile
Slide-Out
OWNER'SMANUAL
Rev: 07.13.2018 In-Frame Low Profile Slide-out Owner's Manual
TABLE OF CONTENTS
Introduction 2
Safety Requirements 2
Operation Instructions 3
Extending Slide-Out Room 3
Retracting Slide-Out Room 3
Basic Troubleshooting 4
Basic Purge Procedure For Hydraulic Pump Units 5
Hydraulic Cylinder Test 5
Hydraulic Slide-Out Cylinder - Retract Test 5
Hydraulic Slide-Out Cylinder - Extend Test 6
Adjusting the Slide Room's Retracted Position 7
Adjusting the Slide Room's Extended Position 7
Maintenance 8
Mechanical Maintenance 8
Low Pro Hydraulic Slide Assembly 9
Low Pro Hydraulic Bed Slide Components 10
Low Pro Hydraulic Bed Slide Components 11
Introduction
The component's purpose is to hydraulically actuate slide-out rooms. Its function should not be used for any
purpose or reason other than to actuate the slide-out room. To use the system for any reason other than what it is
designed for may result in death, serious injury or damage to the coach.
Safety Requirements
Failure to act in accordance with the following may result in death, serious injury,
coach or property damage.
Always wear gloves while handling.
Moving parts can pinch, crush or cut. Keep clear and use caution.
NOTE: Slide room is to be supported by a secondary means when servicing slide arms. Failure to do so could
result in unexpected motion of the slide room.
NOTE: All slide arms are over 100 pounds in weight. Ergonomic considerations should be made for safe
install.
Before actuating the system, please keep these things in mind:
1. Parking locations should be clear of obstructions that may cause damage when the slide-out room is
actuated.
2. Be sure all persons are clear of the coach prior to the slide-out room actuation.
3. Keep hands and other body parts away from slide-out mechanisms during actuation.
4. To optimize slide-out actuation, park coach on solid and level ground.
Rev: 07.12.18
Page 2
CCD-0001599
Operation Instructions
Extending Slide-Out Room
1. Level the coach.
2. Verify the battery is fully charged and hooked up to the electrical system.
3. Remove transit bars (if so equipped).
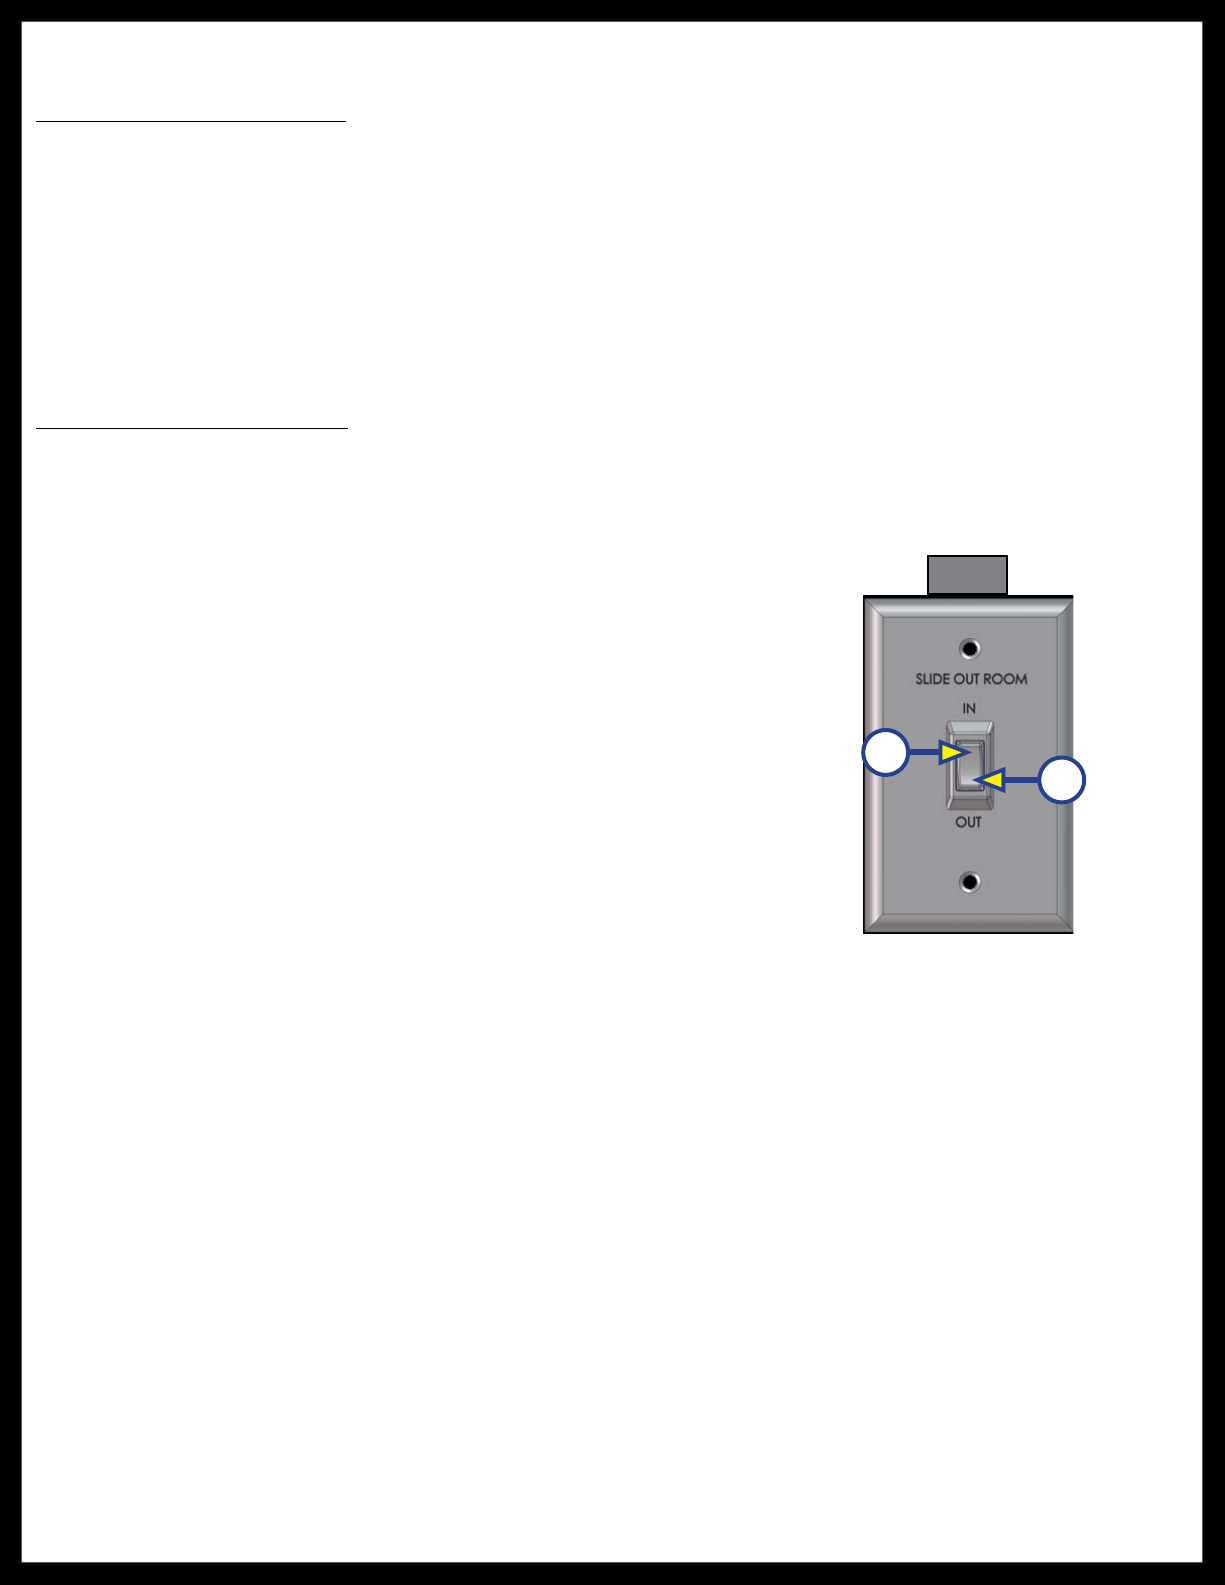
4. Press and hold the IN/OUT switch (Fig. 1) in the OUT position (Fig. 1B) until room is fully extended and
stops moving.
5. Release switch, which will lock the room into position.
NOTE: Only hold OUT switch until room stops.
Retracting Slide-Out Room
1. Verify the battery is fully charged and hooked up to the electrical system.
2. Press and hold the IN/OUT switch (Fig. 1) in the IN position (Fig. 1A) until the room is fully retracted and
stops moving.
3. Release the switch. This will lock the room into position.
NOTE: Only hold IN switch until room stops.
4. Install the transit bars (if so equipped).
Fig. 1
A
B
Rev: 07.12.18
Page 3
CCD-0001599

Basic Troubleshooting
This troubleshooting chart outlines some common problems, their causes and possible corrective actions. If any
part or serial number information is available, provide it to the service technician when asking for assistance.
Every coach has its own personality and what may work to fix one may not work on another even if the symptoms
appear to be the same.
When something restricts room travel, system performance will be unpredictable. It is very important that slide
tubes be free of contamination and allowed to travel full distance (stroke). Ice or mud buildup during travel is an
example of some types of contamination that can occur.
When you begin to troubleshoot the system, make sure the battery is fully charged, there are no visible signs of
external damage to the system and that all connections are secure.
During troubleshooting, remember that if you change something, that change may affect something else. Be sure
any changes you make will not create a new problem.
You can obtain additional information on the Lippert Slide-out System by visiting www.lci1.com/customerservice
or by calling 574-537-8900.
What Is Happening? Why? What Should Be Done?
Room doesn't move when switch is
pressed.
Restriction or obstruction inside
or outside of unit.
Low battery voltage, blown fuse,
defective wiring.
Check for and clear obstruction.
Check battery voltage and charge if
needed. Find and check fuse, replace
if blown. Check battery terminals and
wiring. Look for loose, disconnected or
corroded connectors.
Power unit runs but room does not
move.
Power unit runs, room moves slowly.
Restrictions both inside and
outside of unit.
Low battery, poor ground,
extremely low outdoor
temperature.
Check for and clear restriction.
Charge battery and check ground
wire.
Tighten fittings.
Possible external leak in the
hydraulic system.
Inspect hoses, fittings and power unit
for external leaks.
Room drifts "in" or "out."
Air in system.
After checking all connections,
perform basic purge procedure, see
Basic Purge Procedure for Hydraulic
Pump Units section.
In the closed position, room drifts
out.
Rev: 07.12.18
Leaking cylinder seal. See Hydraulic Cylinder Test section.
Fluid bypassing cylinder piston. See Hydraulic Cylinder Test section.
Hose from pump is leaking. Tighten fitting or replace hose.
Fluid bypass in cartridge valve. Replace cartridge valve.
Loose mounting bolts. Tighten mounting bolts.
Page 4
CCD-0001599
 Loading...