

Page 1
Installation Instructions for
980MOOND13O
Moon Dance 13 Outdoor
Outdoor
GP I :ENERAL RODUCT NFORMATION
This product is suitable for wet locations.
This product can mount either to a 4” square electrical box with a
round plaster ring or an octagon electrical box.
This product may be dimmed with a standard incandescent dimmer.
This instruction shows a typical installation.
CAUTION - RISK OF FIRE
This product must be installed in accordance with
the applicable installation code by a person familiar
with the construction and operation of the product
and the hazards involved.
Use minimum 90°c supply conductors.
OD788_
1.1
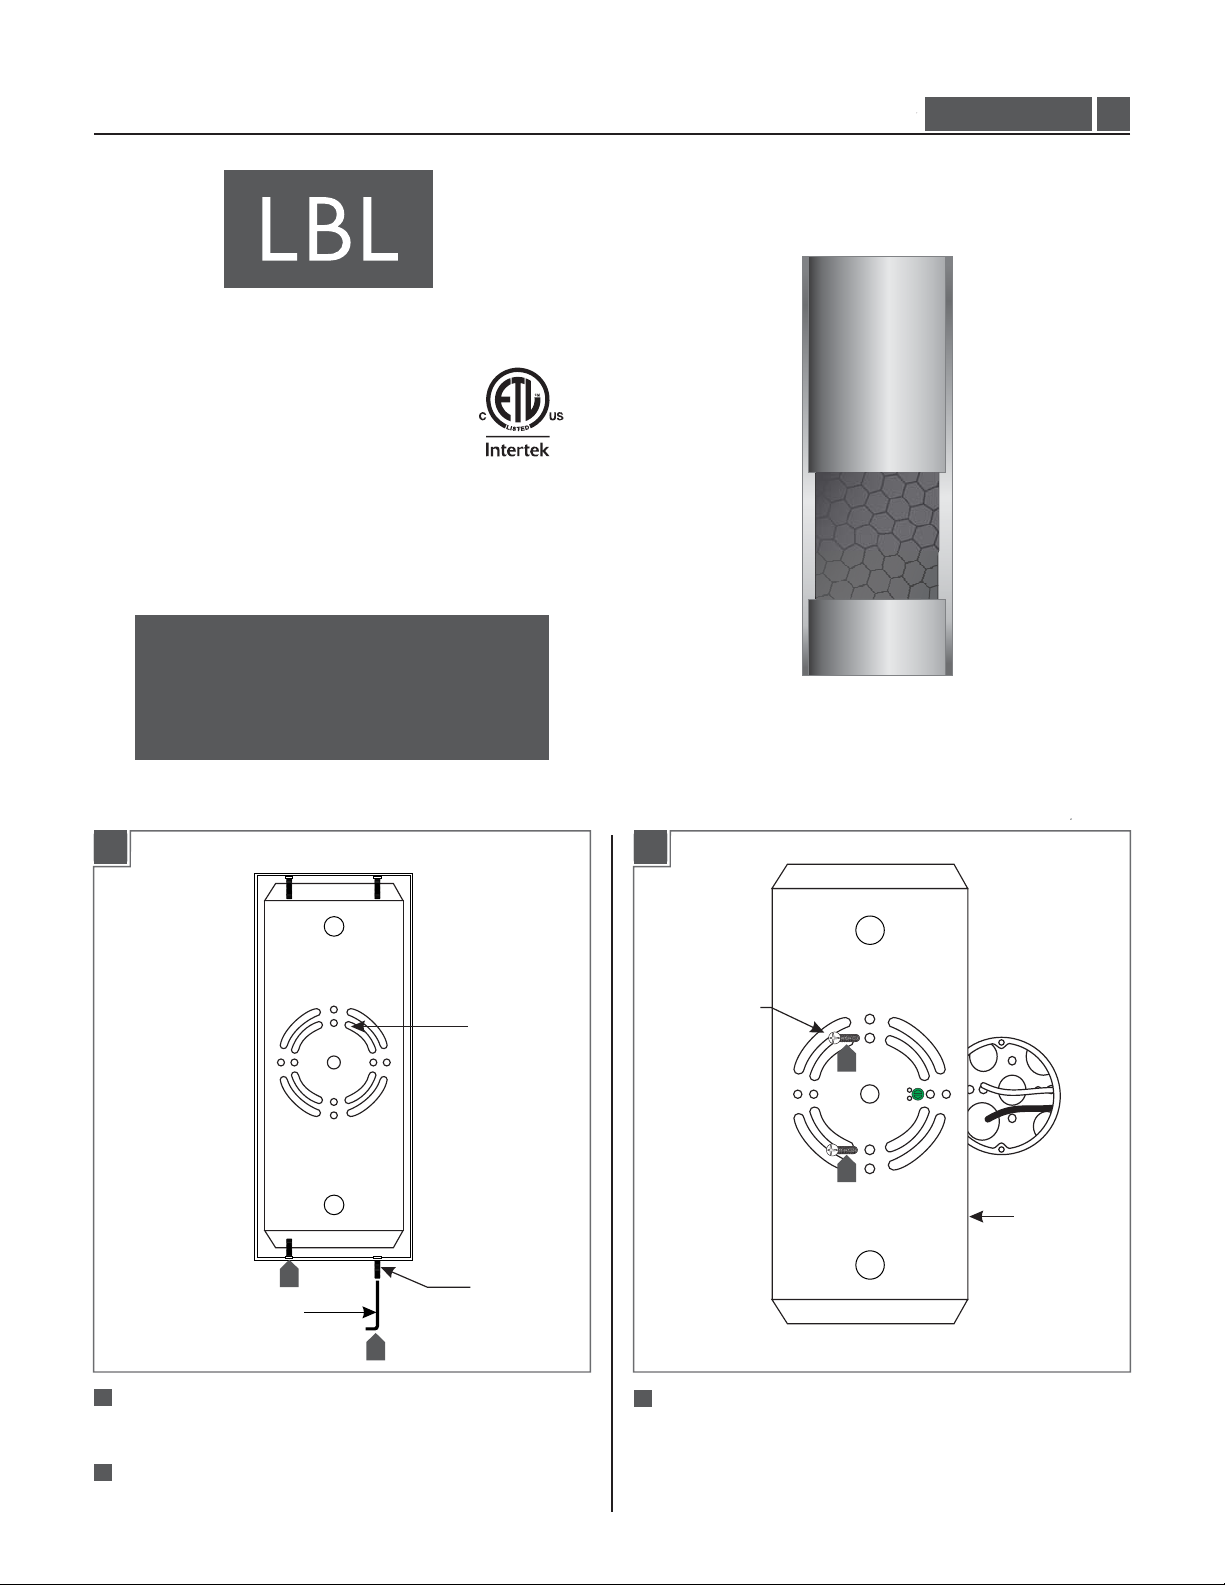
Install the Mounting Plate
1A 1B
MOUNTING
PLATE
1
ALLEN WRENCH
1
SET SCREW
#8-32 SCREW
3
3
MOUNTING
PLATE
1
With the Allen wrench provided, back out (do not fully
remove) the set screws at the bottom of the fixture.
2
Remove the mounting plate from the back of the
fixture.
3
Attach the mounting plate to the electrical box using
the two #8-32 screws provided.
1
Page 2
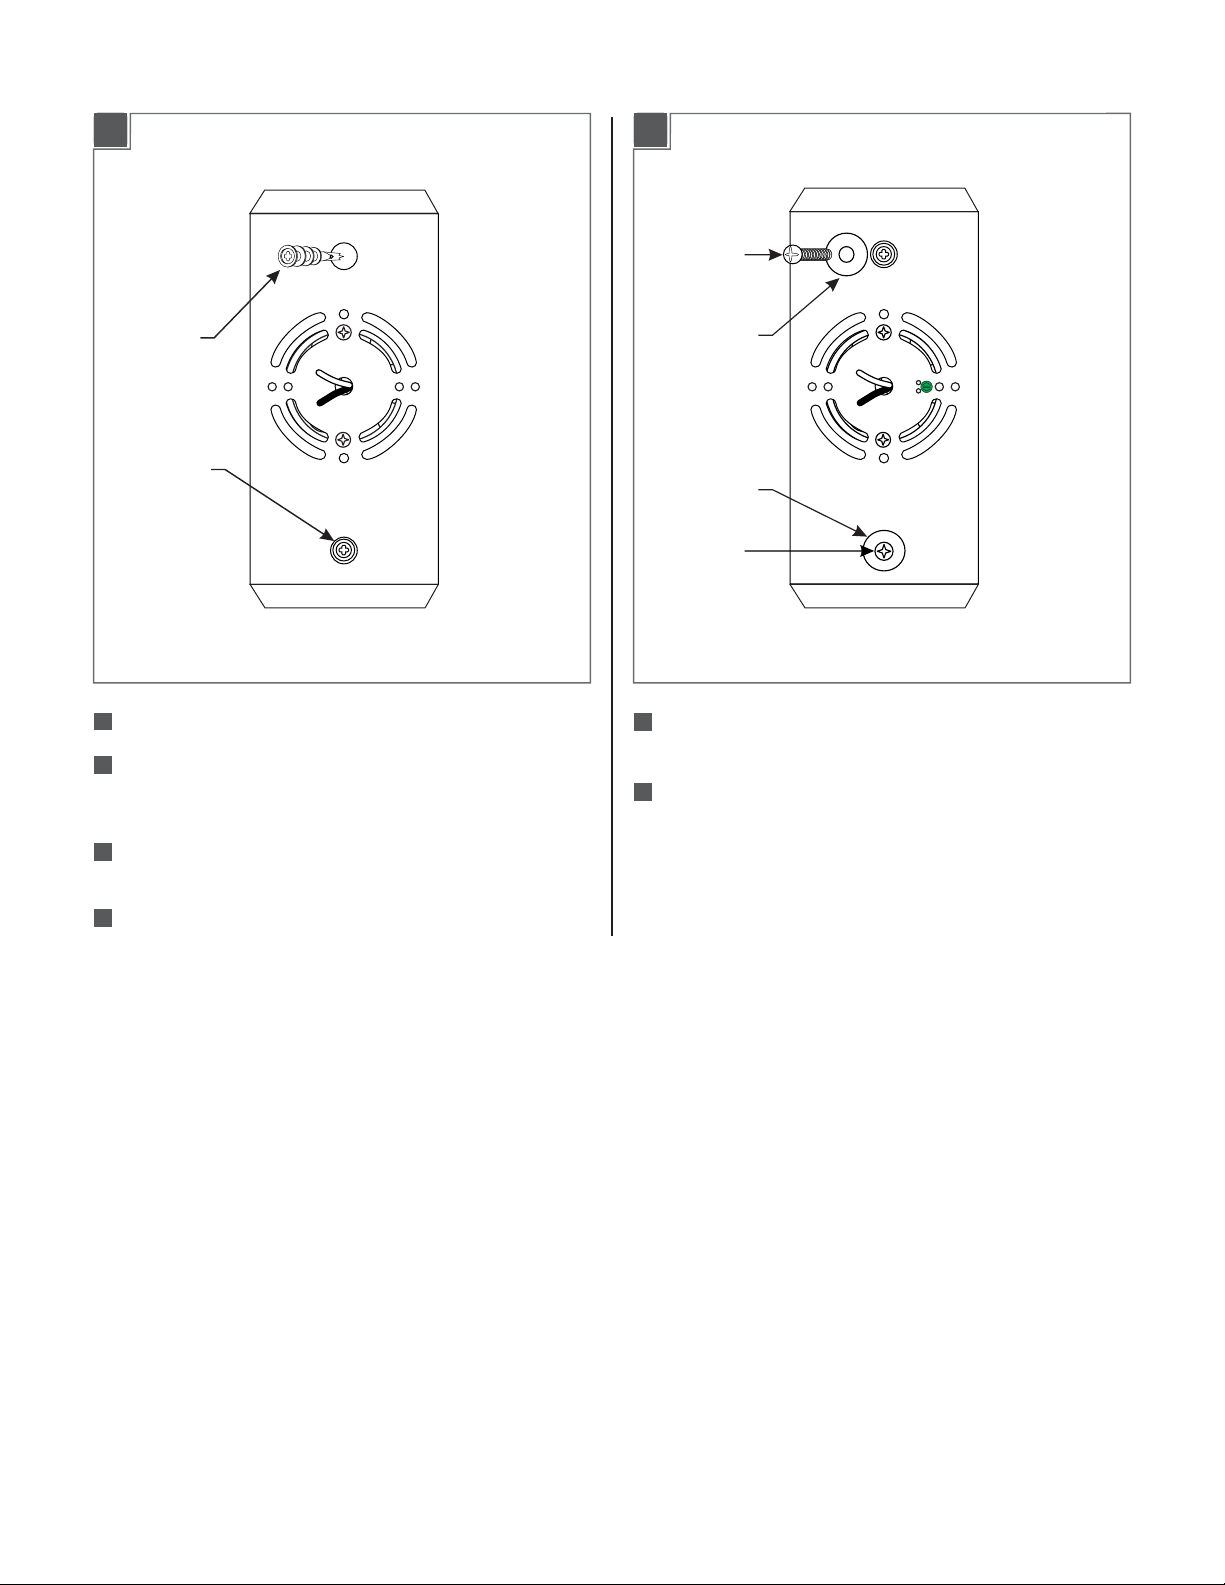
1C
1D
SCREW
ANCHOR
ANCHOR
4
Verify that the mounting plate is level before continuing.
5
Line up an anchor tip with the center of a mounting
plate hole, and push the anchor into the wall up to the
threads.
6
6
Screw the anchors in the rest of the way with a Phillipshead screwdriver.
WASHER
WASHER
SCREW
68
Slide a #8 screw through a washer and screw it into an
anchor.
69
Repeat for the other anchor to secure the mounting
plate to the wall.
Repeat steps 5-6 for the other anchor.
67
2
Page 3

Assemble the Fixture
2A
1
GLASS SHADE
COLLAR NUT
1
Rest the fixture upside down and slide the glass shade
onto the fixture base.
2
Secure the glass shade by installing and tightening the
collar nut onto the socket assembly.
2
SOCKET
2C
6
7
SET SCREW
ALLEN WRENCH
6
Hook the top of the fixture to the top of the mounting
plate and swing the bottom of the fixture toward the
plate until it is flush with the wall.
7
With the allen wrench, tighten the set screws at the
bottom of the fixture to secure it to the mounting plate.
2B
4
5
3
Connect the mounting plate ground wire to a suitable
ground in accordance with local electrical codes.
4
Connect the white fixture wire to the neutral power line
wire with a wire nut.
5
Connect the black fixture wire to the hot power line
wire with a wire nut.
3
3
Page 4

Install the Lamp
2D
3A
SOCKET
LAMP
GLASS SHADE
8
For wet locations, caulk around the base with
waterproof construction sealant.
CAUTION: To reduce the risk of a burn or electric
shock during relamping, disconnect the power to
the fixture.
Use medium base lamp.MAX 50 Watt120 Volt
1
Reach inside the glass shade and screw the lamp into
the socket.
SAVETHESE INSTRUCTIONS!
7400 Linder Ave, Skokie, IL 60077
800.323.3226 - 847.626.6300
www.lbllighting.com
© 2014 LBL Lighting.All rights reserved. The "LBL Lighting" graphic is a
registered trademark of LBL Lighting. LBL Lighting reserves the right to
change specifications for product improvements without notification.
4
A Generation Brands Company
 Loading...