

Page 1
Installation Instructions for
980FSJLUXA
Luxa Pendant
Fusion Jack™
GP I :ENERAL RODUCT NFORMATION
This product is ETL listed and suitable only for indoor dry locations
and approved for use at any height above the finished floor.
CAUTION - RISK OF FIRE
This product requires installation by a qualified
electrician. Before installing be sure to read all
instructions and TURNTHE POWER TO THE
ELECTRICAL BOX OFF.
HS758_
1.1
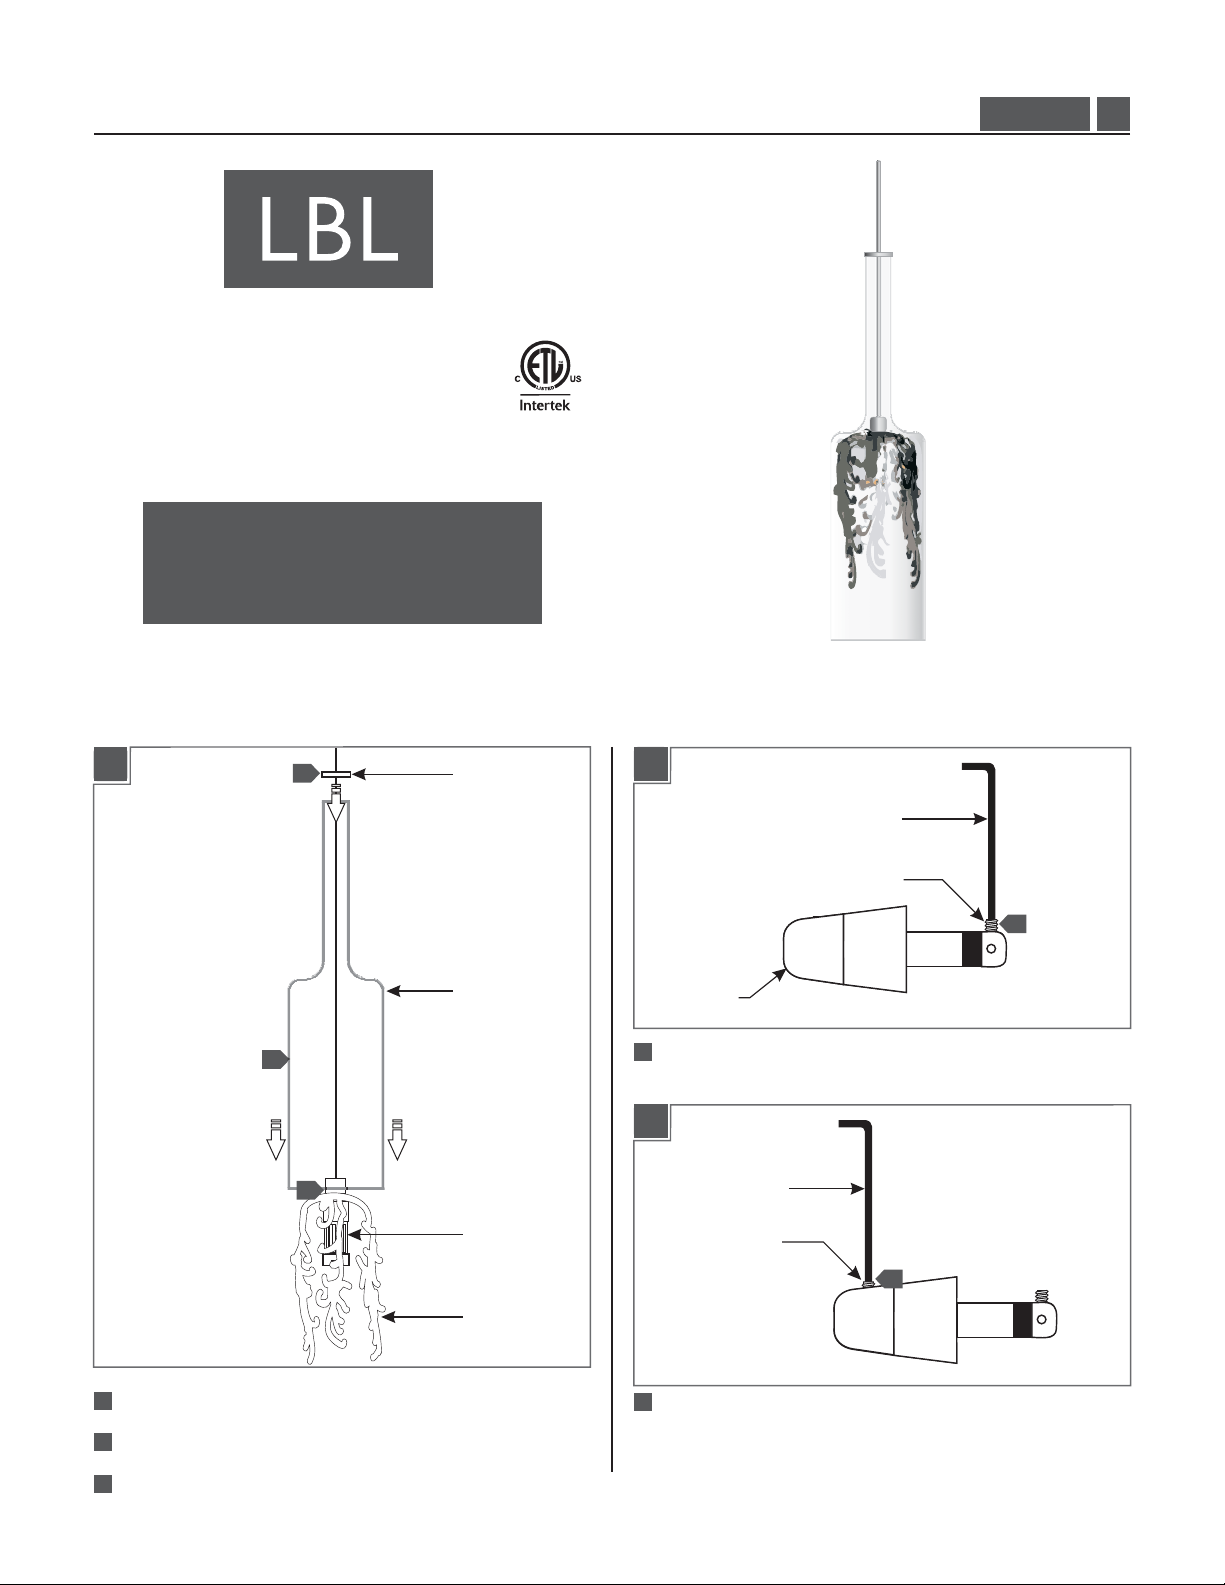
Assemble the Fixture
1A
3
2
1
1
DECORATIVE
CAP
GLASS SHADE
SOCKET
Adjust the Fixture Height
2B
ALLEN WRENCH
SET SCREW
CONNECTOR
3
Back out (do not remove) the set screw on tip of the
connector with the provided Allen wrench.
2C
ALLEN WRENCH
SET SCREW
4
3
FIXTURE FRAME
1
Ensure that the fixture frame is properly placed on the socket.
2
Gently lower the glass shade onto the fixture frame.
3
Place the decorative cap on top of the glass shade.
4
Back out (do not remove) the set screw on the conical
connector with the provided Allen wrench.
1
Page 2
2
1D
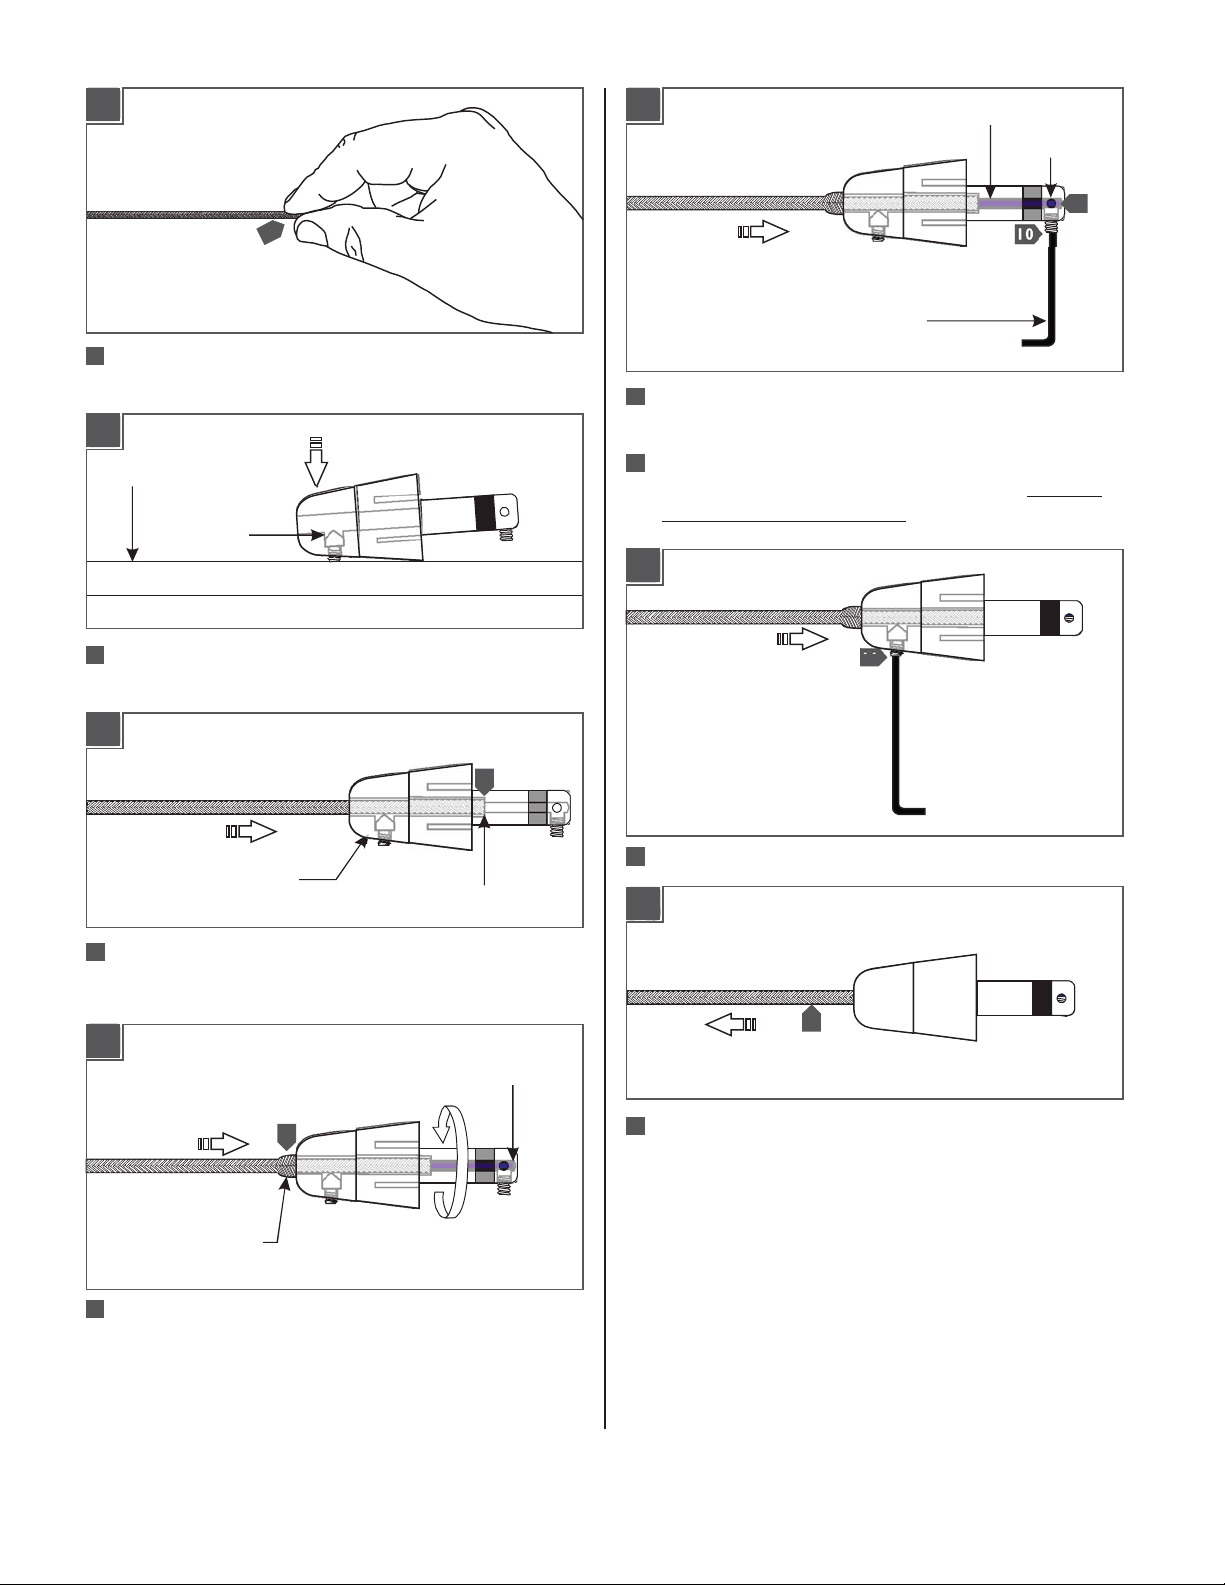
Gently twist the end of the coaxial cable between thumb and
forefinger.
5
5
Tap the conical connector on a hard surface with the set screw
facing down, so the plate inside drops into place.
SURFACE
PLATE
1E
6
1F
7
Feed and push the coaxial cable into the conical connector.The
coaxial cable will come to a stop point after being inserted
3/4" into the conical connector.
CONICAL CONNECTOR
OUTER WRAPPED
WIRE STOPS HERE
7
INNER WIRE
STOPS HERE
1G
Keep pushing the coaxial cable into the connector while
rotating the connector to ease feeding the inner wire into the
tip of the connector.The outer wrapped wire will start
wrinkling while being inserted another 1/2" into the connector.
WRINKLE ON OUTER
WRAPPED WIRE
8
8
Look into the sight hole on the top of the connector to make
sure that the inner wire is contacting the end of the connector.
Hold the coaxial cable in place and tighten the set screw on tip
of the connector with the provided Allen wrench. Make sure
this set screw connection is tight.
SIGHT HOLE
ALLEN WRENCH
10
9
INNER WIRE
1G
9
10
1H
Firmly tighten the set screw on the conical connector.
11
11
Pull the coaxial cable toward the fixture to smooth the
wrinkles.
1I
12
12
Page 3
Install the Lamp
3A
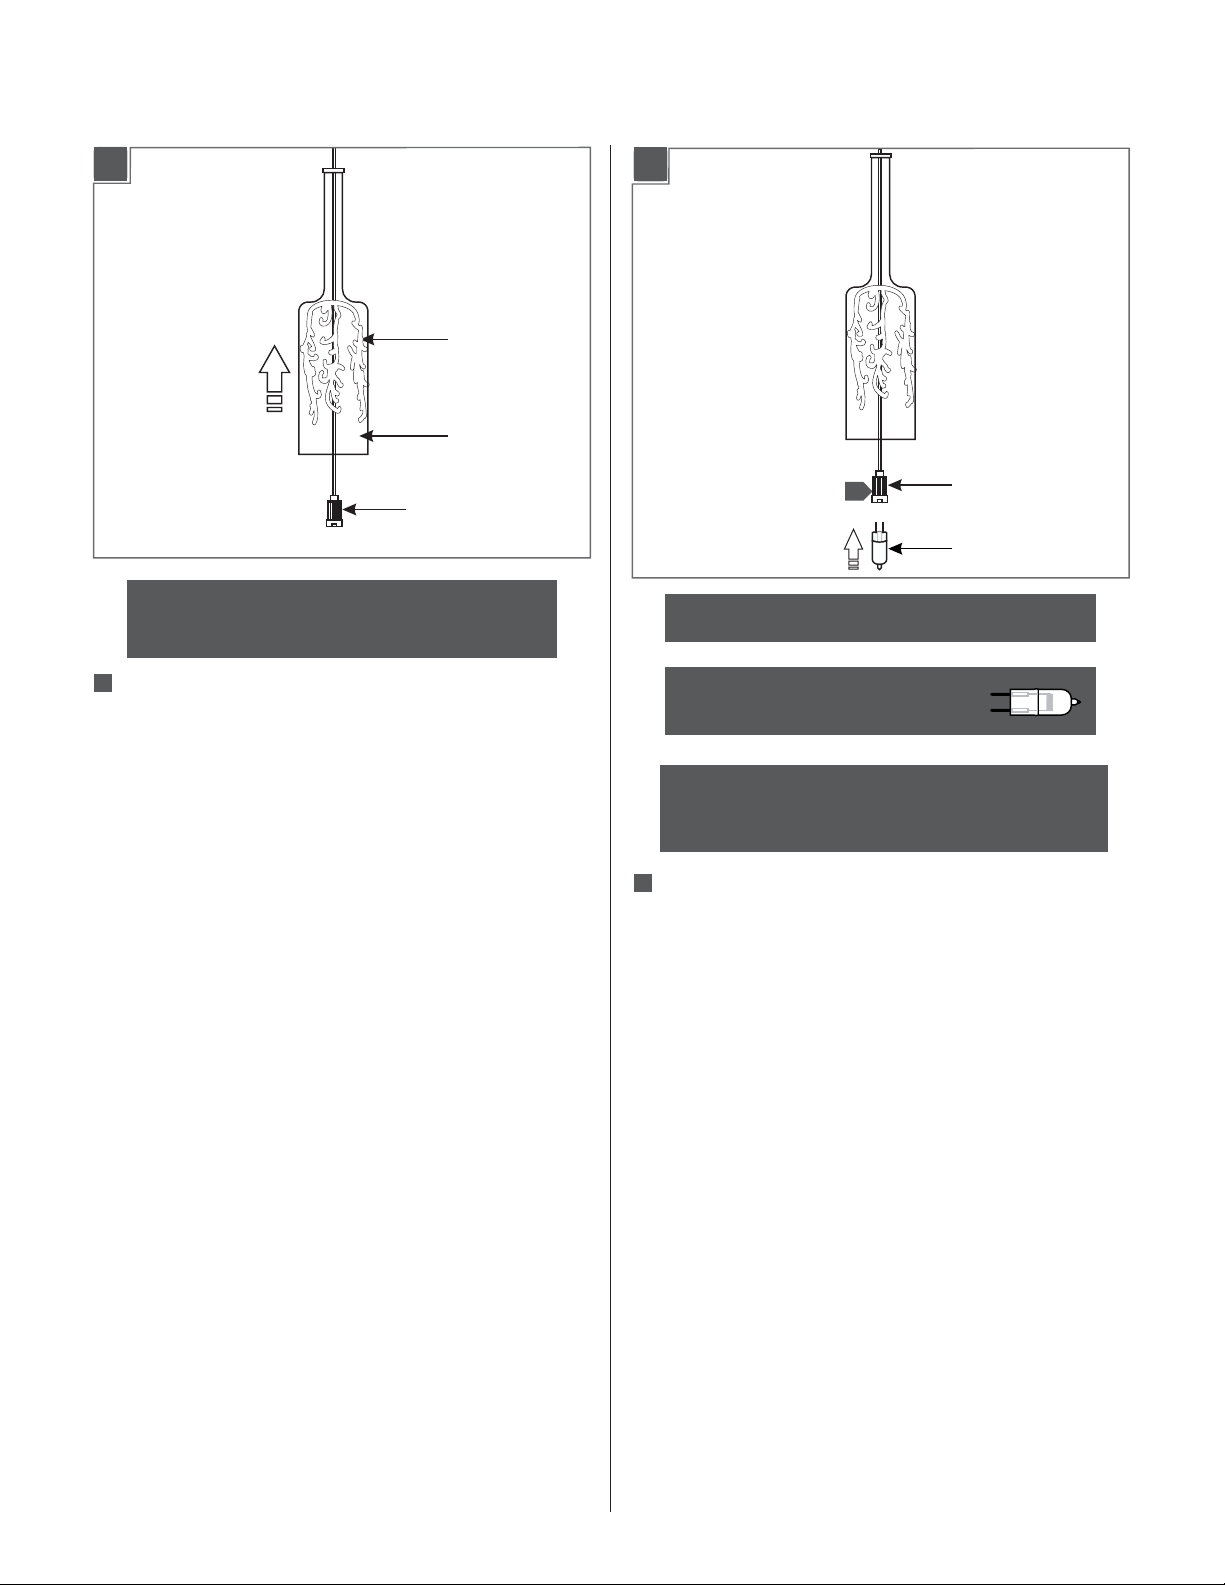
FIXTURE FRAME
GLASS SHADE
SOCKET
NOTE:To reduce the risk of a burn or electric shock
during relamping, disconnect the power to the fixture.
1
1
1
Lift the fixture frame and glass shade up to expose the socket
assembly.
3B
2
NOTE:Use only your fingers to replace the lamp.
Use Type XelogenMAX 50 Watt
(Xenon) Bi-Pin Lamp.
SOCKET
LAMP
CAUTION: RISK OF FIRE
Never replace a Xenon lamp with a regular Halogen lamp.
A Halogen lamp requires a protective glass shield.
2
Push the lamp pins completely into the socket holes.
3
Page 4
3C
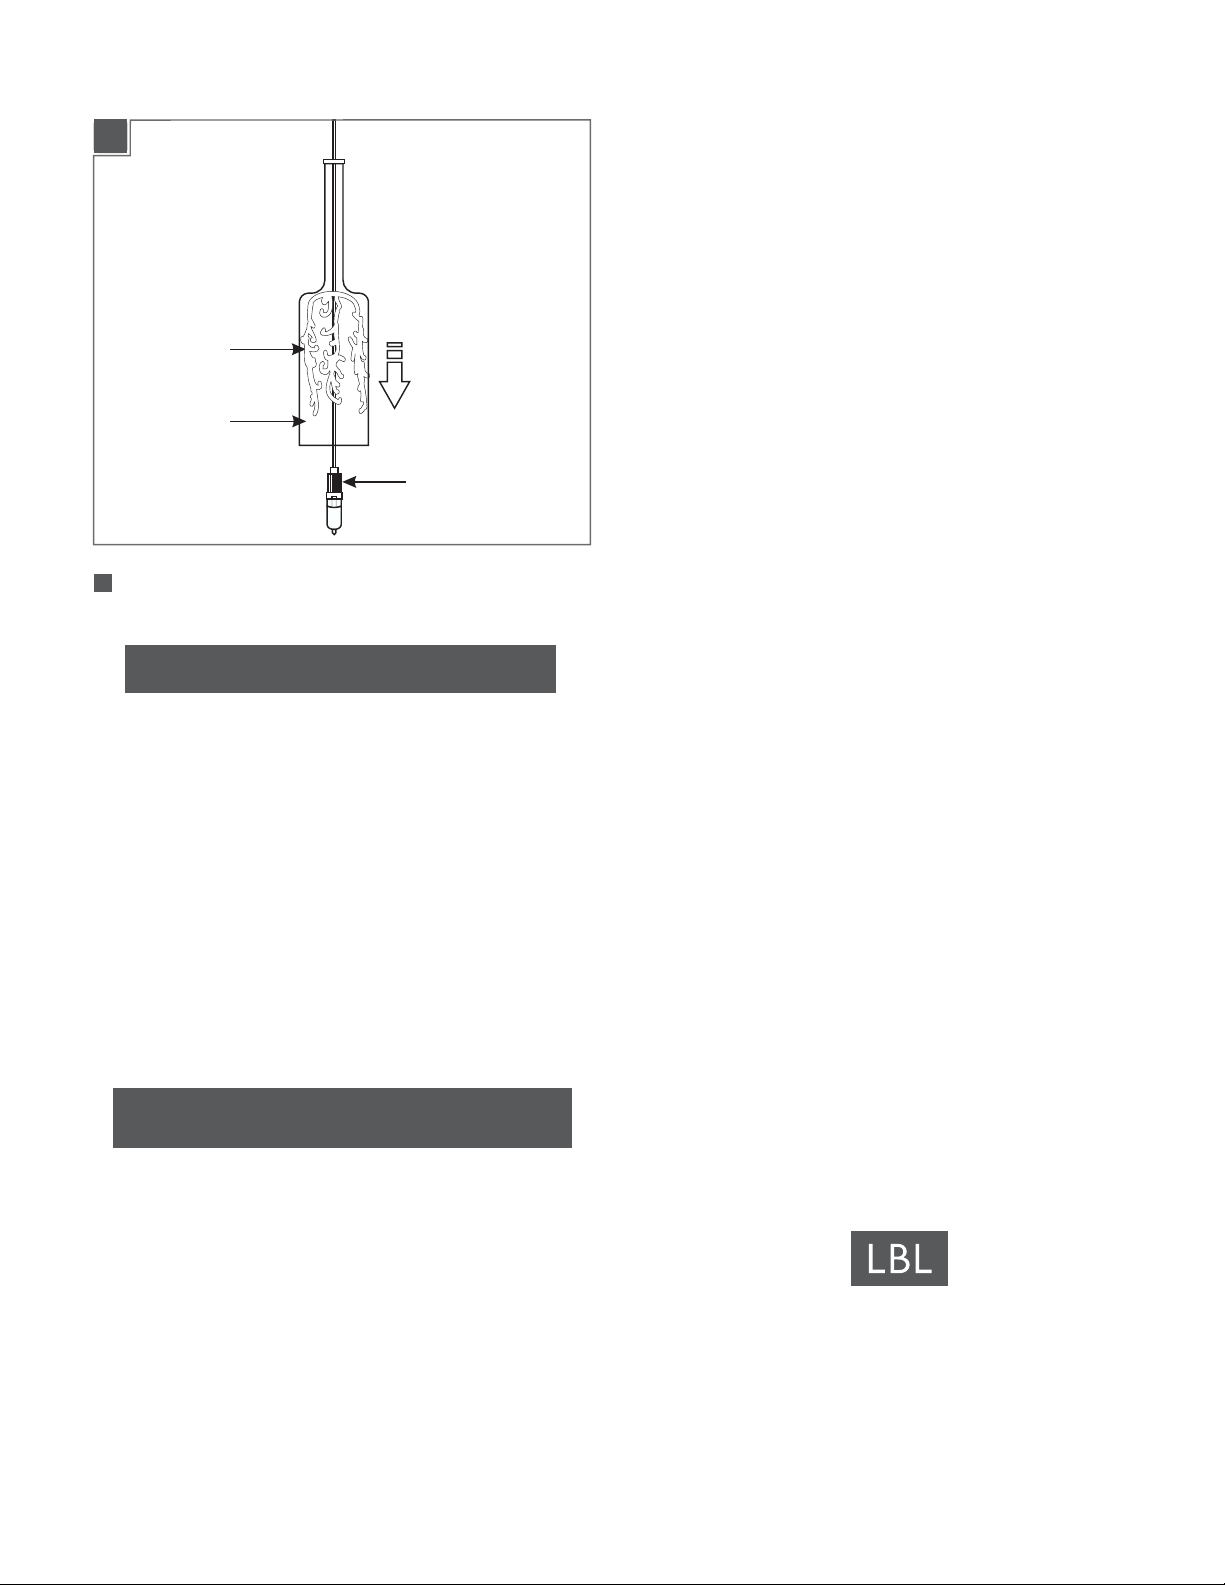
FIXTURE FRAME
GLASS SHADE
SOCKET
3
Gently lower the fixture frame and glass shade until they rest
properly on the socket assembly.
NOTE: To re-lamp,reverse section 3 instructions.
SAVETHESE INSTRUCTIONS!
7400 Linder Ave, Skokie, IL 60077
800.323.3226 - 847.626.6300
www.lbllighting.com
© 2013 LBL Lighting.All rights reserved. The "LBL Lighting" graphic is a
registered trademark of LBL Lighting. LBL Lighting reserves the right to
change specifications for product improvements without notification.
4
A Generation Brands Company
 Loading...