

Page 1
Installation Instructions for
980FUTURWCF39
Futura 36W/39W Compact Fluorescent
Wall
GP I :ENERAL RODUCT NFORMATION
This product can mount to either a 4" square electrical box with
round plaster ring or an octagon electrical box.
This product is suitable for indoor dry locations only.
CAUTION - RISK OF FIRE
This product must be installed in accordance with
the applicable installation code by a person familiar
with the construction and operation of the product
and the hazards involved.
Use minimum 90°c supply conductors.
PW940_139_HE
1.2
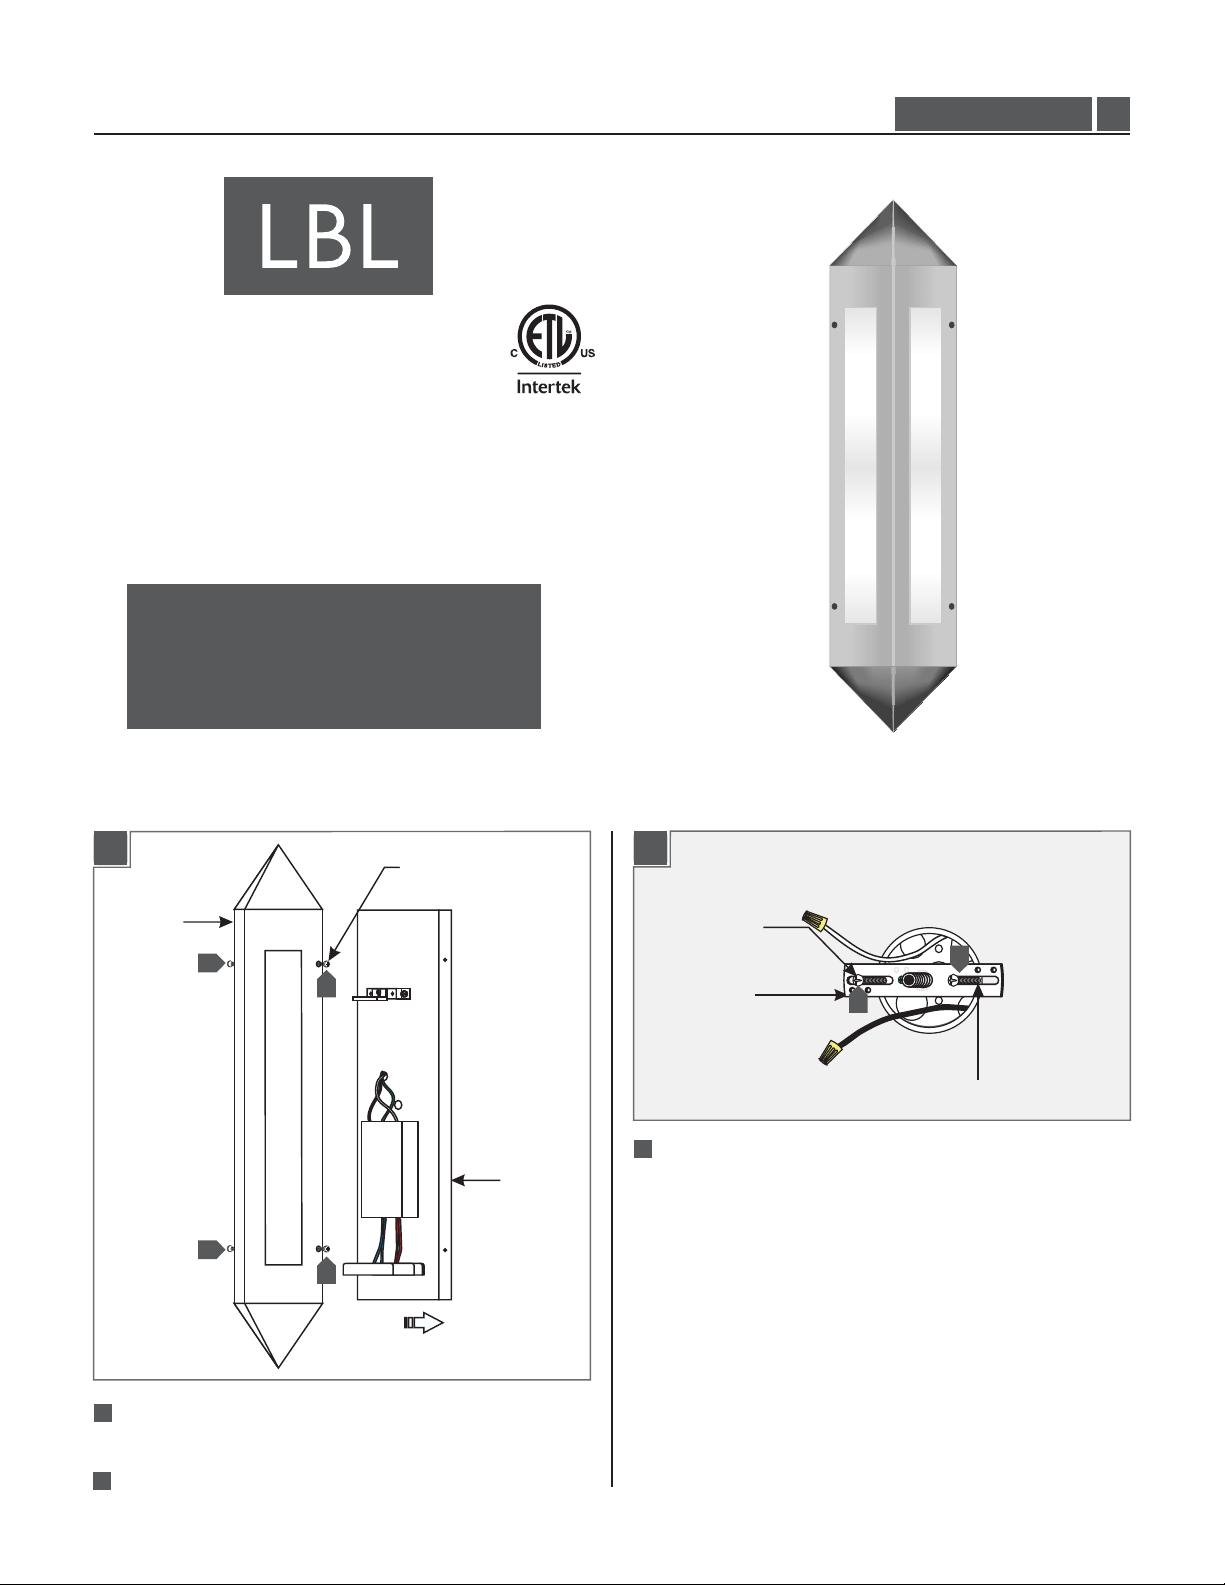
Install the Fixture
1A
METAL
SHADE
1
1
#8-32 PHILLIPS SCREW
1B
#8-32 SCREW
3
1
MOUNTING
PLATE
1
CROSSBAR
ASSEMBLY
3
Mount the crossbar assembly to the electrical box holes with
the two #8-32 screws provided.
3
ELECTRICAL BOX HOLE
1
Unscrew and remove the four #8-32 Phillips screws from the
metal shade sides.
2
Remove the mounting plate.
1
Page 2
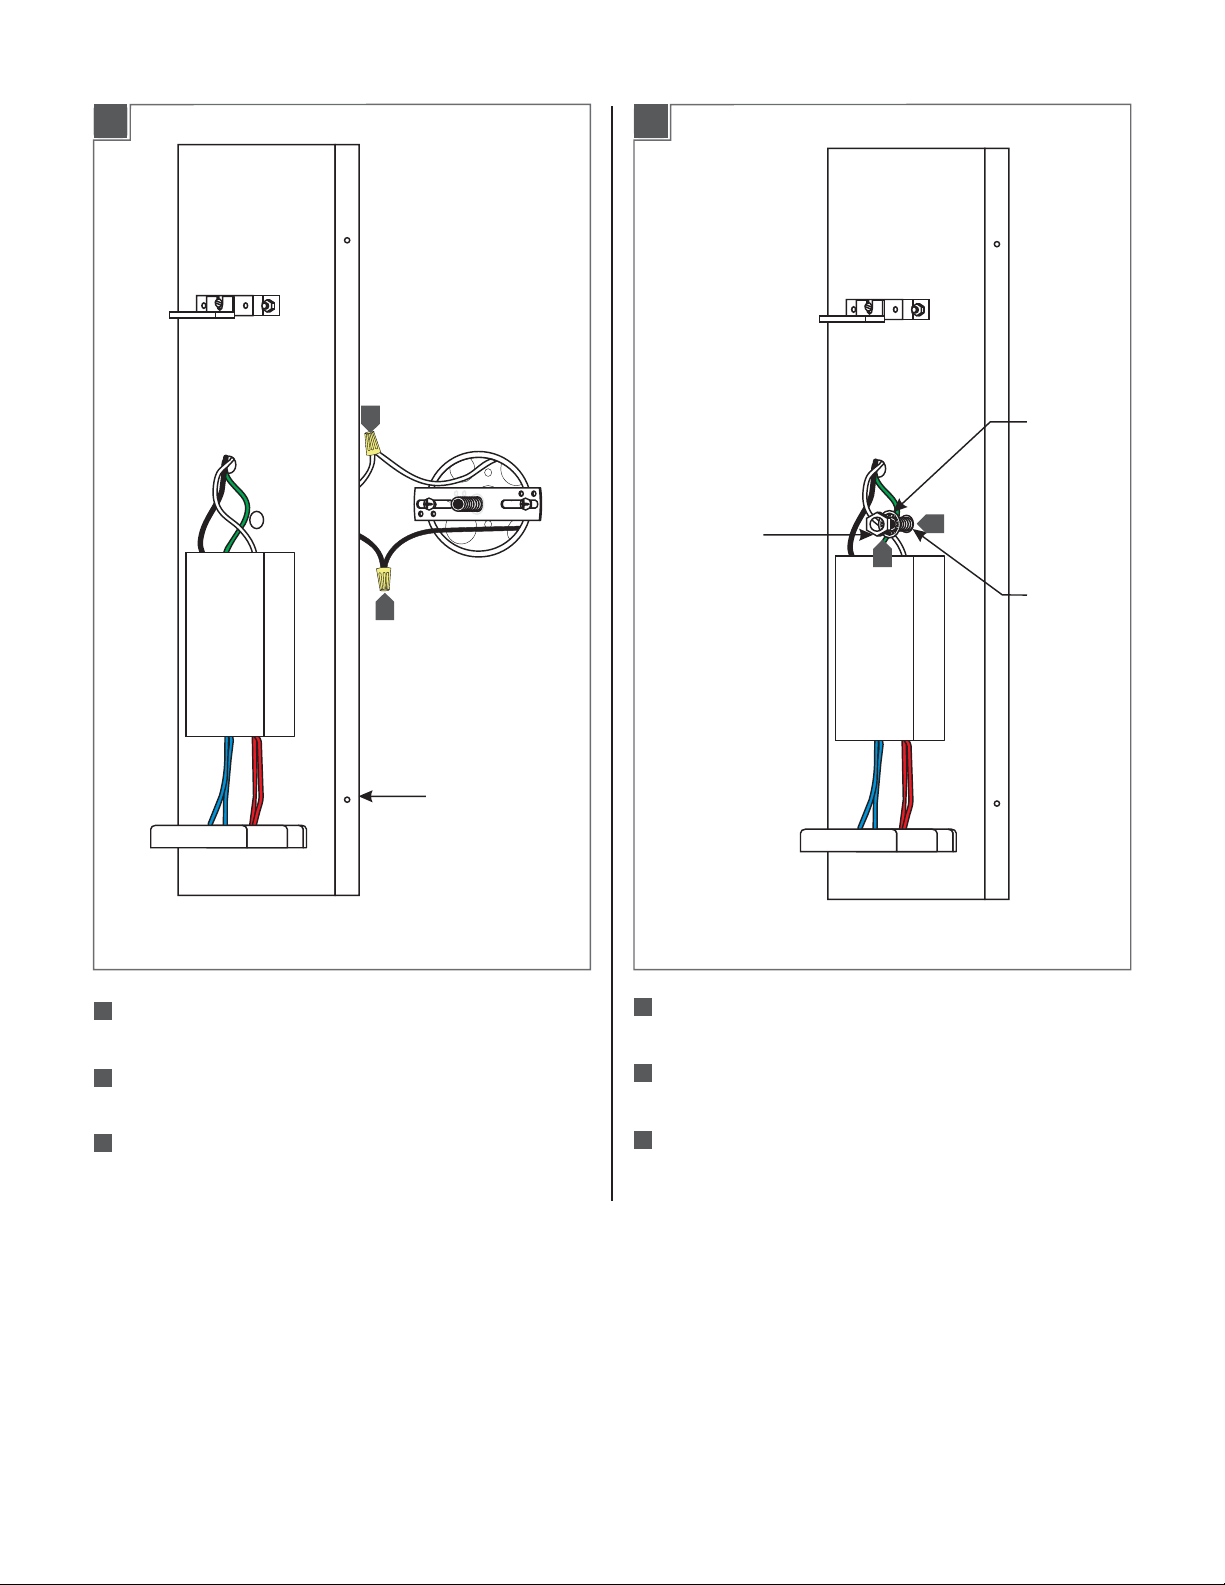
1C
1D
5
NUT
6
MOUNTING PLATE
8
9
LOCK
WASHER
EXPOSED
THREADED
NIPPLE
4
In accordance with local electrical codes, make sure that the
mounting plate is grounded.
5
Connect the fixture white wire to the neutral power line wire
with a wire nut.
6
Connect the fixture black wire to the hot power line wire with
a wire nut.
7
Place all wires and wire nut connections properly inside the
electrical box.
8
Level the mounting plate vertically and slide the center hole
completely onto the exposed threaded nipple.
9
Secure the mounting plate to the threaded nipple with lock
washer and nut.
2
Page 3

Install the Lamp & Shade
2A 2B
LAMP
SOCKET
1
1
CLIP
BRACKET
2
Align the metal shade holes with the mounting plate side holes.
2
2
#8-32 PHILLIPS SCREW
2
2
Replace and tighten the four #8-32 Phillips screws to secure
the metal shade in place.
NOTE:To reduce the risk of a burn or electric shock
during relamping, disconnect the power to the fixture by
turning the wall switch off.
Use 39 Watt type 2G11 Base CompactMAX
Fluorescent Lamp.
A 36 Watt (Recommended) type 2G11 Base Compact
Fluorescent Lamp is provided with
the fixture.
1
Push the lamp pins completely into the socket holes and
secure by snapping into the clip bracket.
3
Page 4

SAVETHESE INSTRUCTIONS!
7400 Linder Ave, Skokie, IL 60077
800.323.3226 - 847.626.6300
www.lbllighting.com
© 2014 LBL Lighting.All rights reserved. The "LBL Lighting" graphic is a
registered trademark of LBL Lighting. LBL Lighting reserves the right to
change specifications for product improvements without notification.
4
A Generation Brands Company
 Loading...