

Page 1
Installation Instructions for
980MR2TSP
Telescoping Rigid Standoffs
2-Circuit Monorail
GP I :ENERAL RODUCT NFORMATION
This product is suitable for indoor dry locations only.
This product must be used only with LBL 2-Circuit Monorail or
LED-Illuminated Monorail systems.
This instruction is for the following models:
Monorail Support 2.5" - 4" (HANGER-ADJ-_1-2)
Monorail Support 6" - 10" (HANGER-ADJ-_2-2)
Monorail Support 12" - 24" (HANGER-ADJ-_3-2)
Monorail Support 24" - 48" (HANGER-ADJ-_4-2)
Monorail Support 48" - 96" (HANGER-ADJ-_5-2)
Above model numbers with -BJ suffix (vaulted ceilings).
HANGER-ADJ-_-2(-BJ)
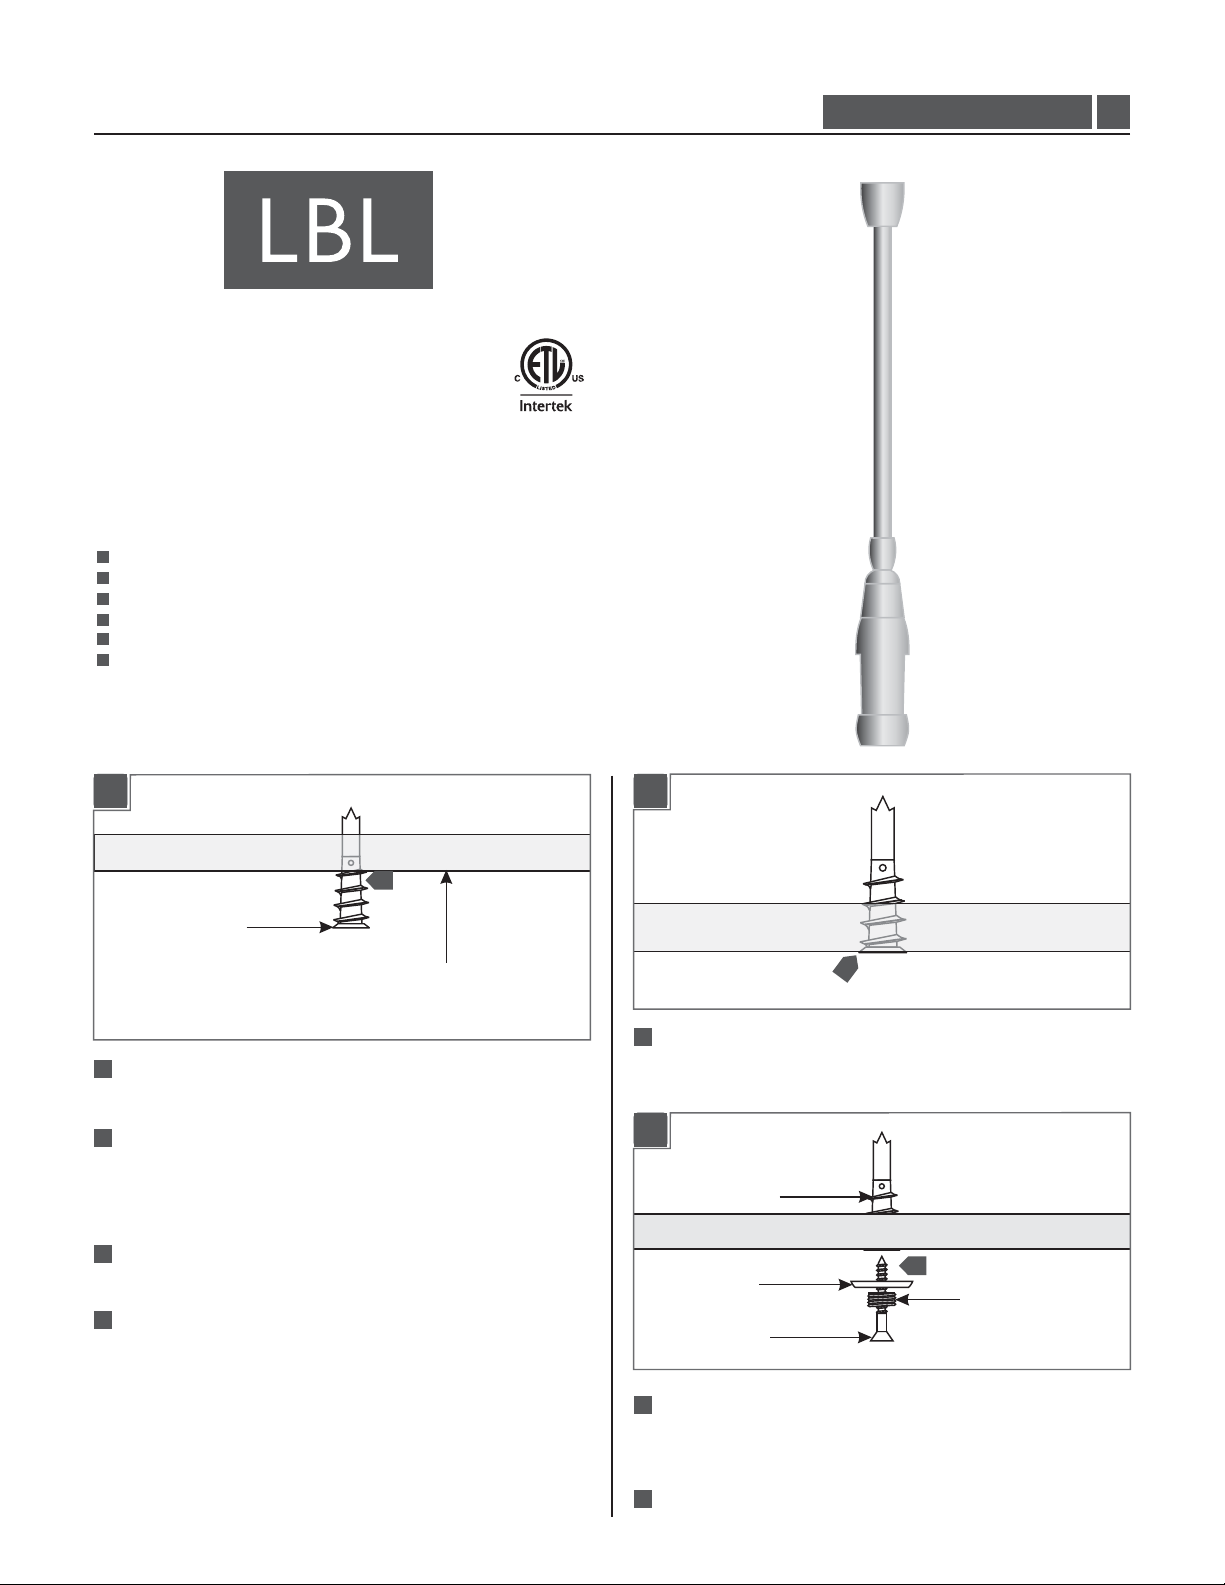
1.1
Install the Ceiling Anchor
1A
1A
4
ANCHOR
CEILING
1
Select a location on the ceiling where the Monorail is to be
mounted.
2
One way of marking the standoff locations on the ceiling is to
lay the Monorail on the floor underneath of the selected
location and by using a plumb bob pointing on the center of
the Monorail, mark the points on the ceiling.
3
Another way is to hold the Monorail directly against the ceiling
and mark the standoff points on the ceiling.
4
Tap the anchors at the marked points up to the threaded
portion with a hammer.
1B
1B
5
5
Screw the anchors in the rest of the way with a Phillips
screwdriver.
1B1C
ANCHOR
WASHER
#8 SCREW
6
THREADED NIPPLE
6
Insert the #8 screw into the threaded nipple and washer.
Tighten the #8 screw completely into the anchor to secure the
washer and threaded nipple.
7
Repeat these steps for each standoff.
1
Page 2
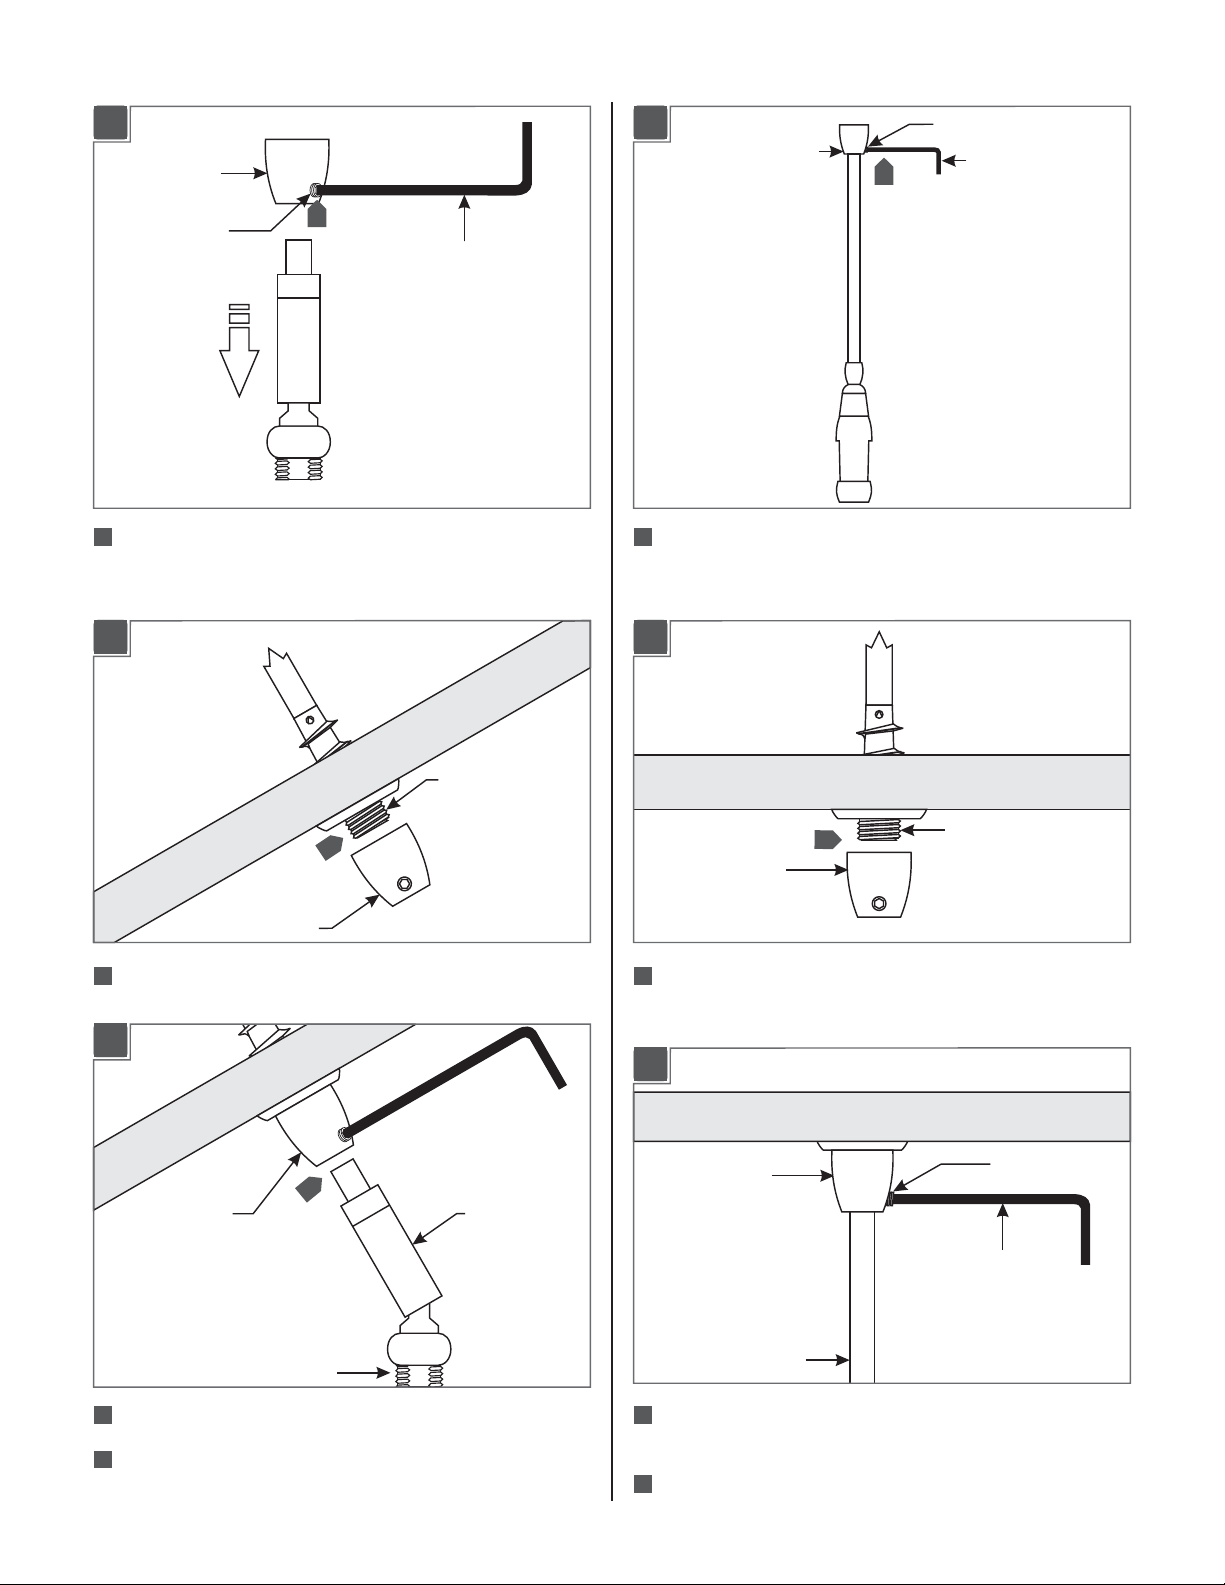
Attach the Vault Adapter (Optional)
Attach the Telescoping Standoff
1A
2A
SUPPORT POST
M4 SET
SCREW
1
Loosen the M4 set screw on the support(Do Not Remove)
post and remove the support post from the ball joint.
1
2 MM ALLEN
WRENCH
1A2B
1
M4 SET SCREW
2 MM ALLEN WRENCH
1A
3A
SUPPORT POST
1
Loosen the M4 set screw on the support(Do Not Remove)
post with the 2 MM Allen wrench provided and remove the
support post.
1A3B
THREADED NIPPLE
2
SUPPORT POST
2
Screw the support post completely to the threaded nipple.
1A2C
3
SUPPORT POST
BALL JOINT
2
SUPPORT POST
2
Screw the support post completely to the threaded nipple on
the anchor (above) or the ball joint (shown in figure 2C).
THREADED NIPPLE
1A3C
SUPPORT POST
3
M4 SET SCREW
2 MM ALLEN
WRENCH
THREADED NIPPLE
3
Reattach the ball joint to the support post.
Repeat these steps for each standoff.
4
STANDOFF ROD
3
Push the standoff rod completely into the support post and
tighten the M4 set screw with the 2 MM Allen wrench.
4
Repeat these steps for each standoff.
2
Page 3

Adjust Standoff Height (Optional)
1A
4A 1A
M3 SET
SCREW
1
1.5MM ALLEN
TELESCOPING POST
WRENCH
Install the 2-Circuit Monorail
5A
1
1
HOUSING CAP
1
Slightly loosen the M3 set screw on the(Do Not Remove)
side of the telescoping post with th 1.5 MM Allen wrench
provided.
2
Adjust standoff height and tighten M3 set screw with 1.5 MM
Allen wrench.
3
Repeat these steps for each standoff.
1
Remove the housing cap on all standoffs.
1A5B
MONORAIL
STANDOFF HOUSING
2
HOUSING CAP
2
Place a section of the Monorail into standoff housings.
3
While supporting the Monorail, tighten the housing cap
completely to the standoff housings to secure the
Monorail in place.
3
NOTE: In case of cross threading, loosen the cap and
repeat step 3.
4
Repeat these steps for each standoff.
3
Page 4

SAVETHESE INSTRUCTIONS!
7400 Linder Ave, Skokie, IL 60077
800.323.3226 - 847.626.6300
www.lbllighting.com
© 2014 LBL Lighting.All rights reserved. The "LBL Lighting" graphic is a
registered trademark of LBL Lighting. LBL Lighting reserves the right to
change specifications for product improvements without notification.
4
A Generation Brands Company
A Generation Brands Company
 Loading...