

Page 1
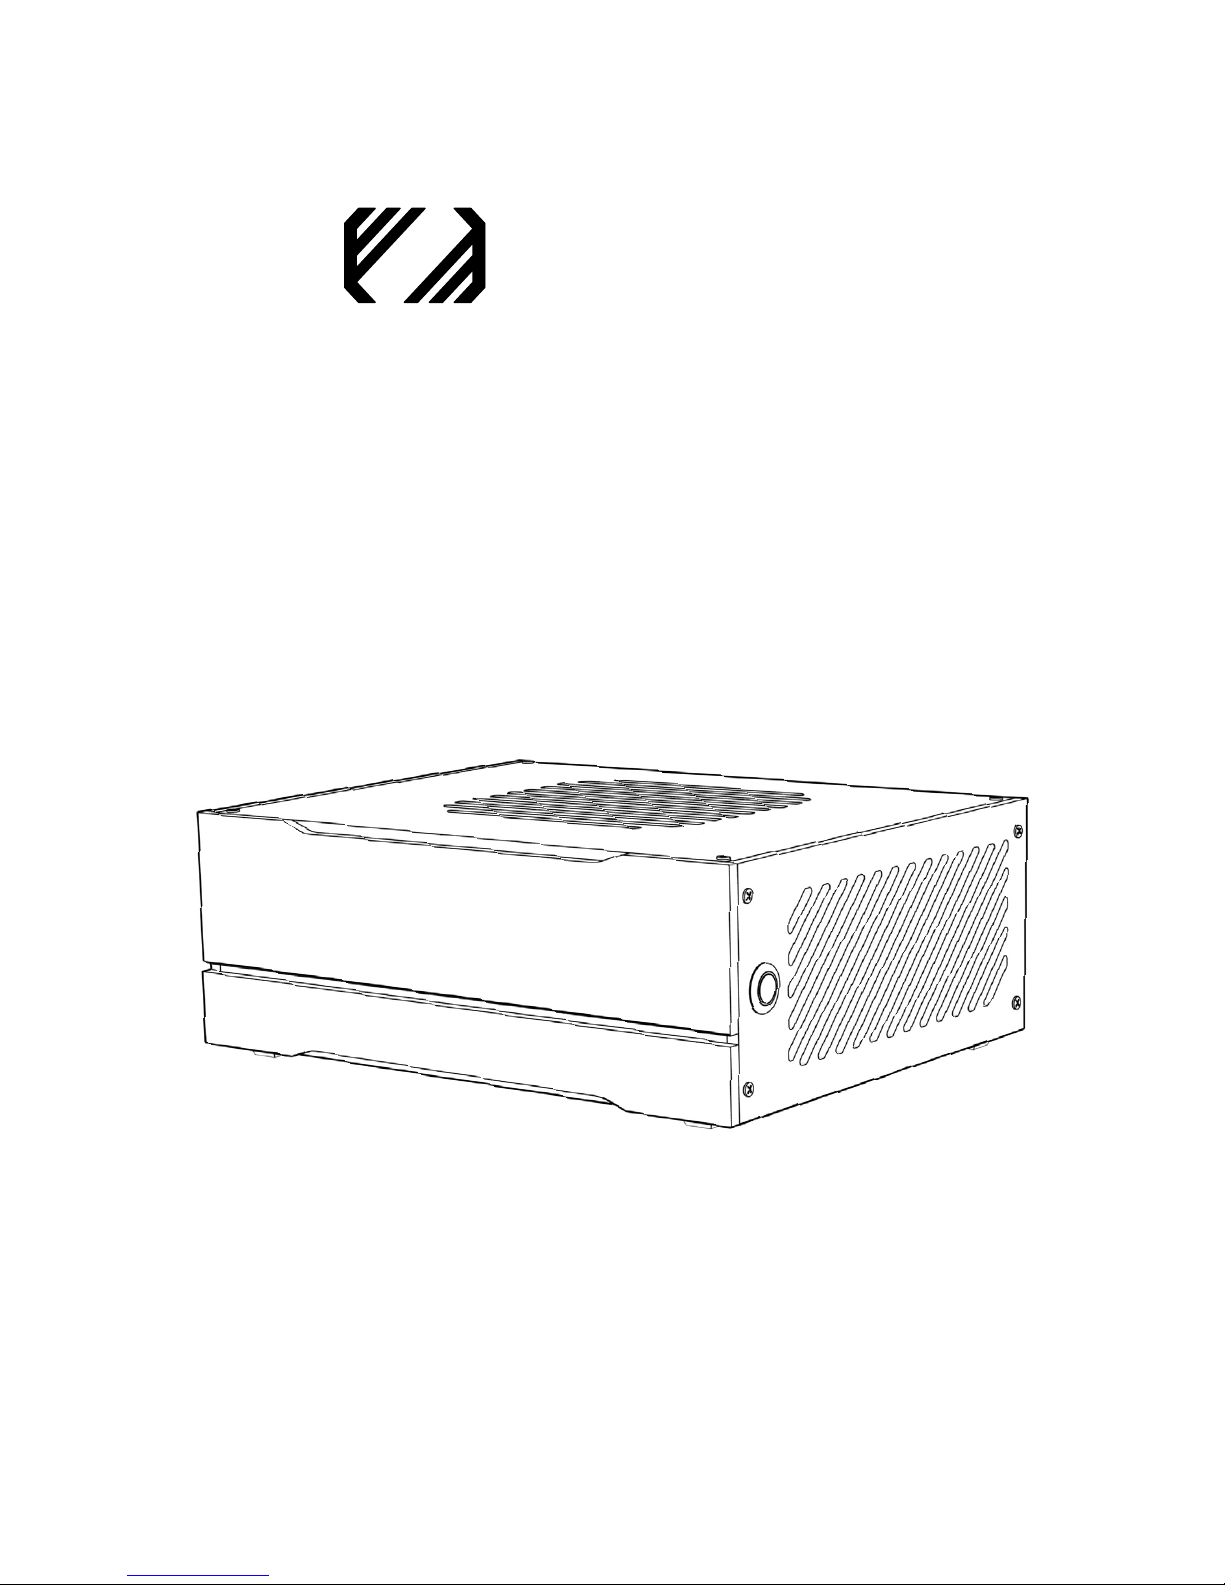
HT5 User Manual
LAZER3D
PERFORMANCE SFF PC CASES
Page 2

Lazer3D HT5 Instruction Manual
NOTE:
Peel off protective film from BOTH sides of
each panel before assembling the case.
CONTENTS
Page 1 - Contents
Page 2 - Introduction
Page 3 - Case Specification
Page 4 - Quick Reference / Exploded View
Page 5 - Parts List
Page 6 - Case Layout Examples
Page 7 - Initial Case Assembly
Page 8 - Motherboard Assembly
Page 9 - Front and Side Panels
Page 10 - Accessory Slot Panels
Page 11 - Power and Cooling Options
Page 12 - Complete Assembly
Page 13 - Case Clearances
Page 14 - Lazer3D Products
PLEASE READ THESE INSTRUCTIONS
CAREFULLY BEFORE ASSEMBLING THE CASE
Page 1
Page 3
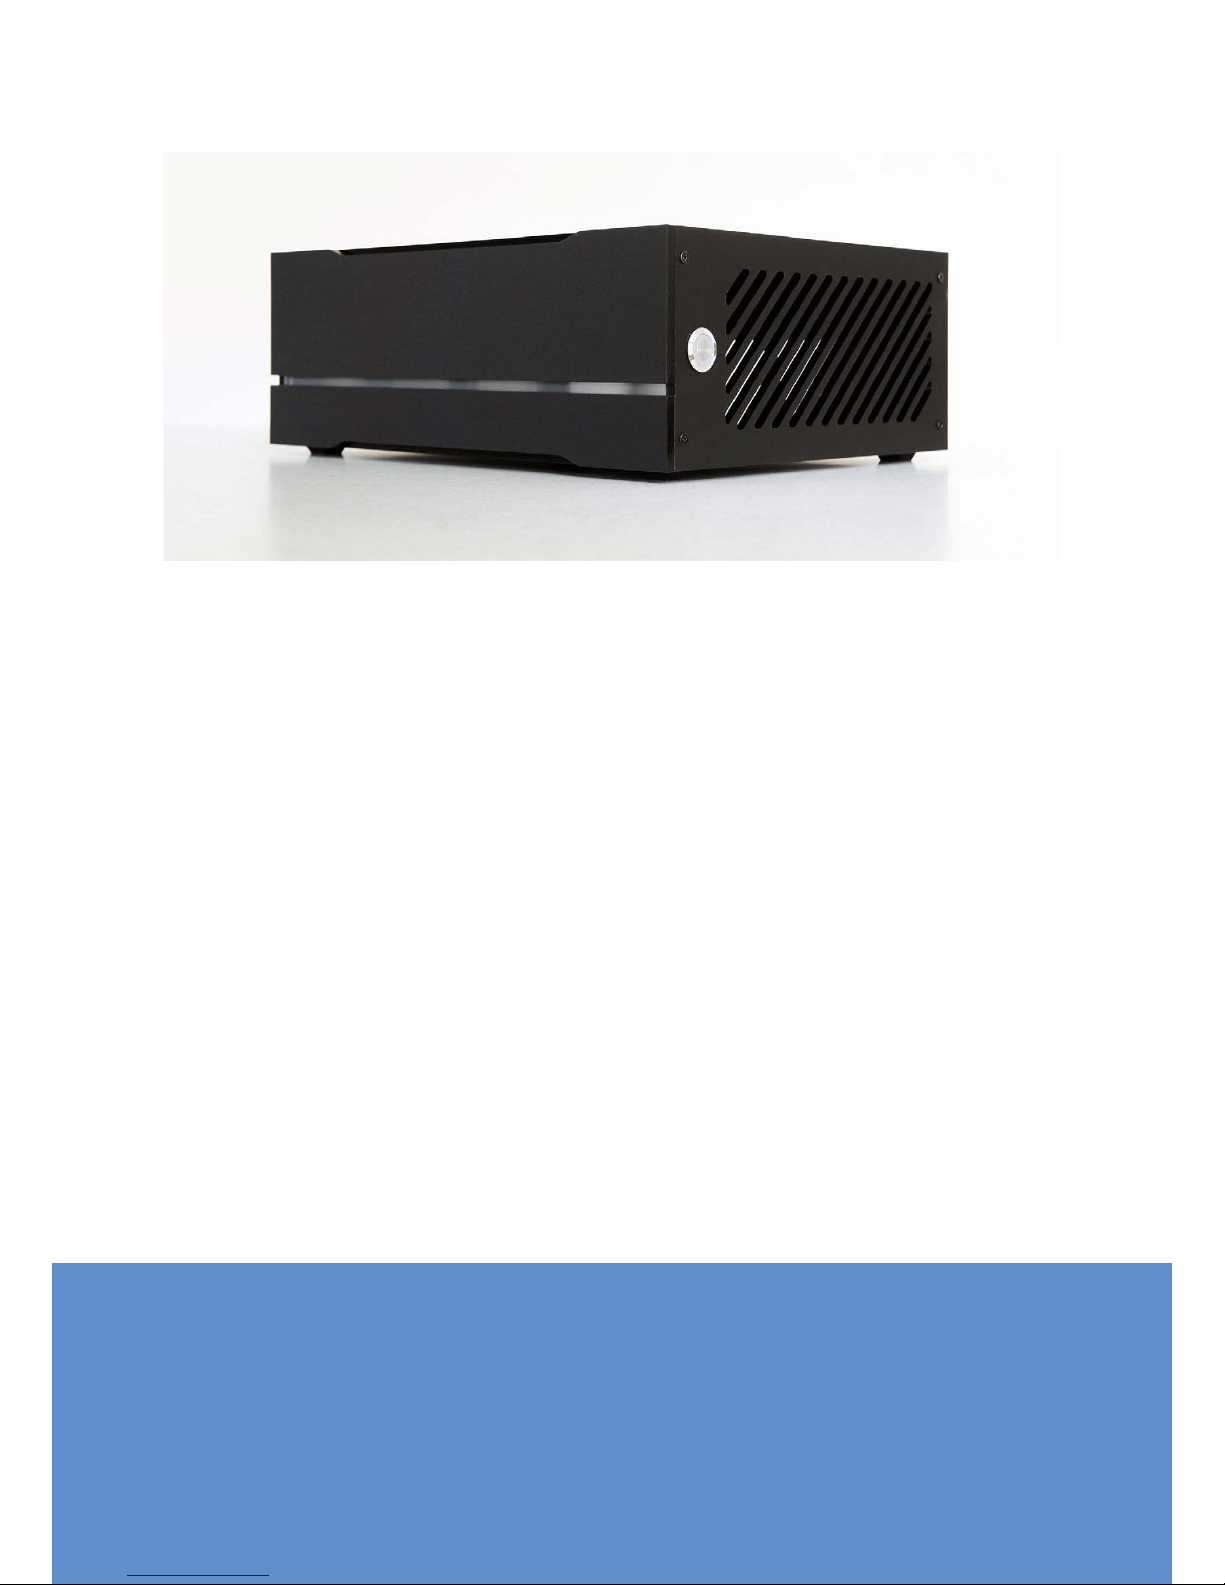
INTRODUCTION
SFF COMMUNITY
If you want to get involved in the SFF (small form factor) community head
over to: www.smallformfactor.net/forum The birthplace of the HT5 and many
other amazing projects, build logs and SFF news, its a great place to talk about
compact tech with other like minded enthusiasts, see you there!
Page 2
APUs made a big comeback in 2018 with AMD’s Ryzen/Vega based AM4 chips
leading the way. Powerful processing and graphics on a single chip with the latest
connectivity will make them a great choice for low cost gaming PC’s or advanced
Home Theatre PC’s.
Introducing the HT5, a compact and versatile low profile PC case focusing
on high performance APU cooling. Despite being only 5 litres in volume it can
accommodate a CPU cooler up to 72mm in height and up to four 80mm fans,
allowing you to run a compact yet powerful system both cool and quietly.
Alternatively the HT5 can be configured with two 80mm fans and a dedicated
low profile dual slot Graphics Card for increased productivity or gaming capability.
Whether you want to build yourself a game console killing HTPC, or a mini
space saving Desktop PC, the HT5 is a great all round choice. With a range of
finishes to choose from, complete your setup in style.
Thank you for choosing Lazer3D.
Page 4
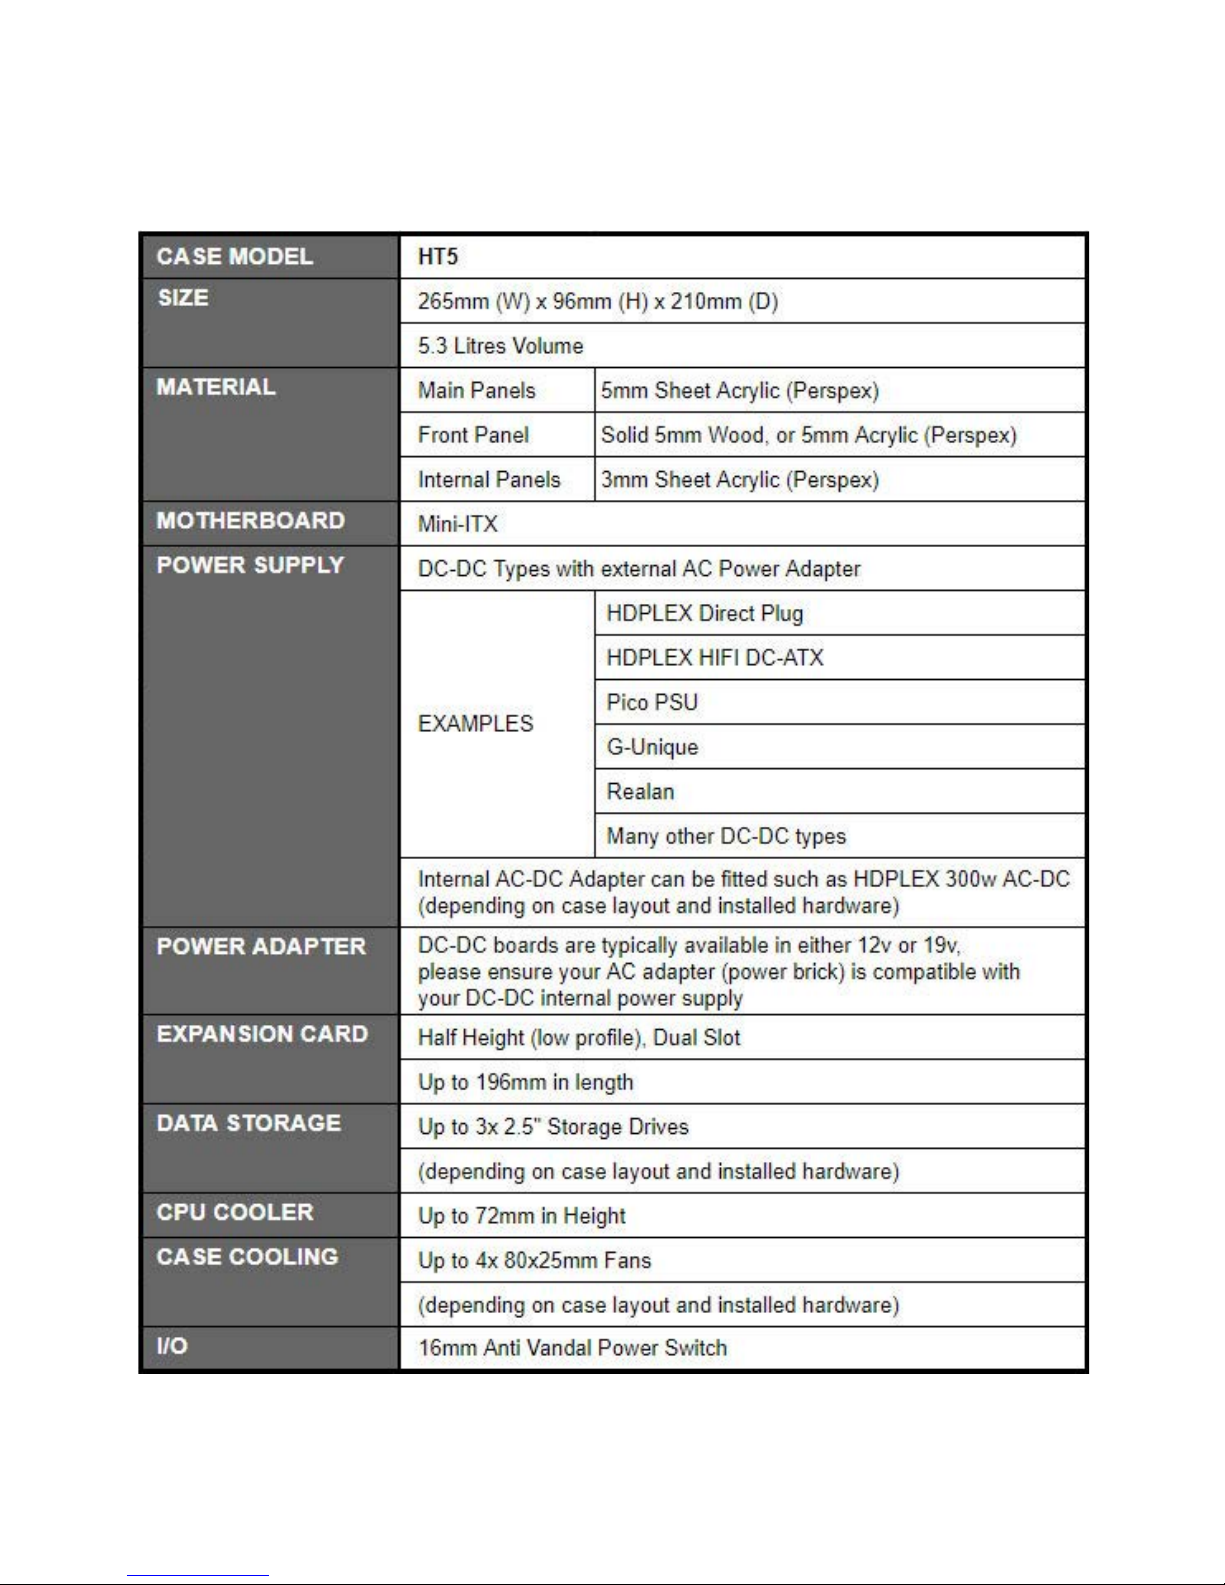
SPECIFICATION
Page 3
Page 5
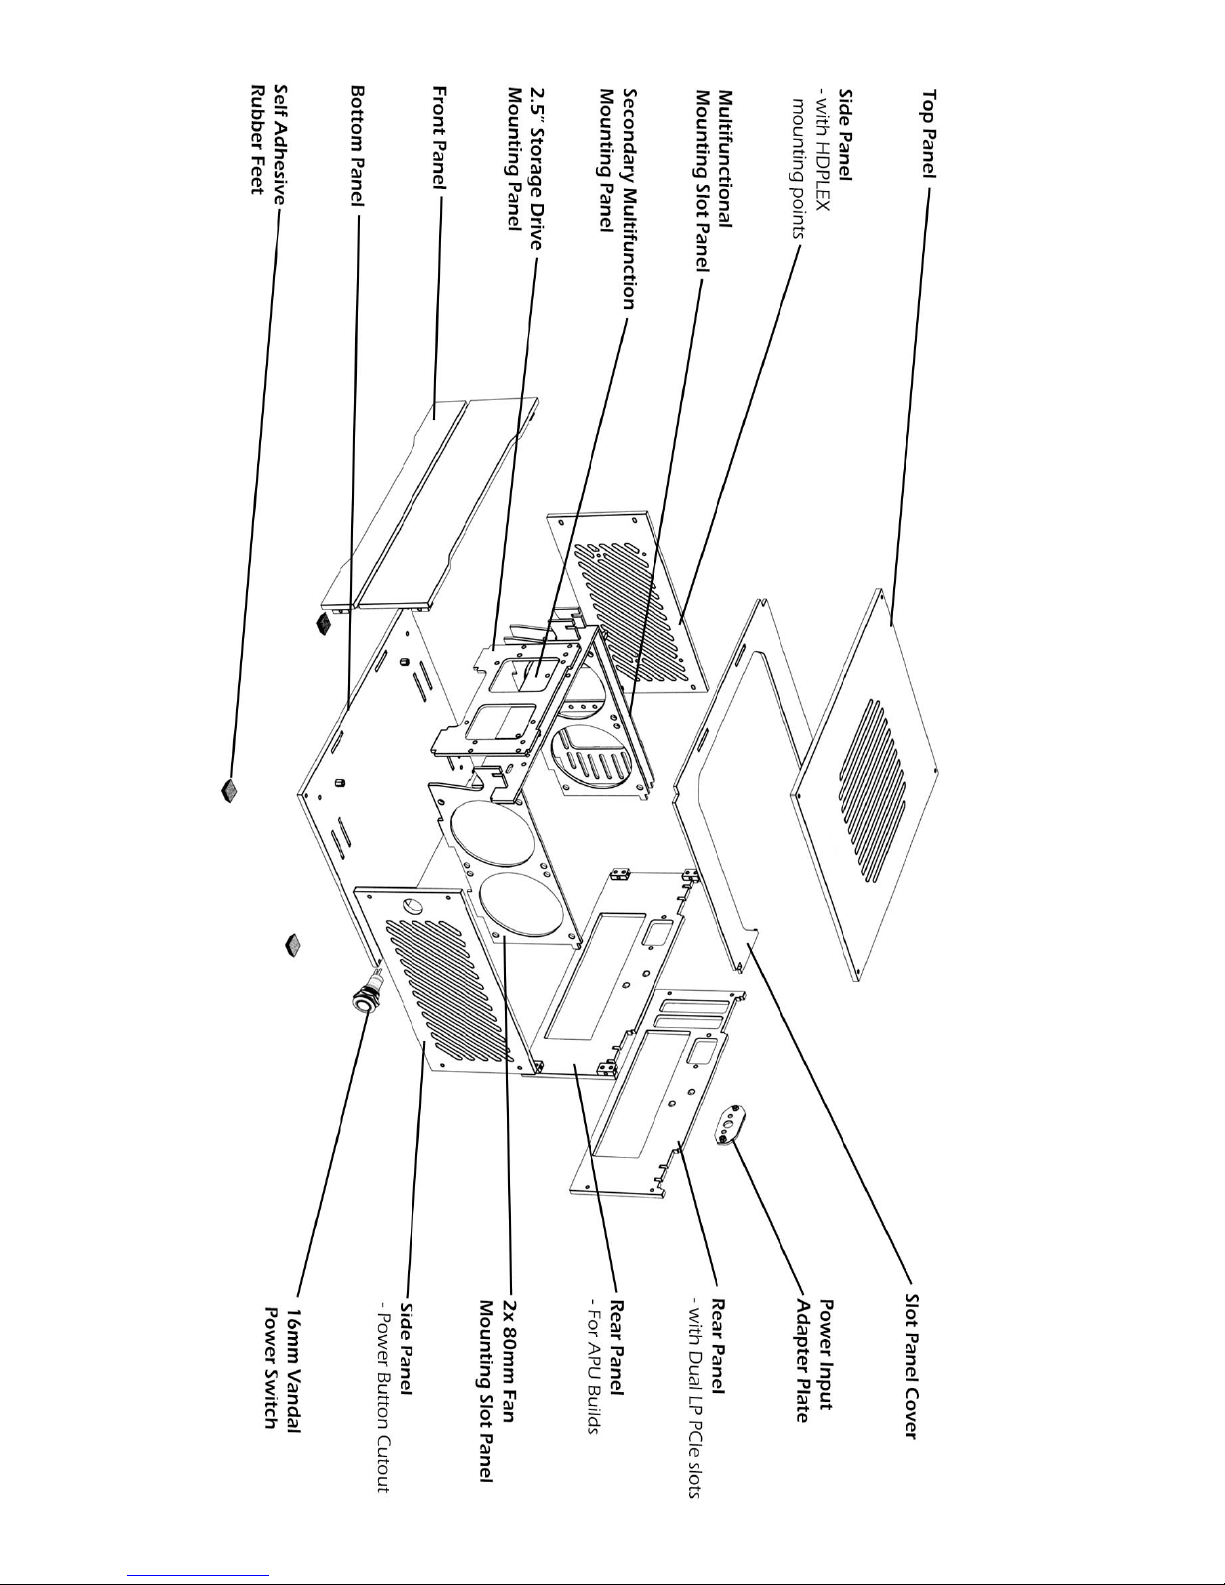
QUICK ASSEMBLY OVERVIEW
Page 4
Page 6

PART LIST
WARNING: Do not over-tighten the screws when securing the
panels as this can reduce thread life.
WARNING: The case is not at full strength until fully built, please
take care when attaching the first panels.
Page 5
Page 7
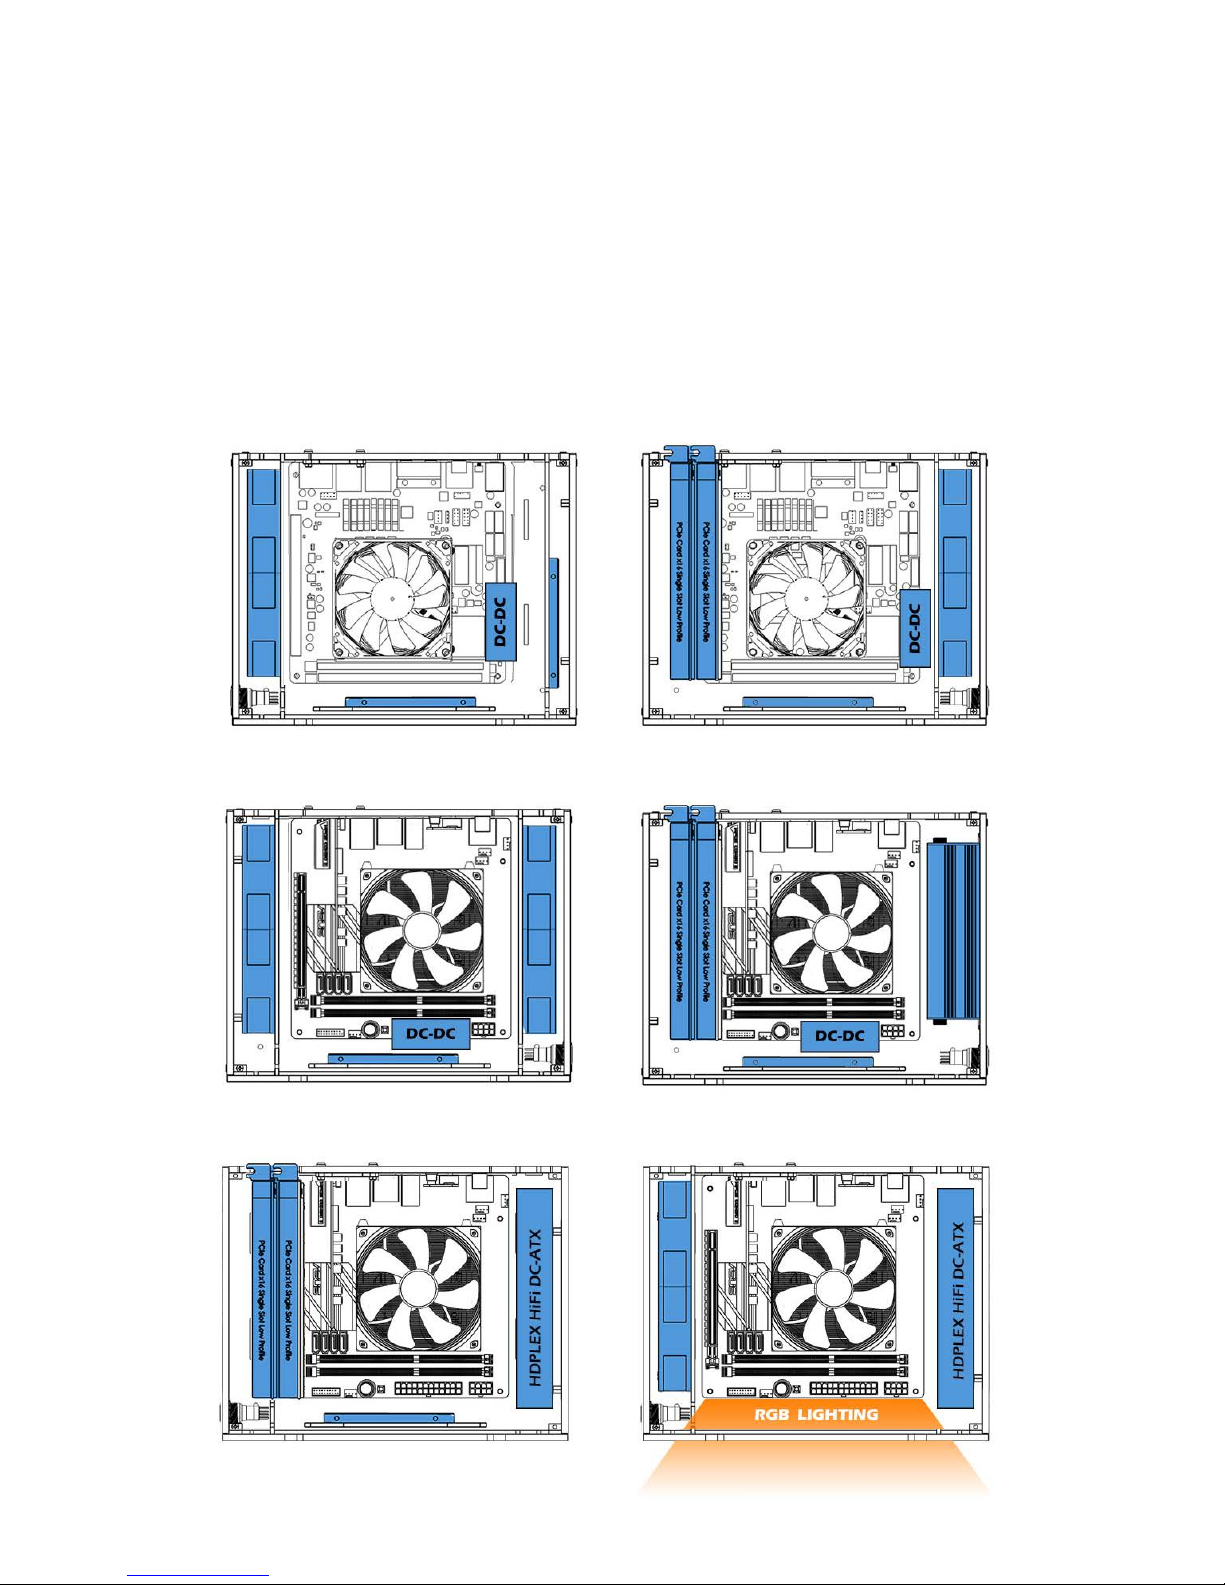
LAYOUT EXAMPLES
Extra 2.5” drive and 2x 80x25mm fans Low profile GPU and 2x 80x25mm fans
Low profile GPU and HDplex 300w ac-dc
(Brickless Build)
4x 80x25mm fans
Plan Your Build With Care Ahead of Assembly!
The HT5 is a versatile case that can be configured in many different ways to suit
the type of system your building. For example a PCIe expansion card can be installed
instead of extra cooling fans, or a DC-DC power board such as the HDPLEX 400w HiFi
DC-ATX board, or an internal power adapter (e.g. HDPLEX 400w AC-DC adapter), or
extra 2.5” storage drives, or a combination of any of these in each side of the case.
Below are some examples of how the case can be configured:
Low profile GPU and HDPLEX Hifi DC-ATX
Leave front of case clear for best RGB results
Page 6
Page 8
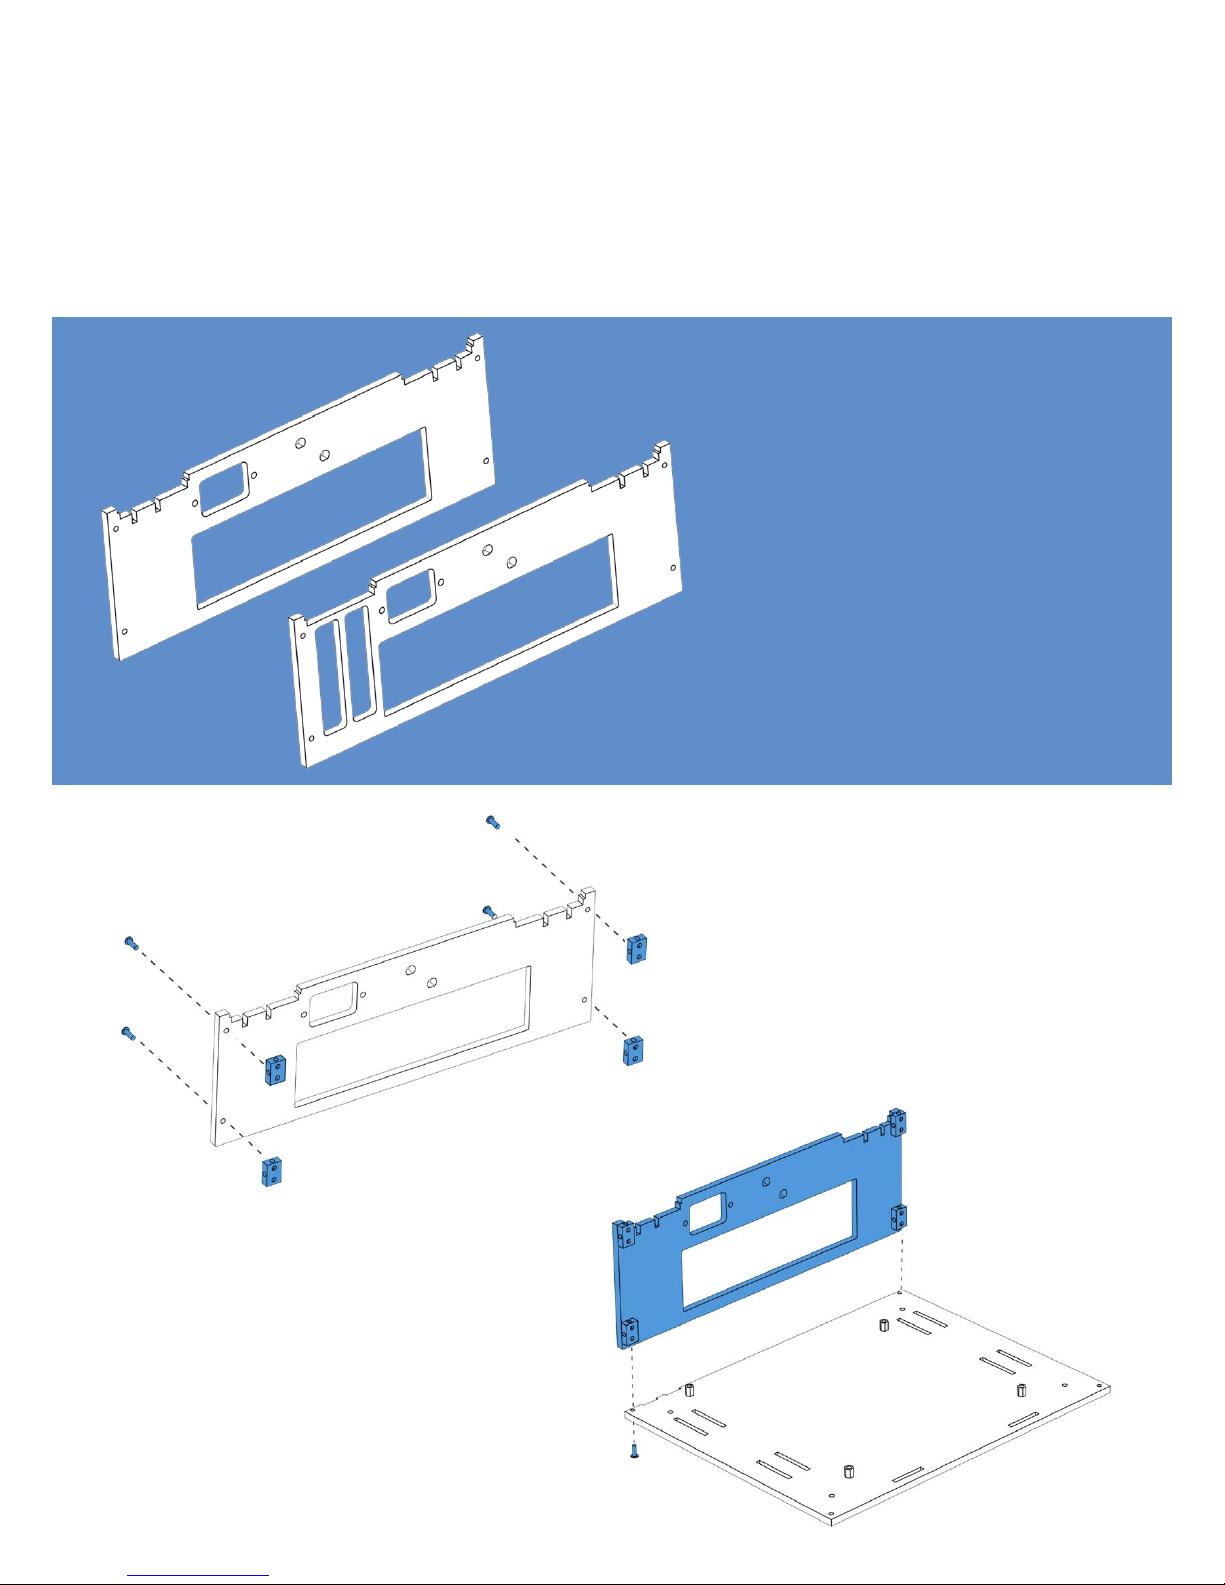
ASSEMBLY INSTRUCTIONS
Plan Your Build With Care Ahead of Assembly!
Attach 4x M3 Rectangle Corners to
the Rear Panel of choice using
4x M3x8mm screws
2 Rear panels
are supplied
with this case:
One for low profile GPUS and
one for APU’S. Choose which
best fits your build type.
Attach Rear Panel to Base Panel
using 2x M3x8mm screws
Page 7
Page 9

Optional
Mount Low Profile GPU to
Motherboard
Mount Motherboard to base panel
(pre-fitted with CPU Cooler + RAM),
using 4x M3 flat head screws
Page 8
Page 10
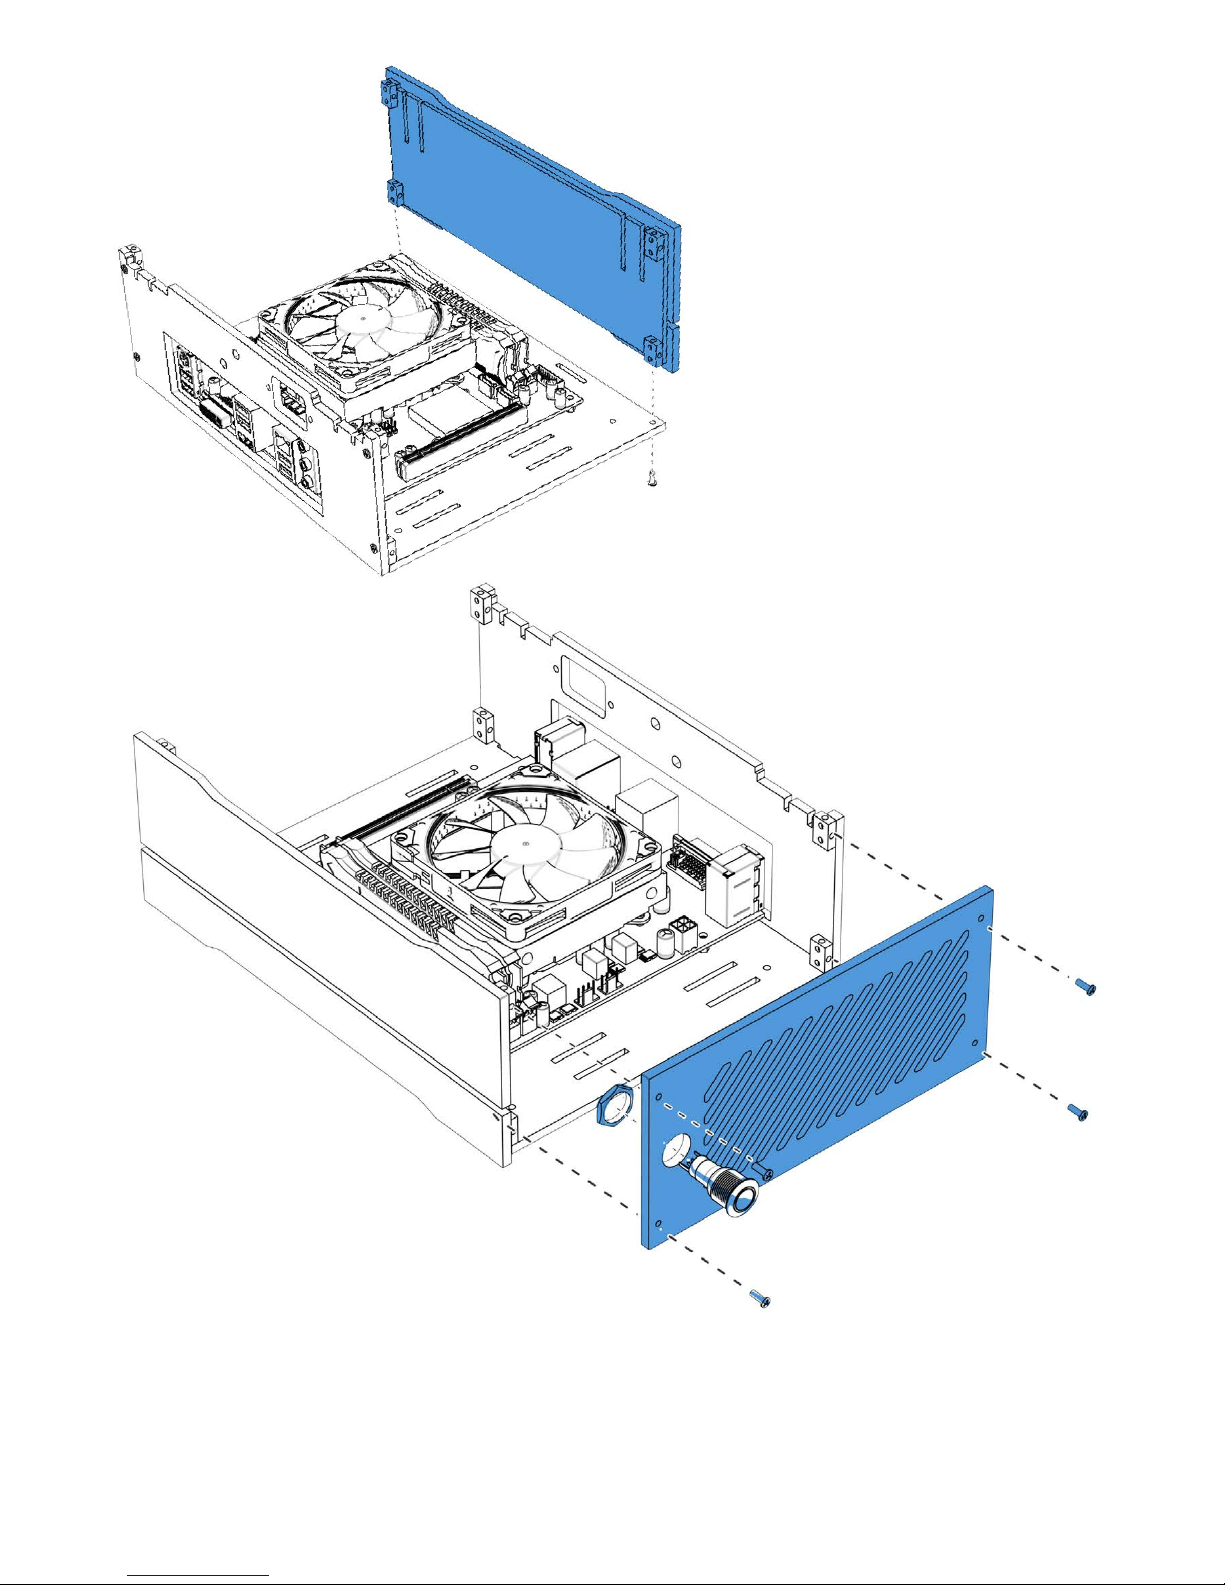
Attach Front Panel to Base with
2x M3x8mm screws
Attach the Side Panel to Case Assembly with 4x M3x8mm Screws.
PLEASE NOTE - Side panels can be attached to either side of the case depending
on what suits your chosen layout, to maximise compatibility.
PRO TIP: Begin Wiring
Attach 16mm Anti-Vandal
Power Switch to the side panel
Page 9
Page 11

Optional
Mount HDPLEX DC-ATX to
Side Panel with the M3 screws
provided with your power supply
Attach Second side panel to main
assembly with 4x M3x8mm screws.
Optional
Slide in accessory slot panels and
extra 2.5” drive bracket
Page 10
Page 12
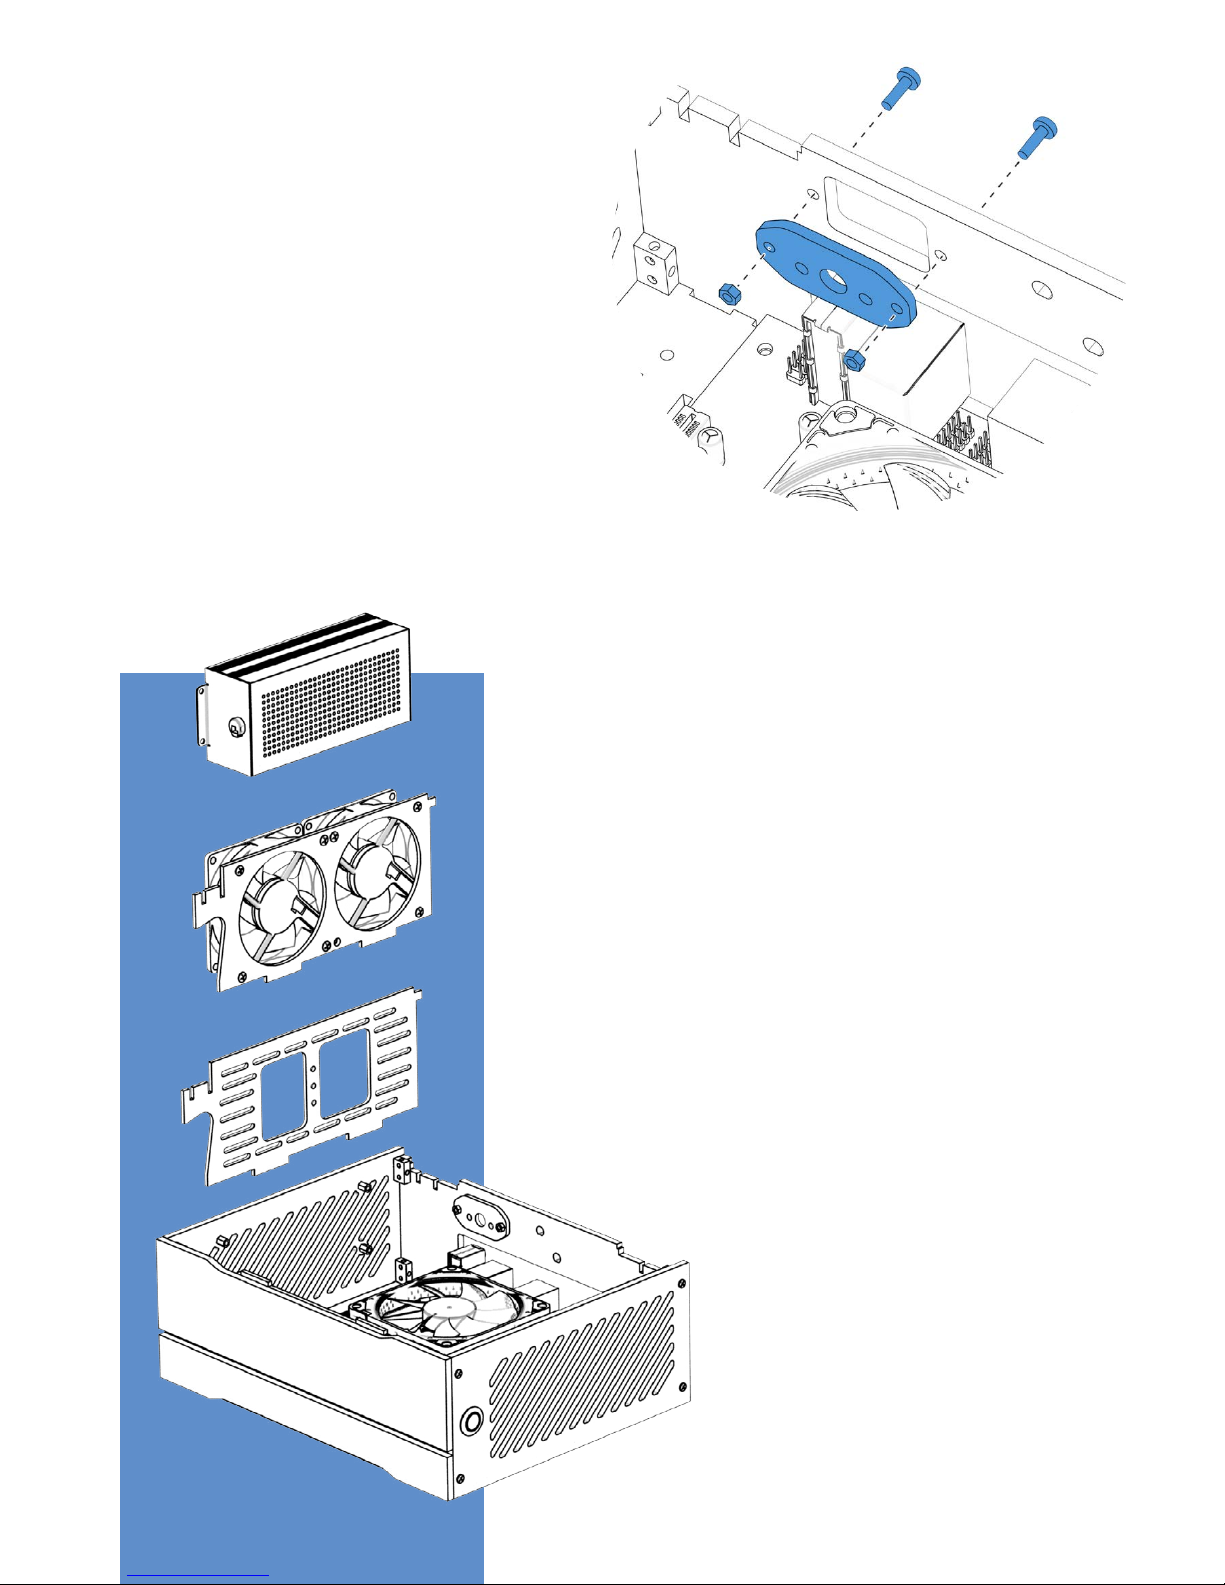
(Optional) Attach Alternative power supply
Attach Relevant C14 adapter plate
(power input) to the Rear Panel,
using 2x M3x10mm bolts and
2x M3 Nuts
(Optional) Attach 80mm Case Fans to Fan Slot Panel(s)
and slide into the front and back chassis slots
(Optional) install your 2.5” storage drives onto the
relevant accessory panel for chosen case layout
Complete your system wiring
The power input connector can be secured
to this adapter plate before or after this
step depending on how your system is
configured.
SLOT IN YOUR CHOSEN ACCESSORIES AND PANELS
Page 11
Page 13
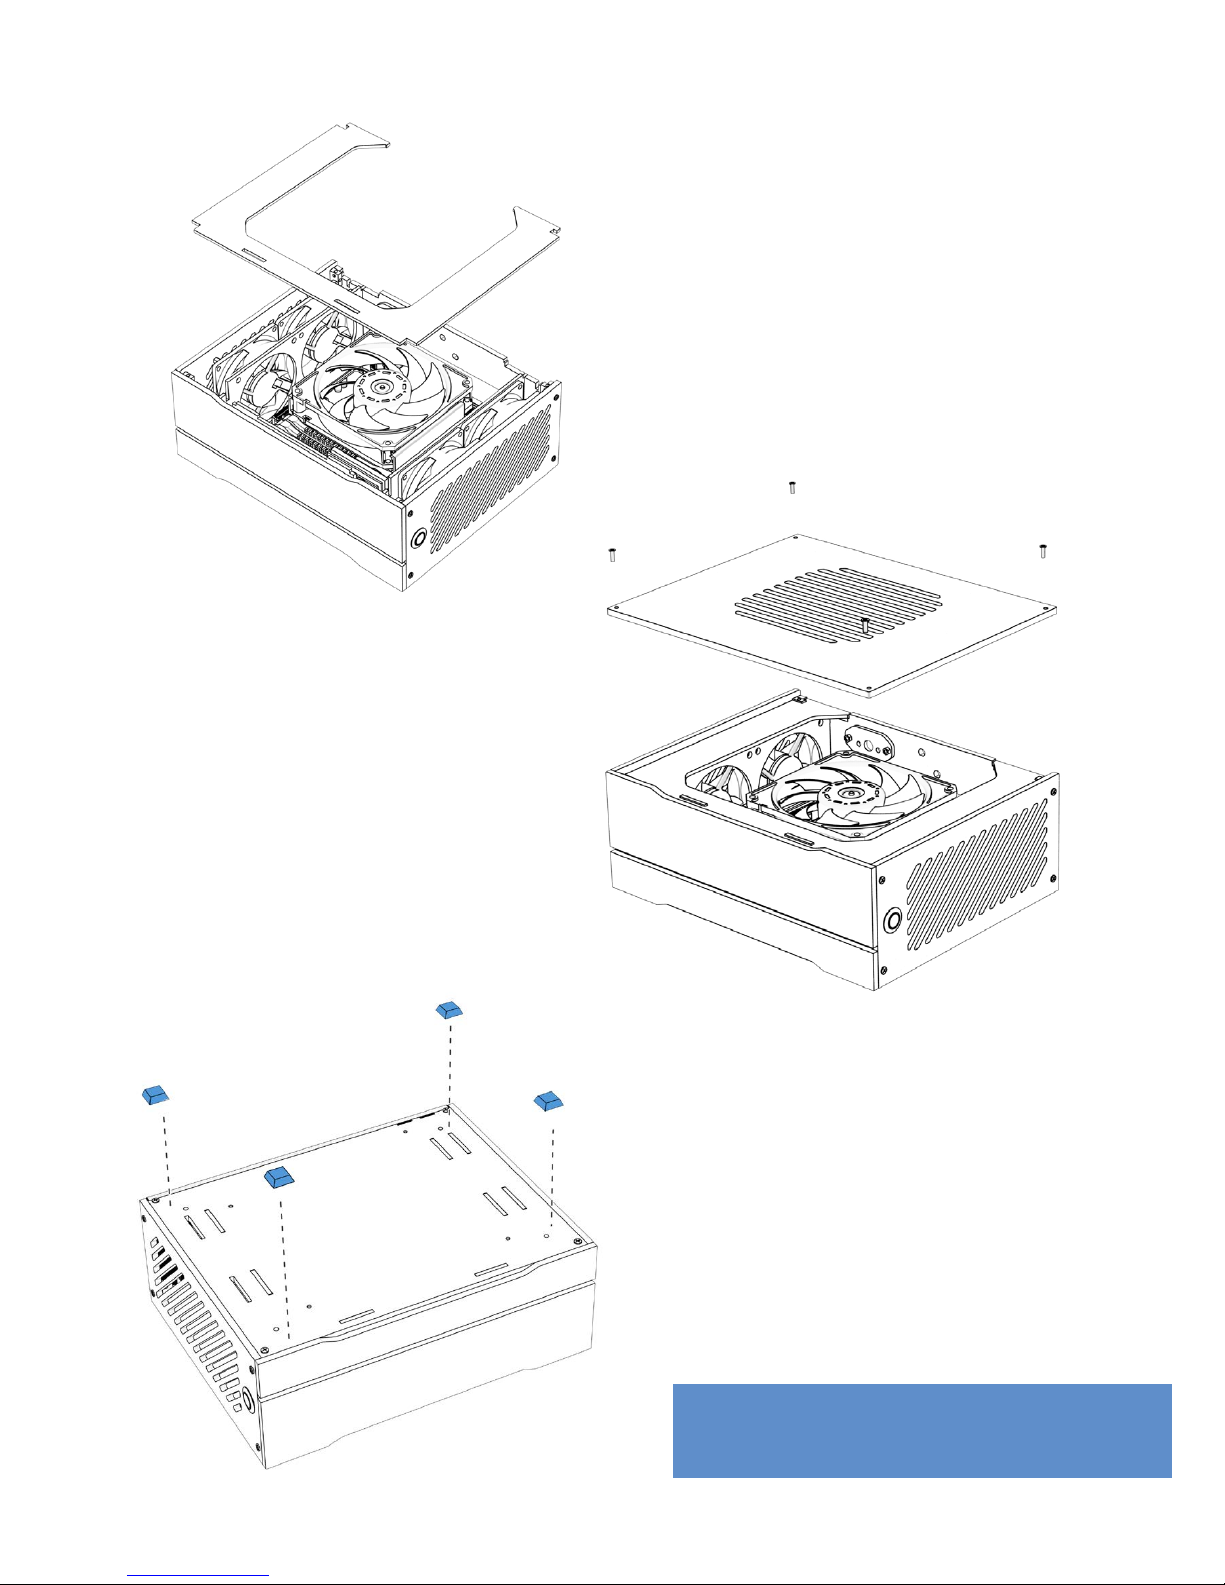
Place “U” shaped cover over slot panels
aligning any the front tabs if present
Attach Top Window Panel using
4x M3x8mm screws
Stick on Rubber Feet either to base
or side of the case depending on
preferred orientation of case
Finished!
Page 12
Page 14
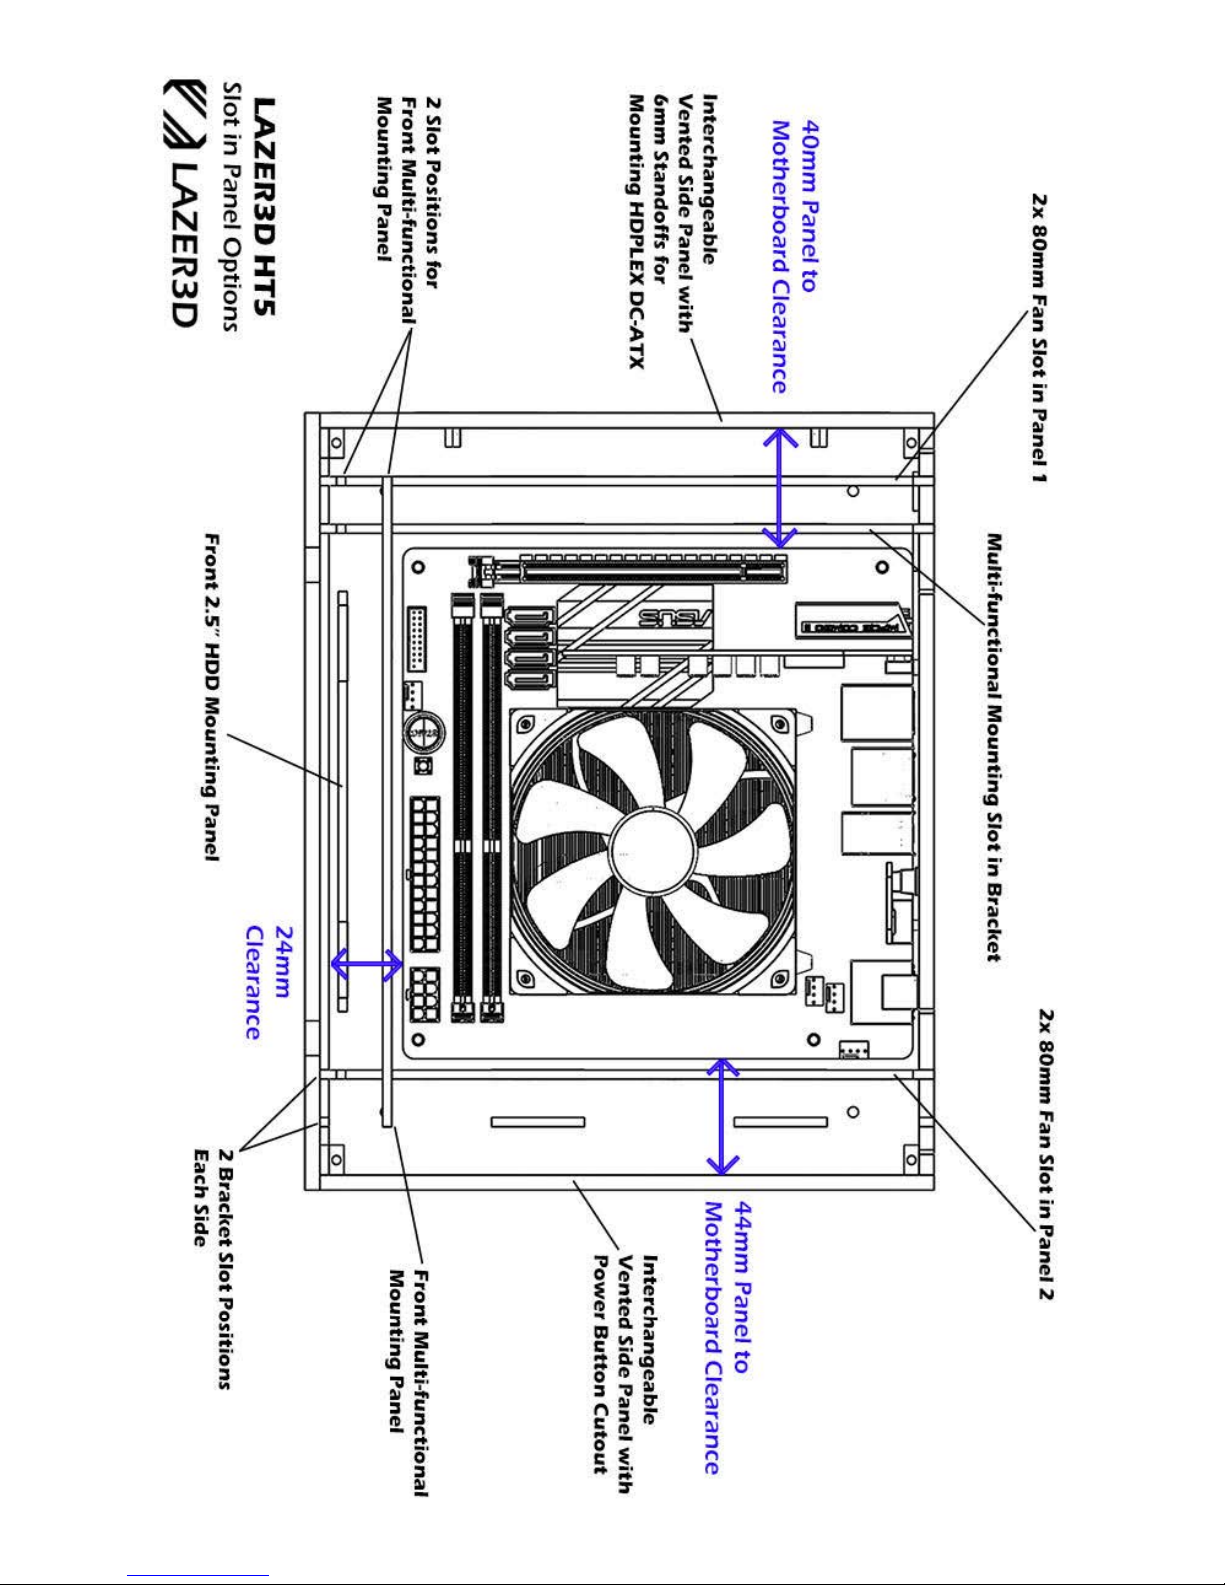
Page 13
Page 15
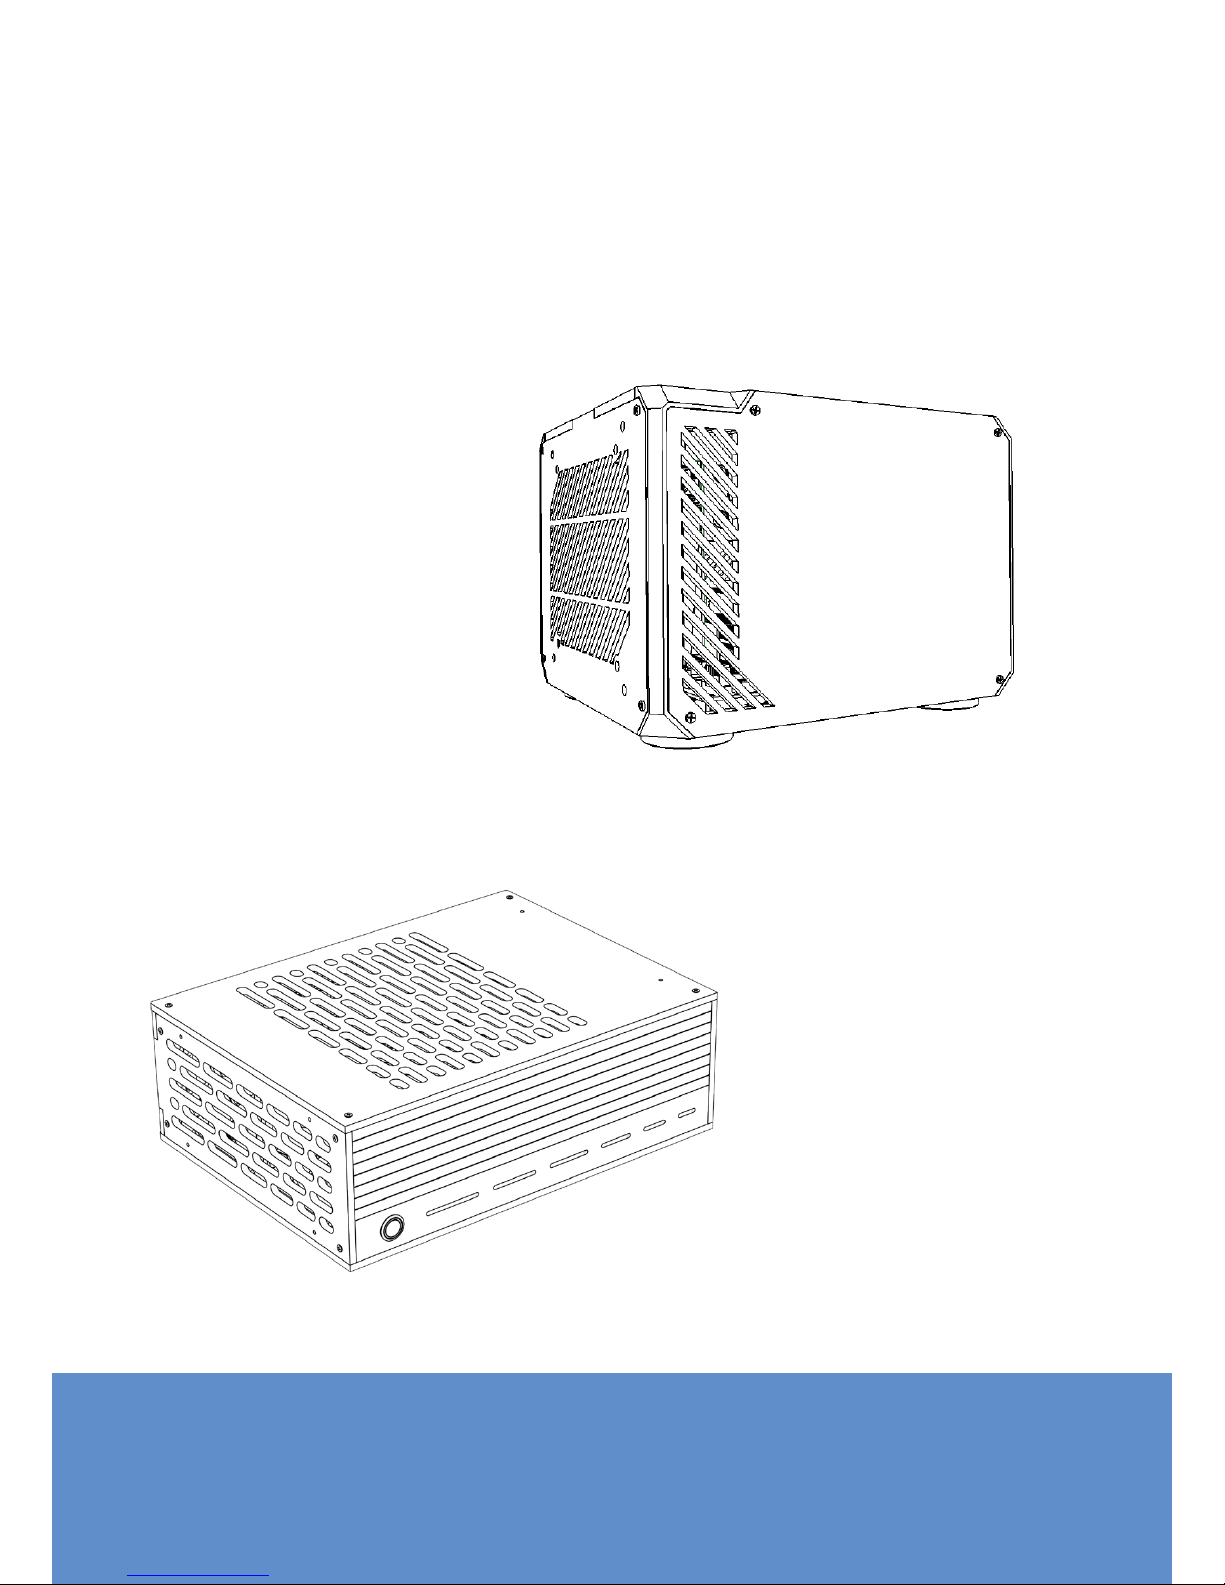
THANK YOU FOR CHOOSING LAZER3D!
CHECK OUT OTHER PRODUCTS:
CG7
Cravo
Lazer3D
LZ7
For more information please visit our website:
www.lazer3d.com
Customisable cube style
gaming case with highly
efficient airflow design
Stylish low profile compact
case, supporting both
Mini-ITX and
limited size M-ATX boards
Page 14
Page 16

User Manual - Version 1.0
Copyright Lazer3D 2018
LAZER3D
PERFORMANCE SFF PC CASES
Visit us: www.lazer3d.com
Contact us: [email protected]
 Loading...