

Lawrence Metal Products Inc. • 800.441.0019 • 631.666.0300 • Fax: 631.666.0336 • www.lawrencemetal.com
e-mail: service@lawrencemetal.com • PO Box 400-M • 260 Spur Drive South, Bay Shore, New York 11706-0779 USA
SC
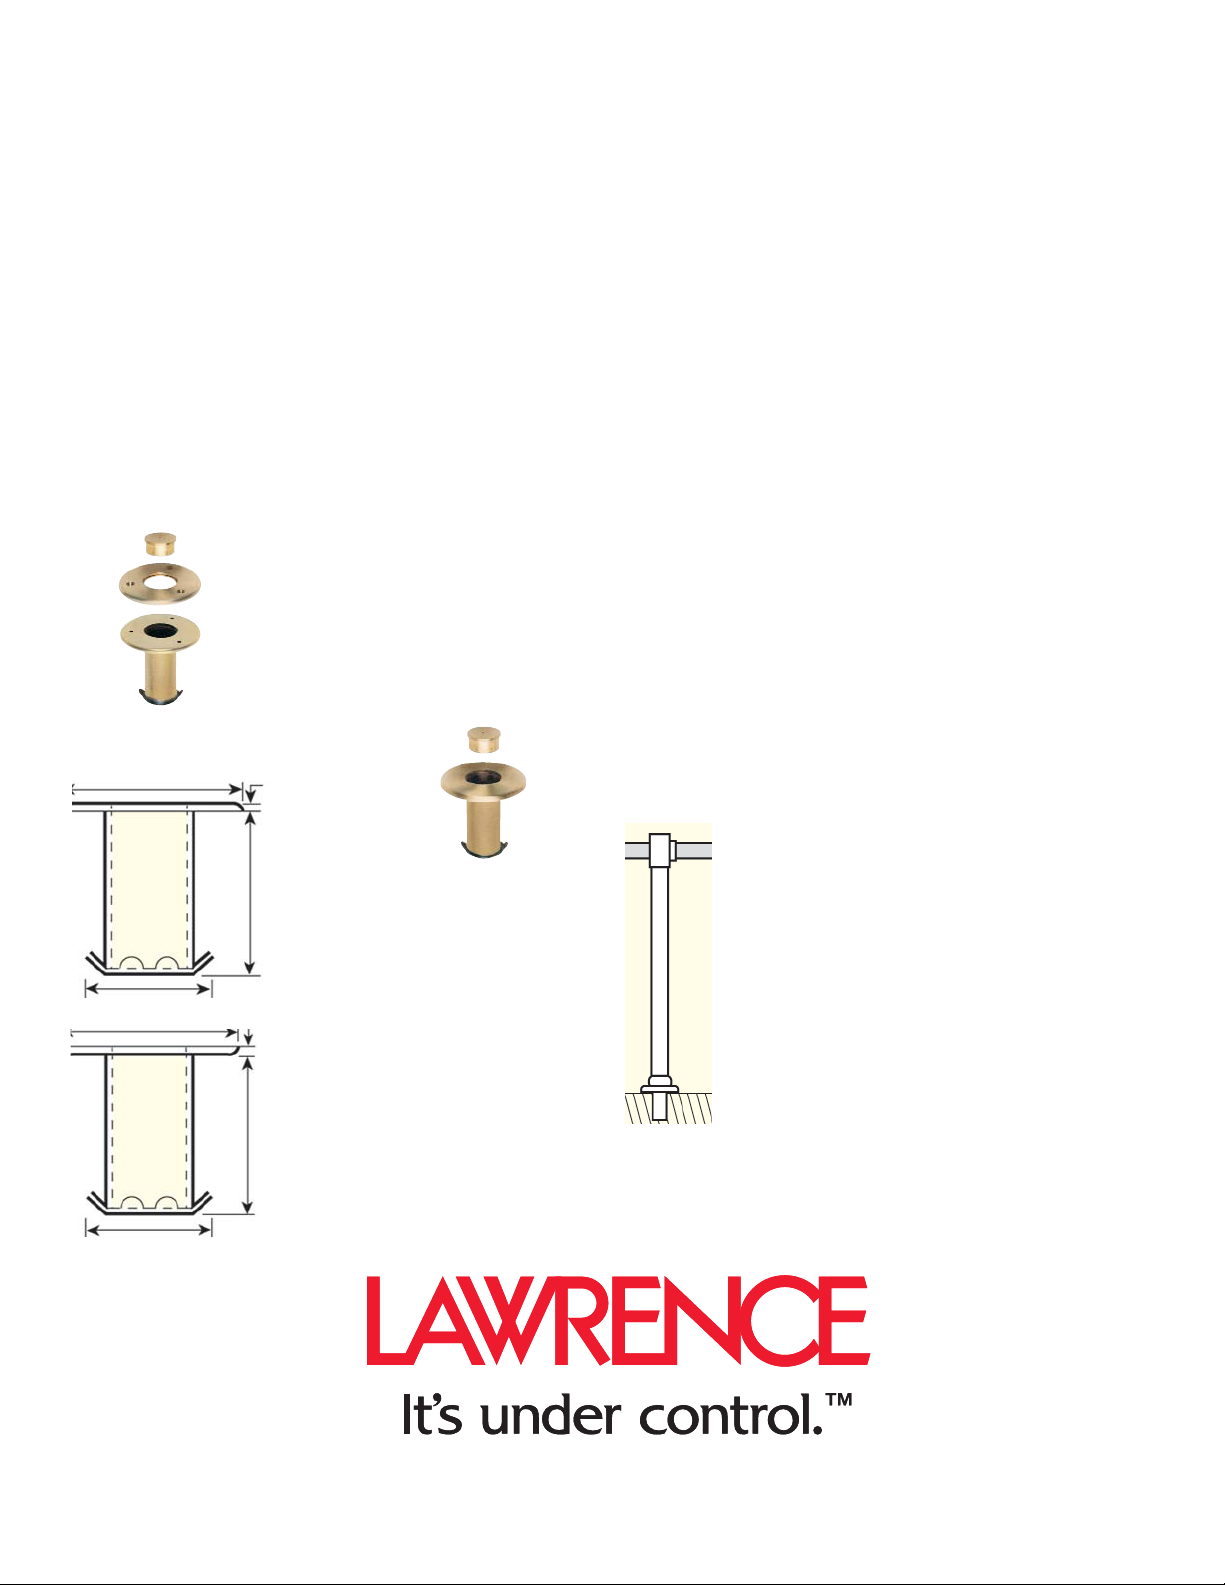
Sockets are permanently set in floors, either
wood or concrete, to accept the 320 Series
Removable Post. Cap fits flush with surface for a safe
and neat closing when post is removed. Sockets are
solid brass, free of pit holes and will not rust. Closed
bottom prevents seepage.
When ordering sockets, specify type of floor
(wood or concrete). When ordered for uncarpeted or
carpeted wood floors, base socket is provided with 3
countersunk holes in flange for use with supplied
flathead wood screws to fasten to floor. Sockets are
supplied with a rounded top outer edge for surface
installation unless flush installation (machined edge) is
specified. Other depths are available when floor will
not accommodate standard socket.
For Carpeted Floors
420-1S Satin Chrome Finish
420-2S Satin Brass Finish
420-6 English Antique Finish
Cover plate secures carpet around post
for neat and safe installation.
For Uncarpeted Floors
Surface Installation
421-1S-S Satin Chrome finish
421-2S-S Satin Brass finish
421-6-S English antique finish
421-8-S Statuary bronze finish
Flush Installation
421-1S-F Satin Chrome finish
421-2S-F Satin Brass finish
421-6-F English antique finish
421-8-F Stauary bronze finish
Installation note: When pouring new cement floors it
is often advisable to roughly block out positions for
the floor sockets. The sockets can be grouted in later when
plumbness and accuracy can be better controlled.
Sockets & Caps
Sockets & Caps
5 1/4”
3 1/8”
1/4”
4 3/8”
4 7/8”
1/4”
3 1/8”
4 3/8”
Installation Instructions
1. We recommend using diamond tipped, water
lubricated Masonry drill bits.
2. Hole for socket shaft should be 3 1/2” to 3 3/4” in
diameter by 5” deep.
3. When installing flush sockets, route out a surface
depression 5” in diameter by 1/4” deep. This
depression should be centered on (concentric
with) the socket shaft hole.
4. Use a quick setting, expanding type cement such
as “Por-Rok” to secure sockets. Fill hole to
approxiamately 1/2 its depth with cemenet before
inserting socket shaft.
5. Install sockets individually, using a removable post
as a leveling guide.
Caution: Cement sets quickly,
Finish with each socket before
going on to the next.
Socket
Post
 Loading...