

Page 1

FORM NO. 3321–749 Rev B
SilverPro
Series
Walk-behind Power Mower
Model No. 10247 – 9900001 & Up
Model No. 10252 – 9900001 & Up
Model No. 10323 – 9900001 & Up
Model No. 10324 – 9900001 & Up
Operator’s Manual
Para
obtener una versión gratis de este manual en español, escriba a la dirección
indicada más abajo. Asegúrese de indicar el modelo y el número de serie de su producto.
Pour obtenir gratuitement une version en français de ce manuel, écrivez à l’adresse
ci–dessous. N’oubliez pas d’indiquer les numéros de modèle et de série de votre produit.
Lawn-Boy Inc., Attn.: Parts Dept., 8111 L
yndale A
ve S, Bloomington, MN 55420–1
196.
English (EN)
Page 2
Contents
Page
Introduction 2.
Safety 3
Safe Operating Practices3. . . . . . . . . . . . . . . . . . . .
Safety and Instruction Decals4. . . . . . . . . . . . . . . . .
Assembly 5
Unfolding the Handle5. . . . . . . . . . . . . . . . . . . . . . .
Changing the Handle Height5. . . . . . . . . . . . . . . . .
Before Starting5. . . . . . . . . . . . . . . . . . . . . . . . . . . . . . .
Oil Mix Ratio5. . . . . . . . . . . . . . . . . . . . . . . . . . . . .
Mixing Gasoline and Oil6. . . . . . . . . . . . . . . . . . . .
Operation 7
Starting the Engine7. . . . . . . . . . . . . . . . . . . . . . . . .
Stopping the Engine7. . . . . . . . . . . . . . . . . . . . . . . .
Self–propel Drive8. . . . . . . . . . . . . . . . . . . . . . . . . .
Adjusting the Cutting Height8. . . . . . . . . . . . . . . . .
Operating T
Maintenance 9
Recommended Maintenance Schedule10. . . . . . . . .
Air Filter10. . . . . . . . . . . . . . . . . . . . . . . . . . . . . . . . .
Maintaining the Spark Plug11. . . . . . . . . . . . . . . . . .
Cleaning the Mower Housing11. . . . . . . . . . . . . . . .
Maintaining the Blade12. . . . . . . . . . . . . . . . . . . . . .
Lubricating the Self–propel Drive14. . . . . . . . . . . . .
Adjusting the Self-propel Cable14. . . . . . . . . . . . . . .
Cleaning the Self-propel Drive14. . . . . . . . . . . . . . .
Exhaust Ports15. . . . . . . . . . . . . . . . . . . . . . . . . . . . .
Troubleshooting 16
Accessories 17
Installing a Rear Grass Catcher17. . . . . . . . . . . . . . .
Installing the Cover Plate19. . . . . . . . . . . . . . . . . . . .
Installing the Mulch Plate19. . . . . . . . . . . . . . . . . . .
Storage 20
Fuel 20
Engine 21
Folding the Handle21. . . . . . . . . . . . . . . . . . . . . . . . .
Removing From Storage21. . . . . . . . . . . . . . . . . . . .
Warranty
. . . . . . . . . . . . . . . . . . . . . . . . . . . . . . . .
. . . . . . . . . . . . . . . . . . . . . . . . . . . . . . . . . . . . . .
. . . . . . . . . . . . . . . . . . . . . . . . . . . . . . . . . . .
. . . . . . . . . . . . . . . . . . . . . . . . . . . . . . . . . . .
ips 8
. . . . . . . . . . . . . . . . . . . . . . . . . . . .
. . . . . . . . . . . . . . . . . . . . . . . . . . . . . . . . .
. . . . . . . . . . . . . . . . . . . . . . . . . . . . . .
. . . . . . . . . . . . . . . . . . . . . . . . . . . . . . . . .
. . . . . . . . . . . . . . . . . . . . . . . . . . . . . . . . . . . . .
. . . . . . . . . . . . . . . . . . . . . . . . . . . . . . . . . . . . .
. . . . . . . . . . . . . . . . . . . . . . . . . . . . . . . . . .
. . . . . . . . . . . . . . . . . . . . . . . . . . . . . .
Back Cover
The 2-stroke engine provided on
this product meets the EPA Phase I
Non-Road Emissions regulations
for engines under 19 KW. This
product does not comply to CARB
TIER 1 regulations and cannot be
sold in California.
Introduction
Thank
you for purchasing a Lawn-Boy product.
All of us at Lawn-Boy want you to be completely satisfied
with your new product, so feel free to contact your local
Authorized Service Dealer for help with service, genuine
Lawn-Boy parts, or other information you may require.
Whenever you contact your Authorized Service Dealer or
the factory
your product. These numbers will help the Service Dealer
or Service Representative provide exact information about
your specific product. Y
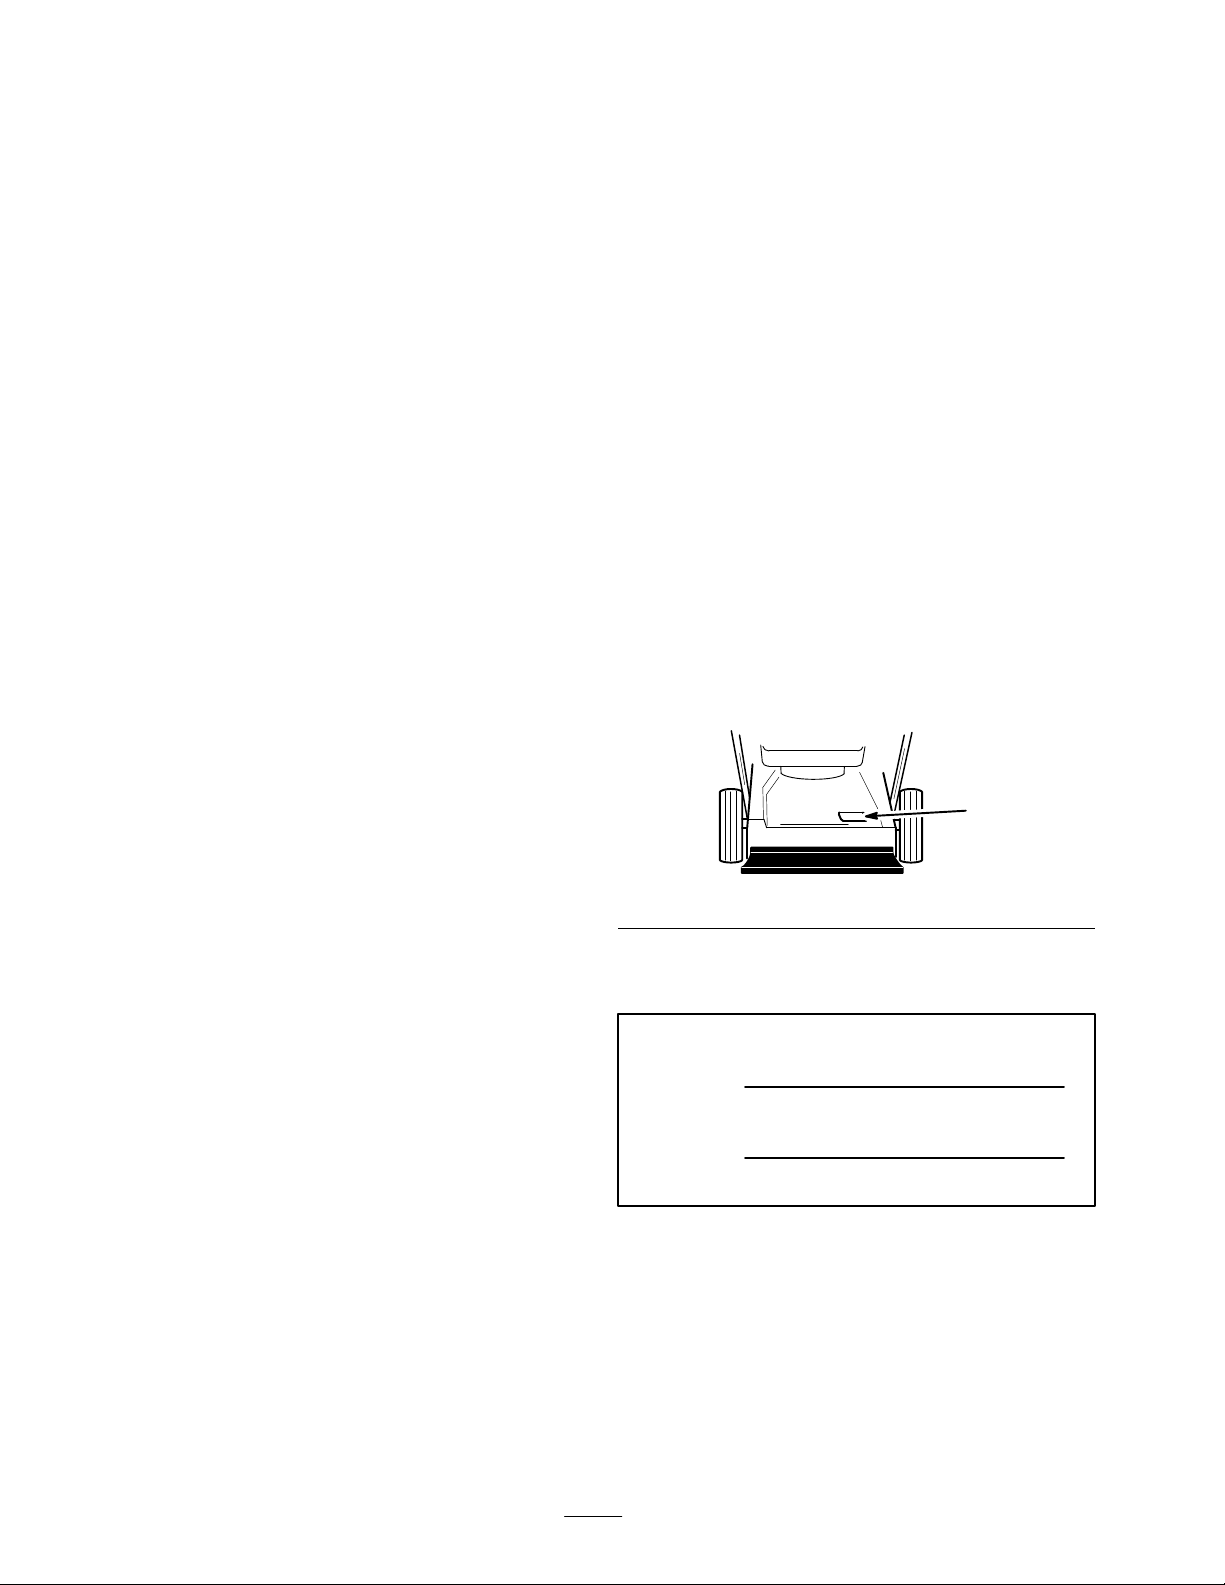
number decal located in a unique place on the product as
shown below
1. Model
For
numbers in the space below
, always know the model and serial numbers of
ou will find the model and serial
.
1064
and Serial Number Decal
your convenience, write the product model and serial
.
Model No:
Serial No.
Lawn Boy, Inc. – 1999
All Rights Reserved
Read
this manual carefully to learn how to operate and
maintain your product correctly
help you and others avoid personal injury and damage to
the product. Although Lawn-Boy designs, produces and
markets safe, state-of-the-art products, you are responsible
for using the product properly and safely
responsible for training persons who you allow to use the
product about safe operation.
2
. Reading this manual will
. Y
ou are also
Printed in USA
Page 3

The Lawn-Boy warning system in this manual identifies
potential hazards and has special safety messages that help
you and others avoid personal injury
DANGER, W
used to identify the level of hazard. However
of the hazard, be extremely careful.
DANGER
serious injury or death if the recommended precautions
are not followed.
WARNING
or death if the recommended precautions are not followed.
ARNING and CAUTION are signal words
signals an extreme hazard that will cause
signals a hazard that may cause serious injury
, even death.
, regardless
POTENTIAL HAZARD
•
Engine exhaust contains carbon monoxide,
which is an odorless, deadly poison.
WHA
T CAN HAPPEN
•
Carbon monoxide can kill you.
HOW T
•
O AVOID THE HAZARD
Do not run engine indoors or in an enclosed
area.
CAUTION
moderate injury if the recommended precautions are not
followed.
wo other words are also used to highlight information.
T
“Important” calls attention to special mechanical
information and “Note” emphasizes general information
worthy of special attention.
The left and right side of the machine is determined by
standing behind the handle in the normal operator
position.
signals a hazard that may cause minor or
’s
Safety
This machine meets or exceeds CPSC blade safety
requir
ements for walk–behind r
B71.1 specifications of the American National
Standards Institute, in effect at time of pr
, impr
However
operator or owner can r
potential for injury
instructions and always pay attention to the safety alert
symbol which means CAUTION, W
DANGER—“personal safety instruction.” Failur
comply with the instruction may r
injury.
Safe
oper use or maintenance by the
esult in injury
, comply with these safety
Operating Practices
otary mowers and the
oduction.
. T
o r
educe the
ARNING or
e to
esult in personal
General Operation
• Read
•
• W
•
•
•
this manual carefully before operating the
mower
. Become familiar with the controls and proper
use of the mower
mower or adults to operate it without proper
instructions.
Keep everyone, especially children and pets, away
from the area of operation. Thoroughly inspect the
area where the mower will be used and remove sticks,
stones, wire, and debris.
ear long pants and substantial shoes. Do not operate
the mower while wearing open-toed shoes, loose
clothing, jewelry or when barefoot.
Check the fuel level before starting the engine. Do not
fill the fuel tank indoors, when the engine is running,
or until the engine cools for several minutes after
running. W
engine.
Keep all guards, shields (including the rear trailing
shield), grass catchers, and safety devices in place.
Repair or replace damaged parts, including decals.
The engine, blade and self–propel drive are designed
to stop when control bails are released. Ensure that the
control and brake function properly before each use of
the mower
. Never allow children to operate the
ipe up spilled gasoline before starting the
.
This
product is capable of amputating hands and feet and
throwing objects. Always follow all safety instructions to
avoid serious injury or death.
This mower is designed for cutting and mulching grass or
when equipped with a grass bag, for catching cut grass.
Any use for purposes other than these could prove
dangerous to user or bystanders.
Note:
This engine is NOT equipped with a spark arrester
muffler
. Use or operation of this mower in your state on
any forest-covered, brush-covered or unimproved
grass-covered land, without an approved spark arrester
muffler
, may be a violation of the law
.
While Operating
• Do
not run the engine indoors.
,
•
Always maintain secure footing. Keep a firm grip on
the handle and walk; never run. Never operate the
mower in wet grass. Mow only in daylight or in good
artificial light.
•
Mow across the face of slopes; never up and down.
Use extreme caution when changing direction on
slopes. Do not mow excessively steep slopes.
•
Always wear safety glasses or eye shields during
operation to protect eyes from foreign objects that may
be thrown from the machine. Keep face, hands, and
3
Page 4
feet away from the mower housing and cutter blade
when the engine is running. Stay behind the handle
until the engine stops.
•
Since the blade rotates for a few seconds after the
blade control bail is released, stay behind the handle
until all movement stops.
•
After striking a foreign object or if mower vibrates
abnormally
the spark plug. Check the mower for damage and
make all repairs before using it again.
•
Stop the engine before adjusting the height–of–cut.
•
Stop the blade/engine when crossing a gravel
driveway
•
Stop the engine before leaving the operator
position–behind the handle. Disconnect the wire from
the spark plug if the mower will be unattended.
•
Do not touch the engine while it is running or shortly
after it is stopped because it will be hot enough to
cause a burn.
, stop the engine and remove the wire from
, road, or sidewalk.
’s
Maintenance
Before the mower is cleaned, inspected, serviced, or
•
adjusted, stop the engine and disconnect the wire from
the spark plug. Keep the wire away from the plug to
prevent accidental starting.
• T
o ensure that the mower is in safe operating
condition, frequently check and keep all nuts, bolts,
and screws tight. Ensure that the blade nut/screw is
tightened to 63 Nm (47 ft.–lbs.).
• T
o reduce fire hazard, keep the engine free of
excessive grease, grass, leaves, and accumulations of
dirt.
Allow the engine to cool before storing the mower in
•
any enclosure. Do not store the mower near any open
flame or where gasoline fumes may be ignited by a
spark.
Do not overspeed the engine by changing governor
•
settings.
At the time of manufacture, the mower conformed to
•
the safety standards in ef
ensure best performance and continued safety
certification of the mower
replacement parts and accessories.
fect for rotary mowers. T
, use genuine Lawn–Boy
o
•
Perform only those maintenance instructions described
in this manual. If major repairs are ever needed or if
assistance is desired, contact your local Authorized
Lawn–Boy Service Dealer
Safety
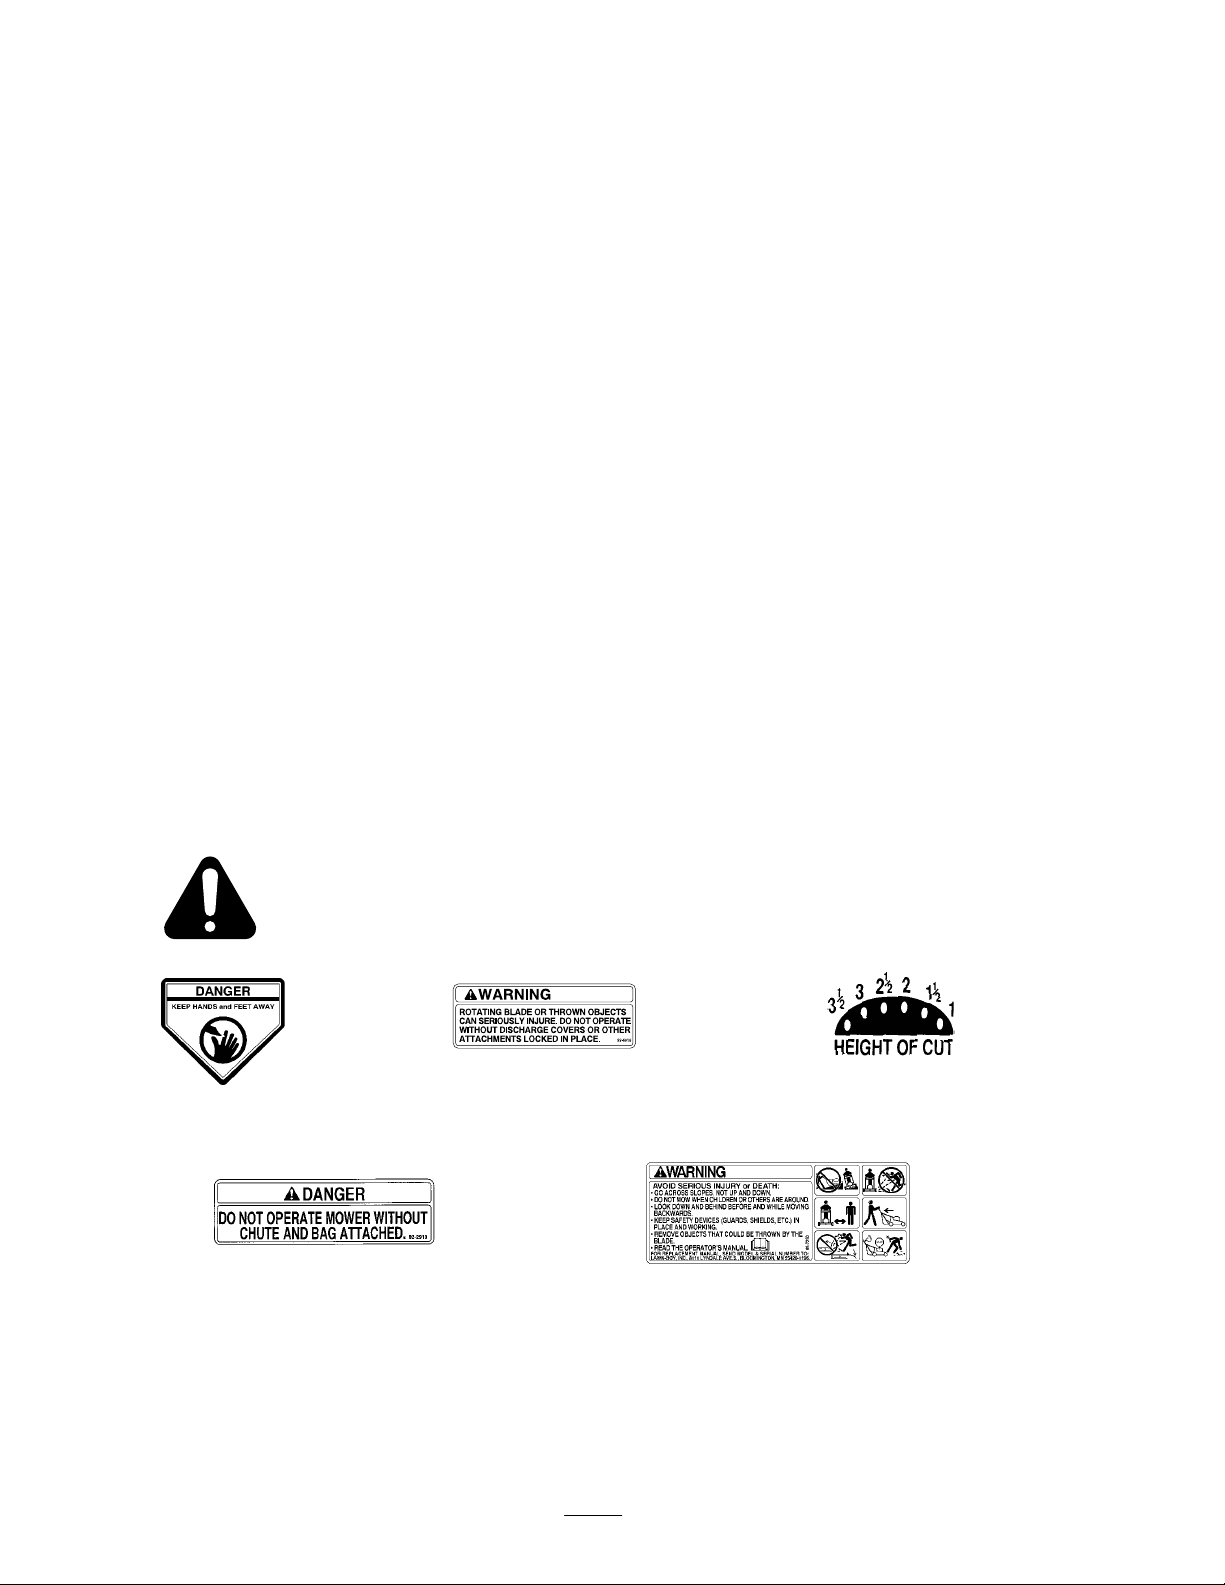
ON MOWER HOUSING
and Instruction Decals
(Part No. 43–8480)
ON T
OP OF GRASS CA
(Part No. 92–2919)
(Models 10324 and 10332)
.
Safety
decals and instructions are easily visible to the operator and are located near any
area of potential danger
TCHER CHUTE
. Replace any decal that is damaged or lost.
ON MOWER HOUSING
(Part No. 99–6018)
BY
FRONT HEIGHT ADJUSTER
(Part No. 92–2914 Right)
(Part No. 92–2915 Left)
ON MOWER HOUSING
(Part No. 93–7250)
4
Page 5
Assembly
Unfolding
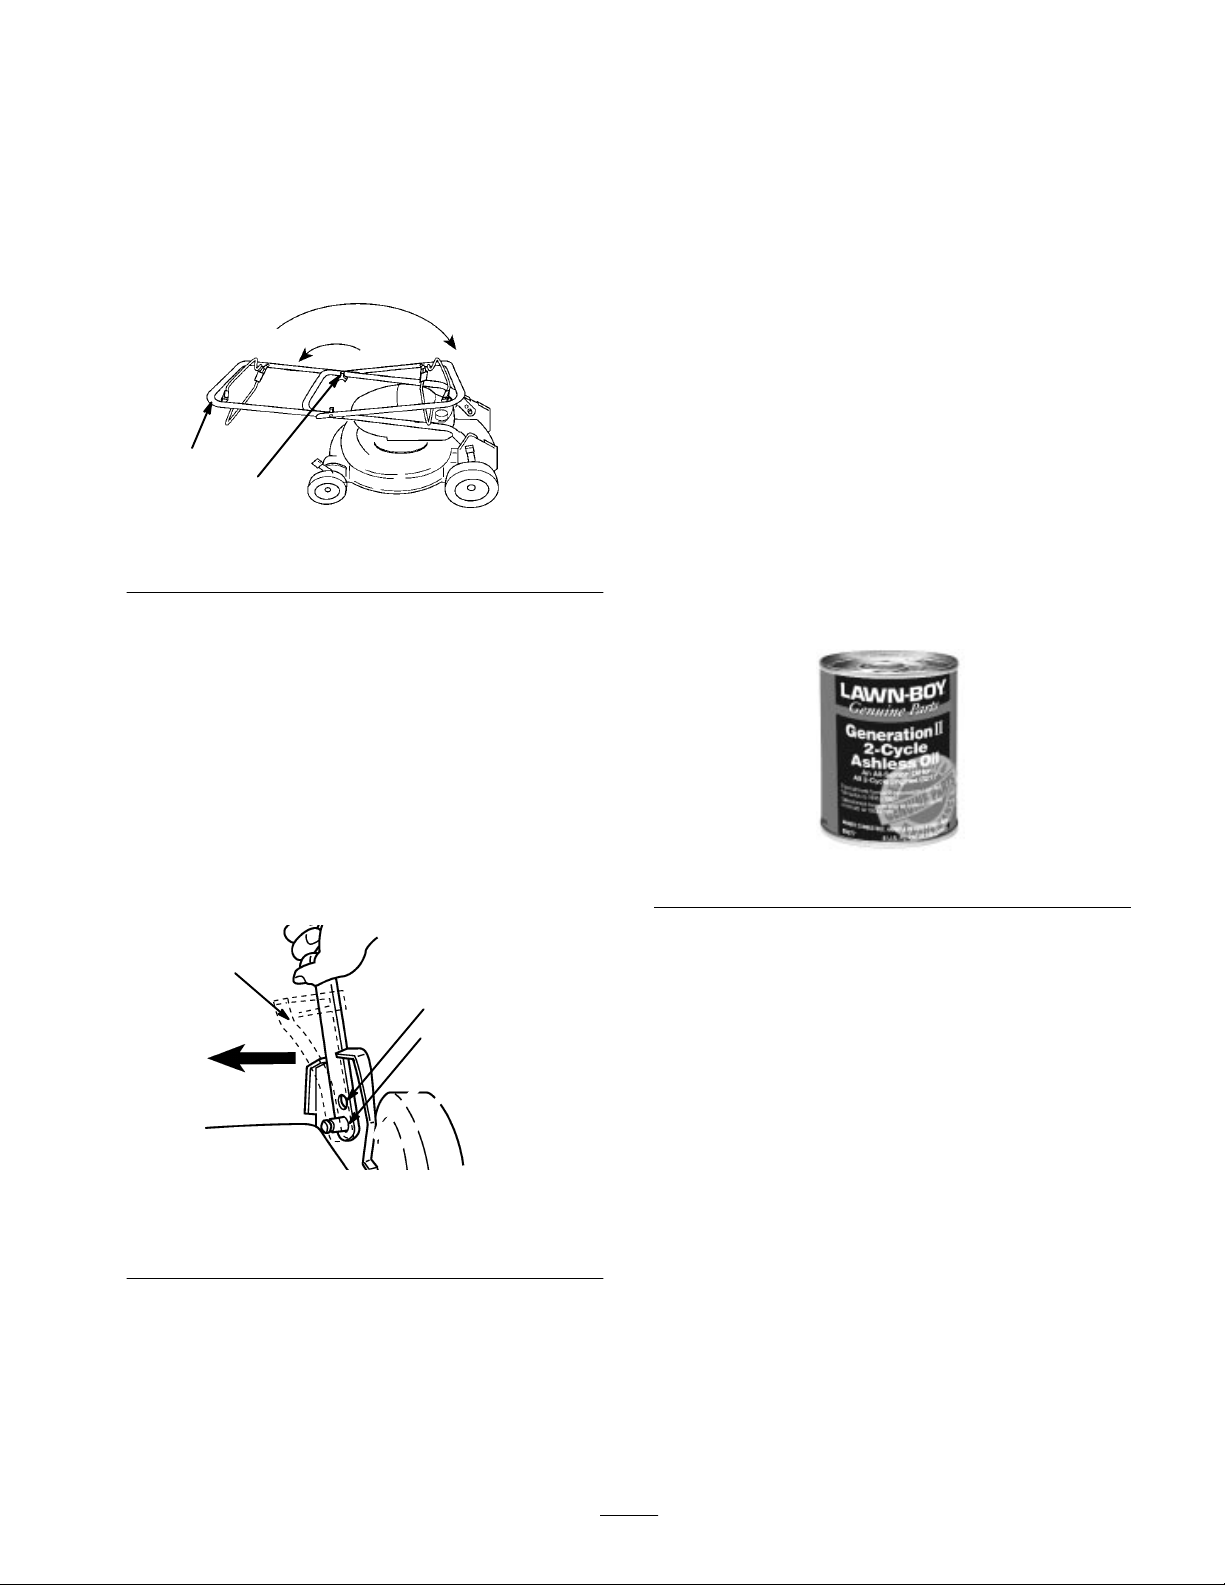
1. Loosen
the handle knobs and lift the top handle half in
an arc until the handle halves are in line and nest
together (Fig. 1).
the Handle
1. Squeeze
of
2.
Position the handle and cable anchor (self-propelled
only) over the pins at the desired height.
Note:
to be loosened and moved slightly
On self-propelled models, adjust the cable. Refer to
3.
Maintenance.
the bottom handle section (both sides) inward
f of the pins.
On self-propelled models, the belt cover may need
.
2
1
Figure
1. Knob 2. Top
IMPORTANT:
str
etching the cables.
2. T
ighten the knobs securely
Rotate the handle toward the rear of the mower until it
3.
snaps into the stops in the handle brackets.
Changing
The
handle has two height positions—high and low
(Fig. 2). Select a handle height position that is most
comfortable for you.
Use car
e to prevent pinching or
the Handle Height
3
1
handle half
.
1
2
1068
Before
Oil
Mix Ratio
Your
Lawn-Boy mower is powered by a 2-cycle engine
which requires a 32:1 mixture of gasoline and oil.
only Lawn-Boyr Generation II, 2-Cycle Ashless Oil,
packaged in purple/gr
pr
emium grade 2–cycle ashless oil, certified NMMA
TCW III.
could result in serious engine damage.
Lawn-Boy
formulated for Lawn-Boy and is available from your
Lawn-Boy retailer
II, 2-Cycle Ashless Oil will help keep your engine clean,
reduce spark plug fouling, piston ring sticking and
pre-ignition. Lawn-Boy Generation II, 2-Cycle Ashless
Oil will also minimize varnish build-up, combustion
chamber deposits and exhaust port blockage.
Failure to use the correct oil or mixture ratio
Generation II, 2-Cycle Ashless Oil is
Starting
Use
een cans (Fig. 3) or an equivalent
Figure
. Regular use of Lawn-Boy Generation
3
1. Low
2.
High setting
setting
Figure
2
3.
Cable anchor –
self-propelled model
1026
IMPORTANT
10W30 etc.) or the wr
damage may occur
been determined that Lawn-Boy Generation II, 2-Cycle
Ashless Oil or an NMMA TCW III certified oil was not
used, the failur
warranty.
5
: Never use automotive oil (i.e. SAE 30,
ong mix ratio because engine
. If engine failur
e may not be cover
e occurs and it has
ed by the Lawn-Boy
Page 6
Mixing
Gasoline and Oil
DANGER
POTENTIAL
•
When fueling, under certain cir
static charge can develop, igniting the gasoline.
WHA
T CAN HAPPEN
•
A fir
and others and cause pr
HOW T
•
Always place gasoline containers on the gr
away from your vehicle befor
•
Do not fill gasoline containers inside a vehicle
or on a truck or trailer bed because interior
carpets or plastic truck bed liners may insulate
the container and slow the loss of any static
charge.
When practical, r
•
equipment fr
the equipment with its wheels on the gr
If this is not possible, r
•
a truck or trailer fr
rather than fr
•
If a gasoline dispenser nozzle must be used,
keep the nozzle in contact with the rim of the
fuel tank or container opening at all times until
fueling is complete.
HAZARD
e or explosion fr
O AVOID THE HAZARD
om the truck or trailer and r
om gasoline can burn you
operty damage.
emove gas–power
efuel such equipment on
om a portable container
om a gasoline dispenser nozzle.
cumstances, a
e filling.
ed
DANGER
POTENTIAL HAZARD
•
In certain conditions gasoline is extr
flammable and highly explosive.
WHA
T CAN HAPPEN
•
A fir
e or explosion fr
others, and cause pr
HOW T
•
•
•
• Stor
•
O AVOID THE HAZARD
Use a funnel and fill the fuel tank outdoors, in
an open ar
any gasoline that spills.
Do not fill the fuel tank completely full. Add
gasoline to the fuel tank until the level is 1/4” to
1/2” (6 mm to 13 mm) below the bottom of the
filler neck. This empty space in the tank allows
gasoline to expand.
Never smoke when handling gasoline, and stay
away fr
fumes may be ignited by a spark.
keep it out of the r
Never buy mor
gasoline.
ea, when the engine is cold. W
om an open flame or wher
e gasoline in an appr
om gasoline can burn you,
operty damage.
oved container and
each of childr
e than a 30-day supply of
emely
e gasoline
en.
ound
efuel
ound.
ipe up
For simplicity and best engine performance, mix 8 ounces
(250 ml) of Lawn-Boy Generation II, 2-Cycle Ashless Oil
with two gallons (8 liters) of fresh, unleaded regular
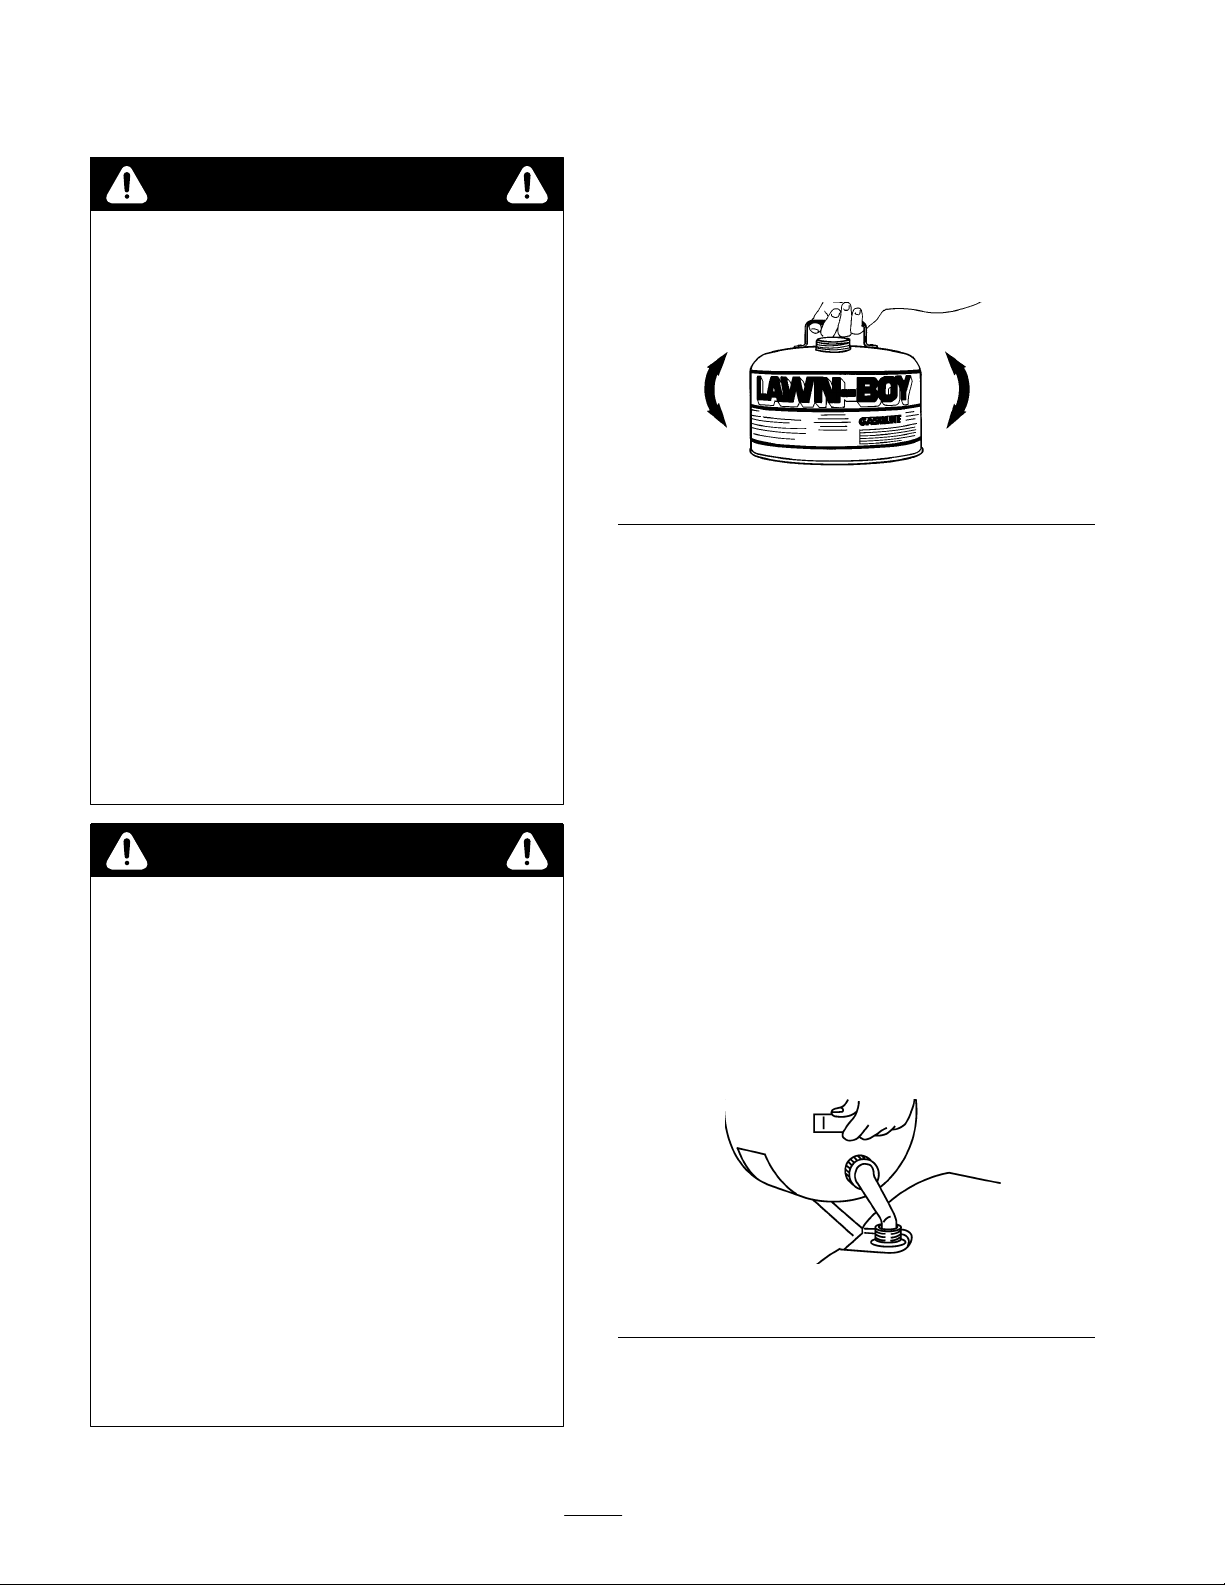
gasoline. Pour one gallon (4 liters) of gasoline into an
approved gasoline container and add the correct amount of
2-cycle oil. Install cap on gasoline container and shake to
mix oil and gasoline thoroughly (Fig. 4). Slowly remove
the cap and add the remaining gasoline.
1056
Figure
Note:
Do not mix gasoline and oil in the product fuel
tank. Oil that is at room temperature mixes easily and
more thoroughly than cold oil.
Use clean, fresh lead-free gasoline with an octane rating
,
of 85 or higher
can be used in 30 days to ensure freshness. Use of
lead-free gasoline results in fewer combustion chamber
deposits and longer spark plug life. Leaded gasoline may
be used if lead-free is not available.
IMPORTANT
containing methanol, gasohol containing mor
10% ethanol, pr
the engine fuel system could be damaged.
1.
Clean around the fuel cap and remove it (Fig. 5).
2.
Fill the fuel tank with gasoline/oil mix to within 1/4
inch (6.5 mm) of top of tank, not into the filler neck.
IMPORTANT
gasoline/oil mix must have r
3.
Replace the fuel cap securely and wipe up any spilled
fuel.
. Purchase only the quantity of gasoline that
: Never use methanol, gasoline
emium gasoline, or white gas because
: Do not over fill the fuel tank. The
Figure
4
e than
oom to expand.
993
5
6
Page 7
Note:
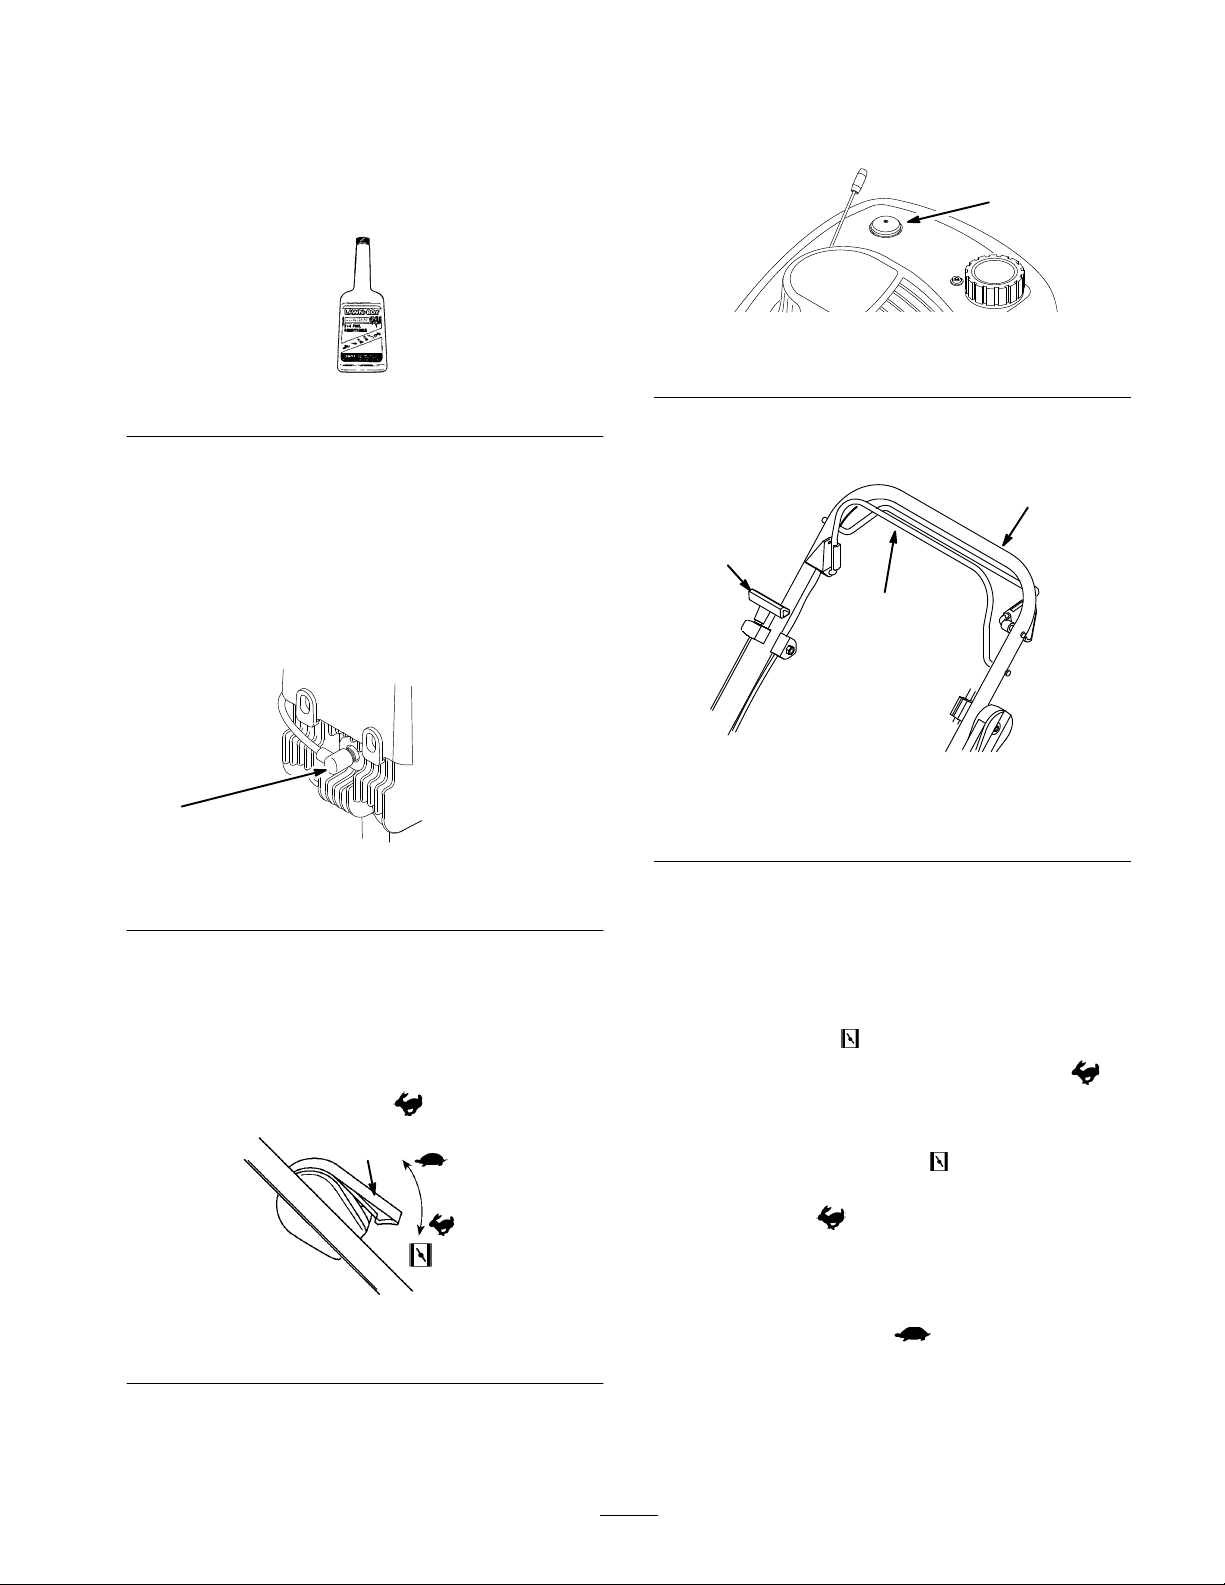
Lawn-Boy recommends that Lawn-Boy 2+4r Fuel
Conditioner (Fig. 6) be used during operation and storage.
Lawn-Boy 2+4r
Fuel Conditioner cleans the engine and
prevents gum-like varnish deposits from forming during
storage.
Figure
IMPORTANT:
those manufactur
Do not use fuel additives other than
ed for fuel stabilization during
storage, such as Lawn-Boy 2+4r Fuel Conditioner
Lawn-Boy does not r
ecommend stabilizers with an
6
.
alcohol base such as ethanol or methanol. Stabilizers
should not be used to try to enhance the power or
performance of the machine.
4.
Connect the spark plug wire (if disconnected) (Fig. 7).
1058
Note: T
once.
1. Primer
3. Hold
(Fig. 10).
3
o restart a warm engine, press the primer only
1
m–3833
Figure
9
the blade control bail against the upper handle
2
1
1
Figure
1. Spark
plug wire
Operation
Starting
1. Move
1. Throttle
2. Push
seconds between each push.
the Engine
the throttle lever to the
Figure
lever
the primer three times (Fig. 9). W
982
10
3.
Starter handle
m–3884
1. Blade
2.
Upper handle
Figure
control bail
7
4. Pull
the starter handle lightly until resistance is felt,
then pull it sharply (Fig. 10). Let the rope return to the
handle slowly
If the engine fails to start, repeat steps 2 through 4.
5.
Note:
If the engine starts but then begins to stall, move
the throttle lever to the
.
position until the engine
continues to run, then move the throttle back to the
position (Fig. 8).
1
position.
In cool temperatures, it may be necessary to prime three
times with the throttle lever in the
position, and then
start the engine. Once the engine has started, move the
1019
throttle lever to the
Stopping
position.
the Engine
8
1. Move
2.
throttle lever to the
position (Fig. 8).
Release the blade control bail (Fig. 1
1). Both the
engine and blade will stop. See your dealer
ait about two
immediately if they do not.
7
Page 8
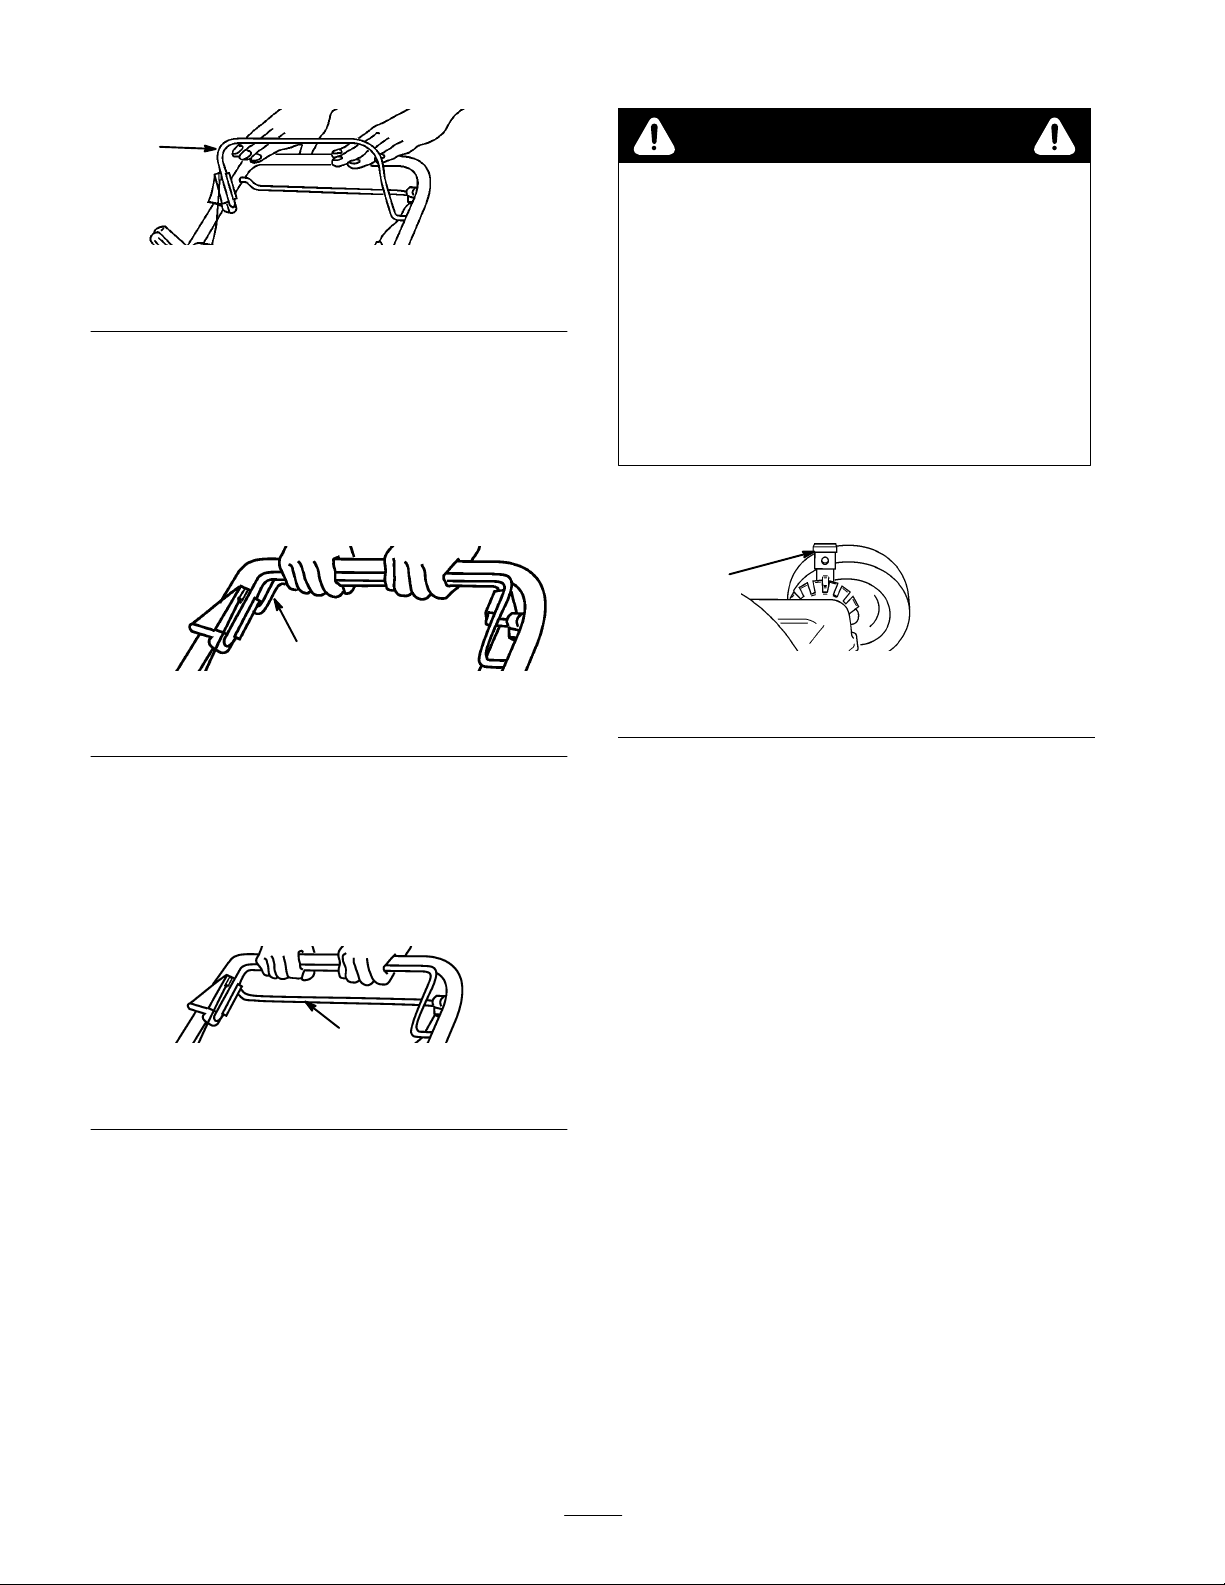
Figure
1. Blade
Self–propel
Self–propelled
1. T
control bail
Drive
Models Only
o operate the self-propel drive, squeeze the
self-propel bail against the handle and hold it
(Fig. 12).
1
1
1060
DANGER
POTENTIAL HAZARD
•
Adjusting the height-of-cut levers could bring
your hands into contact with a moving blade.
WHA
T CAN HAPPEN
•
Contact with a r
injury.
HOW T
•
•
1.
O AVOID THE HAZARD
Stop the engine and wait for all movement to
stop befor
Do not put fingers under the housing when
adjusting the height-of-cut.
Pull the adjusting lever toward the wheel and move it
to the desired position (Fig. 14).
1
otating blade can cause serious
e adjusting the cutting height.
1
Figure
1. Self-propel
Note:
reduce ground speed, increase the space between the bail
and the handle.
2. T
o disengage the self-propel drive, release the
self-propel bail (Fig. 13), then push the mower forward
manually at least 1 in.
1. Self-propel
Adjusting
bail
Maximum self-propel ground speed is fixed. T
Figure
bail
the Cutting Height
12
1
13
o
1016
1017
1021
14
Figure
1. Wheel
2. Release
Note:
height adjustment lever
the height adjust lever and seat it securely in
the desired notch.
Set all four (4) wheels to the same height.
Operating Tips
General Tips
• Review
carefully before operating the mower
Clear the area of sticks, stones, wire, branches, and
•
other debris which could be picked up or hit by the
blade and become thrown objects.
•
Keep everyone, especially children and pets, away
from the area of operation.
• A
objects. Never deliberately mow over any object.
the safety instructions and read this manual
.
void striking trees, walls, curbs, or other solid
Each
wheel is adjusted individually with a wheel height
adjustment lever
2-1/2”, 3” and 3-1/2 inches (25, 38, 51, 64, 74 and
86 mm).
. Cutting heights are 1”, 1-1/2”, 2”,
•
If an object is struck, or the mower starts to vibrate,
immediately stop the engine, disconnect the spark plug
wire, and examine the mower for damage.
•
Maintain a
Periodically file down nicks on blade.
•
Replace the blade when necessary with an original
Lawn-Boy replacement blade.
sharp blade
throughout the cutting season.
8
Page 9

•
Only mow dry grass or leaves. W
tend to clump and may cause the mower to plug or the
engine to stall. They may also be slippery to walk on
and could cause you to slip and fall.
et grass and leaves
WARNING
POTENTIAL HAZARD
• W
et grass or leaves can cause you to slip and
contact the blade.
WHA
T CAN HAPPEN
•
Blade contact can seriously injure you.
HOW T
•
•
•
•
O AVOID THE HAZARD
Mow only in dry conditions.
Clean clippings or leaves from the underside of the
mower deck after each mowing.
Keep the engine in good running condition.
Clean the air filter frequently
clippings and dust which clogs the air filter and
reduces engine performance.
. Mulching stirs up more
appearance. If the grass is too long and leaves clumps
on top of the lawn, the mower may plug and cause the
engine to stall.
•
Alternate the mowing direction. This helps disperse
clippings over the lawn for even fertilization.
If the finished lawn appearance is unsatisfactory
or more of the following:
•
Sharpen the blade.
• W
alk at a slower pace while mowing.
•
Raise the height-of-cut setting on your mower
Cut grass more frequently
•
Overlap cutting swaths instead of cutting a full swath
•
with each pass.
•
Set the height-of-cut on the front wheels one notch
lower than the rear wheels. (example: set the front
wheels at the 2 inch setting and the rear wheels at the
2.5 inch setting)
.
, try one
Cutting Leaves
.
Cutting Grass
• In
the heat of Summer
inch height-of-cut settings. Only about
blade should be cut of
setting is not recommended unless the grass is sparse
or it is late Autumn when grass growth begins to slow
down.
When cutting grass over six inches tall, mow using the
•
highest height-of-cut setting and a slower walking
speed; then mow again at a lower setting for best lawn
, cut the grass at the 2, 2.5, or 3
!/3
of the grass
f. Cutting below the 2 inch
• When
•
• W
•
cutting is complete, ensure that 50% of the lawn
shows through the cut leaf cover
or more passes over the leaves.
Position all wheels at the same height-of-cut setting.
alk at a slower mowing speed if the leaves are not
being cut up finely enough to be hidden in the grass.
If you cut up a lot of oak leaves, add lime to your grass
in the spring. Lime reduces the acidity of the oak
leaves.
Maintenance
NOTICE:
any nonr
pr
ovisions of the Lawn-Boy warranty statement, any service or emission contr
performed by an Authorized Lawn-Boy Service Dealer
Continued safe and dependable operation requires routine maintenance.
Maintenance, r
oad engine r
eplacement, or r
epair establishment or individual. However
epair of the emission contr
.
ol devices and systems may be performed by
, to obtain no charge r
ol part r
. This may require one
epairs under the terms and
epair or r
eplacement must be
9
Page 10
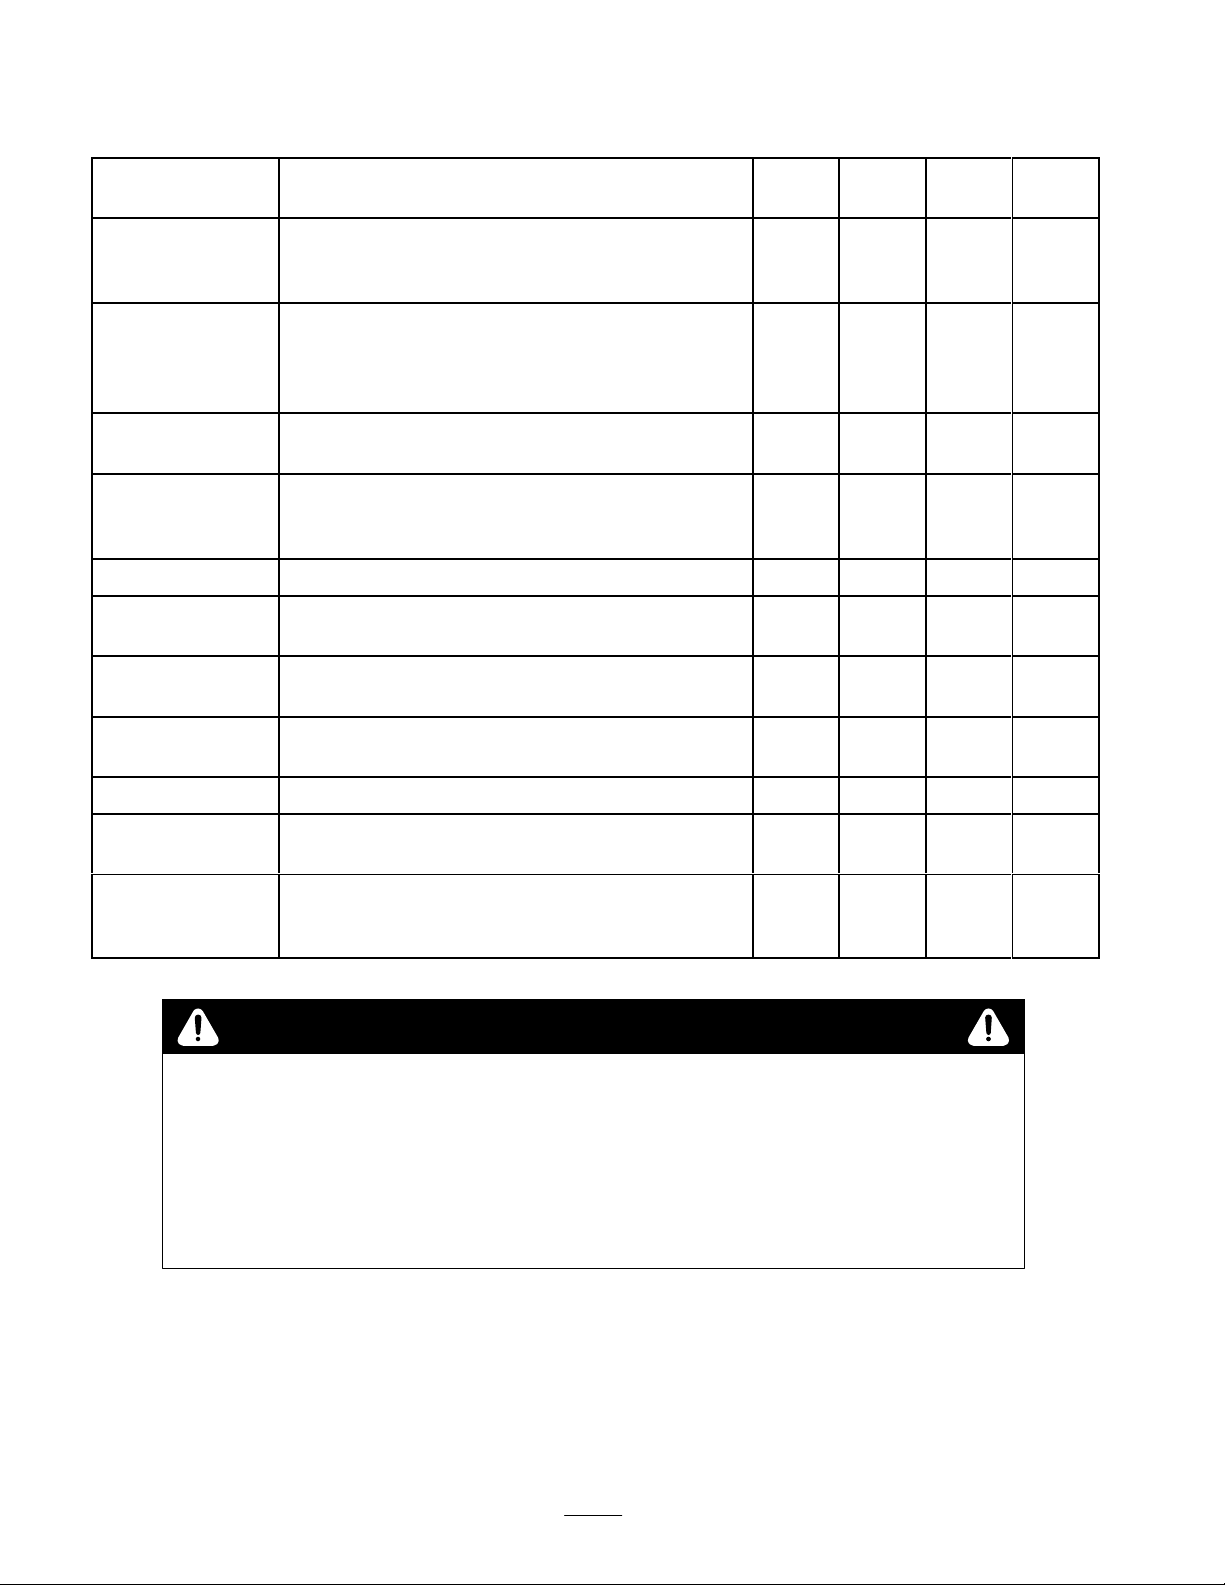
Recommended
Maintenance Schedule
Service
Fasteners
Blade Brake
Housing
Air Filter
Spark Plug
Self-propel
Drive
Blade
Lubrication
Item
Service Operation
Check blade and engine mounting fasteners
frequently
ensure safe operation.
Check stopping time before each use. Blade must
stop within 3 seconds of releasing bail; if not see
your Authorized Lawn-Boy Service Dealer for
repair.
Clean built-up grass clippings and dirt after each
use.
Remove and clean each mowing season or every
50 hours.
conditions are dusty.
Clean, inspect, and gap. Replace if necessary
Clean grass clippings and debris under belt cover
and drive belt.
Sharpen or replace; maintain more frequently if
edge is dulled quickly in rough or sandy conditions.
Grease rear height adjustor brackets
(self-propelled models).
. Keep all nuts, bolts and screws tight to
Clean more frequently if operating
. X
Each
Use25Hours50Hours
X
X
X
X
X
X
X
100
Hours
Exhaust Port
Fuel System
Cooling System
POTENTIAL
•
If you leave the wir
WHA
•
Accidental starting of engine could seriously injur
HOW T
•
Pull wir
accidentally contact spark plug.
Air
Filter
Clean
the air filter once every season or every 50 hours;
clean it mor
e fr
equently under dusty conditions.
Clean every 100 hours.
Check for leakage and/or deterioration of fuel hose.
Replace if necessary
Clean grass clippings, debris or dirt that clog
engine air cooling fins and starter
frequently under dirty or high chaf
HAZARD
e on the spark plug, someone could start the engine.
T CAN HAPPEN
O AVOID THE HAZARD
e off spark plug befor
.
. Clean more
f conditions.
CAUTION
e you or other bystanders.
e you do any maintenance. Also push wir
1.
Snap the air filter cover latch open and swing it to the
side (Fig. 15).
X
X
X
e aside so it does not
Note:
Do not operate the engine without the air filter
element; extreme engine damage will occur
.
10
Page 11
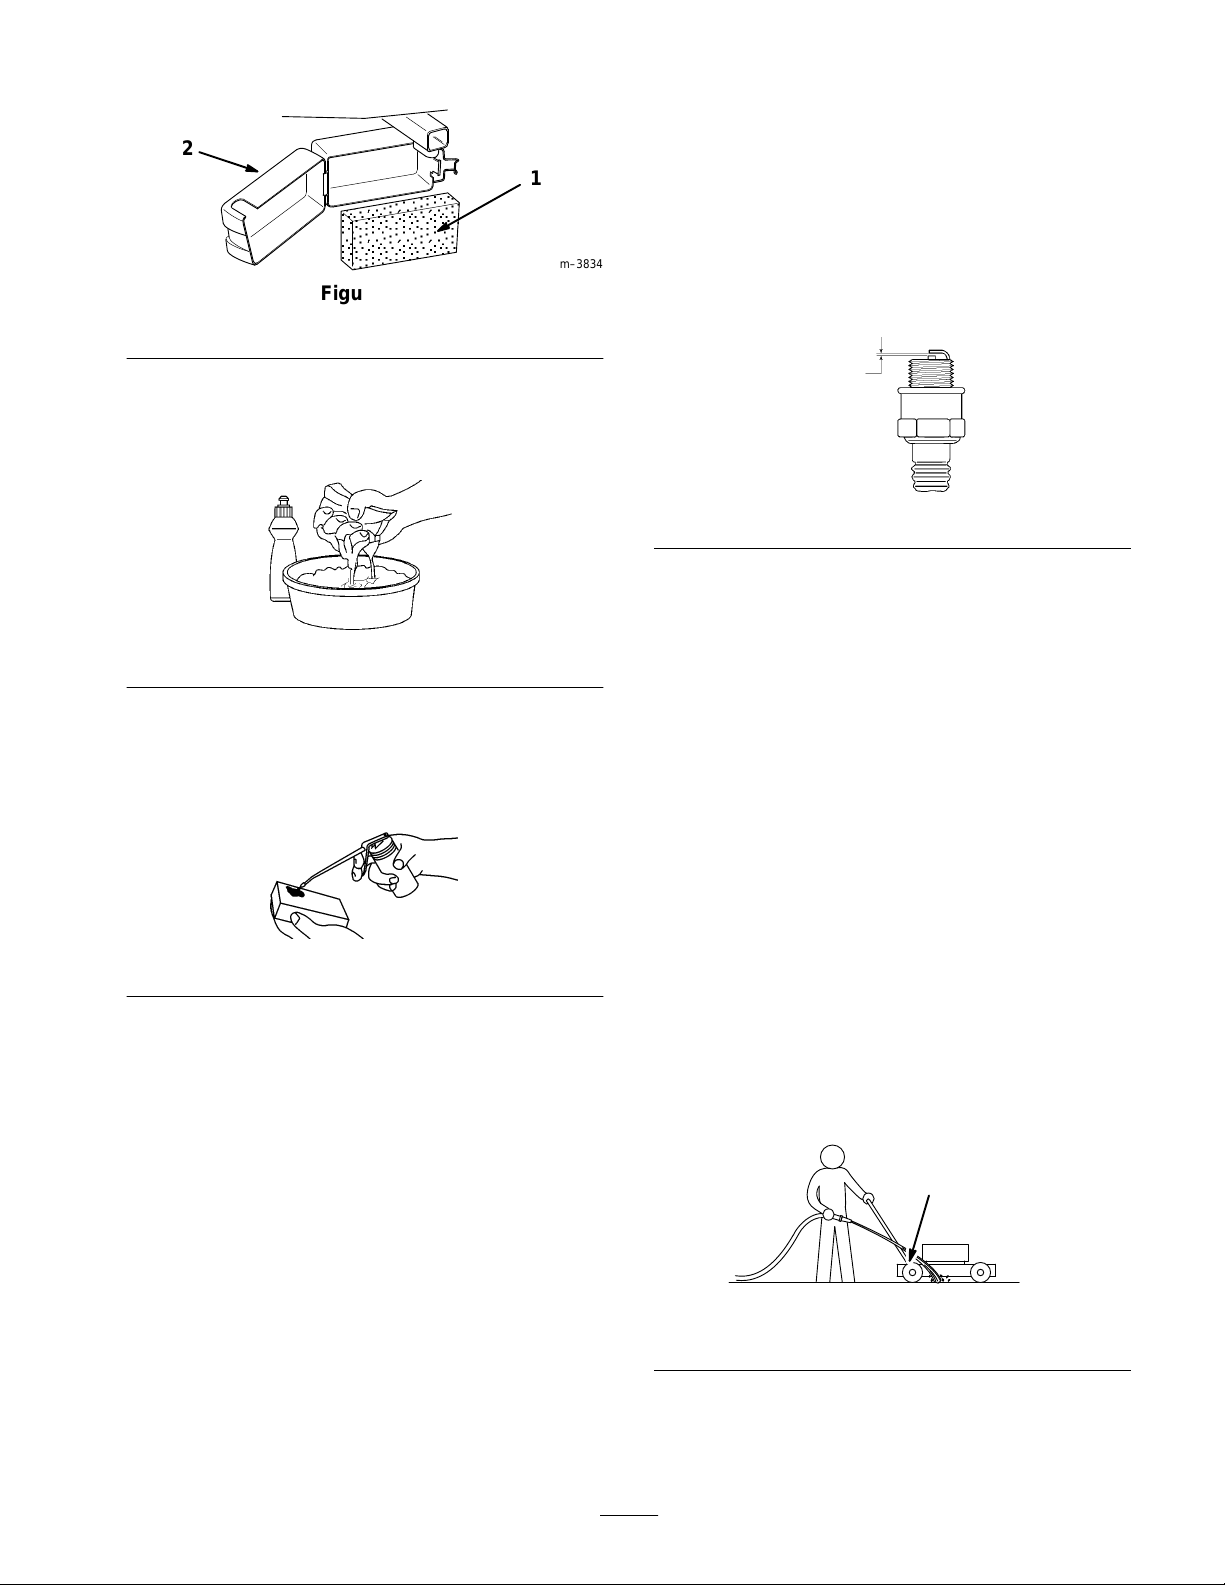
2
Figure
1. Filter 2. Cover
2. Remove
the air filter
.
15
1.
Disconnect the spark plug wire (Fig. 7).
2.
Remove the spark plug and clean it with a wire brush,
1
m–3834
removing carbon build-up.
IMPORTANT
3.
Check the condition of the plug for cracks and
damaged or worn electrodes. Replace it if necessary
Set the spark plug gap at .035 inch (.85 mm) (Fig. 18).
4.
: Do not sand-blast the spark plug.
.035 in.
(.85 mm)
.
ash the air filter in laundry deter
3. W
(Fig. 16).
Figure
4. Squeeze
dry with a paper towel or rag.
5.
Apply one tablespoon of SAE 30W oil to the air filter
(Fig. 17).
6. Squeeze
Blot it lightly with a paper towel to remove excess oil.
7.
Replace the filter with cleanest side facing the
carburetor.
the filter to remove excess liquid and blot it
Figure
the filter until the oil is distributed evenly
gent or kerosene
16
17
986
988
Figure
5. Install
6.
Cleaning
A
clean mower housing provides the best cutting
performance. Check for grass build-up and clean it after
each use.
the spark plug by hand, then torque it to
180 in-lbs. (15 ft-lbs.) (20 N
Connect the spark plug wire.
the Mower Housing
18
⋅m).
Washing Method
1. Position
989
.
surface near a garden hose.
2.
Start the engine.
3.
Hold the running garden hose at handle level and
direct the water to flow on the ground just in front of
the right rear tire (Fig. 19).
The blade will draw in water and wash out clippings.
Let the water run until you no longer see clippings
being washed out from under housing.
the mower on a flat, concrete or asphalt
Ensure that the filter is fully seated in the air box
Note:
and does not pucker
dirt.
Maintaining
A
spark plug that is dirty
worn electrodes may cause hard starting and poor
operation.
Clean or replace the spark plug once a season or every 50
hours, whichever occurs first. Use an NGK BPMR4A
spark plug.
, allowing direct passage of air and
the Spark Plug
, pitted, carbon-covered, or has
11
1. Rear
4. Stop
5. T
urn of
right wheel
the engine.
f the garden hose.
Figure
1
1093
19
Page 12
6.
Start the mower and let it run for a few minutes to dry
out the moisture on the mower and its components.
7.
While the engine is running, engage and disengage the
traction drive several times to dry it out.
Maintaining
A
straight, sharp blade provides maximum cutting
performance. Regularly inspect and sharpen the blade.
the Blade
Scraping Method
If
washing does not remove all debris from under the
mower
, tip it and scrape it clean.
1.
Run the engine dry or remove gas with a hand pump
when the engine is cool.
WARNING
POTENTIAL HAZARD
•
Gasoline is extr
explosive and under certain conditions can
cause personal injury or pr
WHA
T CAN HAPPEN
• T
ipping the mower may cause fuel leakage
fr
om carbur
HOW T
• A
2.
3. T
O AVOID THE HAZARD
void fuel spills by running the engine dry or
r
emoving gas with hand pump; never siphon.
Disconnect the spark plug wire (Fig. 7).
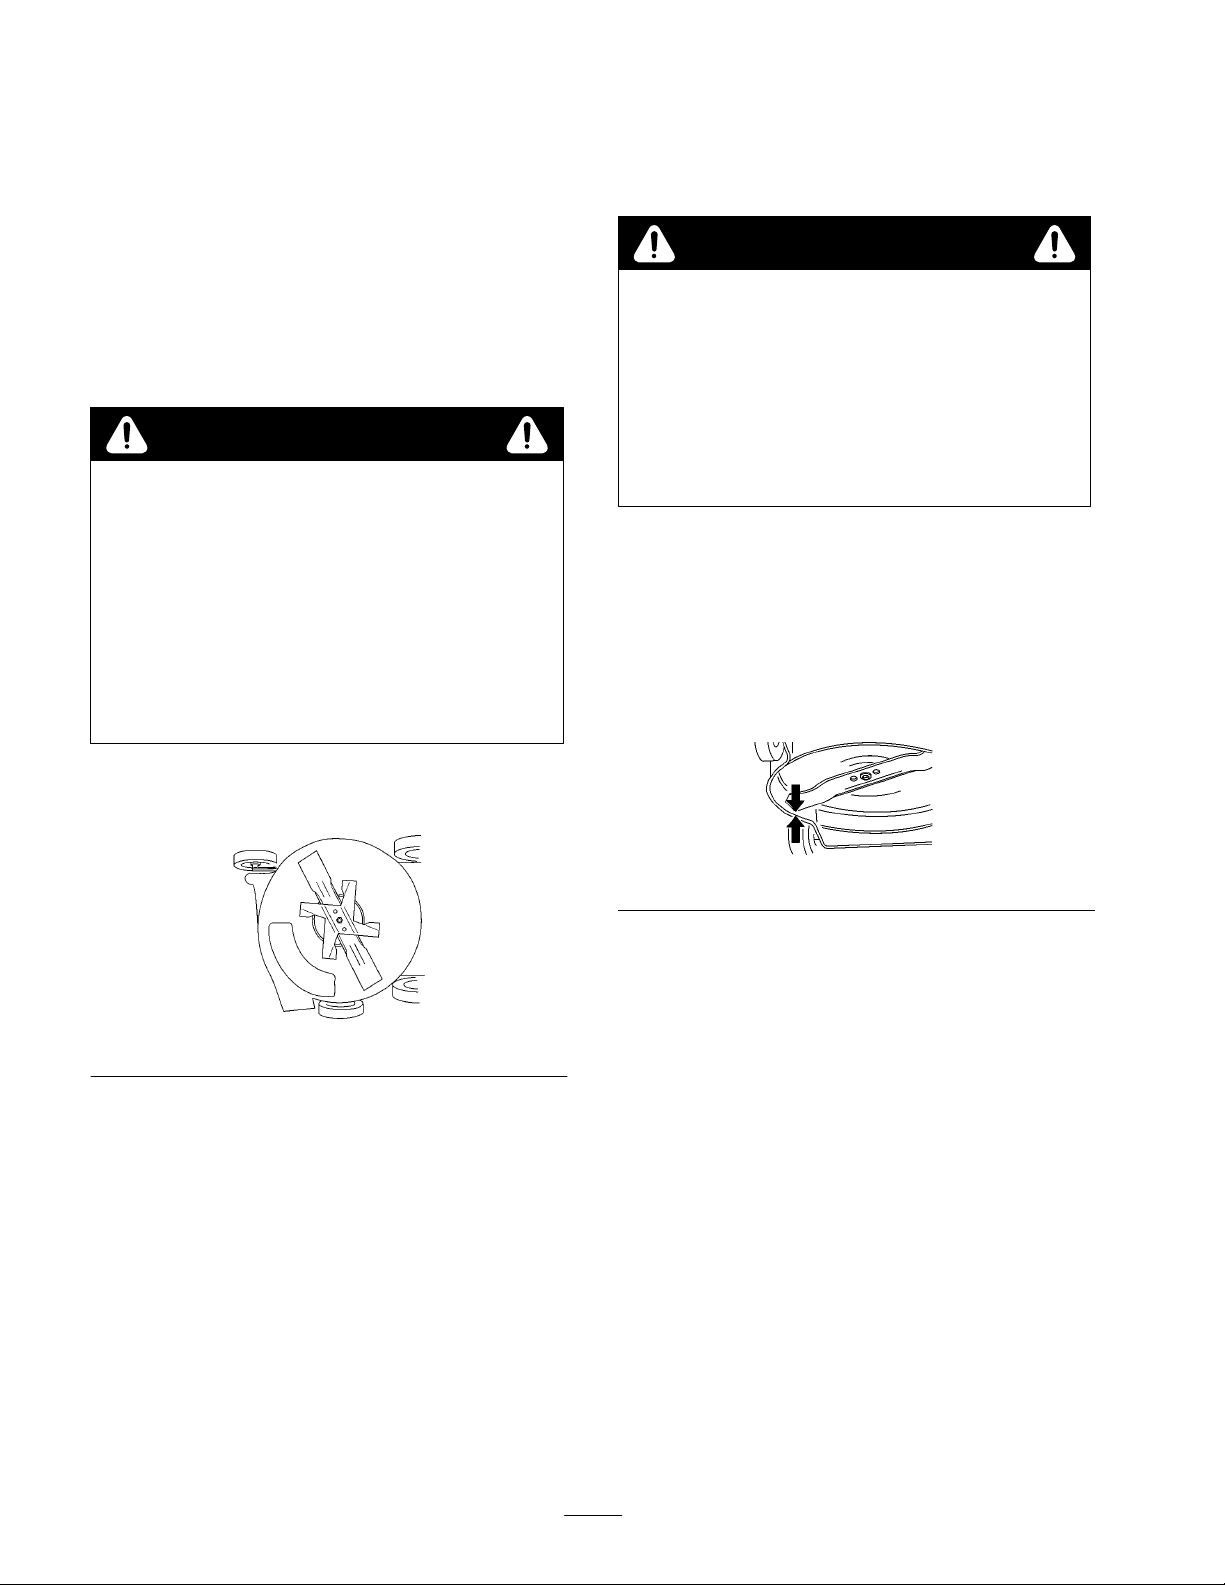
ip the mower onto its right side (Fig. 20).
emely flammable, highly
operty damage.
etor or fuel tank.
WARNING
POTENTIAL HAZARD
•
The blade is sharp.
WHA
T CAN HAPPEN
•
Contact with the sharp blade can cause serious
personal injury
HOW T
• W
1.
2. T
O AVOID THE HAZARD
ear gloves or wrap the sharp edges of the
blade with a rag.
Disconnect the spark plug wire (Fig. 7).
ip the mower onto its right side (Fig. 20).
Checking for Blade Straightness
Measure
housing to the blade tip (Fig. 21). Rotate the blade 180
and measure to the other blade tip.
the distance from the bottom edge of the mower
.
°
Figure
Note:
When the mower is tipped on its side, rotate the
blade as little as possible to avoid starting problems.
4.
Scrape built-up grass clippings and dirt from the
mower housing with a hardwood scraper
ip the mower upright.
5. T
6.
Connect the spark plug wire.
20
.
1036
1005
Figure
22
Note:
If the measurements are not within 1/8 inch (3.2
mm), the blade should be replaced. If, after blade
replacement, the measurements are still not within 1/8
inch (3.2 mm), the crankshaft should be checked for
straightness by your Authorized Lawn-Boy Service
Dealer.
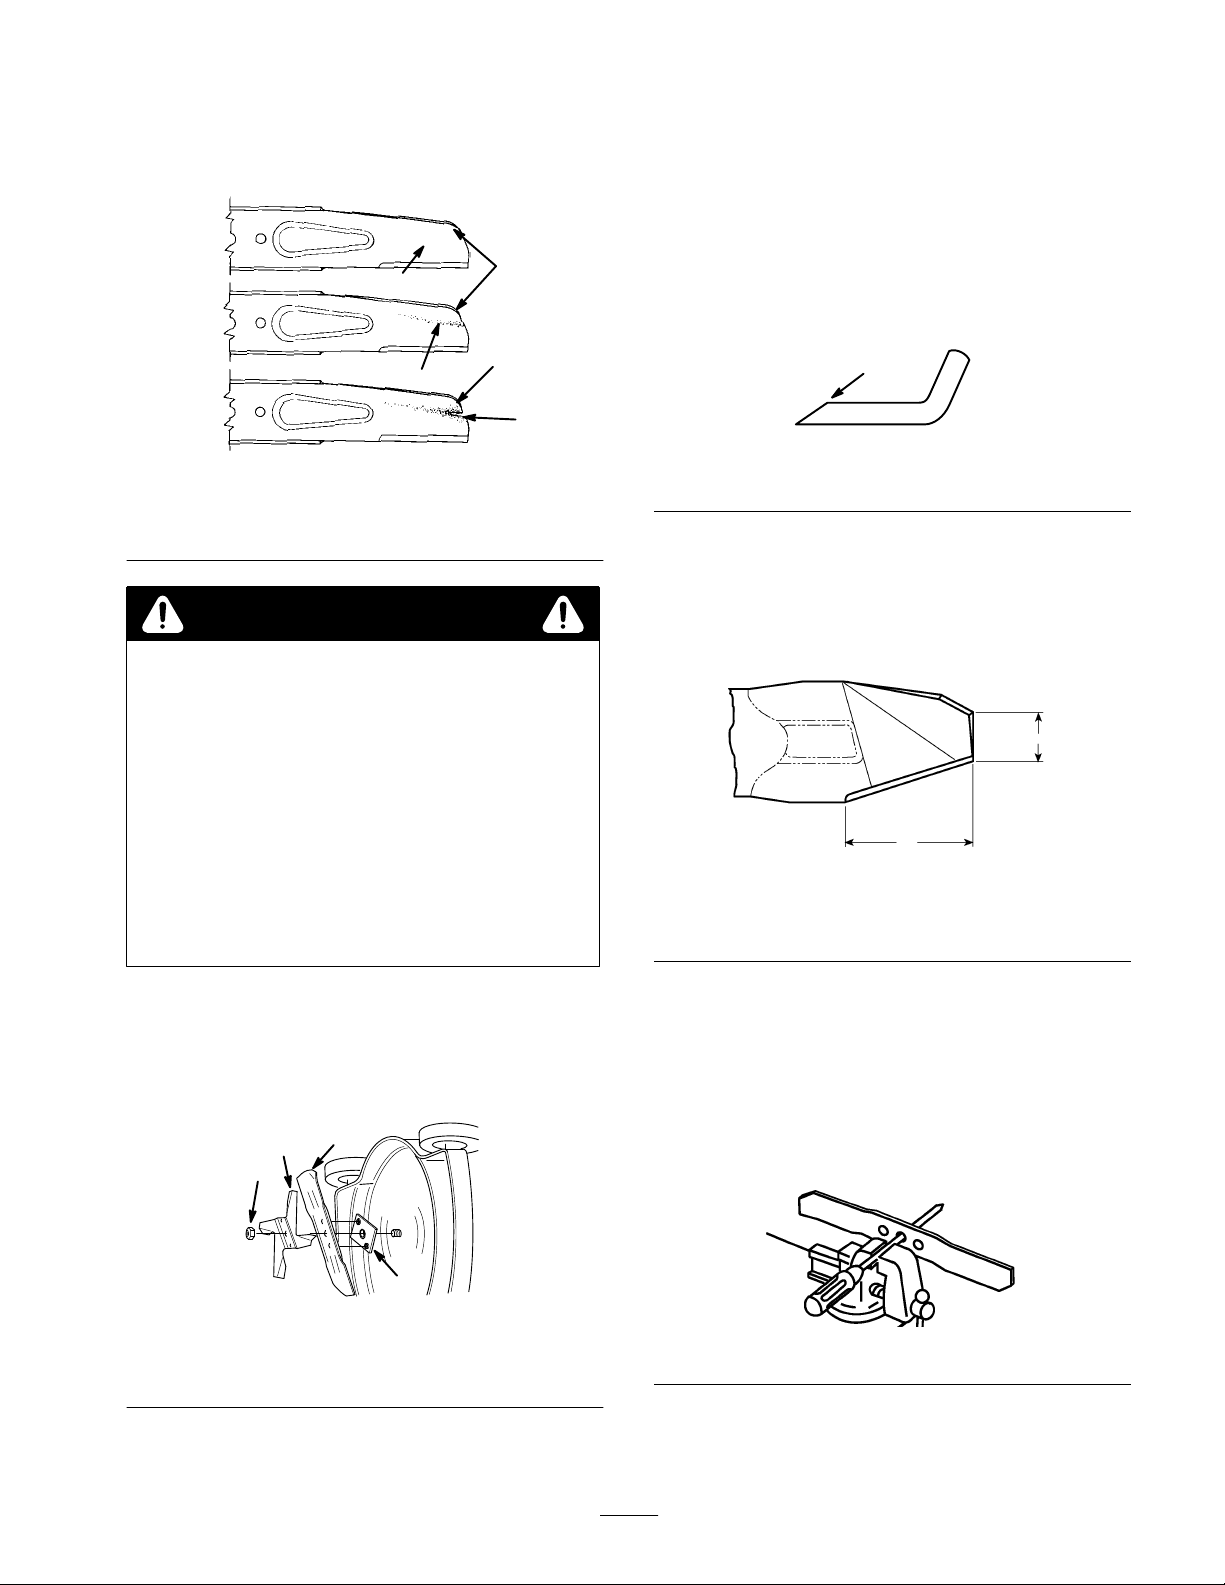
Inspecting the Blade
1. Examine
where the flat and curved parts meet (Fig. 23A).
2.
Complete one of the following:
A.
B.
the blade for sharpness and wear
If a slot or wear is noticed, (Fig. 23B & C), replace
the blade. Refer to the Removing and Installing the
Blade sections.
If the blade is nicked or dull, sharpen it. Refer to
the Removing, Sharpening, Balancing, and
Installing the Blade sections.
, especially
12
Page 13
C.
If there are no signs of wear of dullness, return the
mower to the upright position and replace the spark
plug wire (Fig. 7).
A
1
2
B
3. Examine
Replace it if necessary
Examine the blade driver for bent or sheared drive
4.
lugs. Replace it if necessary
the mulch fan for worn or bent blades.
.
.
Sharpening the Blade
Using
a file, sharpen top side of the blade and maintain
the original cutting angle (Fig. 25).
3
C
23
3. Wear
4.
Slot formed
1. Sail
2. Flat
Figure
part of blade
DANGER
POTENTIAL
•
A worn or damaged blade could br
piece of the blade could be thr
operator’
WHA
T CAN HAPPEN
•
A thr
personal injury or death to the operator or
bystanders.
HOW T
•
Inspect the blade periodically for wear or
damage.
Replace a worn or damaged blade.
•
HAZARD
own into the
s or bystander’s ar
ea.
own piece of the blade could cause serious
O AVOID THE HAZARD
1
4
eak and a
270
1
153
Figure
1. Sharpen
Note:
at this angle only
The blade will remain balanced if same amount of
25
material is removed from both cutting edges.
Note:
The blade should not be ground more than 5 inches
(127 mm) from the outside ends and no less than 2 inches
(51 mm) from the trailing edge (Fig. 26).
2”
(51 mm)
5”
(127 mm)
Figure
26
990
Removing the Blade
1. Remove
2.
Remove the blade from the blade driver (Fig. 24).
1. Blade
2.
Mulching fan
the blade nut and mulching fan (Fig. 24).
3
2
1
4
Figure
nut
24
3. Blade
4.
Blade driver
M–2909
Balancing the Blade
1. Check
Note: You can also check the balance using a
commercially manufactured, blade balancer
13
the balance of the blade by placing the center
hole of the blade over a nail or screwdriver shank
clamped horizontally in a vise (Fig. 27).
Figure
27
.
1007
Page 14
2. If
either end of the blade rotates downward, file that
end (not the cutting edge or the end near the cutting
edge). The blade is properly balanced when neither
end drops.
Installing the Blade
Adjusting
Self–propelled
Whenever the handle height is changed, a new self–propel
cable is installed, or the traction drive belt slips,
adjustment is required.
the Self-propel Cable
Models Only
1. Install
2.
3.
4.
5. Torque
Note:
removing it four times. The locking feature will decrease
and the nut could loosen if not replaced.
6.
Lubricating
the blade driver onto the crankshaft (if
removed) (Fig. 24).
Install the blade over the lugs of the blade driver with
the curved ends toward the mower housing (Fig. 24).
Install the mulch fan into the blade recess (Fig. 24).
Secure the blade with the blade nut (Fig. 28).
1024
Figure
the blade nut to 47 ft-lbs. (63 N
The blade nut must be replaced after installing and
Connect the spark plug wire (Fig. 7).
28
⋅m).
the Self–propel
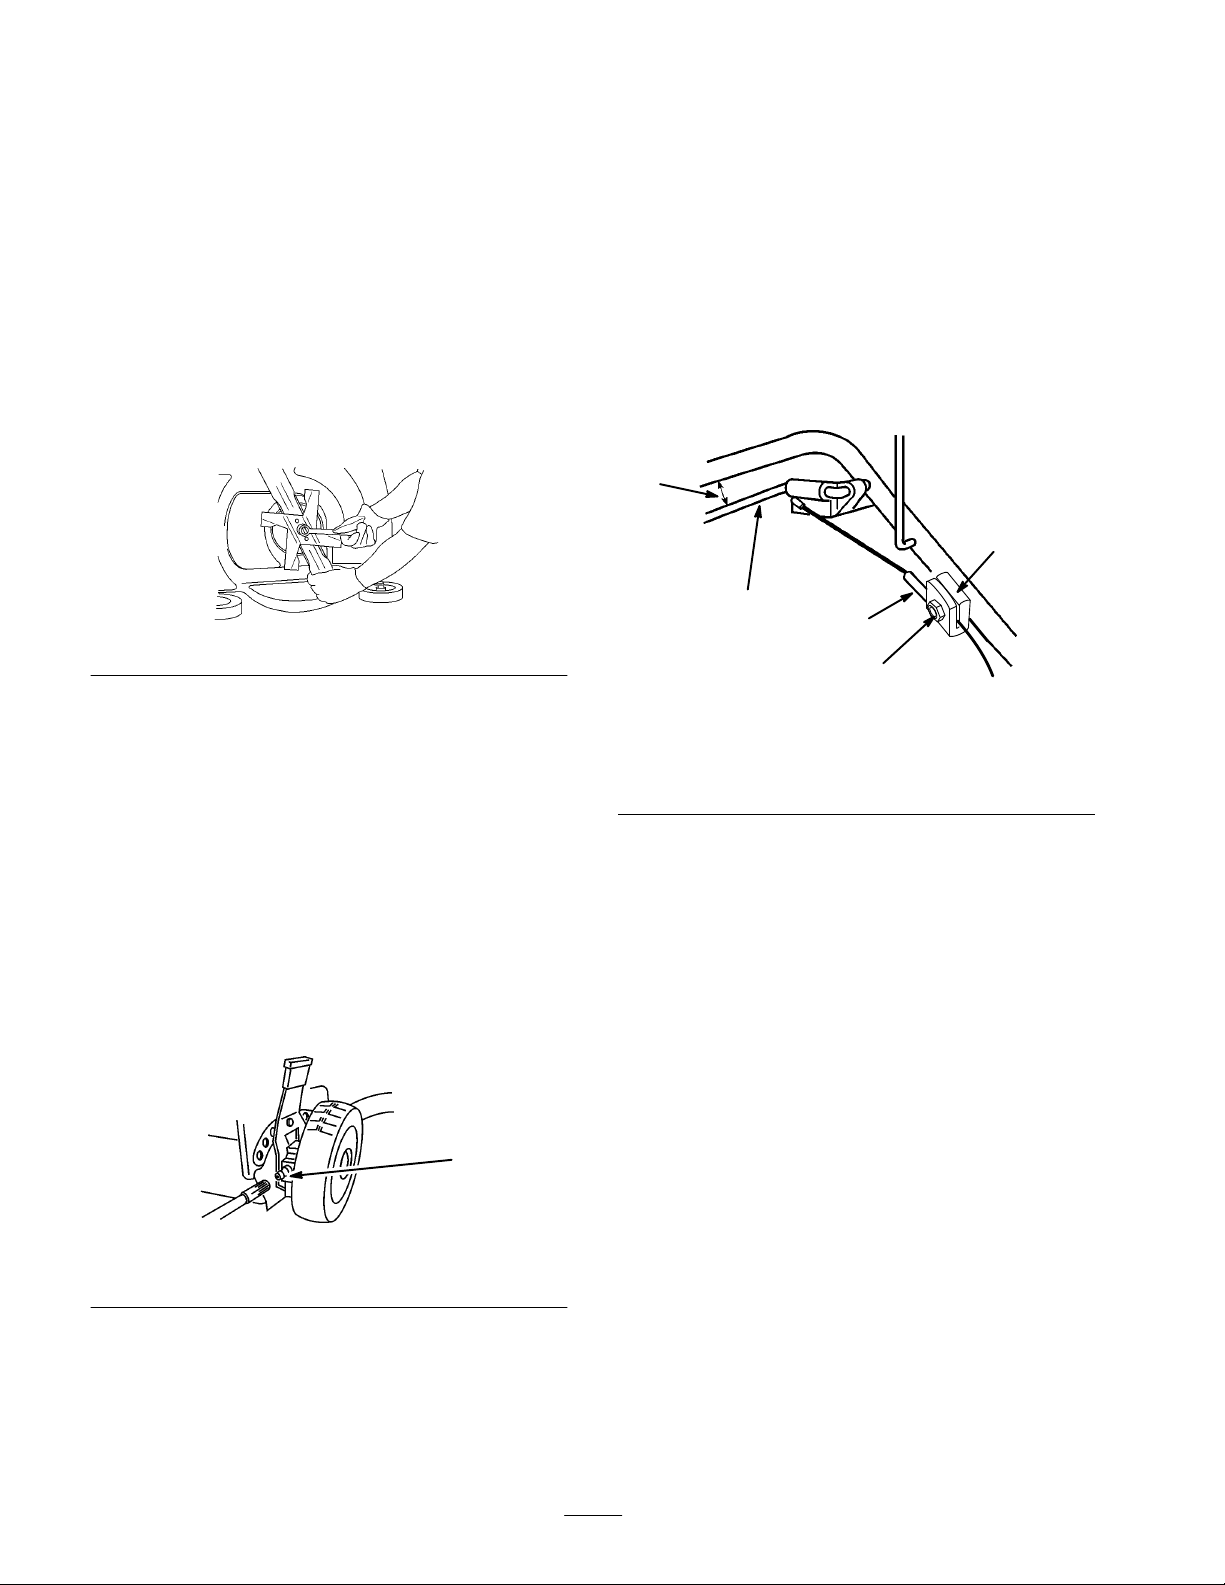
The self–propel cable is adjusted on the handle by moving
the cable jacket held by the cable support.
1.
Loosen the nut on the cable support (Fig. 30).
2.
Hold the self–propel bail 1 to 1
from the handle (Fig. 30).
1
2
Figure
1. 1
to 1
!/2
in. (25 to 38 mm)
2.
Self -propel bail
3.
Cable jacket
3. Pull
the cable jacket down (away from bail) to remove
the slack in the cable between the bail and the cable
support..
3
5
30
4.
5. Nut
!/2
in. (25 to 38 mm)
4
Cable support
1063
Drive
Self–propelled
1. W
ipe the grease fittings on the rear height-of-cut
adjustors (Fig. 29) with a clean rag.
1. Grease
2. Install
apply one or two pumps of #2 multi-purpose lithium
grease to each.
IMPORTANT
and pr
event pr
Models Only
1
Figure
fittings
a grease gun onto each fitting in turn and gently
: Excess gr
oper wheel clutch operation.
29
ease may damage the seals
1018
ighten the nut on the cable support.
4. T
5.
Release the bail and ensure that the cable is loose.
Note:
The cable must be loose when the bail is released or
the mower may creep when the bail is disengaged.
Cleaning
Self–propelled
Under certain conditions, clippings can collect under the
belt drive cover and in the pulley groove. This could cause
belt slippage, loss of self–propel drive, or failure to
disengage the self-propel drive.
Clean grass clippings and debris from under the belt cover
every 25 hours of operation.
1.
Remove the screw from the belt cover (Fig. 31).
the Self-propel Drive
Models Only
14
Page 15
2.
Unhook the cable spring from the drive bracket
(Fig. 31).
3. T
ip the mower on its right side.
4
3
2
m–4461
1. Belt
cover
2. Screw
3. Remove
1
Figure
31
Cable spring
3.
4.
Drive bracket
the belt cover by pulling it straight out from
the engine.
Note:
If the belt cover is pinched between the handle and
handle bracket, remove the handle before removing the
belt cover
. Refer to Changing the Handle Height, page 5,
for more information.
4.
Remove debris from under the cover and pulley
groove.
Replace the belt cover by squezzing the sides together
5.
and inserting the tabs on the belt cover into the
brackets on the engine base (Fig. 32).
WARNING
POTENTIAL HAZARD
•
Gasoline is extr
explosive and under certain conditions can
cause personal injury or pr
WHA
T CAN HAPPEN
• T
ipping the mower may cause fuel leakage
fr
om the carbur
HOW T
• A
O AVOID THE HAZARD
void fuel spills by running the engine dry or
r
emoving the gas with hand pump; never
siphon.
4.
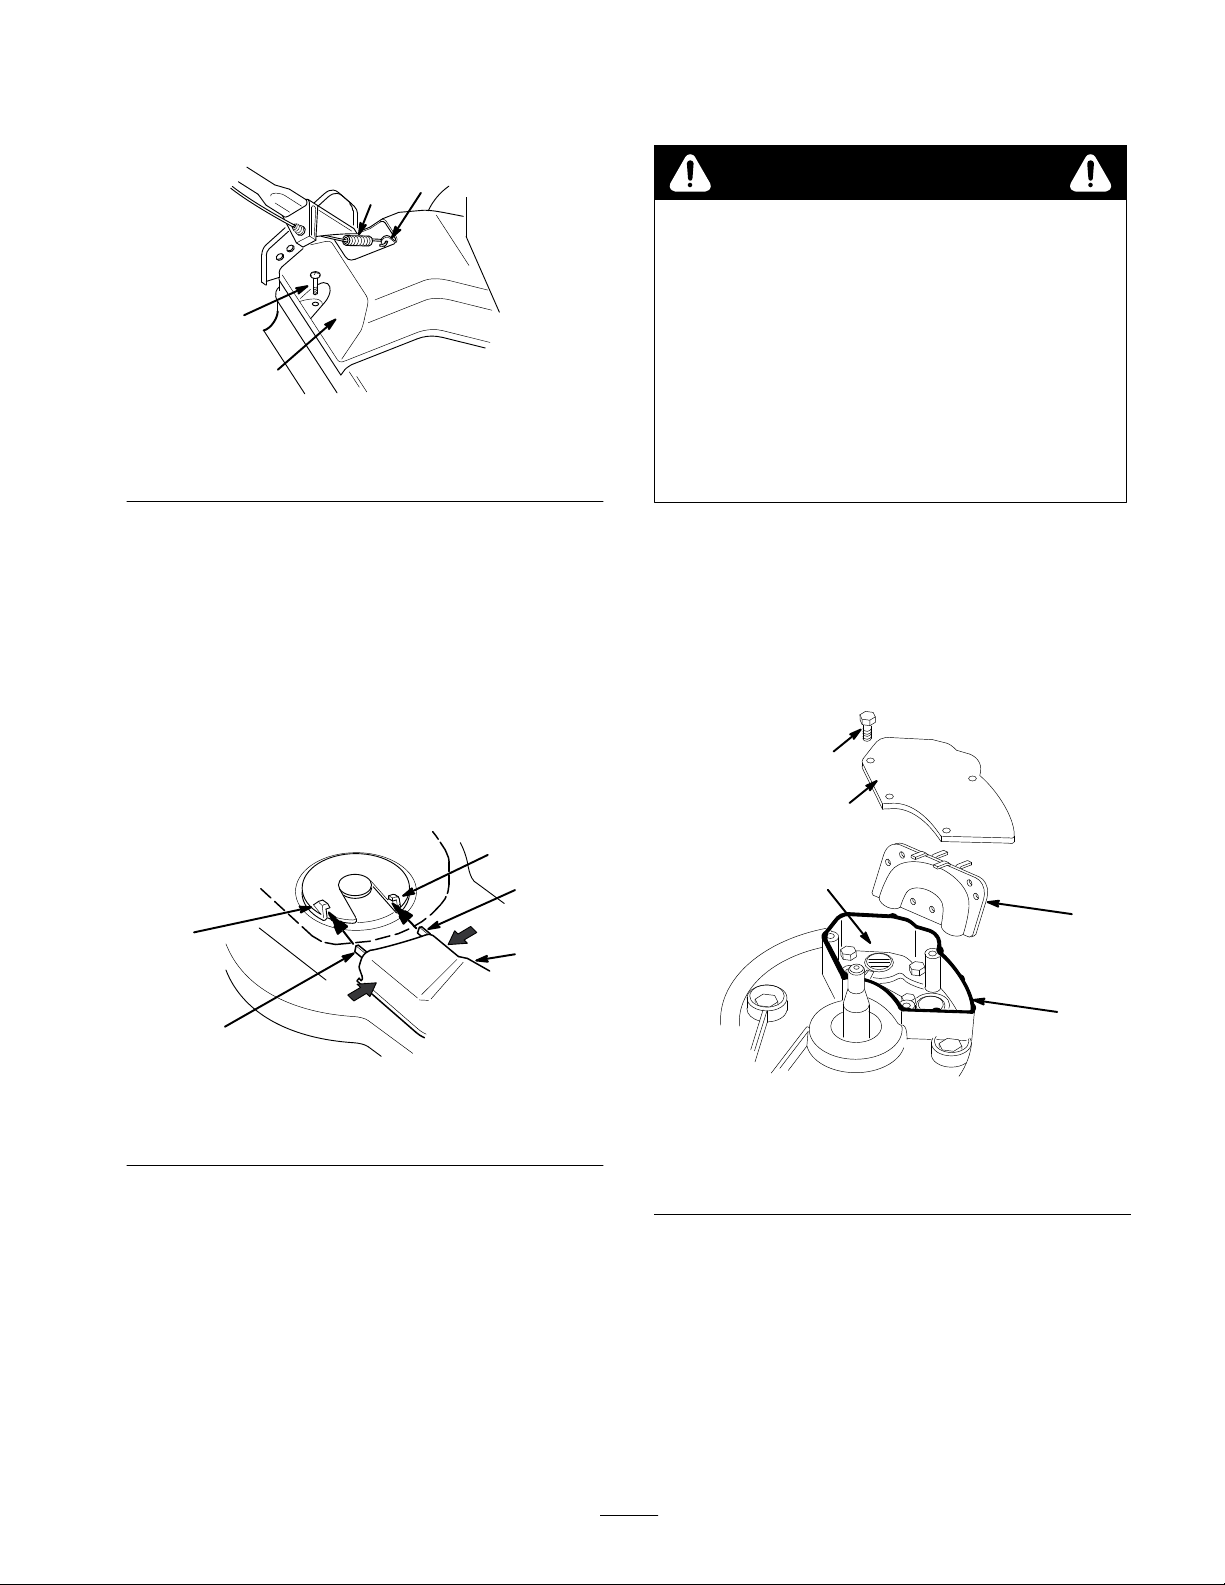
Remove the blade nut, mulch fan, and blade. Refer to
the Removing the Blade section, page 13.
5.
Remove the four capscrews attaching the cover plate
to the engine mounting plate (Fig. 33).
6.
Remove the transfer pipe (Fig. 33).
7.
Inspect the transfer pipe and clean it if it is dirty
emely flammable, highly
operty damage.
etor or fuel tank.
2
1
.
3
2
Figure
1. Belt
cover
2. Tab
6. Secure
7.
Exhaust
Carbon
power
1.
2.
the belt cover with the screw
Hook the cable spring onto the drive bracket.
Ports
deposit build-up causes excessive wear and loss of
. Check and clean them every 100 hours.
Disconnect the spark plug wire (Fig. 7).
Drain the gasoline using a hand pump.
32
3. Bracket
.
3
2
4
3
1
5
m–4472
m–3836
1. Cover
2.
Cap screw
3. T
ransfer pipe
8. Rotate
Figure
plate
the crankshaft slowly until the piston covers the
33
4.
Exhaust port
5.
High temperature silicone
sealant
exhaust port (Fig. 33).
9.
Using a wooden dowel, loosen carbon deposits by
inserting the dowel into the port.
Note:
Do not use metal tools; they could scratch the
piston.
Set mower the upright.
10.
15
Page 16
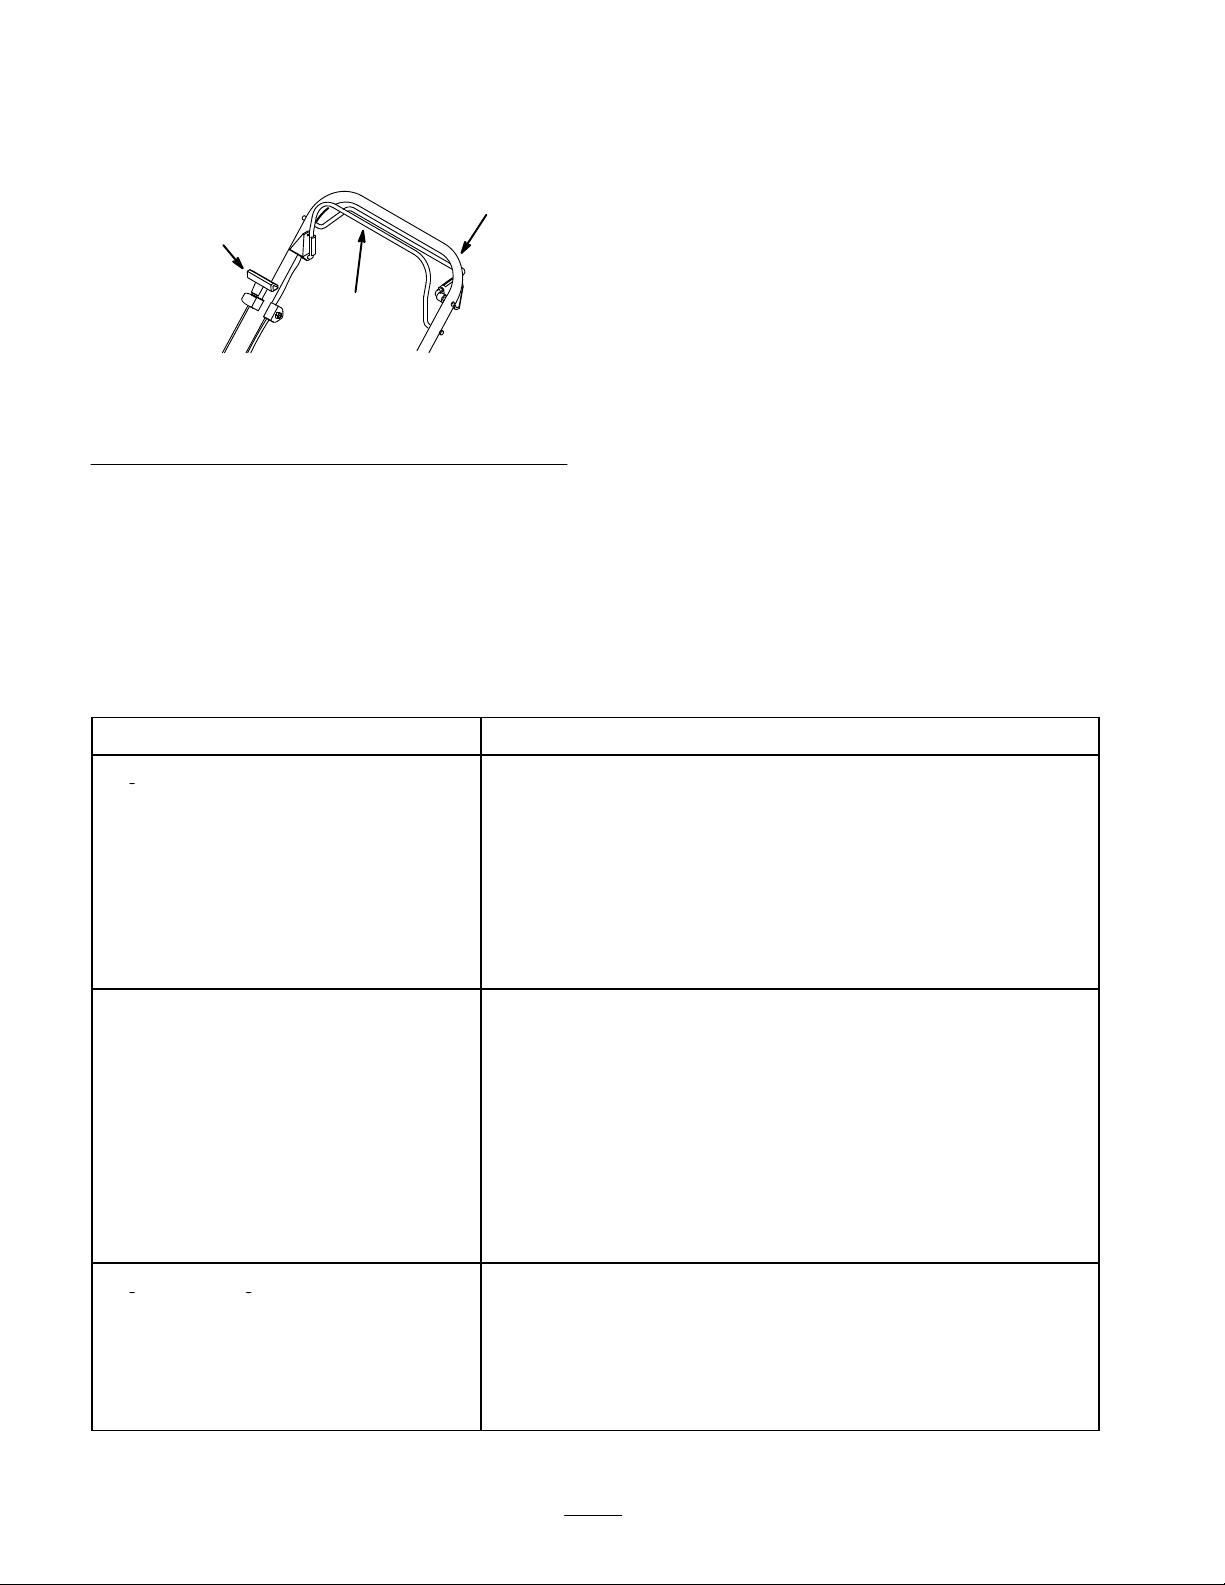
11.
g
gg
Hold the blade control bail against the upper handle
(Fig. 34) and pull the starter rope several times to blow
out loose carbon.
3
1
34
3.
Starter handle
1. Blade
2.
Upper handle
Figure
control bail
13.
Run a bead of high temperature, automotive silicone
sealant along the edge of the engine mounting plate
where the cover plate will rest (Fig. 33).
14.
2
Install the transfer pipe and cover plate (Fig. 33),
torquing the four capscrews to 75 in-lbs. (8.5 N·m).
15.
Install the blade driver
, blade, and mulch fan with the
blade nut. Refer to the Installing the Blade section,
page 14.
16.T
982
orque the blade nut to 560 in-lbs. (47 ft-Ibs.)
(63 Nm).
17.T
ip the mower upright.
18.
Connect the spark plug wire.
12.Wipe
the bottom of the cover plate and the edge of the
engine mounting plate where the sealant will go with a
clean cloth to remove any dirt (Fig. 33).
Troubleshooting
Y
our mower was designed and built for trouble-free operation. Check the following components and items carefully
problem continues, see your Authorized Lawn-Boy Service Dealer
PROBLEM
Engine will not start
1.
Fill the fuel tank with fresh gasoline/oil mix
2.
Move throttle lever to the F
3.
Press the primer three times
4.
Spark plug
•
Connect the spark plug wire
•
Clean the spark plug, check the spark plug gap, and replace
it if it is damaged
Engine starts hard or loses power
1.
Move the throttle lever to the F
2.
Drain and refill the fuel tank with fresh gasoline/oil mix
3.
Clean the gas cap vent hole
.
CORRECTIVE
AST position
AST position.
ACTION
. If a
Engine runs rough
4.
Clean or replace the air filter element
5.
Clean the mower discharge chute
6.
Clean the underside of the mower deck
7.
Clean the spark plug, check the spark plug gap, and replace it
if it is damaged
1.
Connect the spark plug wire
2.
Clean the spark plug, check the spark plug gap, and replace it
if it is damaged
3.
Move the throttle lever to the F
4.
Clean or replace the air filter element
AST position
16
Page 17
PROBLEM
gy
CORRECTIVE ACTION
Mower or engine vibrates excessively
Uneven cutting pattern
Discharge chute plugs
Mower will not self-propel
Accessories
1.
Balance the blade
2. T
ighten the blade mounting nut
3.
Clean the mower discharge chute
4.
Clean the underside of the mower deck
5. T
ighten the engine mounting bolts
1.
Place all four wheels at same height
2.
Sharpen and balance the blade
3.
Change the mowing pattern
4.
Clean the underside of the mower deck
1.
Move throttle lever to the F
2.
Raise the cutting height
3.
Allow grass to dry before mowing
4.
Clean the underside of the mower deck
1.
Adjust the self-propelled cable
2.
Clean debris from under the belt cover
AST position
2
Accessories
are available from your Authorized Lawn-Boy Dealer
proper installation, follow these instructions.
Installing
1. Stop
(Fig. 7).
2.
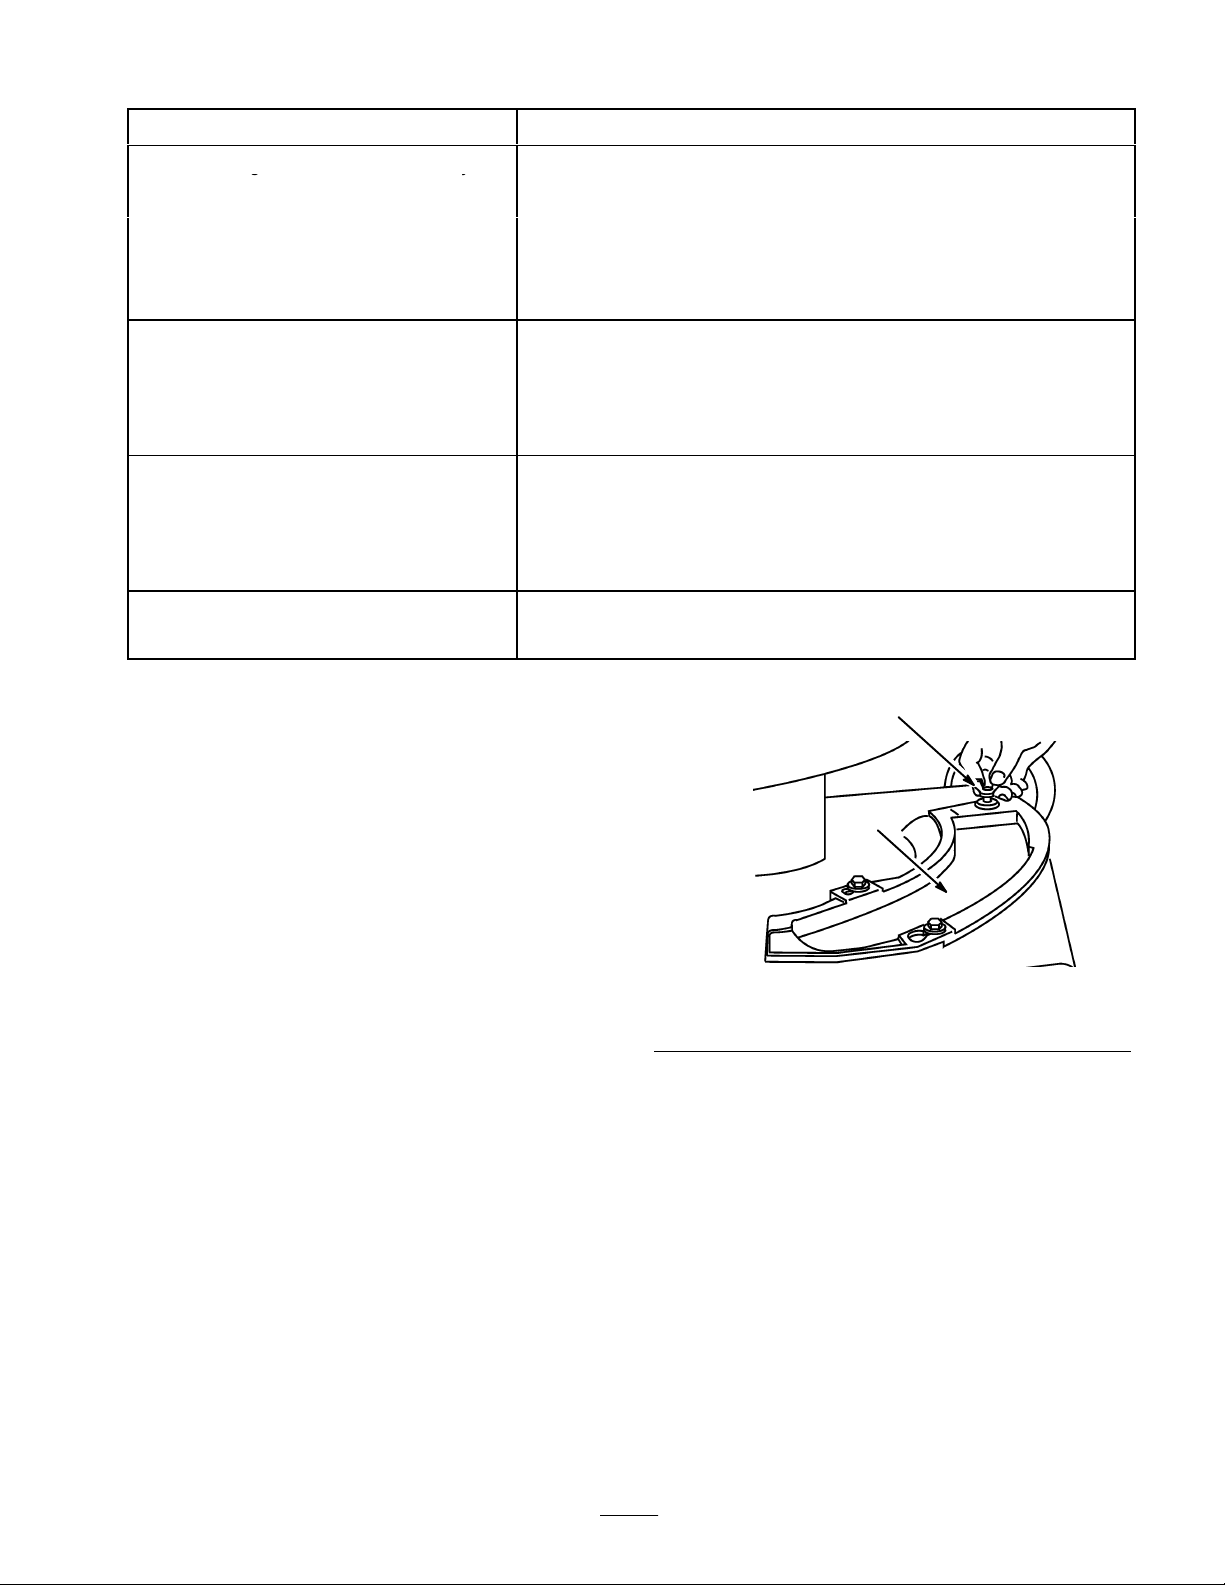
Remove the wing screw that fastens the cover plate to
the housing (Fig. 35).
may have been shipped with your mower or
a Rear Grass Catcher
the engine and disconnect the spark plug wire
. For
1
Figure
1. Cover
3. Slide
4.
or mulch plate
the cover plate counterclockwise and remove it
from the mower housing.
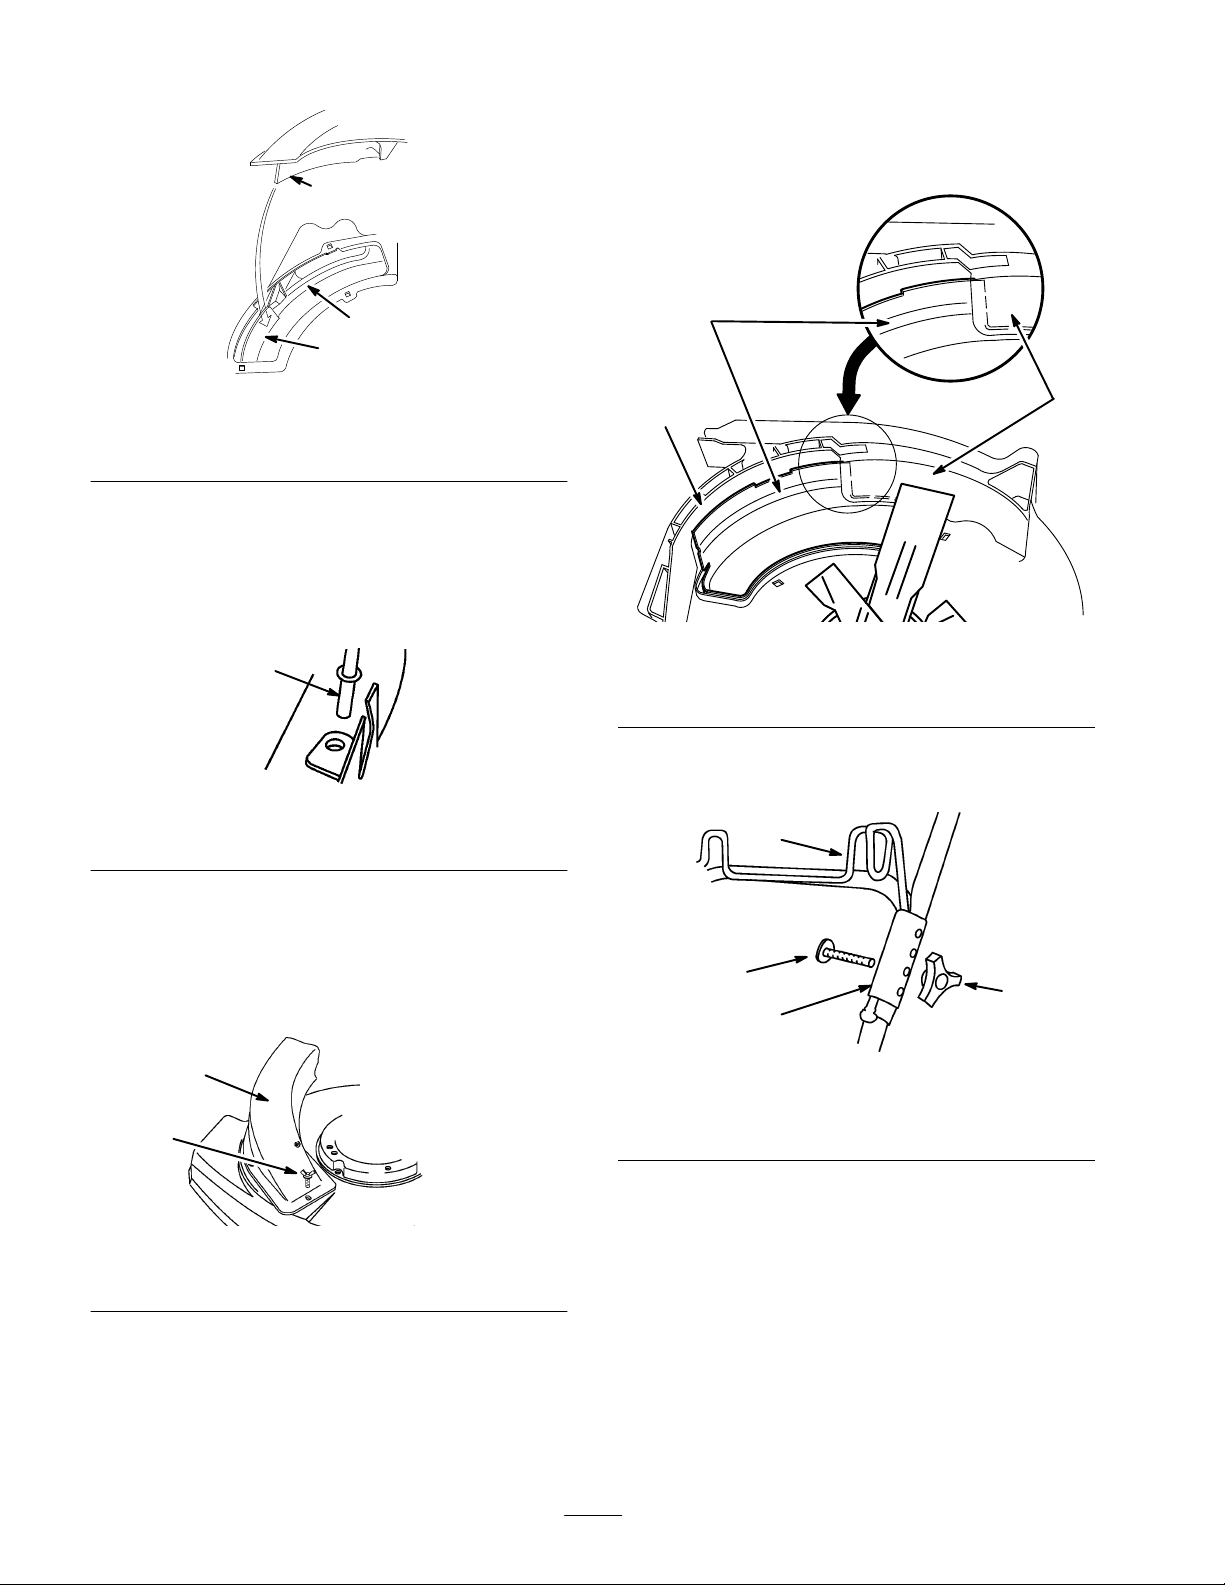
Place the front corner of the chute baf
opening. Rotate the chute counterclockwise and push
it down into the deck opening (Fig. 36).
35
2.
Wing screw
fle into the deck
996
17
Page 18
Note:
The baf
fle must go behind the front deck baf
fle and
between the blade and toe guard to prevent contact with
the blade (Fig. 39).
1
3
2
1073
Figure
1. Chute
2.
Note:
baf
baf
fle
Deck baf
fle
The chute baf
fle must go behind the front deck
fle and between the blade and toe guard to prevent
36
3. T
oe guard
contact with the blade.
5.
Insert the chute support rod through the hole in the
right side of the deck (Fig. 37).
1
1. Chute
Figure
support rod
37
1014
1
3
Figure
1. Baffle
2. Front
9. Remove
deck baf
fle
the knob and bolt securing the left side upper
and lower handle sections (Fig. 40).
4
39
3. T
2
1072
oe guard
6. Push
the key hole slots on the chute down over the two
shoulder bolts on the mower housing, and slide the
chute clockwise to lock it in place.
7.
Secure the chute assembly with the wing screw
(Fig. 38).
1
2
Figure
1. Chute
8. Check
assembly
the clearance between the blade tips and the
baf
fle, ensuring that there is no contact (Fig. 39).
38
2.
Wing screw
1013
2
3
1011
40
Figure
1. Knob
2. Bolt
10.Hold
a hanger clamp on the outside of the handle
3. Hanger
4.
Bag hanger
clamp
sections, and insert a bolt from the inside of the handle
sections through the holes in the hanger clamp
(Fig. 40).
11.
Position the bag hanger leg into the hanger clamp
groove and secure it with a knob (Fig. 40).
12.
Repeat steps 9 through 1
1 for the other side.
1
18
Page 19
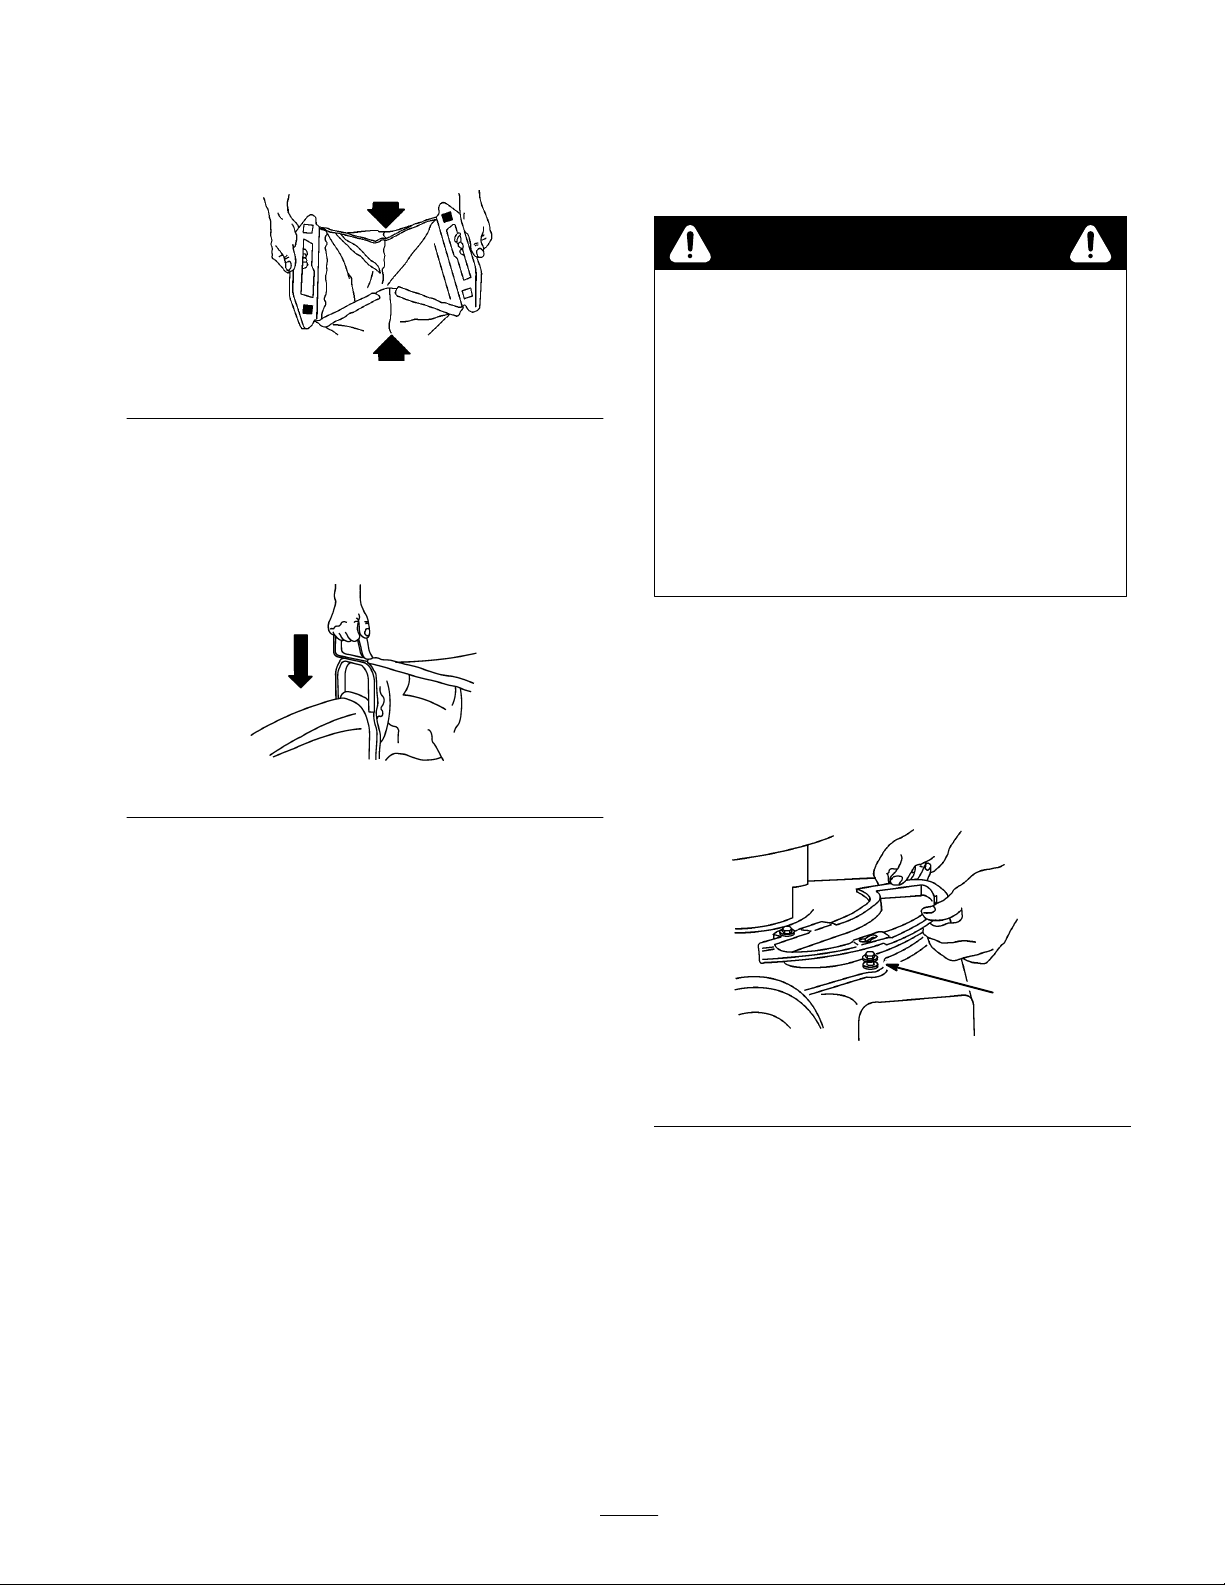
13.
Close the rear of the bag by folding the sides in and
pressing the interlocking rear handle halves together
(Fig. 41).
Figure
14.Hang
15.
the rear bag handles on the bag hanger on the
handle.
Grasp the bag assembly handle and slide it over the
flange of the grass chute (Fig. 42). Push downward on
the handle until it seats into position.
41
1012
Installing
To
convert from mulching operation to side dischar
mulch plate must be removed and a cover plate installed.
the Cover Plate
ge the
WARNING
POTENTIAL HAZARD
•
An uncover
objects to be thr
bystander’
blade could occur
WHA
T CAN HAPPEN
• Thr
own objects or blade contact can cause
serious injury
HOW T
•
Never operate the mower unless a cover plate,
mulch plate, or grass chute and catcher ar
installed.
1.
Stop the engine and disconnect the spark plug wire
(Fig. 7).
2.
Remove the wing screw that fastens the mulch plate to
the housing (Fig. 35).
ed discharge opening will allow
own in the operator’s or
s dir
ection. Also, contact with the
.
.
O AVOID THE HAZARD
e
Figure
16.Ensure
Note:
and the upper holes loosens the assembly
17.
Note:
deterioration and wear
replace it when necessary with a genuine Lawn–Boy
replacement bag. A weakened or inferior bag may let
objects pass through, causing injury
that the bag is taut on the top cloth area
between the front bag handle and the rear bag hanger
handles. If the bag is too tight or too loose, adjust it as
follows:
Remove the bag from the rear bag hanger
A.
Remove the bolts and knobs securing the hanger
B.
clamps to the handle sections (Fig. 40).
C.
Assemble the hanger clamps on the handle
sections, using whichever set of holes best holds
the bag taut.
Using the lower holes tightens the bag assembly
Connect the spark plug wire.
Under normal use, bag materials are subject to
. Check the grass bag often and
42
.
.
.
1010
3.
Slide the mulch plate counterclockwise and pull it up
and out of the mower housing.
4.
Slide the cover plate over the shoulder bolts (Fig. 43).
1
995
Figure
1. Shoulder
5. Slide
6.
Secure the cover plate with the wing screw
Connect the spark plug wire (Fig. 7).
7.
Installing
To
convert from side discharge operation to mulching the
cover plate must be removed and the mulch plate
installed.
bolt
the cover plate clockwise.
the Mulch Plate
43
.
19
Page 20
WARNING
POTENTIAL HAZARD
•
An uncover
objects to be thr
bystander’
blade could occur
WHA
T CAN HAPPEN
• Thr
own objects or blade contact can cause
serious injury
HOW T
•
Never operate the mower unless a cover plate,
mulch plate, or grass chute and catcher ar
installed.
1.
Stop the engine and disconnect the spark plug wire
(Fig. 7).
2.
Remove the wing screw that fastens the cover plate to
the housing (Fig. 35).
3.
Slide the cover plate counter clockwise and remove it
from the mower housing.
4.
Place the front corner of the mulch plate baffle into the
deck opening (Fig. 36).
5.
Rotate the mulch plate counterclockwise and push it
down into the deck opening (Fig. 36).
Note:
The mulch plate baf
deck baf
prevent contact with the blade.
6.
7.
8.
fle and between the blade and toe guard to
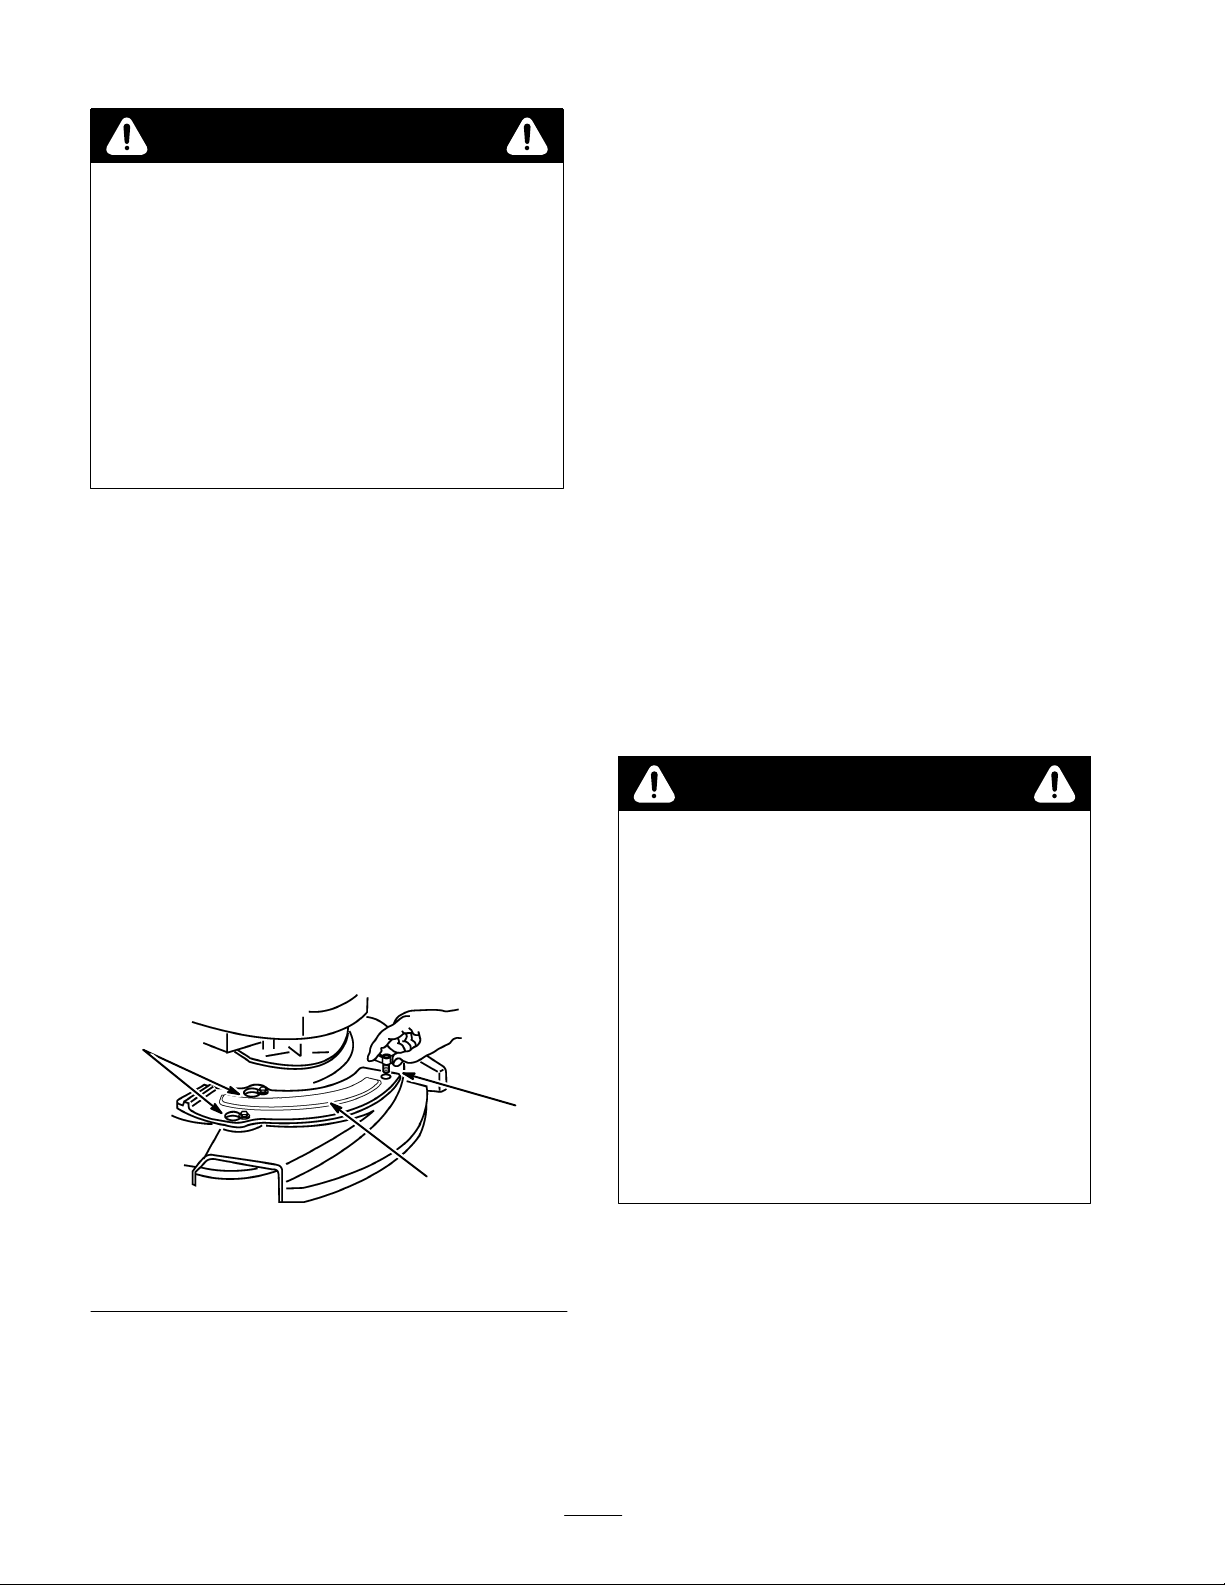
Slide the mulch plate over the shoulder bolts (Fig. 44).
Slide the mulch plate clockwise.
Secure the mulch plate with the wing screw (Fig. 44).
2
ed discharge opening will allow
own in the operator’s or
s dir
ection. Also, contact with the
.
.
O AVOID THE HAZARD
fle must go behind the front
1
10.
Connect the spark plug wire.
Note:
Use only a genuine Lawn–Boy replacement cutting
blade. Other blades may strike the mulch plate when the
engine is started and run.
Mulching Operation
To
achieve the best mulching action, set the mower height
of cut so that no more than 1/3 of grass stem is cut of
maximum of 1 inch (25 mm) long clippings. If you
attempt to mulch more or if the grass is very lush, the
mulching action will be poor
may be beneficial to use the side discharge or grass
e
catcher instead of mulching. A few days later
the mulch plate installed will put you back on schedule.
. Under these conditions it
, a pass with
f;
Storage
T
3
1008
o prepare the mower for of
recommended maintenance procedures. Refer to the
Maintenance section.
Store the mower in a cool, dry place.
Fuel
POTENTIAL HAZARD
•
In certain conditions, gasoline is extr
flammable and highly explosive.
WHA
T CAN HAPPEN
•
A fir
e or explosion fr
and others and cause pr
HOW T
•
• T
•
O AVOID THE HAZARD
Do not store gasoline (fuel) over long periods of
time.
o pr
event possible explosion of vaporized fuel,
do not stor
carbur
(Example: furnace or water heater pilot light).
Allow the engine to cool befor
enclosure.
e the mower with fuel in the tank or
etor in an enclosur
f-season storage perform
WARNING
emely
om gasoline can burn you
operty damage.
e with an open flame
e storing in any
Figure
1. Mulch
2.
9. Check
Note:
between the blade and toe guard to prevent contact with
the blade (Fig. 39).
plate
Shoulder bolts
the clearance between the blade tips and the
baf
fle, ensuring that there is no contact (Fig. 39).
The baf
fle must go behind the front deck baf
44
3.
Wing screw
fle and
W
e recommend Lawn-Boy 2 + 4r Fuel Conditioner to
stabilize fuel for storage (Fig. 6). If possible, the last fuel
fill of the year should be treated with Lawn-Boy 2 + 4
Fuel Conditioner
Plan ahead and try to run the fuel tank empty when
mowing the last time prior to storage. The smaller the
amount of fuel in the tank, the shorter the time required to
run the fuel system dry
from lack of fuel.
.
. Run the mower until engine stops
20
r
Page 21
Engine
1.
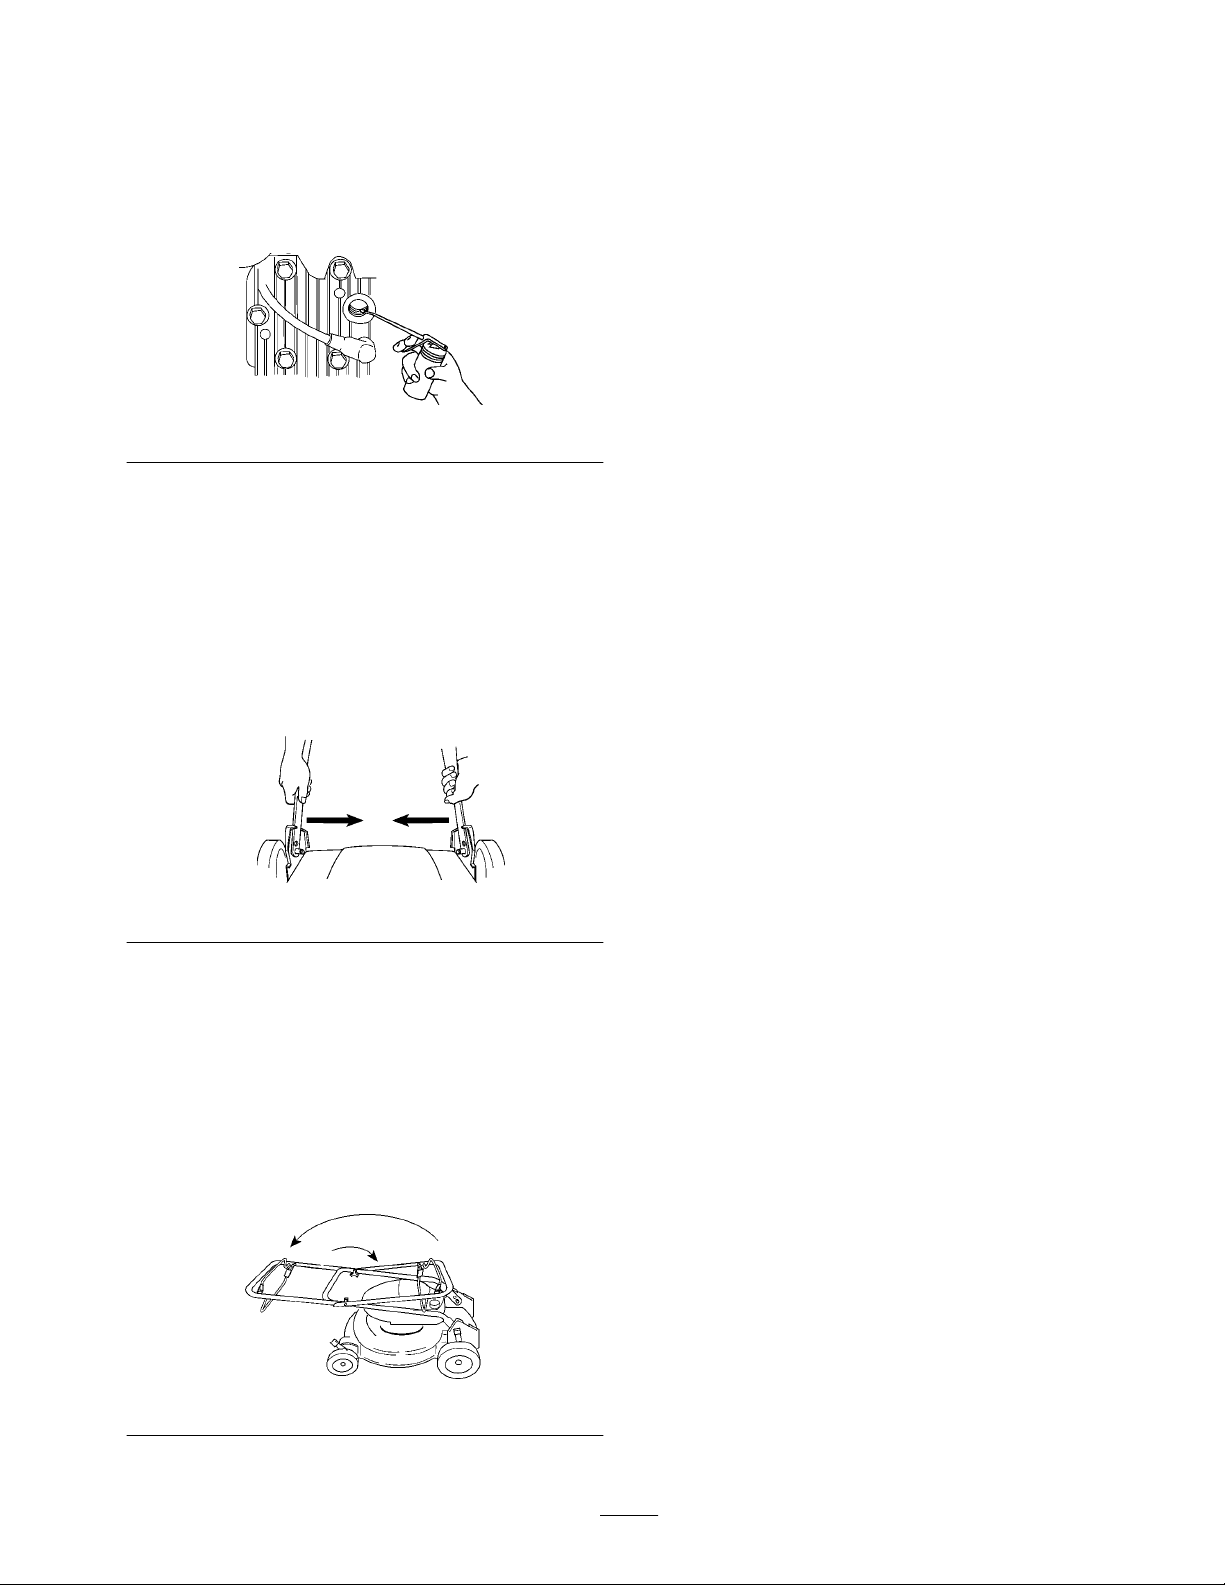
Remove the spark plug.
2.
Using an oil can, squirt about one tablespoon of oil
through the spark plug hole (Fig. 45).
Figure
45
1009
Removing
1. Unfold
2.
3.
4.
5.
6.
the handle. Refer to the handle assembly
instructions in the Assembly section
Check and tighten all fasteners.
Remove the spark plug and spin the engine rapidly
using the starter to blow excess oil from the cylinder
Clean the spark plug or replace it if it is cracked,
broken, or the electrodes are worn.
Install the spark plug and torque it to 180 in-lbs.
(15 ft-lbs.) (20 N
Perform the recommended maintenance procedures.
Refer to the Maintenance section.
From Storage
m).
.
3. Slowly
4.
Folding
1. Squeeze
2. Rotate
3.
rotate the engine several times, using the
starter rope, to distribute the oil (Fig. 10).
Replace the spark plug but
plug wire.
do not
connect the spark
the Handle
the bottom handle sections together and slide
them past the stops on the handle brackets (Fig. 46).
Figure
the handle toward the front of the mower
(Fig. 47).
Loosen the knobs securing the top handle section to
the bottom section and fold the top handle section
back towards rear of the mower into the storage
position (Fig. 47).
46
1039
7.
Fill the fuel tank (Fig. 5) with fresh, clean gasoline/oil
mix.
Connect the spark plug wire (Fig. 7).
8.
Note:
When folding the handle, do not allow the cables to
get pinched, crimped, or caught on the handle knobs.
Fold the handle only in the direction illustrated (Fig. 47).
Figure
47
1068
21
Page 22

THE LAWN-BOY
Silver
Series WPM
Commercial WPM
Cordless & Electric WPM
What
Is Covered By This Express W
For
a period of 2 years from the date of purchase, Lawn-Boy
promises to repair any Lawn-Boy Product used for normal
residential
or
if it stops functioning due to the failure of a component.
purposes* if defective in materials or workmanship
NO-WORRY WARRANTY
A
Full W
(Limited W
arranty for Commercial Use)
arranty?
arranty
What Must Y
You
must maintain your Lawn-Boy Product by following the
maintenance procedures described in the operator’s manual.
Such routine maintenance, whether performed by a dealer or
by you, is at your expense.
ou Do T
o Keep The W
arranty In Effect?
The cost of parts and labor is included, but the customer
pays the transportation costs.
What
Products Are Covered By This W
This
warranty applies to all Gold Series, Silver Series, Com
mercial Series, Cordless, and Electric W
How
About Commercial Use?
Lawn-Boy W
tional or rental use are warranted against defects in material
or workmanship. Components failing due to normal wear are
not covered by this warranty
ply from the date of purchase:
Commercial Series Mowers
All
other Lawn-Boy mowers
Should
service, contact the dealer who sold you the product or any
Authorized Lawn-Boy Service Dealer
your telephone directory is a good reference source. The
dealer will either arrange service at his/her dealership or rec
ommend another Authorized Service Dealer who may be
more convenient. Y
registration card, sales receipt, etc.) for warranty validation.
If for any reason you are dissatisfied with the Service Deal
er’
s analysis of the defect in materials or workmanship or if
you need a referral to a Lawn-Boy Service Dealer
feel free to contact us at the following address:
alk Power Mowers used for commercial, institu
. The following time periods ap
.
. . . . . . . . . . . . . . . . . . . .
. . . . . . . . . . . . . . . . . . . .
How
Do Y
ou Get W
you feel your Lawn-Boy Product requires warranty
ou may need proof of purchase (copy of
Lawn-Boy Customer Service Department
811
1 L
yndale A
Bloomington, MN 55420–1
612–888–8801
800–526–6937
venue South
arranty Service?
alk Power Mowers.
. The Y
196
arranty?
1 year
45 days.
ellow Pages of
-
, please
What
Does This W
arranty Not Cover?
and
How Does Y
There
-
-
-
-
is no other express warranty except for special emis
sion system coverage on some products. This express warranty does not cover:
D
Cost of regular maintenance service or parts, such as fil
ters, fuel, lubricants, oil changes, spark plugs, blade sharpen
ing, blade worn out, cable/linkage adjustments or brake and
clutch adjustments.
D
Any product or part which has been altered or misused or
required replacement or repair due to accidents or lack of
proper maintenance.
D
Repairs necessary due to improper fuel, contaminants in
the fuel system, or failure to properly prepare the fuel system
prior to any period of non-use over three months.
D
Repairs necessary due to improper battery care, electrical
supply irregularities, or failure to properly prepare the mower
prior to any period of non–use.
D
Pickup and delivery charges.
All repairs covered by this warranty must be performed by an
Authorized Lawn-Boy Service Dealer using Lawn-Boy ap
proved replacement parts.
Repair
by an Authorized Lawn-Boy
remedy
Lawn-Boy is not liable for indirect, incidental or conse
quential damages in connection with the use of the
Lawn-Boy Products covered by this warranty
any cost or expense of providing substitute equipment or
service during reasonable periods of malfunction or non–
use pending completion of repairs under this warranty
Some states do not allow exclusions of incidental or con
sequential damages, so the above exclusion may not ap
ply to you.
our State Law Relate T
under this warranty
o This Warranty?
Service Dealer is your sole
.
, including
-
-
-
-
-
.
-
-
This
warranty gives you specific legal rights, and you may
also
have other rights which vary from state to state.
*
Normal residential purposes means mowing the lawn on
the same lot as your home. Use at more than one location is
considered
ty would apply
COUNTRIES
Customers
Lawn-Boy Distributor (Dealer) to obtain guarantee policies for your country
dissatisfied with your Distributor
porter
who have purchased Lawn-Boy Products exported from the United States or Canada should contact their
. If all other remedies fail, you may contact us at Lawn-Boy
OTHER THAN THE UNITED STATES OR CANADA
’s service or have dif
ficulty obtaining guarantee information, contact the Lawn-Boy im
.
commercial use and the commercial use warran
.
, province, or state. If for any reason you are
-
-
Page 23

Federal
Emission Control W
A T
wo Y
ear Limited W
our W
Y
arranty Rights and Obligations
arranty Statement
arranty
The U.S. Environmental Protection Agency (EPA) and Lawn-Boy are pleased to explain the emission control system
warranty on your 1997 and later utility/lawn/garden equipment engine. 1997 and later model year utility/lawn/garden
equipment engines must be designed, built and equipped, at the time of sale, to meet the U.S. EPA regulations for small
nonroad engines. The equipment engine must be free from defects in materials and workmanship which cause it to fail to
conform with U.S. EPA standards for the first two years of engine use from the date of sale to the ultimate purchaser.
Lawn-Boy must warrant the emission control system on your utility/lawn/garden equipment engine for the period of time
listed above provided there has been no abuse, neglect or improper maintenance of your utility/lawn/garden equipment
engine.
Your emission control system may include parts such as the carburetor or fuel injection system, the ignition system, and
catalytic converter. Also included may be hoses, belts, and connectors and other emission related assemblies.
Where a warrantable condition exists, Lawn-Boy will repair your engine at no cost to you including diagnosis, parts and
labor.
Manufacturer’
The
emission–related part on your engine is defective in materials or workmanship, the part will be repaired or replaced by
Lawn-Boy free of char
Owner’s
s W
arranty Coverage:
1997 and later utility/lawn/garden equipment engines are warranted for two years from the date of delivery
ge.
W
arranty Responsibilities:
. If any
• As the engine owner, you are responsible for the performance of the required maintenance listed in your
owner’s manual. Lawn-Boy recommends that you retain all receipts covering maintenance on your equipment,
but Lawn-Boy cannot deny warranty solely for the lack of receipts or for your failure to ensure the performance
of all scheduled maintenance.
• Any replacement part or service that is equivalent in performance and durability may be used in non–warranty
maintenance or repairs, and shall not reduce the warranty obligations of the engine manufacturer.
• As the engine owner, you should, however, be aware that Lawn-Boy may deny you warranty coverage if your
engine or a part has failed due to abuse, neglect, improper maintenance or unapproved modifications or parts.
• You are responsible for presenting your equipment engine to a LAWN-BOY Service Dealer as soon as a
problem exists. The warranty repairs should be completed in a reasonable amount of time, not to exceed 30
days.
• If you have any questions regarding your warranty rights and responsibilities or if you need a referral to a
Lawn-Boy Service Dealer, please feel free to contact us at the following address:
Lawn-Boy Customer Service Department
8111 Lyndale Avenue South
Bloomington, MN 55420–1196
612–888–8801
800–348–2424
W
arranted Parts:
The
warranty period begins on the date the engine or equipment is delivered to a retail purchaser
warrants to the initial owner and each subsequent purchaser that the engine is free from defects in materials and
workmanship which cause the engine to fail to conform with applicable regulations for a period of two years.
Failures caused by abuse, neglect, or improper maintenance are not covered. The use of add–on or modified parts can be
grounds for disallowing a warranty claim. The manufacturer is not liable to cover failures of warranted parts caused by the
use of add–on or modified parts. Lawn-Boy is liable for damages to other engine components caused by the failure of a
warranted part still under warranty
the manufacturer in the written instructions.
. The owner is responsible for the performance of the required maintenance, as defined by
. The manufacturer
Rev
. 10/29/1998
Page 24

Any warranted part which is not scheduled for replacement as required maintenance, or which is scheduled only for regular
inspection to the ef
which is scheduled for replacement as required maintenance shall be warranted for the period of time up to the first
scheduled replacement point for that part. Coverage under this warranty extends only to the parts listed below (the emissions
system parts) to the extent that these parts were present on the engine when purchased.
fect of ”repair or replace as necessary” shall be warranted for the warranty period. Any warranted part
– Fuel Metering System
• Cold start enrichment system including the choke mechanism or priming system
• Fuel pump
• Air fuel ratio feed back system
• Carburetor and internal parts
•
Fuel injection system
– Air Induction System
• Air cleaner
•
Reed intake system
• Intake manifold
• Controlled hot air intake system
– Ignition System
• Spark plug(s)
• Ignition coils and electronics
•
Advance/retard mechanisms
– Catalytic Converter/Thermal Reactor System
• Catalytic converter
• Thermal reactor
• Exhaust manifold
– Air Injection System
• Air injection system or pulse valve
• Valves affecting distribution of air
– Exhaust Gas Recirculation (EGR) System
• EGR valve body and piping system connecting to the intake side of the engine
• EGR control system
– Particulate Controls
• Traps filters, precipators and any other device used to capture particulate emissions
Miscellaneous Items Used in the Above Systems
–
• Vacuum, temperature, and time sensitive valves and switches
• Electronic controls
•
Hoses, connectors, and assemblies of same
How to Get W
Should
Authorized Lawn-Boy Service Dealer or Lawn-Boy Master Service Dealer
a good reference source. The dealer will either arrange service at his/her dealership or recommend another Authorized
Service Dealer who may be more convenient. Y
for warranty validation. The owner shall not be char
warranted part is defective, if the diagnostic work is performed at a warranty station.
arranty Service:
you feel your Lawn-Boy Product requires warranty service, contact the dealer who sold you the product or any
. The Y
ellow Pages of your telephone directory is
ou may need proof of purchase (copy of registration card, sales receipt, etc.)
ged for diagnostic labor which leads to the determination that a
The Lawn-Boy Company is not liable for indirect, incidental or consequential damages in connection with the use
of the Lawn-Boy Products covered by this warranty, except for damages to other engine components caused by the
failure of a warranted part still under warranty. Some states do not allow exclusions of incidental or consequential
damages, so the above exclusion may not apply to you.
This warranty gives you specific legal rights, and you may also have other rights which vary from state to state.
 Loading...