

Page 1
LAVA PayLink-IP/Dial
Quick Installation Guide
™
Rev.B00
Page 2

1
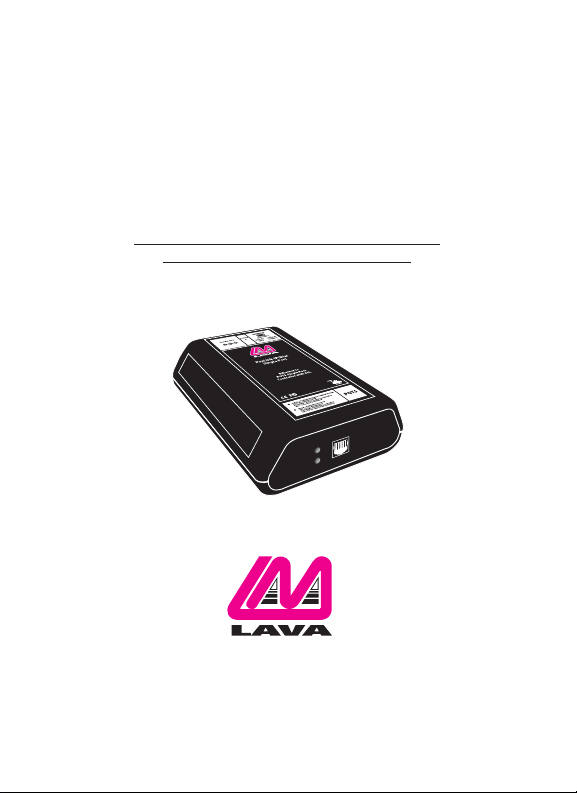
Congratulations on your purchase of a LAVA PayLink-IP/Dial.
PayLink-IP devices securely connect payment terminals to payment
processors over an Ethernet/TCP/IP connection.Any payment
terminal that can transmit transaction information over a POTS port
can send its information to the The
PayLink-IP/DIal
payment processor, places the serial data in a TCP/IP wrapper and
sends it out its Ethernet port. Data moving the other direction,from
the Ethernet side of the to the payment
terminal, undergoes the same process in reverse.
LAVA PayLink-IP/Dial
With a , you can:
• Securely network payment terminals
• Stop using dial-up modems
• Eliminate long-distance phone-modem charges
Included with your package, you should have the following:
•
LAVA PayLink-IP/Dial
• Power supply
• Quick Installation Guide
Before Proceeding:The PayLink-IP is factory preset with an
IP address of 192.168.0.35. If this IP address conflicts with a
device already installed on the network, follow the
procedure described in the "Configuring network settings"
section of this manual to set the IP address to a usable
address.
Getting Started
LAVA PayLink-IP/Dial. LAVA
establishes an SSL-secured connection to the
LAVA PayLink-IP/DIal
Page 3
2
Hardware Setup
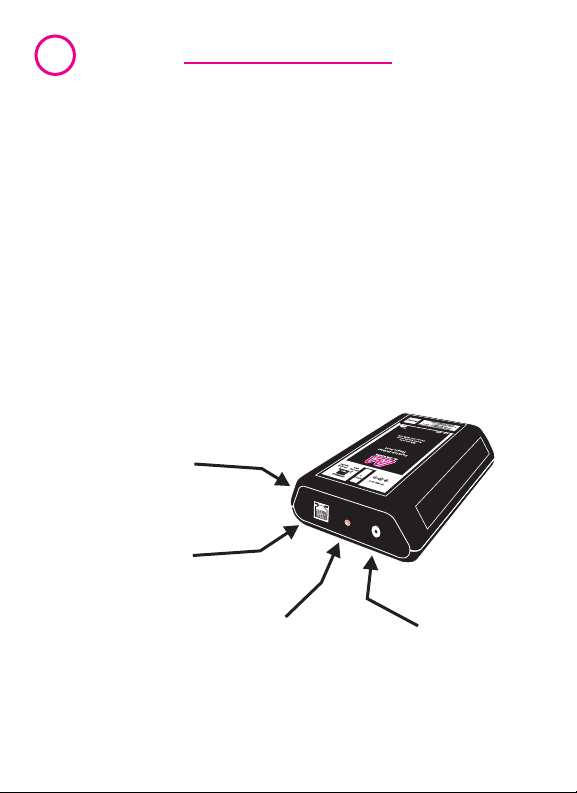
1. Connect the power supply to the and to
AC power. The power (red) LED will light to indicate that the
unit is receiving power.
2. Connect to the Ethernet RJ-45 jack
of the . Attach the other end of the
crossover network cable to a host PC directly.
Network status is indicated by two LEDs on the RJ-45 connector.
The left (yellow) LED indicates network activity.It is on by default,
turning off when network activity occurs at the PayLink-IP.The right
(green) LED indicates a network link.It is off by default, but lights
when a network link exists.
an Ethernet cross-over cable
LAVA PayLink-IP/Dial
Network
Activity and Link
indicators
Network
connector (RJ-45)
Power
indicator
LAVA PayLink-IP/Dial
Power
connector
Page 4
3
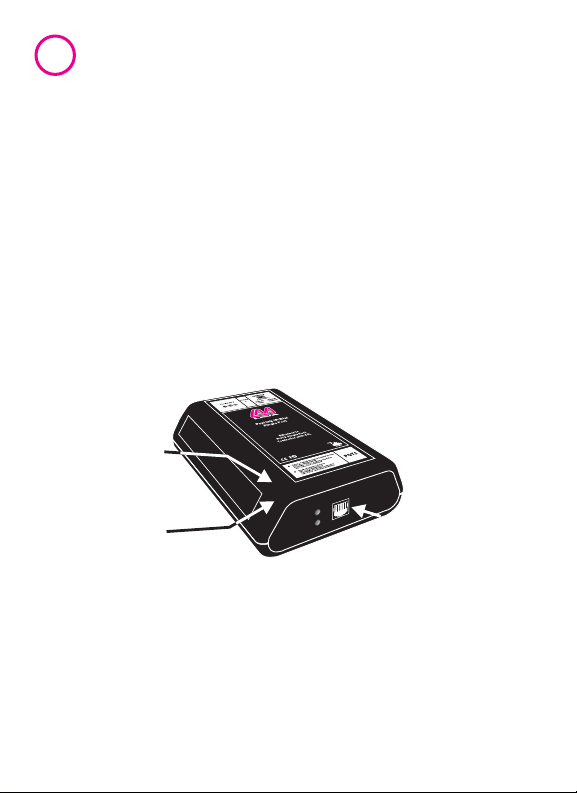
3. Open a web browser to the IP address of the PayLink-IP and
configure the device as described in the "Configuration"
section of this manual.
4. After configuring the LAVA PayLink-IPDial,attach it to your
network and connect a payment terminal to its serial port.
Serial port activity is indicated by two status LEDs per port. The
yellow LED lights when the serial port is transmitting data.The
green LED lights when the serial port is receiving data.
POTS Tx
indicator
POTS Rx
indicator
RJ-11 POTS
connector
Single Port PayLink-IP/Dial
Page 5

4
Configuration consists of the following:
A. Configuring network settings
B. Host configuration
C. Protocol configuration
D. Password selection
E. Upgrading software
Configuration
A. Configuring network settings
PayLink-IP devices installed on your network will need unique IP
addresses.These are set by using a web browser.
The factory default network settings for the PayLink-IP are:
IP address: 192.168.0.35
Subnet mask: 255.255.255.0
Gateway address: 0.0.0.0
Name: [empty]
Workgroup: [empty]
DHCP detection: disabled
Configuring PayLink-IP network settings
To set a PayLink-IP's network settings, open a web browser and
enter the IP address of the PayLink-IP into the browser's location
bar.The embedded web server running on the PayLink-IP will
display the opening screen of the PayLink-IP.
Page 6

5
Opening screen
Click "Configure" if no password has been set,or enter the
password for the PayLink you are configuring, and then click
"Configure." The Configuration menu will open.
Configuration Menu
Page 7

6
Choose the "Configure the LAVA PayLink-IP on my network" link. In
the configuration screen that appears,enter the network settings
you wish for that PayLink-IP.Once the new values are entered and
accepted,the PayLink-IP will reboot to implement the new network
settings.
Network Settings
Changing the network settings of a PayLink-IP device that is
NOTE:
installed on a network may make that device unavailable to other
stations that have activated a connection to that device using older
network settings.
The following network parameters can be configured for the LAVA
PayLink-IP/Dial:
Page 8

7
Device name
Use this field to supply a“friendly” name for the
IP/Dial
device being configured.The friendly name is optional, and
can be chosen to provide a conveniently-remembered name for
the unit.
IP address
The IP address for the will identify the device
on the LAN on which it is located.Any conventional IP address can
be used.The ships with its default IP address
as 192.168.0.35; ensure that this IP address is available on the LAN
onto which the is being installed.
Subnet mask
A subnet mask can be configured for the in
this dialog box; by default the has a subnet
mask of 255.255.255.0.
Default gateway
Configure the IP address of the default gateway that the
PayLink-IP/Dial
its network segment.The default gateway is configurable as a 12
digit numeric address.
HTTP port
By default, the communicates on port number
80. A measure of increased security may be obtained by changing
this port number to a non-standard TCP port for HTTP
communications.
LAVA PayLink-IP/Dial
LAVA PayLink-IP/Dial
LAVA PayLink-IP/Dial
LAVA PayLink-IP/Dial
will use when communicating with devices outside
LAVA PayLink-IP/Dial
LAVA PayLink-
LAVA PayLink-IP/Dial
LAVA
DHCP enabled
When installing the onto a network where IP
addresses are assigned by DHCP servers, please ensure that the
LAVA PayLink-IP/Dial
Page 9

8
“DHCP enabled” checkbox has been set. The
will then act as a DHCP client and obtain its IP address from the
DHCP server on its LAN that first leases an IP address to the
PayLink-IP/Dial
Assigned local TCP port
Use this dialog box to change the TCP port number assigned to the
serial port of the . By default the
IP/Dial
the network is already using this TCP port number,reassign the
serial port to another TCP address.
After making changes to the network settings, four options exist:
Submit changes and reboot device
This option will register the changes you have entered into the
dialog box and reboot the , implementing the
changes on reboot.
Restore factory defaults and reboot device
This option will restore factory defaults and reboot the
PayLink-IP/Dial
Exit without changes
This option will discard changes entered into the dialog box and
return you to the“Administrator Menu” screen.
Reboot device
This option will reboot the device with the settings currently
implemented,and discard changes entered into the dialog box and
not submitted.
.
LAVA PayLink-IP/Dial LAVA PayLink-
assigns TCP port 2300 to its serial port; if another device on
LAVA PayLink-IP/Dial
, implementing the changes on reboot.
LAVA PayLink-IP/Dial
LAVA
LAVA
Page 10

9
B. Host configuration
The PayLink-IP/Dial POTS port can be configured through a web
browser.The settings for the LAVA PayLink-IP/Dial's host connection
should match the requirements of the hosting server used by the
payment terminal.
Host Configuration
The Host Side configuration dialog provides settings for a Primary
Host, a Secondary host, and two additional user-defined hosts.Each
host can be configured or SDLC or asynchronous communications.
Page 11

10
Configuring the connection for SDLC communications consists of
supplying basic modem communication parameters.
SDLC Configuration
Configuring the connection for asynchronous communications
consists of supplying basic modem communication parameters as
well as terminal settings that define the data format and message
negotiation protocols for the terminal/server connection. Details
on these settings can be found in the "PayLink-IP_Dial manual
Axx.pdf" file on the installation diskette.
Asynchronous Configuration
Page 12

11
C. Protocol configuration
The PayLink-IP/Dial Host Side Configuration screen has options for
configuring SDLC or Asynchronous links,and the related message
formatting protocols.for a variety of payment processing hosts.
Users will need to supply the addressing information suitable to
their specific payment processing hosts.
Each host connection can have a unique protocol configuration.
If the host connection is configured for asynchronous
communications, protocol settings for framing data can be selected
to meet a variety of message formats: pass-through, DP3000,
Merchant Link,VISA 1/2 Standard framing,VISA 1/2 Transparent
framing,Length Prefix framing,First Data framing,or Length Prefix
framing for VISA II.Details on the framing options and handshaking
are available in the "PayLink-IP_Dial manual Axx.pdf" file on the
installation diskette.
In addition, SSL 3.0 for the connection can be enabled or disabled.
If the host connection is configured for SDLC communication,SSL
3.0 for the connection can be enabled or disabled.In addition,
message header lengths can be specified for the choice of message
format employed.Details on the framing options are available in
the "PayLink-IP_Dial manual Axx.pdf" file on the installation
diskette.
Page 13

12
Protocol Configuration (ASYNC)
Protocol Configuration (SDLC)
Page 14

13
By default, the LAVA PayLink-IP/Dial's connection to the payment
processor is set up using an SSL Ver. 3.0 link.Disabling this setting
will set data over an unsecured TCP/IP link.
By default, two host configurations (primary and secondary) are
configured to the most common settings.These can be changed to
suit specific needs, and additional strings can be defined for other
host interfaces.
D.Password selection
The PayLink-IP/Dial password configuration screen can be accessed
through a web browser. The password permits securing the
PayLink-IP against unauthorized configuration of network settings,
port settings, processor gateway settings, and advanced
configuration features.The password supplied here is required to
access the web browser configuration screens.
By default the PayLink-IP is shipped with no password set.LAVA
recommends applying a password immediately to any PayLink-IP
devices being deployed.
Page 15

14
Password Selection
E. Upgrading Software
New versions of PayLink-IP software and firmware may be found at
www.lavalink.com.
Page 16

LAVA
Technical Support
9:00 am to 5:30 pm Monday to Friday (EasternTime)
Tel:+416 674-5942
Fax:+ 416 674-8262
E-mail: tech@lavalink.com
Internet: www.lavalink.com
™
LAVA Computer MFG Inc.
Toronto, Canada
This device complies with part 15 of the FCC Rules.Operation is subject
to the following conditions:(1) This device may not cause harmful interference,
and (2) this device must accept any interference received,including interference
LAVA Computer MFG Inc. 908 Niagara Falls Blvd.#629. North Tonawanda NY 14120-2060
that may cause undesired operation.
 Loading...