

Page 1
LAVA AIRE
I T A LIA
Man u factu red for: www. L ava Heat .co m
Model Name:
Introduction:
This ultrasonic mist fan is an attractive and easy to use product with a luxurious finish. It functions as an industrial fan
and an ultrasonic mist machine to make the environment cooler. Please take note that the functions may be used
separately. You will definitely feel the cool wind during hot summer days. This product is suitable for your home, office,
commercial or industrial establishment.
Working Principle:
The Ultrasonic mist fan uses supersonic concussive elements that atomize water down to 1-5 micron (ultra particles),
and through the industrial fan, it spreads the ultrasonic mist into the air and thus cooling down the room temperature.
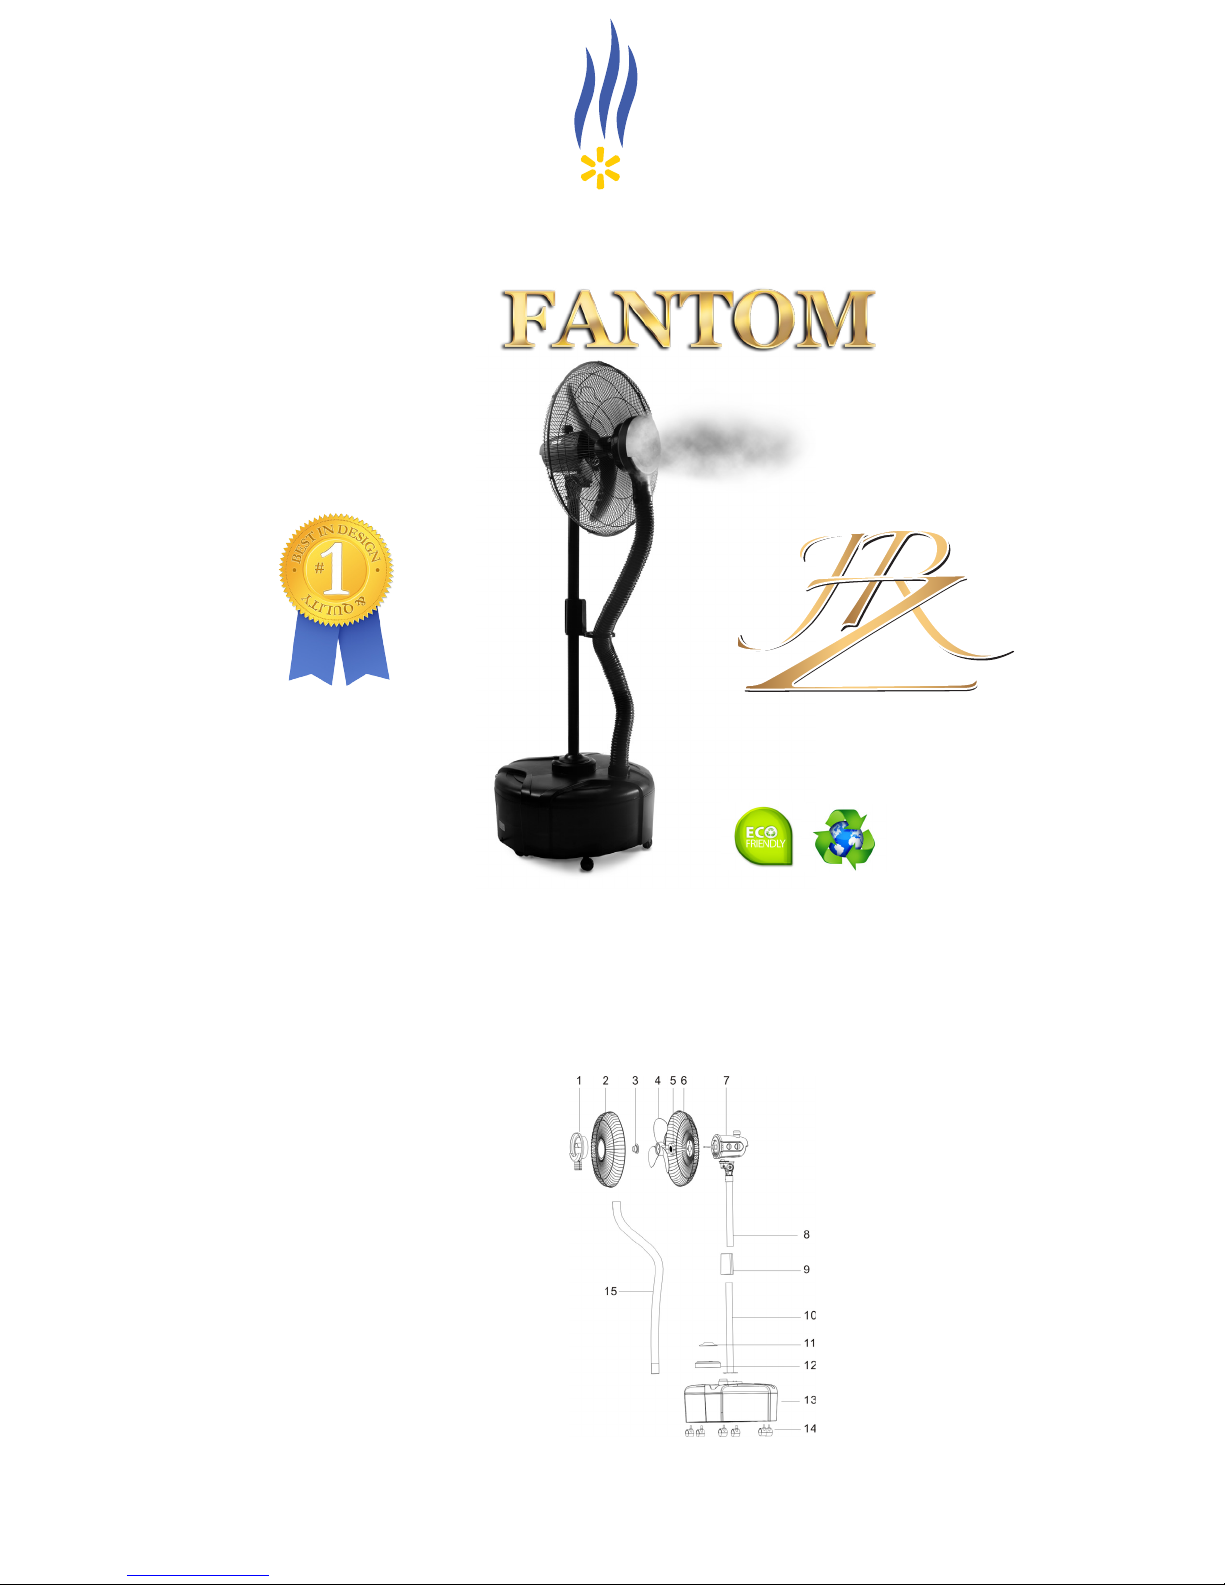
1. Front grille guard ornament
2. Front guard
3. Blade cap
4. Blade
5. Guard mounting nut
6. Rear guar
7. Motor
8. Iron tube (upper)
9. Iron tube connector
10. Iron tube (lower)
11. Decorative cover
12. Wiring cover
13. Flume
14. Wheel
15. Plastic mist tube
d
JR ZIONI DESIGNER
90%
Less energy consumption
Page 2
Technical Specifications
> Rated Voltage : 120V~
> Rated Frequency : 60Hz
Assembly of fan body
1. Install power cord terminal from iron tube (upper) into the iron tube connector, and then insert iron tube (upper) into the
iron tube connector and fasten them by 2 screws.
2. Insert decorative cover and wiring cover into iron tube (lower).
3. Let power cord terminal from iron tube connector into iron tube (lower), and then fasten iron tube (lower) and connector
by 2 screws.
Assembly of fan body to base
1. Match and fix 6 wheels into their
2. Match and fix two terminals from power cord and flume, and then place iron tube (lower) on the flume and fasten by 4
screws.
3. Lift the decorative cover and then fix wiring cover by 3 screws.
Assembly of rear guard
1. Take out the rear guard mounting nut in a counter-clockwise motion.
2. Insert the rear guard into the motor matching 3 rods on the front side of the motor(the handle must be positioned on the
top) to 3 holes of the rear guard.
3. Fasten the rear guard tightly by tu
Assembly of fan blade
1. Insert the blade to the motor shaft and ensure the pin enters the blade slot.
2. Tighten the blade using the blade cap turning it counter-clockwise in the direction with a “TIGHT” arrow indicated on it.
Note: Proper assembly of the blade is of great importance. Otherwise, the blade spins out of direction and can cause
damage to the appliance.
Assembly of front guard
1. Fix the front guard with the logo in the upright position on the rear guard, and then fasten both guards together by c
2. Tighten the screw on the guard by screwdriver.
Note: Do not operate the fan without assembling the guards properly and tightly.
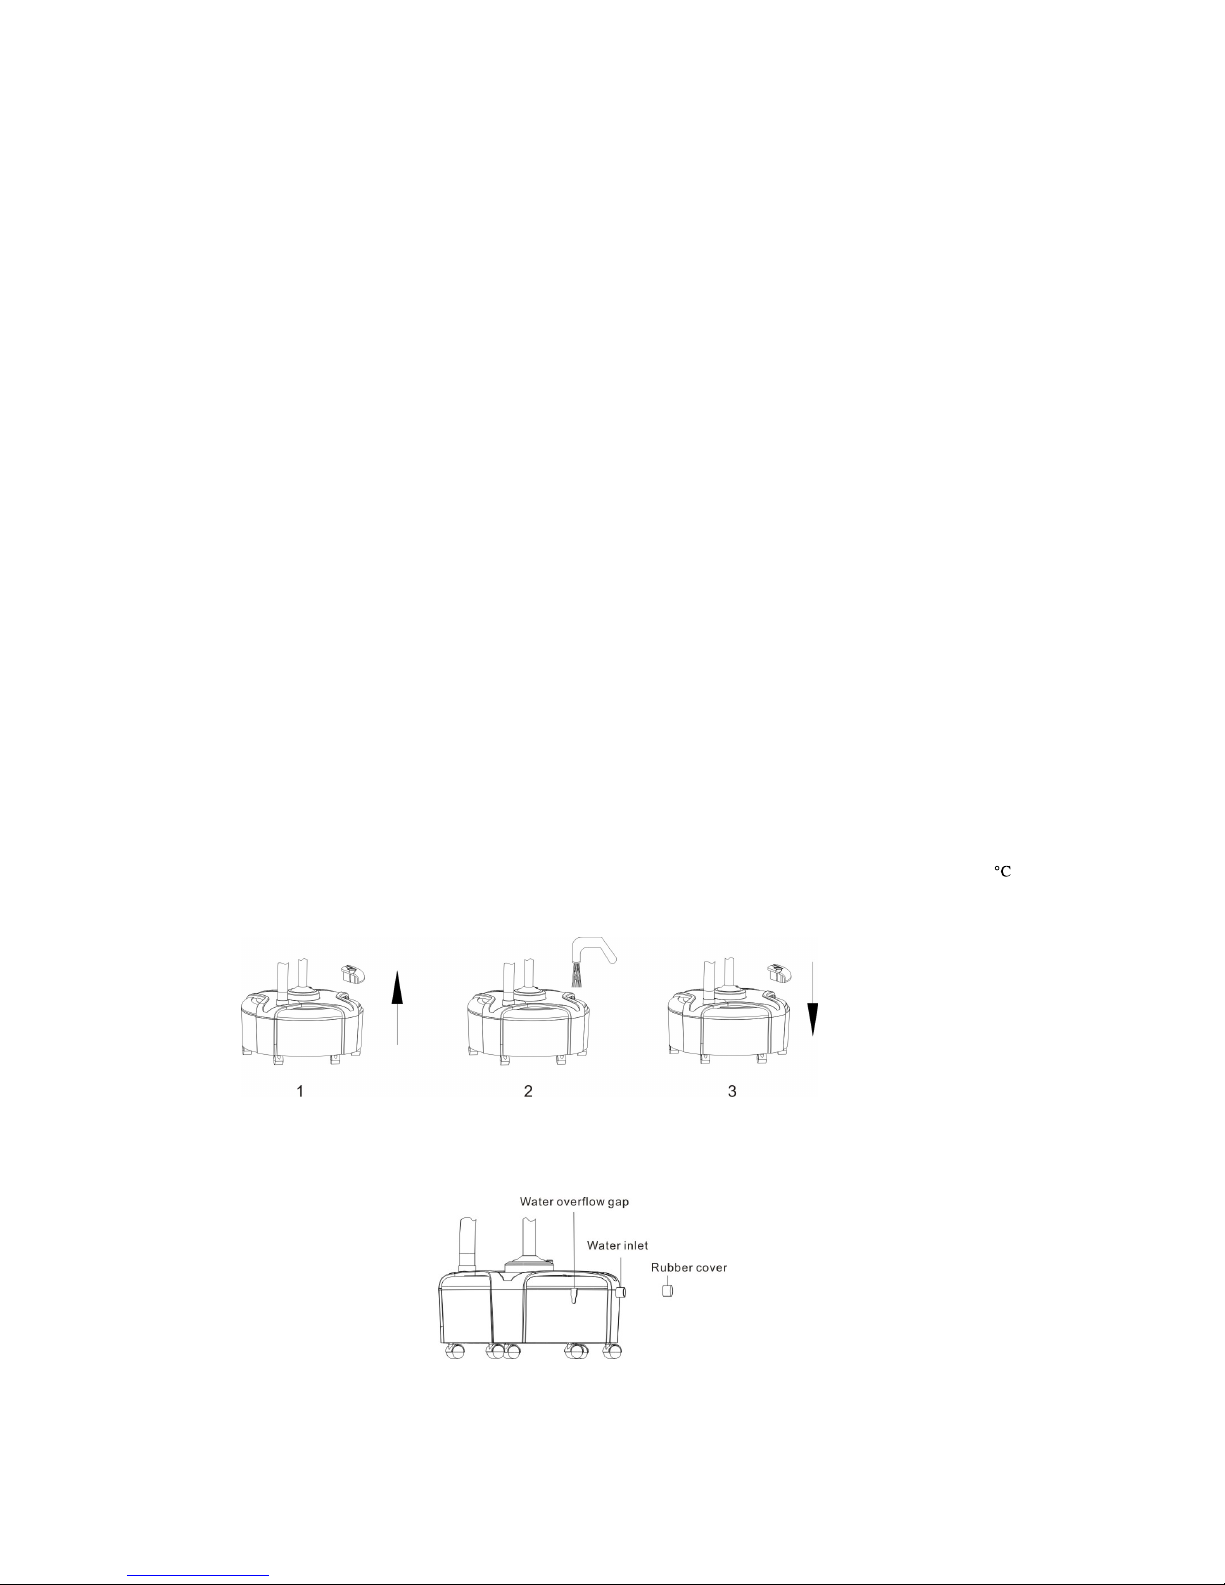
Place the fan on the ground in a level position and add water inside the water tank according to the steps below:
Note: Unplug the unit from the mains before adding or removing water from the tank. Do not add hot water (40
above)in the water tank.
Adding water manually
1. Open the water tank cover.
2. Add water in the flume, take note of the water level.
3. Close the water tank cover.
Note: Please ensure that water level will not be over the allowable limit to avoid spilling water on the floor. See
picture below.
holes of base and press them firmly.
rning the guard mounting nut clockwise.
lips.
and
Page 3
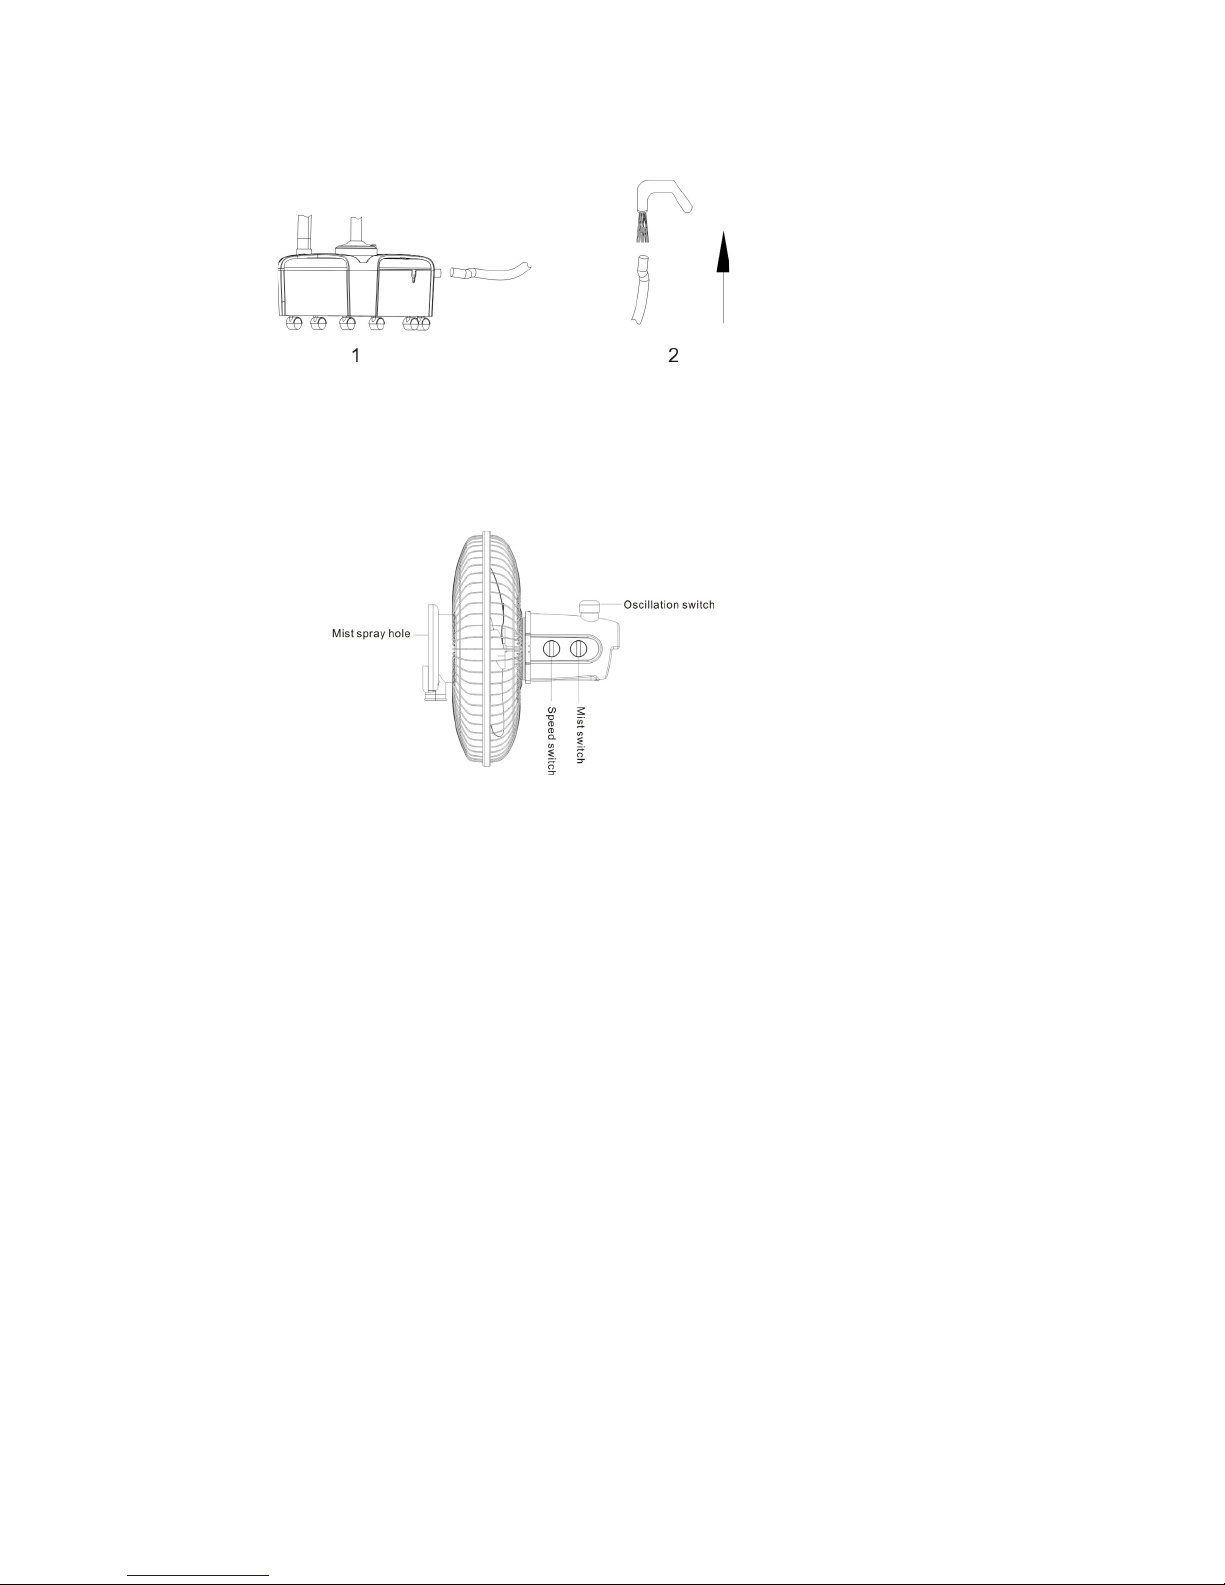
2. Continuous water supply
3.
1. Take out rubber cover from the water inlet.
2. Connect one end of water pipe to the base. (Internal diameter of pipe is 15mm)
3. Connect another end of water pipe to the tap, and then open the tap.
Note: Do not add dirty water or any additives (such as perfume, essential oil and mosquito repel, etc.), instead add
clean drinking water or purified water to ensure longer life of the humidifier.
Operating the Fan
Insert plug to the electrical outlet, and then turn on each switch to oper
1. Turn on speed switch, to choose the wind speed - Low, Med, High.
2. Pull down oscillation switch, to change the wind direction. Pull up this button again to stop oscillation.
3. Turn on mist switch, the mist will spread out from the mist spray hole, “MIST” function can be used together with or
independently of the fan. If the mist function is used separately, it can increase humidity level in the air.
ate above functions.
Safety Precaution
1. Make sure this appliance and the power cord is not damaged before operating. In case of da
to the authorized technical service center.
2. Do not unplug the unit from the electrical outlet with wet hands.
3. Do not touch the electrical wirings and water in the tank if the unit is turned on.
4. Do not insert any object into guard and mist spray hole to avoid destroying the unit.
5. Unplug the unit from the electrical outlet when not operating and before moving, installing, uninstalling and cleaning the
unit.
6. Do not pull the plug while the power is on. Always ensure that the plug is fully inserted i
operating.
7. Do not add any chemical, metal ingredient into the water tank or flume, as these materials are dangerous and may
cause problems.
8. Automatic switch shall be cut off when water in the tank is not enough. This is to protect the ultrasonic transducer. Add
more water to allow continuous use.
9. This appliance must be used under the rated voltage and frequency as indicated in rating label.
10. Do not disassemble, repair or modify this appliance on your own or send the
as warranty will be void.
11. If the power cord is damaged, it must be replaced immediately by the service center to avoid electrical hazard.
12. This appliance is not intended for use by persons (including children) with reduce physical, sensory or mental
capabilities, or lack of experience and knowledge. With proper supervision or instruction concerning use of the appliance
by a person responsible for their safety, they may operate it otherwise.
13. Children should be supervised to ensure that they do not pl
mage, please send the unit
nto the electrical outlet before
unit for repair to an unauthorized perso n
ay with the appliance.
Page 4
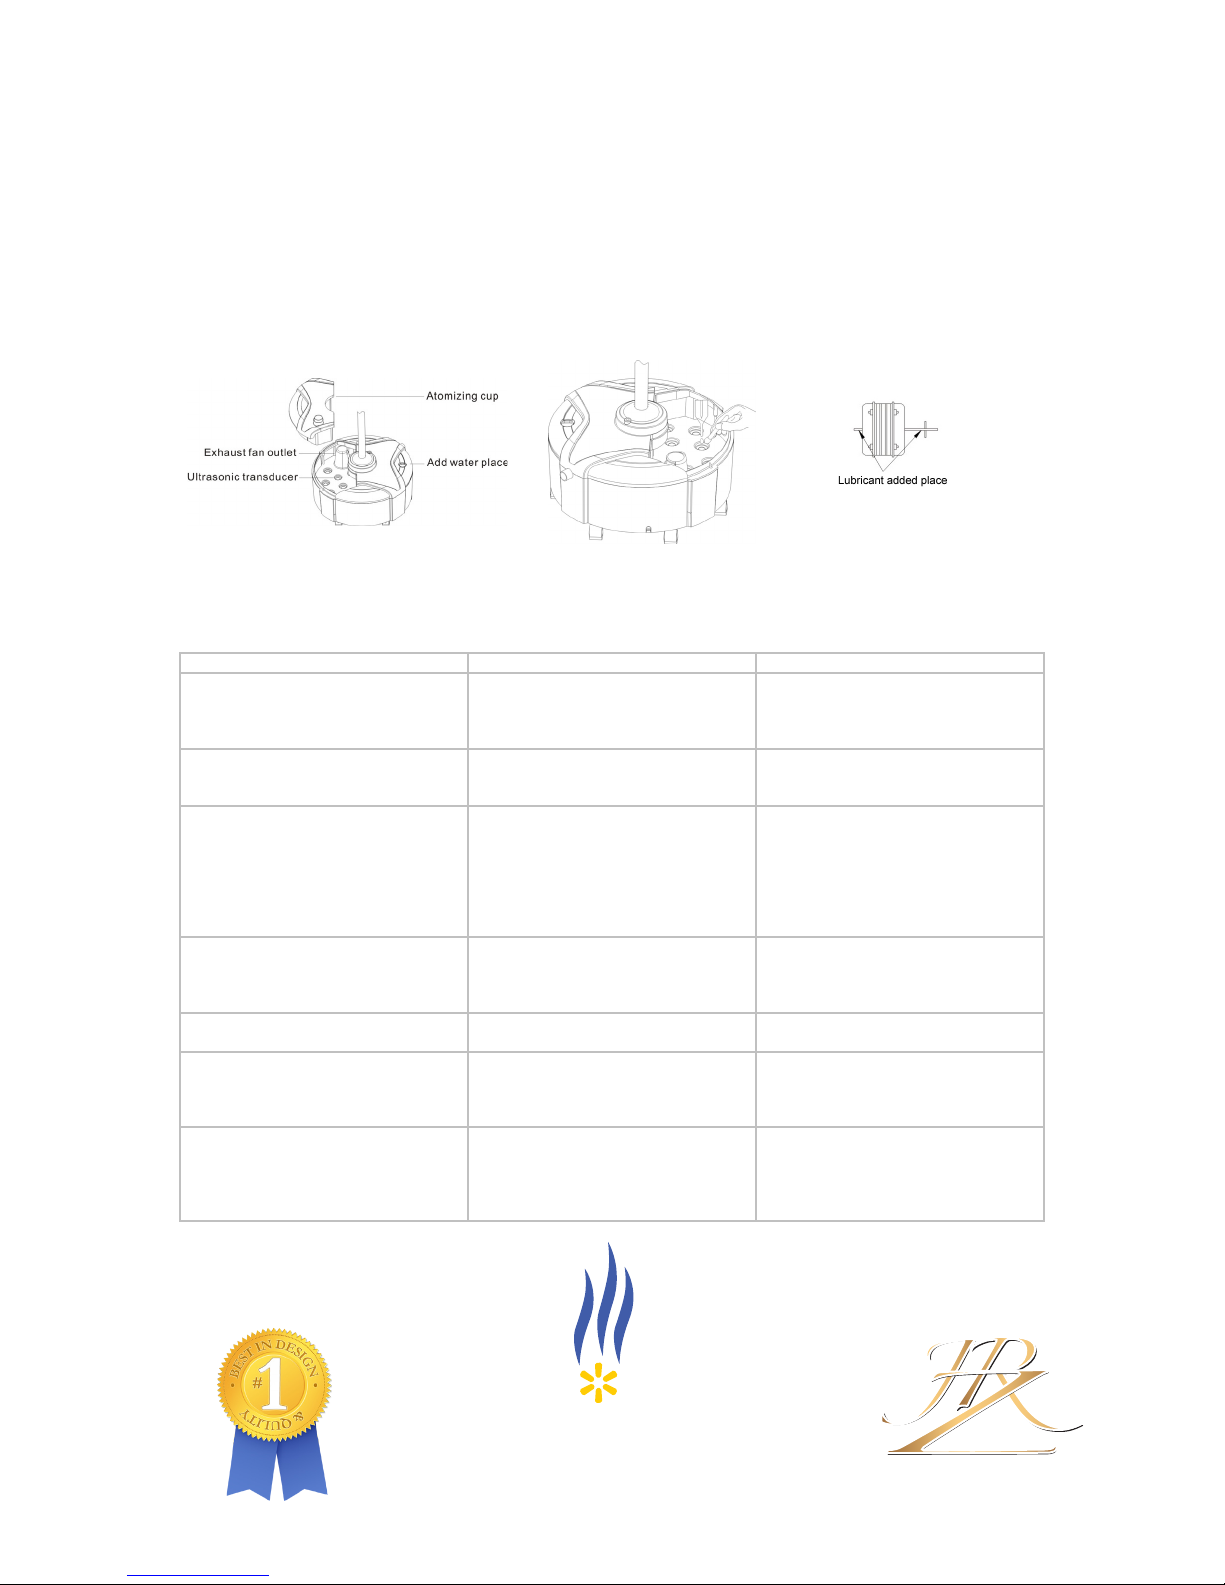
Cleaning and Maintenance
Questions
Answers
Solution(s)
1. Why is there no mist and no wind
a. Power cord plug is not connected
a. Ensure that the power cord plug is
on the MIST switch.
2. The ultrasonic transducer is working
spray?
a. Water tank is broken or with crack, so
working.
a. Pour out the water from flume,
new fan motor.
4. Why is there a peculiar smell of mist?
a. Peculiar smell of new product will
long.
a. Take out the tank and open tank
and change the clean water.
electricity or fuses may have gone off.
your fuses.
6.Heavy unit vibration.
a. The rear guard is not installed
a. Install the rear guard tightly. b.
a. Motor appeared smoke or a smell of
1. Please unplug the unit before cleaning it.
2. Please clean the water tank every two or three weeks, and clean the flume every week.
3. Please take out the water tank when cleaning it and pull the plastic tube out of the atomizing cup properly, then
take out the atomizing cup and clean them.
4. Use a dry cloth to absorb water remaining when cleaning the atomizing cup and dry it using a pi
Or use mild detergent to clean the atomizing cup if it is dirty.
5. Please add a few drops of lubricant to the motor shaft after cleaning to extend motor life every year.
6. Pack this appliance properly and store it in a cool dry place if you are not using it for a period of time.
ece of soft cloth.
Frequently Asked Questions
If your fan is not working properly, please check the followings (1-4 for mist fun
ction) before sending to service agent:
from fan?
properly but how come there is no mist
3. Why is there no mist even though fan
is working?
5. Why is the fan not operating? a. The plug inserted may be lacking
7. Other unusual problem.
properly and electric power is off. b.
MIST switch is off.
flume is full of water. b. Fan is not
a. No water or water level is not
enough. b. Bobber doesn’t float in the
water. c. Ultrasonic transducer surface
was filled up. d. Clamp plate of water
level switch is not firmly positioned in
place. e. Ultrasonic transducer is
damaged.
disappear after a period of using. b.
Dirty water or water storage time is too
tightly. b. The blade cap is loosened. c.
The blade is damaged. d. The blade is
not aligned
burnt. b. Exposed metal parts with
electric or the fan insulation is
damaged. c. The rear cover of motor is
damaged.
fully inserted into the electrical outlet
and turn on the electric power. b. Turn
change a new water tank. b. Change a
a. Add water. b. Pull out the bobber
and let it float out. c. Clean ultrasonic
transducer with detergent supplied
together with product. d. Reinstall clamp
plate of water level switch. e. Change
the ultrasonic transducer.
cover, and put it to a ventilated and dry
place. b. Clean water tank and flume
a. Make sure the plug works and check
Tighten the blade cap. c. Change a new
fan blade. d. Turn the fan blade 180°
and then reinstall blade.
a.b.c. Stop using and send to service
agent for repair.
LAVA AIRE
Manufactured for: www.LavaHeat.com
I T A LIA
JR ZIONI DESIGNER
 Loading...