

Page 1

User’s Manual
Latte Espresso
Digital Media Player
Version 1.1
This manual shall only be used for providing information and operating instruction.
Latte Communications, Inc. shall reserve the right to modify the specifications and other
information without further notice.
Software, music or film etc. with copyrights shall be protected by relative laws.
Shape and color of actual product may vary slightly from the shown pictures.
Display screens in default setting may vary slightly from the screen contents used here.
Page 2

Contents 01
Main Functions…………………………………………………………………………… .…… ……….02
Precautions……………………………….…………………...…………………………….….……….03
About the Player……………………………………………………….……………………..…… …....04
Display Description………………………………………………………………………….……….…05
Basic Operations………………………………………………………………………………………..07
System Menu…………………………………………………………………………….……………...09
Music Play………………………………………………………………………...……………………..12
Video Play………………………………………………………………………………………………..17
Picture Browse…………………………………………………………………………………………..19
TXT Browse…………………………………………………………………… ………………………...20
Record……………………………………………………………………………………………………22
FM Radio…………………………………………………………….…………………………………..23
Others…………………………………………………………………..………………………………..25
USB and Charge…………………………………………………………...…………………………...27
Firmware Update………………………………………………………………………………………..28
Troubleshooting…………………………………………………………………………………………29
Page 3

02 Main Functions
3.0‘ Touch TFT LCD (resolution: 420*240)
Supports MP3 / WMA / FLAC / APE / AAC music formats. Supports MS PLAY FX
Supports AVI, RM, RMVB, FLV, WMV
Supports touch screen with haptics
Supports picture auto browse in JPEG/BMP/GIF format
Supports auto-rotating screen by G-Sensor
Built-in MIC and extended recording time
Built-in FM radio transmitting and receiving (transmit music to your radio)
Supports energy-saving settings: LCD brightness control, auto power off, Stand-by mode
Multi EQ modes and multi repeat modes
Multi-language support
Support Win2000, Win XP, Vista OS. No driver required if OS is WIN 2000 and above
USB2.0 high speed transfer and the speed up to 4MB/S
Supports Text file viewing function and bookmark setting
Can be used as a portable file storage
Multi task handling function - you can listen to music while reading texts or viewing
pictures
* Warranty information, product features and specifications are subject to change without notice.
Page 4

Precautions 03
Do not use the player in extremely hot, cold, dusty or damp environments.
Do not drop the player when using it.
The service life of the battery is subject to the use of the player, manufacturer and
production date.
Please charge the battery in the following instances:
The battery icon is showing a low power level.
The player turns off automatically and turns off again after restarting.
The touch buttons are non responsive.
When formatting the player or uploading/downloading files, do not disconnect the player
from the PC. This may damage files or the player.
Static discharge to the cable during connection to the computer may corrupt files or the
storage area of the player.
The player is charging when connected to the PC via the supplied USB cable.
This player contains no user serviceable parts. Disassembling the player may damage the
player and will void the warranty. Please check the trouble shooting section of this manual
if experiencing problems.
Latte Communications reserves the right to improve the product. Different software and
hardware versions may influence the product performance and functions. Therefore the
product shall be subject to change without further notice.
The images used in this manual may vary slightly from actual product.
Please respect the copyright laws in your area.
Page 5
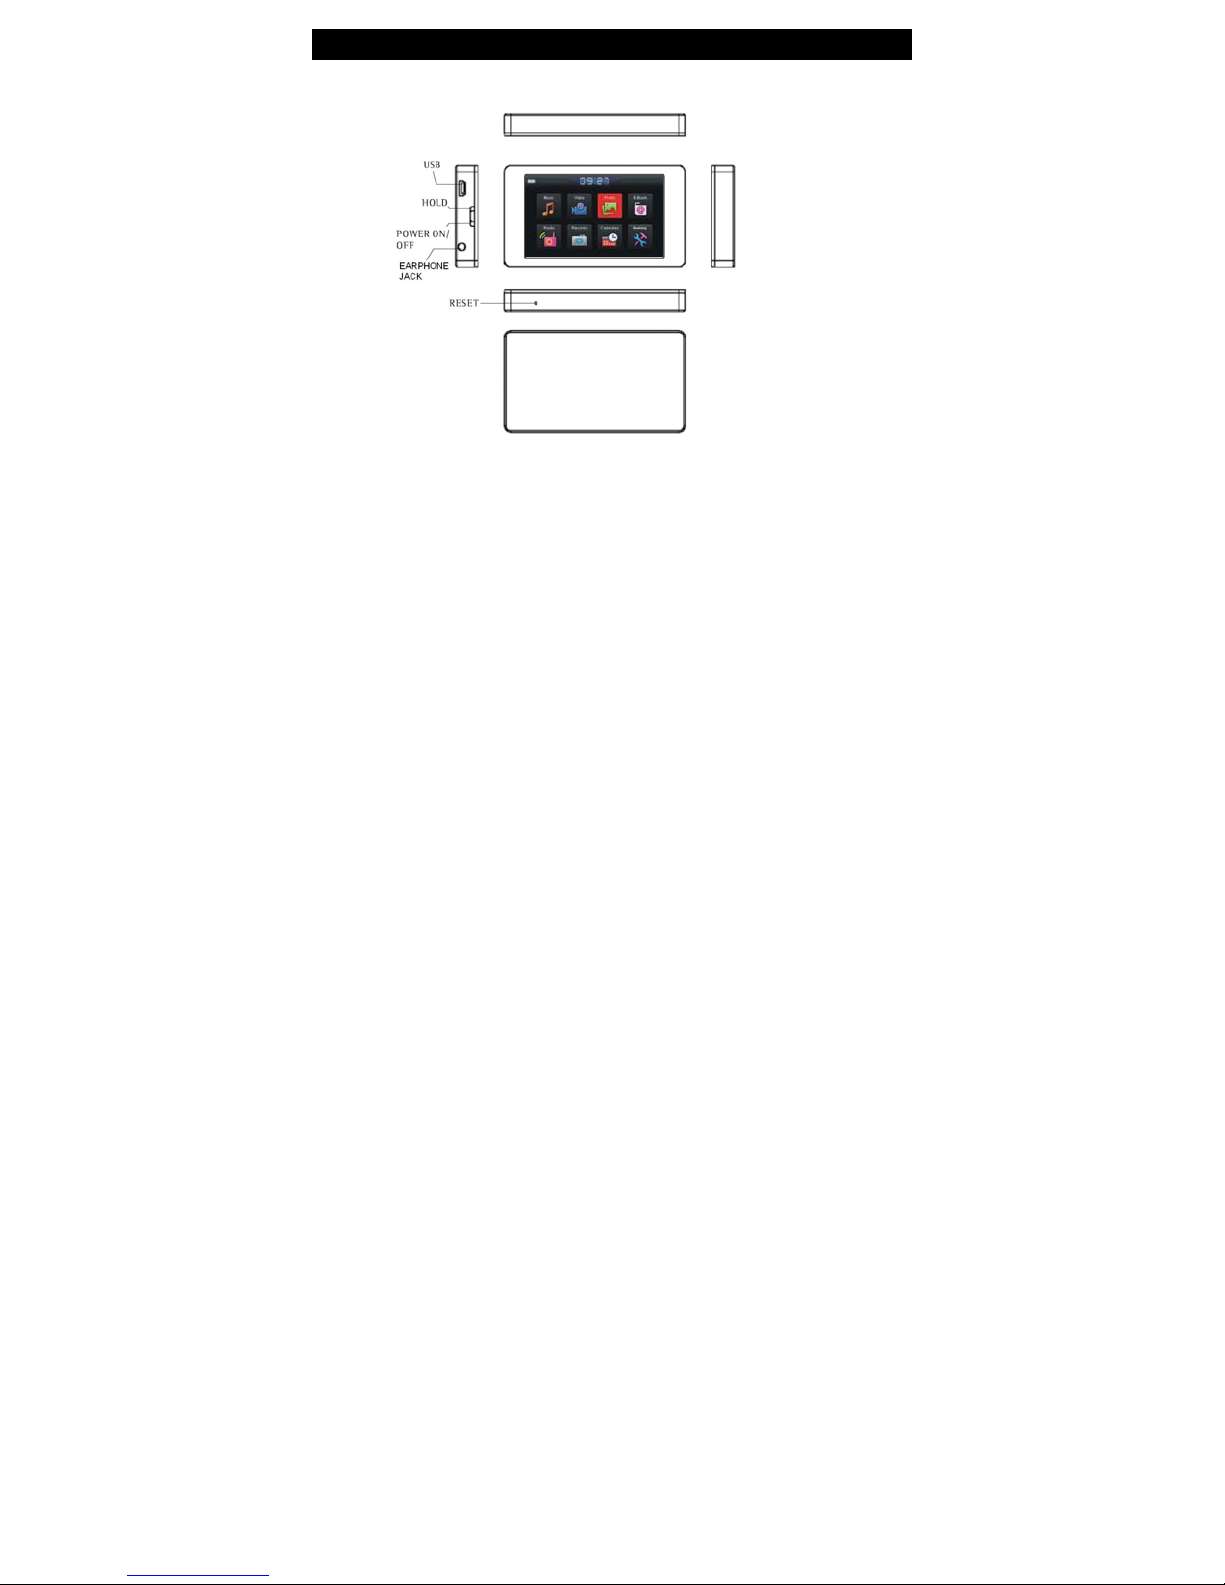
04 About the Player
Page 6
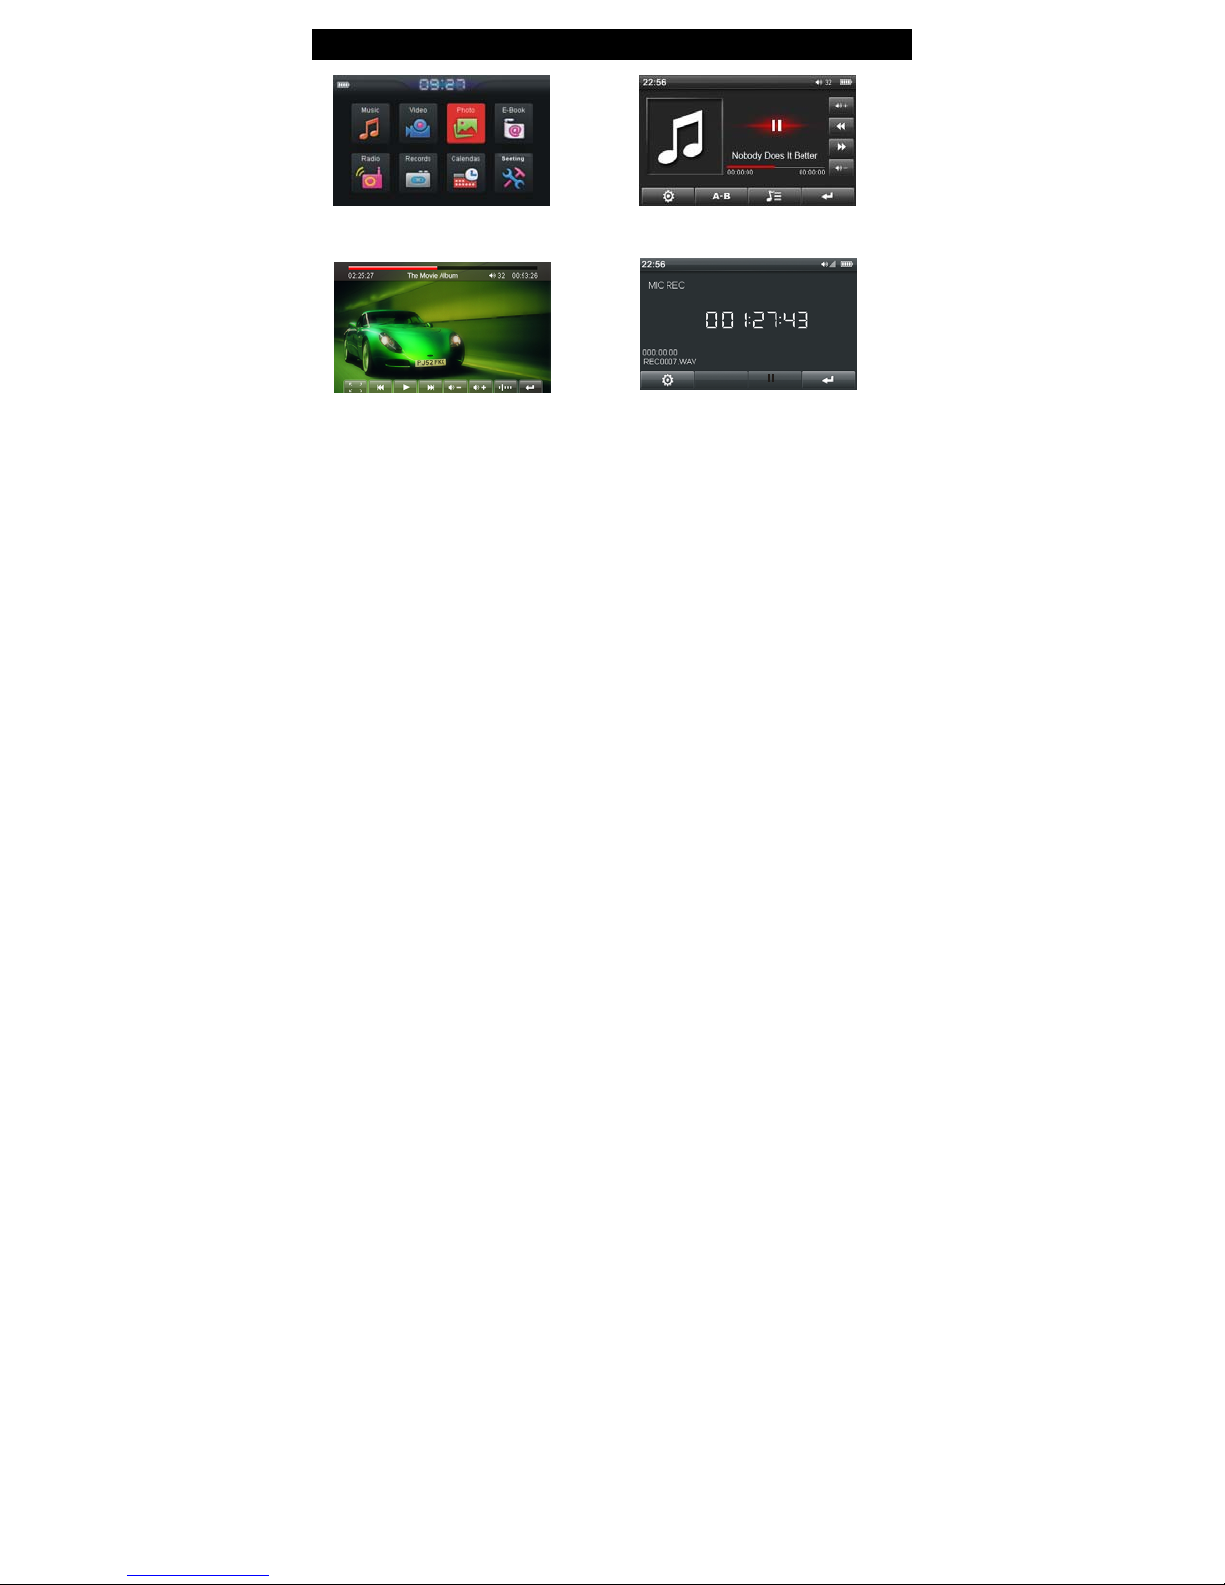
Display Descriptions 05
Main Menu Music play
Rea d y.. .
Video play Record
H
igh rate !
Re ad y .. .
REC
Page 7
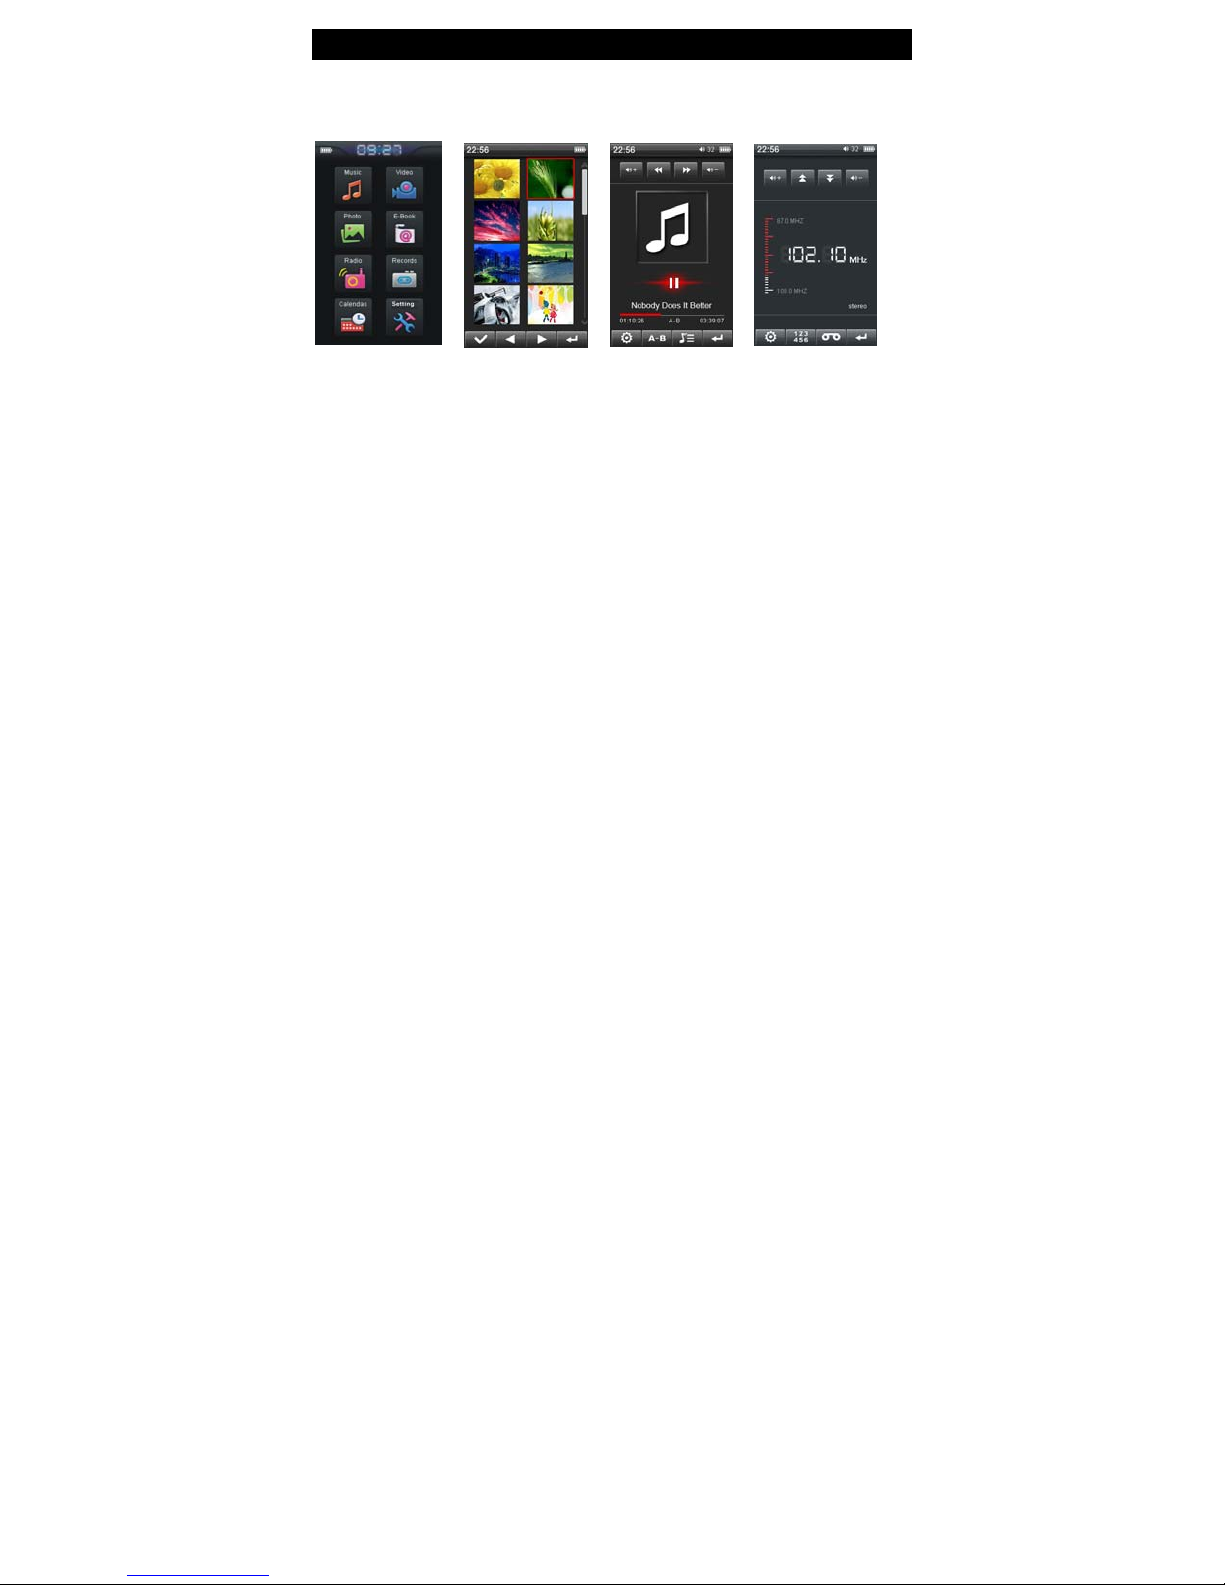
06 Display Descriptions
Main menu Photo play Audio play Radio
China
Page 8
Basic operations 07
Power On/Off
1. Power On: Push the power switch down and hold for 3 seconds. The player will start and
display the main menu.
2. Power Off: Push the power switch down and hold for 3 seconds.
Locking/Unlocking the Player
In Video, Record or Music Playback mode, you can lock the player’s buttons to prevent
unintentional operation.
1. Lock: Push the power switch toward HOLD to lock the player.
2. Unlock: In the lock mode, push the power switch down.
Basic Key Operations
/ : Move to previous or next options
: Enter into the selected item (menu)
: Go back to previous menu or directory.
Deleting Files
In the explorer interface (under “Other Function”), touch or icon to select and touch your
required file and touch icon. The player will show a text box “Do you want to delete?” Touch
YES option to delete the selected file or NO option to cancel.
Page 9

08 Basic operations
Connect to Computer and File Transfer
Start your computer and connect the player using the USB cable included. The player will be
detected as a standard removable disk by your computer and will allow you to transfer and
manage files on the player
Charging the Player
Charge y
our player by connecting it to your PC with the supplied USB cable. Charging will take
about 6 hours when fully discharged. The PC must remain on during the charging process. The
player interface is not available when connected to a PC for file transfer or charging.
Screen Rotation Function Powered by G-Sensor
G-Sensor technology enables the screen display to rotate perpendicularly to any direction per
the player’s position. The player can adjust/rotate the screen display (except for the video play)
to any direction powered by the G-SENSOR. Please note that G-SENSOR works by
weight acceleration, the function might not work properly in a plane.
Power Reset
If your player is frozen during the play, press the small button in the RESET hole until the player
turns off. The player can be started again as described earlier. This may return all settings to
default.
sensing
Page 10

System Menu 09
The Main menu is displayed when the player is turned on. Touch
the Setting menu.
1. Touch or
2. Touch
3. Touch
Display setting
This adjusts screen brightness and sets the amount of time the backlight remains lit after the last
button click.
1. Light Time: 5s, 10s, 15s, 20s, 30s, and Always on
2. Brightness Control: +1, +2, +3, +4, +5. Selecting higher levels will increase the brigh tness o f
the LCD display. Adjusting these settings will impact battery duration.
3. Light Mode: All Dark or Penumbra option can be selected when the player goes into
energy-saving mode. Adjusting these settings will impact battery duration.
icon to select previous or next item or touch an item directly.
icon or the item directly again to confi rm y our selection an d enter in to the sele ction.
icon to exit to the previous menu or directory.
Settings icon to enter into
Page 11

10 System Menu
System Setting
1. Firmware Upgrade: Select “YES” or “NO” to continue or exit the firmware upgrade
2. Reset All Settings: Select “YES” or “NO” to restore the player settings to default
3. Calibration: Touch screen sensitivity might go low and might operate not accurately when the
player is used for a long period of time. In this case, please re-calibrate the screen. Touch and
select the “Calibration” option. Touch the “+” cursor precisely when it appears on the display.
Once this operation is done, the player will go back to the previous menu automatically.
4. Slide Show – Set the time interval for photo slideshow
5. Screen Rotation Setting
You can turn On or Off the G-GENSOR auto screen rotation function.
6. Haptic Setting
You can turn On or Off the Haptic function.
Note: Upgrading firmware should only be used if recommended by a Latte technician.
Wallpaper
You can change the background graphics of the player. You can choose from 8 pre-loaded
wallpapers.
Page 12

System Menu 11
Time Setting
You can set the current time and date. Once done, current time will be displayed on the top left
corner of the screen
Language
Select the desired language for the player.
System Information
This option displays background information about the player including: software revision
number, available memory status on the player.
Auto Shutdown Time
The player will automatically turn off after the last button is pressed and if no files are playing.
This sets the period of time in minutes. Select the required value (10, 20, 30, 60 minutes and no
automatic Shutdown)
Page 13

12 Music Play
Music Play
From the Main Menu, touch Music
to display your music in the following ways: Current Play (if a song is already playing), All
Music, Artist, Album, My Favorite, or Record (voice or FM recorded files).
Touch or to select the song you want to play and touch icon or touch the song
1.
directly to play.
2.
Touch icon to pause the play and touch icon again to resume.
3. Touch or icon to move to the previous or next track. Touch and hold or icon
to fast forward or fast reverse through the music.
4. Touch or icon to increase or decrease the volume.
**T
he Media Library Update feature updates the Music Menu and categorizes media files
appropriately. This should be run every time after files have been transferred to the player. File
listing will depend on information contained in the MP3 tag.
icon to enter the Music Menu. The Music menu allows you
Page 14

Music Play 13
My Favorite
From the All Music listing, select the song and touch the icon. The “Add to Favorite” and
“Exit” options will be shown. Touch “Add To Favorite” to confirm and add file to the “My Favorite”
list. Or, touch “Exit” to confirm and return the previous menu.
Under the “My
shown. Touch “Delete” to delete the music you have selected, touch the “Delete All” to delete all
music in “My Favorite” list, or touch “Exit” to confirm and return the previous menu.
Favorite” list,touch icon. The “Delete”, “Delete All” and “Exit” options will be
Page 15
14 Music Play
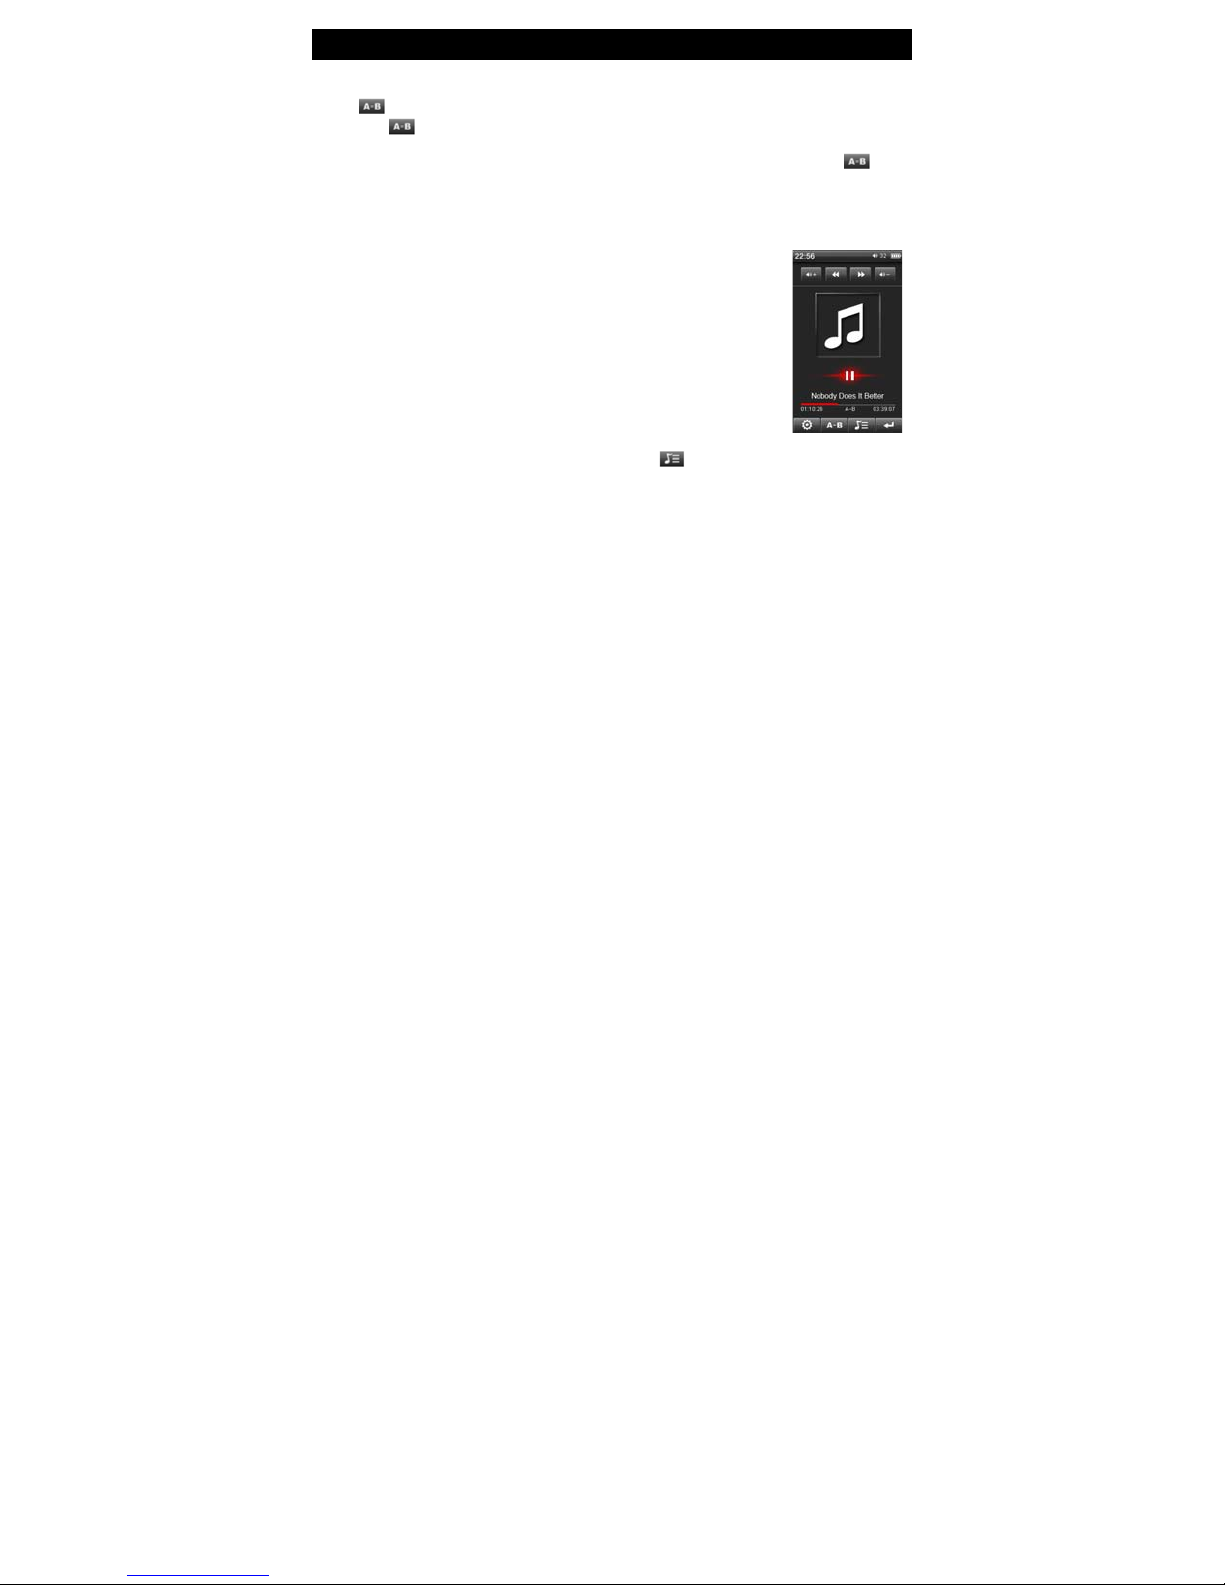
A-B repeat play
Touch icon. An “A” will be displayed on the screen, which confirms the starting repeat point.
Then touch icon again to display “B” on the screen. This confirms the ending repeat point.
“A-B” is now displayed and the A-B Repeat mode is set. The player will continue to repeat the
selection between the starting and ending point. To stop the A-B Repeat mode, touch icon
again.
Display
Touch the graphic (shown in the picture) to change different display option.
ID3: Displays the creation information of the playing music.
EQ View: Displays the frequencies of the playing music track.
Cover Graphic: Display the cover picture of the song attached to the file.
* Only available when the file has the graphic information attached to it.
Lyric
This player support “LRC” type lyric files. Lyrics can be displayed
isochronously while playing music. The Lyric file must be in the same
folder as the music file and have the same name as the music file. E.g.:
Track1.MP3 and Tr ack1.LRC. When a song is sele cted and the ly ric file for
the song is available, the lyrics will be displayed. Touch icon to display lyrics.
Page 16
Music Play 15
Options
T
ouch icon to display the playback options (Repeat Mode, Play Mode, MSEQ, EQ Sel,
User EQ Setup). Double-Touch each option to enter the submenu
1. Repeat Mode:
- Once: Stops after playing the current song.
- Repeat: Repeats the selected single song.
- ALL: Plays all songs in the current folder once.
- ALL Repeat: Plays and repeats all files in the current folder.
- Intro: Plays all songs in the current folder for the first 10 seconds in sequence (After
2. Play Mode: Plays songs in order or shuffle (random).
3. MSEQ: Set MSEQ mode 3D, Bass, LEQ
4. EQ Sel.: 7 preset equalizer settings Normal/MSEQ/Rock/Pop/Classic/Bass/Jazz
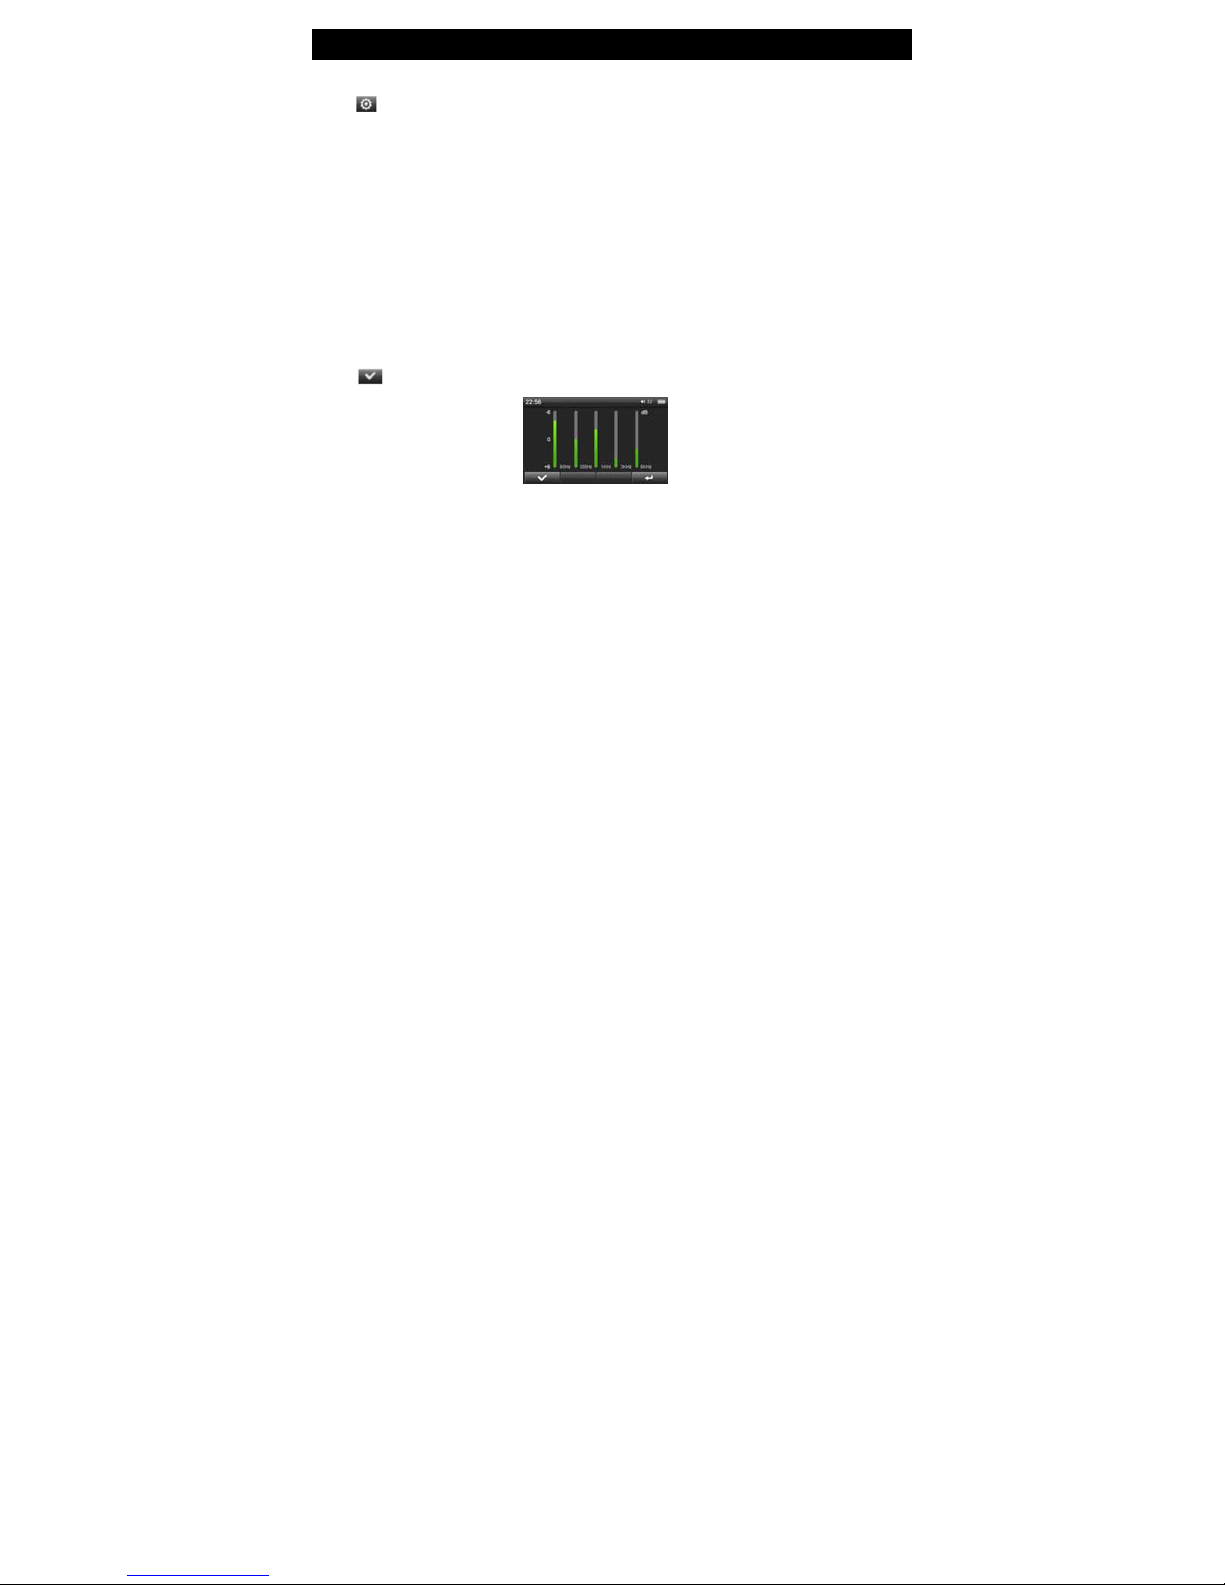
5. User EQ Setup: Increase or decrease the frequency by touching (sliding down or up) the
frequency you wish to change. You might need to use a stylus to adjust the frequency accura tely.
Touch icon to confirm your change and exit to the previous menu.
listening, it will return to the normal play mode)
Page 17

16 Music Play
Frequency Out: Select “On” or “Off” option and press key to confirm. Selecting “On” allows
for FM transmitting of music from your player to radio. Use Frequency Set to select available
frequency.
Frequency Set: When “Frequency Out” option setting is on mode, touch or icon to adjust
the
frequency. After adjusting the frequency you want to use for FM transmission, press
to confirm your setting.
key
Note: The earphones included will act as an antenna and you are required to plug the
earphones into the player to get the clear radio transmission. Adjust your radio frequency setting
to the same frequency set on your player. This will allow you to transmit your music to the radio.
Memory play
In the music play mode, when the music play was interrupted or paused, the player will
automatically remember the stopped point. When you want to play the same song from the
stopped point, just touch “Resume play” option from the Music main menu. The player will
automatically skip and play from the stopped point.
Note: The player only supports APE format of 3. 95, 3.97, 3.98, and 3.99 edition NORMAL and
FAST compressi on edition
Page 18

Video play 17
Video play
From the main menu, touch Video
1. Touch or icon to navigate and select your desired file to play
2.
Touch icon or touch the file selected directly to play.
3.
Touch icon to exit to the previous menu.
Options
1. P
lay & Pause: Touch icon to pause the video play, and touch icon to resume play.
2. File Navigation: Touch or icon to play the previous or next video file. Touch and
hold or icon to fast forward or fast reverse through the current file.
3. Volume: Touch or icon to increase or decrease the volume.
4. Screen Adjustment: Touch icon to play the current video file in full screen mode
5. Select Time Play: Touch icon. Set the time by touching or icon to select hour or
minute or second and or icon to set the time. Touch “Yes” to confirm your setting. The
player skip to the time set and play.
icon to enter the Video Menu.
Page 19

18 Video play
Memory Play: The player has the video memory function. When
the Video play is interrupted or stopped and you want to play the
same file again, the player will ask you “Continue from the last
scene?”. Touch “Yes” to continue from the last stopped scene or
“No” to start from the beginning.
Note 1:
Touch the screen at any time to show or hide the option bar on the bottom.
Note 2: This player can only supports RM/RMVB video files (up to 720 X 576 resolution), AVI
files (up to 800 X 480 resolution), FLV/WMV video files (up to 720 X 480 resolution). Video files
encoded in greater resolution may not be playable on this device and may report a “File Format”
error. Please ensure files are encoded to the correct resolution for playback.
Note 3: Due to the number of different Codecs used to create AVI files, it may not be possible to
play all AVI files on this player. If you have difficulty playing particular AVI files on this player, you
are recommended to re-encode the video files using a 3
rd
party video file converting software
(not provided).
Page 20

Picture Browse 19
Picture Display
From the main menu, touch Photo icon to enter the Picture menu.
1. Touch or icon to navigate and select your desired file to play.
2. Touch icon or touch the file selected directly to display.
3. Touch icon to exit to the previous menu.
Opti
ons
1. Touch icon to Zooms in on the image.
2. Touch icon to Zooms out of the image when Zoom in has been used
Push the power switch down shortly to go into the slideshow mode for the pictures. The time
3.
interval can be set under System menu (Settings > System Setting)
Note 1: Touch the screen at any area to hide/unhide the toolbar on the bottom.
Note 2: In order to conserve space on the player it is recommended that digital photos be
resized to a resolution of approximately 400 X 240 before being copied to the player. Some
picture formats may need to be converted to be compatible with this player.
Page 21
20 TEXT Browse
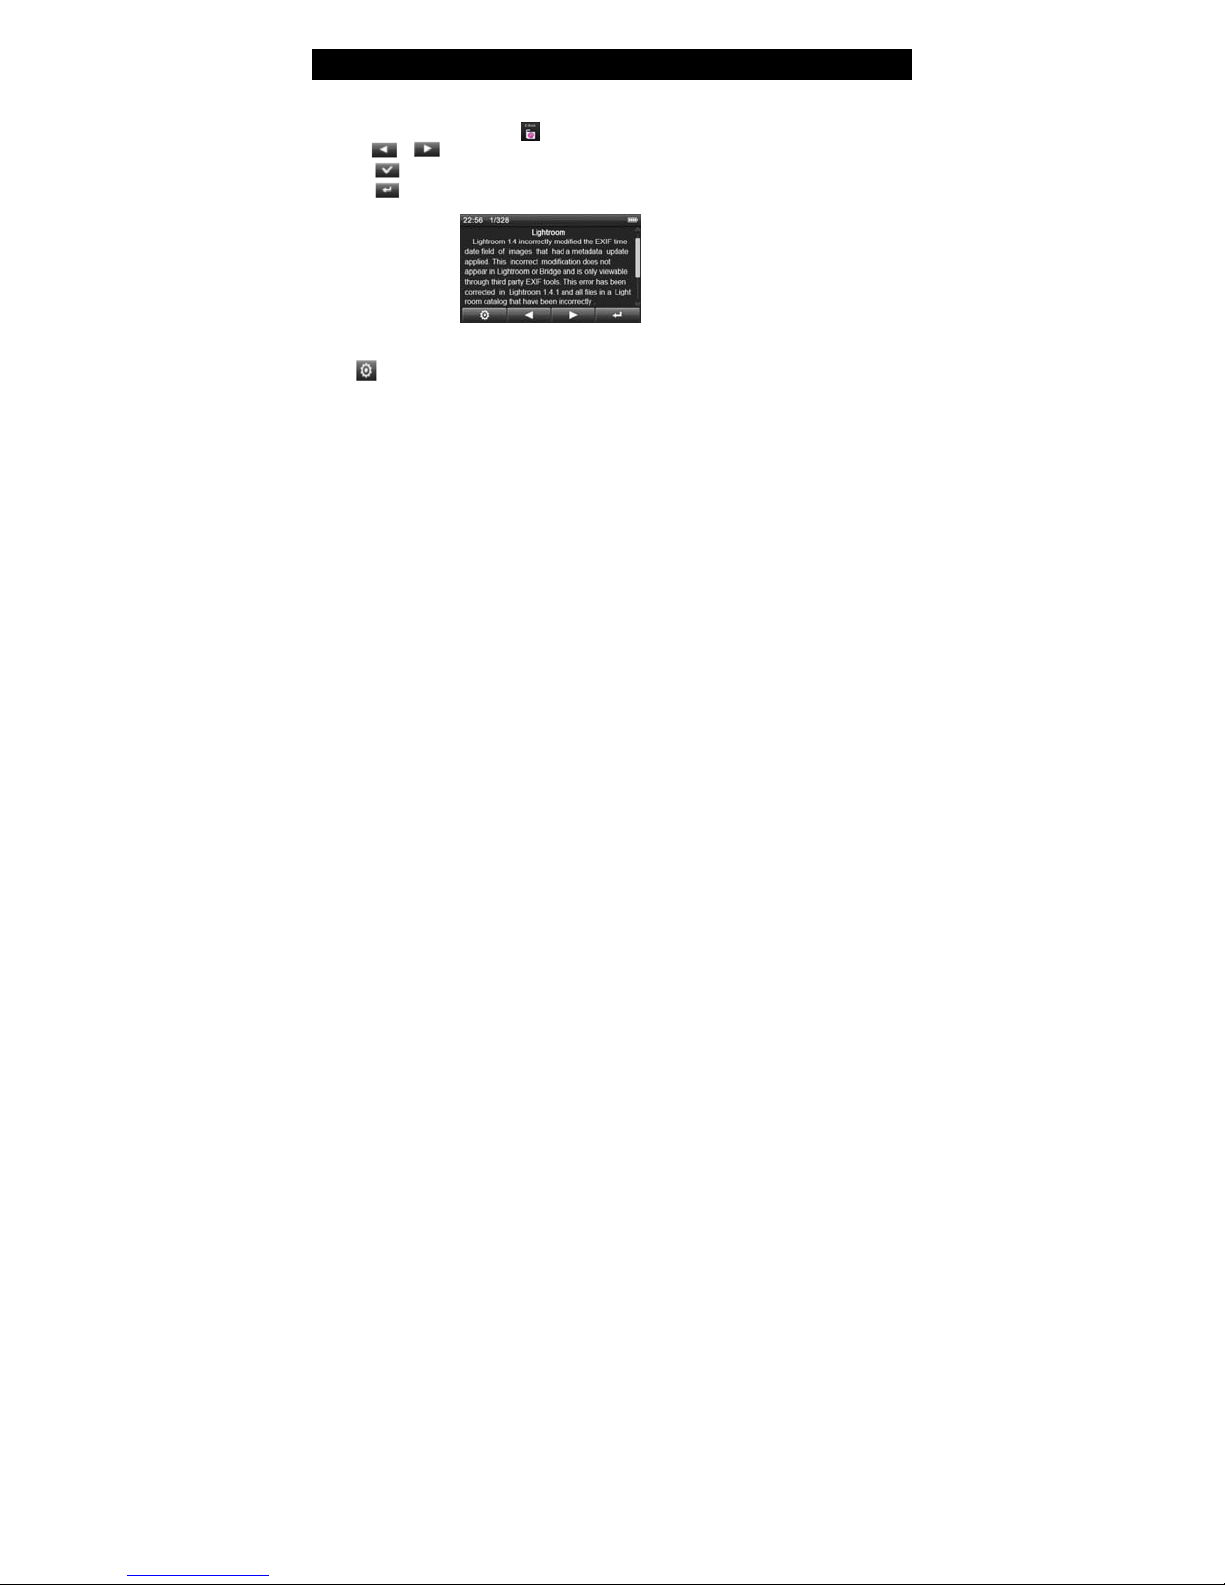
Text Browse
From the main menu, touch Text icon to enter the Text menu.
1.
Touch or icon to navigate and select your desired file to play.
2. Touch icon or touch the file selected directly to display.
ouch icon to exit to the previous menu.
3. T
Options
Touch icon to display the available options.
age Jump. Jumps to and displays the desired page.
1. P
2. Save Bookmark: Saves current location in file.
3. Search Mark: Returns to page marks as set above.
4. Delete Mark: Deletes saved mark s.
Page 22

TEXT Browse 21
5. Set Font: Set the font size to Small, Med or Large.
6. Set Color: Sets the font color to Green, Red or Blue.
7. Auto Browsing Timer: Sets the time the next page will be displayed automatically. Time can
be set in 5 second increments from 10 to 30 seconds.
Note: This player only supports files saved as “.TXT” or “.LRC” files in ANSI code. Files with
format codes will not be displayed. Format codes should be removed from file prior to being
transferred to the player.
Page 23
22 Voice Record
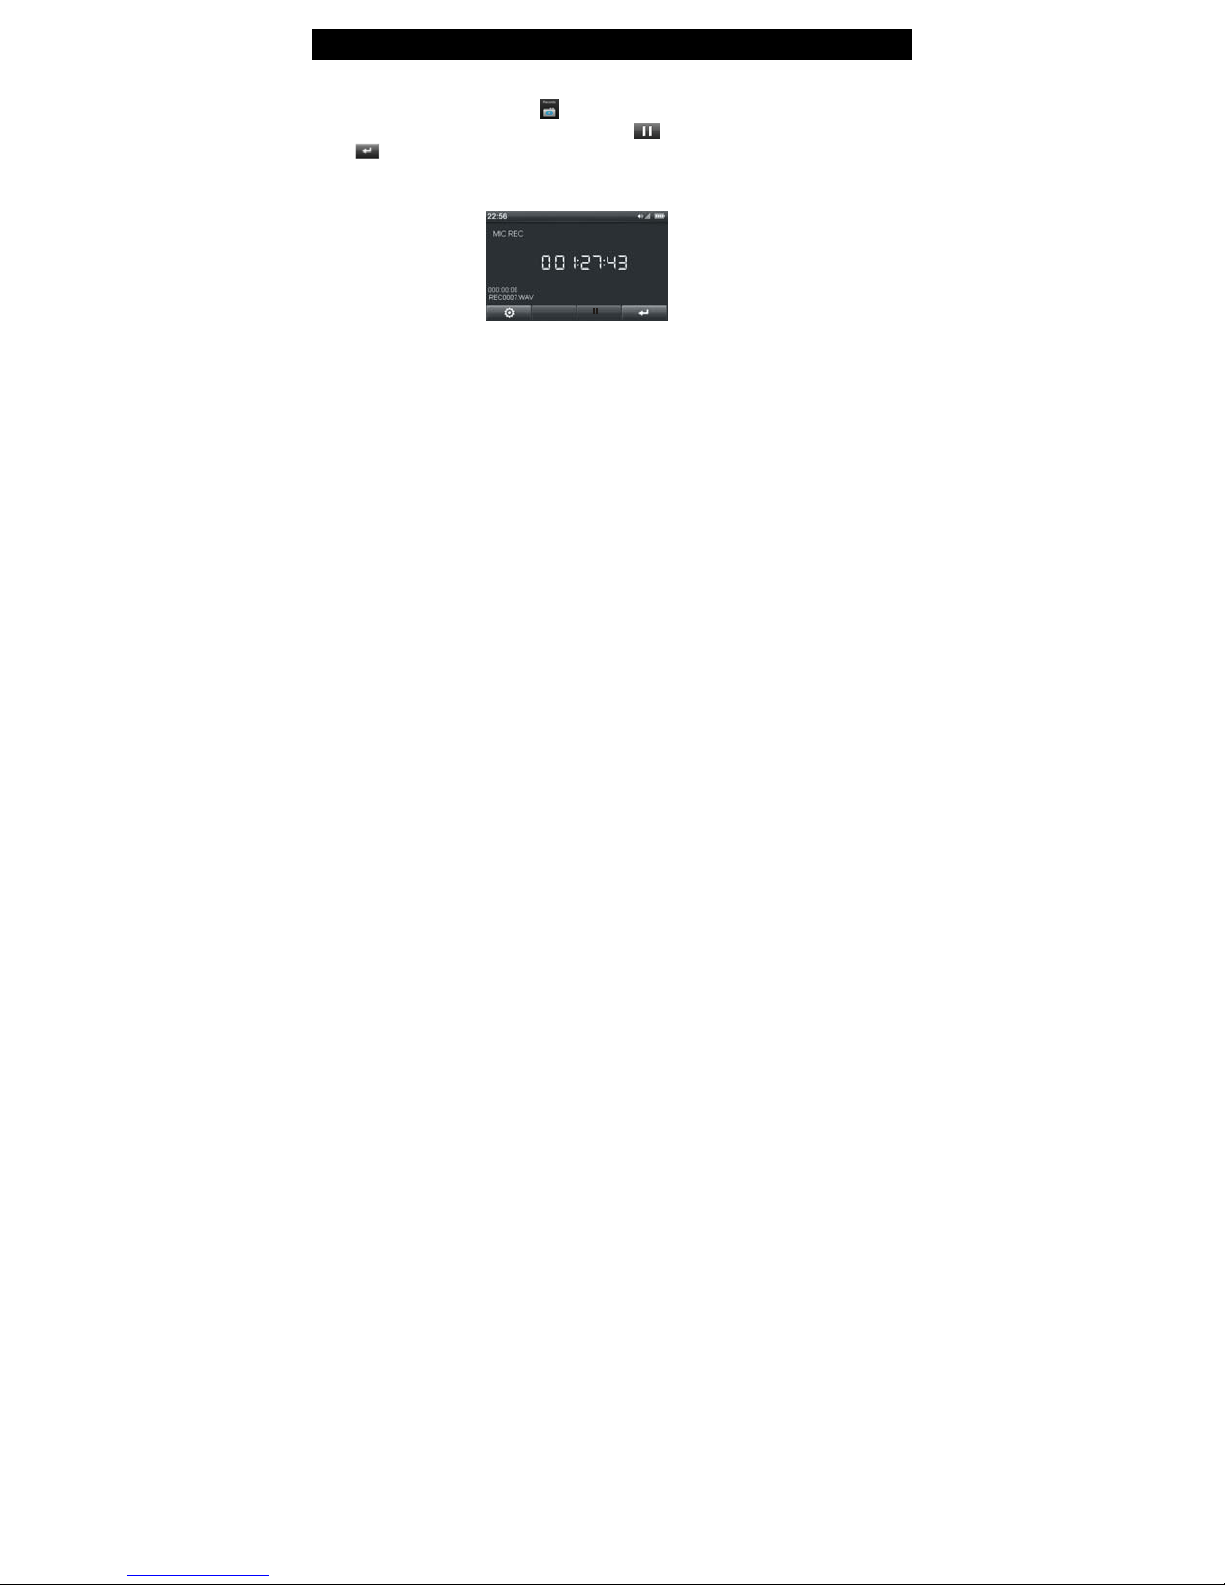
Record with the built-in microphone
From the main menu, touch Record icon enter to the Voice Record menu.
Touch the REC to start voice recording and touch to pause recording.
Touch icon to save recorded file and exit to the previous menu. Files names are generated
automatically in time sequence. Please see the time and date feature to ensure the correct time
and date stamp are recorded on the files when saved.
Opti
ons
Ready...
High rate !
Rea d y.. .
REC
1. Recording Quality: Set the recording quality (low rate / high rate)
2. Recording Volume: Set the recording volume (1 to 5)
Note: Recorded files can be found under the Record folder in the Explorer menu and played by
touching the file directly.
Page 24
FM Radio 23
FM Radio
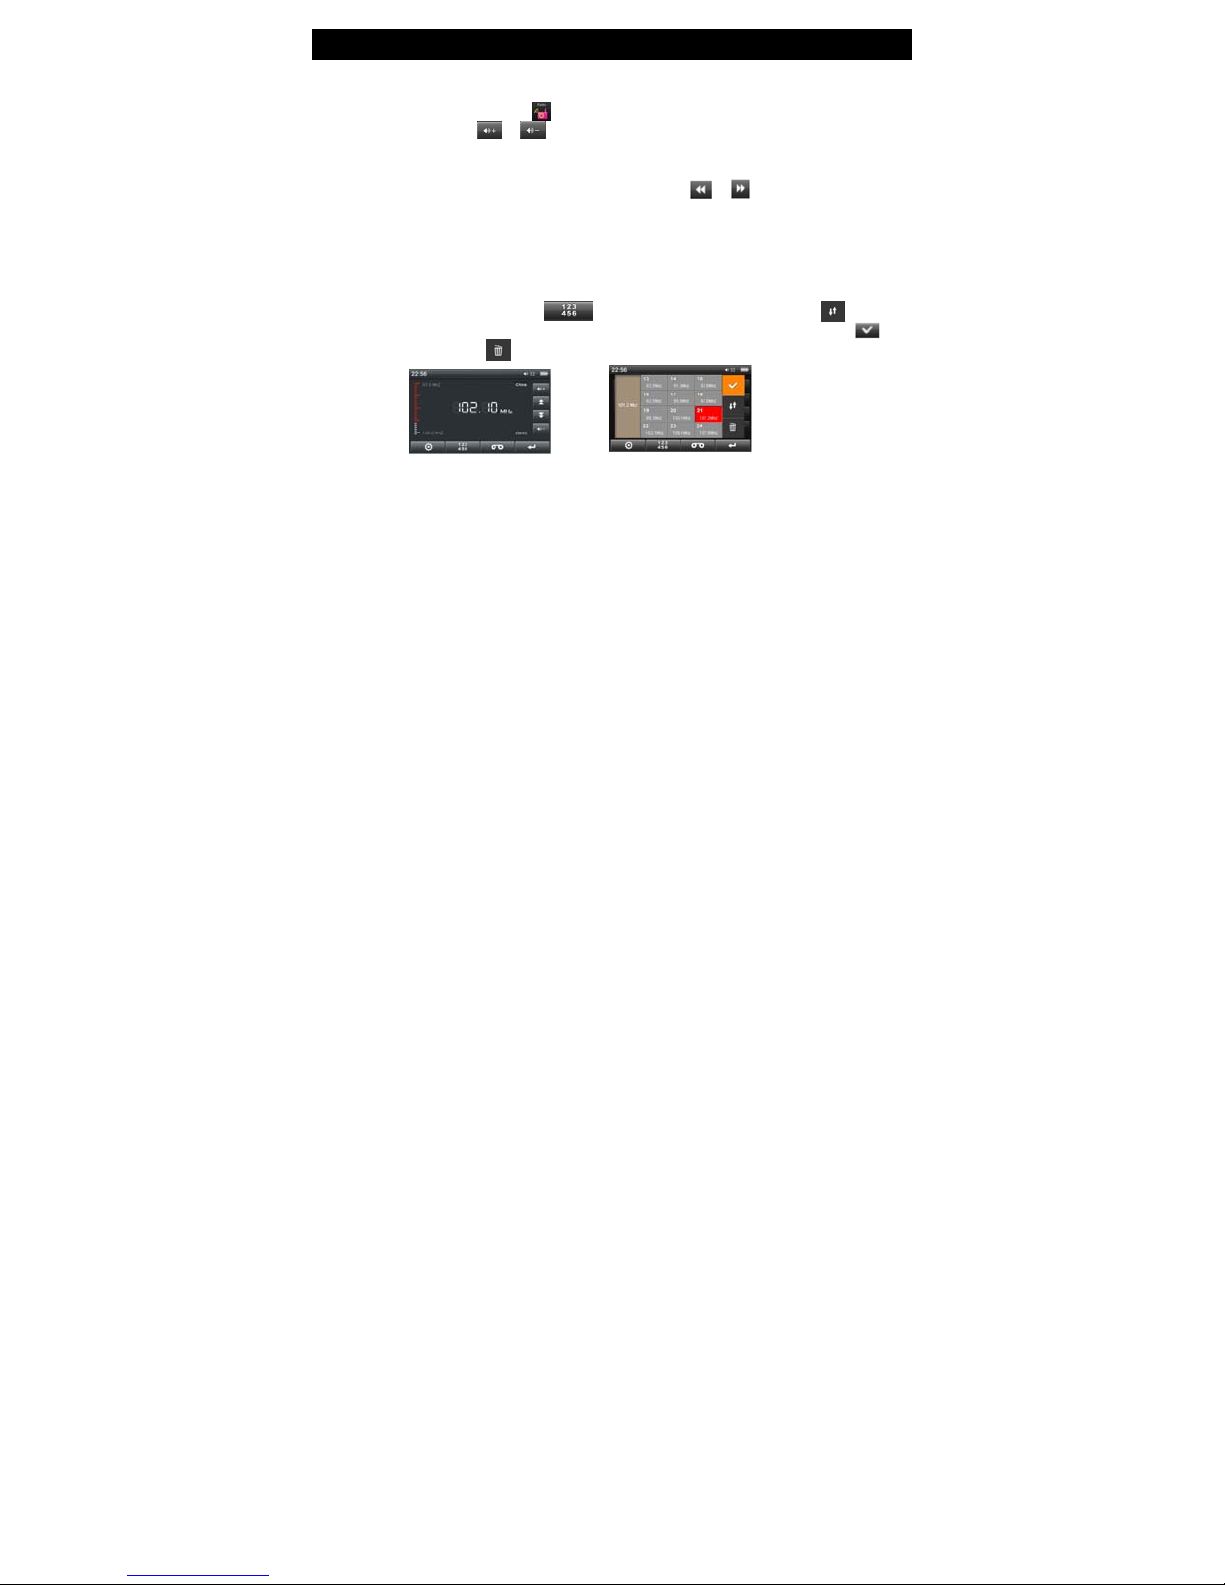
From the main menu, touch Radio icon enter the radio menu. The volume can be increased
or decreased by touching or icon to control the volume.
ons
Opti
1. Manual Search: Changes the frequency manually. Touch or icon to move up or
down by 0.1MHZ increments to fine radio stations. T ouch and hold them to fast -scan to the
desired frequency.
uto Search: The player will automatically scan all frequencies in your area and save radio
2. A
stations automatically when found.
3. Preset mode: Touch the preset mode to skip to the next or previous saved stations.
4. Save and delete channel: Touch icon to show the channel list. Touch to skip to
the next set of channel list. Touch a number block to select the channel and then touch to
save the channel, or touch icon to delete the channel.
Page 25

24 FM Radio
5. FM Recording: Record the FM radio you are currently listening to.
Touch icon to enter the FM recording mode. Touch the REC to start recording and touch
to pause recording. Touch icon to save the recorded file and exit and return to the
previous menu. The recorded files will be saved under “Record” folder in the Music menu.
T
ouch icon will display the available options for FM recording.
1. Reco
rding Quality: Set the recording quality (low rate / high rate)
2. Recording Volume: Set the recording volume (1 to 5)
Note: This player uses the earphones as the Antenna for FM reception. The earphones are
required to be plugged in for a clear FM reception. Please make sure that the earphone is
correctly connected to the player.
Page 26
Others 25
Other functions
From the main menu, touch other function icon to enter the Other function menu. .
1. Touch or icon to navigate and select your desired file to play.
2. Touch icon or touch the file selected directly to display.
3. Touch icon to exit to the previous menu.
S
top Watch
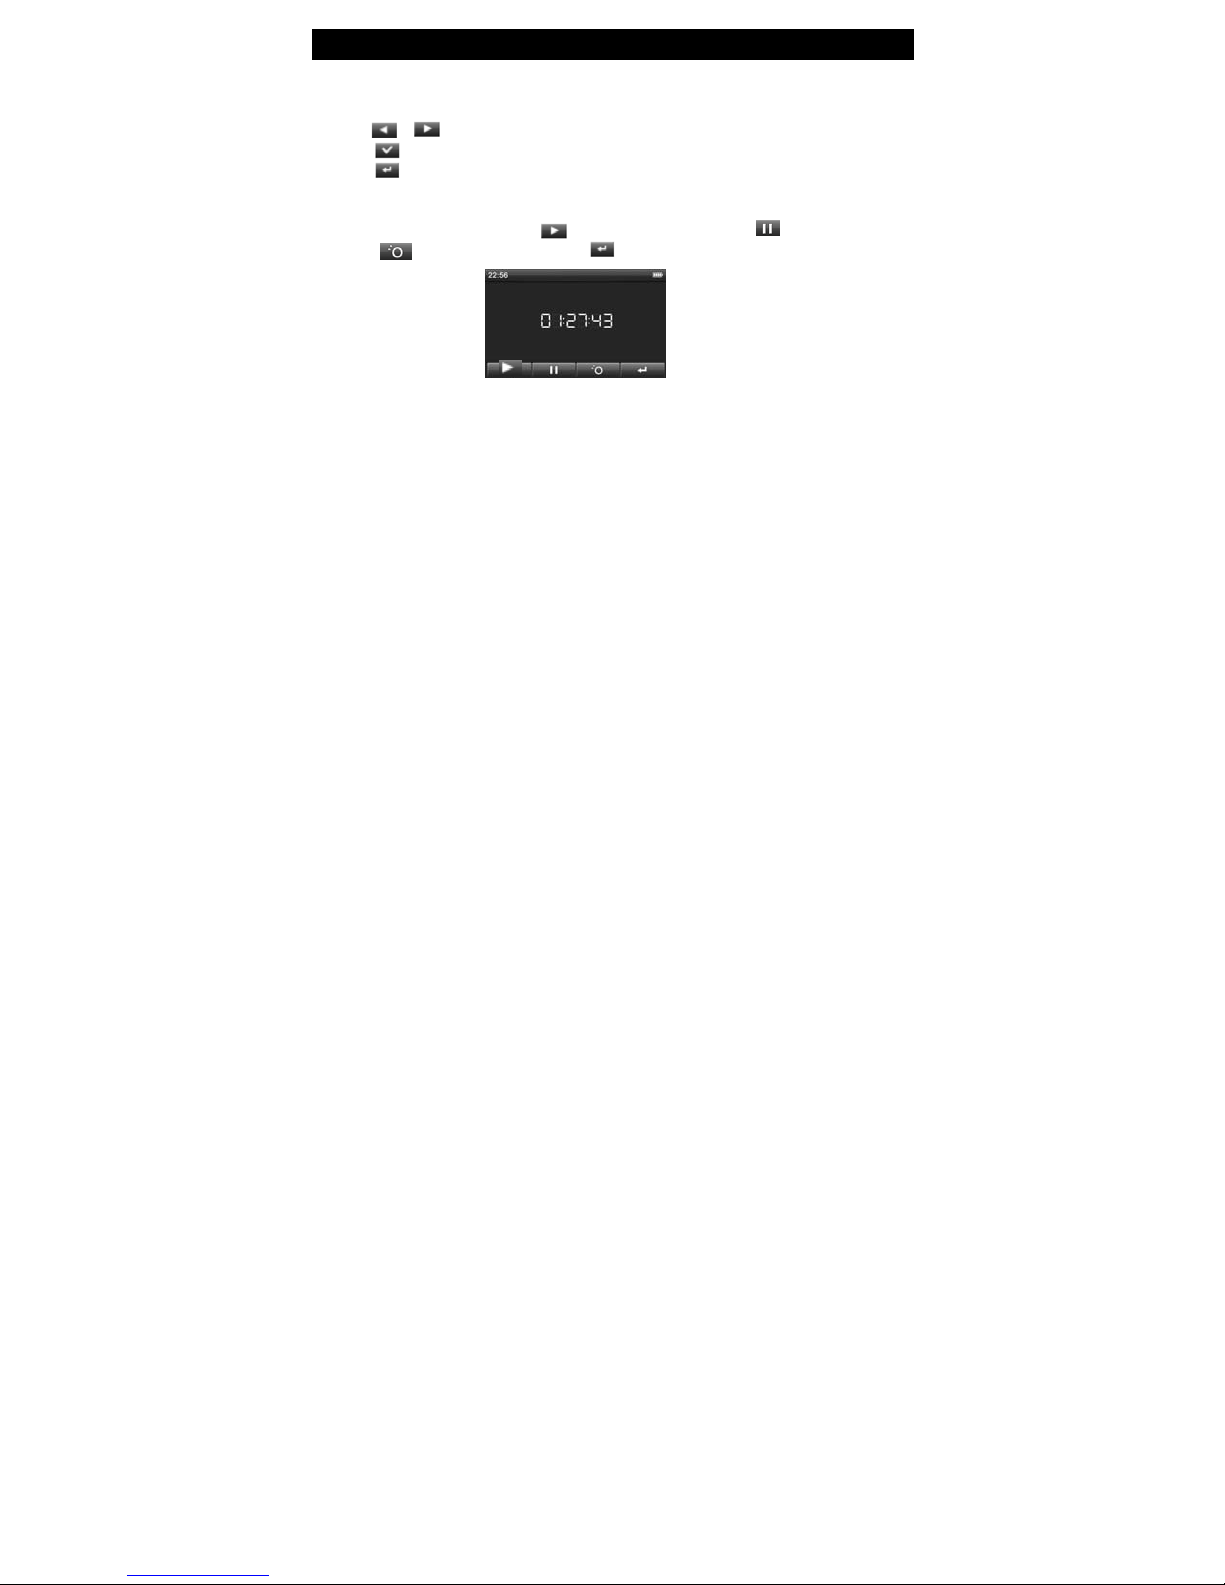
Touch the Stopwatch option. Touch icon to start the timer. Touch to stop the timer.
Touch the to clear the time. Touch the in any submenu to exit to the previous menu.
Expl
orer
You can view all the files and folders you have in the player. You can delete or play files directly
from this menu
Page 27

USB and Charge 26
USB Display Mode
Please connect the player to the PC via the USB data cable included (for Windows 2000 above,
you do not need driver installation). The player w ill display an “Online” mod e icon. The play er w ill
be displayed in the “My Computer” window and be assigned the next available drive letter by
your PC. Double click this icon to open and display the contents of the player. Files and folders
can be transferred, copied or deleted to and from this drive as you would on any other drive on
your computer.
Charge Display Mode
If the battery is too low, the player will display “Low battery to power off”. Then the player w ill turn
off automatically. The player should be charged using the supplied USB cable by connecting to a
PC. Charging time is approximately 4 hours for a fully charge.
Playback duration is approximately 3 to 4 hours for Video and 8 to 9 hours for Audio playback.
Battery duration is dependent on several factors including backlight brightness and duration,
Auto off settings and battery condition.
Note: It is recommended that the player be charged for 8 hours during the first 2 charges to help
condition the battery.
Page 28

27 Firmware Update
1. Users can download the latest firmware in the download center of our website.
(http://www.lattefone.com
2. After you download the latest firmware, please copy and transfer the file from your PC to
your player via the USB data cable.
3. Disconnect the player and turn on the player.
4. From the main menu, select [Settings] option to enter the system setting. Select Upgrade
option and select “YES” to start.
5. The updating p rocess may t ake up to 5 minutes . Once the updating proce ss is fini shed, the
player will automatically turn off and turn on.
.
Note: Please do not attempt to update the firmware before you talk to our technician or read the
detailed instruction on our website.
).
Page 29

Troubleshooting 28
The player cannot be turned on
Check if the battery is low. Recharge the player if required by connecting to your PC with the
USB cable. Ensure that the computer is on during the charging process.
No sound can be heard from the earphones
1. Check if the volume is set as 0. Adjust the volume as required.
2. Check the volume of the file attempting to be played.
3. Confirm the earphones are properly connected.
Noise through earphones
1. Check to ensure earphone plug is clean; foreign particles can cause static to be heard
through the earphones during playback.
2. Check if the music file is damaged. Confirm by play ing other music files. The damaged file
may create serious noises or voice dithering.
Incorrect language displayed
Please make sure that you have selected the correct language. Set language in (Setting) => (System
Setting) => (Language Selection)
Page 30

29 Troubleshooting
Files cannot be downloaded
1. Make sure the proper connection between computer and player is established.
2. Check if the memory is full.
3. Check if the USB cable is damaged and replace if necessary.
Audio files not playable
This player cannot play audio files that are copy protected. Please ensure that only files that
contain no copy protection are transferred to the player.
Video files not playable
Please check that the video files transferred to the player are in the correct size and format.
Some files may need to be re-encoded to be compatible with this player. (you might need a
rd
3
party video converting software)
FM Radio and FM transmission not clear
Make sure that you plug your earphones into the player. The earphones will work as an
antenna for a clear FM transmission
Page 31

For more
For technical support, please contact us at [email protected]
(Your email inquiry will be answered within 48 business hours)
For Genuine Latte Accessories, please visit www.lattezone.com
product information, please visit www.lattefone.com
 Loading...