


ASSEMBLY INSTRUCTION
COFFEE TABLE
Page 1 of 4
Assembly Instruction
ASSEMBLY TIPS:
1.Remove hardware from box and sort by size.
2.Please check to see that all hardware and parts are present prior to start of assembly.
3.please follow attached instructions in the same sequence as numbered to assurefast &
easy assembly.
Warning!
1.Don't attempt to repair or modify parts that are broken or defective.Please contsct the
store immediately.
2.This product is for home use only and not intended for commercial estabalishment.
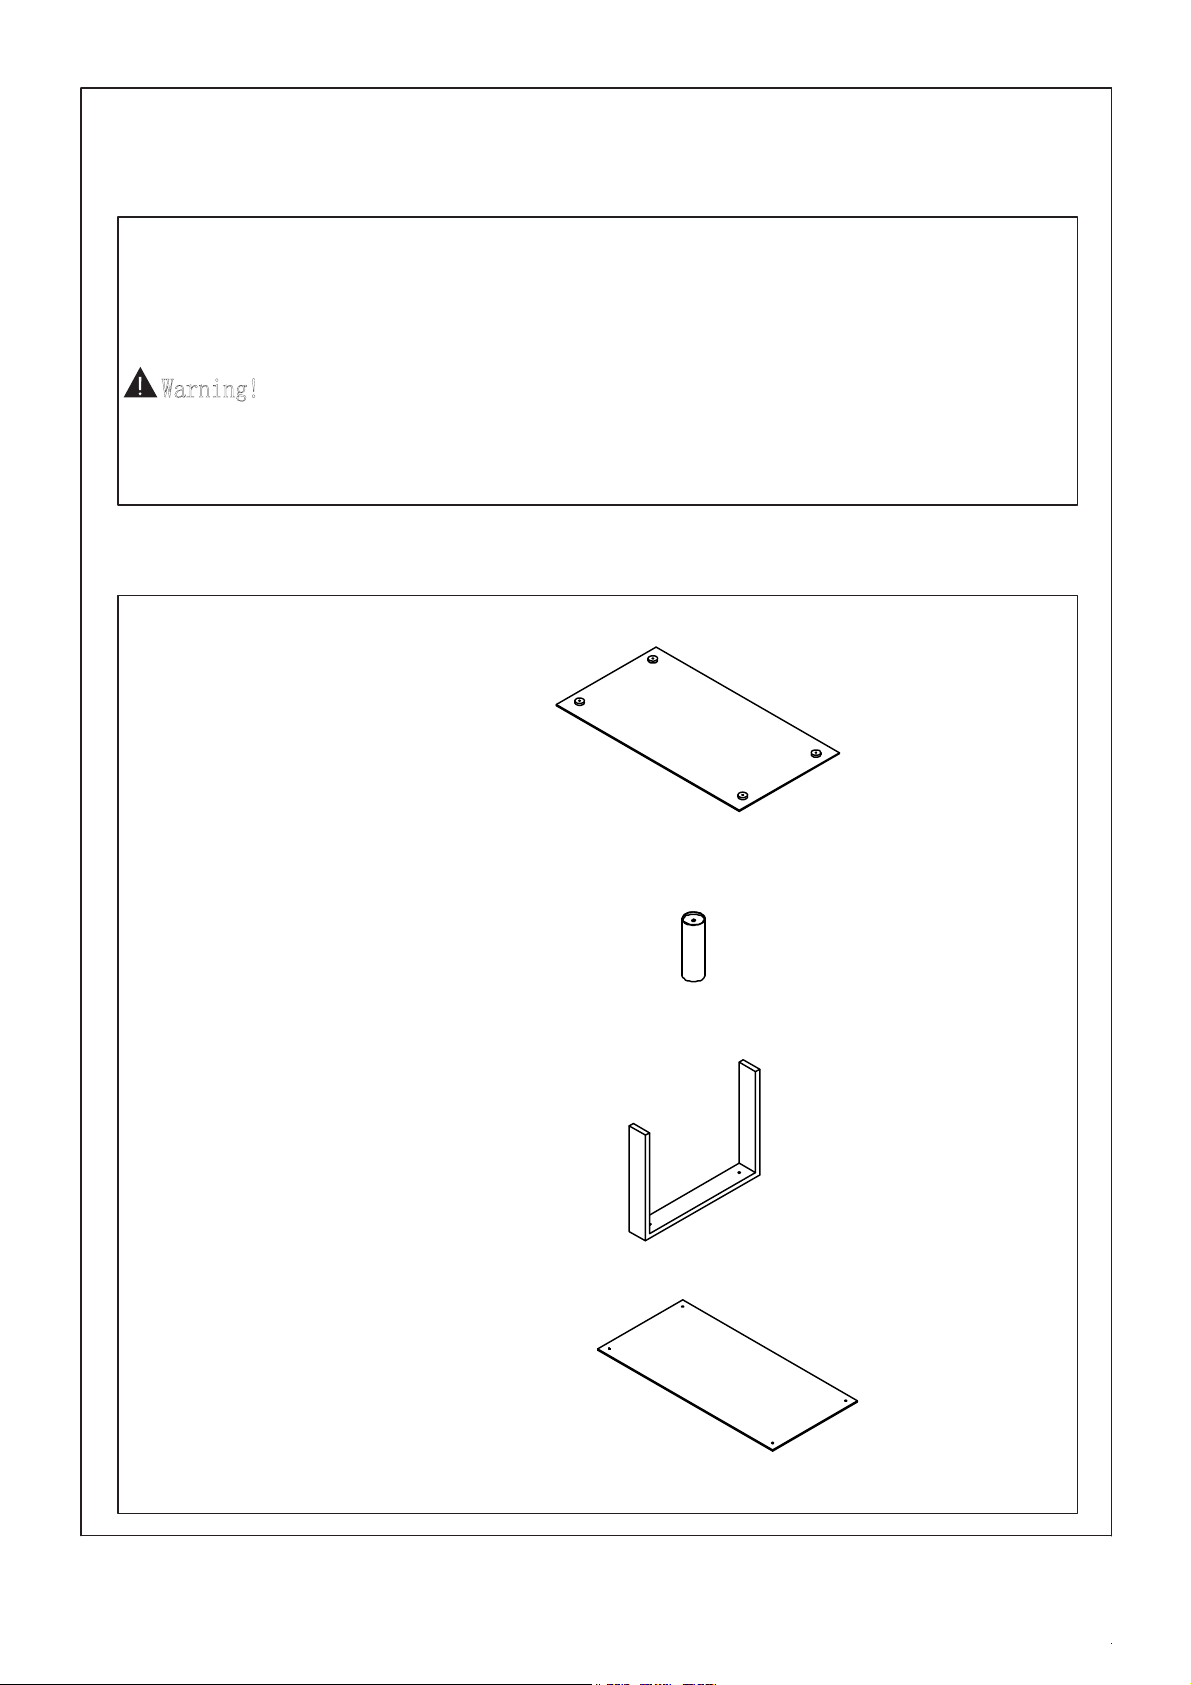
PARTS IDENTIFICATION:
(A) TOP
(B)
PILLAR
(C) LEG
1PC
PCS
8
2PCS
(D)
SHELF
1PC
Page 2 of 4
ASSEMBLY INSTRUCTION
pillars till steady.
Z
NO
1
2
3
4
5
6
7
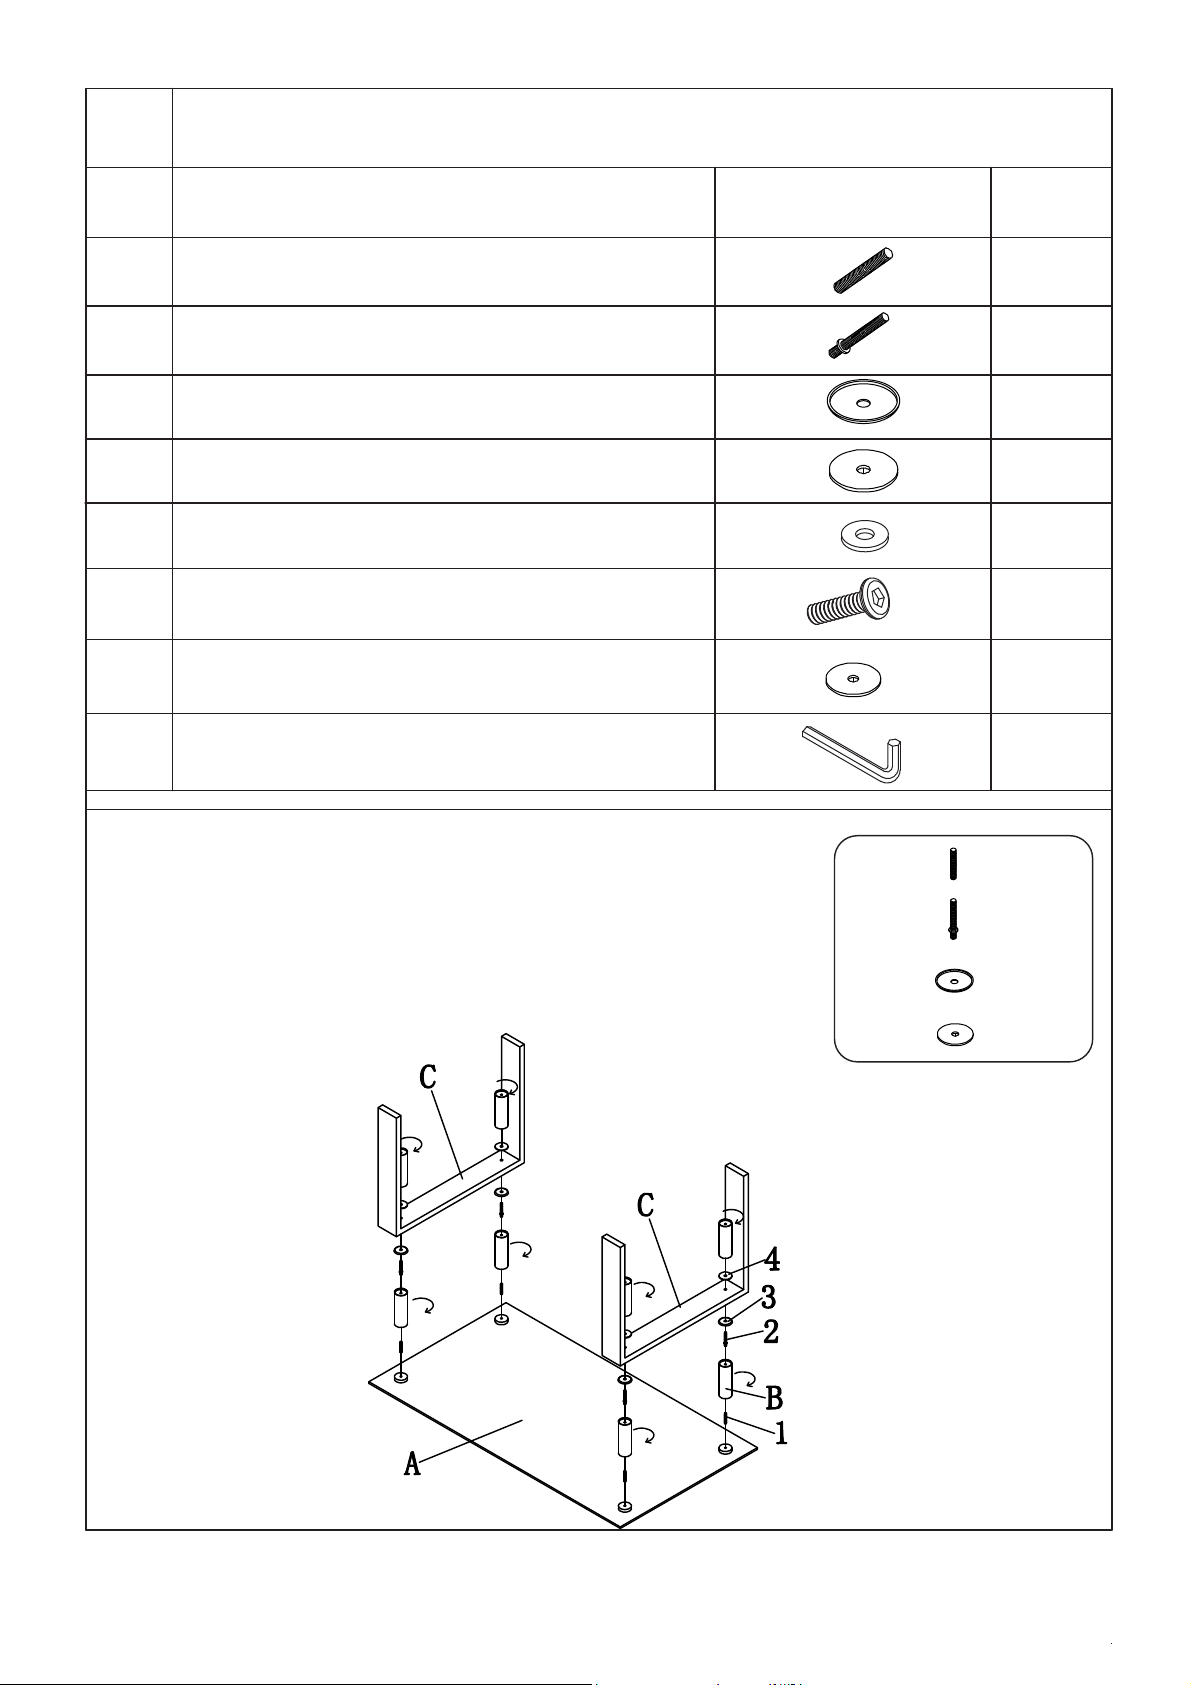
HARDWARE PACKAGE:
DESCRIPTION
SCREW Φ5/16*35mm
STUD BOLT
CHROMED WASHER
BIG WASHER
FLAT WASHER Φ5/16*20mm
ALLEN BOLT Φ5/16*35mm
SMALL WASHER
5/16*35mm
Φ
5/16*(10+65)mm
Φ5/16*55mm
Φ5/16*
Φ5/16*25mm
50mm
FIGURE
QTY
4pcs
4pcs
pcs
8
4pcs
4pcs
4pcs
4pcs
8
STEP 1:
surface, then spin screws(part"1") into four holes on the top.
Align and spin pillars (part"B") in screws. Then screw stud
bolts (part"2") into the other side of
washers (part"3") through the bolts with grooved sides
towards bolts. Then insert two legs
(part"4") and last pillars(part"B") in each bolt. Finally revolve
ALLEN WRENCH Φ5/16*66mm
Place top upside down on a soft and scratch resistant
the pillars. Put chromed
(part"C"), big washers
1pc
1
2
3
4
4PCS
4PCS
4PCS
4PCS
Page 3 of 4
ASSEMBLY INSTRUCTION
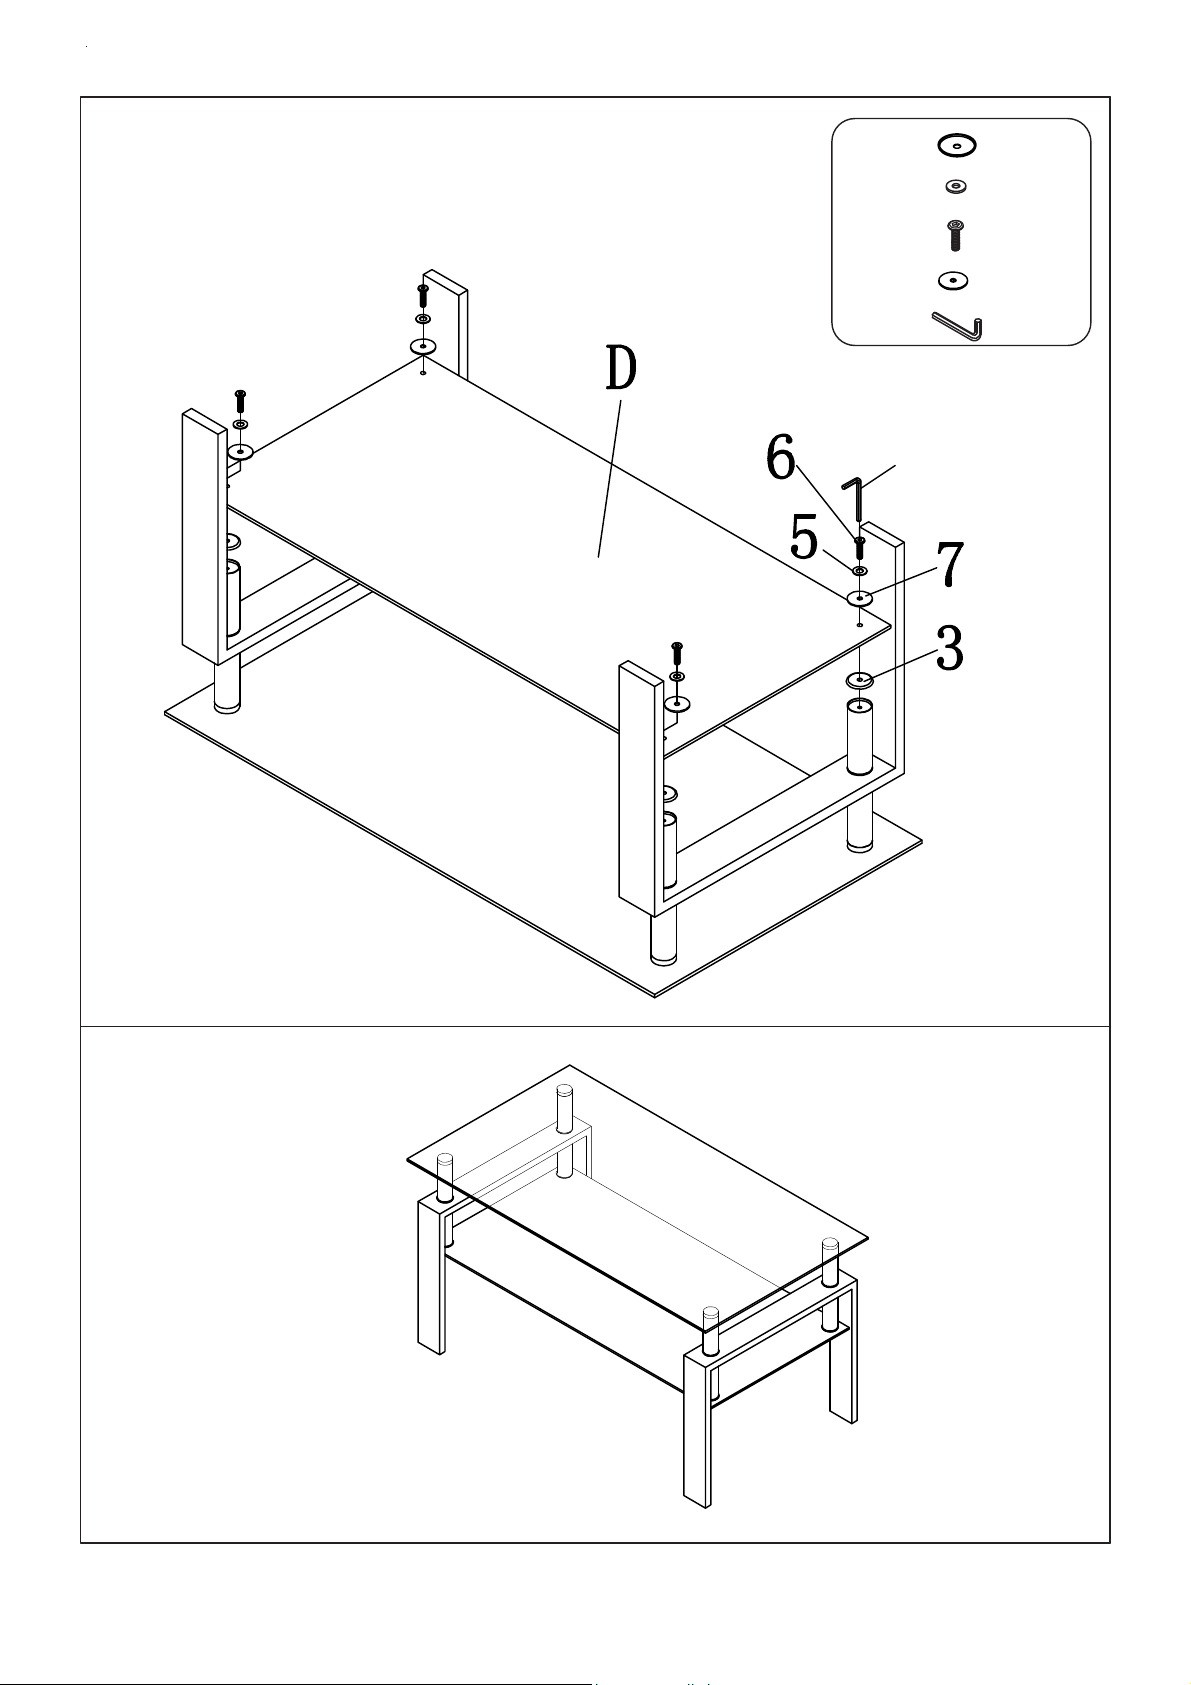
STEP 2:
side down, and then align the holes of shelf (part"D") to that
of chromed washers(part"3").Then put small washers
(part"7")first, flat washer(part"5"),and screw Allen bolts
(part"6")into the holes tightly with Allen wrench.
Put chromed washers on pillars(part"B") with grooved
3
5
6
7
8
4PCS
4PCS
4PCS
4PCS
8
STEP 3:
Complete.
Page 4 of 4
 Loading...