

Page 1
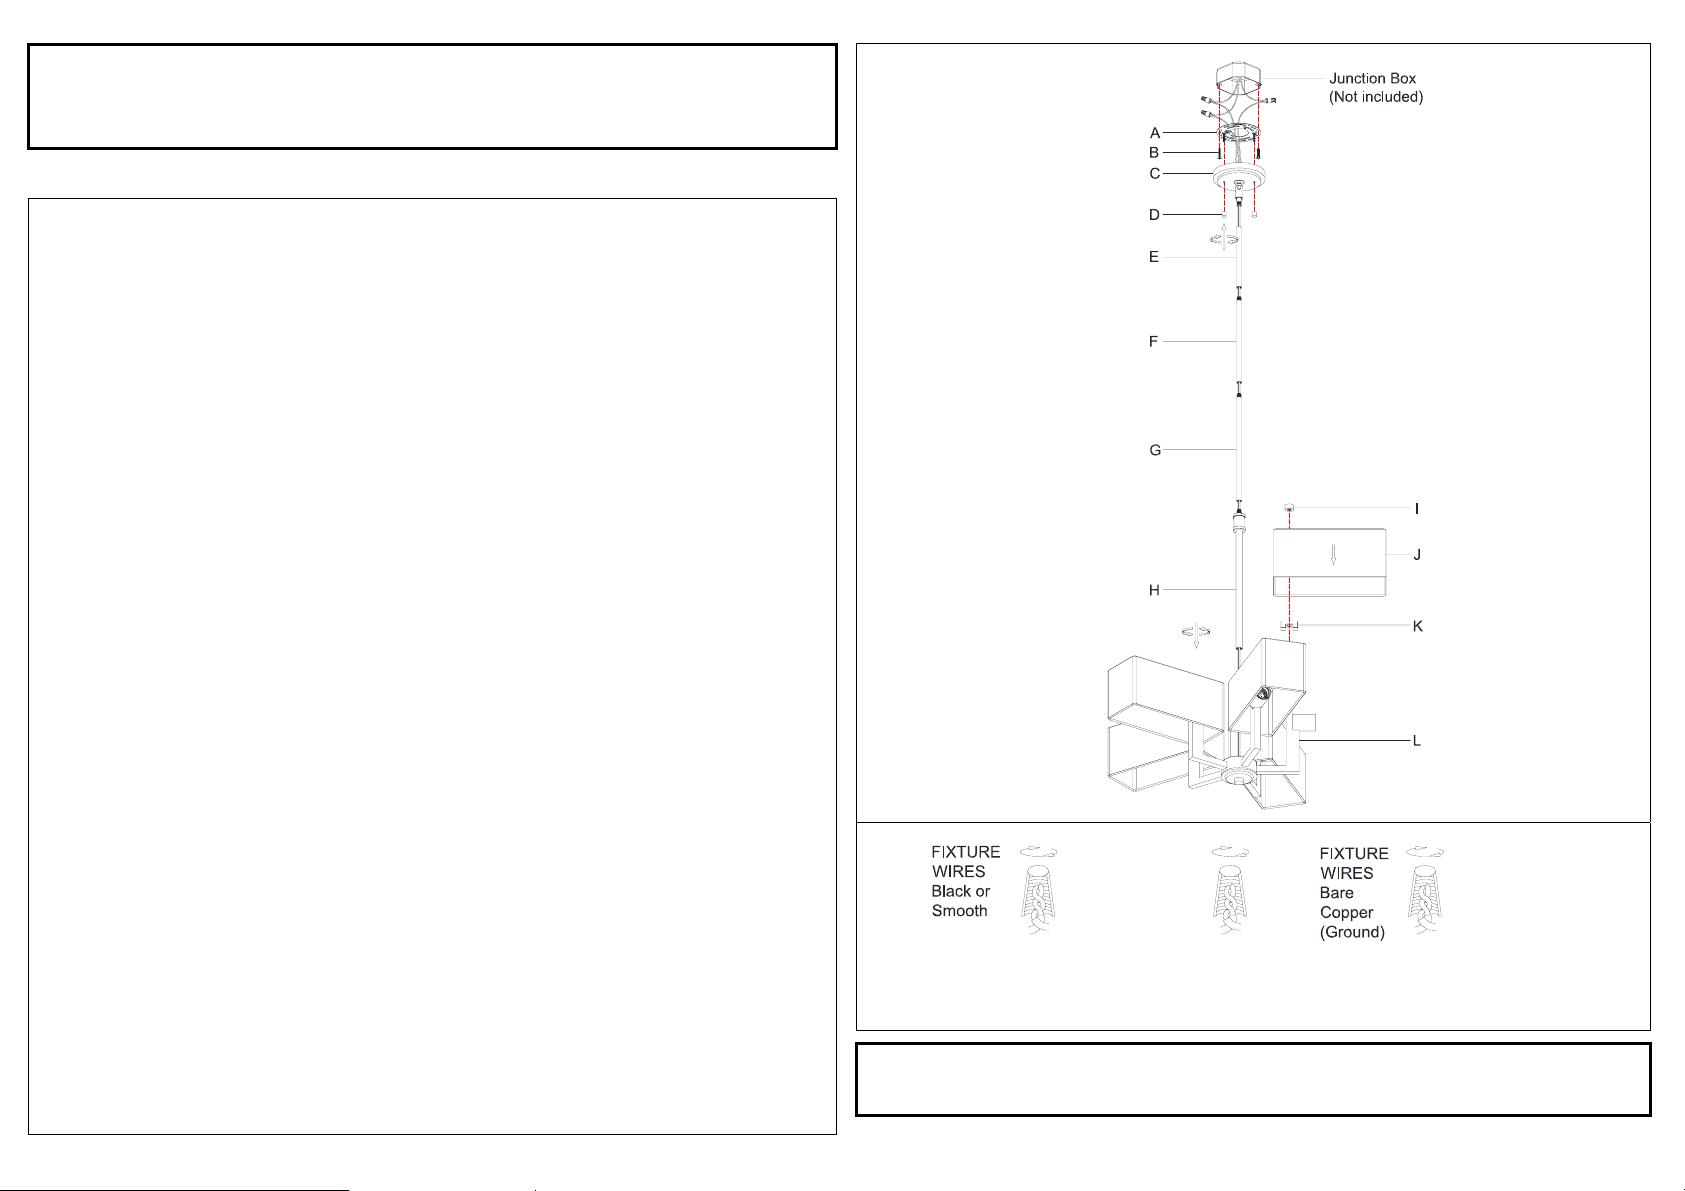
ASSEMBLING & INSTALLATION INSTRUCTIONS
The drawing shown may not exactly match the product enclosed.
However, the installation instructions do apply to this product.
WARNING! SHUT POWER OFF AT FUSE OR CIRCUIT BREAKER.
ATTENTION! COUPER LE COURANT AU FUSIBLE OU UN DISJONCTEUR.
ASSEMBLING THE FIXTURE (Fig.1).
1. Shut off the power at the circuit breaker and remove old fixture from ceiling, including the old
single bar.
2. Carefully unpack new fixture and lay all the parts on a clear surface.
3. Attach the mounting plate (A) to the junction box using screws (B). The side of the mounting
plate marked “GND” must face out.
The junction box is not included.
4. Determine th e desired hanging height and thread rods (H, G, F and/or E) to the lamp body (L).
Feed the wires carefully through each rod during assembl ing.
5. Connecting canopy (C) to the tube (E) and turn clockwise until firmly tightened.
6. Attach the fastener (K) and the shade (J) onto the tube of the lamp body (L), and then lock it
securely with the check ring (I).
7. Install the light bulbs (Not incl uded)
NOT EXCEED THE SPECIFIED WATTAGE!
CONNECTING THE WIRES (Fig.2)
1. Take the black wire from the ceiling junction box and the smooth wire leg from the fixture and
twist bare ends together. Twist wire connector onto end of wire until snug.
2. Repeat same process with white junction box wire and ribbed wire leg of fixture wire. NOTE:
Twist wires together in the same direction you twist the wire connector onto wires.
3. If your junction box has a grounding wire (green or bare copper), attach this wire and the bare
copper wire from the fixture together as step 1. If junction box has no ground wire, attach the
bare copper fixture wire to the green ground screw on the mounting plate.
4. Put the Lamp Body onto the ceiling, aligning the screws on the mounting plate with the
mounting holes on the canopy (C). Lock it securely with the Ball Nut (D).
Your installation is now complete. Return power to the junction box and test the fixture.
in accordance with the fixture specifications. NOTE: DO
FIG.1
FIG.2
FIXTURE
WIRES
White or
Ribbed
HOUSE
WIRES
Black (Hot)
HOUSE
WIRES
White
(Neutral)
HOUSE
WIRES
Green or Bare
Copper (Ground)
Thank you for purchasing a product.
Need assistance with parts or assembly? Please call customer service
 Loading...