

Page 1

THE
WARNING
TO REDUCE THE RISK OF SEVERE INJURY OR DEATH:
• READ AND FOLLOW ALL DIRECTIONS
• Never apply more force than the products
published load limit
• Do not make any modifications to the product
THE FOLD DOWN WORK STATION
• Never operate unless bench is properly installed
and secured to wood studs
• Never allow children to operate or play on or
around bench
• Never operate bench under the influence of
alcohol or drugs
THE QUICK BENCHS CAPACITY IS 500 LBS. OF STATIC
LOAD EVENLY DISTRIBUTED OVER THE TOP OF THE
BUTCHER BLOCK COUNTERTOP.
INSTRUCTION MANUAL &
ASSEMBLY INSTRUCTIONS
Thank you for choosing The Quick Bench.
This product will be an integral part of your life with
an array of applications in garages, laundry rooms,
kitchens, and anywhere you need extra space.
FOR MORE INFO PLEASE VISIT WWW.MYQUICKBENCH.COM
20
MIN
THE BRACKETS MUST BE ANCHORED TO 2" STUDS
TO PERFORM CORRECTLY AND BE ABLE TO SUPPORT
THE RATED CAPACITY.
THIS PRODUCT MUST BE SECURELY MOUNTED TO WOOD
STUDS ON A FLAT WALL. THE WOOD STUDS MUST HAVE
THE ABILITY TO HOLD THE WEIGHT OF THE QUICK BENCH
AND ITS CONTENTS. ANY MISAPPLICATION OF THIS
PRODUCT TO NON-STUDS WILL VOID THE WARRANTY
AND THE PRODUCT WILL BE DEEMED UNSAFE DUE TO
OWNER’S INSTALLATION ERROR.
If you do not feel comfortable installing this bench,
contact a licensed professional.
ASSEMBLY TIME SHOULD TAKE AROUND 20-MINUTES WITH
ONE PERSON TO ATTACH THE BRACKETS TO THE STUD
WALL AND TWO PEOPLE TO LIFT THE BUTCHER BLOCK
TOP AND FASTEN IT IN PLACE.
Page 2
TOOLS & MATERIALS NEEDED
STEP
2
TOOLS (not inc lud e d )
• Drill
• 5/32" Drill Bit
• 10 mm Socket
• Stud Finder
• Tape Measure
• Level
• Pencil
• Square
• Phillips Screwdriver
HARDWARE (i n clu d ed)
QTY DESCRIPTION
1 Wood Top
2 Mounting Brackets
7 1" Screws
7 2 3/8" Lag Bolts
7 Washers
ASSEMBLY INSTRUCTIONS
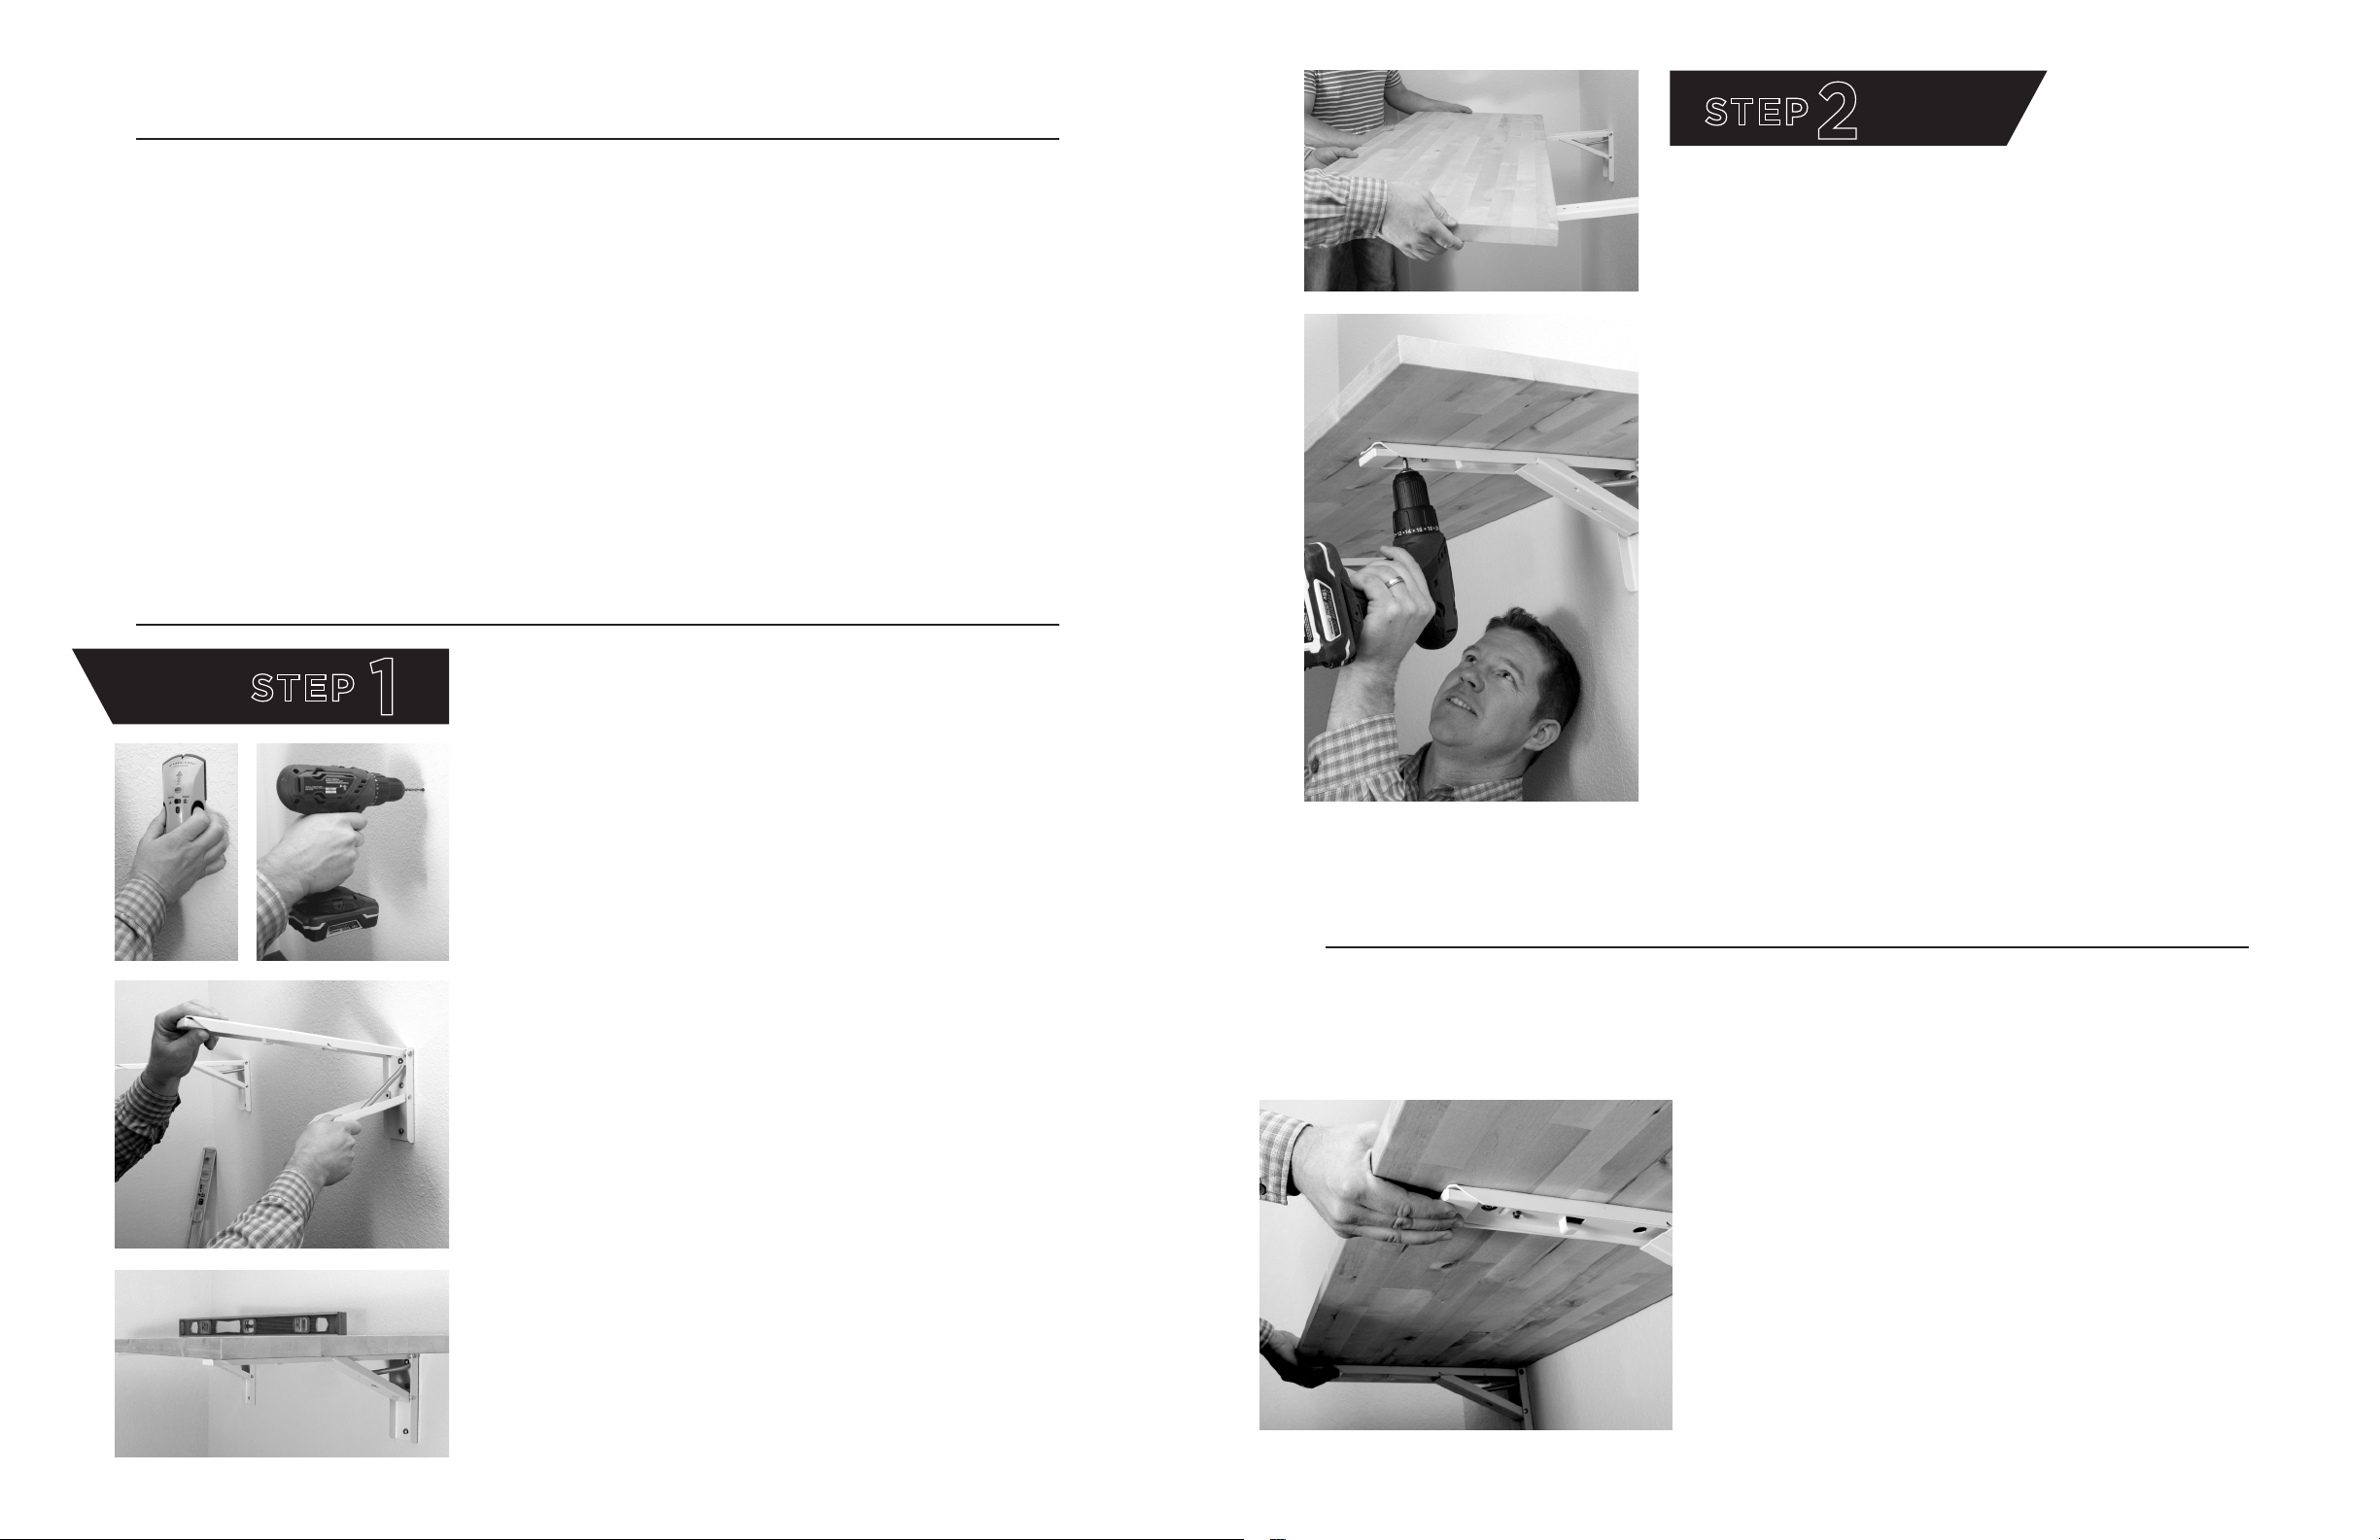
• Determine and mark the desired height of the
STEP
1
workbench on the wall with a pencil. (NOTE: The
bench is designed to operate at a height of
30 inches to 72 inches.)
• Lift the brackets into the UP position with the
latches set at a right angle and the locking bracket
LOCKED as seen below.
• Place the countertop on the brackets with the back
edge securely against the stop tab on the bracket.
(NOTE: This will leave a 1/4" space between the
wood top and the wall.)
• Center wood top between the brackets.
(NOTE: If the brackets are placed 16" apart, the
ends of the bench will be 16" from the outside of
the brackets. If the brackets are placed 24" apart,
there will be 12" from the ends to the outside of the
brackets.)
• Screw the 6 - 1" screws into the underside of the
countertop to fasten the board in place.
(NOTE: Have a second person hold the board in
place to make sure it does not move or fall.)
• Use a stud finder to find the closest stud and mark
the location. Then measure 2 3/4" down from your
predetermined workbench height and predrill a
hole with the 5/32" bit.
• When hole is predrilled, fold down spring support
plate and secure top bolt and washer using your
10 mm socket through bracket and into stud
behind wall. Make sure support plate is all the way
down so it does not create a pinch point.
• Measure 24" or 32" to the left or right from your
first located stud and locate your other mounting
position using the stud finder. (NOTE: Stud spacing
in American Residential Settings is 16" or 24"
on center and your New Quick Bench must be
anchored to the center of the Studs.)
• Repeat the previous process and install the top
bolt on the second mounting bracket.
• Use a level to make sure both brackets are level, and
then pre drill the remaining holes on each bracket.
• Make sure all 6 anchor screws and washers are
fastened securely into studs on the vertical walls
before continuing.
OPERATING INSTRUCTIONS
PLEASE NOTE THAT BEFORE USING YOUR BENCH, IT IS IMPORTANT
THAT YOU UNDERSTAND THAT AFTER THE ASSEMBLY IS COMPLETE,
LOCATIONS IN AND AROUND YOUR HINGES WILL CREATE PINCH POINTS.
1. Ensure bench is clear of all items that could
interfere with the bench’s range of motion and
that all bolts and screws are securely fastened
to the studs and the countertop.
2. To raise the bench, lift the bench upward until
you hear the brackets click and lock into place.
3. To lower the bench, stand in front of the bench
and use your fingers to compress the release
on the end of both brackets, and then lower the
bench to the wall. When you lower the bench it
will fit flush against the wall.
 Loading...