

Page 1
TROUBLE SHOOTING GUIDE
TROUBLE PROBABLE CAUSE SOLUTION
Model 1129
Fan not working or • No power Make sure Unit is plugged in
Humidifier doesn’t Check that the Power Switch is on
turn on • Humidistat not set correctly Set Humidistat to higher humidity level
Water leaking • Base is overlled Reduce water level in Base
• Filter is old and dirty Replace Filter
Foul odor • Filter needs to be replaced Replace Filter
• Base needs to be cleaned Follow
• Whole Humidier needs cleaning Follow
Filter discoloration • Mineral deposits in water Replace Filter
Water discoloration • Humidier needs to be cleaned Follow
• Hard water - Iron in water Use ltered or distilled water
• Some humidier additives can cause
discoloration
Lights don’t work:
Humidistat Light Off, • Humidity is not yet achieved in room Let Humidier continue to run
Power Light On
Power Light Off, •
Room has reached desired Humidity level
Set Humidity Knob for more Humidity
Humidistat Light On
No water show • Hose not connected to Pump Connect Hose to Pump
• Hose not connected to Water Show Connect Hose to Water Show
• No Water in Unit Rell Unit
LIMITED WARRANTY
WHAT THIS WARRANTY COVERS: This product is warranted against defects in workmanship and/or materials.
HOW LONG THIS WARRANTY LASTS: This warranty extends only to the original purchaser of the product and lasts for one (1) year from the
date of original purchase or until the original purchaser of the product sells or transfers the product, whichever first occurs.
WHAT LASKO WILL DO: During the warranty period, Lasko will, at its sole option, repair or replace any part or parts that prove to be defective
or replace the whole product with the same or comparable model.
WHAT THIS WARRANTY DOES NOT COVER: This warranty does not apply if the product was damaged or failed because of accident, improper
handling or operation, shipping damage, abuse, misuse, unauthorized repairs made or attempted, or the use of the product for commercial
or nonresidential service. This warranty does not cover shipping costs for the return of products to Lasko for repair or replacement. Lasko will pay return
shipping charges from Lasko following warranty repairs or replacement .
ANY AND ALL WARRANTIES, EXPRESSED OR IMPLIED (INCLUDING, WITHOUT LIMITATION, ANY IMPLIED WARRANTY OF
MERCHANTABILITY), LAST ONE YEAR FROM THE DATE OF ORIGINAL PURCHASE OR UNTIL THE ORIGINAL PURCHASER OF THE
PRODUCT SELLS OR TRANSFERS THE PRODUCT, WHICHEVER FIRST OCCURS AND IN NO EVENT SHALL LASKO’S LIABILITY UNDER
ANY EXPRESS OR IMPLIED WARRANTY INCLUDE (I) INCIDENTAL OR CONSEQUENTIAL DAMAGES FROM ANY CAUSE WHATSOEVER,
OR (II) REPLACMENT OR REPAIR OF ANY HOUSE FUSES, CIRCUIT BREAKERS OR RECEPTACLES. NOTWITHSTANDING ANYTHING TO
THE CONTRARY, IN NO EVENT SHALL LASKO’S LIABILITY UNDER ANY EXPRESS OR IMPLIED WARRANTY EXCEED THE PURCHASE
PRICE OF THE PRODUCT AND ANY SUCH LIABILITY SHALL TERMINATE UPON THE EXPIRATION OF THE WARRANTY PERIOD.
Some states and provinces do not allow limitations on how long an implied warranty lasts, or the exclusion or limitation of incidental or
consequential damages, so these exclusions or limitations may not apply to you. This warranty gives you specific legal rights. You may also
have other rights which vary from state to state and province to province.
FOR PARTS:
For Replacement Parts or Filters please call: 1-800-233-2068,
MONDAY - FRIDAY, BETWEEN the HOURS of 8 AM and 4 PM EST. "PLEASE DO NOT RETURN PRODUCT TO PLACE OF PUR-
CHASE." Reference model number 1129 when you call.
FOR TECHNICAL ASSISTANCE and SERVICE CENTER LOCATIONS:
For any questions, comments or the location of your nearest service center, PLEASE CALL OUR TOLL-FREE "HOTLINE" AT
1-800-233-0268, MONDAY - FRIDAY, BETWEEN the HOURS of 8 AM and 5 PM EST. Please reference model number 1129 when
Appliance Service Dept. • 300 Confederate Drive, Franklin, TN 37065-0569 PLEASE DO NOT SEND PRODUCT TO THIS LOCATION!
Rev. A 5/07 4 2084473
you call.
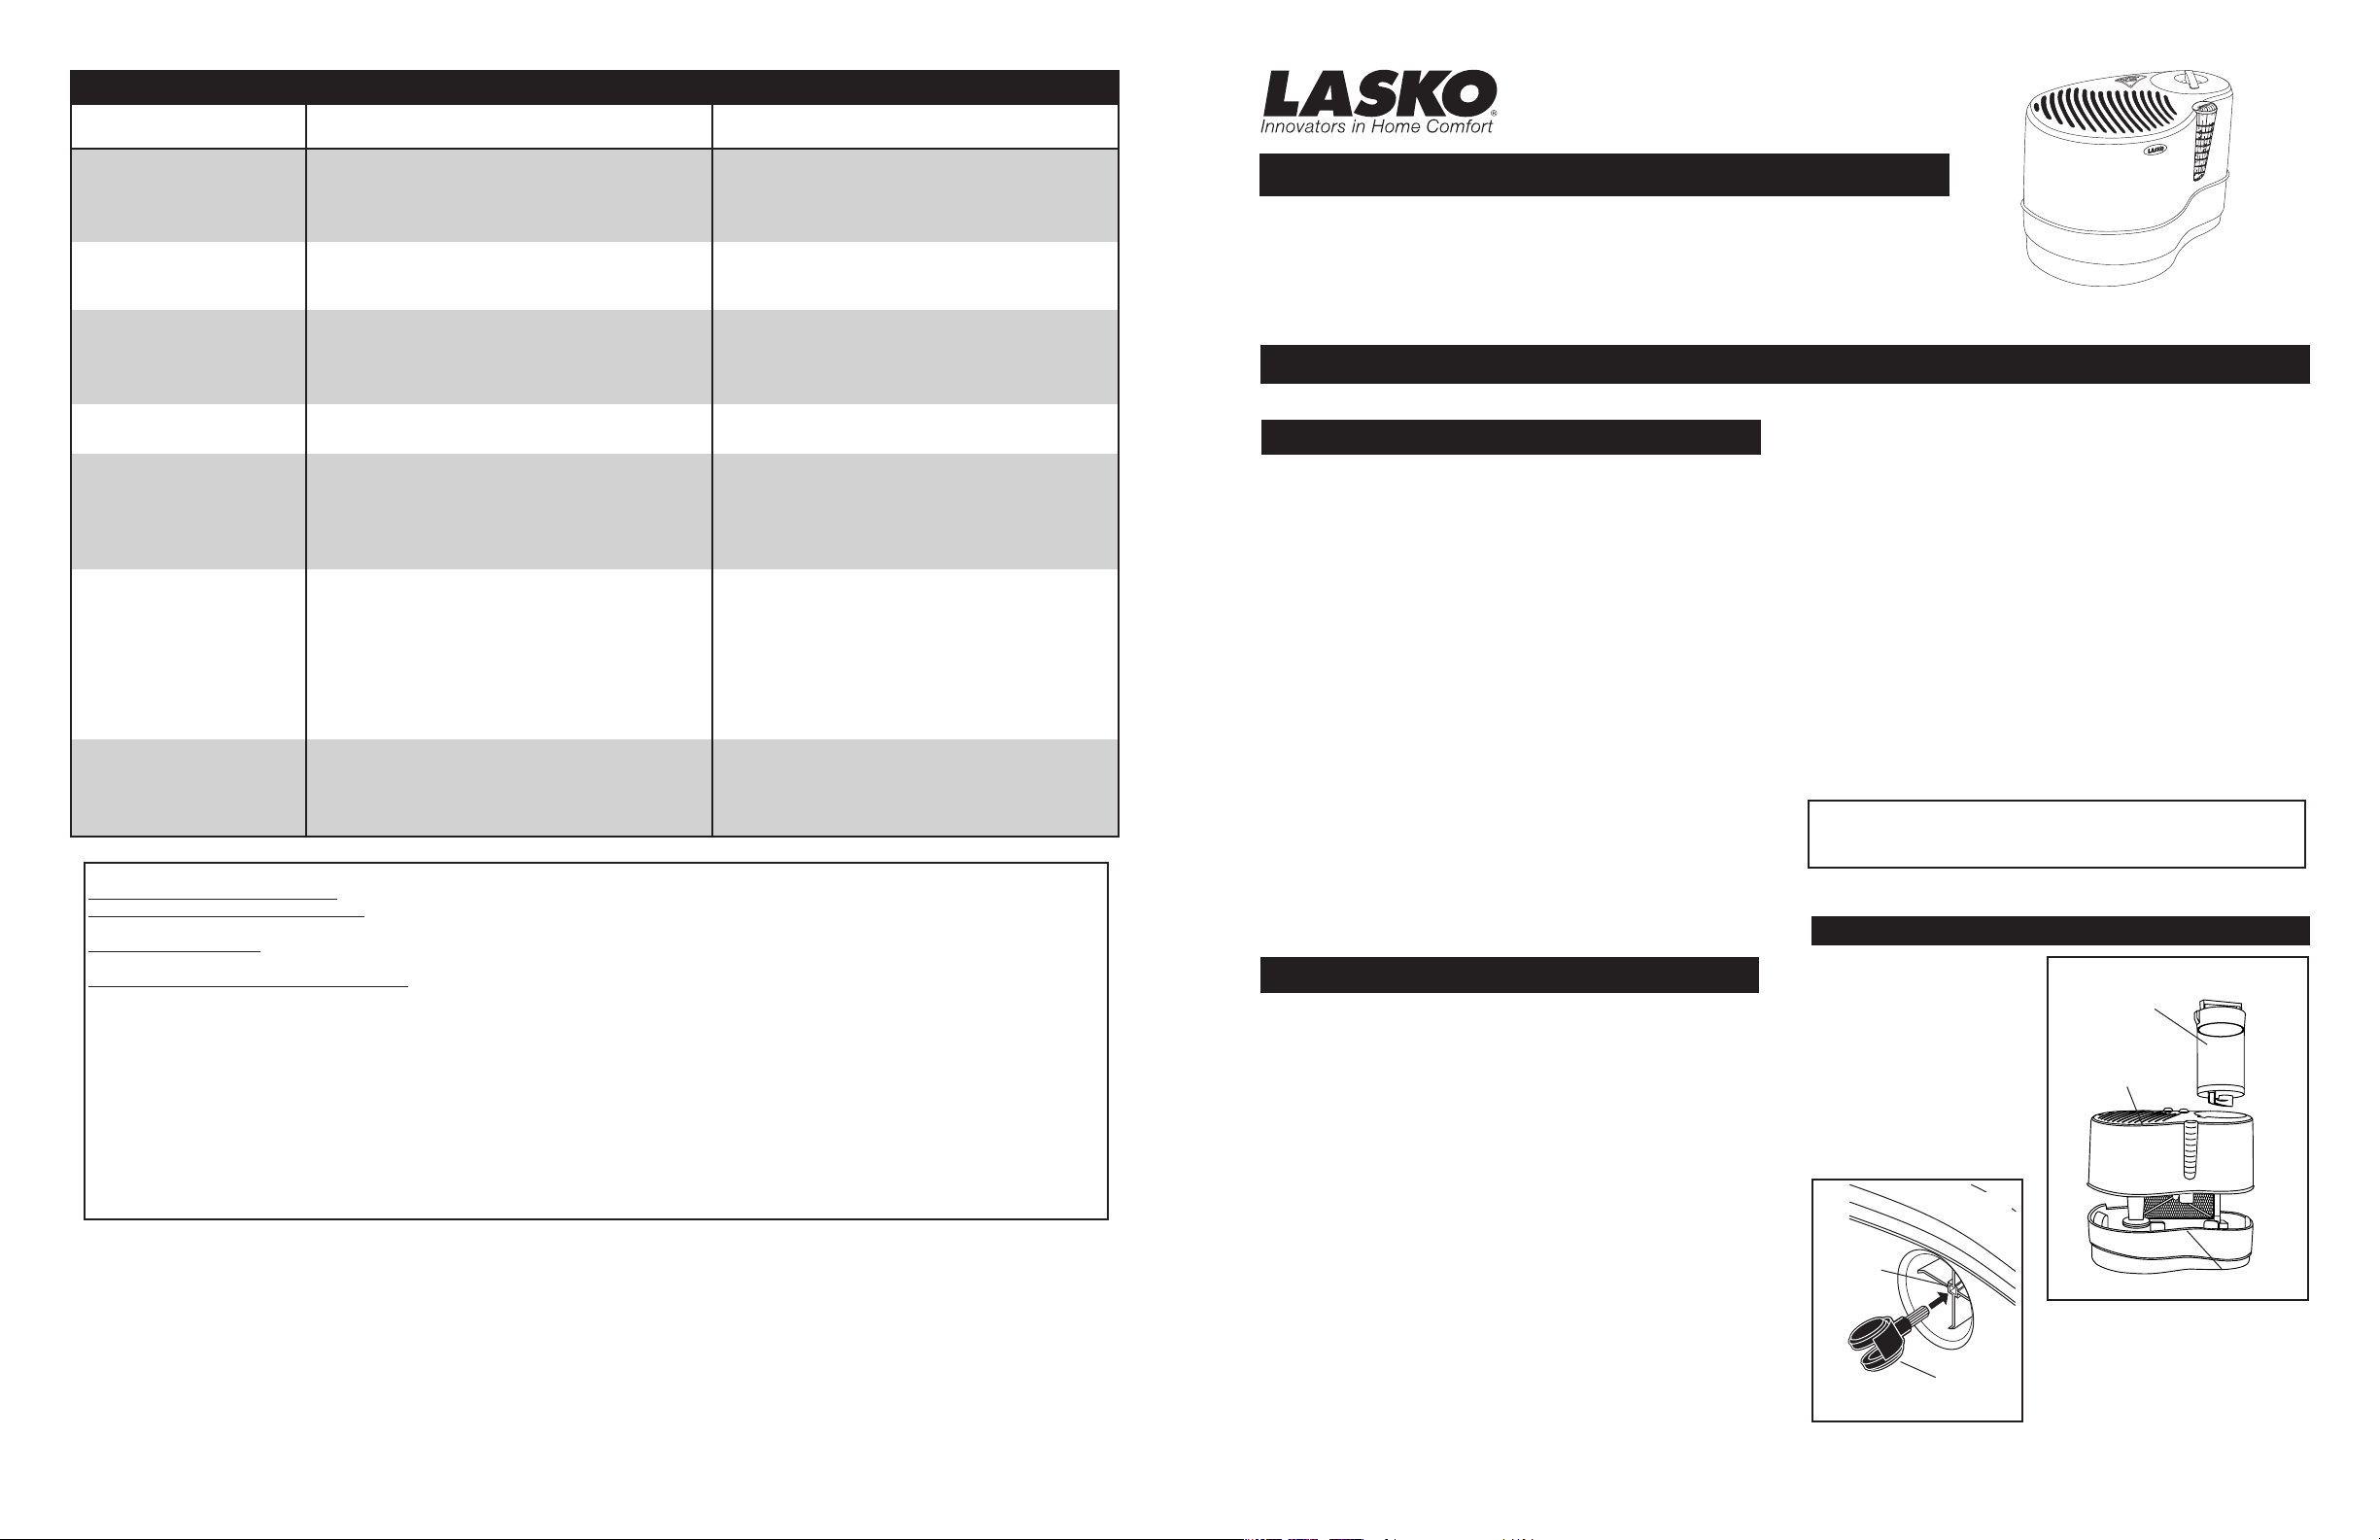
EVAPORATIVE HIGH PERFORMANCE
RECIRCULATING DIGITAL HUMIDIFIER
This Humidifier is not intended to be used in
commercial, industrial or agricultural settings.
IMPORTANT SAFETY INSTRUCTIONS
READ AND SAVE THESE INSTRUCTIONS
IMPORTANT INFORMATION and FEATURES
Your Recirculating Console Humidifier is an EVAPORATIVE TYPE
HUMIDIFIER. This means that the air being drawn through the
moistened filter naturally evaporates the water and disperses
INVISIBLE MOISTURE into the air. This type of humidifier
DOES NOT PRODUCE MIST, WATER DROPLETS, STEAM OR
EXCESSIVE CONDENSATION associated with other types of
humidifiers.
EXCESSIVE HUMIDITY CAN OFTEN LEAD TO UNANTICIPATED PROBLEMS. Air containing water droplets or mist can
create a good habitat for the growth of mold and mildew.
Misting units often oversaturate the air, while the Lasko Recirculating
Console Humidifier reaches a maximum humidity output level
without oversaturating. With a properly operating Evaporative
Humidifier, the evaporation rate increases naturally when the
air is dry. When the humidity in your home is high, moisture
output automatically decreases to help prevent damaging
condensation.
The Watershow Viewing Window provides a visible way for you
to know that your Recirculating Console Humidifier is operating.
As air passes over the filter, the humidity in the room will increase, and the water level in the Unit will begin to decrease.
Unlike misting humidifiers, the Evaporative Filter in your Recirculating Console Humidifier also traps unwanted minerals that reside
in normal tap water. This filtering also assures there is NO WHITE
DUST dispersed into the air.
IMPORTANT SAFETY INSTRUCTIONS
When using electrical appliances, especially where children are
present, basic precautions should always be followed in order
to reduce the risk of fire, electric shock and injury to persons.
Including the following:
1. To prevent possible electrical shock, always turn the unit
off and unplug before filling, servicing or moving.
2. Always place Humidifier on a stable, flat, level surface. Locate Power Cord so the Humidifier or other objects are not
resting on it. Keep the Cord away from room traffic.
3. Do not place Humidifier near a heat source such as stoves,
radiators or heaters.
4. This appliance is equipped with a polarized plug (one blade is
wider than the other). To reduce the risk of electrical shock, this
plug is designed to fit in a polarized outlet only one way. If plug
does not fit, contact a qualified electrician. Do not attempt to
defeat this safety feature.
WARNING: THIS PLUG IS A SAFETY FEATURE. TO REDUCE
THE RISK OF FIRE, ELECTRIC SHOCK AND PERSONAL IN
JURY, DO NOT REMOVE, REPLACE, REPAIR OR TAMPER
WITH THE ORIGINALLY SUPPLIED PLUG. IF THE FAN
DO ES NOT FUNCTION PROPERLY, IT MAY BE DUE TO THE
SAFETY DEVICE INCORPORATED IN THIS PLUG. RETURN TO
DO NOT pour water into Grill. DO NOT spill water on Control Panel.
Water should only be poured into the Unit using the Jug.
Rev. A 5/07 1 2084473
AN AUTHORIZED SERVICE CENTER OR CALL 800-233-0268,
MONDAY-FRIDAY, BETWEEN 8:00AM AND 5:00PM EST. IF THE
PLUG WARNING LABEL IS MISSING OR DAMAGED, CALL THE
TOLL FREE NUMER FOR A REPLACEMENT LABEL.
5. Never tilt or attempt to move the Humidifier while it is operating.
6. Always direct air flow away from walls or furniture as excessive
moisture may cause damage.
7. Humidifiers require regular cleaning to maintain proper operating conditions. Refer to Cleaning Instructions for proper cleaning
procedures.
WARNING: TO REDUCE THE RISK OF FIRE OR ELECTRIC
SHOCK, DO NOT USE THIS HUMIDIFIER WITH ANY SOLID
STATE SPEED CONTROL DEVICE.
NOTE: A few droplets of water may be present in your humidifier as a result of our quality testing prior to packaging
and shipment.
ASSEMBLY
CAUTION: DO NOT fill
unit before assembling.
1. Remove Water Jug then,
Upper Housing from base
of unit. (Figure 1)
2. Lay base of unit on it’s
side so the bottom of the
unit is facing you.
Figure 2
Hole
Castor
Water Jug
Upper Housing
3. Fully insert the four Castors into
the holes in the bottom of the
unit. (Figure 2)
4. Replace Upper Housing, then
Water Jug into unit.
Figure 1
Base
Page 2
CAUTION: Do not pour water through
1
2
3
0
FILLING
the Exhaust Grill on the Upper Housing.
Doing so may cause damage and personal injury.
CAUTION: • Unplug Unit when filling
• Always place Humidifier on a firm level
surface. Locate the Power Cord so the
Humidifier is not resting on it, and is away
from traffic.
• Be careful not to overll.
• Do not pour water through Exhaust Grill,
doing so may cause damage and personal injury.
• Take extra care to prevent water spillage
that may damage furniture or flooring. The
manufacturer will not accept responsibility for
damage to property caused by water spillage.
• Always be sure the Power Knob is in the OFF
position when plugging Humidifier into a
grounded 120 volt AC wall outlet.
• To prevent risk of electrical shock and injury to
persons, do not plug Humidifier into electrical
outlet with wet hands.
1. It is recommended that all Humidifiers be cleaned prior to
use. Please read Cleaning Instructions for Base and Jug
cleaning.
2. Use the convenient Carrying Handle found on the bottom of
the Water Jug to bring it to a faucet. The Water Jug features a
‘Quick Fill/Quick Empty’ Spout. To fill, hold Jug upside down
by the Handle. Use thumb to press down Stopper Lever, and
fill Jug. Fill the Water Jug with cool tap water. Never use hot
water. (Figure 3)
(Jug Holds 1-1/2 Gallons)
(Base Holds 3 Gallons)
Carry Handle
Water Capacity of Unit is 4.5 Gallons
When the Jug is replaced back into the Base it will quickly
empty to ll Base.
NOTE: While carrying filled Water Jug back to the Humidifier,
hold the Handle with one hand, while supporting bottom of
Water Jug with other hand.
3. Place the Water Jug securely in the Base. If positioned
properly, water will quickly pour into Base and automatically
stop when reaching desired amount.
4. When gurgling noise stops lift up the Water Jug to see if it is
empty. Refill if empty. When the Unit is full some water will
remain in the Jug.
5. Even though your Humidifier will produce approximately 9.0
gallons in a 24 hour period*, the water capacity (amount
of water the Humidifier will hold at one time) is 4.5 gallons.
(3 FULL Jugs).
Figure 3
Stopper Lever
Quick Fill /
Quick Empty
Spout
OPERATION
1. Turn fan speed knob to desired speed.
- For fast humidification of a large room or house,
3
approximately 9 gallon per day.*
- For normal operation.
2
- For quiet, night time operation or after desired moisture
1
level is reached.
* Calculations based on ambient room conditions of 70° F
and 30% relative humidity in a room of average insulation.
The presence of water flow in the Water Show Window indicates
the circulation of water to the Filter.
Figure 4
The correct room humidity display will set itself 10 seconds
after the power cord is plugged into a 120 V outlet.
2. Push the humidity set button up or down, to adjust the
humidity to the desired level. The desired humidity range
is 25% to 95%.
The desired humidity level is displayed in small numbers and
the correct room humidity % is displayed in large numbers.
Once the current room humidity level reaches the desired
humidity level, the fan will turn off and the humidity indicator
light will come on. This light indicates that the humidifier is
still on and will again start when the current room humidity
level falls below the desired set level.
If the current room humidity drops below 25% or goes above
95%, the display will blink off and on until the current room
humidity is within the 30% to 90% range.
1
2
5
1. Fan Speed Knob
2. Humidity Set Button
3. Desired Humidity %
4. Current Room Humidity %
5.
Humidity Indicator Light
- Light comes on when desired
humidity level is the same or
lower than current room humidity
while the speed knob is in the on
position.
3
Figure 5
4
FILTER CARE
The Filter inside your Humidifier plays a very important part in
its operation. In order to maintain peak performance, it is highly
recommended to use only LASKO REPLACEMENT FILTERS.
Some imitation filters do not comply with Lasko’s quality standards,
resulting in decreased performance of your Humidifier.
CAUTION: To prevent electric shock, always turn Power
Control Knob to OFF position and unplug before servicing.
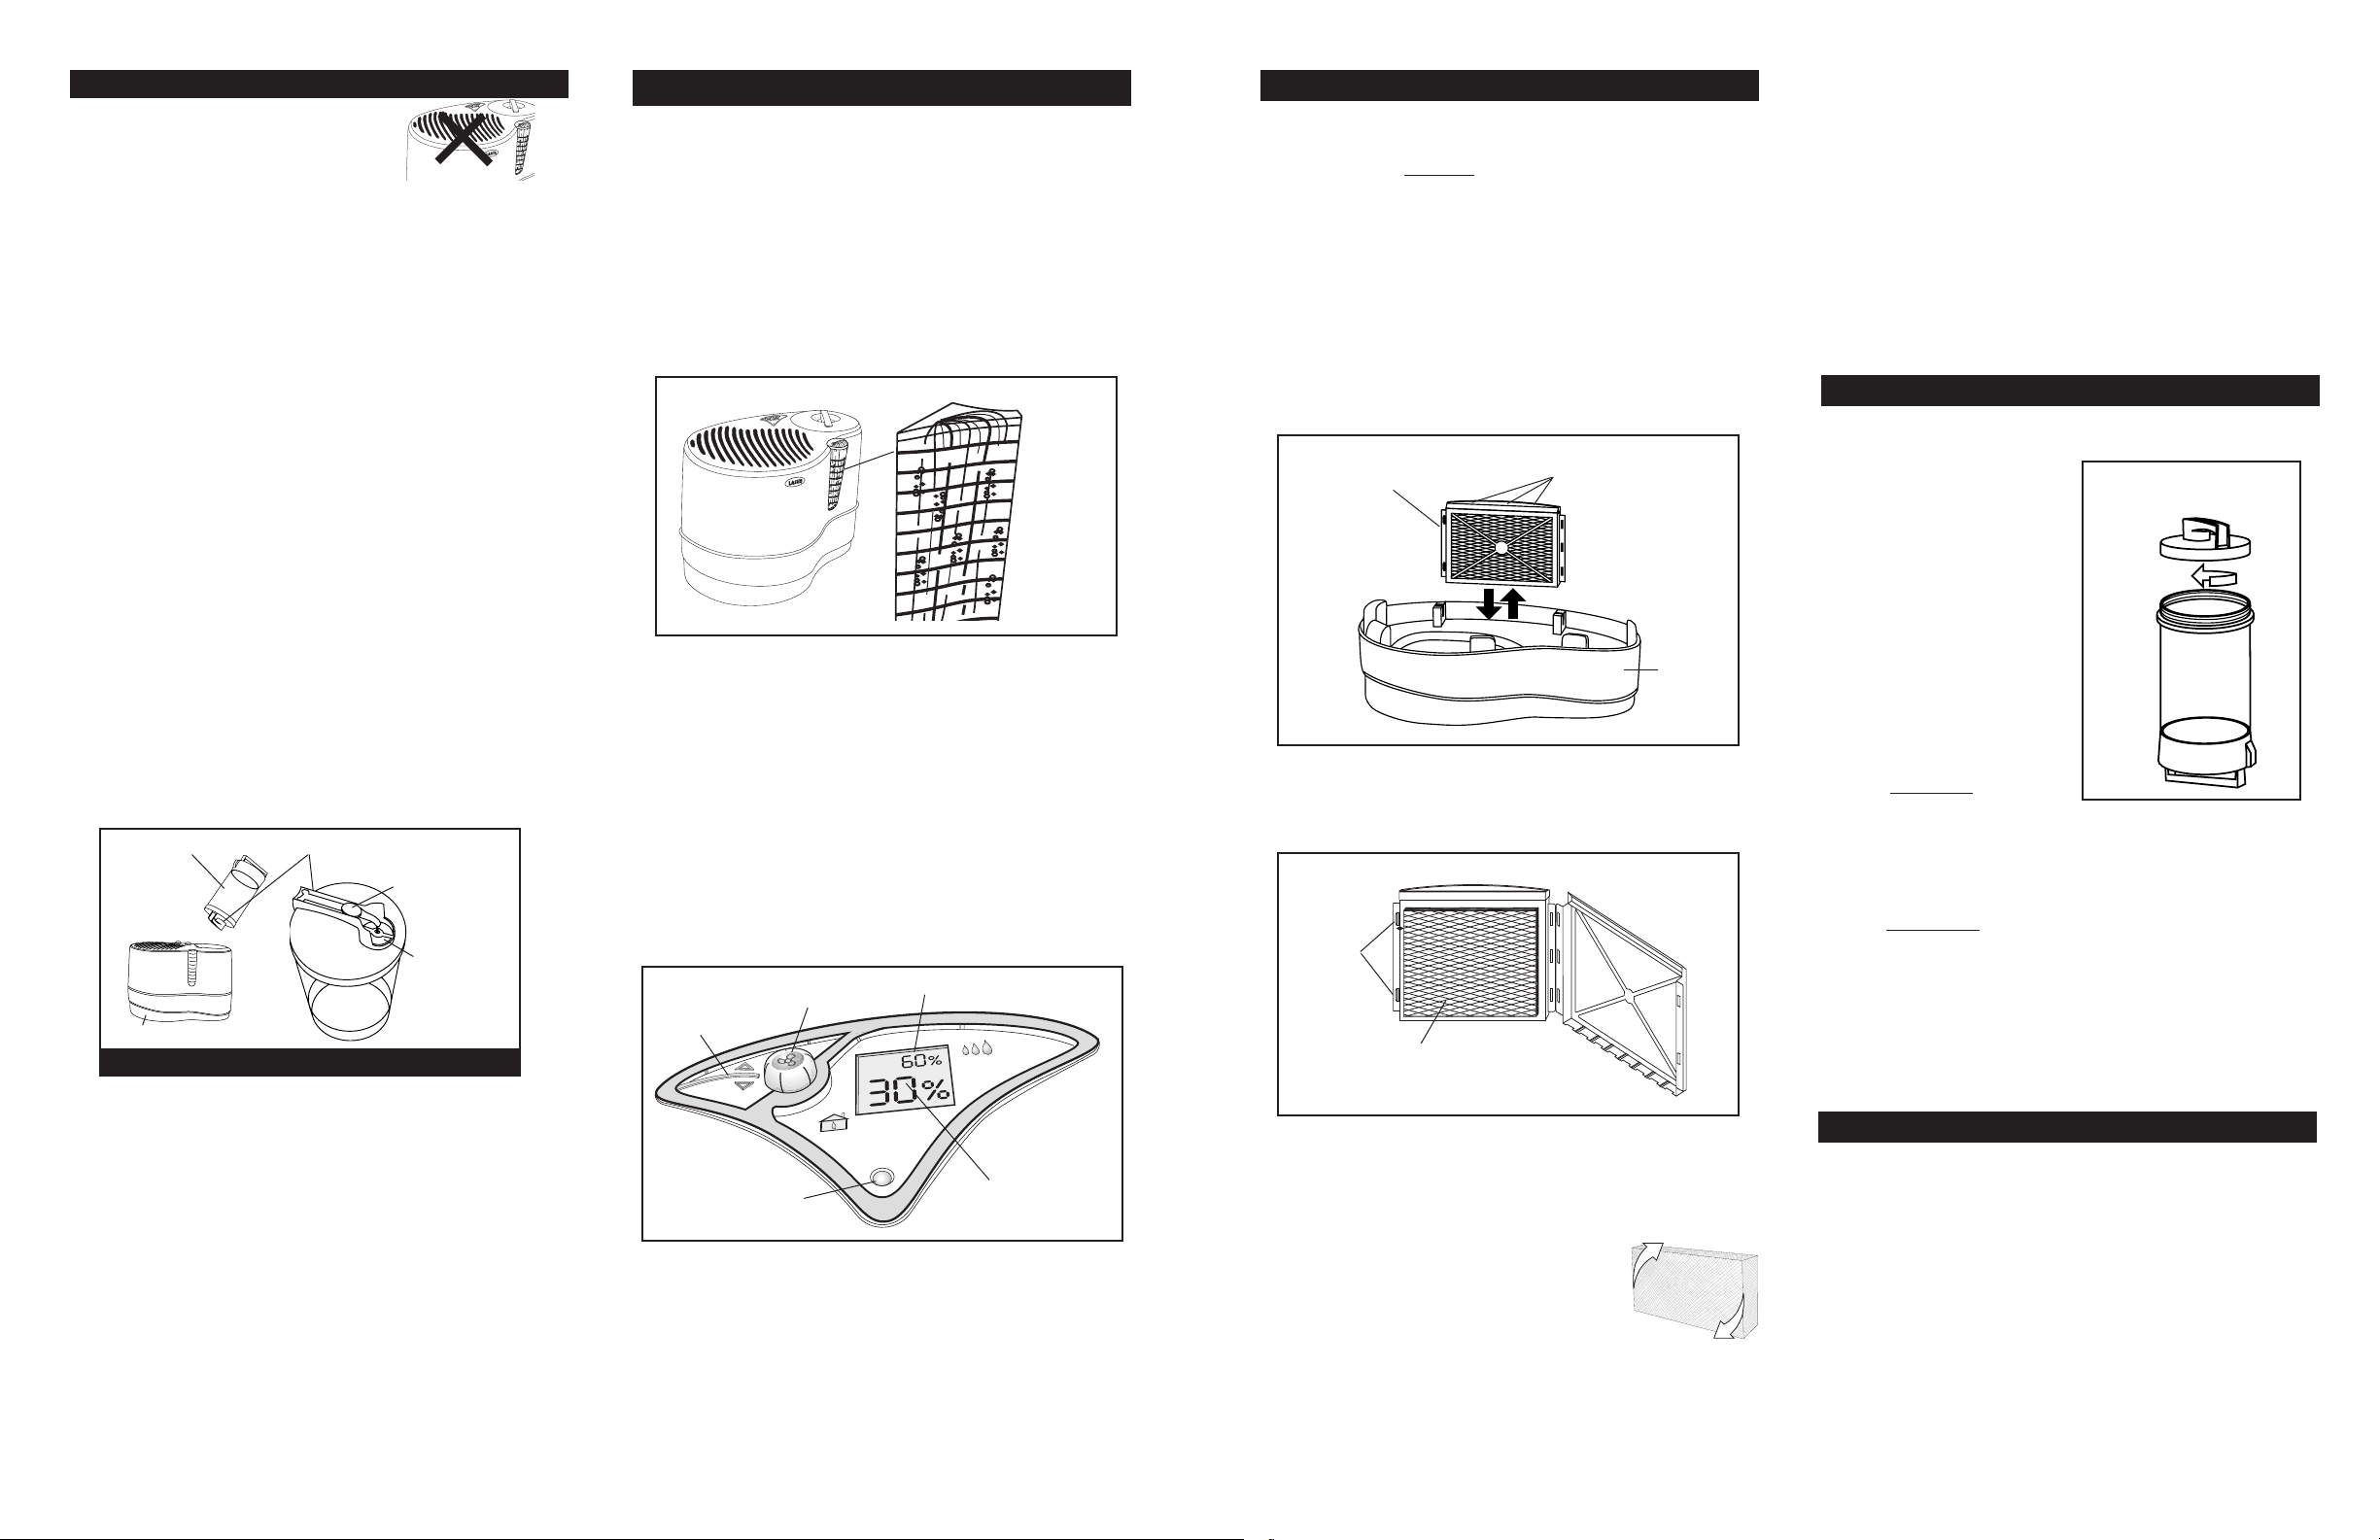
1. To replace the Evaporative Filter Pad, remove the Jug and
Upper Housing from the Base. Be careful not to let excess
water from pump spill onto furniture or flooring.
2. Remove Evaporative Filter Pad Holder from Base and in-
spect Small Water Drip Holes for any blockage.
Filter Pad Holder
3. To open the Filter Holder apply outward pressure to the
two snaps and it will hinge open. Remove used Filter from
Holder and discard.
Snaps
Evaporative Filter Pad
4. Insert new Filter into Holder, snap closed, and reinstall
Holder into Base. The Filter will only t into the Holder
one way. Make sure the Rounded side of the Filter Holder
is facing outward. Replace Upper Housing, then Water Jug
into Base.
5. To increase the life of your Filter Pad turn
Filter around (so the bottom of Filter is
now at the top).
6. Filter life may be extended by cleaning
the Filter in a 20% vinegar solution. To
clean Filter, mix one part undiluted vinegar with four parts
warm tap water. Soak the Filter in this solution for 20 minutes, rinse Filter thoroughly with warm water to remove
vinegar odor.
Drip Holes
Figure 7
Base
Figure 8
DO NOT FLATTEN, SQUEEZE OR TWIST FILTER WHEN
CLEANING
7. Discoloration of the Evaporative Pad is normal after
extended use. The discoloration is caused by mineral deposits in the water, and the degree of discoloration will vary depending upon the amount of
mineral content in the water. When the Filter surface area is thoroughly discolored, or you notice
reduced water usage, it is a good indicator that the Filter
Pad needs to be replaced. The Evaporative Pad should be
replaced at least once every season.
The Replacement Filter to be used in this unit is:
The Lasko Replacement Evaporative Pad Model THF 8
(Available separately)
1. Regular cleaning is necessary to ensure proper and
efficient operation. The frequency of cleaning depends
on the amount of impurities which may be found
in the water or howoften
the Humidifier is in operation. In either instance, it
is recommended that the
Humidifier be cleaned at
least once a week.
NOTE: The bottom of the Jug
may be unscrewed for easy
cleaning.
CAUTION: Make sure bottom of
jug is securely fastened to Jug
before reinstalling into Base.
2. TO DESCALE BASE AND
JUG: Mix one part undi-
luted white vinegar with four parts warm tap water. Let
vinegar solution stand for 20 minutes then wipe away any
scale buildup using a soft brush or cloth. Do not use soap
or detergents and never use an abrasive cleaner.
3. TO DISINFECT BASE AND JUG: Fill Jug with 1 teaspoon
of chlorine bleach and 1 gallon of water. Let solution stand
for 20 minutes. Carefully empty Jug and rinse well with
water until bleach smell is gone.
4. Commercial "Descalers" and "Bacteriostats" are available
at your local home improvement center.
5. Do not operate Humidifier when there is still cleaner in
the water.
CLEANING
Figure 9
OFF-SEASON STORAGE
1. Clean and dry Humidifier thoroughly per the Cleaning
Instructions. Do not leave any water in the Unit when storing.
2. Dispose of the Evaporative Filter Pad. Do not store used
Evaporative Filter Pad in the Humidifier.
3. Place Humidifier back into its carton and store in a cool
dry place.
Rev. A 5/07 2 2084473 Rev. A 5/07 3 2084473
Page 3

GUIA PARA LA LOCALIZACION DE AVERIAS
El ventilador no funciona o • No hay alimentación eléctrica Asegúrese que la máquina esté enchufada
el humidicador no se enciende Revise que el interruptor de alimentación esté encen-
dido
• El humidistato no está bien ajustado Ajuste el humidistato a un nivel de humedad mayor
Fuga de agua • La base se ha llenado excesivamente Reduzca el nivel de agua en la base
• El ltro está viejo y sucio Reemplace el filtro
Olor desagradable • El ltro necesita reemplazarse Reemplace el filtro
• La base necesita limpiarse Siga las instrucciones de limpieza
• Todo el humidicador necesita limpiarse Siga las instrucciones de limpieza
Decoloración del ltro • Depósitos de minerales en el agua Reemplace el filtro
Decoloración del agua • El humidicador necesita limpiarse Siga las instrucciones de limpieza
• Agua dura - hierro en el agua Use agua filtrada o destilada
• Algunos aditivos para humidicadores
pueden causar la decoloración
Las luces no funcionan:
Luz del humidistato apagada, • No se ha alcanzado el nivel de humedad Permita que el humidificador siga funcionando
luz de alimentación encendida deseado en la habitación
Luz de alimentación apagada, • Se ha alcanzado el nivel de humedad Ajuste la perilla de control de humedad a un nivel
mayor
luz del humidistato encendida deseado en la habitación
No se ve agua en la ventanilla • La manguera no está conectada a la bomba Conecte la manguera a la bomba
• La manguera no está conectada a la ventanilla Conecte la manguera a la ventanilla
• No hay agua en la unidad Llene la unidad
GARANTÍA LIMITADA
QUÉ CUBRE ESTA GARANTÍAS: Este producto está garantizado contra defectos de mano de obra y/o materiales.
CUÁNTO DURA ESTA GARANTÍA: Esta garantía se extiende únicamente al comprador original del producto y dura un (1) año a partir de la fecha
original de compra o hasta que el comprador original del producto venda o transfiera el producto, cualesquiera de ambas que ocurriera en primer
lugar.
QUÉ HARÁ LASKO: Durante el período de garantía, Lasko, a opción propia, reparará o reemplazará cualquier parte o partes que demuestren ser
defectuosas o reemplazará el producto completo por el mismo modelo u otro comparable.
QUÉ NO CUBRE ESTA GARANTÍA: Esta garantía no tiene validez si el producto fue dañado o falló debido a un accidente, manipulación u
operación inadecuadas, daño en el envío, abuso, mal uso, reparaciones no autorizadas hechas o el intento de hacerlas, o el uso del producto
para servicio comercial o no residencial. Esta garantía no cubre los costos de envío para la devolución de productos a Lasko para su reparación o
reemplazo. Lasko abonará los cargos de envío de devolución a Lasko con posterioridad a las reparaciones o el reemplazo bajo garantía
CUALESQUIERA Y TODAS LAS GARANTÍAS, EXPLÍCITAS O IMPLÍCITAS (INCLUYENDO, SIN LIMITACIÓN, CUALESQUIERA GARANTÍA
IMPLÍCITA DE COMERCIABILIDAD), DURAN UN AÑO A PARTIR DE LA FECHA ORIGINAL DE COMPRA O HASTA QUE EL COMPRADOR
ORIGINAL DEL PRODUCTO VENDA O TRANSFIERA EL PRODUCTO, CUALESQUIERA DE AMBAS QUE OCURRIERA EN PRIMER LUGAR
Y EN NINGÚN CASO LA RESPONSABILIDAD DE LASKO BAJO CUALQUIER GARANTÍA EXPLÍCITA O IMPLÍCITA INCLUIRÁ (I) DAÑOS
INCIDENTALES O POR CONSECUENCIA POR CUALQUIER CAUSA QUE FUERE, O (II) REEMPLAZO O REPARACIÓN DE CUALESQUIERA
FUSIBLES HOGAREÑOS, CORTA-CIRCUITOS O TOMACORRIENTES. INDEPENDIENTEMENTE DE CUALQUIER DECLARACIÓN CONTRARIA,
EN NINGÚN CASO LA RESPONSABILIDAD DE LASKO BAJO CUALQUIER GARANTÍA EXPLÍCITA O IMPLÍCITA PODRÁ EXCEDER EL PRECIO
DE COMPRA DEL PRODUCTO Y DICHA RESPONSABILIDAD TERMINARÁ AL VENCIMIENTO DEL PERÍODO DE GARANTÍA.
Algunos estados y provincias no permiten limitaciones sobre la duración de una garantía implícita, o sobre la exclusión o limitación de los daños
incidentales o por consecuencia, por lo tanto dichas exclusiones o limitaciones podrían no aplicarse en su caso. Esta garantía le otorga a usted
derechos legales especícos. Usted también podría tener otros derechos que varían de estado en estado y de provincia en provincia.
Se requiere prueba de compra antes que se acepte un reclamo bajo garantía.
PARA PIEZAS DE REPUESTO:
Para piezas de repuesto o filtros, llame al: 1-800-233-0268, DE LUNES A VIERNES, DE 8:00 A.M. a 4:00 P.M., HORA ESTÁNDAR DEL
ESTE. “POR FAVOR, NO DEVUELVA EL PRODUCTO AL LUGAR DONDE LO COMPRÓ.” Mencione el número de modelo 1129 al llamar.
PARA APOYO TÉCNICO y UBICACIONES DE CENTROS DE SERVICIO:
Para cualquier pregunta o comentario, o para encontrar el centro de servicio más cercano, FAVOR DE LLAMAR A NUESTRA “LÍNEA CALI-
ENTE” (LLAMADA SIN CARGO) AL 1-800-233-0268, DE LUNES A VIERNES, DE 8:00 A.M. A 5:00 P.M., HORA ESTÁNDAR DEL ESTE. Men-
cione el número de modelo 1129 al llamar.
Appliance Service Dept. • 300 Confederate Drive, Franklin, TN 37065-0569
¡POR FAVOR, NO ENVÍE EL PRODUCTO A ESTA DIRECCIÓN!
Rev. A 5/07 8 2084473
Modelo 1129
EVAPORATIVO DE ALTO RENDIMIENTO
HUMIDIFICADOR RECIRCULANTE DIGITAL
Ce Humidificador n'est pas concu pour tilisation dans des installations commerciales, industrielles ou en agriculture.
INSTRUCCIONES IMPORTANTES DE SEGURIDAD
Felicitaciones por su compra del humidificador recirculante tipo
consola. Gracias a su sistema de circulación del agua impulsada por
bomba, esta unidad destaca características exclusivas no ofrecidas
por ningún otro humidificador.
INFORMACIÓN y CARACTERÍSTICAS IMPORTANTES
Su humidificador recirculante de consola es un HUMIDIFICADOR TIPO
EVAPORATIVO. Esto quiere decir que el aire aspirado a través del ltro
humedecido evapora el agua naturalmente y despide HUMEDAD INVISIBLE al aire. Este tipo de humidificador NO PRODUCE LA NEBLINA,
LAS GOTAS DE AGUA, EL VAPOR NI LA CONDENSACIÓN EXCESIVA
asociados con los demás tipos de humidificador.
LA HUMEDAD EXCESIVA MUCHAS VECES CAUSA PROBLEMAS IMPREVISTOS. El aire que contiene gotitas de agua o neblina puede crear
condiciones ideales para el crecimiento del moho.
Las unidades que producen neblina muchas veces sobresaturan el aire, pero
el humidificador recirculante tipo consola de Lasko alcanza un nivel máximo
de salida de humedad sin producir la sobresaturación. Con un humidicador
evaporativo funcionando debidamente el ritmo de evaporación aumenta de
forma natural cuando el aire está más seco. Cuando la humedad del aire de
su hogar está alta, la salida de humedad se reduce automáticamente para
ayudar a evitar la condensación dañina.
La ventanilla de nivel del agua ofrece una manera visible de confirmar
que su humidificador recirculante tipo consola está funcionando. A
medida que el aire pasa sobre el ltro, la humedad de la habitación
aumenta y el nivel del agua en la unidad disminuye.
A diferencia de los humidificadores que producen neblina, el filtro
evaporativo de su humidificador recirculante tipo consola atrapa
los minerales indeseables encontrados en el agua de grifo normal.
Este proceso de filtrado asegura que NO SE DESPIDA POLVO BLANCO
al aire.
INSTRUCCIONES IMPORTANTES DE SEGURIDAD
Al usar un aparato eléctrico, especialmente en presencia de
niños, siempre deben tomarse algunas precauciones básicas
para reducir el riesgo de incendios, choques eléctricos y lesiones
personales. Éstas incluyen:
1. Para evitar la posibilidad de choques eléctricos, siempre apague y
desenchufe la unidad antes de llenarla, darle servicio o moverla.
2. Siempre coloque el humidificador en una superficie estable, plana y
nivelada. Ubique el cable de alimentación de modo que no se apoye
el humidificador ni ningún otro objeto encima del cable. Mantenga
el cable alejado de las zonas de movimiento de la habitación.
3. No coloque el humidificador cerca de fuentes de calor tales como
los hornos, radiadores y calentadores.
4. Este aparato tiene un enchufe polarizado (una de sus cuchillas es
más ancha que la otra). Para reducir el riesgo de choques eléctricos,
este enchufe ha sido diseñado para enchufarse de una sola manera
en un tomacorriente polarizado. Si el enchufe no encaja bien, consulte a un electricista calificado.. No intente burlar esta característica de
seguridad.
ADVERTENCIA: ESTE ENCHUFE ES UNA MEDIDA DE SEGURI
DAD. PARA REDUCIR EL RIESGO DE INCENDIO, CHOQUE
ELÉCTRICO Y LESIONES PERSONALES, NO QUITE, NI REEM
PLACE, NI REPARE O ALTERE EL ENCHUFE QUE SE PROVEE
ORIGINALMENTE. SI EL VENTILADOR NO FUNCIONA CORRECTAMENTE, PUEDE DEBERSE AL DISPOSITIVO DE SEGURI
DAD INCORPORADO EN ESTE ENCHUFE. REGRESE A UN
NO vierta agua por la Rejilla. NO deje que se derrame agua en el tablero de control.
Rev. A 5/07 5 2084473
LEA Y GUARDE ESTAS INSTRUCCIONES
CEN TRO DE SERVICIOS AUTORIZADO O LLAME AL 800-2330268,DE LUNES A VIERNES ENTRE LAS 8:00AM Y LAS 5:00 PM
EST. SI LA ETIQUETA DE ADVERTENCIA DEL ENCHUFE FALTA
O ESTA DAÑADA, LLAME AL NÚMERO DE CONSULTA GRATUITO PARA PEDIR UNA ETIQUETA DE REEMPLAZO.
5. Nunca incline ni intente mover el humidificador mientras está encendido.
6. Siempre dirija el flujo de aire en sentido contrario a las paredes y
muebles, puesto que la humedad excesiva puede causar daños.
7. Los humidicadores requieren limpiarse periódicamente para mantener-
los en condiciones adecuadas de funcionamiento. Consulte las Instruc-
ciones de limpieza para los procedimientos de limpieza correctos.
ADVERTENCIA: PARA REDUCIR EL RIESGO DE INCENDIOS
O CHOQUES ELÉCTRICOS, NO USE ESTE HUMIDIFICADOR
CON NINGÚN DISPOSITIVO DE ESTADO SÓLIDO PARA
CONTROL DE VELOCIDAD.
NOTA: Puede haber unas cuantas gotitas de agua en su humidificador como resultado de nuestras pruebas de calidad
antes del empacado y despacho de la unidad.
ARMADO
PRECAUCIÓN: NO llene la unidad antes de armarla.
1. Retire el recipiente de agua
y luego la caja superior de la
base de la unidad. (Figura 1)
2. Coloque la base sobre uno
de sus costados de manera
que la parte inferior de la
unidad quede hacia usted.
3. Inserte las cuatro ruedas ori
entables completamente en
Figura 2
Abertura
Rueda
Orientable
El agua se debe verter a la unidad únicamente con el recipiente.
Recipiente
de agua
Caja superior
-
las aberturas en la parte inferior de
la unidad. (Figura 2)
4. Vuelva a colocar la caja superior y
luego el recipiente de agua en la
unidad.
Figura 1
Base
Page 4

LLENADO
1
2
3
0
PRECAUCIÓN: No vierta agua por la
rejilla de escape en la caja superior.
Al hacerlo se puede causar daños y
lesiones personales.
PRECAUCIÓN: • Desenchufe la
1. Se recomienda que se limpie todo humidificador antes del uso.
Favor de leer las Instrucciones de limpieza para el proced-
imiento de limpieza de la base y el recipiente.
2. Use la manija para transporte conveniente ubicada en la parte
inferior del recipiente de agua para llevarlo al grifo. El recipiente
tiene un pico de “llenado rápido/vaciado rápido”. Para llenarlo,
use la manija para sostener el recipiente en posición invertida.
Presione la palanca de cierre con el pulgar y llene el recipiente.
Llene el recipiente de agua con agua fresca del grifo. Nunca use
agua caliente. (Figura 3)
(La capacidad del recipiente es de 1-1/2 galones)
(La capacidad de la base
es de 3 galones)
La Capacidad de Qgua de la Unidad es de 4.5 Galones
Al volver a colocar el recipiente en la base, se vacía rápidamente
para llenar la base.
3. Coloque el recipiente de agua firmemente en la base. Cuando está
correctamente colocado, el agua se vierte rápidamente a la base
y deja de fluir automáticamente al alcanzar la cantidad deseada.
4. Cuando no se oye el agua vaciándose, levante el recipiente
para ver si está vacío. Vuelva a llenarlo si está vacío. Cuando la
unidad está llena, resta cierta cantidad de agua en el recipiente.
5. Aunque su humidificador puede producir aproximadamente
9,0 galones durante un período de 24 horas*, su capacidad de agua (cantidad total de agua que puede contener el
humidificador) es de 4,5 galones. (3 recipientes LLENOS.)
unidad antes de
llenarla.
• Siempre coloque el humidicador en una superficie firme y nivelada. Ubique el cable de aliment-
ación de modo que no se apoye el humidicador
encima del cable, y asegure que quede alejado
de las zonas de movimiento de la habitación.
• Procure no llenar la unidad excesivamente.
• No vierta agua por la rejilla de escape; al
hacerlo se puede causar daños y lesiones
personales.
• Tenga cuidado adicional de evitar los derrames de agua que pueden dañar los mue-
bles o el piso. El fabricante no acepta ningu-
na responsabilidad de daños a la propiedad
causados por el agua derramada.
• Verique siempre que la perilla de alimentación
esté en la posición de APAGADO al enchufar
el humidificador en un tomacorriente de pared
de 120 VCA con conexión a tierra.
• Para evitar el riesgo de choque eléctrico y le-
siones personales, no enchufe el humidificador
en el tomacorriente eléctrico con las manos
húmedas.
Manija para transporte
Figura 3
Palanca de cierre
Pico de llenado
Rápido/Vaciado Rápido
FUNCIONAMIENTO
1. Ajuste la perilla de velocidad del ventilador a la velocidad
deseada.
3- Para humidicar rápidamente una habitación grande o
una casa, aproximadamente 9 galones por día.*
2- Para uso normal.
1- Para funcionamiento nocturno silencioso, o después
de alcanzar el nivel de humedad deseado.
* Calculations based on ambient room conditions of 70°
F and 30% relative humidity in a room of average insulation.
Cuando se ve el ujo de agua en la ventanilla es indicación de que
el agua está circulando por el filtro. (Figura 4)
Figura 4
La indicación correcta de humedad de la habitación se visualiza
10 segundos después de enchufar el cable de alimentación en un
tomacorriente de 120 V.
2. Mueva el botón de ajuste de humedad hacia arriba s o abajo
para t ajustar la humedad al nivel deseado. El intervalo de
humedad deseado es del 25% al 95%.El nivel de humedad
deseado se indica con números pequeños y el porcentaje real
de humedad de la habitación se indica con números grandes.
Una vez que el nivel de humedad actual de la habitación alca-
nza el nivel deseado, el ventilador se apaga y la luz indicadora
de humedad se ilumina. Esta luz indica que el humidificador
está encendido y se activará de nuevo cuando el nivel actual
de humedad de la habitación baje a menos del nivel deseado
que se ha ajustado. Si la humedad actual de la habitación
disminuye a menos de 25% o sobrepasa de 95%, la indicación
de la pantalla empieza a destellar hasta que la humedad de la
habitación esté dentro del intervalo de 30% a 90%.
1
3
2
5
1. Perilla de velocidad del ventilador
2. Botón de ajuste de humedad
3. Humedad deseada %
4. Humedad actual de la habitación %
5. Luz indicadora de humedad - Se enciende cuando el nivel de
humedad deseado es igual o
inferior que la humedad actual
de la habitación siempre que la
perilla de velocidad esté en la
posición encendida.
Figura 5
4
CUIDADO DEL FILTRO
El ltro dentro de su humidicador desempeña un papel muy importante en su funcionamiento. Para mantener un rendimiento óptimo,
se recomienda enfáticamente que se usen únicamente los FILTROS
DE REPUESTO LASKO. Algunos filtros de otros fabricantes no
cumplen con las normas de calidad de Lasko, dando por resultado
un rendimiento reducido de su humidificador.
PRECAUCIÓN: Para evitar los choques eléctricos, siempre
coloque la perilla de control en la posición de APAGADO y
desenchufe la máquina antes de efectuar cualquier trabajo
de mantenimiento.
1. Para reemplazar la almohadilla evaporativa del filtro, retire el
recipiente y la caja superior de la base. Tenga cuidado de evitar que el agua de la bomba se derrame en los muebles o el
piso.
2. Quite el soporte de la almohadilla evaporativa del filtro de la base
y revise los agujeros pequeños de goteo de agua en busca de
Soporte de la
Almohadilla del Filtro
Agujeros
de Goteo
obstrucciones. (Figura 7)
3. Para abrir el soporte del filtro, empuje hacia afuera las dos trabas
a presión; se abrirá sobre la articulación. Retire el ltro usado
Trabas
a Presión
Almohadilla
Evaporativa
del Filtro
del soporte y deséchelo. (Figura 8)
4. Inserte el ltro nuevo en el soporte, ciérrelo y vuelva a instalar el
soporte en la base. (Figura 7) El ltro sólo se encaja en el soporte
en un sentido. Asegúrese que el lado redondeado del soporte
del filtro quede hacia afuera. Vuelva a colocar la caja superior y
luego el recipiente de agua en la base.
5. Para aumentar la vida útil de la almohadilla del filtro, puede dar vuelta al filtro (de
modo que la parte inferior del filtro quede
hacia arriba).
6. Se puede extender la vida útil del filtro
limpiándolo en una solución de vinagre al
20%. Para limpiar el filtro, mezcle una parte de vinagre sin diluir
con cuatro partes de agua de grifo tibia. Remoje el filtro en esta
solución durante 20 minutos y luego enjuague el ltro bien con
agua tibia para eliminar el olor a vinagre.
Figura 7
Base
Figura 8
NO APLASTE, COMPRIMA O RETUERZA EL FILTRO AL LIMPIARLO
7. Es normal que la almohadilla se decolore después del uso prolon-
gado. Esta decoloración se debe a la presencia de minerales
en el agua, y el grado de decoloración depende del contenido
de minerales en el agua. Cuando la superficie del filtro está
muy decolorada, o si observa un consumo reducido de agua,
es indicación de que se debe reemplazar la almohadilla del
filtro. La almohadilla evaporativa debe reemplazarse al menos
una vez durante cada temporada de uso de la unidad.
Se debe usar el siguiente filtro de repuesto en esta unidad:
Lasko Replacement Evaporative Pad (Almohadilla de repuesto
de Lasko) Modelo THF 8
LIMPIEZA
1. La limpieza periódica es necesaria para asegurar el funciona-
miento correcto y eficiente. La frecuencia de la limpieza depende de la cantidad de impurezas presentes en el agua, o de
la frecuencia de uso del humidificador. En cualquier caso, se
recomienda limpiar el humidificador al menos una vez por semana.
NOTA: Se puede desenroscar el fondo del recipiente de agua para
facilitar la limpieza. (Figura 9)
PRECAUCIÓN: Asegúrese que el
fondo del recipiente esté firmemente fijado al recipiente antes
de instalarlo en la base.
2. PARA DESINCRUSTAR LA
BASE Y EL RECIPIENTE: Mez-
cle una parte de vinagre blanco
sin diluir con cuatro partes de
agua de grifo tibia. Deje reposar
la solución de vinagre durante
20 minutos y luego quite los
depósitos acumulados usando
un cepillo suave o un trapo.
No use jabón ni detergentes y
nunca use limpiadores abrasivos.
3. PARA DESINFECTAR LA BASE
Y EL RECIPIENTE: Llene el
recipiente con una mezcla de
una cucharadita de blanqueador doméstico a base de cloro en
un galón de agua. Deje reposar la solución durante 20 minutos.
Vacíe cuidadosamente el recipiente y enjuáguelo bien con agua
hasta haber eliminado el olor a cloro.
4. Se puede conseguir productos desincrustantes y bacteriostatos
comerciales en la mayoría de las empresas de ventas de productos para el hogar.
5. No utilice el humidificador mientras tenga agente limpiador en el
agua.
ALMACENAMIENTO ENTRE TEMPORADAS DE USO
1. Limpie el humidicador y séquelo a fondo siguiendo las in-
strucciones de limpieza. No deje agua en la máquina durante
el período de almacenamiento.
2. Deseche la almohadilla evaporativa del filtro. No almacene una
almohadilla evaporativa usada en el humidificador.
3. Coloque el humidicador en su caja original y almacénelo en un
lugar fresco y seco.
Filter Pad Holder Soporte de la almohadilla del filtro
Drip Holes Agujeros de goteo
Base Base
3. Para abrir el soporte del filtro, empuje hacia afuera las dos trabas
a presión; se abrirá sobre la articulación. Retire el ltro usado del
soporte y deséchelo. (Figura 8)
Figura 8
Snaps Trabas a presión
Evaporative Filter Pad Almohadilla evaporativa del filtro
(Disponible por separado)
Figura 9
Rev. A 5/07 6 2084473 Rev. A 5/07 7 2084473
 Loading...