

Lasermark LMH, LMH-C, LMH-CR, LMH600, LMH-GR Instruction Manual
INSTRUCTION MANUAL
LMH Series Electronic
Self-Leveling Rotary Laser
LMH | LMH-C | LMH-GR | LMH600
57-LMH Shown
LMH Series Rotary Lasers • 1

Copyright© 2002-2006 CST/berger. All rights reserved
The information contained herein is proprietary information of CST/berger, and is subject to
change without notice. CST/berger is a division of Stanley Works®
This document shall not be copied or otherwise reproduced without CST/berger's written consent.
2 • LMH Series Rotary Lasers

Thank you for purchasing the LaserMark® LMH Electronic Self-Leveling
Rotary Laser. Please read this manual thoroughly before operation.
CONTENTS
1. LMH Features ..................................................................................4
2. Laser Safety ....................................................................................7
2.1 Electrical safty procedures ...............................................................................8
2.2 Certifi cations.....................................................................................................9
2.3 Environment Protection ..................................................................................9
3. LMH Operation ...............................................................................9
3.1 Leveling .............................................................................................................9
3.2 Re-leveling ......................................................................................................10
3.2.1 Axis Drive Error (Spindle Error) .......................................................................10
3.3 Anti-Drift System (ADS)...................................................................................10
3.4 Grade Mode: Single Axis Grade (LMH-GR and LMH600 Only) .........................11
3.5 Grade Mode: Dual Axis Slope (LMH600 Only)..................................................13
4. LMH Applications .........................................................................14
4.1 Procedures for Ceiling Grid Applications .......................................................14
4.2 Procedures for Laydown Applications ...........................................................15
4.3 Procedures for General Construction Applications ......................................16
5. LMH Battery Replacement .........................................................17
6. LMH Calibration ............................................................................18
6.1 Upright Position Peg Test (X axis) ..................................................................18
6.1.2 Upright Position Calibration - X axis (LMH, LMH-C, LMH-GR) .........................19
6.1.3 Upright Position Peg Test and Calibration - Y axis (LMH, LMH-C, LMH-GR) ...20
6.2.1 Upright Position Calibration (LMH600) ...........................................................21
6.2.2 Laydown Position Calibration (LMH600) .........................................................22
7. Care of LMH Instrument ............................................................ 23
8. LMH Series Specifi cations ..........................................................23
9. Troubleshooting ..........................................................................24
10. Warranty .......................................................................................26
11. Universal Laser Detector ............................................................27
12. Remote Control ...........................................................................30
LMH Series Rotary Lasers • 3
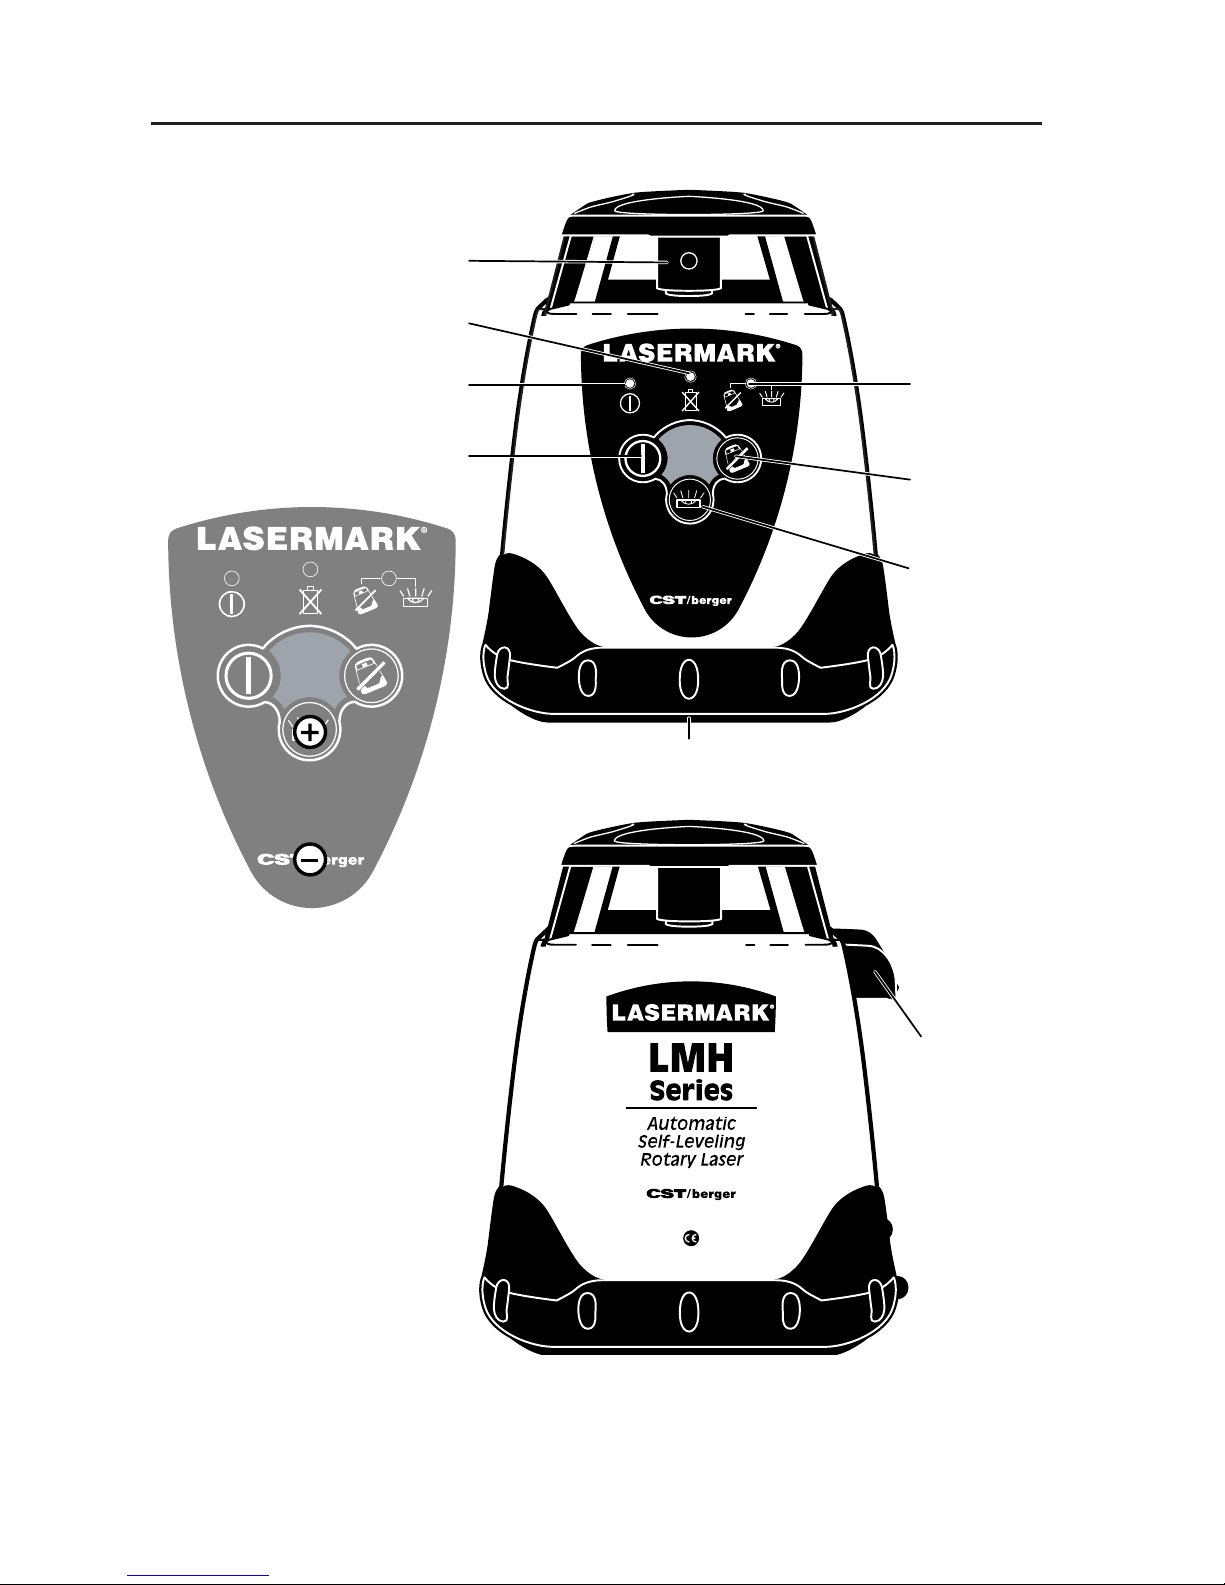
1.1 LMH AND LMH-C FEATURES
Rotating Laser Head
Battery Low LED
Power On LED
Anti-Drift
System On
LED
Power On/Off
Button
LMH
POWER
MANUAL
Automatic Self-Leveling
Rotary Laser
ANTI-DRIFT
SYSTEM
LOCATION OF
CALIBRATION BUTTONS
LMH
MANUAL
Rotary Laser
ANTI-DRIFT
SYSTEM
POWER
Automatic Self-Leveling
Battery Compartment Access/
5
⁄8" x 11 Tripod Mounting Thread
Anti-Drift
System
On/Off
Button
Manual
Mode
SIDE VIEW
4 • LMH Series Rotary Lasers
Built-In
Handle
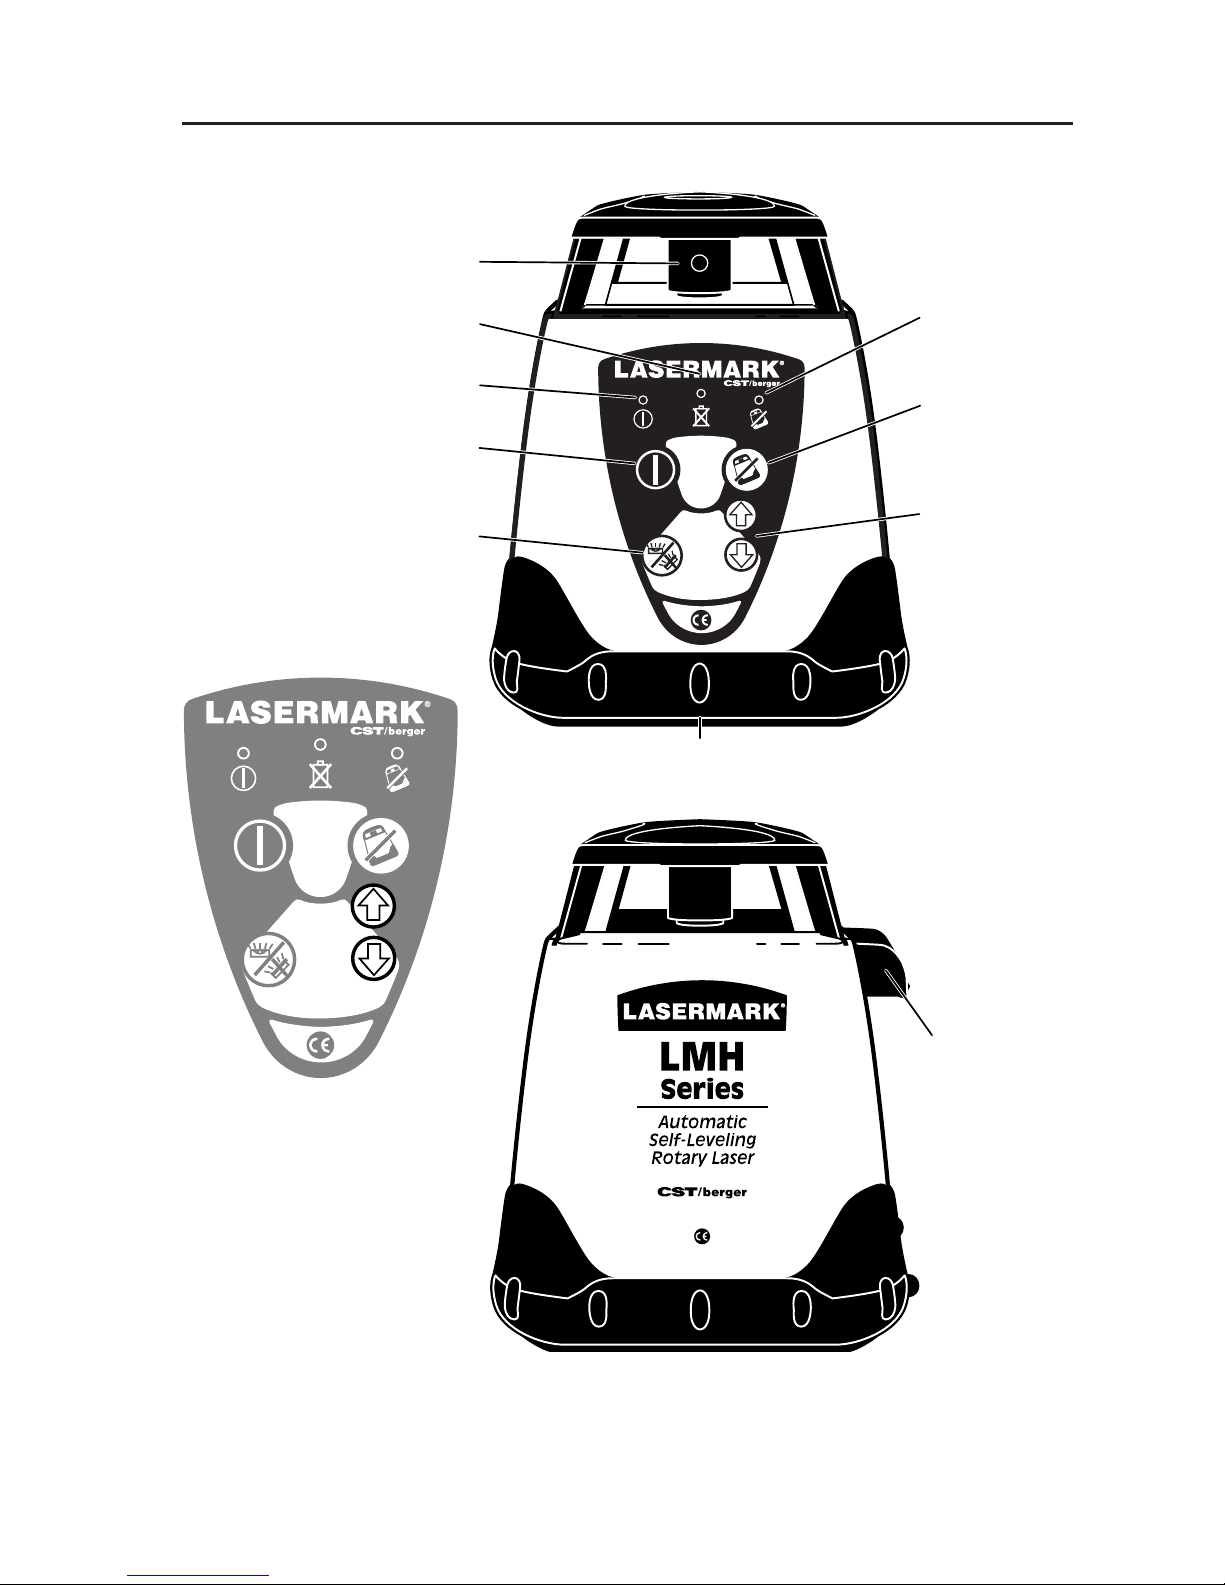
1.2 LMH-GR FEATURES
Rotating Laser Head
Battery Low LED
Power On LED
Power On/Off
Button
Manual Grade Button
(See LMH600)
LMH
-GR
POWER
LEVEL ON/OFF
ANTI-DRIFT SYSTEM
LMH
-GR
LEVEL ON/OFF
Manual
Grade Setting
ANTI-DRIFT SYSTEM
POWER
Battery Compartment Access/
5
⁄8" x 11 Tripod Mounting Thread
Anti-Drift
System On
LED
Anti-Drift
System
On/Off
Button
Manual
Grade
Adjustment
Buttons
SIDE VIEW
Manual
Grade Setting
LOCATION OF
CALIBRATION BUTTONS
Built-In
Handle
LMH Series Rotary Lasers • 5
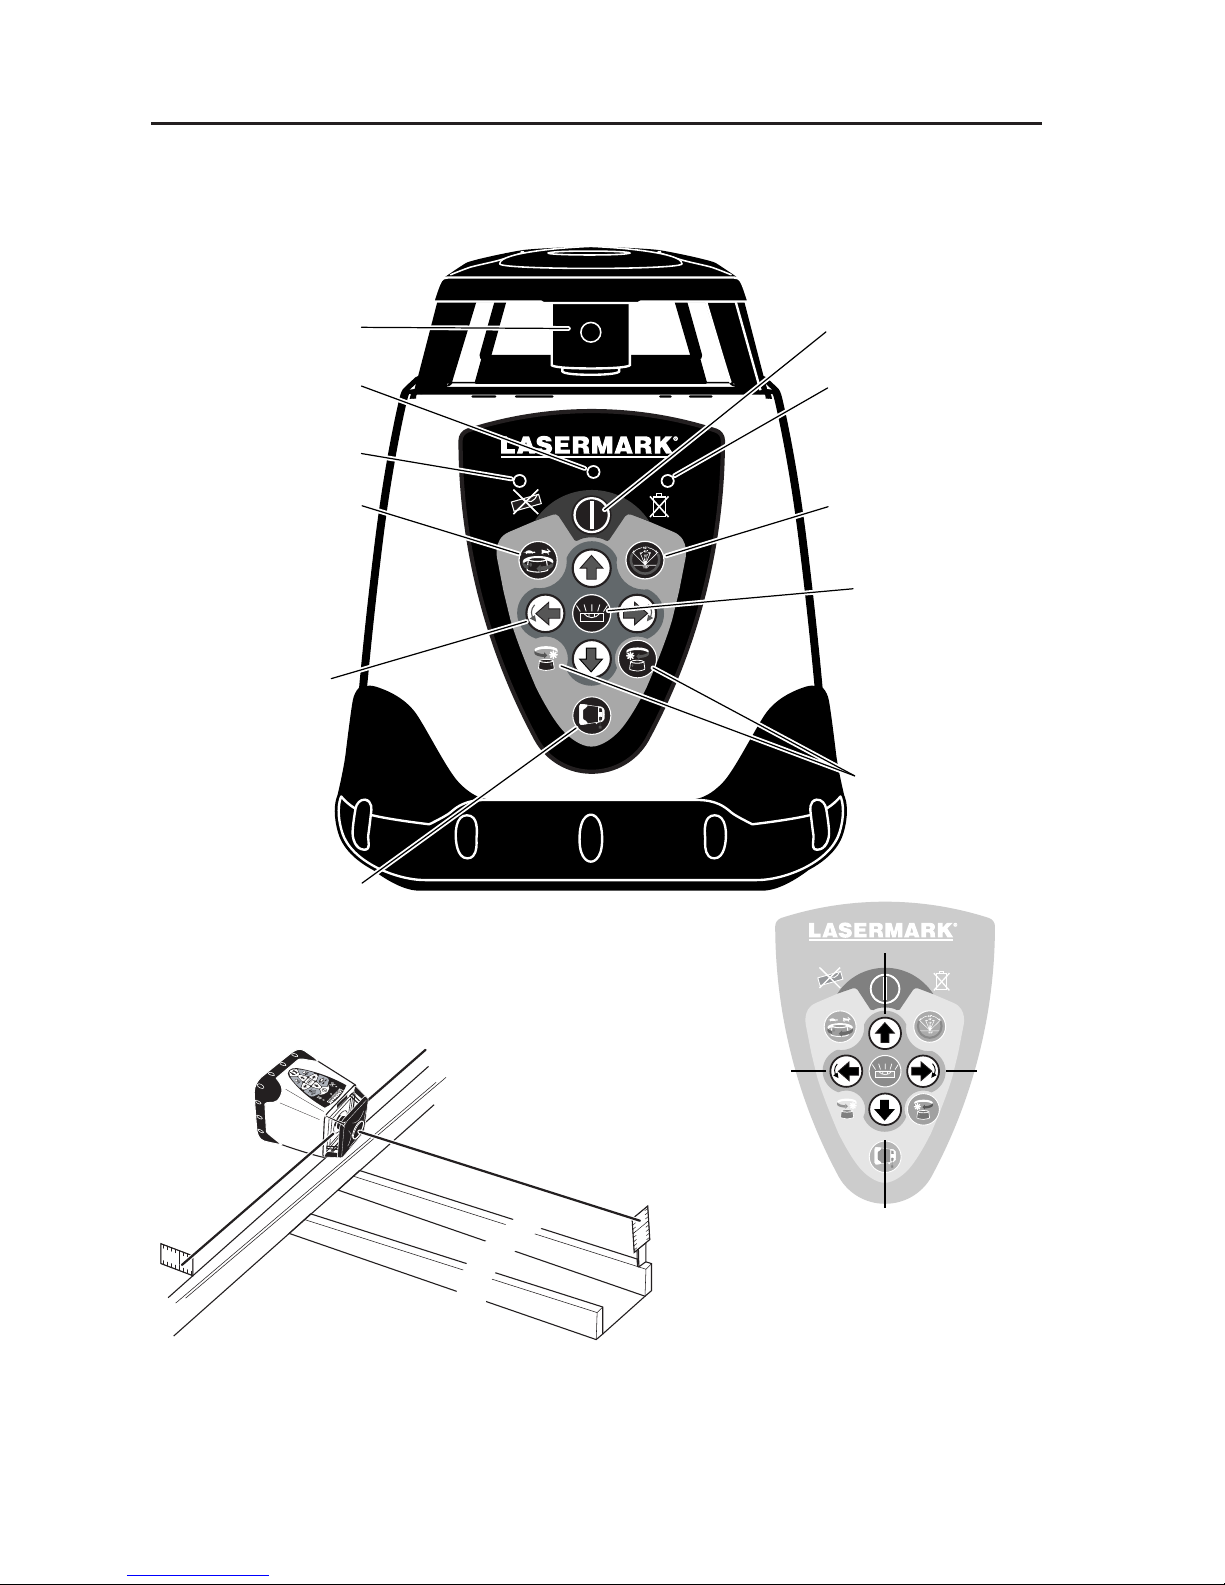
1. LMH600 FEATURES
y
Self-Leveling
Rotating Laser Head
Power On LED
Out-of-Level Indicator LED
Variable Speed
Rotation Button
Four Speed Selection.
Speed Decreases
Each Time Button is Pressed
Manual Grade/Slope
Setting Buttons
Auto Beam Positioning
Button. Positions the
Laser Dot in Plumb
Down Position
(Vertical Mode), for
Vertical Laydown Set-ups
Button also used in normal
operation to activate ADS
LMH600 Self-Leveling Rotary Laser
Battery Compartment Access/
5
⁄8" x 11 Tripod Mounting Thread
Power On/Off
Button
Battery Low LED
Scan Mode Button
Scanning to Preset
Angles of 10º, 15º,
45º, 90º and 180º to
Increase Visibility
Manual Grade Button
Turns unit to manual
mode to allow
manual grade setting
Head Positioning Button
for Fast and Easy
Alignment in Vertical/
Horizontal Applications,
Clock-Wise and CounterClock-Wise Rotation.
Pressing and Holding
Button Moves the
Rotating Beam more Quickl
LMH600 Self-Leveling Rotary Laser
LMH600 Shown
6 • LMH Series Rotary Lasers
X
Y
LOCATION OF
CALIBRATION BUTTONS
2. LASER SAFETY
WARNING: Be sure to read and understand all instructions in this
manual before using this product. Failure to follow all
instructions may result in hazardous radiation exposure, electric
shock, fi re, and/or bodily injury.
CAUTION: Use of controls or adjustments or performance of
procedures other than those specifi ed in this manual, may result
in hazardous radiation exposure.
CAUTION: The use of optical instruments with this product will
increase eye hazard.
IMPORTANT: The following labels are on your LMH for your
convenience and safety. They indicate where the laser light is emitted
by the level. ALWAYS BE AWARE of their location when using the level.
ALWAYS make sure that any bystanders in the vicinity of use are made
aware of the dangers of looking directly into the LMH.
DO NOT remove or deface any warning or caution labels. Removing
labels increases the risk of exposure to laser radiation.
DO NOT stare directly at the laser beam or project the laser beam
directly into the eyes of others. Serious eye injury could result.
DO NOT place the LMH in a position that may cause anyone to stare
into the laser beam intentionally or unintentionally. Serious eye injury
could result.
DO NOT use any optical instruments such as, but not limited to,
telescopes or transits to view the laser beam. Serious eye injury could
result.
ALWAYS remove the batteries when cleaning the laser light aperture
or laser lens.
DO NOT operate the LMH around children or allow children to operate
the LMH. Serious eye injury could result.
LMH Series Rotary Lasers • 7

ALWAYS turn the LMH "OFF" when not in use. Leaving the LMH "ON"
increases the risk of someone inadvertently staring into the
laser beam.
DO NOT operate the LMH in combustible areas such as in the presence
of fl ammable liquids, gases or dust.
ALWAYS position the pipe laser tool securely. Damage to the LMH
and/or serious injury to the user could result if the LMH falls.
ALWAYS use only the accessories that are recommended by the
manufacturer of your LMH. Use of accessories that have been
designed for use with other rotary lasers could result in
serious injury.
DO NOT use this LMH for any purpose other than those
outlined in this manual. This could result in serious injury.
DO NOT leave LMH "ON" unattended in any operating mode.
ALWAYS repair and servicing must be performed by a qualifi ed repair
facility. Repairs performed by unqualifi ed personnel could result in
serious injury.
DO NOT disassemble the LMH. There are no user serviceable parts
inside. Disassembling the laser will void all warranties on the product.
Do not modify the product in any way. Modifying the LMH may result
in hazardous laser radiation exposure.
2.1 ELECTRICAL SAFETY PROCEDURES
WARNING: Batteries can explode or leak, and can cause injury or
fi re. To reduce this risk:
ALWAYS follow all instructions and warnings on the battery label and
package.
DO NOT short any battery terminals.
DO NOT charge alkaline batteries.
DO NOT mix old and new batteries. Replace all of them at the same
time with new batteries of the same brand and type.
DO NOT mix battery chemistries.
DISPOSE of batteries per local code.
DO NOT dispose of batteries in fi re.
KEEP batteries out of reach of children.
REMOVE batteries if the device will not be used for several months.
8 • LMH Series Rotary Lasers
2.2 CERTIFICATIONS
This laser complies with all applicable portions of title 21 of the Code
of Federal Regulations set by the Food and Drug Administrations,
Center for Devices, and Radiological Health. Complies with 21CFR
1040.10 and 10040.11 except for deviations pursuant to Laser notice
No. 50, dated July 26, 2001.
This LMH has also been tested and complies with the CE certifi cation
requirements set forth in the EC regulations 89/336/EEC and EN
61000-6-1 (EN50082-1), EN 61000-6-3 (EN50081-1) and EN 60825-1.
2.3 ENVIRONMENT PROTECTION
Recycle raw materials & batteries instead of disposing of waste. The
unit, accessories, packaging & used batteries should be sorted for
environmentally friendly recycling in accordance with the your
countries latest regulations.
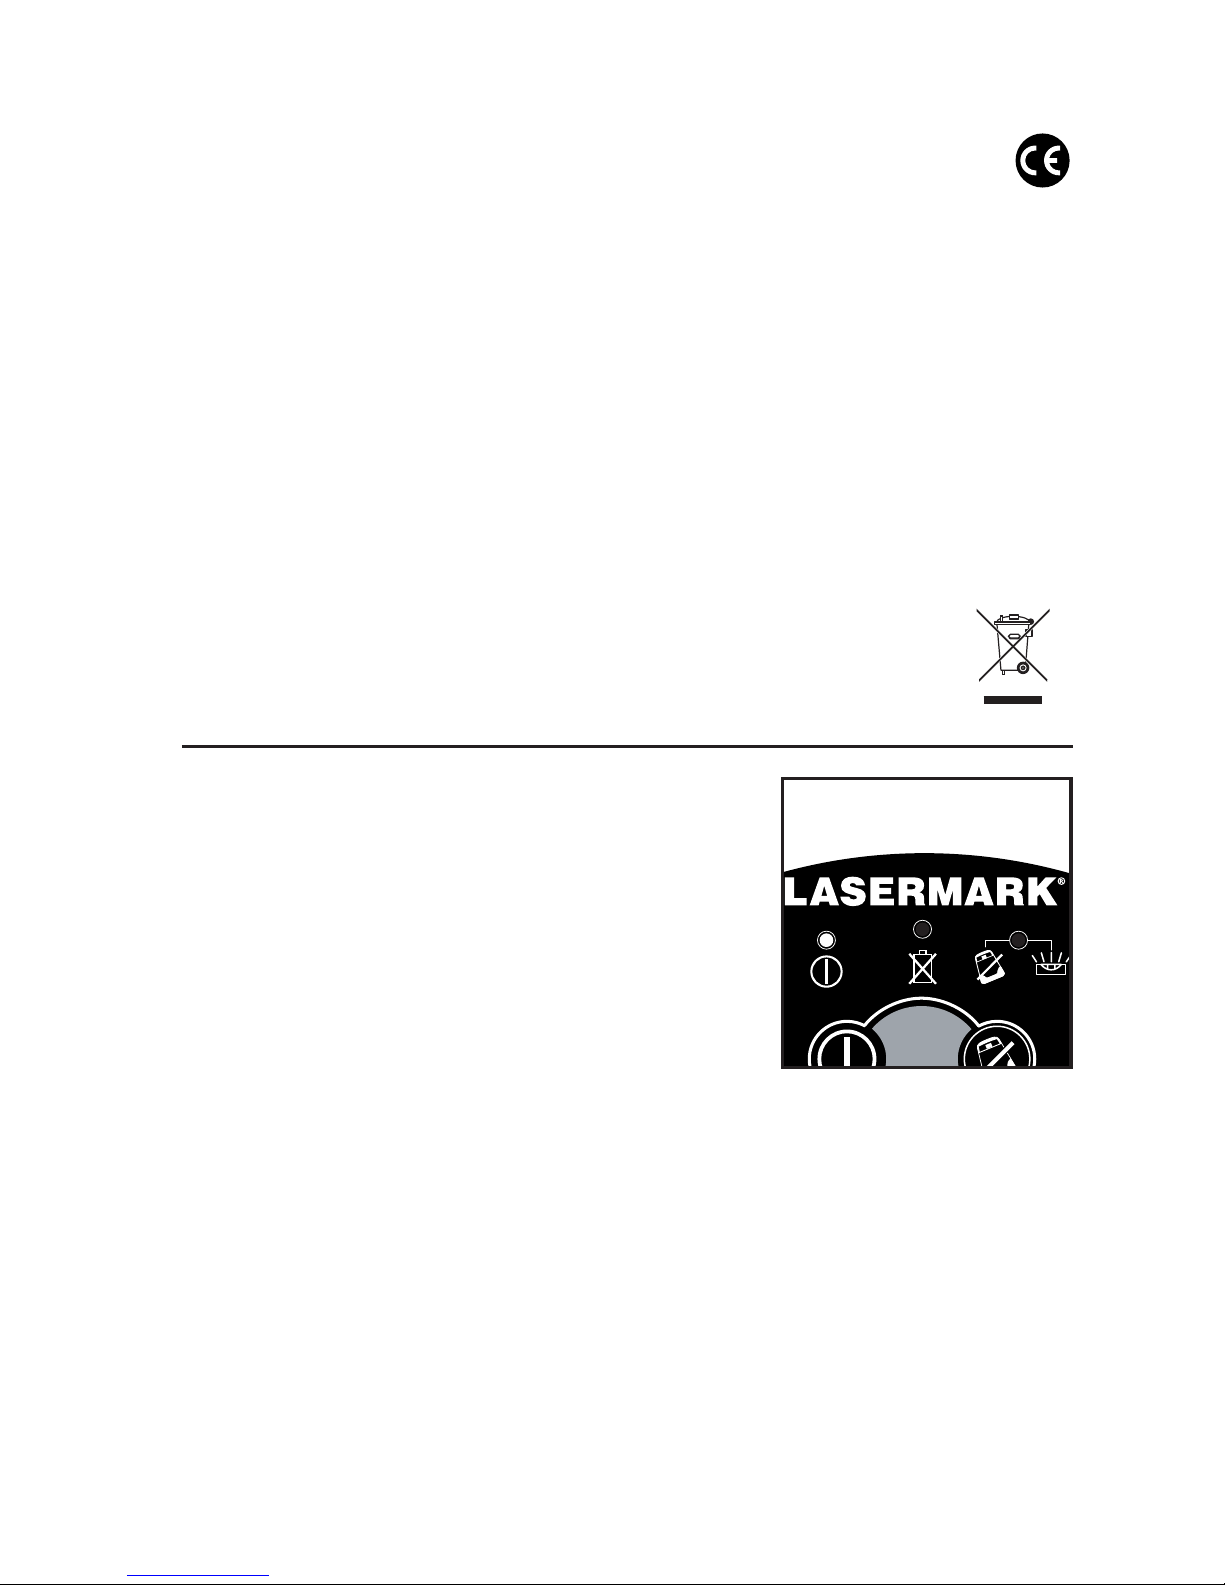
3. LMH SERIES OPERATION
Power On
3.1 Leveling
1: Remove the LaserMark
®
LMH from its case.
The unit is shipped with a battery current
protection insert, which must be removed
before operation. The unit can stand alone
on a level, sturdy surface or be secured to a
5
⁄8" -11 surveyor’s tripod.
2: Press the Power button once, and allow
time (up to 60 seconds) for the unit to selflevel. The Power On LED (Fig. 1) and the laser
will blink during this process. Please note, the laser head may begin to
rotate before leveling is complete. The
self-leveling speed is approximately 1° per 4 seconds.
3: After self-leveling, the laser head will rotate at 600 RPM (LMH600 will
rotate at the last selected speed. Press the Power button again to turn
the unit off. (Note: for LMH-GR and LMH600 models, see section
4.3.2 (page 11)
(if blinking, unit is self-leveling)
LMH
Fig. 1
LMH Series Rotary Lasers • 9
3.2 Re-leveling
If the unit is bumped or moved, the unit
will automatically attempt to re-level
itself. The Power On LED and the laser
will blink during this process until the
unit is level once again. The laser head
will resume rotation.
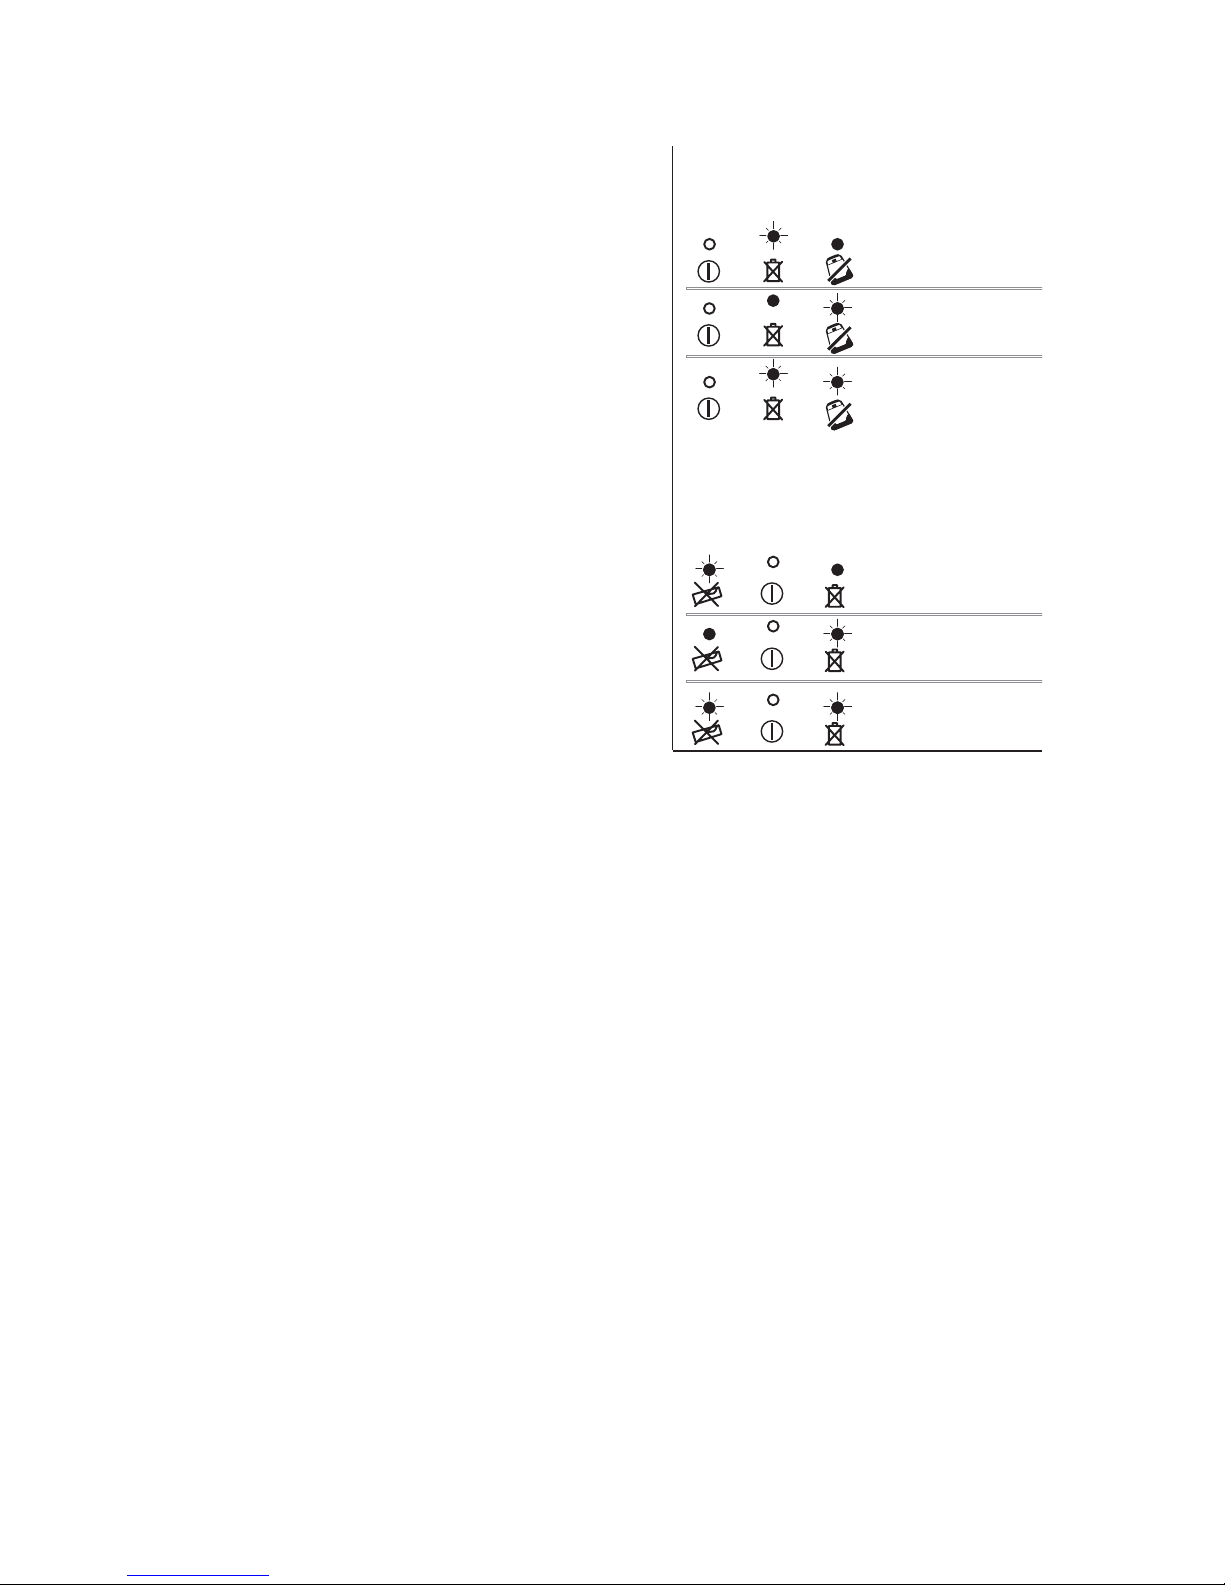
LMH
X—AXIS ERROR
Y—AXIS ERROR
On the job site, it may be necessary to
prevent re-leveling in order to prevent
SPINDLE ERROR
inaccurate measurements by the operator. The LMH’s Anti-Drift System (Section
3.3) is used for this purpose.
LMH600
3.2.1 Axis Drive Error
If the LMH is set up or tipped beyond its
self-leveling range of ±5°, the laser head
will initially attempt to level; however,
when the self-leveling limit is reached,
the LEDs will blink, indicating an axis
drive error (Fig. 2). Turn the LMH off,
move the unit into a more level position,
then turn the unit on again.
3.3 Anti-Drift System (ADS) (LMH, LMH-C, and LMH-GR only)
By default the ADS feature is ON. The default setting of the ADS function may be set to ON or OFF. When the unit is OFF, press and hold
the MANUAL MODE (for LMH-GR, DOWN ARROW button) and then press
the POWER button. Once the unit is on, turn the unit off for 15 Sec
and then back on. ADS will not be the default when unit is turned ON.
To make the unit return to ADS as default, repeat these instructions.
When the LMH Series laser is fi rst turned ON, the ADS feature does not
begin recording for 1 minute. This allows the instrument to be set up
and adjusted.
If after 1 minute, the unit is disturbed and the ADS light is fl ashing
it is necessary to check any bench marks that have been made and
ensure the proper "HI" (Height of Instrument). After the fl ashing ADS
has been reset, by pressing the ADS button one time, you will have an
additional minute to set and check your measurements. To turn ADS
off press the ADS button once. This will put the unit into normal Auto
Self-Leveling mode.
10 • LMH Series Rotary Lasers
X—AXIS ERROR
Y—AXIS ERROR
SPINDLE ERROR
Fig. 2
 Loading...