

Laser Link Golf XL1000 Instruction Manual And Warranty Information

Laser Rangefinder
Featuring Technology
Model Number: XL1000
Don’t forget to register your rangender.
Visit www.laserlinkgolf.com/contact/register to learn the benets.
Instruction Manual and
Warranty Information
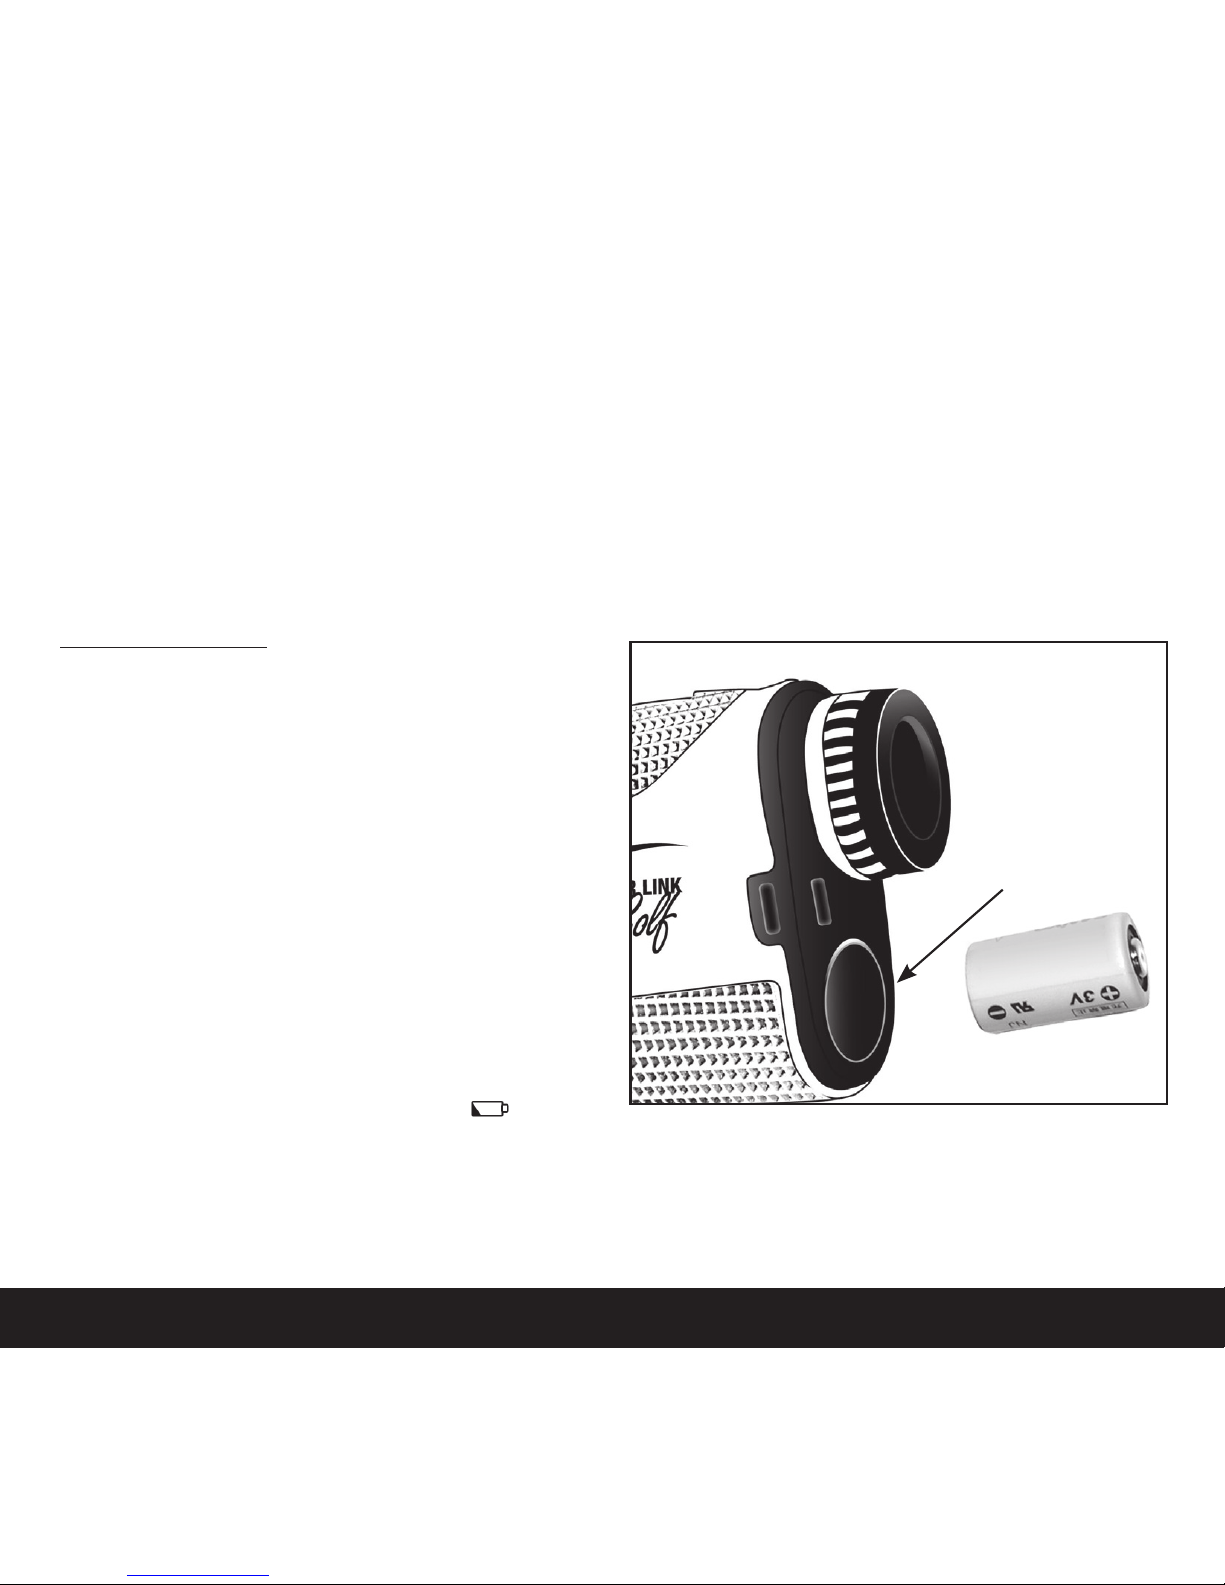
The Battery
Your XL1000 rangefinder comes equipped
with a CR2 3-volt lithium battery. To install
the battery:
1. Remove the battery cap located below
the eyepiece.
2. Insert the CR2 battery negative end first.
The negative end is the flat end of the
battery. When the battery runs low on
power, a low battery indicator ( ) will
appear on the LCD screen. Once this indicator appears, the rangefinder will power off
after fifteen minutes, and you must insert a new battery to resume use.
Congratulations on your purchase of the XL1000 Laser Rangefinder by Laser Link Golf!
XL1000 is a precision measurement device designed specifically for those who love the
game of golf. Knowing the precise distance to your target is the first step in the quest
toward better swings, better shots, and better scores.
To learn more about the features and operation of your XL1000, please read the
instruction manual.
STARTING OUT
Battery
Door
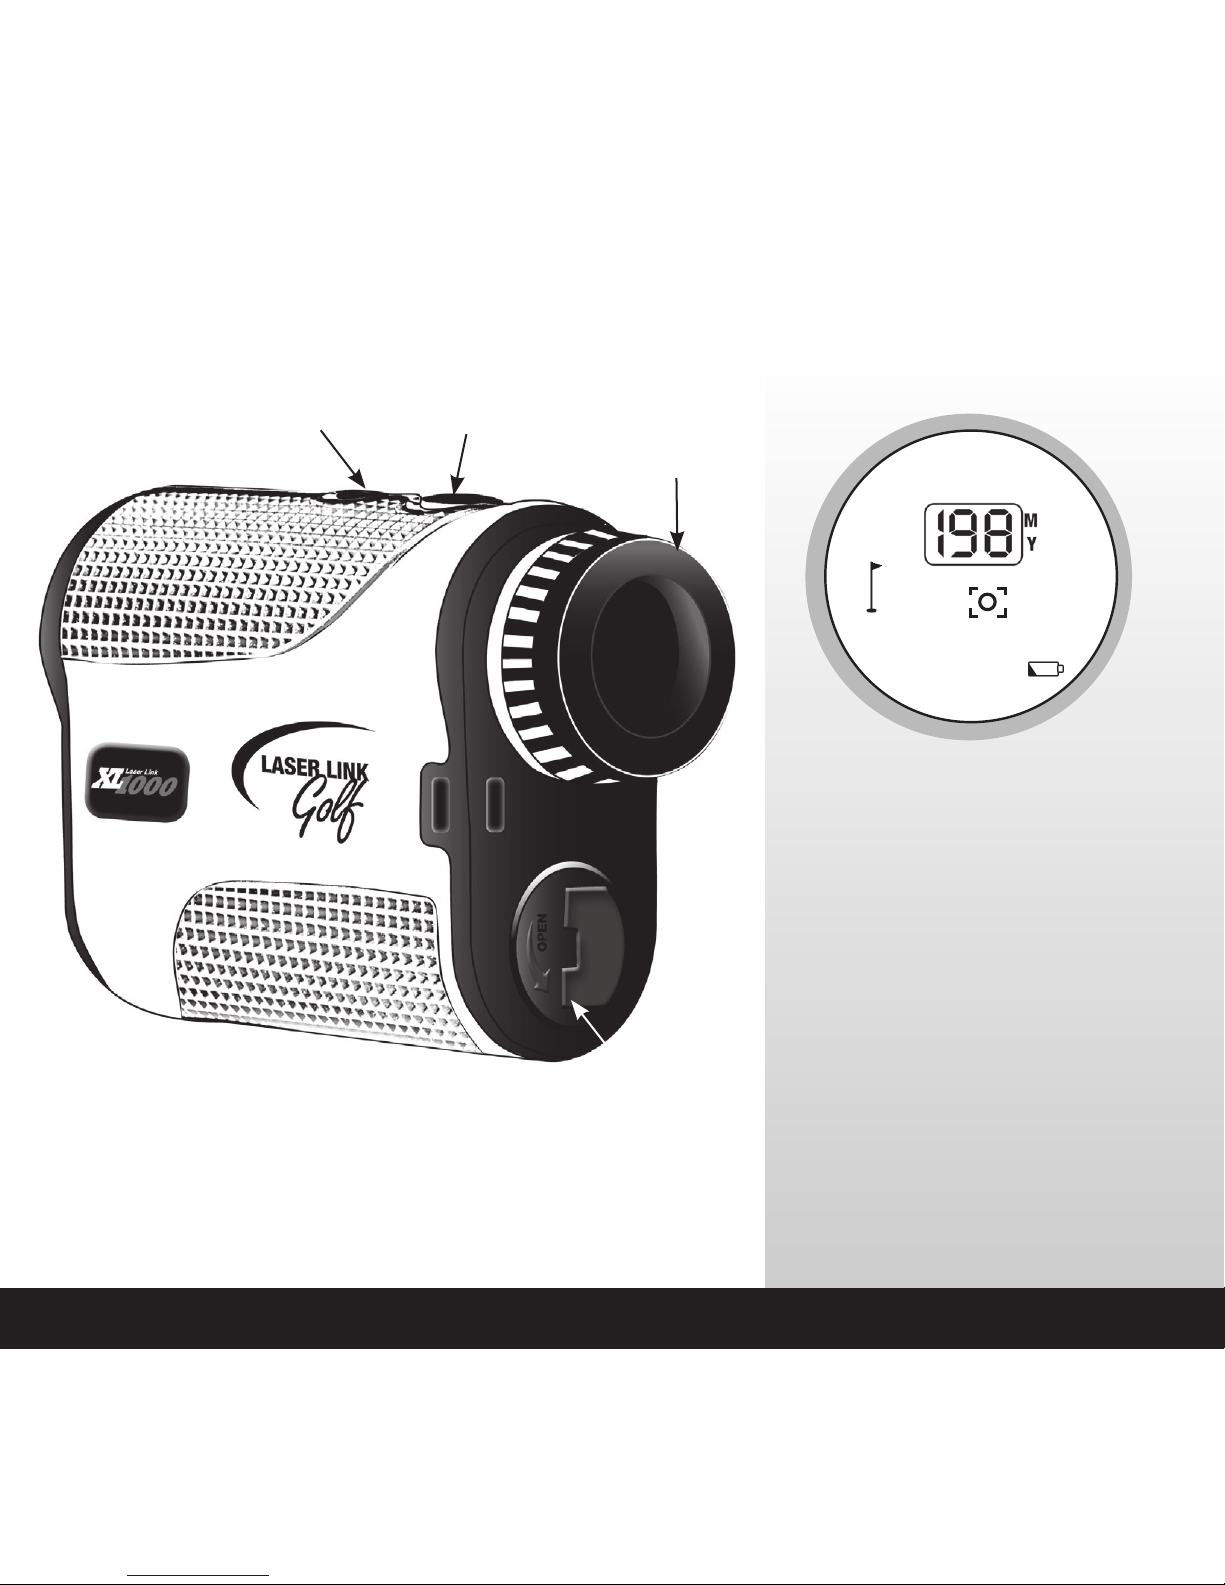
Mode
Button
Power
Button
Eyepiece
Battery
Door
AccuFLAG Mode Indicator
Distance Display
Unit of Measurement
Zero-In Aiming Circle with
Laser Indicator Box
Low Battery Indicator
Internal LCD
1
2
3
4
5
1
2
3
4
5
OPERATING INSTRUCTIONS
The measurement range of XL1000 is 5-1000 yards (5-914 meters) to objects, and
5-300 yards (5-274 meters) to a golf flagstick.
NOTE: The maximum range of the XL1000 rangefinder can depend on several factors,
including target characteristics and environmental conditions. For instance, longer maximum
distances may be obtained to targets that are large in size, brightly colored, or have a shiny
finish. Ranging capability can also be affected by lighting conditions (low light/overcast days
will provide best performance) and the angle to the target (i.e. a target at a 90-degree
angle to the laser pulses will provide better measurement characteristics than a target
at a
45-degree angle.)
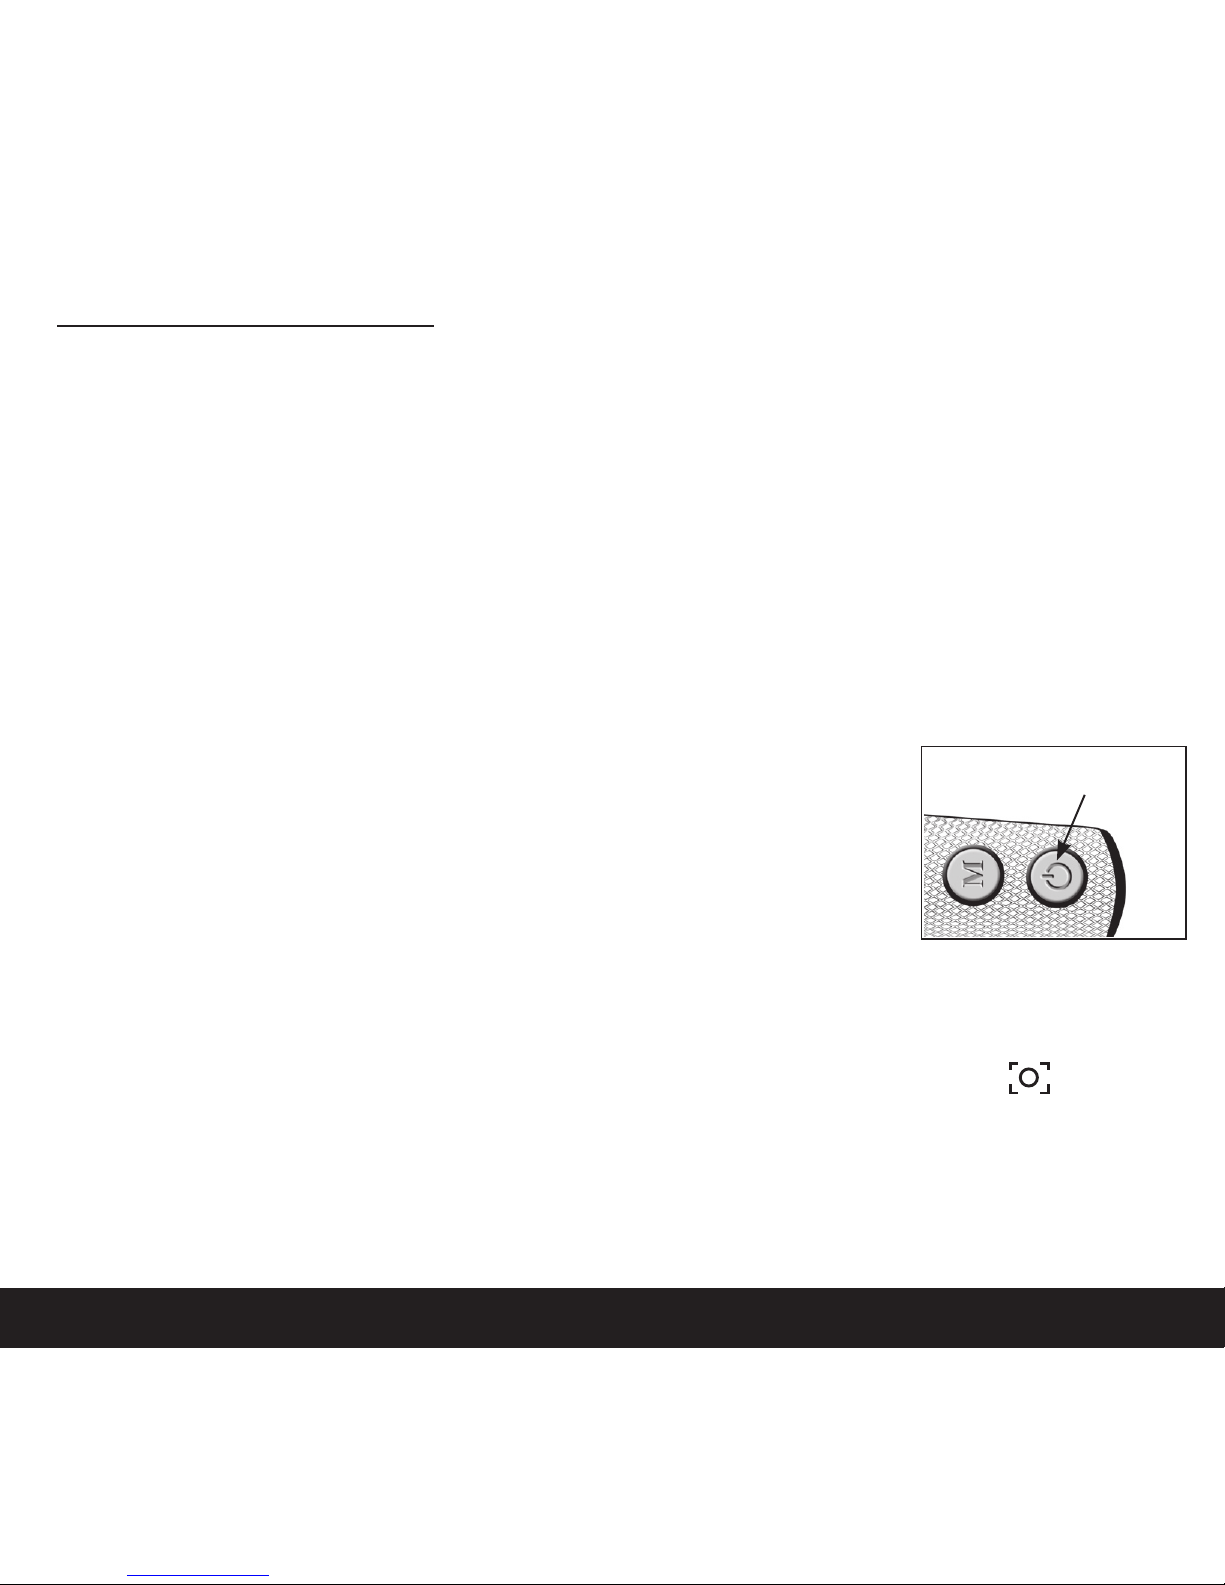
To Use:
1. Hold the rangefinder with the eyepiece and battery door facing you.
2. Bring the rangefinder up to eye level and PRESS AND RELEASE
the Power button. The rangefinder is on.
3. Aim the Zero-In Aiming Circle at your intended target. Press and release the Power button
once to take a measurement. When the laser is firing a laser indicator box ( ) will
appear around the aiming circle. When this box disappears, your measurement has been
calculated. If you would like to scan the landscape, hold down the Power button and
move the rangefinder across the landscape. The box will flash to indicate that the laser
continues to fire.
Power Button
 Loading...