

Page 1
USER MANUAL MP4-S5
1
Please read carefully before use
Note: The clock feature of this device works in tandem with the operating system and needs
to be on in order to correctly function. This does place some extra power demand on the
battery so please ensure the unit is powered off while not in use.
Page 2
USER MANUAL MP4-S5
2
IMPORTANT SAFETY INSTRUCTIONS AND PRECAUTIONS
- Read all instructions carefully before use.
- Retain manuals for future reference.
- Use this product only in the manner described.
- Only use a water-dampened soft-cloth to clean the surface of this product.
- The following will damage this product: any liquid such as water or moisture, extreme
heat; cold; humidity, dusty or sandy environments.
- Only place this device on stable surfaces and ensure that any attached cables are secure
and will not cause the device to fall.
- It is recommended to thoroughly charge electronic devices for the first time overnight.
Subsequent charges can be as needed. During charging, or extended use, the
product may become warm.
- There are no user serviceable parts in this product.
- Un-authorized attempts to dismantle or repair this product will void product warranty and
may result in dangerous electric shock.
- Remove any power or data cords by pulling them from the plug and not the cord.
- Using this device near other electronic devices may cause interference.
- Do not use this product in electrical storms.
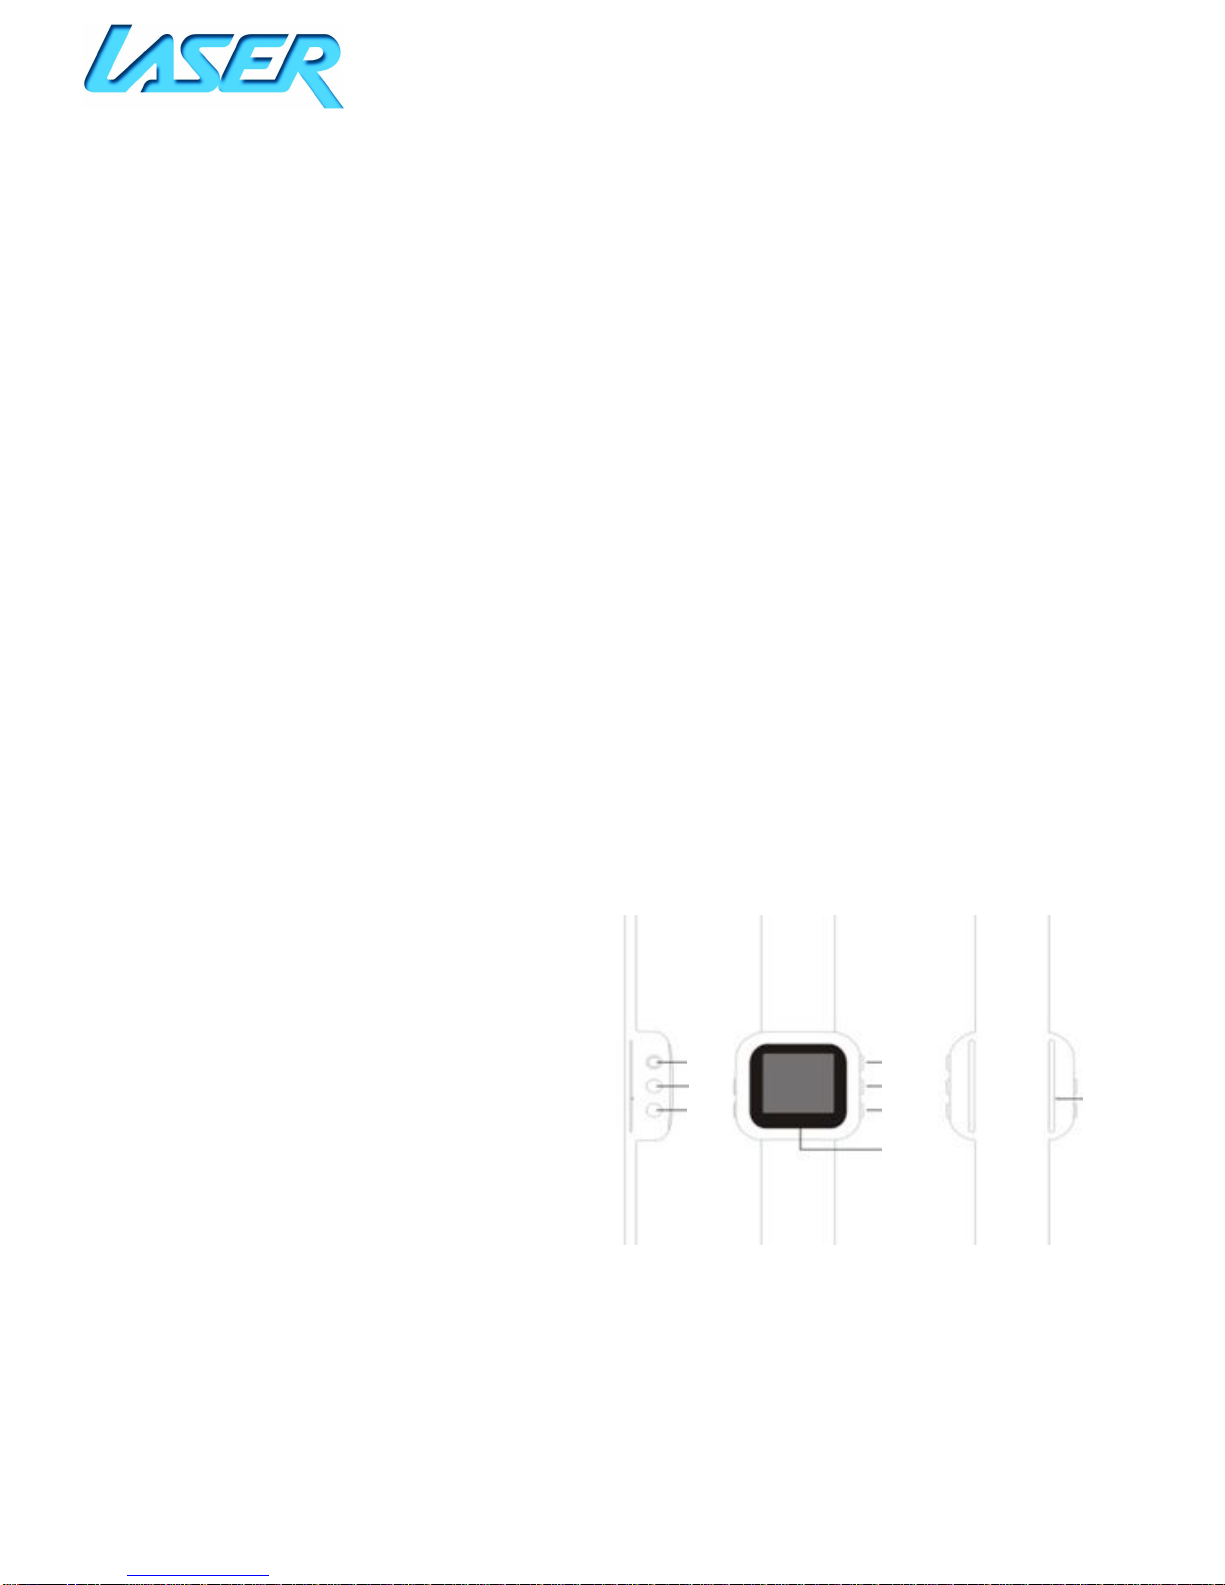
PRODUCT CONNECTIONS AND USE
1: USB Port / Ear bud input
2: Previous track / Rewind / Vol –
3: Next track / Fast forward / Vol +
4: Menu
5: Select / Play / Pause / Power On /
Power Off
6: Adjust volume / Clock & Volume
shortcut
7: Screen
8: Reset button
WHAT’S IN THE BOX
1 x MP4-S5, 1 x USB charging / file transfer cable, 1 x pair of ear buds, 1 x Video conversion
software CD, 1 x User Instruction
1
2
3
4
5
6 7 8
Page 3

USER MANUAL MP4-S5
3
BASIC OPERATION
1. Power On / Power off
Press and hold the power On / Off button until the unit turns On / Off
2. Volume Key
Press to adjust the volume either up or down.
3. Charge / Connect / Disconnect from PC
Connect the MP4-S5 to your PC via the USB Cable supplied. (The USB side for your PC
and the 2.5mm jack for your S5. Once connected, the S5 will appear in your
Windows Explorer feature as a removable drive. Use your PC’s standard “safely
remove hardware” procedure to remove the drive
MAIN MENU SETTINGS
Press and hold the Menu button until the Menu screen appears.
The options to then choose from are:
Music, Run, History, Clock, Stopwatch, Images, System, Other.
Note 1: To return to the main Menu screen, press and hold the Menu button
Note 2: By default, your S5 will continue playback of the last previous paused / stopped
feature.
Note 3: If the automatic screen saver mode engages (and the screen goes black) you may
need to press your button once to awaken the device, then a second time to confirm your
selection.
Note 4: Select any file for playback using the “next” and “previous” buttons for navigation
then the “play” button to confirm your choice.
MUSIC PLAYBACK
Select Music from the menu screen. This is called the Audio main screen.
1. Pause a song:
Press the Play / Pause button. The screen will either display a pause or play logo to
show what status it is in
2. Next / previous track: Press the Next / Previous track button
3. Rewind / Fast forward: Press and hold either the Rewind or Fast forward button. The
related screen icon will be illuminated when selected.
4. Repeat or shuffle songs: Select “Next Set” from the Music menu screen during audio
playback. This is called the Audio settings screen.
4.1. Repeat all songs in the current track playback folder: Repeatedly press the
Menu button until this icon the circular arrow icon appears is highlighted.
All tracks in the current playback folder will then be played back only.
4.2. Repeat the current song only: Repeatedly press the Menu button until this
icon the circular arrow icon appears with the number 1 next to it . The
current track will be played back only
4.3. Shuffle songs randomly: Repeatedly press the Menu button until the shuffle
icon is highlighted . All tracks will then be played back randomly
Page 4

USER MANUAL MP4-S5
4
Music file management
From the Audio main screen, press the Menu button, then select from the following
options:
1. Local folder: Show and explore files and folders
2. Delete File: Delete the currently played tracks
3. Delete all: Delete all tracks from your S5 (WARNING: Deleted files are permanently
deleted)
RUN (PEDOMETER)
1. Select “Run” from the main Menu screen.
2. Enter your Weight, Step (Length) and Daily goal using the “next” and “previous”
buttons, then the “play” button to confirm.
Note: A reminder will be given once your “Daily Goal” has been reached.
3. Once your details have been entered, selected Pedometer from the menu.
4. Press the “Play” button to begin. A silhouette of a running person will appear when
this feature is activated. The total steps taken will be displayed in the black band in
the middle of the screen.
Note: Use the “previous” / “next” buttons to toggle between total Kilometers, Calories or
Time consumed / elapsed.
5. When you have finished your session, you have the option to be able to save your
data (and to add to it at a later time) Use the “next” and “previous” to make your
selection and the play button to confirm your choice.
HISTORY MODE
Select “History” from the main Menu screen. You are then able to select from the following:
Max score, History and Inquiry.
1. Max score: Show details of the highest score such as distance, steps, time and
calories
2. History: Shows a record of all saved data files sorted by date.
3. Inquiry: Use this option to search by date for a data file
Note: Use the “next” and “previous” buttons for navigation then the “play” button to
confirm your choice.
CLOCK MODE
Select “Clock” from the main Menu screen to show the display the clock
STOP WATCH MODE
Select “Stopwatch” from the main Menu screen.
Page 5

USER MANUAL MP4-S5
5
1. Use the “next” and “previous” button to toggle between “start” and “reset” and use
the play button to confirm your choice.
2. Once the stop button has been selected, it can be restarted by pressing the
“play” button again without losing the current data.
3. Use the “next” and “previous” buttons to record multiple lap times. Display lap
information and stop timing by pressing the Menu button. Use the “next” and
“previous” buttons to review down your lap time list.
4. Exit this feature to reset the timer and delete the saved data.
IMAGE MODE
Select “Images” from the main Menu screen.
Use the “next” and “previous” buttons for navigation while in thumbnail view, then the
“play” button to confirm your choice and to view the image. While an image is on screen,
use the “next” and “previous” buttons to skip between images.
SYSTEM
Select “System” from the main Menu screen. You are then able to select from the following
options:
Note: Use the “next” and “previous” buttons for navigation then the “play” button to
confirm your choice.
About
Display memory information such as total stored songs photos and memory capacity,
available memory, firmware revision and model number.
Music
Select between:
1. Repeat options: (Normal, repeat one, repeat all or random)
2. Equaliser: Natural, rock, Pop, Classic, Soft, Jazz, WOW and 3D sound.
3. Volume limit: Select a volume sound limit between a 0 and 30 scale
General
Adjust settings including:
1. Date and Time: Including date, time and time zone
2. Settings: Off time: (Select between 0 and 60 minutes) Sleep time (Select between 0
and 120 minutes)
3. Black: Adjust between 0 and 30 seconds to automatically engage the screen saver
(and turn the screen to off/black)
4. Brightness: Adjust between 0 and 10
5. Language
Photos
Select between:
1. Manual play: User has to manually select to next image
Page 6

USER MANUAL MP4-S5
6
2. Auto play: Choose between 0 and 10 seconds delay for each image to be viewed as a
slide show.
Reset settings
Use this to option to reset all user settings back to factory defaults (this does not affect
saved files)
OTHERS – MOVIE
Select “Others” from the main Menu screen. Then select Movie.
From the Movie main screen, press the Menu button, then select from the following
options:
1. Local folder: Show and explore files and folders
2. Delete File: Delete the currently played movie
3. Delete all: Delete all movies from your S5 (WARNING: Deleted files are permanently
deleted)
OTHERS – TEXT
Select “Others” from the main Menu screen. Then select Text.
From the Text main screen, press the Menu button, then select from the following options:
Local folder, Play set, Delete file and Delete all.
1. Local folder: Show and explore files and folders
2. Play set: Manual play (User has to manually turn each page of the text document)
select to next image. Auto play (Choose between 0 and 10 seconds delay for each
page to be displayed then turned automatically)
3. Delete File: Delete the currently played text document
4. Delete all: Delete all text documents from your S5 (WARNING: Deleted files are
permanently deleted)
VIDEO CONVERSION TOOL
Your MP4-S5 supports AVI (128x128 pixel) video format files. Use the supplied Video
Conversion Tool before loaded movies onto this device.
Note: If an AVI file has not been converted to 128 x 128 pixels, it will take up to one minute
to load before playback can begin.
Page 7

USER MANUAL MP4-S5
7
SPECIFICATIONS
1.5-inch TFT screen display
Measure: Steps, calculate distance and calories, save data to
history list, show best score and target steps
Includes watch display, lap timer and countdown timer
128 x 128 pixels display resolution
Plays AVI video format file
Plays MP3, WMA, WAV music format files
Picture browsing of JPEG format
Support TXT E-book format
Integrated 400mAh Li-ion rechargeable Battery
Multi-language support
Page 8
USER MANUAL MP4-S5
8
TROUBLE SHOOTING / Q & A
I have loaded my AVI
files but when I try and
play them back the
screen goes black
The AVI must be resized/converted to play on your S5
player as the screen size is far smaller than your average
TV. Please use the software tools supplied to resize your
files to ensure smooth playback. Playback is still possible
with unconverted files, but it will take up to one minute
before the player can start playback.
No power Check battery has been fully charged
Even after a full
charge, my battery
doesn’t last very long
If your S5 is not in use it is best to turn it fully off. As per its
design, it needs to always be on in order for the clock
feature to work correctly.
Unable to locate or
play files
Check that the file is in a compatible format
Check to see if the file is stored in
the corre
ct
directory
There is no sound from
the ear buds
Check the volume level
Check the connection (earphone to the earphone jack)
Check if your music files and ear buds are compatible with
another MP3 player
Not charging
Check to make sure that your MP4-S5 is connected to a
USB port on your computer. Check that the USB port is
working for other devices.
Unable to store music
Check if you have enough space on your MP4-S5 to store
the music file
Check to make sure that the USB cable is connected to the
PC and to the MP4-S5 securely and correctly
Computer does not
recognise my MP4-S5
Check that the USB cable is properly connected to your
computer
Try plugging the USB cable into a different USB Port. The
ports at the rear are often the best, rather than a USB hub,
as they correct direct to the mother board
For further product information and instruction please visit our product
web page at www.laserco.net or email [email protected]
Please note: As continual improvements are made to this product, slight operational
differences may occur. For the most up-to-date user manual, please visit our web site.
Page 9

USER MANUAL MP4-S5
9
Warranty Against Defects
Laser Corporation Pty Ltd (“Laser”) warrants your new product to be free from defects in materials
and workmanship for 12 months, from the date of purchase, provided that the product is used in
accordance with accompanying recommendations or instructions where provided. The benefit of
this warranty is in addition to your rights under the Australian Consumer Law and to other rights and
remedies of the consumer under a law in relation to the goods or services to which the warranty
relates.
Through a network of retailers and resellers, Laser will provide you with your choice of a refund,
repair or exchange (where possible) for this product if it becomes defective within the warranty
period. This warranty will no longer apply where the defect is a result of alteration, accident,
misuse, abuse, normal wear and tear, neglect or improper storage.
Please retain your receipt as proof of purchase
How to make a product warranty claim:
Step 1: Find your receipt which proves the date of purchase. Where the date of purchase cannot
be verified, your place of purchase or Laser will make an assessment based on the date of
manufacture, the condition of the Laser Product and the type of defect.
Step 2a): Contact your place of purchase. They will assess the nature of the fault and refund or
replace the product as per their store refund or warranty policy.
Step 2b): If your place of purchase cannot be contacted, then you can contact Laser . Customer
Service with details of your defective Laser Product: Phone: (02) 9870 3355; or Email:
Users)”). Our business address is at 1/6-8 Byfield Street, North Ryde, NSW 2113
Step 3: Laser . will issue you with a Return Authorisation (RA) number within 48 hours. When
requested, send us the defective Product and a copy of your receipt. Laser will cover the cost of the
return delivery.
Step 4: Wait for us to contact you. Once we have received your defective Laser Product for
inspection, we will inform you of our assessment of your claim within 7 days. When we contact you,
we will firstly let you know whether you have a valid claim under this Warranty, and if so, we will
inform you whether your defective Laser Product will be replaced or repaired, together with the
number of days you can expect to wait to receive your replaced or repaired Laser Product.
Our goods come with guarantees that cannot be excluded under the Australian Consumer Law. You
are entitled to a replacement or refund for a major failure and compensation for any other
reasonably foreseeable loss or damage. You are also entitled to have the goods repaired or replaced
if the goods fail to be of acceptable quality and the failure does not amount to a major failure.
 Loading...