

Page 1
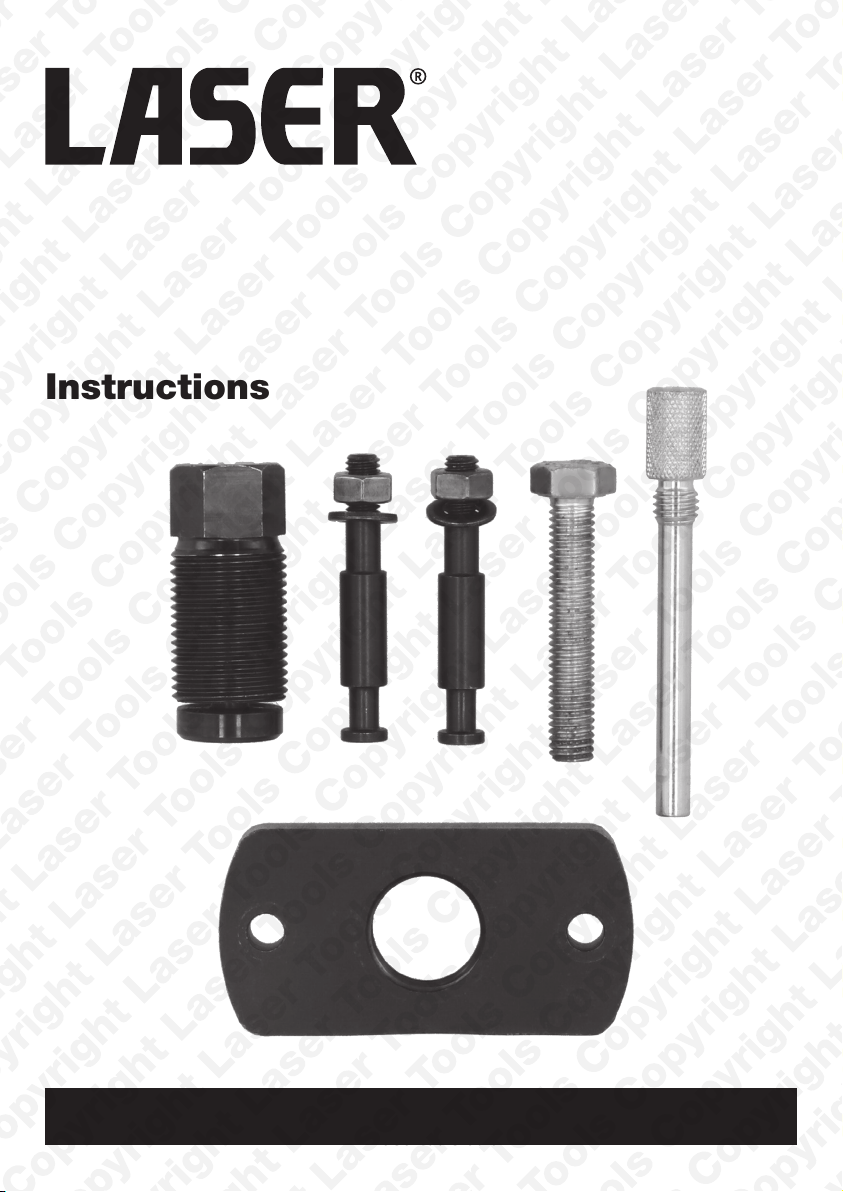
Part No. 8956
Water Pump Drive Sprocket
Removal & Fitting Kit
VW Group 1.5 TSI
Instructions
www.lasertools.co.uk
www.lasertools.co.uk
1
Page 2
Introduction
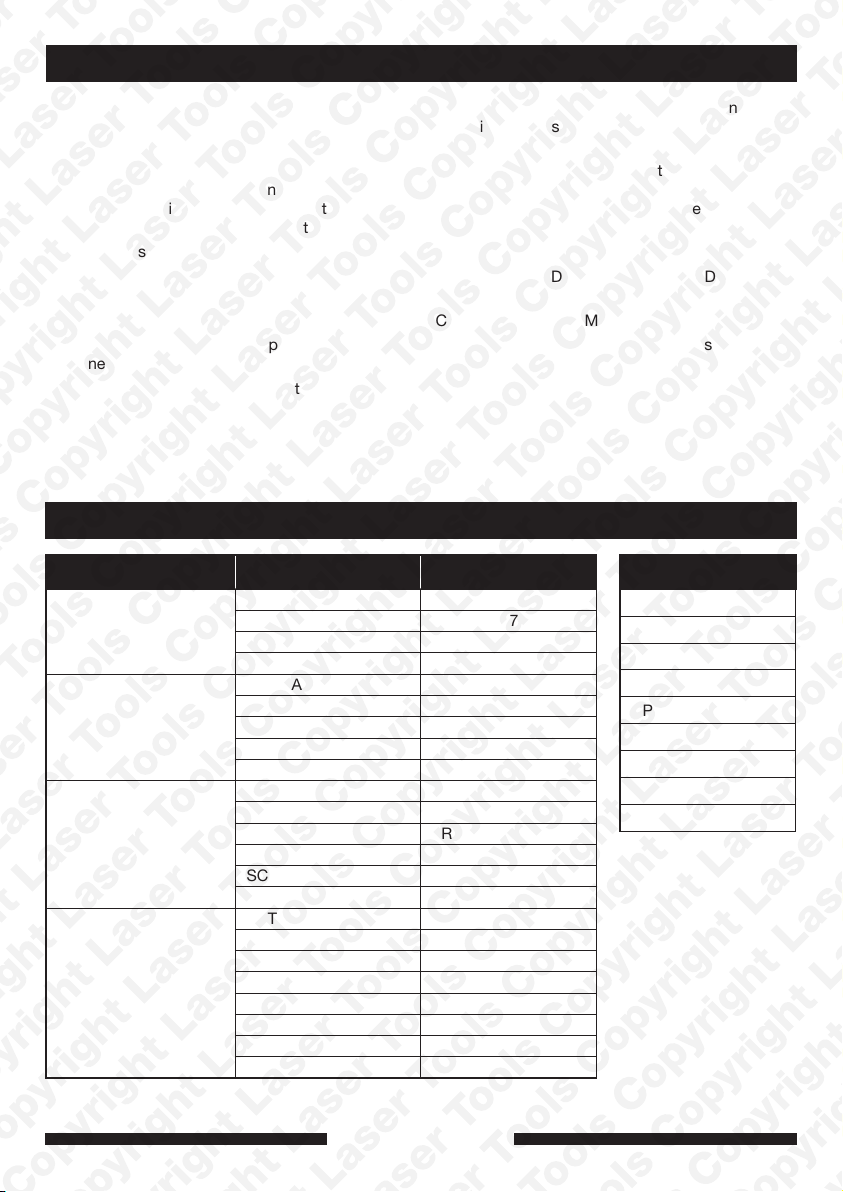
The VW group 1.5L TSi engines use a water pump that is belt driven via the inlet camshaft. When
performing engine timing checks or timing belt replacement, itis necessary to remove the water pump
and drive sprocket from the end of thecamshaft.
Removal and fitting of the sprocket must be done in a controlled manner that does not pull or push on
the internal camshaft components and the sprocket must also be correctly aligned when being fitted.
The Laser 8956 kit has been designed to allow removal, fitting and alignment of the sprocket using force
screws to ensure the camshaft is not pulled or pushed within the cam cover.
• Applications include Audi (from 2017), Seat (from 2017), Skoda (from 2017) & Volkswagen (from 2017).
• Engine Applications include: 1.5L TSi petrol engines – DACA, DACB, DADA, DFYA, DHFA, DPBA,
DPCA & DPBE.
• Engine variants include: EA211, EVO 4 cylinder TSi ACT. Equivalent to OEM T10221-A.
• Recommended for use when performing timing checks and belt replacement – use with Laser 8824
engine timing kit.
Supplied with water pump sprocket alignment pin to ensure correct alignment – use in accordance with
OEM instructions. Do not use power tools with this product.
The information given below is for reference only. Laser Tools recommends the use of
Manufacturer data or Autodata. Laser Tools cannot be held responsible for damage to engine
or personnel whilst using this tool kit.
Applications
Make Model Year
A1 FROM 2018
AUDI
SEAT
SKODA
VOLKSWAGEN
2
A3 FROM 2017
Q2 FROM 2018
Q3 FROM 2018
ARONA 2017 TO 2021
ATECA FROM 2018
IBIZA 2017 TO 2021
LEON FROM 2018
TARRACO FROM 2019
KAMIQ FROM 2019
KAROQ FROM 2017
KODIAQ FROM 2019
OCTAVIA III/IV FROM 2017
SCALA FROM 2019
SUPERB III 2017 TO 2020
ARTEON 2018 TO 2020
GOLF VII/VIII FROM 2017
PASSAT FROM 2018
POLO 2017 TO 2021
T-CROSS FROM 2019
TIGUAN/ALLSPACE FROM 2018
TOURAN FROM 2019
T-ROC 2017 TO 2022
www.lasertools.co.uk
Engine Codes
1.5LT
DADA
DFYA
DHFA
DPCA
DACA
DPBA
DACB
DPBE
Page 3
Kit List
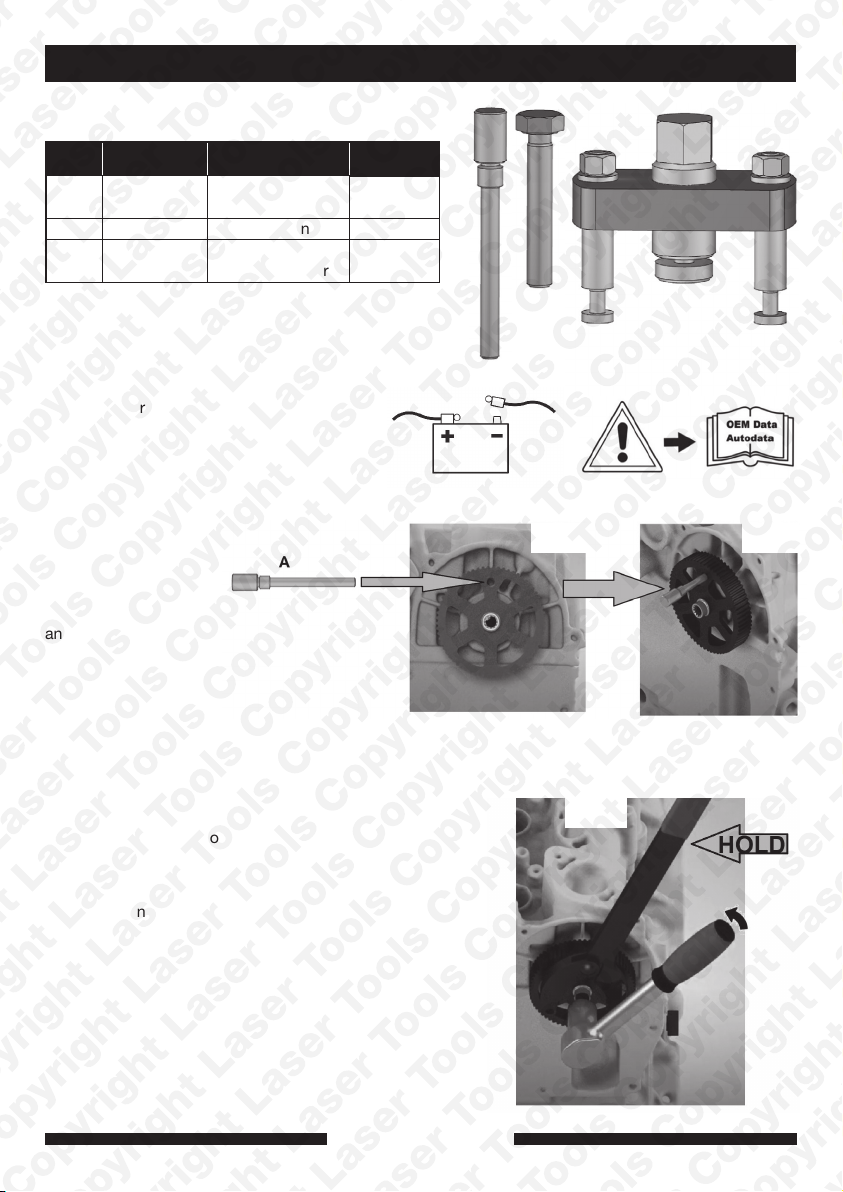
Item Comp. No. Description OEM.
A C736
B N/A M8 Reaction bolt
C C1071
Instructions for use:
• Always refer to manufacturer specific data
and instructions.
• Ensure the engine is set to TDC on cylinder
number 1.
Component A,
Alignment pin:
Used to check the
alignment of the water
pump sprocket before
sprocket removal
and also when
refitting the sprocket.
Check the alignment
of the sprocket
before removing the
sprocket fixing; see
figures 1 and 2.
Water Pump
Alignment Pin
Water Pump
Sprocket Puller
T10504/2
T10221A
A
B
C
FIG:1
FIG:2
Remove the pin A; using a suitable sprocket holding
tool as shown in figure 3 (Laser tools recommend 4237
or similar) undo the sprocket fixing bolt:
With the sprocket fixing bolt removed, recheck the
sprocket alignment using pin A.
www.lasertools.co.uk
FIG:3
3
Page 4
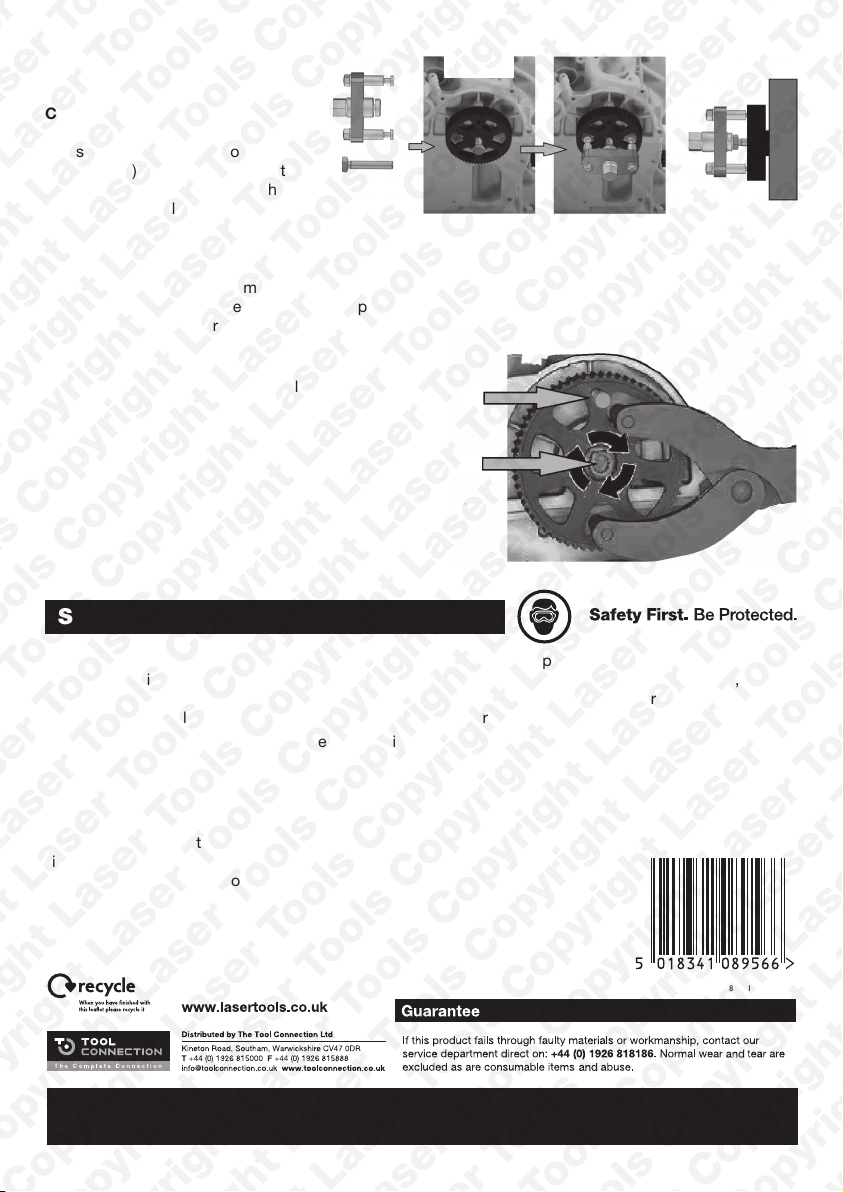
Component B, Reaction bolt: Used
to allow the puller to push against
the camshaft and refit the sprocket.
Component C, Sprocket remover:
Screw component B in to the
camshaft as far as it will go by hand
(see figure 4). Mount the sprocket
puller C so the force screw pushes
on the head of bolt B and the legs
hook into the sprocket, as shown
infigure 5:
While holding the cross beam of the puller so the leg remain in contact with the sprocket, turn the force
screw with a 17mm spanner to pull off the sprocket to touch the head of B. Slacken the puller, back off
the reaction bolt B and repeat the above process.
Fitting the sprocket: Place the sprocket on the
end of the camshaft by hand and align the sprocket
using alignment pin A. With the reaction bolt B and
a suitable 13mm spanner press the sprocket back
on to the camshaft. Hold the sprocket from turning
using a suitable holding tool; where possible keep the
alignment pin in place to help ensure the sprocket
does not turn on the camshaft. (see figure 6). Once the
reaction bolt B bottoms out in the camshaft remove it
and complete the fitment using the OEM fixing bolt.
C
B
FIG:4
A
B
FIG:5
FIG:6
HOLD
Safety Warnings - please read
Our products are designed to be used correctly and with care for the purpose for which they are
intended. No liability is accepted by the Tool Connection for incorrect use of any of our products, and
the Tool Connection cannot be held responsible for any damage to personnel, property or equipment
when using the tools. Incorrect use will also invalidate the warranty.
If applicable, the applications database and any instructional information provided has been designed
to offer general guidance for a particular tool’s use and while all attention is given to the accuracy
of the data no project should be attempted without referring first to the manufacturer’s technical
documentation (workshop or instruction manual) or the use
of a recognised authority such as Autodata.
It is our policy to continually improve our products and thus we reserve the
right to alter specifications and components without prior notice. It is the
responsibility of the user to ensure the suitability of the tools and information
prior to their use.
8956_Instructions_V1
www.lasertools.co.uk
 Loading...