

Page 1

Instructions
UK
Engine Timing Kit
for 1.0 Wet Belt Non-Turbo Ford Petrol
Part No. 8945
REGISTERED
DESIGN
www.lasertools.co.uk
Page 2
Description
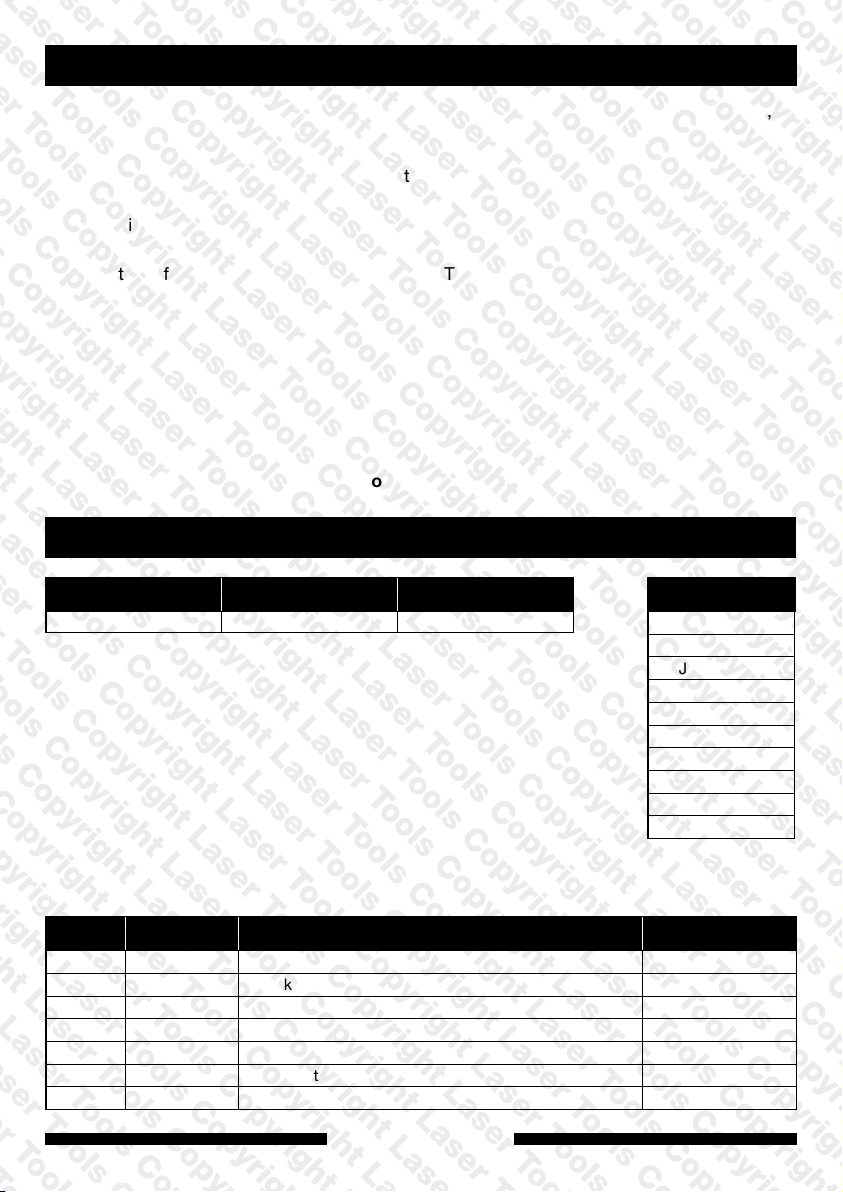
Designed specifically for the 1.0 litre 3 cylinder normally aspirated petrol engine from Ford,
the 7828 kit provides all the tools required to set the engine timing. Our specially designed
cam locking bridges offer an easy to use and more positive method of locking the camshaft
than even the OEM tools can offer, ensuring the camshafts are securely locked in position
quickly and easily.
• Applications include: Ford Fiesta (from 2013) 1.0lt Non-Turbo petrol engine codes:
P4JA, P4JB, P4JC, P4JD, XMJA, XMJB, XMJC, XMJD and XTCA.
• For setting of the Variable Camshaft Timing (VCT) units, please use Laser Part No. 6291.
For Ecoboost Turbo 1.0L engine timing, please see Laser Part No. 6952 (if you already own
the Laser timing tool Part No. 6952, the camshaft locking blocks for 1.0L non-turbo are
available to buy separately, under part no. 8946).
• Use with Laser 7318 and 6291.
NOTE*= for 1.0 non-turbo engine only.
The information given below is for reference only. Laser Tools recommends the use of
Manufacturer data or Autodata. Laser Tools cannot be held responsible for damage to
engine or personnel whilst using this tool kit.
Applications
Make Model Year
Ford
Item Comp. No. Description OEM.
A C701 Flywheel Holding Tool 303-1602
B C702 Crankshaft Timing Pin 303-1604
C C282 Tensioner Pulley Locking Pin 303-1054
D C089 Crankshaft Pulley Alignment Pin 303-732
E C488 4mm Tensioner Pin 4MM PIN
F C1070 Camshaft Timing Tools & Fixings 303-1605*
G
2
C705 Front Cover Oil Seal Installer 303-1603
Fiesta 2013 to 2017
www.lasertools.co.uk
Engine Codes
1.0LT
P4JA
P4JB
P4JC
P4JD
XMJA
XMJB
XMJC
XMJD
XTCA
Page 3
Instructions for use
• Always refer to manufacturer specific data and instructions.
• N.B. the camshaft drive belt on the Ford 3 Cylinder 1.0lt engine is “oil bathed”.
The front engine casing must be removed to gain access.
• Turn engine to TDC number one before disassembly of engine.
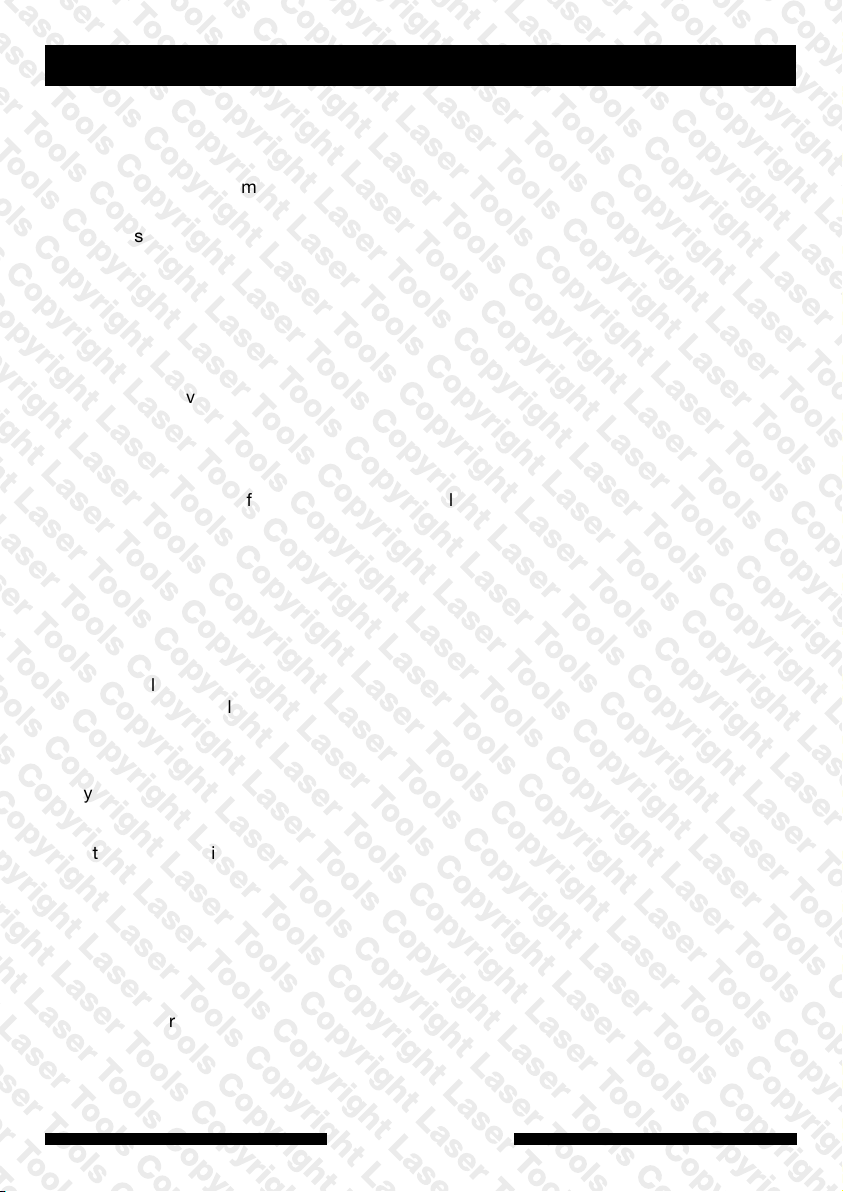
• Remove starter motor and use component A to hold the flywheel when undoing
the crankshaft pulley bolt.
A
Component A:
Used to lock the flywheel when loosening and tightening the crankshaft
pulley bolt. Remove the starter motor, assemble components A as
shown and fit in the starter aperture so that its tooth locks the flywheel
(see opposite):
Component B:
Used to set the crankshaft position. Remove the blanking plug in the side of the engine block
as shown and fit component B; turn the crankshaft slowly clockwise until the crankshaft web
contacts the end of component B.
Component C:
Used to lock the belt tensioner in
its fully retracted position as shown.
Component D:
Used to initially set the position of
the crankshaft via a hole in the front
crankshaft pulley as shown in figure 3.
NOTE: Remove pin D in place when
torqueing or loosening the crankshaft
pulley bolt.
Component E:
Used to lock the auxiliary belt
tensioner in its retracted position.
Component F:
Used to lock the camshafts in their
timed position independently of
their pulleys. With component B
already fitted and the engine at TDC
cylinder number 1, assemble the
components for F as shown below.
B
C
D
F = Assembly
www.lasertools.co.uk
3
Page 4

Install the assembled camshaft components F over the square section of the camshafts
ensuring the holding tools seat on the surface of the cylinder head. Fit fixing bolts hand tight.
Inlet
F
Exhaust
N.B. On engines equipped with VCT, if the VCT pulleys require removal or loosening
ensure their initial position is marked with chalk or paint. Additional tooling will be
required to set the position of the VCT pulleys, see Laser 6291.
Component G:
This is used fit the new front crankshaft
G
oil seal into the front cover after the front
cover has been re-fitted to the engine.
N.B. Always observe manufacturers tightening sequence and torques for the front
cover bolts.
Our products are designed to be used correctly and with care for the purpose for which they
are intended. No liability is accepted by the Tool Connection for incorrect use of any of our
products, and the Tool Connection cannot be held responsible for any damage to personnel,
property or equipment when using the tools. Incorrect use will also invalidate the warranty.
If applicable, the applications database and any instructional information provided has been
designed to offer general guidance for a particular tool’s use and while all attention is given
to the accuracy of the data no project should be attempted without referring first to the
manufacturer’s technical documentation (workshop or instruction manual) or the use
of a recognised authority such as Autodata.
It is our policy to continually improve our products and thus we
reserve the right to alter specifications and components without prior
notice. It is the responsibility of the user to ensure the suitability of the
tools and information prior to their use.
8945_Instructions_V2
www.lasertools.co.uk
 Loading...