

Page 1
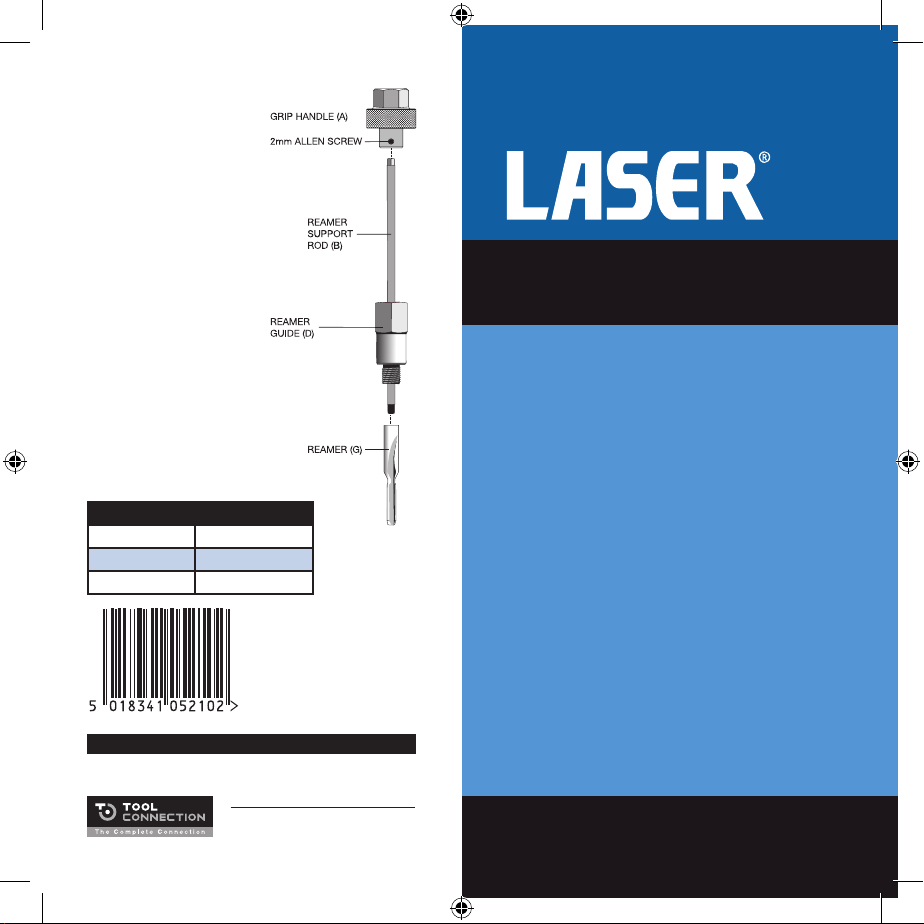
Replacement parts available
Reamer Part Number
8mm 2649
10mm 2650
12mm 2651
Replacement parts
available:
Due to the nature of the task
and tools, the three reamers
are regarded as consumable
and not therefore covered by
the Tool Connection guarantee.
Guarantee
If this product fails through faulty materials or workmanship, contact our service
department direct on: +44 (0) 1926 818186. Normal wear and tear are excluded as
are consumable items and abuse.
Distributed by The Tool Connection Ltd
Kineton Road, Southam, Warwickshire CV47 0DR
T +44 (0) 1926 815000 F +44 (0) 1926 815888
[email protected] www.toolconnection.co.uk
5210
Glow Plug Aperature
Cleaner | Reamer Set
Set for M8 | M10 | M12 Glow Plugs
Instructions
This special tool has been designed
to ream out and clean the bore
of the glow plug aperture and the
sealing seat, after removing an old
| damaged glow plug and before
fitting the new replacement.
One of the main reasons that glow
plugs seize in the aperture is carbon
entering the glow plug bore. The tool
screws into the glow plug thread
and reams out any unwanted carbon
from within the bore. At the same
time it cleans the sealing seat, ready
for the new glow plug.
www.lasertools.co.uk
Page 2
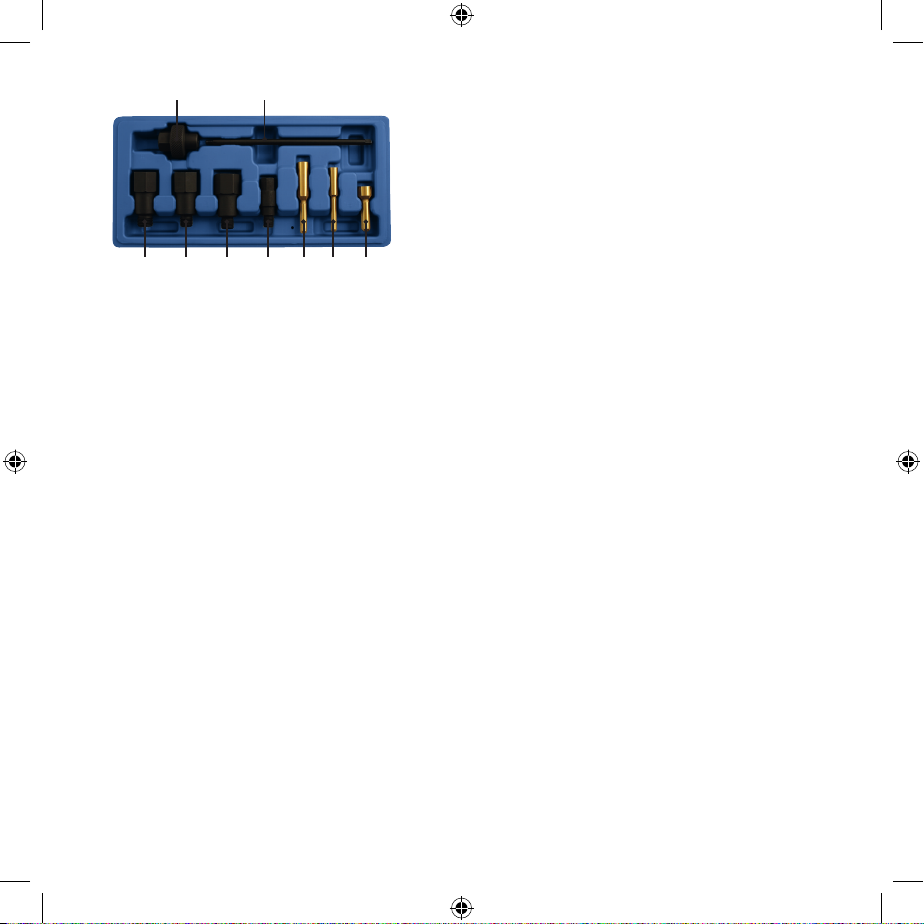
A B
Instructions:
1. Identify the size of the glow plug aperture
and the glow plug thread, then chose the
appropriate components from the kit.
2. Insert reamer support rod (B) into grip
handle (A) and secure by tightening the
2mm Allen key.
3. Slide the appropriate reamer guide (C, D,
C D E F G H I
A: Grip handle
B: Reamer support rod
C: Reamer guide: M12 x 1.25
D: Reamer guide: M10 x 1.25
E: Reamer guide: M10 x 1.0
F: Reamer guide: M8 x 1.0
G: Reamer: M10
H: Reamer: M8
I: Reamer: M12
Before you start:
• We strongly recommend that the cylinder
head is removed from the engine before
work is commenced.
• If cylinder head is to be left in situ, then
remove the relevant injector and connect
an air-line via a suitable adaptor to ensure
metal swarf and dirt | carbon cannot enter
the combustion chamber.
• Maintain tools in a good and clean condition.
• Keep well lubricated. Lubricate cleaning
reamers with thick machine oil or grease.
This will also help to contain the metal swarf
and carbon.
• Where correct eye protection, particularly
when cleaning any swarf away from engine.
• When finished, account for all tools and
parts being used. Do not leave them in or
near the engine. Return all parts to the case
and store in a safe, dry place.
Precautions:
E or F) over the support rod.
4. Screw the appropriate reamer (G, H or I)
onto the end of the support rod.
5. Coat cleaning reamer and rod with thick
machine oil or grease. This will help to
contain the metal swarf and carbon.
6. Place the reamer into the glow plug
aperture and screw the reamer guide
down into the glow plug thread.
7. Push the grip handle | rod down the
aperture until resistance is felt. The reamer
is now in position on the sealing seat.
8. Using firm hand pressure only (can be
assisted with 14mm spanner or socket),
turn the grip handle clockwise to clean and
ream out the lower aperture and sealing
seat. The intention is to clean off carbon
build-up and restore the sealing seat, not
to ‘cut’ into the sealing seat or aperture.
9. When finished, unscrew the reamer guide
and withdraw the tool.
10. Clean out aperture making sure that there
is no swarf or grease left. Carefully use
a cleaning fluid to degrease making sure
no fluid escapes down the glow plug
aperture.
11. The cleaning operation is now complete
and the new glow plug can be installed.
• Wear suitable eye protection.
• DO NOT USE POWER TOOLS (ELECTRIC
OR AIR) WITH THIS PRODUCT.
2 3
 Loading...