

Page 1

Part No. 4641
Engine Timing Tools
BMW 2.5 | 3.0 Twin Vanos
3388
LASER Copyright LASER Copyright LASER Copyright LASER Copyright
www.lasertools.co.uk
www.lasertools.co.uk
Page 2
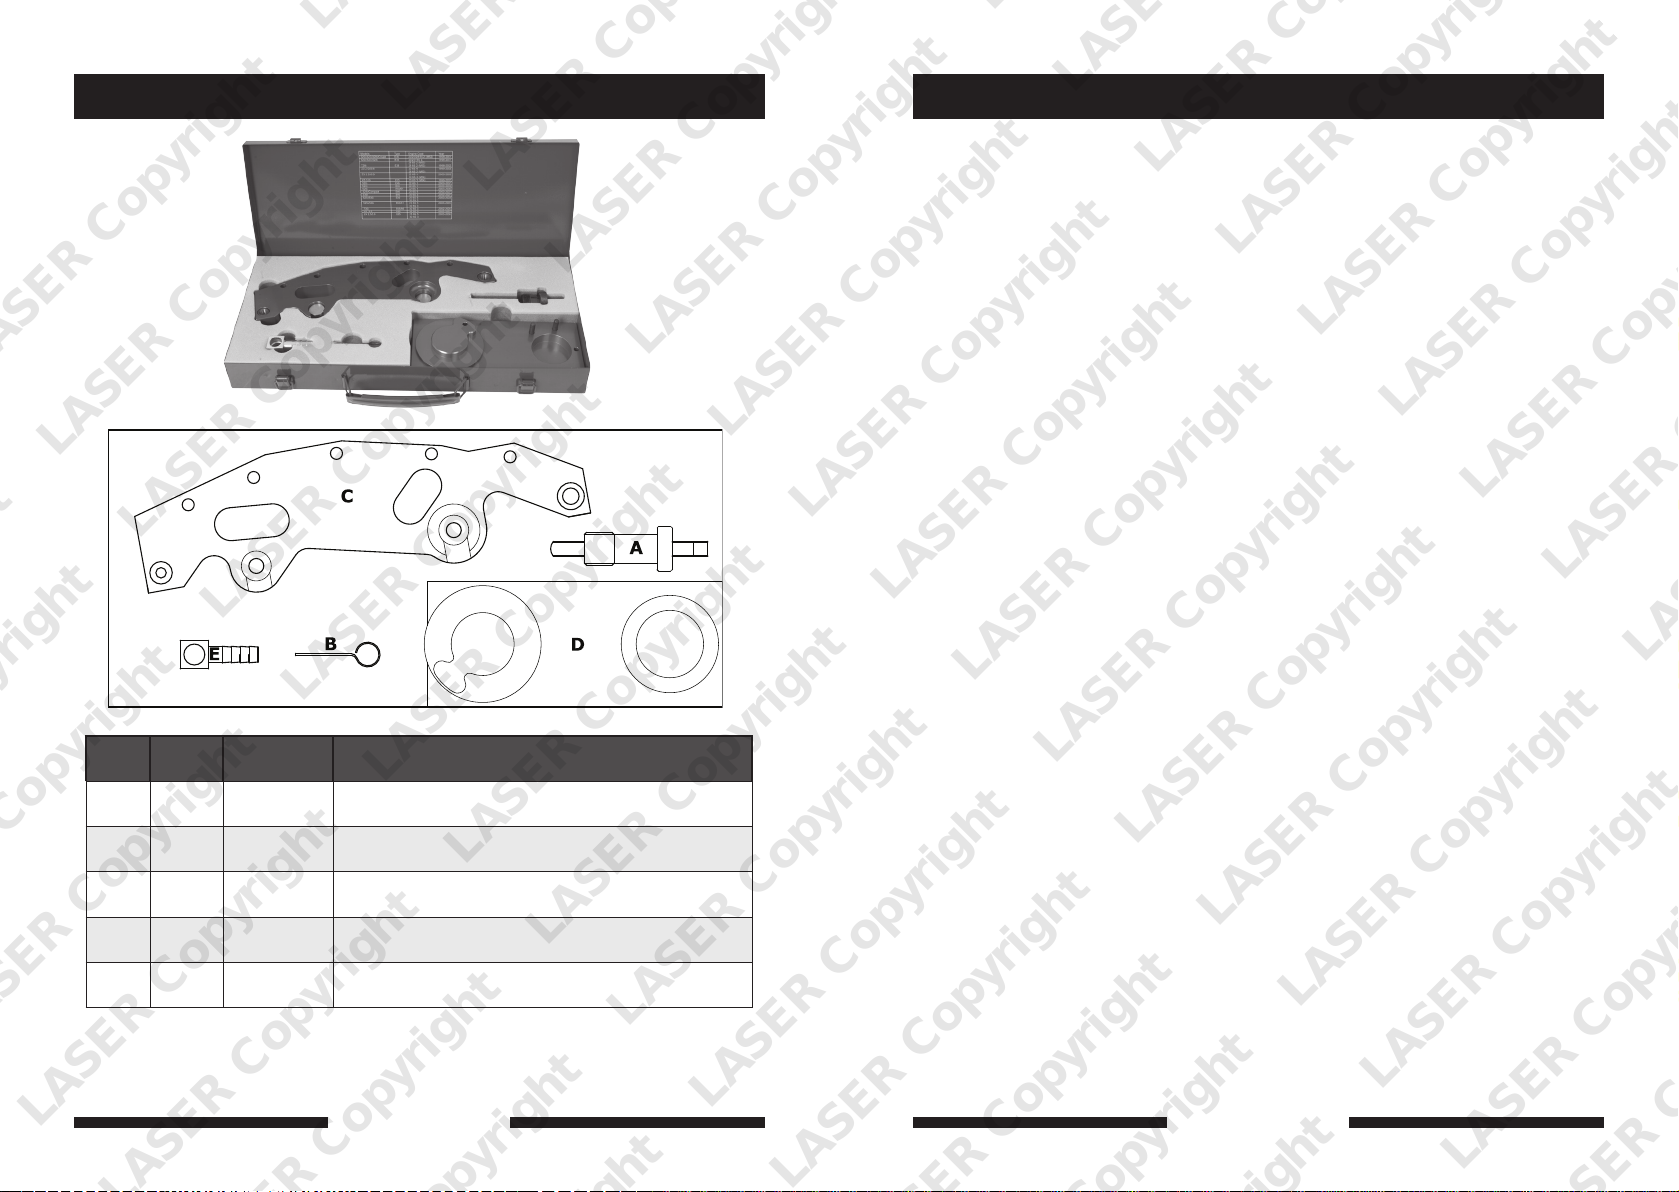
Plan Layout
Ref Code OEM Ref Description
A C385 11 4 220 Timing Chain Pre-tensioning tool
B C026 11 3 292 Tensioner Locking Tool
C C379 11 6 150 Camshaft Timing Setting Tool
D C381 11 6 180 Camshafts Sprockets Alignment Tool
E C380 11 3 450 Compressed Air Connector
OTHER LASER TOOLS REQUIRED KIT 3112
C020 Flywheel Timing Pin 11 2 300
C021 Camshaft Alignment Tool 11 3 240
LASER Copyright LASER Copyright LASER Copyright LASER Copyright
2 7
www.eldontools.
www.lasertools.co.ukwww.lasertools.co.uk
Page 3
Warning
Applications
Incorrect or out of phase engine timing can result in damage to the valves.
The Tool Connection cannot be held responsible for any damage caused
by using these tools in anyway.
Safety Precautions – Please read
• Disconnect the battery earth leads
(check radio code is available)
• Remove spark or glow plugs to make
the engine turn easier
• Do not use cleaning fluids on belts,
sprockets or rollers
• Always make a note of the route of the
auxiliary drive belt before removal
• Turn the engine in the normal direction
(clockwise unless stated otherwise)
• Do not turn the camshaft, crankshaft or
diesel injection pump once the timing
chain has been removed (unless
specifically stated)
• Do not use the timing chain to lock the
engine when slackening or tightening
crankshaft pulley bolts
• Do not turn the crankshaft or camshaft
when the timing belt/chain has been
removed
• Mark the direction of the chain before
removing
• It is always recommended to turn the
engine slowly, by hand and to re-check
the camshaft and crankshaft timing
positions.
• Crankshafts and Camshafts may only be
turned with the chain drive mechanism
fully installed.
• Do not turn crankshaft via camshaft or
other gears
• Check the diesel injection pump timing
after replacing the chain
• Observe all tightening torques
• Always refer to the vehicle
manufacturer’s service manual or a
suitable proprietary instruction book
• Incorrect or out of phase engine timing
can result in damage to the valves
• It is always recommended to turn the
engine slowly, by hand, and to re-check
the camshaft and crankshaft timing
positions
The application list for this product has been compiled cross referencing the OEM Tool Code
with the Component Code.
In most cases the tools are specific to this type of engine and are necessary for Cam belt or
chain maintenance.
If the engine has been identified as an interference engine valve to piston damage will occur
if the engine is run with a broken Cam belt.
A compression check of all cylinders should be performed before removing the cylinder head.
Always consult a suitable work shop manual before attempting to change the Cam belt or
Chain.
The use of these engine timing tools is purely down to the user’s discretion and
The Tool Connection cannot be held responsible for any damage caused what so ever.
ALWAYS USE A REPUTABLE WORKSHOP MANUAL
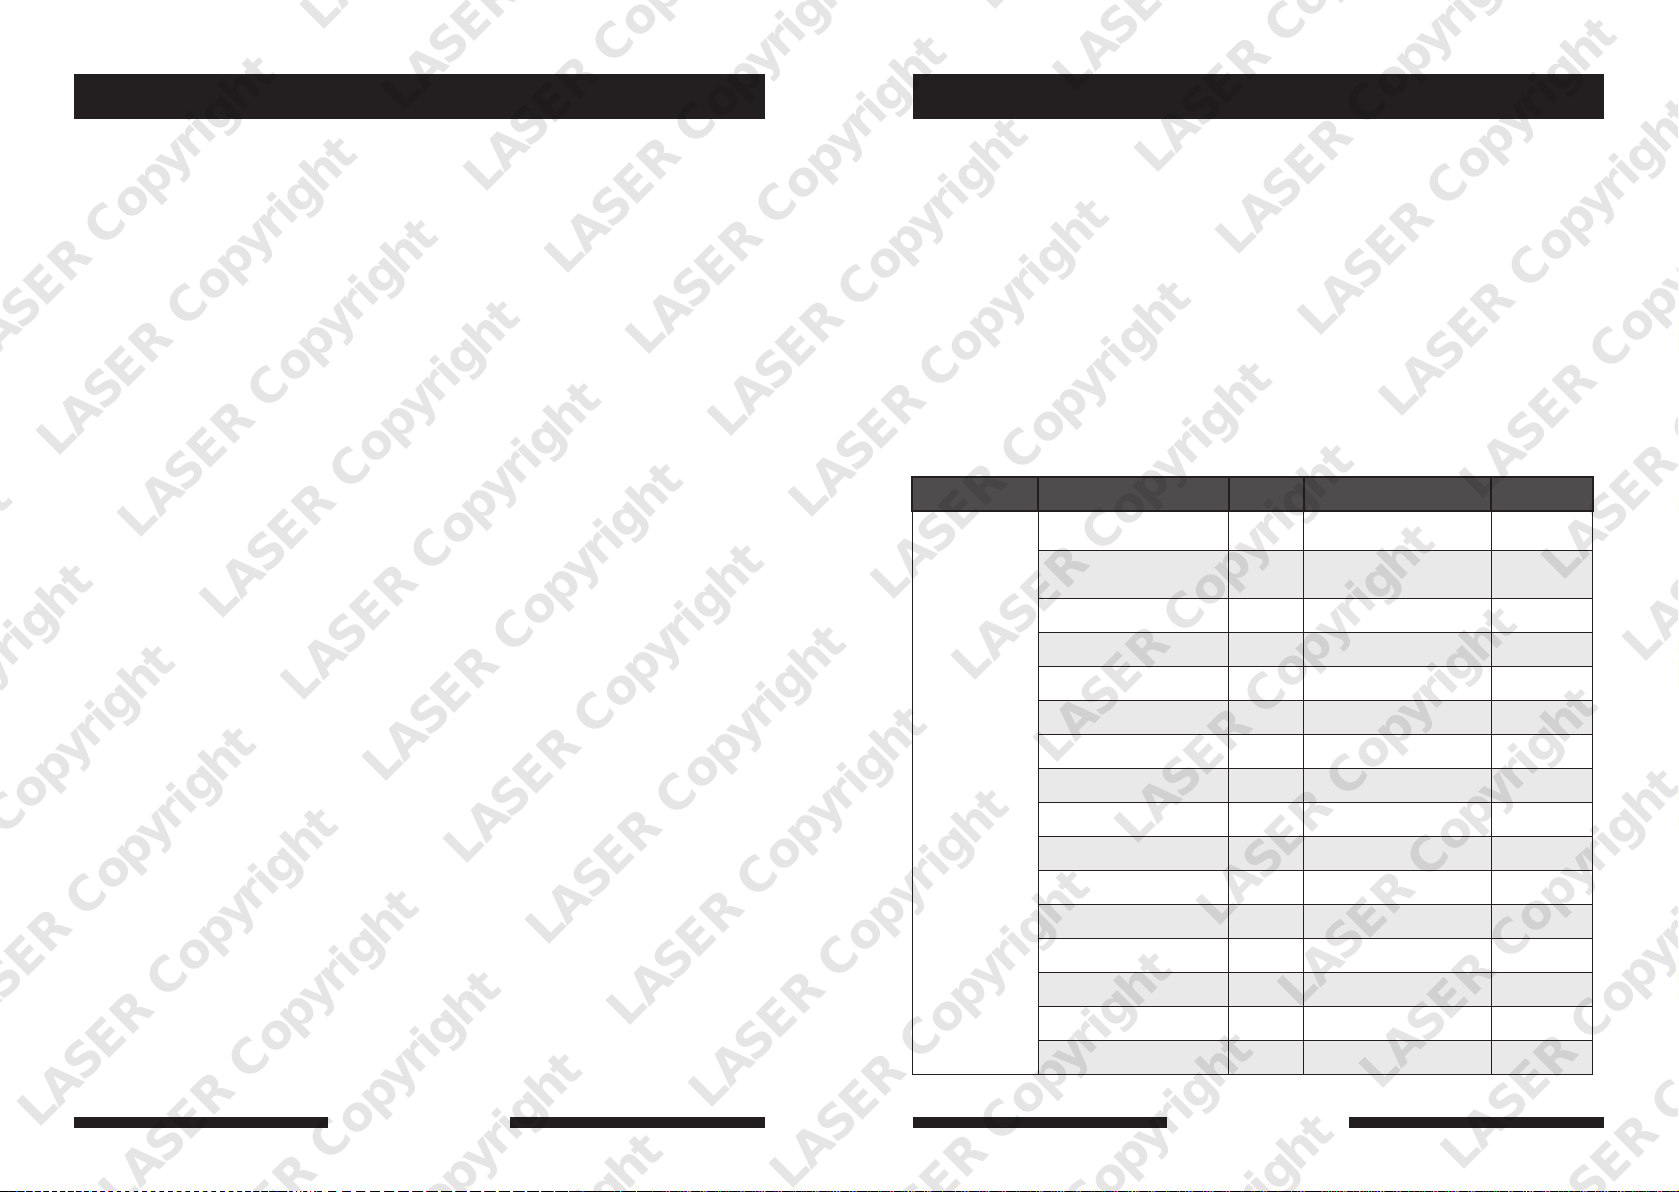
Manufacturer Model Type Engine Code Year
BMW
320i | 323i | 328i Coupe E46 20 | 25 | 28 6S 2 (M52) 1998-2001
520i | 523i | 528i E39
728i E38 28 6S 2 (M52) 1998-2002
Z3 2.0i | 2.8i 20 6S 4 | 28 6S 2 (M52) 1999-2003
Z3 2.2i | 3.0i 22 6S | 30 6S 3 (M54) 2000-2003
X5 3.0i E53 30 6S 3 (M54) 1999-2007
320i E46 22 6S 1 2000-2007
520i E39 22 6S 1 2000-2003
520i E60 | 61 22 6S 1 2003-2005
20 | 25 | 6S 4
28 6S 2 (M52)
1998-2001
325i | Compact E46 25 6S 5 2000-2007
330i E46 30 6S 3 2000-2007
525i | 530i E39 25 6S 5 | 30 6S 3 2000-2003
525i | 530i E60 | 61 25 6S 5 | 30 6S 3 2003-2005
730i E65 | 66 30 6S 3 2002-2005
X3 3.0 E83 30 6S 3 2003-2007
Z4 2.5 | 3.0 E85 25 6S 5 | 30 6S 3 2003-2006
LASER Copyright LASER Copyright LASER Copyright LASER Copyright
6
www.lasertools.co.uk
www.lasertools.co.uk
3
Page 4
Instruction
Instruction
BMW introduced a Twin VANOS System (Variable Valve Control) on the 6 cylinder twin
camshaft petrol, chain driven engines. VANOS Adjustment Units are fitted to both camshafts
(inlet and exhaust) and must be re-set to align with camshafts when setting engine timing
after Cam Chain replacement etc.
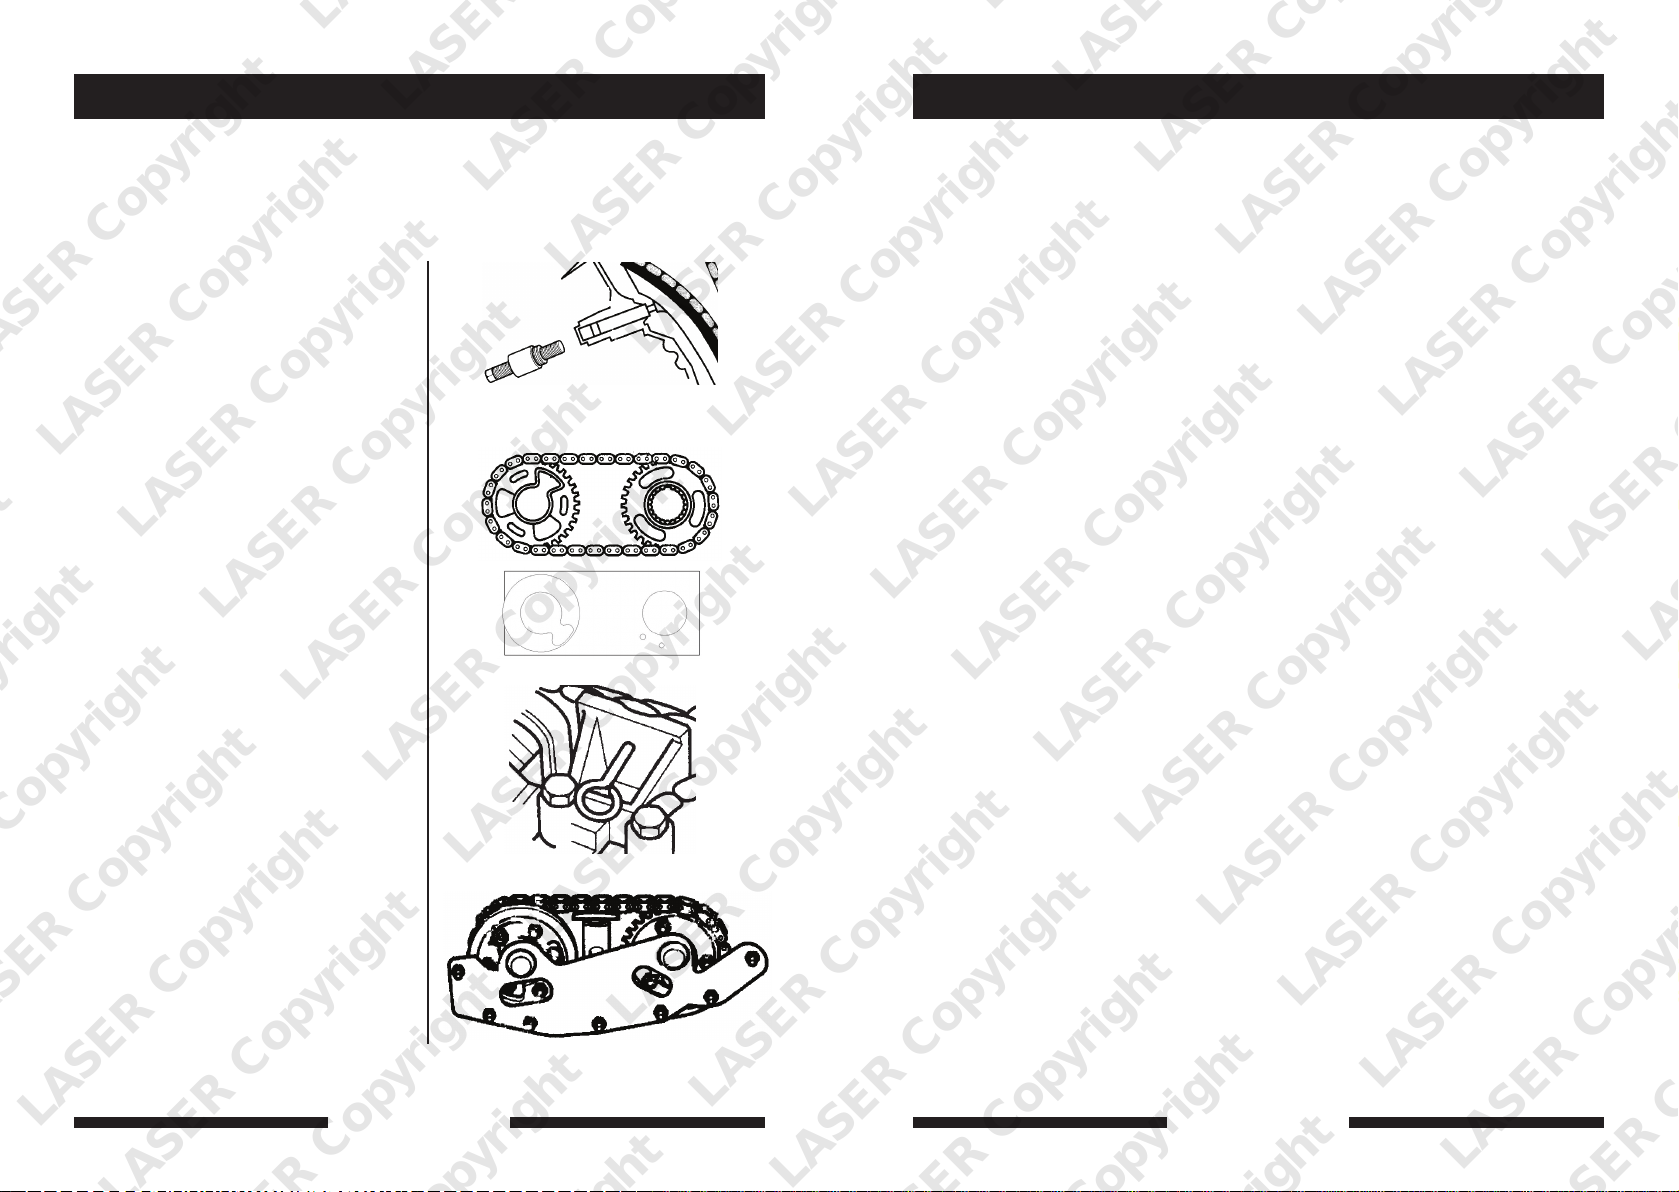
1. Remove the timing chain tensioner
and insert in its place Tool (A) to
pre-load the tensioning rail by
applying a torque of 0.7Nm.
2. Unscrew the oil pressure pipe to the
Vanes Unit and insert the VANOS
unit checking tool (E) and connect a
compressed air supply to pressurise
the VANOS unit between 2 and 8 bar.
WARNING: Some oil may be forced out
of the VANOS Unit when compressed air
is introduced. Cover unit with a suitable
cloth. It is possible that the camshafts will
not be in the correct position when the
engine is switched off.
3. With the compressed air supply
connected, turn the engine over at
least two revolutions, in the normal
direction of rotation, and return to a
position where the camshaft lobes of
the inlet and exhaust camshafts on the
first cylinder, face each other.
4. Check engine timing position by fitting
C020 Flywheel Locking Pin and C021
Camshaft Setting Plate Assembly from
Laser Tool kit No 3112.
NOTE: The Camshaft Setting Plate
Assembly must rest fully on the surface
of the cylinder head for engine timing
position to be correct.
5. The VANOS unit can now be removed.
NOTE that the screws behind the sealing
caps are left hand threaded.
6. Follow the manufacturers’ procedures
through to completing the removal of
the sprockets and chain.
A
D
C
C
7. The following tools are required when
re-installing the sprockets and chain
8. Timing Chain pre-tensioning tool (A)
is fitted after attaching the exhaust
camshaft sprocket and chain.
9. Install secondary tensioner.
10. Align the camshaft sprockets with
the secondary chain in the correct
position using the Camshaft Sprocket
Alignment Tool (D).
11. Checking that the tooth gaps on inlet
side align with each other.
12. Check that the sensor gear is correctly
aligned with the cylinder head.
13. Pull out the toothed shaft on the
exhaust side as far as possible
14. Install and release the secondary
tensioner pin (B)
15. The camshaft timing is set using tool
(C)
16. The screws and nuts are tightened in
two stages as specified.
17. Install the timing chain tensioner.
18. Remove all of the alignment tools and
rotate the crankshaft two
revolutions.
19. Check the engine is at Top Dead Centre
(TDC) on No.1 cylinder.
20. Install the VANOS unit using the left
hand threaded fasteners.
LASER Copyright LASER Copyright LASER Copyright LASER Copyright
4
www.lasertools.co.uk
www.lasertools.co.uk
5
 Loading...