

Page 1

Larson Electronics LLC www.LarsonElectronics.com sales@larsonelectronics.com
9419 E US HWY 175, Kemp, TX 75143 - P: (800) 369-6671 - F: (903) 498-3364
RL‐85-3W1
INFRARED LIGHT
These handheld spotlights are offered in 850 nanometer and 940 nanometer configurations. A
night vision system (i.e. night vision goggles or an infrared camera) is required to be able to use
the infrared light output of this handheld spotlight.
850NM can be seen by GEN 2 night vision systems. Typical night vision goggles are GEN 2.
940NM can be seen by GEN 3 night vision systems. Most 940NM systems are government use
equipment.
POWER
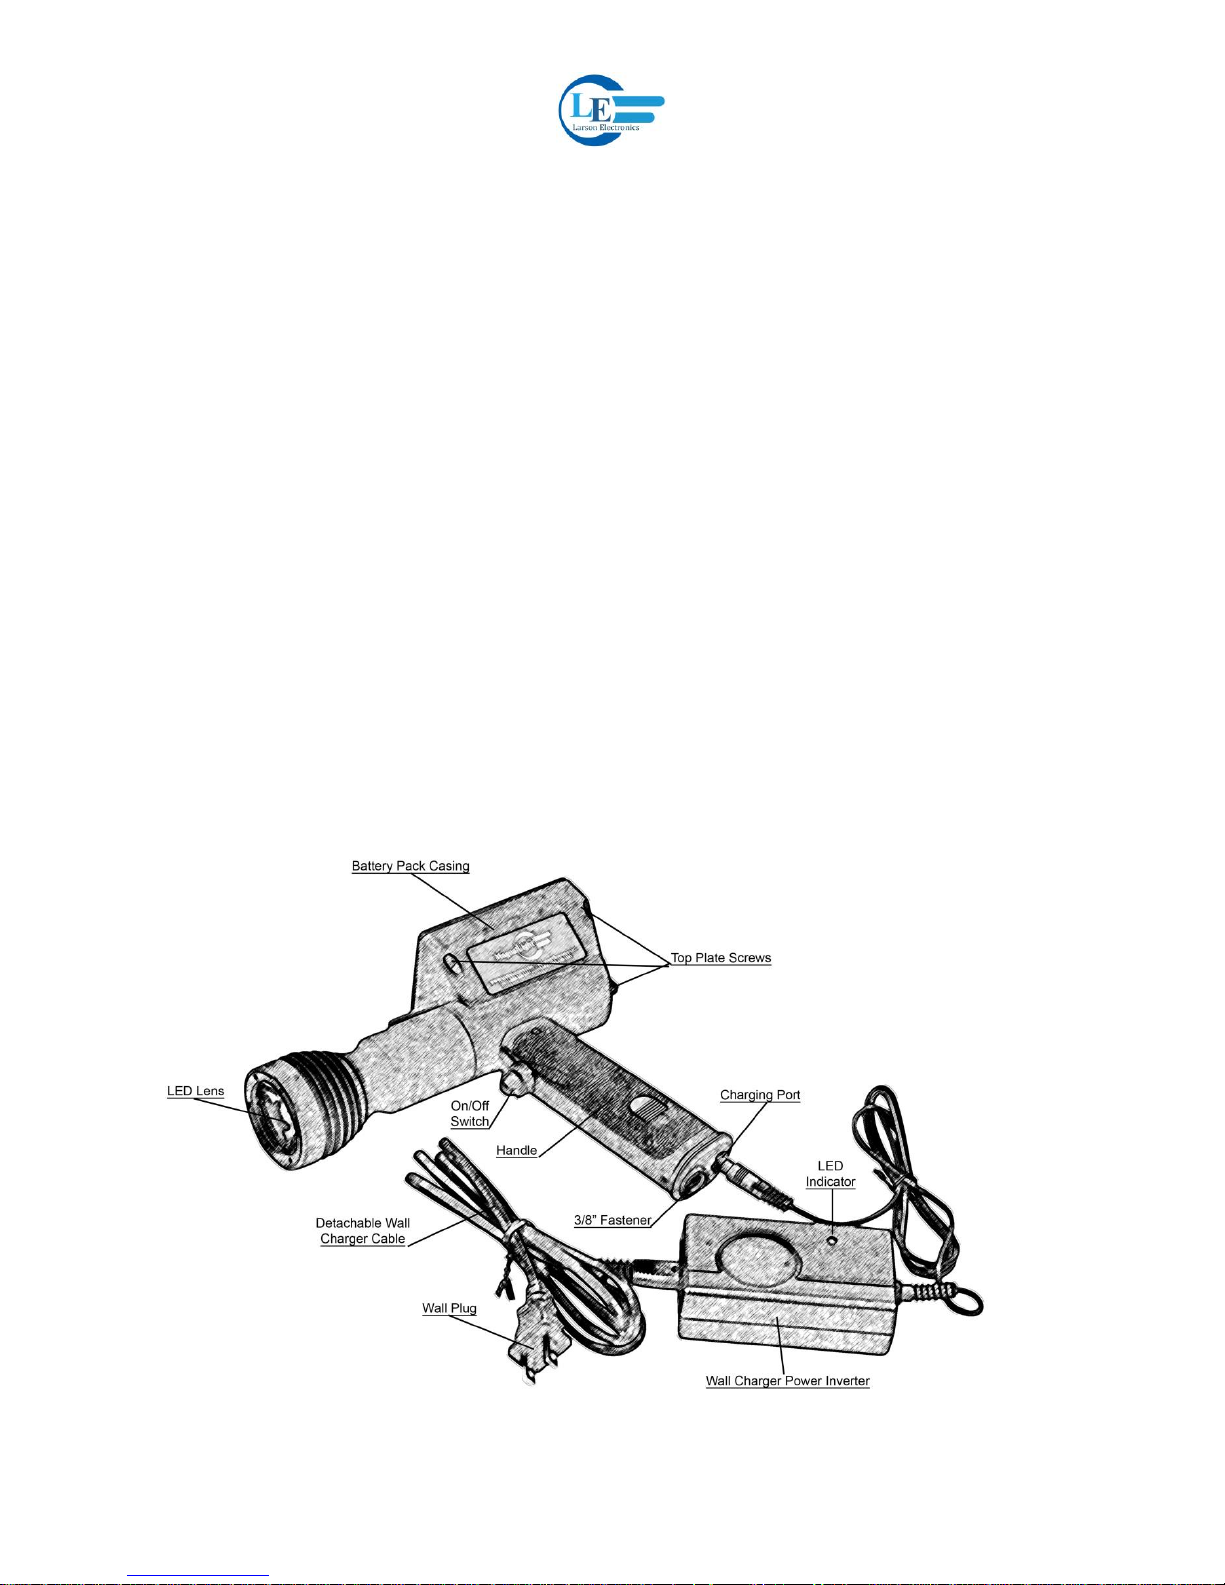
1. This rechargeable spotlight can be plugged into a standard household wall charger. The charger
connects to the light at the base of the handle.
2. The charger will have a solid red indicator light when the battery is charging.
3. Charge time will vary based on remaining battery charge and battery condition. Maximum
charge time is 4 hours.
4. The spotlight can be turned on while the charger is plugged in. However, the spotlight will not
charge while the light is being operated.
5. This LED spotlight has a lithium ion battery. The battery can be charged as little or as much as
desired without “memory” issues. Lithium ion batteries do not need to be fully drained before
charging nor fully charged before continuing usage.
6. The LED indicator will turn green when the battery is fully charged.
WARNING: While the charger is intelligent enough to back off the charger when the battery is
fully charged, it is not recommended that you leave the light on the charger indefinitely.
Ultimately, the heat created by the charger and the battery will degrade the components.
Leaving the battery to charge for a day will not cause damage. However, leaving the battery to
charge for multiple days or weeks continuously will degrade the life of the charger and the
battery.
7. Lithium ion batteries generally will discharge very slowly while not being used. You can expect a
fully charged lithium ion battery to last 9-12 months on the shelf if the light was fully charged
when stored.
CHANGING THE BATTERY
The battery is not designed to be “swapped out” in the field. It can be done, but it is not designed to
operate like a cordless drill, allowing the operator to snap a replacement battery into place.
Page 2
Larson Electronics LLC www.LarsonElectronics.com sales@larsonelectronics.com
9419 E US HWY 175, Kemp, TX 75143 - P: (800) 369-6671 - F: (903) 498-3364
1. Remove the 4 screws holding the top cover in place on the rear of the main housing. This is the
squared section. The 4 screws can be seen when you turn the light upside down. Once the top
cover is removed, you will see the battery pack.
2. The battery pack consists of 6 cells welded together. A single Molex style connector brings
power from the battery to the LED bulb. Disconnect this connector and remove the battery pack
as a whole. Double sided tape secures the battery pack. Be sure that if the tape has lost its
adhesion qualities that you replace it when replacing the battery pack.
3. Replace the battery pack (part number RL-85-BATT), replace tape if required, reconnect the
power connector from the battery to the light, and replace the top cover. Secure the 4 top cover
screws.
4. Lithium ion batteries have a very long life. Users should not have to replace the battery pack
often.
MOUNTING
1. These units are handheld via the pistol grip handle, but can be mounted via the 3/8-16” brass
nut fastener embedded into the base of the handle.
2. We offer a 100lb magnetic base (MM-2) for magnetic mounting, and a permanent mounting
plate with swiveling and tilting bracket (PMB-4X4) for permanent mounting.
 Loading...