

Page 1
SoundTr ack LxT
®
N/Forcer
Model NFR w/Printe r
FIELD OPERATION GUIDE
Page 2

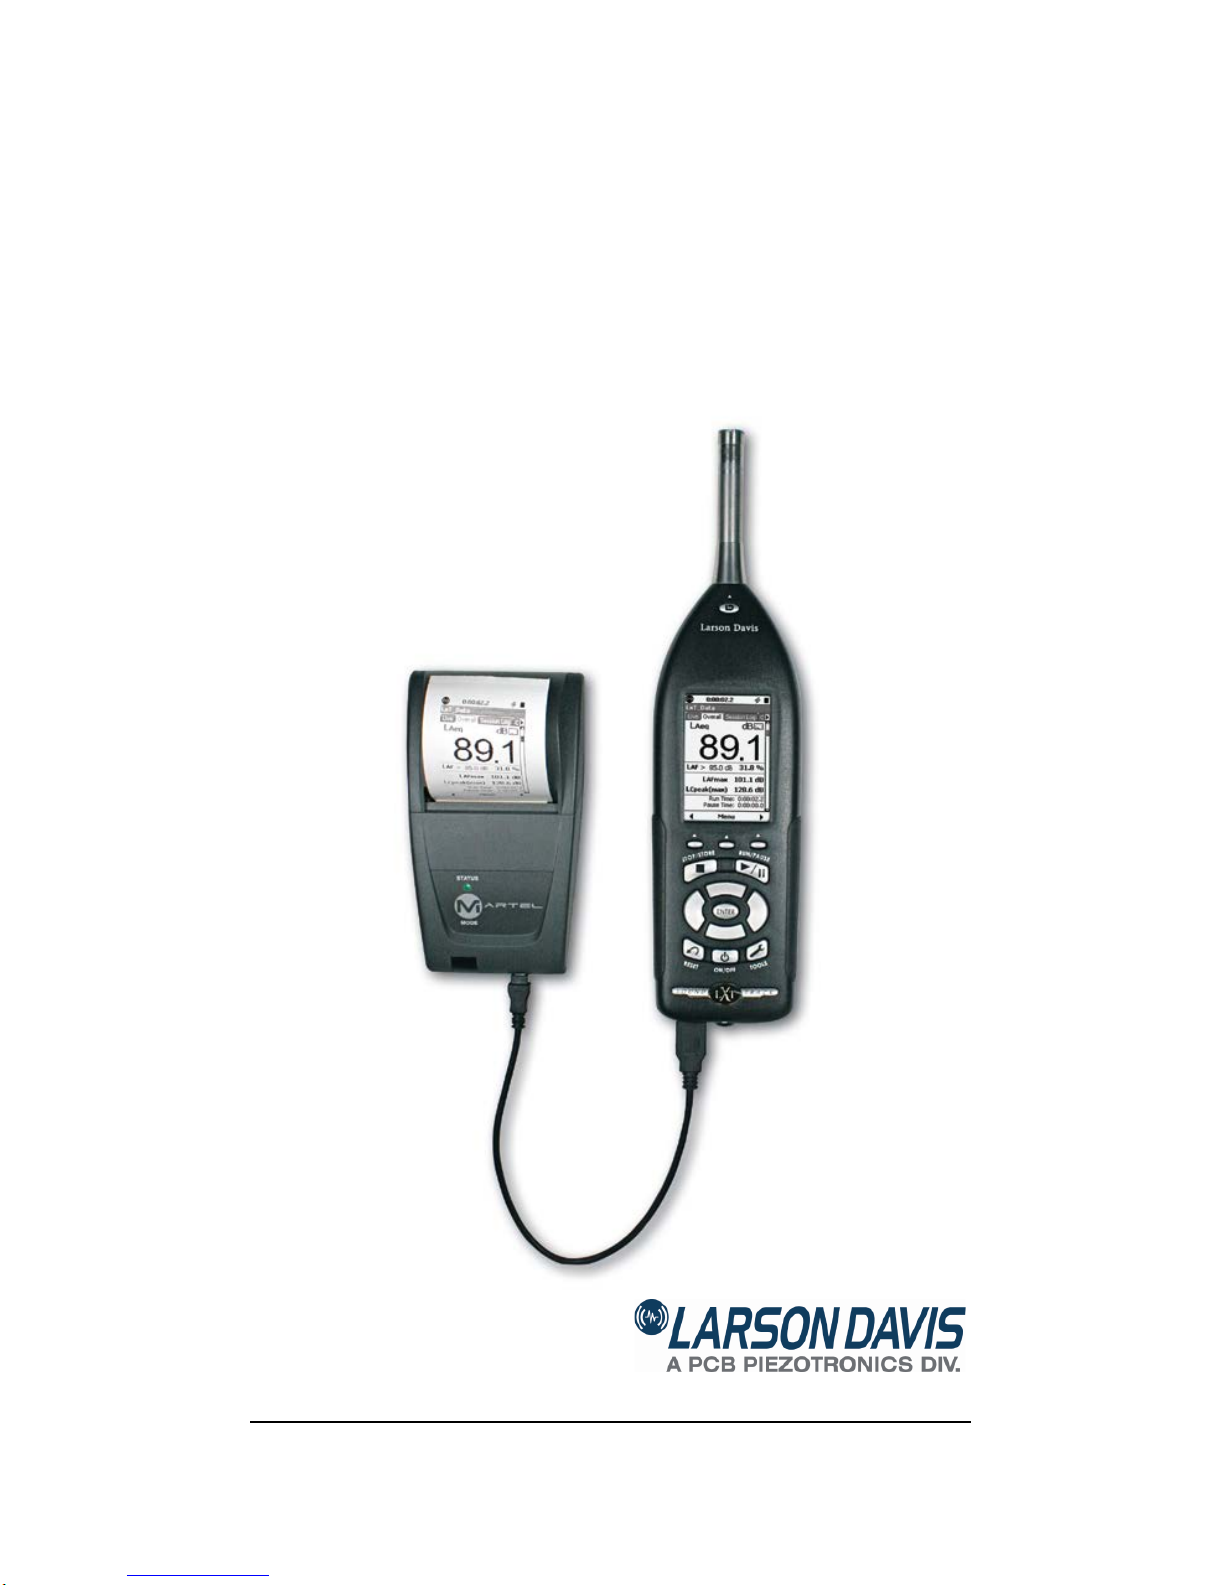
HARDWARE
Power
Button
Microphone
Preamplifier
LCD Display
3 control
buttons
linked to
display menus
and tabs
Control Keys
USB Cable
SoundTrack LxT®
Printer
PRN003
2 I770.04(B)
Page 3
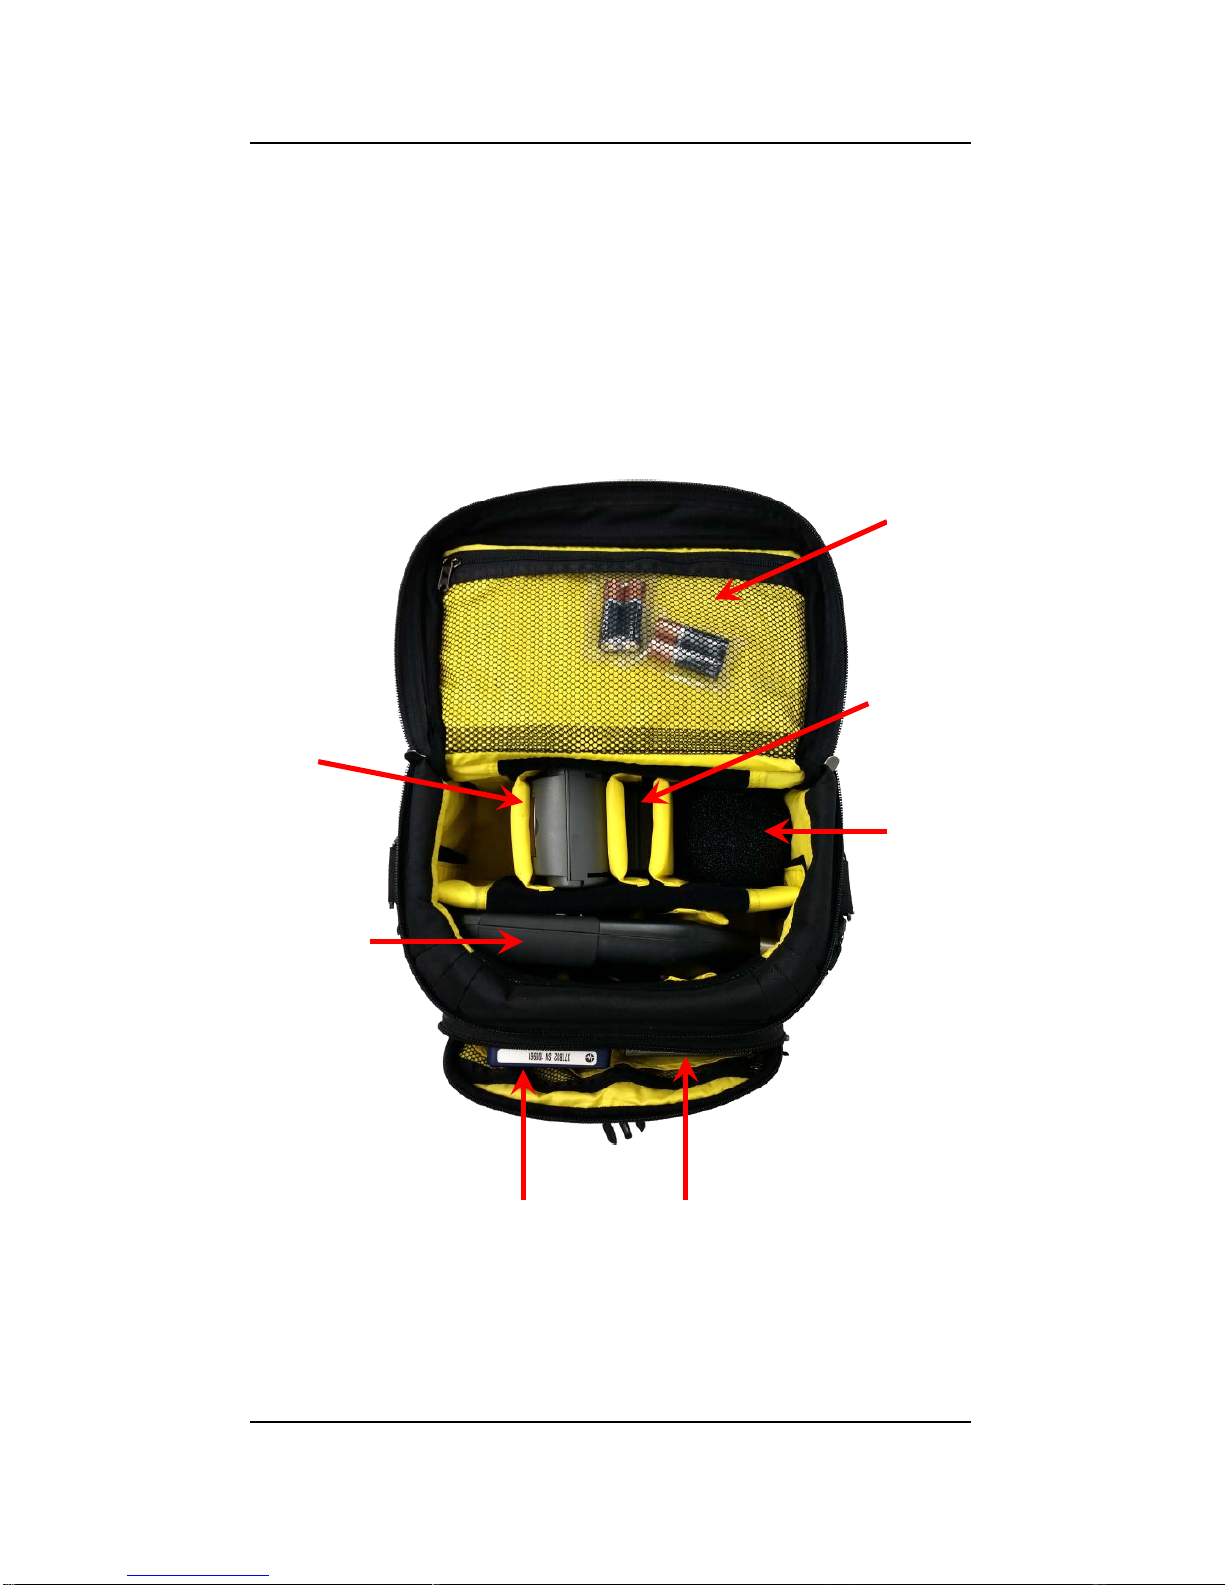
ASSEMBLY IN SOFT CASE
Step 1. Unpack components from the shipping
packaging
Step 2. Place the components inside the soft case
as shown below
Microphone
Printer
PRN003
Calibrator
CAL200
Windscreen
LxT Sound
Level Meter
Preamplifier
PRMLxT
Misc
Batteries
& cables
3 I770.04(B)
Page 4
ASSEMBLY FOR MEASUREMENT
Step 2. Verify that the meter and printer have
charged batteries. LxT uses alkaline
batteries.
Step 3. Connect preamp and microphone to LxT
by aligning the line on the preamp with the
preamplifier release button on the meter
and inserting the end with the multi-pin
connector into the top of the LxT while
applying gentle pressure until the
preamplifier snaps into position. To release
press the preamplifier release button and
pull out.
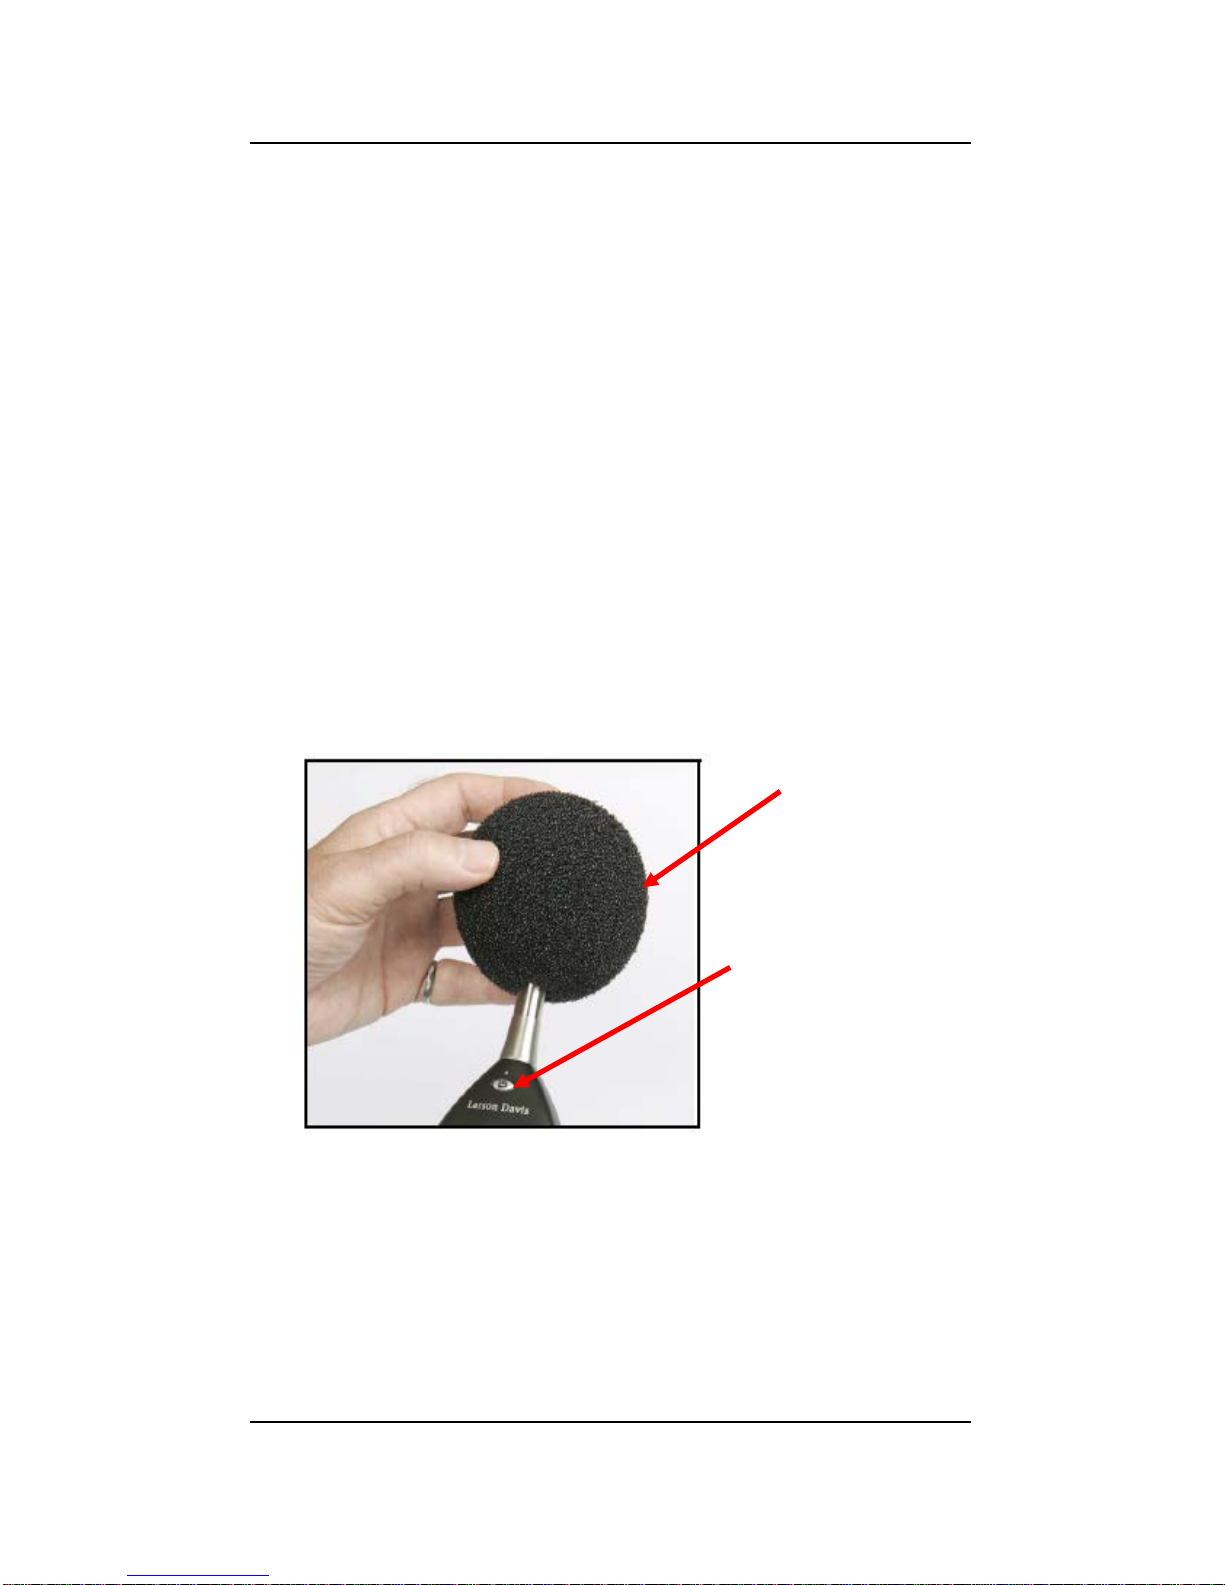
Step 4. Attach the windscreen.
Windscreen
Preamplifier
release button
4 I770.04(B)
Page 5

N/FORCER KEYS & SCREENS
Function Keys Navigation Keys
RIGHT
LEFT
DOWN
UP
Blue arrow points to ACTIVE VIEWING tab
Red arrow points to tabs that are NOT currently being viewed
5 I770.04(B)
Page 6

These three buttons allow
you to control the views
and functions available on
the LCD display. They are
used as both FUNCTION
and NAVIGATION controls.
Data screens have a tab at the top like a file folder. To move
from one to the next, simply use the left and right control keys
to maneuver.
In this example you are on the Live tab screen and wish to
view the Overall tab screen: Simply push the right key to
move to the Overall tab; to move back push the left key.
LEFT CENTER RIGHT
6 I770.04(B)
Page 7

Use the small control buttons to move from left to right; use
the down key to view Overall data screens as below.
UP
DOWN
Notice how
the scroll bar
indicates more
than one data
display
(available by
pushing the
down key)
7 I770.04(B)
Page 8

MAKING A MEASUREMENT
GETTING STARTED
Check to see that the main power switch on the
bottom of the LxT is in the “on” position (l). Turn on
the LxT by pressing the power ON button once.
Power on the printer by briefly pressing the large M
(the green LED above the M will be lit). The printer
will print a self test page if the “M” button is held for 2
or more seconds.
Power ON
Button
8 I770.04(B)
Page 9

MEASURE MENT
Step 1. When making a measurement, hold the
SoundTrack LxT® extended from the body
while pointing the sound level meter at the
noise source.
Step 2. Press the RUN/PAUSE button to begin.
Step 3. When the measurement is complete, press
the STOP/STORE button to end the
measurement. The measurement will end
and you will automatically be prompted to
save the measurement. Using the left, right
control buttons under the display screen
you have “Yes”, “No” or “Browse” choices
for the file save. Using the Enter key you
can confirm your
selection. Note if
you select No, you
must confirm
delete by pressing
the RESET button
prior to making a
new measurement.
9 I770.04(B)
Page 10

PRINTING RESULTS
Step 4. Press the center
control button
below the word
Menu on the
LCD and then
press down key
to highlight
Print
Enforcement.
Press Enter and
the printout will
begin. Repeat
for Print
Calibration.
Step 5. Tear off the Measurement and Calibration
printouts and complete by writing the
location in the space provided and signing
the printouts.
10 I770.04(B)
Page 11

PRINTER FEATURES
Battery Charging
•
Insert batteries following correct polarity
•
Charge batteries for 16 hours with printer off before
initial use
•
Printer can be left connected to the power adapter
•
If printing becomes faint, erratic or not possible, turn
off the printer and charge for at least 15 minutes. The
printer requires battery power to print.
•
Use only the supplied power adapter. The use of an
unapproved source may void the printer’s
warranty.
Printer head thermal limit—after extensive printing the
print head temperature may rise to an unusable level. and
printing will be stopped until the head temperature returns to
normal levels.
Paper Out—the printer
will automatically detect
when the printer paper
has run out. Replace the
paper roll by lifting up on
the printer paper window
until the lid is released
from its locked position.
To avoid damage do not
use excessive force.
Remove the remaining
paper; reel off a few
centimeters from a new
11 I770.04(B)
Page 12

roll of paper, hold about 5cm of paper outside the printer as
the roll is dropped into the paper reservoir. Close the lid by
applying equal amounts of pressure on each side until the lid is
locked into position.
Paper tear procedure—tear the surplus paper or the printout
report off by pulling the paper toward the front of the printer
and tearing from one side to the other across the serrated
edge.
Total Customer Satisfaction Guaranteed
3425 Walden Avenue, Depew NY USA 14043
Technical Support: 888-258-3222
Outside US or Canada Phone: (++1) 716-684-0001
LarsonDav is.c om FA X: 716-926-8215
12 I770.04(B)
 Loading...