

Page 1

www.lark.com.pl
FreeBird 4.3AT
EN User Manual 1
PL Instrukcja obsługi 11
CZ Návod k obsluze 21
SK Návod na použitie 31
HU Kezelési útmutató 41
HR Upute za uporabu 51
Page 2

Thank you for choosing Lark FreeBird GPS device!
ENGLISH
We highly recommend reading this manual before you start using the device.
Defects caused by improper usage are not covered by the manufacturer’s warranty,
hence we do ask you to follow the instructions included in this booklet.
Please, keep this manual for future reference.
1
Page 3

ENGLISH
Precautions
1. Please install the device correctly, do not block the driver’s line of sight, otherwise easily lead to product failure and personal injury.
2. Keep the product away from strong magnetic eld, the magnetic eld may cause damage to the machine.
3. In the format and use of the process, do not suddenly disconnect the power supply and plug microSD, microSD or they may cause damage or program
error.
4. microSD used in this product can not be used to store any other les on the machine prior to use to format the microSD, and timely back up important
les.
5. The power plug with wet hands to prevent electric shock.
6. Is prohibited in high temperature above 80°C or low temperature - 30°C or less and too humid use this product.
7. Use the product matching dedicated charger and related accessories, in order to avoid the lack of conformity.
8. Please use Class6 microSD card.
9. Do not use ne-pointed or sharp hard substance click on the screen to avoid scratches. When the screen smudges, wipe with a soft cloth and mild
detergent, do not use a hard cloth or alcohol wipe containing aggressive liquids.
10. Please read all the tips in detail before installation.
Disclaimer
This product is the main provider of outdoor sports navigation for the driver to enhance driving safety and convenience, but because of the road conditions and the driver of the complexity of the dierent driving habits, the Company does not undertake vehicle accidents occurred in the installation of this
product under any circumstances related joint and several liability, the driver please drive carefully, obey trac safety regulations.
Please read carefully before using this manual, this specication is subject to change, please prevail in kind, without notice.
The illustrations in this manual may dier from the actual product, please prevail in kind.
The Company will continue to develop new features for the product when the product performance and functionality changes occur without notice.
The symbol to the left means that according to European Union laws and regulations your product and/or its battery shall be disposed
of separately from household waste. When this product reaches its end of life, take it to a collection point designated by local authorities.
The separate collection and recycling of your product and/or its battery at the time of disposal will help conserve natural resources and
ensure that it is recycled in a manner that protects human health and the environment.
2
Page 4

What’s in the box?
1. USB Cable
2. Adaptor
3. Bracket
4. Car Charger
5. Holder
ENGLISH
1
The installation
Installation steps:
1. This product xed with a snap.
2. One end of the car charger cable is connected
to this product.
3. Will plug into the cigarette lighter, turn on the power.
4. xed buckle, guarantee that the product will not shake.
The basic operation
1. Turn on
The product after detecting an external power supply,
and will automatically boot into the main interface.
2. Turn of
When the external power supply is stopped, the system
will automatically save data and shut down in 10 seconds.
3. Sleep:
In the boot state, long press the power button for 2 seconds to go to sleep.
Start: In sleep mode, press power button for 2 seconds to start.
2
3
Product overview
1. USB por t
2. microSD card slot
3. Power button
3
Page 5

ENGLISH
1. GPS navigation
Set the destination by using the satellite navigation function, live-action
navigation can help you get to the destination.
GPS navigation on the main interface is the convenient entry
for navigation.
When the rst time using it, need to install navigation software
and set navigation path. After setting the navigation path,
you can click to start the corresponding navigation software.
2. MUSIC
Click to enter into MUSIC mode.
When you insert a memory card, can play music.
The device supports formats such as MP3, WMA
4
Page 6

3. MOVIE
Click to enter into MOVIE mode.
When you insert a memory card, can realize video playing.
Video playing support all format such as MP4, MPG, MPGE, AVI.
4. PHOTO
Click to enter into PHOTO mode.
When you insert a memory card, can realize pictures playing.
The device supports formats such as BMP, JPG
ENGLISH
5
Page 7

ENGLISH
4. E-book
Click to enter into E-BOOK mode.
When you insert a memory card, you can browse
documents saved in TXT format.
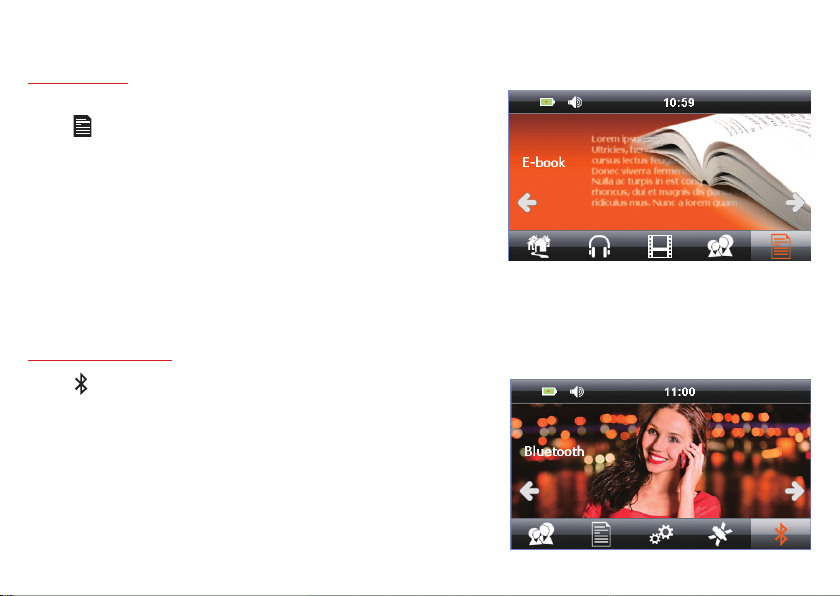
5. BLUETOOTH
Click to enter into BLUETOOTH mode.
If your phone supports Bluetooth, after pairing the devices
you can use your GPS as a hands-free set.
BT connecting
To active BT function of device and mobile. Auto-sourcing BT from mobile,
nd the marched one, then connect it. PIN code is 0000
If clicking „delete”, it will deleted each BT hotpot, if clicking „delete all”,
it will delete all BT hotpots.
6
Page 8
6. Tools
Windows
Click the icon, it will come out a message windows, then conrm it to get into windows cooperation system.
Calculator
Click the icon of calculator ,then get into this function.
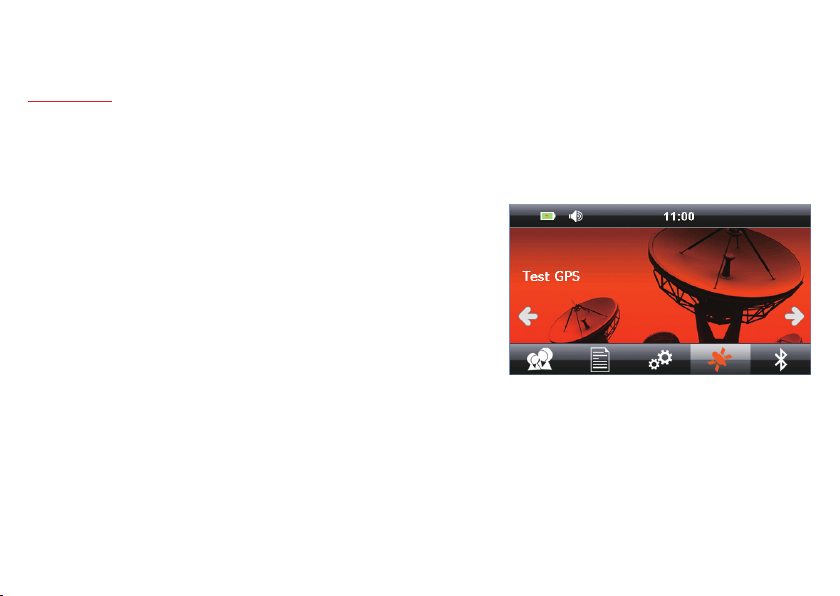
GPS testing
Check GPS information(interface shows instant information), which depends
on the actual environmental state.
Click “GPS testing” icon, enter into GPS testing.
Game
Click to enter into game interface.
There are game programs for entertainment, such as Sweep Mine, Pocket Lian,
Snake and so on.
ENGLISH
7
Page 9

ENGLISH
7. Settings
Click to enter into SETTINGS mode.
You can set language, backlight, sound, time and check system resource.
1. Language setting
Click to enter LANGUAGE mode.
Choose the OSD menu language.
2. Backlight setting
Click to enter mode.
You can adjust the screen brightness, open screen protection and set the time.
3. Power management
Click Power management to enter mode.
You can check power condition and set auto sleep.
4. Sound setting
Click to enter mode.
You can adjust the sounds, choose the open sound or mute.
5. Time setting
Click to enter mode.
You can set the date, time and time zone.
6. Update LOGO
Click to enter mode.
To check the storage, SN number, application version, kernel version.
8
Page 10

Settings
7. Coordinates calibration
When the touch place not correct or no response, please press this
button to adjust.
When a black cross appears on the screen press the very centre of the cross,
using your pointing pen. Than the cross will move to another position, again
press the centre of it. Continue until the ‘OK’ message appears. Than touch
the screen to conrm the calibration setting and return to the main menu.
In case the calibration process fails, it will be repeated until successful.
8. Update LOGO
This function allow to set customization logo.
The LOGO size must 480x272, .bmp format, not large than 2M,
name must LOGO. BMP. Put the picture in the microSD root directly,
insert the microSD and press ”start”.
9. USB Setting
In system setting, press
Available options:
Connect: USB connect
Sync: synchronize
ENGLISH
9
Page 11

ENGLISH
Specications
1. GPS Receiver Mstar MSR2112
2. 4.3” LCD touch screen
3. Screen resolution 480×272 pixels
4. CPU 800MHz
5. Memory 128 MB
6. Built-in ash memory 8 GB
7. Operational system WINCE 6.0
8. Bluetooth: BLE 4.0 /HSP/A2DP/AVCP
9. USB port
10. microSD memory card slot (max. 32GB)
11. Supported video format: MP4 / MPGE / MPG / AVI
12. Supported audio format: WMA / MP3
13. Supported picture format: JPG / BMP
14. Power: battery 3.7V/1300mAh or charger DC 5V/2A
15. Power consumption < 20mW
16. External Size: 130mm (W) × 96mm (H) × 19mm (D)
17. Weight: ~150g
Note!
Lark Europe S.A. reserves the right to change or improve its products and to make changes in the content of this manual without obligation to notify any
person or organization of such changes or improvements.
10
Page 12

Dziękujemy za wybór nawigacji Lark FreeBird!
Prosimy uważnie przeczytać niniejszą instrukcję, co pozwoli utrzymać urządzenie w jak najlepszym stanie.
Ze względu na różnice w oprogramowaniu i działaniu poszczególnych elementy wyświetlane na ekranie urządzenia
mogą być inne od opisanych, dlatego prosimy dokładnie zapoznać
się z informacjami widocznymi na ekranie.
POLSKI
11
Page 13

POLSKI
Środki ostrożności
1. Urządzenie należy zainstalować prawidłowo, tak aby nie zasłaniało widoku kierowcy, w przeciwnym razie może dojść do uszkodzenia produktu i
uszczerbku na zdrowiu.
2. Produkt trzymać z dala od silnych pól magnetycznych, pole magnetyczne może uszkodzić urządzenie.
3. Podczas formatowania i uruchamiania funkcji nie odłączać zasilania ani nie podłączać karty microSD, może to spowodować uszkodzenie lub błąd
programu.
4. Na karcie microSD stosowanej w niniejszym urządzeniu nie można przechowywać żadnych innych plików przed jej sformatowaniem, należy regularnie
tworzyć kopię zapasową istotnych plików.
5. Nie dotykać wtyczki zasilającej mokrymi rękoma, grozi porażeniem.
6. Nie używać niniejszego urządzenia w temperaturze powyżej 80°C, poniżej - 30°C, ani w nadmiernie wilgotnym otoczeniu.
7. Stosować tylko ładowarkę i akcesoria przeznaczone specjalnie do urządzenia, celem uniknięcia niezgodności.
8. Stosować kartę pamięci Class6.
9. Nie obsługiwać ekranu za pomocą ostrych przedmiotów, grozi to jego zarysowaniem. Ekran czyścić za pomocą miękkiej szmatki i łagodnego środka
do czyszczenia, nie stosować szorstkich materiałów ani chusteczek nasączonych agresywnymi substancjami.
10. Przed instalacją dokładnie przeczytać wszystkie wskazówki.
Wyłączenie odpowiedzialności
Niniejszy produkt służy do nawigacji na zewnątrz, zwiększa bezpieczeństwo i wygodę prowadzenia pojazdu, jednak ze względu na warunki drogowe oraz
nawyki kierowcy, Firma nie przyjmuje żadnej odpowiedzialności, łącznej ani rozdzielnej, za jakiekolwiek wypadki zaistniałe podczas użytkowania niniejszego produktu w jakichkolwiek okolicznościach; kierowca powinien prowadzić ostrożnie i zgodnie z przepisami ruchu drogowego.
Należy dokładnie przeczytać niniejszą instrukcję, specykacja produktu może ulec zmianie bez powiadomienia.
Ilustracje w niniejszej instrukcji mogą różnić się od faktycznego produktu.
Firma wciąż opracowuje nowe funkcje dla produktu, i z tego względu parametry i funkcjonalności produktu ulegają zmianie bez powiadomienia.
Przekreślony symbol pojemnika na śmieci oznacza, że na terenie Unii Europejskiej po zakończeniu użytkowania produktu
należy się go pozbyć w osobnym, specjalnie od tego przeznaczonym punkcie. Nie należy wyrzucać tych produktów razem
z niesortowanymi odpadami komunalnymi.
12
Page 14

Co jest w pudełku?
1. Kabel USB
2. Adapter
3. Uchwyt
4. Ładowarka samochodowa
5. Stojak
1
2
Instalacja
Etapy instalacji:
1. Niniejsz y produkt wyposażony jest w zatrzask.
2. Jeden koniec k abla ładowarki samochodowej podłącz
do produktu.
3. Podłącz do gniazda zapalniczki, włącz zasilanie.
4. Klamra zapobiega wibracjom produktu.
Podstawowy sposób obsługi
1. Włączanie urządzenia
Po wykryciu zasilania zewnętrznego urządzenie automatycznie
włączy główny interfejs.
2. Wyłączanie urządzenia
Po odłączeniu zasilania zewnętrznego system automatycznie
zapisze dane i wyłączy się w ciągu 10 sekund.
3. Tryb uśpienia:
Gdy urządzenie jest włączone, naciśnij przycisk zasilania i przytrzymaj
przez 2 sekundy, aby przełączyć je w stan uśpienia
W trybie uśpienia naciskaj przez 2 sekundy przycisk zasilania,
aby włączyć urządzenie.
3
Wygląd
1. Złącze USB
2. Gniazdo kar ty microSD
3. Prz ycisk zasilania
POLSKI
13
Page 15

POLSKI
1. Nawigacja GPS
Określ miejsce docelowe za pomocą funkcji nawigacji satelitarnej, nawigacja
w czasie rzeczywistym pomoże ci dotrzeć do celu.
Przy pierwszym użyciu należy zainstalować oprogramowanie nawigacyjne
i określić ścieżkę nawigacji.
Po określeniu ścieżki nawigacji kliknij ikonę ,
aby uruchomić program nawigacyjny.
2. MUZYKA
Kliknij , aby otworzyć interfejs MUZYKA.
Po podłączeniu karty pamięci, urządzenie może odtwarzać muzykę
zapisaną w formatach takich jak MP3, WMA.
14
Page 16

3. FILMY
Kliknij , aby otworzyć interfejs FILMY.
Po podłączeniu karty pamięci urządzenie może odtwarzać lmy
zapisane w formatach takich jak MP4, MPG, MPGE, AVI.
4. ZDJĘCIA
Klikni , aby otworzyć interfejs ZDJĘCIA.
Po podłączeniu karty pamięci, moża przeglądać
obrazy w formatach takich jak BMP, JPG.
POLSKI
15
Page 17
POLSKI
4. E-book
Kliknij , aby otworzyć interfejs E-BOOK.
Po podłączeniu karty pamięci, moża przeglądać dokumenty
zapisane w formacie TXT.
5. BLUETOOTH
Kliknij , aby otworzyć interfejs BLUETOOTH
Jeśli twój telefon posiada funkcję Bluetooth, po udanym sparowaniu
możesz używać urządzenia GPS tak jak zestawu głośnomówiącego.
Podłączenie Bluetooth
Aby włączyć funkcję Bluetooth w urządzeniu i w telefonie. Automatyczny przesył
Bluetooth z telefonu, znajdź telefon, następnie przygotuj połączenie. Kod PIN to 0000
Jeśli klikniesz „skasuj” źródło BT zostanie skasowane, jeśli klikniesz „skasuj wszystkie”
skasowane zostaną wszystkie źródła BT.
16
Page 18

6. Narzędzia
Kliknij “narzędzia” aby wyświetlić menu Windows
Po kliknięciu tej ikony pojawi się okno komunikatu. Potwierdź, aby włączyć system współpracy z Windows.
Kalkulator
Kliknij ikonę kalkulatora, aby skorzystać z tej funkcji.
Test GPS
Sprawdź informacje GPS (interfejs pokazuje natychmiastowe informacje,
które zależą od faktycznego otoczenia.
Kliknij ikonę „test GPS”, wejdź do [test GPS].
Gra
Kliknij “gra” otwórz interfejs [Gra].
Znaleźć tu można gry, np. saper, kieszonkowa liana, wąż itp.
POLSKI
17
Page 19

POLSKI
7. Ustawienia
Kliknij , aby otworzyć interfejs USTAWIENIA SYSTEMOWE.
Możesz zmienić język, podświetlenie, dźwięk, czas i sprawdzić zasoby systemowe.
1. Ustawienia języka
W interfejsie ustawień systemu kliknij
Wybierz język, w jakim ma być uruchamiane menu urządzenia.
2. Ustawienia podświetlenia
W interfejsie ustawień systemu kliknij
Możesz ustawić jasność ekranu, wyłączyć zabezpieczenie ekranu
i ustawić czas po jakim podświetlenie ma być wyłączone.
3. Zarządzanie zasilaniem
W interfejsie ustawień system kliknij w Zarządzanie zasilaniem.
Możesz sprawdzić stan zasilania i ustawić automatyczny stan uśpienia.
4. Ustawienia dźwięku
W interfejsie ustawień systemu kliknij
Możesz ustawić żądany poziom głośności.
5. Ustawienia czasu
W interfejsie ustawień systemu kliknij
Możesz ustawić datę, czas i strefę czasową.
6. Informacje systemowe
W interfejsie ustawień systemu kliknij
Możesz sprawdzić składowanie, numer seryjny, wersję aplikacji, wersję kernela.
18
Page 20

Ustawienia
7. Kalibracja współrzędnych
Jeśli miejsce dotknięcia jest nieprawidłowe lub nie reaguje, wciśnij ,
aby przeprowadzić regulację.
Używając rysika dotykaj środka kursora (k rzyżyka). Kursor będzie się przemieszczał,
za każdym razem dotykaj rysikiem jego środka.
Po zakończeniu kalibracji ekran kalibracji zamknie się automatycznie.
Jeśli proces kalibracji siĘ nie powiedzie, cała procedura będzie powtarzana
aż do skutku.
8. Aktualizacja LOGO
Ta funkcja umożliwia ustawienie własnego LOGO.
Rozmiar logo nie może przekraczać 480x272, format .bmp.
Plik nie może być większy niż 2M, nazwa LOGO.BMP.
Umieść plik w katalogu głównym karty pamięci i naciśnij „start”.
9. Ustawienia USB
W interfejsie ustawień systemu kliknij
Dostępne opcje:
Podłączenie: Podłączenie USB
Sync: synchronizacja.
POLSKI
19
Page 21

POLSKI
Specykacja
1. Odbiornik GPS Mstar MSR2112
2. Ekran kolorowy, dotykowy LCD 4,3”
3. Rozdzielczość ekranu 480×272 piksele
4. Procesor 800MHz
5. Pamięć operacyjna 128 MB
6. Wbudowana pamięć ash 8 GB
7. System operacyjny WINCE 6.0
8. Bluetooth: BLE 4.0 /HSP/A2DP/AVCP
9. Złącze komunikacyjne: USB
10. Obsługa kart microSD (max. 32GB)
11. Format wideo: MP4 / MPGE / MPG / AVI
12. Format audio: WMA / MP3
13. Format obrazów: JPG / BMP
14. Zasilanie: akumulator litowo-jonowy 3.7V/1300mAh lub ładowarka samochodowa DC 5V/2A
15. Pobór mocy < 20mW
16. Wymiary: 130mm (Sz) × 96mm (W) × 19mm (G)
17. Waga: ~150g
UWAGA!
Zastrzegamy sobie możliwość wprowadzania zmian w urządzeniu bez wcześniejszego powiadomienia.
Wygląd grak w urządzeniu zależy od wersji oprogramowania i może różnić się od przedstawionego w instrukcji!
20
Page 22

Děkujeme, že jste si vybrali navigační Lark Freebird!
Přečtěte si prosím pozorně tento návod, abyste mohli udržovat zařízení v co nejlepším stavu.
Vyhrazujeme si právo na provedení změn v tomto zařízení bez písemného upozornění a na
konečnou interpretaci funkce. Vzhledem k rozdílům v softwaru a funkci jednotlivých sítí se
mohou prvky zobrazené na displeji zařízen lišit od popsaných, proto se prosím důkladně
seznamte s informacemi zobrazenými na displeji.
ČEŠTINA
21
Page 23

ČEŠTINA
Bezpečnostní opatření
1. Zařízení je třeba namontovat tak, aby nepřekáželo řidiči ve výhledu, v opačném případě může dojít k poškození výrobku i zdraví uživatele.
2. Výrobek uchovávejte v bezpečné vzdálenosti od silných magnetických polí, magnetické pole může zařízení poškodit.
3. Během formátování a spouštění funkcí neodpojujte napájení ani nezapojujte TF kartu, může to způsobit poškození nebo chybu programu.
4. Na TF kartě používané v tomto zařízení nelze před jejím naformátováním uchovávat žádné jiné soubory, je třeba pravidelně vytvářet zálohované kopie
důležitých souborů.
5. Nedotýkejte se zástrčky napájení mokrýma rukama, mohlo by dojít k úrazu elektrickým proudem.
6. Nepoužívejte toto zařízení při teplotě nad 80°C, pod - °C ani na příliš vlhkém místě.
7. Používejte výhradně nabíječku a příslušenství určení speciálně pro toto zařízení, abyste se vyhnuli případnému nesouladu.
8. Používejte paměťovou kartu Class6 TF.
9. Neobsluhujte obrazovku s použitím špičatých nebo ostrých předmětů, mohli byste ji poškrábat. Čistěte obrazovku hadříkem a jemným saponátem,
nepoužívejte drsné materiály ani kapesníčky napuštěné agresivními látkami.
10. Před namontováním si pečlivě přečtěte všechny pokyny.
Vyloučení odpovědnosti
Tento výrobek je určený k venkovní navigaci, zvyšuje bezpečnost a pohodlí při řízení, avšak nemá vliv na podmínky na cestě a zvyklosti řidiče. Firma nepřijímá žádnou odpovědnost, celkovou ani částečnou, za jakékoliv nehody vzniklé během používání tohoto výrobku za jakýchkoliv okolností; řidič by měl řídit
opatrně a v souladu s předpisy silničního provozu.
Je třeba si důkladně přečíst tento návod, specika výrobku se mohou změnit bez předchozího informování.
Ilustrace v tomto návodu se mohou lišit od skutečného výrobku.
Firma stále zpracovává nové funkce pro výrobek a to, pokud se efektivita a funkčnost výrobku nemění, bez informování.
Přeškrtnutý symbol odpadkového koše znamená, že na území Evropské unie je třeba výrobek po skončení jeho životnosti odevzdat na
zvláštním sběrném místě. Tyto výrobky se nesmějí vyhazovat jako běžný netříděný komunální odpad.
22
Page 24

Co je v krabici?
1. Kabel USB
2. Adapter
3. Držák
4. Nabíječka do automobilu
5. Stojan
1
2
Namontování
Etapy namontavnia:
1. Tento výrobek je vybavený spojením na zacvaknutí.
2. Jeden konec k abelu automobilové nabíječky
zapojte do výrobku.
3. Připojte do zapalovače, zapojte napájení.
4. Pevná spona brání vibracím výrobku.
Základní způsob obsluhy
1. Zapněte zařízení
Po zjištění vnějšího napájení zařízení automaticky zapne hlavní obrazovka.
2. Vypnutí zařízení
Po odpojení vnějšího napájení systém automaticky uloží data a vypne
se během 10 sekund.
3. Režim uspání:
Když je zařízení zapnuto, stlačte a přidržte tlačítko napájení po dobu
2 sekund, abyste je přepnuli do stavu uspání.
V režimu uspání stlačte a přidržte po dobu 2 sekund tlačítko napájení,
abyste zařízení zapnuli.
3
Rozvržení zařízení
1. Konektor USB
2. Slot pro microSD kar ty
3. Tlačítko napájení
ČEŠTINA
23
Page 25

ČEŠTINA
1. Navigace GPS
Určete cílové místo s použitím funkce satelitní navigace, navigace
v reálném čase Vám pomůže dorazit k cíli. [
Hlavní obrazovka umožňuje pohodlně určit parametry navigace.
Při prvním použití je třeba nainstalovat navigační program a určit cestu navigace.
Po určení cesty navigace klepněte, abyste spustili navigační program.
2. MUSIC
Klepněte , pro otevření obrazovky MUSIC.
Po zapojení paměťové karty, může zařízení přehrávat hudbu
v takových formátech, jako MP3, WMA.
24
Page 26

3. VIDEO
Klepněte , pro otevření obrazovky VIDEO.
Po zapojení paměťové karty, může zařízení přehrávat lmy
v takových formátech, jako MP4, MPG, MPGE, AVI.
4. FOTKY
Klepněte , pro otevření obrazovky FOTKY.
Po zapojení paměťové karty, můžete prohlížet fotograe
ve formátech jako BMP, JPG.
ČEŠTINA
25
Page 27

ČEŠTINA
4. E-book
Klepněte , pro otevření obrazovky E-BOOK.
Po zapojení paměťové karty, zařízení obsluhuje pouze soubory TXT.
5. BLUETOOTH
Klepněte , pro otevření obrazovky BLUETOOTH.
Pokud má Váš telefon funkci BT, po úspěšném párování můžete
používat GPS zařízení, jako handsfree.
Spojení BT
Pro zapnutí funkce BT v zařízení a v telefonu. Autovyhledávání BT z telefonu,
najděte telefon, následně ho spojte. Kód PIN je 0000.
Pokud klepněte „odstranit“, odstraní zdroj BT, pokud klepněte „odstranit vše“
budou odstraněny všechny zdroje BT.
26
Page 28

6. Nástroje
Klepněte na „nástroje“ pro zobrazení následující nabídky Windows
Po klepnutí na tuto ikonu se zobrazí okno hlášení. Potvrďte za účelem zapnutí
systému spolupráce s Windows.
Kalkulačka
Pro využití této funkce klepněte na ikonu kalkulačky.
Test GPS
Kontrola informací GPS (obrazovka ukazuje okamžité informace, které závisí
na skutečném okolí.
Klepněte na ikonu „test GPS“, vstupte na [test GPS].
Hra
Klepnutím na „hra“ otevřete obrazovku [hra].
Je zde možné najít hry, např. miny, kapesní liána, had apod.
Klepněte na ikonu Otevřít obrazovku určité hry.
ČEŠTINA
27
Page 29

ČEŠTINA
7. Nastavení
Klepněte na otevřete obrazovku SYSTÉMOVÁ NASTAVENÍ.
Můžete změnit jazyk, podsvícení, zvuk, čas a zkontrolovat systémové zdroje.
1. Jazyková nastavení
Na obrazovce nastavení systému klepněte
Zvolit jazyk, ve kterém má startovat menu zařízení.
2. Nastavení podsvícení
Na obrazovce nastavení systému klepněte
můžete nastavit jas obrazovky, vypnout zajištění obrazovky
a nastavit čas .
3. Řízení napájení
Na obrazovce nastavení systému klepněte na Řízení napájení
Můžete zkontrolovat stav napájení a nastavit automaticky stav uspání.
4. Nastavení zvuku
Na obrazovce nastavení systému klepněte
Můžete nastavit zvuky, zvolit spuštěný zvuk nebo ztlumení.
5. Nastavení času
Na obrazovce nastavení systému klepněte
Můžete nastavit datum, čas a časovou zónu.
6. Systém
Na obrazovce nastavení systému klepněte
Pro kontrolu skladování, sériového čísla, verze aplikace, verze kernel.
28
Page 30

Nastavení
7. Kalibrace souřadnic
Pokud je místo poklepání nesprávné nebo nereaguje, stlačte za účelem
provedení kalibrace toto tlačítko
Pomocí dotykového pera dotýkat střed kurzoru (křížku). Kurzor se bude
přemísťovat, pokaždé je třeba dotýkat se dotykovým perem jeho středu.
Po ukončení kalibrace se obrazovka kalibrace automaticky zavře.
Jestliže je proces kalibrace neúspěšný, je třeba celou proceduru opakovat
až do úspěšné realizace.
8. Vlastní LOGO
Tato funkce umožňuje nastavení vlastního LOGA.
Velikost loga nemůže překročit 480X272, formát bmp, soubor maximálně 2M,
název LOGO.BMP. Umístěte soubor v hlavním adresáři paměťové karty,
připojte kartu microSD a klepněte na „start“.
9. Ustawienia USB
Na obrazovce nastavení systému klepněte
Dostupné možnosti:
Připojení: USB připojení.
Sync: synchronizace.
ČEŠTINA
29
Page 31

ČEŠTINA
Specikace
1. Přijímač GPS GPS Mstar MSR2112
2. Dotyková obrazovka LCD 4,3”
3. Rozlišovací schopnost obrazovky 480×272 pixelů
4. Procesor 800MHz
5. Operační paměť 128 MB
6. Zabudovaná paměť ash 8 GB
7. Operační příjem WINCE 6.0
8. Bluetooth: BLE 4.0 /HSP/A2DP/AVCP
9. Komunikační spojUSB
10. Zásuvka karty paměti microSD (max. 32GB)
11. Formát videa: MP4 / MPEG / MPG / AVI
12. Audio formát: WMA / MP3
13. Obrazový formát: JPG / BMP
14. Napájení: lithium - iontového akumulátoru 3.7V/1300mAh nebo automobilové nabíječky ładowarka DC 5V/2A
15. Příkon <20mW
16. Rozměry: 130mm (šířka) × 96mm (výška) × 19mm (tloušťka)
17. Hmotnost: ~150g
POZOR!
Vyhrazujeme si možnost provádět změny v zařízení bez předchozího upozornění.
Vzhled graky v zařízení závisí na verzi software a může se lišit od uvedeného v návodu!
30
Page 32

Ďakujeme, že ste si vybrali navigačné Lark Freebird!
Prosíme, aby ste si pozorne prečítali tento návod na obsluhu, čo Vám umožní udržiavať zariadení
v čo najlepšom stave. Vyhradzujeme si právo na zavádzanie zmien v tomto zariadení bez
písomného oznámenia a na konečné rozhodovanie o správnosti fungovania zariadení.
SLOVAK
31
Page 33

SLOVAK
Bezpečnostné opatrenie
1. Zariadenie je treba namontovať tak, aby neprekážalo vodičovi vo výhľadu, v opačnom prípade môže dôjsť ku poškodení výrobku aj zdravia užívateľa.
2. Výrobok uchovávajte v bezpečnej vzdialenosti od silných magnetických polí, magnetické pole môže zariadenie poškodiť.
3. Pri formátovaniu a spúšťaniu funkcie neodpojujte napájanie ani nezapojujte microSD kartu, môže to spôsobiť poškodenie alebo chybu programu.
4. Na microSD karte používané v tomto zariadení sa nedajú pred jej naformátovaním uchovávať žiadne iné súbory, je treba pravidelne vytvárať zálohované kópie dôležitých súborov.
5. Nedotýkajte sa zástrčky napájania mokrými rukami, mohlo by dôjsť ku úrazu elektrickým prúdom.
6. Nepoužívajte toto zariadenie pri teplote nad 80°C, pod - 30°C ani na príliš vlhkom mieste.
7. Používajte výhradne nabíjačku a príslušenstvo určené špeciálne pre toto zariadenie, aby ste sa vyhli prípadnému nesúladu.
8. Používajte pamäťovou kartu microSD Class6.
9. Neobsluhujte obrazovku s použitím špicatých alebo ostrých predmetov, mohli by ste ju poškriabať. Čistite obrazovku handrou a jemným saponátom,
nepoužívajte drsné materiály ani vreckovky napustené agresívnymi látkami.
10. Pred namontovaním si riadne prečítajte všetky pokyny.
Vylúčenie zodpovednosti
Tento výrobok je určený na vonkajšiu navigáciu, zvyšuje bezpečnosť a pohodlie pri riadení, avšak nemá vplyv na podmienky na ceste a zvyklosti vodiča.
Firma neprijíma žiadnu zodpovednosť, celkovou ani čiastočnú, za akékoľvek nehody vzniknuté počas používania tohto výrobku za akýchkoľvek okolností;
vodič by mal riadiť opatrne a v súladu s predpismi cestnej premávky.
Je treba si dôkladne prečítať tento návod, špecika výrobku sa môžu zmeniť bez predchádzajúceho informovania.
Ilustrácie v tomto návodu sa môžu líšiť od skutočného výrobku.
Firma stále pripravuje nové funkcie pre výrobok a to, pokiaľ sa efektivita a funkčnosť výrobku nemení, bez informovania.
Prečiarknutý symbol smetného koša označuje, že na území Európskej únie je potrebné výrobok po skončení používania zlikvidovať
na zvláštnom mieste určenom špeciálne na tento účel. Tieto výrobky sa nesmú vyhadzovať spolu s netriedeným komunálnym
odpadom.
32
Page 34

Čo je v krabici?
1. Kábel USB
2. Adaptér
3. Držiak
4. Nabíjačka do automobilu
5. Stojan
Namontovanie
Etapy montovania:
1. Tento výrobok je vybavený spojením na zacvaknutie.
2. Jeden koniec k ábla automobilovej nabíjačky zapojte
do výrobku .
3. Pripojte do zapaľovača, zapojte napájanie.
4. Pevná spona bráni vibráciám výrobku
Základní spôsob obsluhy
1. Zapnite zariadenie
Po zistenie vonkajšie napájanie zariadenia automaticky zapne
hlavná obrazovka.
2. Vypnutie zariadenie
Po odpojeniu vonkajšieho napájania systém automaticky uloží
dáta a vypne sa počas 10 sekúnd.
3. Režim uspania:
Keď je zariadenie zapnuté, stlačte a pridržte tlačidlo napájanie
po dobu 2 sekúnd, aby ste ho prepli do stavu uspanie.
V režime uspania stlačte a pridržte po dobu 2 sekúnd tlačidlo
napájanie, aby ste zariadenie zapli.
SLOVAK
1
2
3
Vzhľad
1. USB prípojk a
2. Port microSD kar ty
3. Tlačidlo napájanie
33
Page 35

SLOVAK
1. Navigácia GPS
Určite cieľové miesto s použitím funkcie satelitnej navigácie, navigácia
v reálnom čase Vám pomôže doraziť ku cieľu.
Hlavná obrazovka umožňuje pohodlne určiť parametre navigácia.
Pri prvom použití je treba nainštalovať navigačný program a určiť cestu navigácie.
Po určení cesty navigácie klepnite , aby ste spustili navigační program.
2. HUDBA
Klepnete , pre otvorení obrazovky HUDBA.
Po zapojeniu pamäťovú kartu, môže zariadenie prehrávať hudbu
uložené vo formátoch, ako sú MP3, WMA.
34
Page 36

3. VIDEO
Klepnete , pre otvorení obrazovky VIDEO.
Po zapojeniu pamäťovú kartu, môže zariadenie prehrávať lmy
v takých formátoch, ako MP4, MPG, MPGE, AVI.
4. OBRAZY
Klepnete , pre otvorení obrazovky OBRAZY.
Po zapojeniu pamäťovú kartu, môže zariadenie prezerať
obrázky v takých formátoch, ako BMP, JPG.
SLOVAK
35
Page 37

SLOVAK
4. E-book
Klepnete , pre otvorení obrazovky E-BOOK.
Zariadenie obsluhuje iba súbory TXT.
5. BLUETOOTH
Klepnete , pre otvorení obrazovky BLUETOOTH.
Ak má váš telefón funkciu Bluetooth po úspešnom spárovaní, môžete použiť
GPS zariadenie ako hlasný odposluch.
Spojení Bluetooth
Pre zapnutie funkcie Bluetooth v zariadení a v telefónu. Autovyhľadávanie
BT z telefónu, nájdite telefón, následne ho spojte. Kód PIN je 0000
Pokiaľ klepnete „odstrániť“, odstráni zdroj BT, pokiaľ klepnete „odstrániť všetko“
budú odstránené všetky zdroje BT.
36
Page 38

6. Nástroje
Windows
Po klepnutí na tuto ikonu sa zobrazí okno hlásenie. Potvrďte za účelom zapnutie systému
spolupráce s Windows.
Kalkulačka
Pre využitie tejto funkcie klepnite na ikonu kalkulačky.
Test GPS
Kontrola informácii GPS (obrazovka ukazuje okamžité informácie, ktoré závisia
na skutočnom okoliu. Klepnite na ikonu „test GPS“, vstúpte na [test GPS].
Hra
Klepnutím na „hra“ otvorite obrazovku [hra]. Tu je možné nájsť hry, napr. míny,
vrecková liana, had apod. Klepnite na ikonu Otvoriť obrazovku určitej hry.
SLOVAK
37
Page 39

SLOVAK
7. Nastavení
Klepnite na otvorte obrazovku SYSTÉMOVÉ NASTAVENIA.
Môžete zmeniť jazyk, podsvietenie, zvuk, čas a skontrolovať systémové zdroje.
1. Jazyková nastavení
Na obrazovke nastavení systému klepnite na
Zvoliť jazyk, v ktorom má štartovať menu zariadenie.
2. Nastavení podsvietenia
Na obrazovke nastavení systému klepnite na
Môžete nastaviť jas obrazovky, vypnúť zaistenie obrazovky
a nastaviť čas.
3. Riadenie napájanie
Na obrazovke nastavení systému klepnite na Riadenie napájanie
Môžete skontrolovať stav napájanie a nastaviť automaticky stav uspania.
4. Nastavenie zvuku
Na obrazovke nastavení systému klepnite na
Môžete nastaviť zvuky, zvoliť spustený zvuk alebo jeho stlmenie.
5. Nastavenie času
Na obrazovke nastavení systému klepnite na
Môžete nastaviť dátum, čas a časovú zónu.
6. Systém
Na obrazovke nastavení systému klepnite na
Pre kontrolu skladovania, sériového čísla, verzie aplikácie, verzie kernel.
38
Page 40

Nastavení
7. Kalibrácia súradníc
Pokiaľ je miesto poklepania nesprávne alebo nereaguje, stlačte za účelom
prevedenia kalibrácie toto tlačidlo .
Pomocou dotykového pera dotýkať stred kurzora (krížika). Kurzor sa bude
premiesťovať, je nutné za každým dotykovým perom dotýkať jeho stred.
Po ukončení kalibrácie sa obrazovka kalibrácie zavrie automaticky.
Ak sa proces kalibrácia nepodarí, celá procedúra sa bude opakovať až sa
podarí.
8. Vlastné LOGO
Tato funkcia umožňuje nastavenie vlastného LOGA. Veľkosť loga nemôže
prekročiť 480x272, formát bmp, súbor maximálne 2M, názov LOGO.BMP.
Umiestnite súbor v hlavnom adresáru microSD karty, pripojte kartu
a klepnite na „štart“.
9. Nastavenie USB
Na obrazovke nastavení systému klepnite na
Dostupné možnosti:
Pripojenie: USB pripojenie
Sync: synchronizácia.
SLOVAK
39
Page 41

SLOVAK
Špecikácia
1. Prijímač GPS Mstar MSR2112
2. Dotyková obrazovka LCD 4,3”
3. Rozlišovacia schopnosť obrazovky 480×272 pixelov
4. Procesor 800MHz
5. Operačná pamäť 128 MB
6. Vbudovaná pamäť ash 8 GB
7. Operačný príjem WINCE 6.0
8. Bluetooth: BLE 4.0 /HSP/A2DP/AVCP
9. Komunikačný spojUSB
10. Konektor karty pamäti microSD (max. 32GB)
11. Formát videa: MP4 / MPEG / MPG / AVI
12. Audio formát: WMA / MP3
13. Obrazový formát: JPG / BMP
14. Napájanie: lhitovo - iónového akumulátora 3.7V/1300mAh nebo automobilovej nabíjačky DC 5V/2A
15. Príkon <20mW
16. Rozmery: 130mm (šírka) × 96mm(výška) × 19mm(hrúbka)
17. Hmotnosť: ~150g
UPOZORNENIE!
Vyhradzujeme si možnosť vykonávať zmeny zariadenia bez predchádzajúceho upozornenia.
Gracký vzhľad zariadenia závisí od verzie softvéru a môže sa líšiť od vzhľadu uvedeného v návode!
40
Page 42

Köszönjük, hogy a navigációs Lark Freebird!
HUNGARIAN
Kérjük, gyelmesen olvassák el az alábbi útmutatót, ami lehetővé teszi, hogy
Fenntartjuk magunknak a jogot, hogy írásbeli értesítés nélkül változtatásokat hajtsunk
a készüléket a lehető legjobb állapotban tartsák.
végre ebben a készüléket, és véglegesen meghatározzuk a működését.
41
Page 43

HUNGARIAN
Óvintézkedések
1. A készüléket úgy kell helyesen telepíteni, hogy az ne zavarja a gépkocsivezető kilátását, ellenkező esetben fokozza a termék sérülésének és a testi
sérülés kockázatát.
2. Tartsa távol a terméket az erős mágneses terektől, a mágneses mezők a készülék meghibásodását eredményezhetik.
3. A formázás és a funkció elindítása alatt ne kapcsolja le a tápellátást és ne csatlakoztassa a microSD kártyát, mert károsodást vagy programhibát
okozhat.
4. A jelen készülékben használt microSD kártyán semmilyen más fájl nem tárolható a formázás előtt, rendszeresen készítsen biztonsági másolatot a
fontos fájlokról.
5. Ne érintse meg nedves kezekkel a tápdugót, áramütés veszélye.
6. Ne használja a jelen készüléket 80°C feletti és - 30°C alatti hőmérsékleten, valamint túlságosan nedves környezetben.
7. Kizárólag a készülékhez rendelt töltőt és tartozékokat használja az összeférhetetlenség elkerülése végett.
8. Class6 microSD memóriakártyát használjon.
9. A képernyőt nem szabad hegyes vagy éles tárggyal kezelni, karcolást veszélye. A képernyőt enyhe tisztítószerrel benedvesített puha törlőkendővel
tisztítsa, ne használjon durva anyagokat és agresszív anyagokkal benedvesített kendőket.
10. A telepítés előtt gyelmesen olvassa el az alábbi útmutatókat.
A felelősség kizárása
A jelen termék szabadtéri navigációra szolgál, növeli a biztonságot és a vezetés kényelmét, de az útviszonyokra és a gépkocsivezető szokásaira való tekintettel, a Vállalat semmilyen, teljes vagy különálló, felelősséget nem vállal a jelen termék használata során bekövetkező bárminemű balesetért, függetlenül
annak körülményeitől. A gépkocsivezetőnek óvatosan és a közlekedési szabályoknak megfelelően kell vezetnie.
Figyelmesen olvassa el a jelen útmutatót, a termék jellemzői a felhasználó értesítése nélkül módosulhatnak.
A jelen útmutatóban található ábrák eltérhetnek a valós terméktől.
A vállalat folyamatosan dolgozik a készülék új funkcióin, amikor a termék kapacitása és funkcionalitása a felhasználó értesítése nélkül módosulhat.
Az áthúzott szemetes edényt ábrázoló szimbólum azt jelzi, hogy az Európai Unió területén a terméket a használatának befejezése után,
külön erre kijelölt pontra kell beszállítani. Ezeket a termékeket ne dobja ki a nem szegregált, háztartási hulladékkal együtt.
42
Page 44

Mi van a dobozban?
1. USB kábel
2. Adapter
3. Fogantyú
4. Autós töltő
5. Tartókar
HUNGARIAN
1
Telepítés
A telepítés szakaszai:
1. A jelen termék pattintós zárral rendelkezik.
2. Az autós töltőkábel egyik végét csatlakoztasd a termékre.
3. Csatlakoztasd a szivargyújtóra, kapcsold be a tápellátást.
4. A x tar tóretesz megelőzi a termék vibrálását
Alapvető műveletek
1. K apcsold be a készüléket
A külső táplálás észlelése után a készülék automatikusan
bekapcsolja a fő interfészt
2. Kik apcsolása be a készüléket
A külső táplálás lekapcsolása után a rendszer automatikusan
elmenti az adatokat és 10 másodpercen belül kikapcsol.
3. Alvó mód:
Amikor a készülék be van kapcsolva, nyomd meg és tartsd
lenyomva 2 másodpercig a tápkapcsoló gombot, hogy alvó
módra kapcsold a készüléket.
Alvó módban nyomd meg és tartsd lenyomva 2 másodpercig
a tápkapcsoló gombot a készülék bekapcsolásához.
2
3
A készülék elrendezése
1. USB csatlakozó
2. microSD kár tya aljzat
3. Tápkapcsoló gomb
43
Page 45

HUNGARIAN
1. GPS Navigáció
Határozd meg a célpontot a navigációs műhold funkció segítségével;
valós időben történő navigáció segít eljutni a célhelyre. A fő interfészen
lehetővé teszi a navigálási paraméterek kényelmes meghatározását.
Első használat során telepítsd a navigációs szoftvert és határozd meg
a navigációs sávot.
A navigációs sáv meghatározása után kattints a program elindításához.
2. MUSIC
Kattints MUSIC-ra a interfész megnyitásához.
Ha csatlakoztat egy memóriakártyát, a készülék képes zenét lejátszani
mentett formátumok, mint az MP3, WMA.
44
Page 46

3. VIDEÓ
Kattints az -ra az [VIDEÓ] interfész megnyitáshoz.
Ha a csatlakoztatott memória kártyát játszhat videókat elmentett
formátumok, mint az MP4, MPG, MPGE, AVI.
4. FOTÓK
Kattints az -ra az [FOTÓK] interfész megnyitáshoz.
Ha csatlakoztat egy memóriakártyát, megtekintheti a képeket
formátumok, mint a BMP, JPG.
HUNGARIAN
45
Page 47

HUNGARIAN
4. E-book
Kattints az -ra az [E-book] interfész megnyitáshoz.
Ha csatlakoztat egy memóriakártyát, megtekintheti
tárolt dokumentumok TXT formátumban.
5. BLUETOOTH
Kattints az -ra az [BLUETOOTH] interfész megnyitáshoz.
Ha a telefon Bluetooth funkcióját, miután sikeres párosítás, akkor
használja a GPS készüléket kihangosító.
Bluetooth csatlakoztatása
A Bluetooth funkció bekapcsolására a készüléken és a telefonon.
BT Auto forráskeresés telefonról, keresd meg a telefont, majd csatlakoztasd.
A PIN kód 0000. Ha a „törlés”-re kattintasz, törli a BT forrást,
ha az „összes törlése” opcióra kattintasz, törli az összes BT forrást.
46
Page 48

6. Eszközök
Kattints az “eszközök”-re a következő Windows menü megjelenítéséhez.
Erre az ikonra kattintva megjelenik az értesítés ablak. Erősítsd meg, hogy bekapcsold a windows együttműködési rendszert.
Számológép
Kattints a számológép ikonra a funkció használatához.
GPS teszt
Ellenőrizd a GPS információkat (az interfész azonnali információkat mutat,
melyek a valós környezettől függnek. Kattints a „GPS test” ikonra, menj
a [test GPS]-re az alábbiak szerint:
Játék
Kattints a “játék”-ra, nyisd meg a [játék] interfészt. Itt játékokat találsz,
pl. aknakereső, pocket lian, kígyójáték stb.
HUNGARIAN
47
Page 49

HUNGARIAN
7. Beállítások
Kliknij , aby otworzyć interfejs USTAWIENIA SYSTEMOWE.
Możesz zmienić język, podświetlenie, dźwięk, czas i sprawdzić zasoby systemowe.
1. A nyelv beállítása
A rendszerbeállítás interfészen kattints a opcióra.
Válassza ki a nyelvet, amelyen futtatni a készülék menüjében.
2. Háttérvilágítás beállítása
A rendszerbeállítás interfészen kattints a opcióra.
Be tudod állítani a képernyő fényerejét, kikapcsolhatod a képernyő
védelmet és beállíthatod az időt.
3. Energiagazdálkodá
A rendszerbeállítás interfészen kattints a Energiagazdálkodá opcióra.
Ellenőrizheted a töltési szintet és beállíthatod az automatikus alvó állapotot
4. Hang beállítása
A rendszerbeállítás interfészen kattints a opcióra.
Be tudod állítani a hangot, kiválaszthatsz egy nyitott hangot vagy a némítást.
5. Idő beállítása
A rendszerbeállítás interfészen kattints a opcióra.
Beállíthatod a dátumot, az időt és az időzónát.
6. Rendszer
A rendszerbeállítás interfészen kattints a opcióra.
Ellenőrizni tudod a tárolást, a szériaszámot, az alkalmazás verzióját,
a kernel verzióját.
48
Page 50

Beállítások
7. Koordináták kalibrálása
Ha az érintés helye hibás vagy nem reagál, nyomd meg ezt a gombot
a kalibrálás végrehajtásához.
A ceruzával érintse meg a kurzor (kereszt) közepét.
A kurzor újabb helyekre ugrik, minden alkalommal érintse meg a ceruzával
a középpontját. A képernyő kalibrálásának befejezése után a kalibráció
automatikusan bezáródik.
Ha a kalibráció nem sikerül, az egész folyamat megismétlődik, egészen
a sikeres befejezésig.
8. Saját LOGO
Ez a funkció saját LOGO beállítására ad lehetőséget. A logó mérete nem
haladhatja meg a 480x272 méretet, bmp formátumú, a fájl nem lehet nagyobb,
mint 2M, a neve: LOGO.BMP. Helyezd a fájlt a microSD kártya fő katalógusába,
csatlakoztasd a microSD kártyát és nyomd meg a „start”-ot.
9. USB beállítás
A rendszerbeállítás interfészen kattints a opcióra.
Rendelkezésre álló lehetőségek:
Csatlakozás: USB csatlakozás
Szinkron: sync.
HUNGARIAN
49
Page 51

HUNGARIAN
Specikáció
1. GPS vevőkészülék Mstar MSR2112
2. LCD 4,3” érintőképernyő
3. Aképernyő felbontása 480×272 pixel
4. 800 MHz processzor
5. 128 MB operatív memória
6. Beépített 8 GB ash memória
7. WINCE 6.0 operációs rendszer
8. Bluetooth: BLE 4.0 /HSP/A2DP/AVCP
9. USB csatlakozó
10. microSD memóriakártya csatlakozó (max. 32GB)
11. Video formátum: MP4 / MPEG / MPG / AVI
12. Audio formátum: WMA / MP3
13. Kép formátum: JPG / BMP
14. Áramellátás: a beépített lítium-ion akkumulátorról 3.7V/1300mAh vagy autós töltőről DC 5V/2A
15. Teljesítményfelvétel <20mW
16. Méretek: 130mm (szélesség) × 96mm(magasság) × 19mm(vastagság)
17. Súly: ~137g
FIGYELEM!
A grakák/animációk megjelenése a készülékben a programverziótól függően változhatnak, és eltérhetnek az instrukcióban szereplőtől!
50
Page 52

Hvala vam na odabiru navigaciju Lark Freebird!
HRVATSKI
Molimo da pažljivo pročitate ovaj priručnik, koji će se održavati jedinicu u najboljem mogućem stanju.
S obzirom na razlike u softveru i rad različitih elemenata prikazuju na zaslonu
mogu se razlikovati od onih opisanih, pa vas molimo da pažljivo pročitate
podaci koji se prikazuju na ekranu.
51
Page 53

HRVATSKI
Predostrožnosti
1. Molimo vas ispravno postavite uređaj, nemojte blokirati pogled vozača jer to može dovesti do neispravnosti proizvoda ili osobne ozljede.
2. Držite proizvod podalje od jakog magnetskog polja jer magnetsko polje može oštetiti uređaj.
3. U formatu i korištenju procesa nemojte isključivati napajanje i uključivati TF karticu jer to može dovesti do oštećena ili greške u programu.
4. microSD kartica koja se koristi u ovom proizvodu se ne smije koristiti za spremanje drugih podataka na uređaju prije formatiranja microSD kartice
i pravovremenog backupa važnih podataka.
5. Nemojte uključivati napajanje vlažnim rukama kako biste spriječili električni udar.
6. Zabranjeno je koristiti ovaj proizvod na temperaturama iznad 80°C ili ispod - 30°C te u prevlažnom okolišu.
7. Koristite punjač koji je namijenjen za proizvod i povezane dodatke kako biste izbjegli nesklad.
8. Molimo vas koristite microSD memorijsku karticu klase 6.
9. Nemojte koristiti alate s tankim vrhom ili oštre alate za pritiskivanje ekrana kako biste izbjegli ogrebotine. Kada se ekran zaprlja obrišite ga mekanom
krpom i blagim deterdžentom, nemojte koristiti tvrdu krpicu ili agresivna sredstva koja sadržavaju alkohol.
10. Molimo Vas pročitajte sve savjete u detaljima prije ugradnje.
Isključenje odgovornosti
Ovaj proizvod je glavni pružatelj usluga navigacije za vanjske sportove za vožnju kako bi se povećala sigurnost vožnje i pogodnost, ali zbog uvjeta na
cesti i vozača te kompleksnosti različitih načina vožnje Poduzeće ne preuzima odgovornost za nezgode uzrokovane ugradnjom proizvoda pod uvjetima
povezanih odgovornosti. Vozač mora poštovati prometne i sigurnosne odredbe.
Molimo Vas pažljivo pročitajte ove upute prije korištenja, ove pojedinosti su podložne promjenama bez prethodnog upozorenja.
Ilustracije u ovim uputama se mogu razlikovati od stvarnog izgleda proizvoda, molimo Vas da uzmete to u obzir.
Poduzeće će razvijati nove mogućnosti proizvoda, te se promjene rada i funkcionalnosti proizvoda mogu uvesti bez prethodnog upozorenja korisnika.
Precrtani simbol kante za smeće označava da se na teritoriju Europske unije nakon završenog korištenja proizvoda on mora biti odstranjen
u zasebnom posebno za to dizajniranom mjestu. Ne bacate te proizvode zajedno s nerazvrstanim gradskim otpadom.
52
Page 54

Što je u kutiji?
1. USB Kabel
2. Adapter
3. Postolje
4. Automobilski punjač
5. Držač
Postavljanje
Koraci pri postavljanju:
1. Ovaj proiz vod je učvršćen kopčom.
2. 2. Jedan k raj kabela automobilskog punjača
je spojen na ovaj proizvod.
3. Spojite na upaljač te uključite proizvod.
4. Fiksna kopča osigurava da se proizvod neće tresti.
Treće, osnovno funkcioniranje
1. Uk ljučivanje uređaja
Proizvod će, nakon što otkrije vanjski izvor energije,
automatski otvoriti glavno sučelje.
2. Isk ljučite uređaja
Kada se zaustavi vanjski izvor energije sustav će automatski
spremiti podatke i ugasiti se u 10 sekundi
3. Stanje pripravnosti:
U stanju podizanju sustava držite tipku za paljenje 2 sekunde
za odlazak u stanje pripravnosti.
4. Pokretanje: u stanju pripravnosti držite tipku za paljenje
2 sekunde za pokretanje.
HRVATSKI
1
2
3
Izgled
1. USB sučelje
2. Utor za microSD kar ticu
3. Tipka za PALJENJE
53
Page 55

HRVATSKI
1. GPS navigacija
Postavite odredište koristeći satelitsku navigaciju.
Navigacija u stvarnom vremenu Vam može pomoći da dođete do odredišta.
Satellite navigation na glavnom sučelju je prikladan ulazak za navigaciju.
Kada se prvi put koristi potrebno je instalirati navigacijski software
i postaviti navigacijski put.
Nakon postavljanja navigacijskog puta možete pritisnuti
za pokretanje odgovarajućeg navigacijskog software-a.
2. GLAZBA
Kliknite za ulazak u menije GLAZBA.
Kada stavljate microSD karticu u uređaj možete reproducirati glazbu
spremljene u formatima kao što su MP3, WMA.
54
Page 56

3. VIDEO
Kliknite za ulazak u menije VIDEO .
Kada stavljate microSD karticu u uređaj možete igrati lmove
spremiti u formate kao što su MP4, MPG, MPGE, AVI.
4. SLIKA
Kliknite za ulazak u menije SLIKA.
Kada stavljate microSD karticu u uređaj možete pregledavati
slike u formatima kao što su BMP, JPG.
HRVATSKI
55
Page 57

HRVATSKI
4. E-book
Kliknite za ulazak u menije E-BOOK.
Kada stavljate microSD karticu u uređaj pobrinite se da
sadrži TXT datoteku.
5. BLUETOOTH
Kliknite za ulazak u menije BLUETOOTH.
Ako vaš telefon ima Bluetooth funkciju, uspješno uparivanje.
Možete koristiti GPS uređaja poput handsfree.
Bluetooth spajanje
Za aktiviranje Bluetooth funkcije uređaja i mobitela automatski pretražite
BT s mobitela, odaberite odgovarajuću vezu te spojite. PIN je 0000.
Ukoliko kliknete “delete“, obrisat će se pojedini BT spoj, ukoliko kliknete
“delete all“, obrisat će se svi BT spojevi.
.
56
Page 58

6. Alati
Klikom na TOOLS pronaći ćete sljedeće menije Windows
Klikom na ikonu pojavit će se prozor poruke, zatim potvrdite za ulazak u sustav Windows
Kalkulator
Kliknite na ikonu KALKULATORA, zatim ulazite u ovu funkciju.
GPS testiranje
Provjera GPS informacija (sučelje prikazuje trenutačne informacije koje ovise
o stvarnom stanju okoliša). Kliknite ikonu GPS TESTING za ulazak u GPS testing
Igra
Kliknite GAME za ulazak u sučelje Igra interface
Nalaze se programi igara za zabavu poput Minolovca, Džepnog Liana, Zmije i sl.
HRVATSKI
57
Page 59

HRVATSKI
7. Postavke
Kliknite kako biste ušli u sučelje SYSTEM SETTING.
Možete postaviti jezik, pozadinsko svjetlo, zvuk, vrijeme i provjeru izvora sustava.
1. Postavke jezika
U postavkama sustava, pritisnite za
Odaberite jezik s kojim se pokrenuti iz izbornika uređaja.
2. Pozadinskog svjetla
U postavkama sustava, pritisnite za
Požete postaviti svjetlinu ekrana, otvoriti zaštitu ekrana i postaviti vrijeme
3. Upravljanje energijom
U postavkama sustava, pritisnite za Upravljanje energijom
Možete provjeriti uvjete potrošnje i postavite automatsko stanje pripravnosti.
4. Postavke zvuka
U postavkama sustava, pritisnite za
Možete postaviti zvukove, otvoriti zvuk ili ugasiti.
5. Postavke vremena
U postavkama sustava, pritisnite za
Možete postaviti datum, vrijeme i vremensku zonu.
6. Sustav
U postavkama sustava, pritisnite za
Za provjeru pohrane, SN broja, verzije aplikacije, verzije jezgre.
58
Page 60

Postavke
7. Kalibracija koordinata
Kada odabrano mjesto ne odgovara ili nije ispravno, molimo Vas pritisnite
ovo dugme za podešavanje.
8.
9. Korištenje olovke, dodirnite središte pokazivača (križ). Pokazivač će se kretati,
svaki put kada dodirnete olovku središtu. Nakon kalibracije, zaslon za kalibraciju
automatski zatvara. Ako je postupak kalibracije ne uspije, cijeli postupak
se ponavlja sve dok se ne uspije.
10. Ažuriranje LOGO-a
Ova funkcija dozvoljava postavljanje korisnički postavljenog logoa.
Veličina mora biti 480*272 , bmp formata, ne većeg od 2M, ime mora
biti LOGO. BMP. Spremite sliku direktno na microSD karticu, umetnite
microSD karticu zatim pritisnite „start”.
11. USB Postavke
U postavkama sustava, pritisnite za USB postavke
Dostupne opcije:
Spajanje: USB spajanje
Sync: sinkronizacija.
HRVATSKI
59
Page 61

HRVATSKI
Specikacija
1. GPS prijemnik Mstar MSR2112
2. Zaslon osjetljiv na dodir dijagonale 4,3”
3. Rezolucije 480×272 piksela
4. Processor 800MHz
5. Operativna memorija 128 MB
6. Ugrađena memorija ash 8 GB
7. Sustav WINCE 6.0
8. Bluetooth: BLE 4.0 /HSP/A2DP/AVCP
9. Komunikacija sučelje: USB
10. Utor na kartice memorije microSD (max. 32GB)
11. Video Format: MP4 / MPEG / MPG / AVI
12. Audio format: WMA / MP3
13. Format slike: JPG / BMP
14. Snaga: Litij-ionska baterija 3.7V/1300mAh ili Auto PunjačDC 5V/2A
15. Potrošnja energije <20 mW
16. Dimenzije: širina: 130mm × visina: 96mm × debljina: 19mm
17. Težina: ~150g
NAPOMENA!
Zadržavamo pravo na izmjene u uređaju bez prethodne najave.
Izgled graka u uređaju ovisi od verzije softvera i može se razlikovati od predstavljenog u priručniku!
60
Page 62

© Lark Europe S.A.
No part of this manual can be reproduced, copied, transmitted without the written consent of Lark Europe S.A.
Kopírování návodu v plném nebo částečném rozsahu bez předchozího písemného souhlasu majitele autorských práv je zakázáno.
Reprodukcia celku alebo časti tohto návodu bez predchádzajúceho písomného súhlasu držiteľa autorských práv je zakázané.
Kopiowanie całości lub części instrukcji jest zabronione bez wcześniejszej pisemnej zgody właściciela praw autorskich.
A kézikönyvsokszorosítása, részbenvagyegészbentilos aszerzői jog tulajdonos előzetes írásbeli hozzájárulása nélkül.
Reprodukcija u cijelosti ili dijelom priručnika je zabranjeno bez prethodnog pismenog dopuštenja vlasnika autorskih prava.
Declaration of conformity with the standards contained in the directives specic
to the device together with the description, can be found at www.lark.com.pl
Deklaracja zgodności z normami zawartymi w właściwych dla urządzenia dyrektywach
wraz z ich wyszczególnieniem znajduje się na stronie www.lark.com.pl
Importer: Lark Europe Inc.
e-mail: biuro@lark.com.pl
Osikowa 16
05-092 Lomianki
www.lark.com.pl
 Loading...