

Page 1

EN User manual 1
DE Benutzerhandbuch 1
CS Návod k obsluze 13
SK Návod na použitie 25
Instrukcja szybki start 37
PL
FreeAction
SPORTS CAMERA
200HD
Page 2

Ďakujeme, že ste si kúpili FreeAction 200HD.
Pred prvým použitím si starostlivo prečítajte túto príručku, aby
ste dosiahli čo najlepšie výsledky a predĺžili životnosť výrobku.
Děkujeme Vám za nakup FreeAction 200HD.
Prosíme, před použitím přečtěte si pečlivě tento manual pro
dosahnuti co nejlepších výsledků a prodloužení životnosti
výrobku.
Vielen Dank für den Kauf FreeAction 200HD.
Vor dem Gebrauch lesen Sie bitte sorgfältig dieses Handbuch,
um die besten Ergebnisse zu erzielen und die Lebensdauer des
Produkts zu verlängern.
Thank you for buying our FreeAction 200HD.
Before start using this product, please read this manual
carefully to maximize its performance and extend
the life of the product.
Dziękujemy za zakup FreeAction 200HD.
Przed rozpoczęciem użytkowania prosimy o staranne
przeczytanie tego podręcznika, aby osiągnąć jak najlepsze
wyniki oraz wydłużyć czas użytkowania wyrobu.
1
Page 3

Přeškrtnutý symbol odpadkového koše znamená, že na území Evropské unie je
třeba výrobekpo skončeníjeho životnostiodevzdat nazvláštním sběrném místě.
Tytovýrobky senesmějí vyhazovat jako běžný netříděnýkomunálníodpad.
Die durchgestrichene Mülltonne bedeutet, dass innerhalb der Europäischen
Union nach dem Gebrauch des Produktes muss in einem separaten verworfen
werden, die speziell von diesem Punkt aus entwickelt. Sie diese Produkte
entsorgenunsortierten Hausmüll.
Prečiarknutý symbol smetného koša označuje, že na území Európskej únie
je potrebné výrobok po skončení používania zlikvidovať na zvláštnom mieste
určenom špeciálne na tento účel. Tieto výrobky sa nesmú vyhadzovať spolu
snetriedenýmkomunálnymodpadom.
Przekreślonysymbol pojemnika naśmieci oznacza, że naterenie UniiEuropejskiej
po zakończeniu użytkowania produktu należy się go pozbyć w osobnym,
specjalnie od tegoprzeznaczonym punkcie. Nie należy wyrzucać tych produktów
razemzniesortowanymiodpadamikomunalnymi.
The symbol to the left means that according to European Union laws and
regulations yourproduct and/or its battery shall be disposed of separately from
household waste. When this product reaches its end of life, take it to a collection
point designated by local authorities. The separate collection and recycling
of your product and/orits battery at thetime ofdisposalwill help conserve natural
resources and ensure that it is recycled in a manner that protects human health
andtheenvironment.
2
Page 4

Before you begin
Safety and handling
Prevent your device and accessories from getting wet. Getting electrical
equipment wet not only causes serious damage, but it is also a threat to
the user (risk of electric shock).
Protect your device against shocks, falls and vibrations.
Protect the device from high and low temperatures.
Do not drop, bend, puncture, insert foreign objects, or place heavy objects
on your device.
Do not use unauthorized accessories, as the may damage the device and
void manufacturer's warranty.
Important safety instructions
Be sure to follow instructions bellow. Make sure that they are known to all
users of your device, including children.
Turn off the device in the plane for the whole ight or during take-off and
landing, according to the instructions given by the aircraft personnel.
Switch off the device near important electronic devices, which could be
disrupted by possible interference.
Do not attempt to disassemble, modify or repair the device. Always
entrust these tasks to authorized specialist.
Protect your device from strong magnetic elds. These elds can damage
magnetic storage media.
Do not use the device in very high temperatures or in areas at high risk of
re or explosion, such as petrol stations.
Supervise the use of the device by children, do not let them play with the
device unattended.
3
EN
Page 5

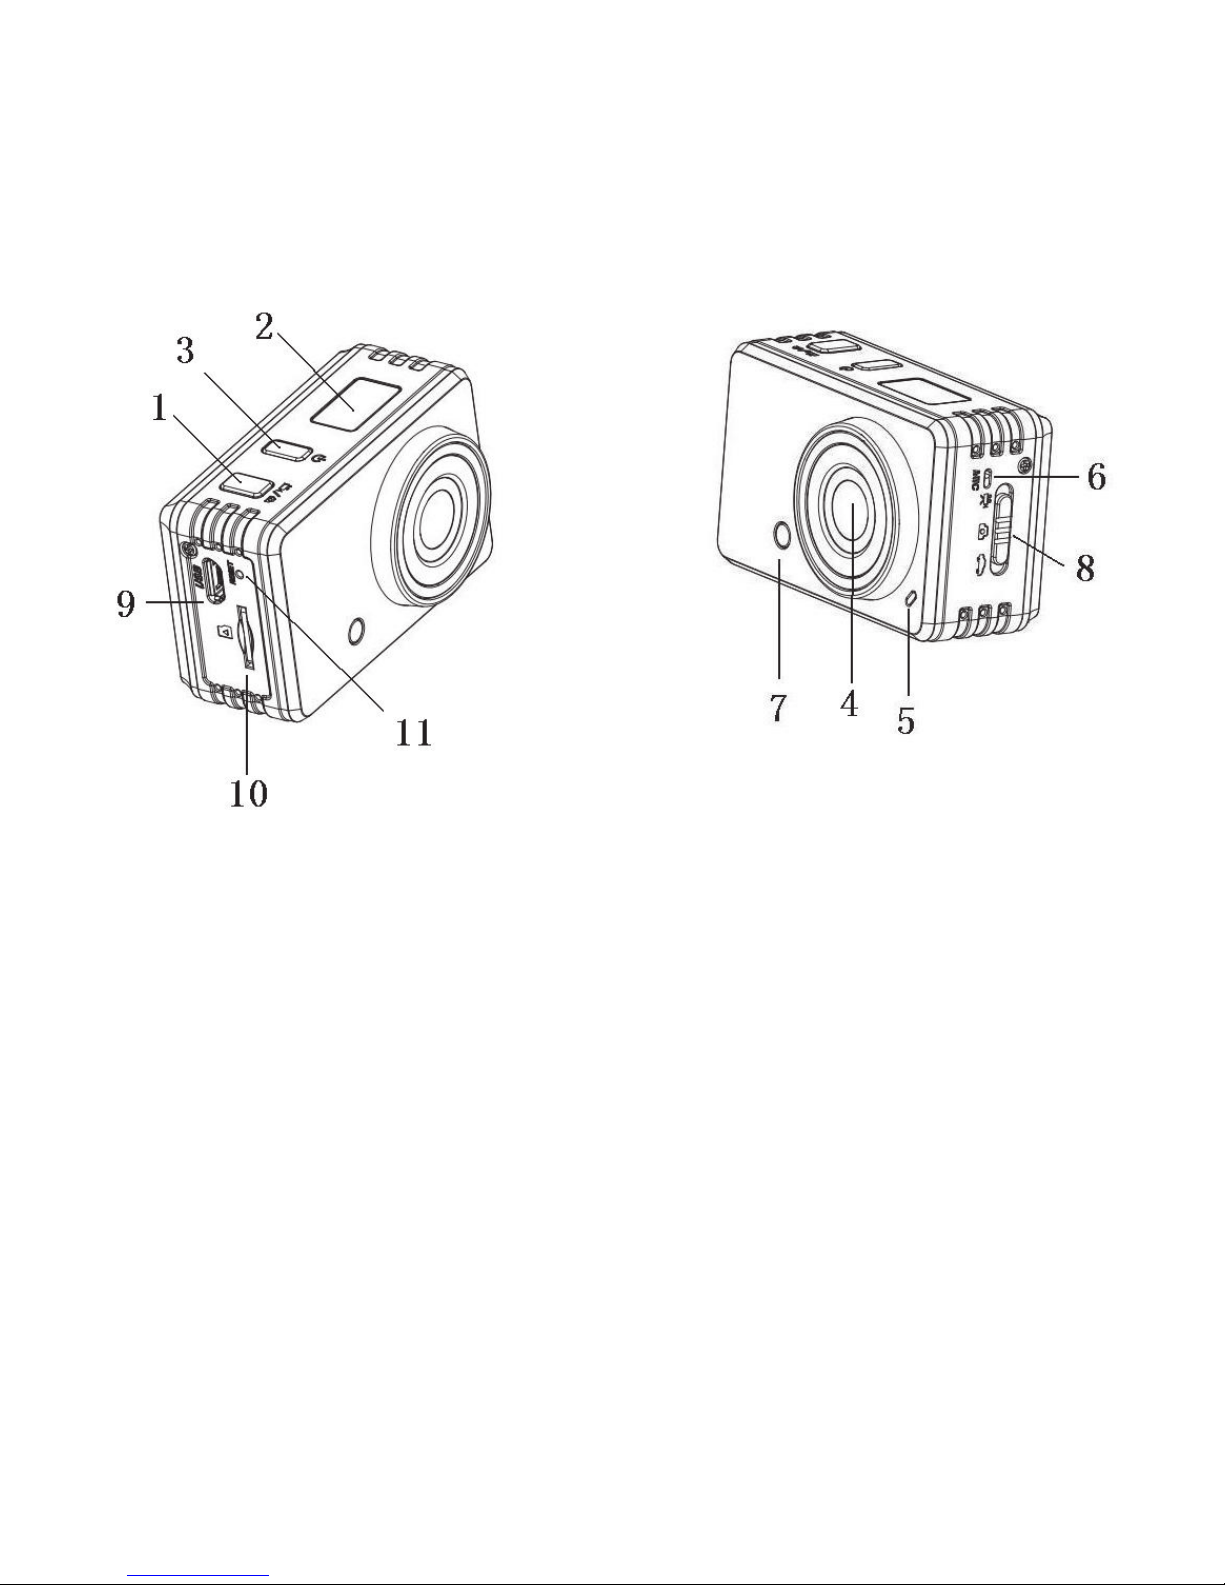
Appearance and Buttons
1. Shutter button
2. LCD display
3. Power button
4. Lens
5. Indicator Light for charging (Red)
6. Microphone
7. Working Indicator Light (Blue)
8. Mode Switch
9. Micro USB port
10. Micro SD card slot
11. Reset button
4
Page 6

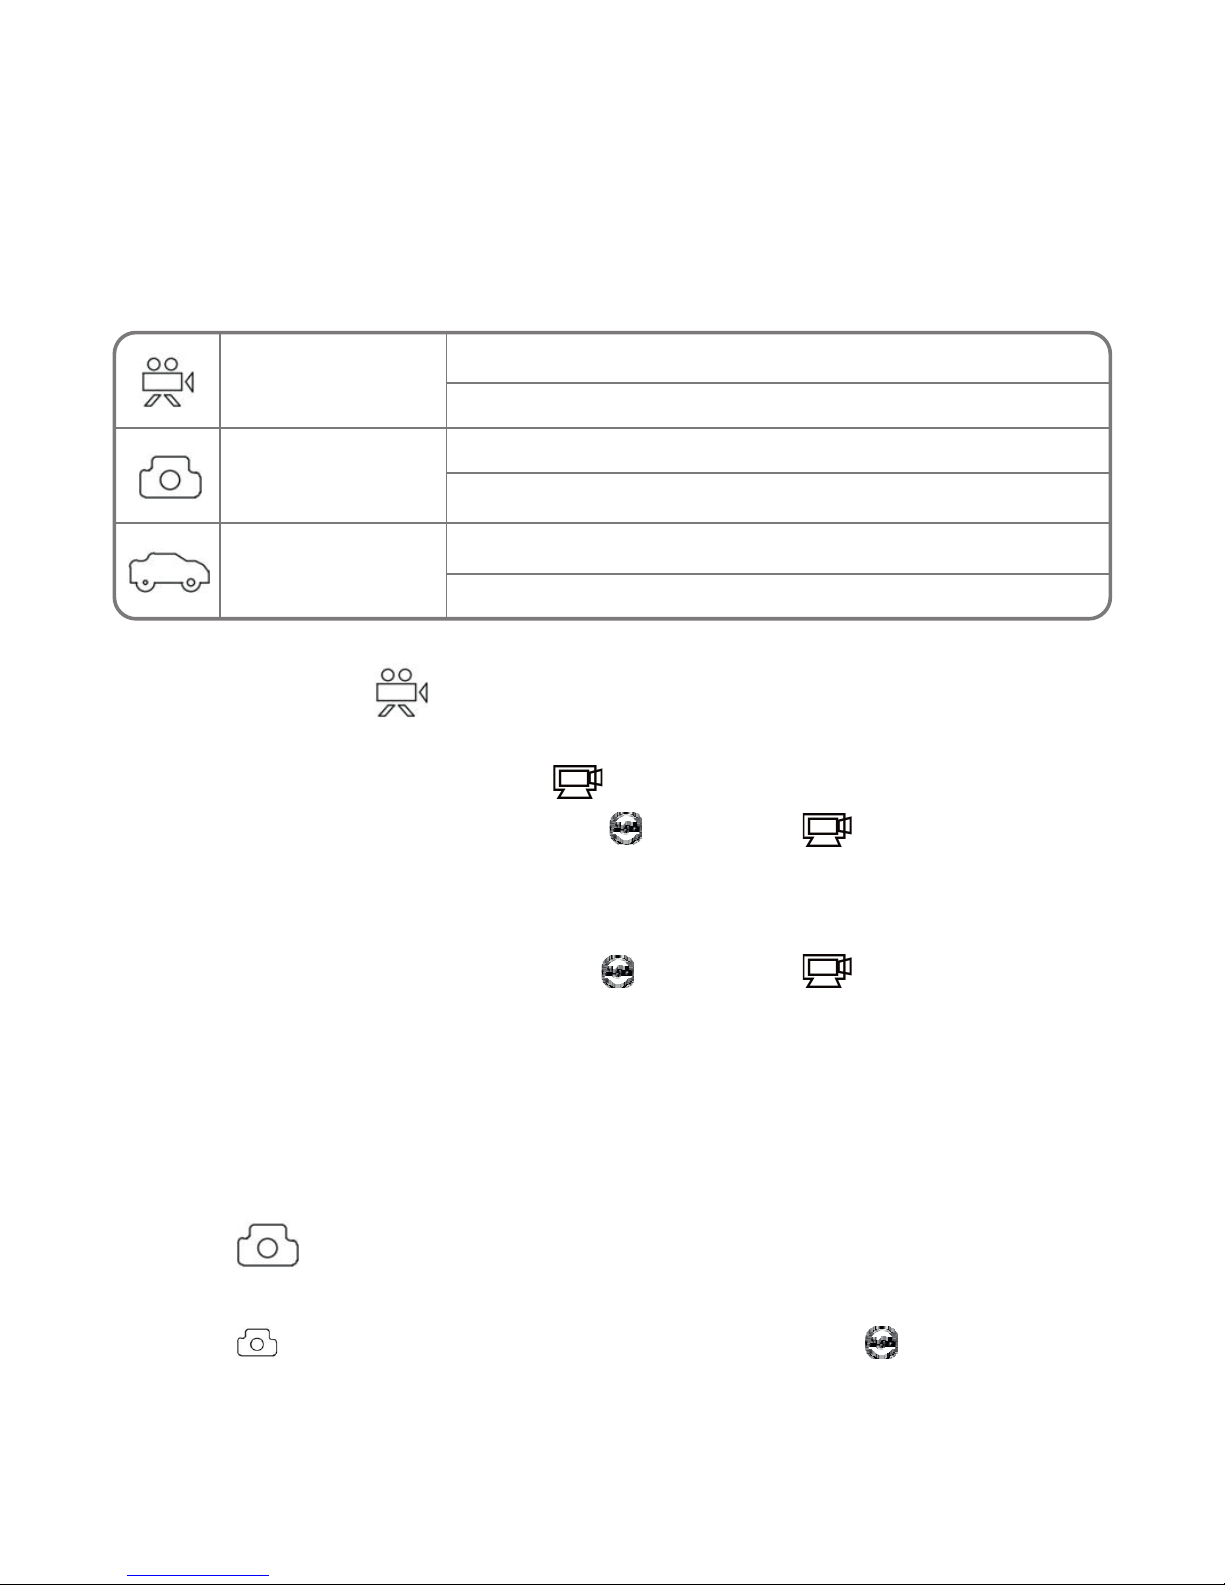
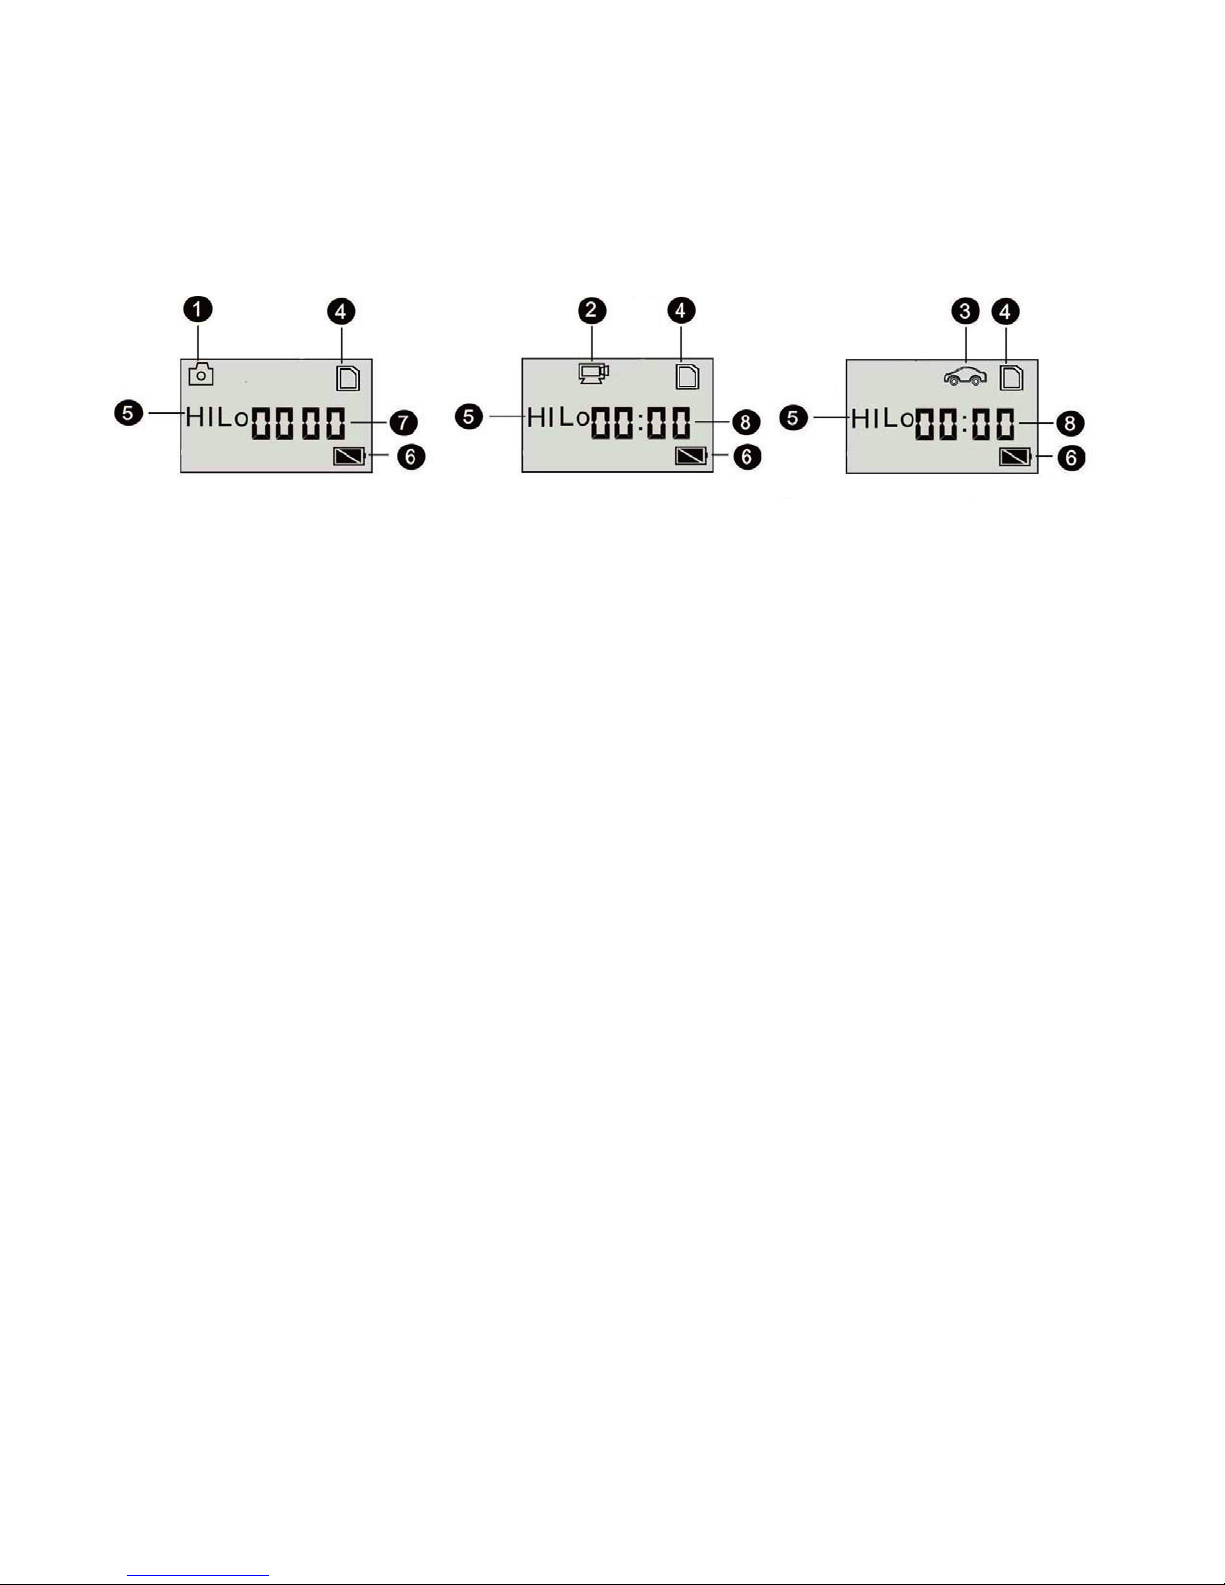
LCD Display
Turn on the Sport DV, the LCD will display the following status and settings:
1. Camera mode
2. Video recording mode
3. vehicle-mounted mode
4. TF card icon (display when loaded)
5. Resolution icon:
In camera mode, stands for 3.1 Mega Pixels (2048×1536), and in videoHI
recording and vehicle-mounted mode, it stands for 720P.
In camera mode, stands for 1.3 Mega Pixels (1280x1024), and in videoLO
recording and vehicle-mounted mode, it stands for 640P.
6. Battery icon: current battery level of the camera.
7. Counter, displays up to 9999.
8. Timer, displays minutes and second.
NOTE:
The above icons may vary according to the status of the DV.
5
Page 7

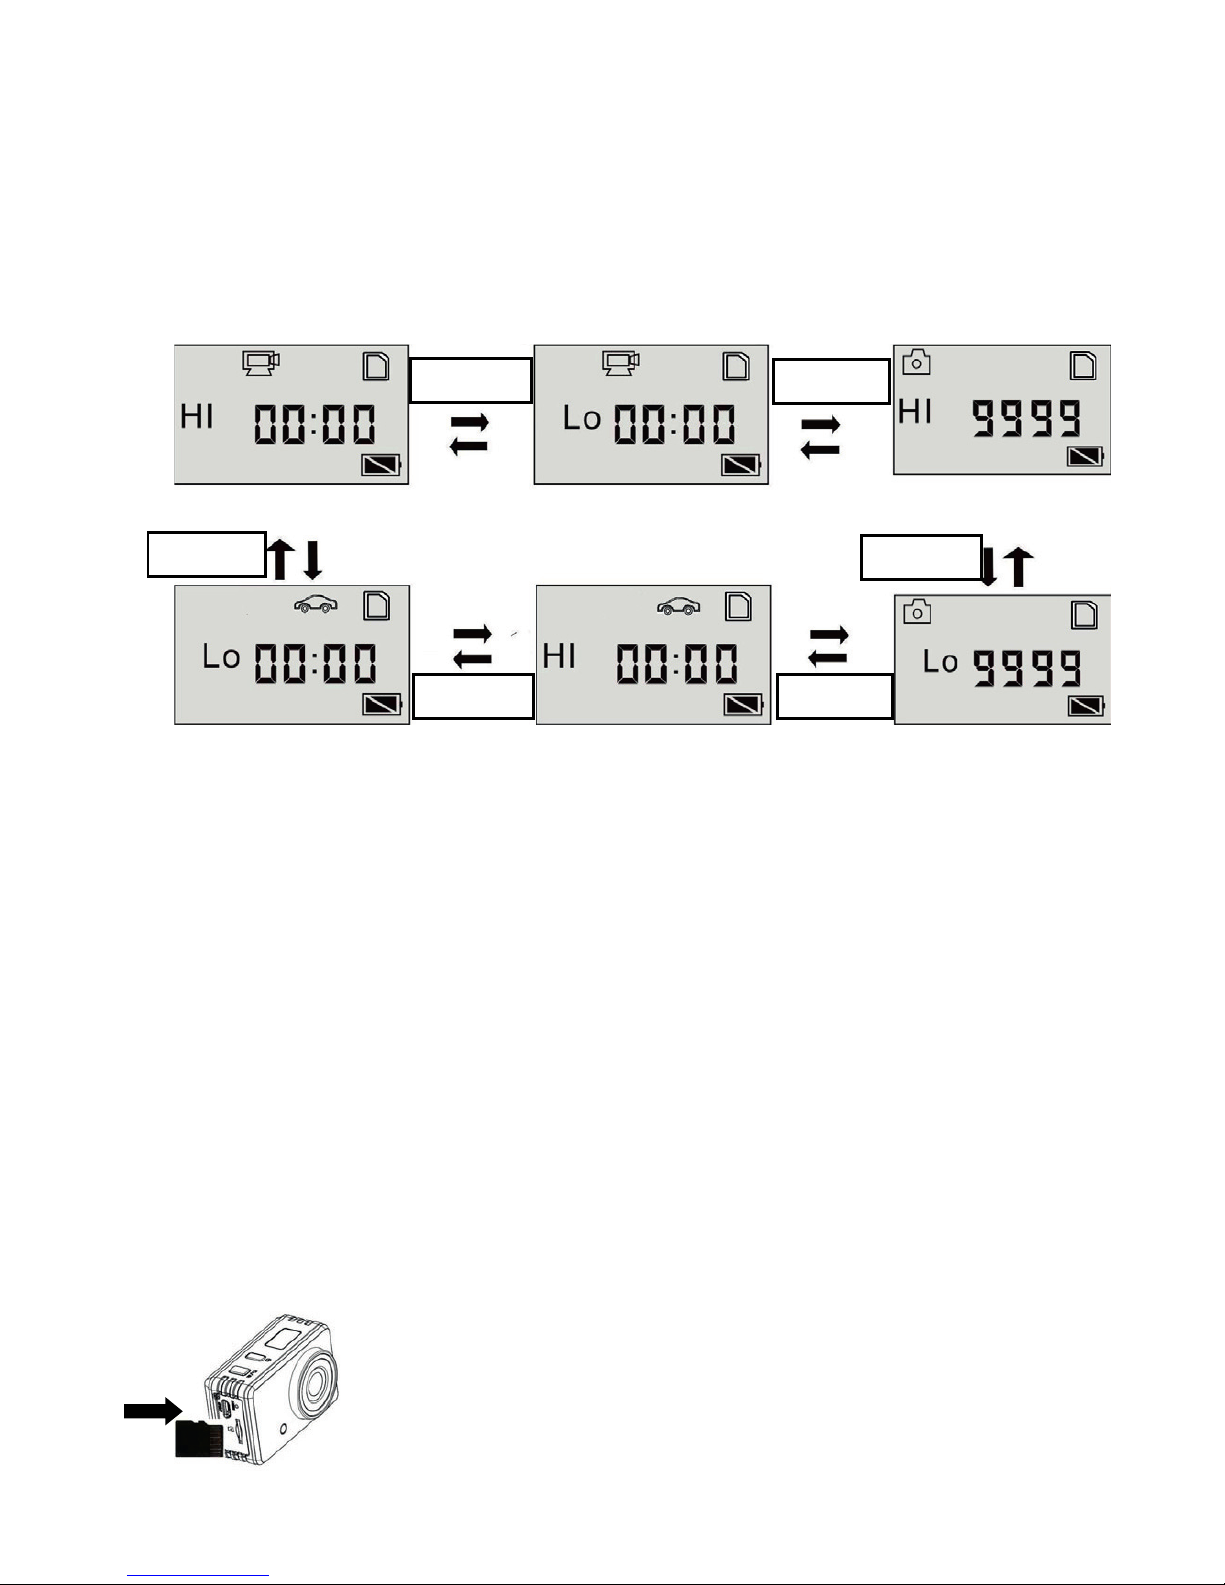
Working Mode Flow Chart
When you use the DV for the rst time,please:
Insert a micro SD or micro SDHC card, as shown in the following picture.
Vehicle-mounted mode Vehicle-mounted mode
Camera mode
Video recording mode Video recording mode
Camera mode
Mode
switch
Power
button
Power
button
Power
button
Mode
switch
Mode
switch
After turn on the DV, you can change the Power button/Mode switch to switch
the following modes in turn:
In video recording and vehicle-mounted mode , press the Shutter button
to start recording, Working Indicator Light ash .,and press it again to stop
In camera mode, press the Shutter button to take photo.
How insert microSD card?
High speed card at least Class 4 is recommended.
Turn off the DV before inserting or removing the card.
6
Page 8

The DV uses built-in rechargeable lithium battery. When the DV is off,
connect it to the PC via USB cable to charge the battery. During charging,
indicator light for charging will light on, and the indicator off when charging
completes.
NOTE:
When the DV is on, connecting it to the PC will not charge. It will not charge
until the DV turn off.
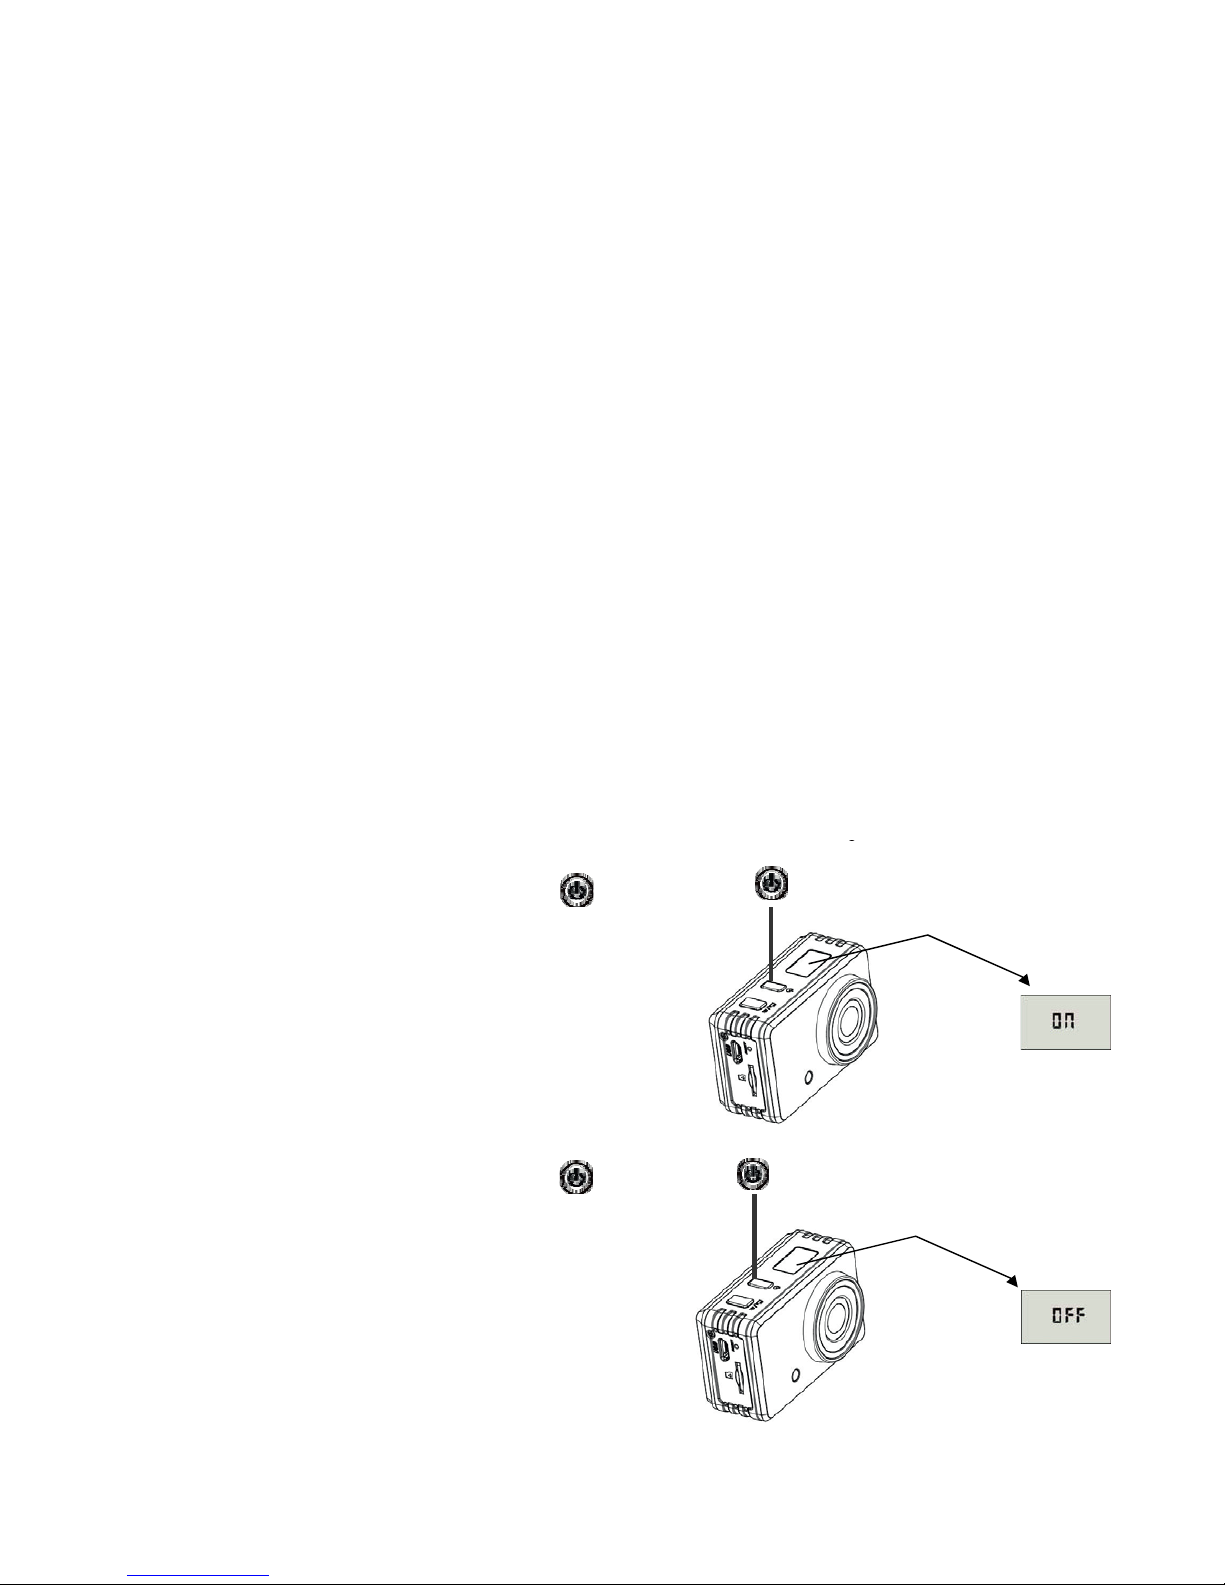
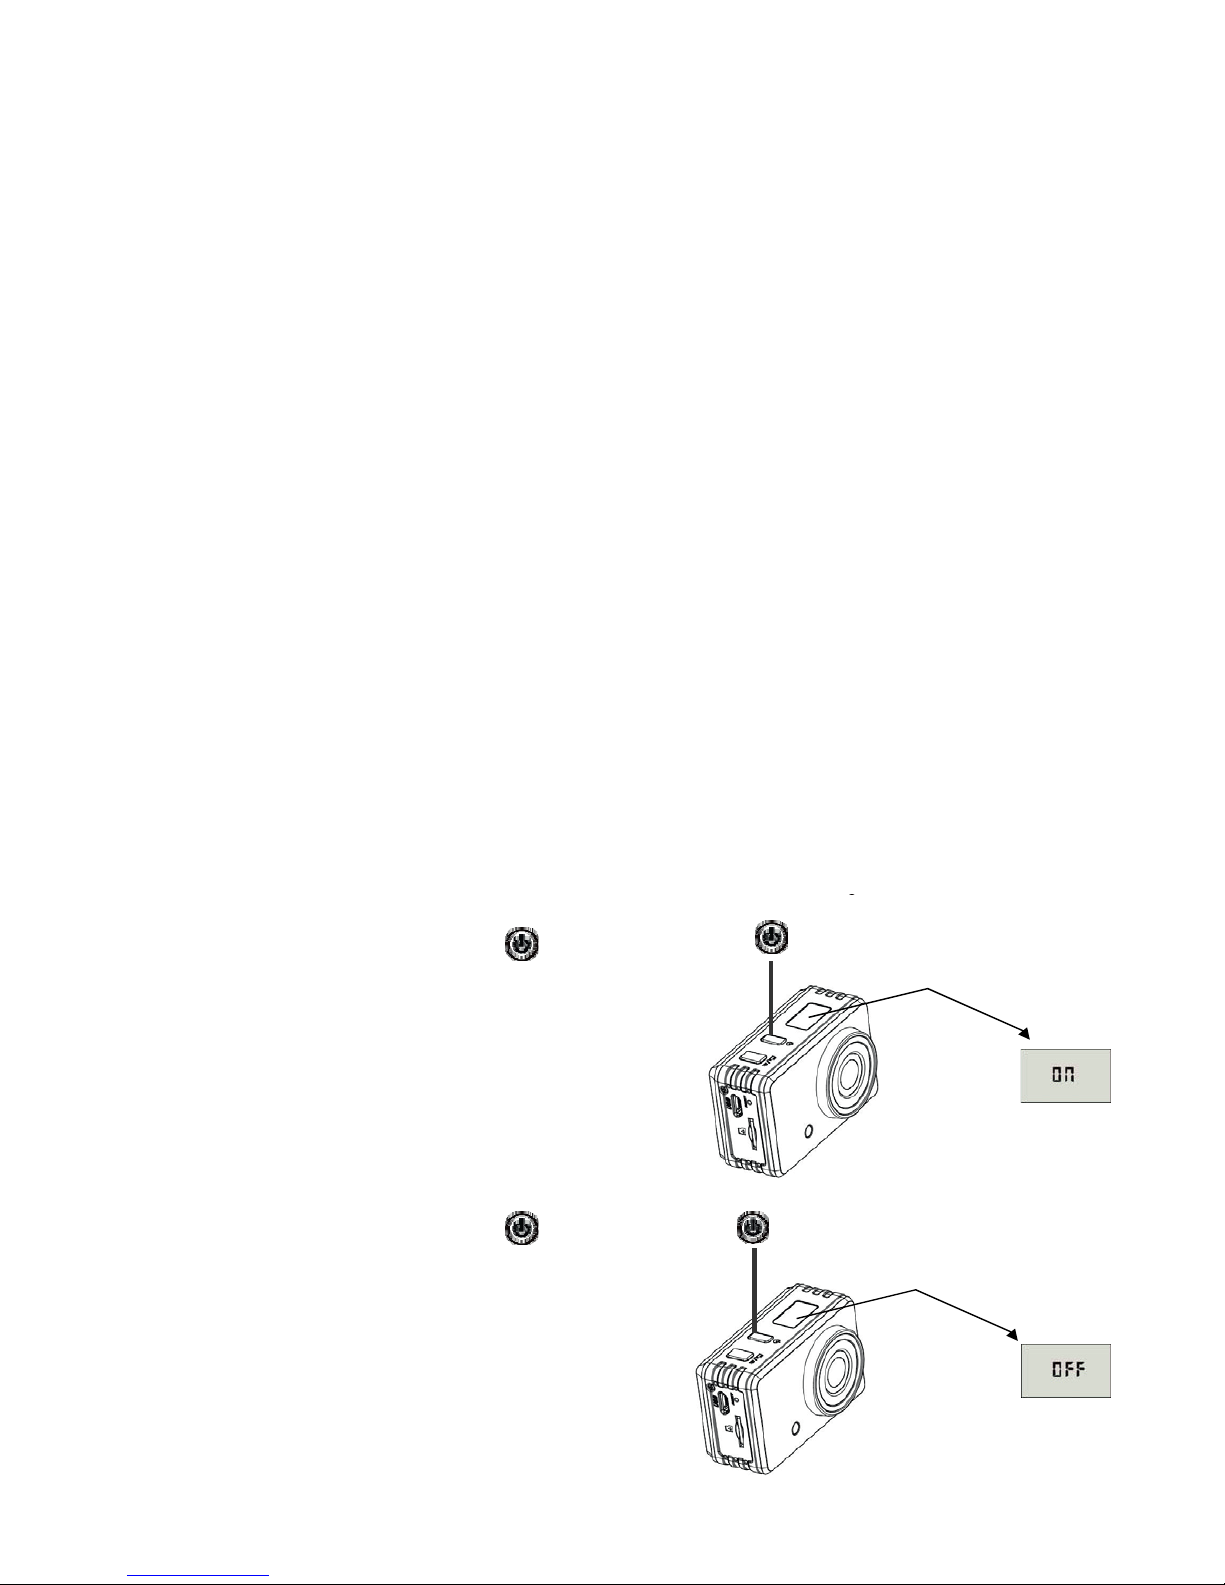
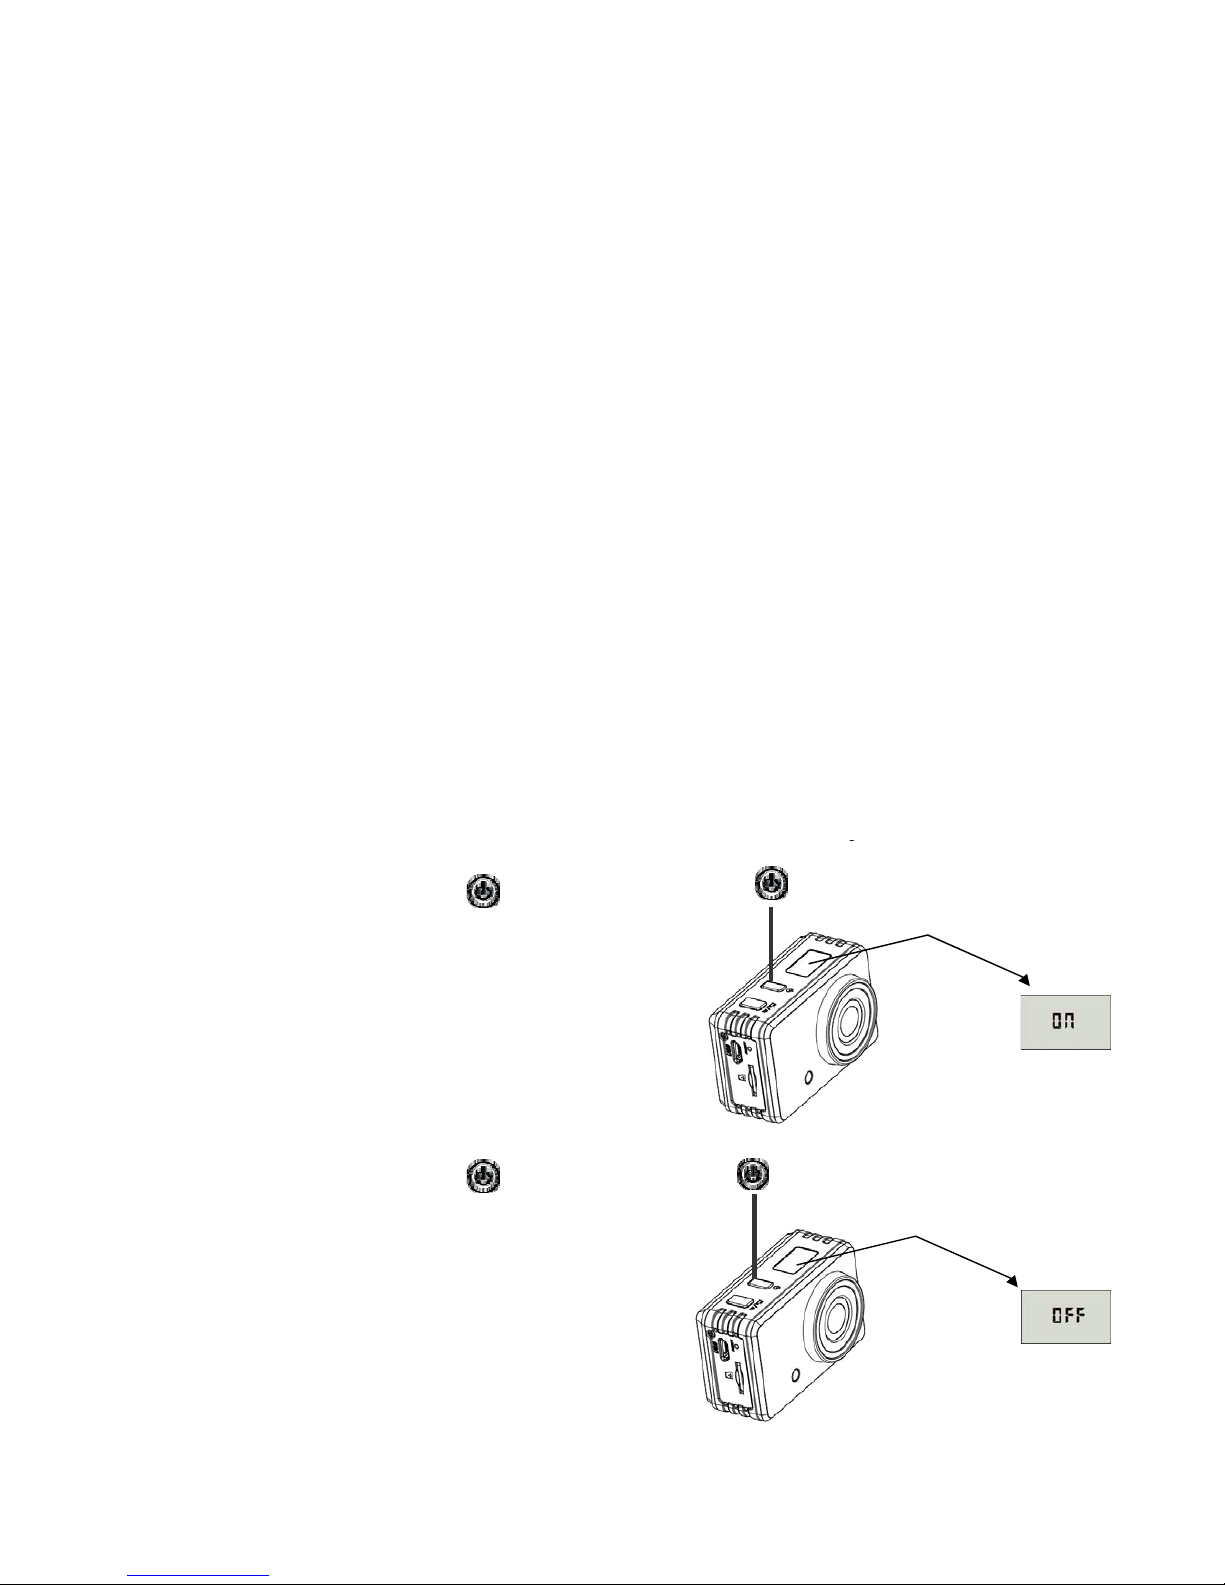
Turn on/off
1. Turn on:
Press and hold the button for about
2 seconds, LCD displays“ON” .
NOTE:
The DV will turn off automatically
if it is idle for 5 minutes.
1. Turn off:
Press and hold the button for about
2 seconds, LCD displays“OFF”.
Charging the battery
7
Page 9
Start to Use
1. Video recording
To record a video, please check whether the DV is under Video mode.
The icon is played on the screen .
Start recording: Press and release the button, the icon and [:]
displayed in LCD will ash. At the same time the blue indicator will ash
too, meaning the recording is in process.
Stop recording: Press and release the button, the icon and [:]
displayed in LCD will stop ashing. At the same time the blue indicator
will stop ashing either, meaning the recording is stopped.
When the TF card is full, or the battery runs out, the recording will stop
automatically, and the recorded video will be saved before the DV turns off.
2. Photo
To take a photo, please check whether the DV is under Camera mode.
The icon is played on the screen. Press and release the button, the blue
indicator will ash, meaning a photo is taken.(If you take photos more than
9999 copies, the LCD screen display only 9999).
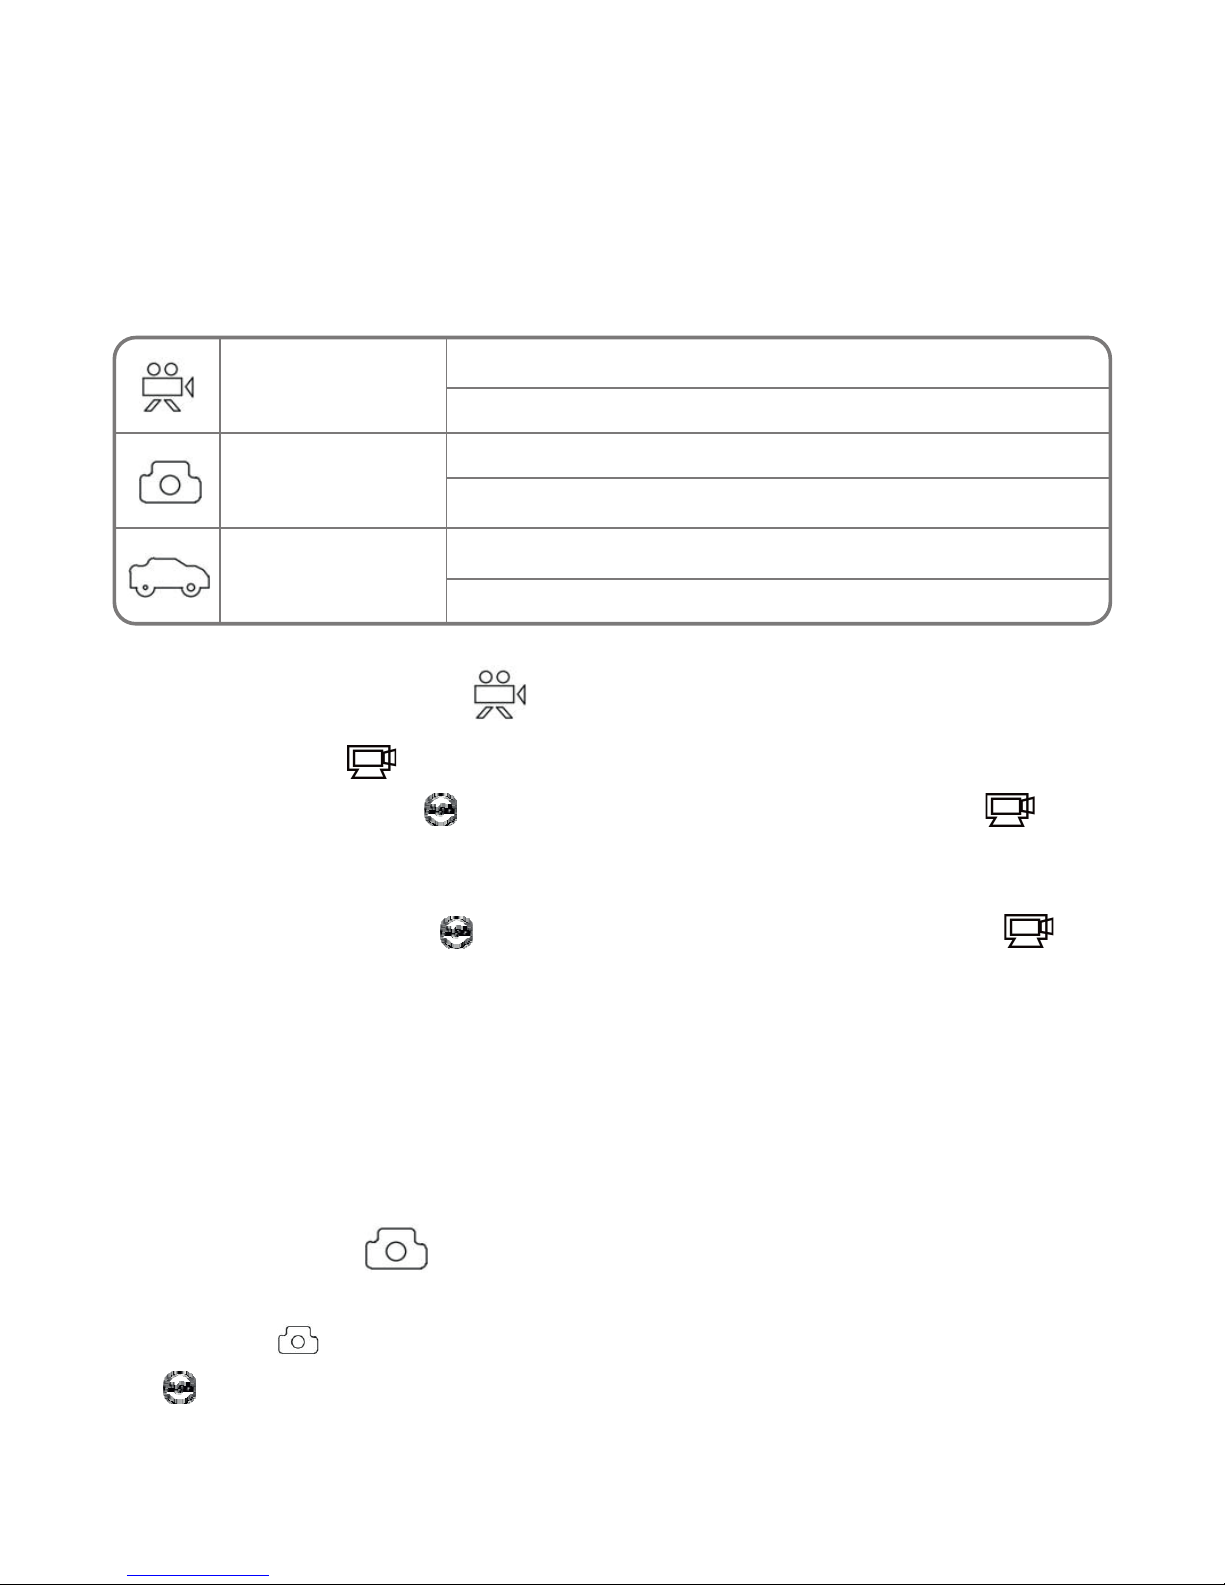
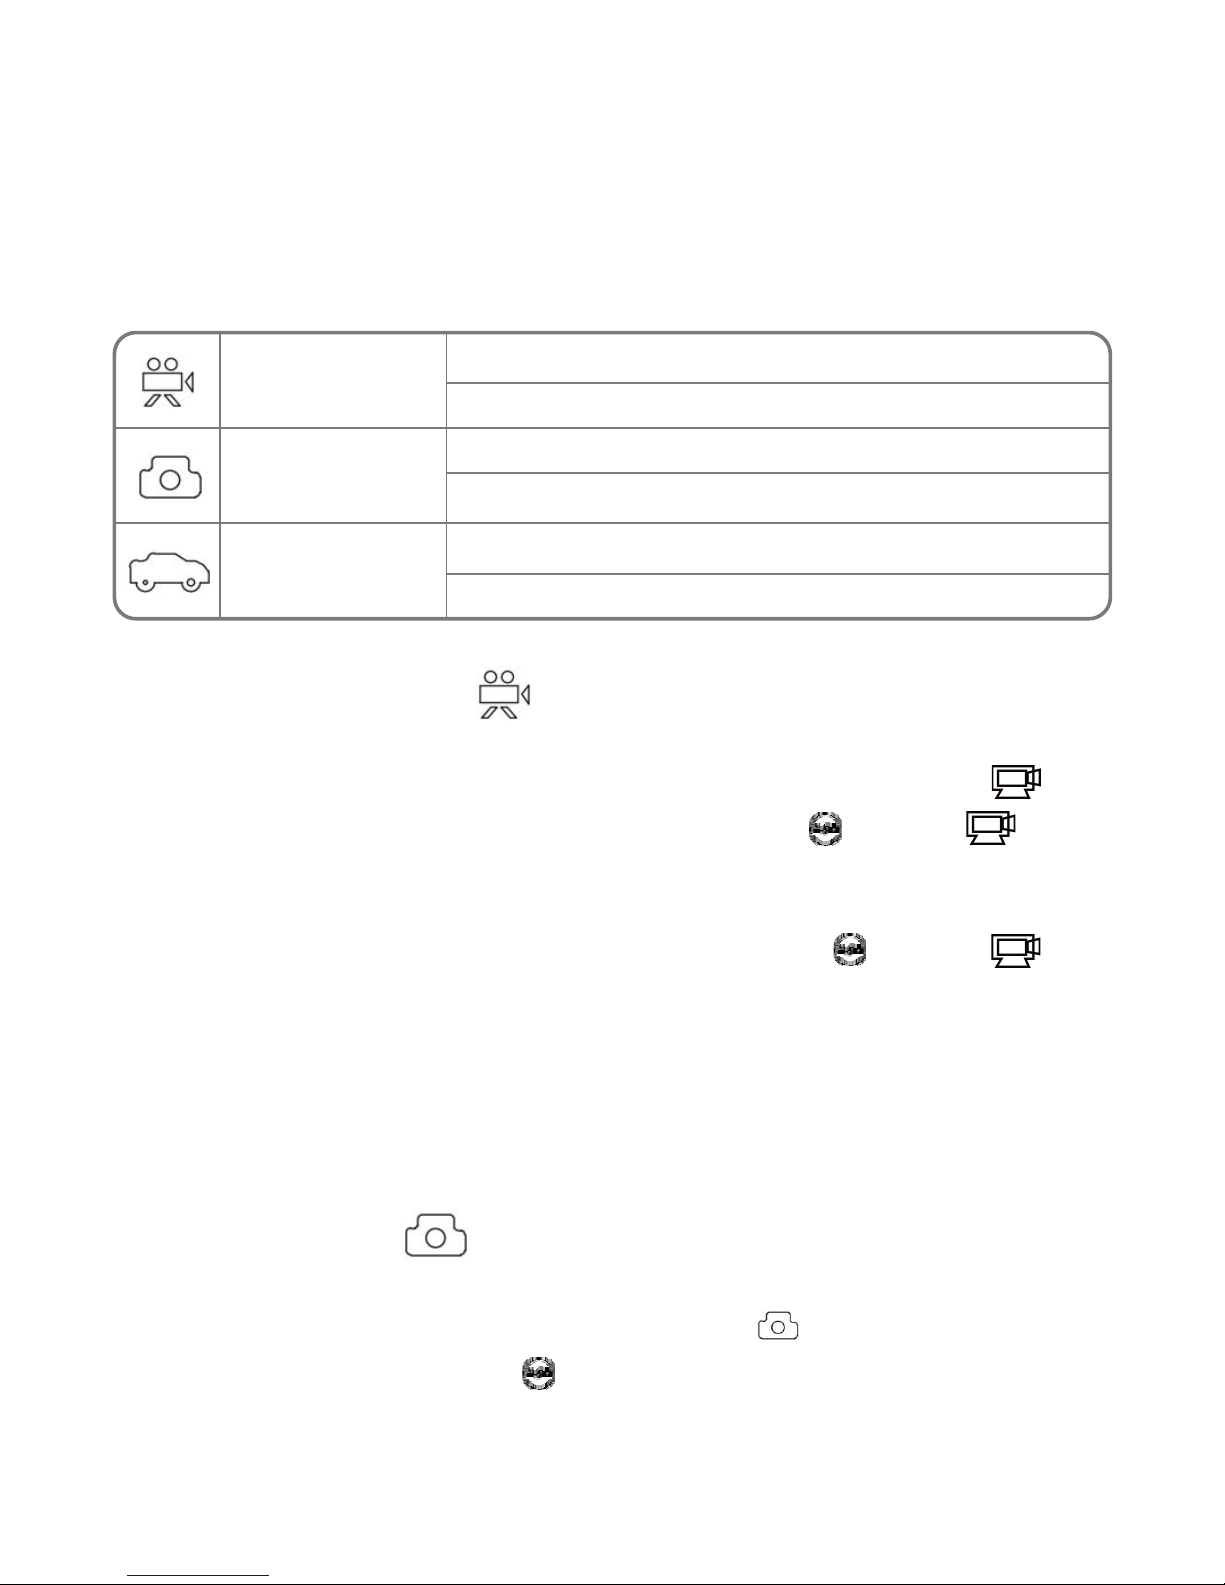
The DV provides different shooting modes. Conversion is available
via the mode switch after startup:
Vehicle-mounted
mode
Video recording
mode
Picture taking
mode
HI stands for 720P (1280x720,30 fps) video
Lo stands for 640P (640x480,60 fps) video
HI stands for 5M (2592 x 1944) resolution
Lo stands for 1M (1280x 960) resolution
HI stands for 720P (1280x720,30 fps) video
Lo stands for 640P (640x480,60 fps) video
8
Page 10

3. Vehicle-mounted recording
To record a video, please check whether the DV is under Vehicle-mounted
mode. The icon is played on the screen.
Start recording: Press and release the button, the icon and [:]
displayed in LCD will ash. At the same time the blue indicator will ash
too, meaning the recording is in process.
Stop recording: Press and release the button, the icon and [:]
displayed in LCD will stop ashing. At the same time the blue indicator
will stop ashing either, meaning the recording is stopped.
Press the shutter button once under the preview state to begin recording, save
a segment for recording every 3 minutes, then start to record the next segment
of video. When the storage card is full, the earliest segment of video will
be deleted to release the corresponding space for continuous recording.
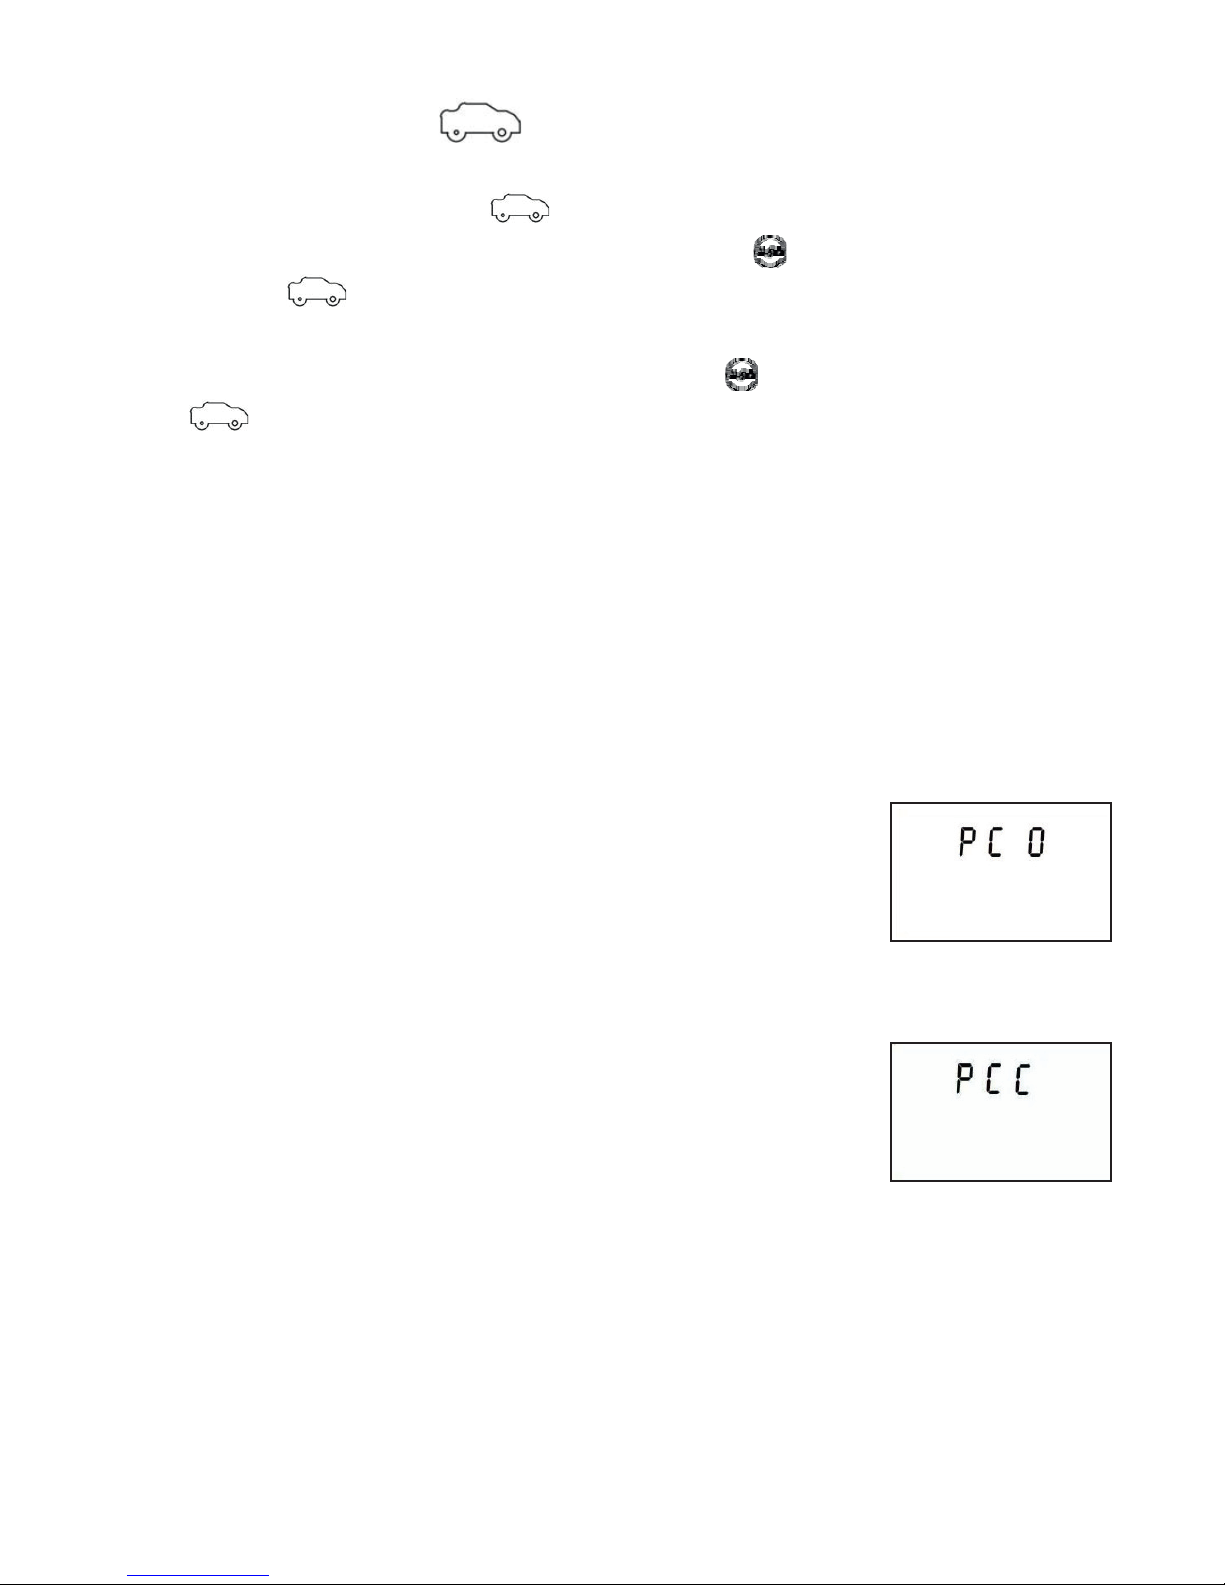
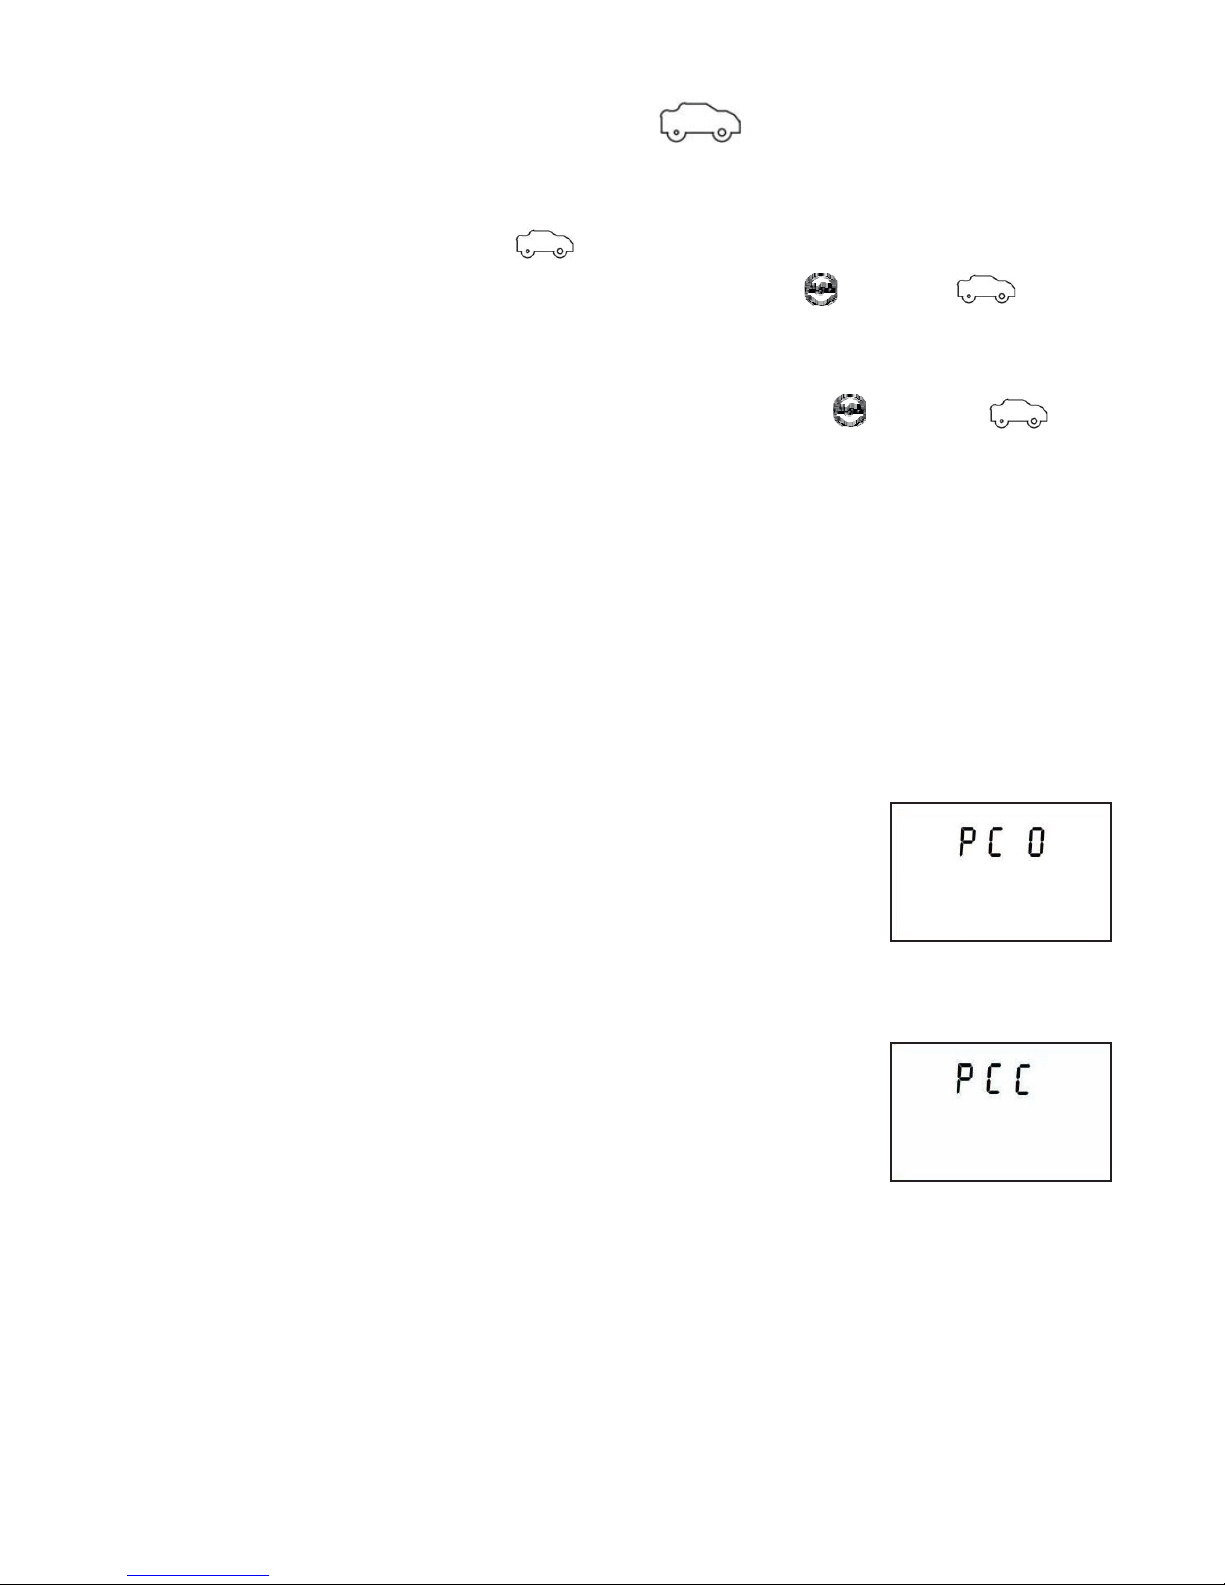
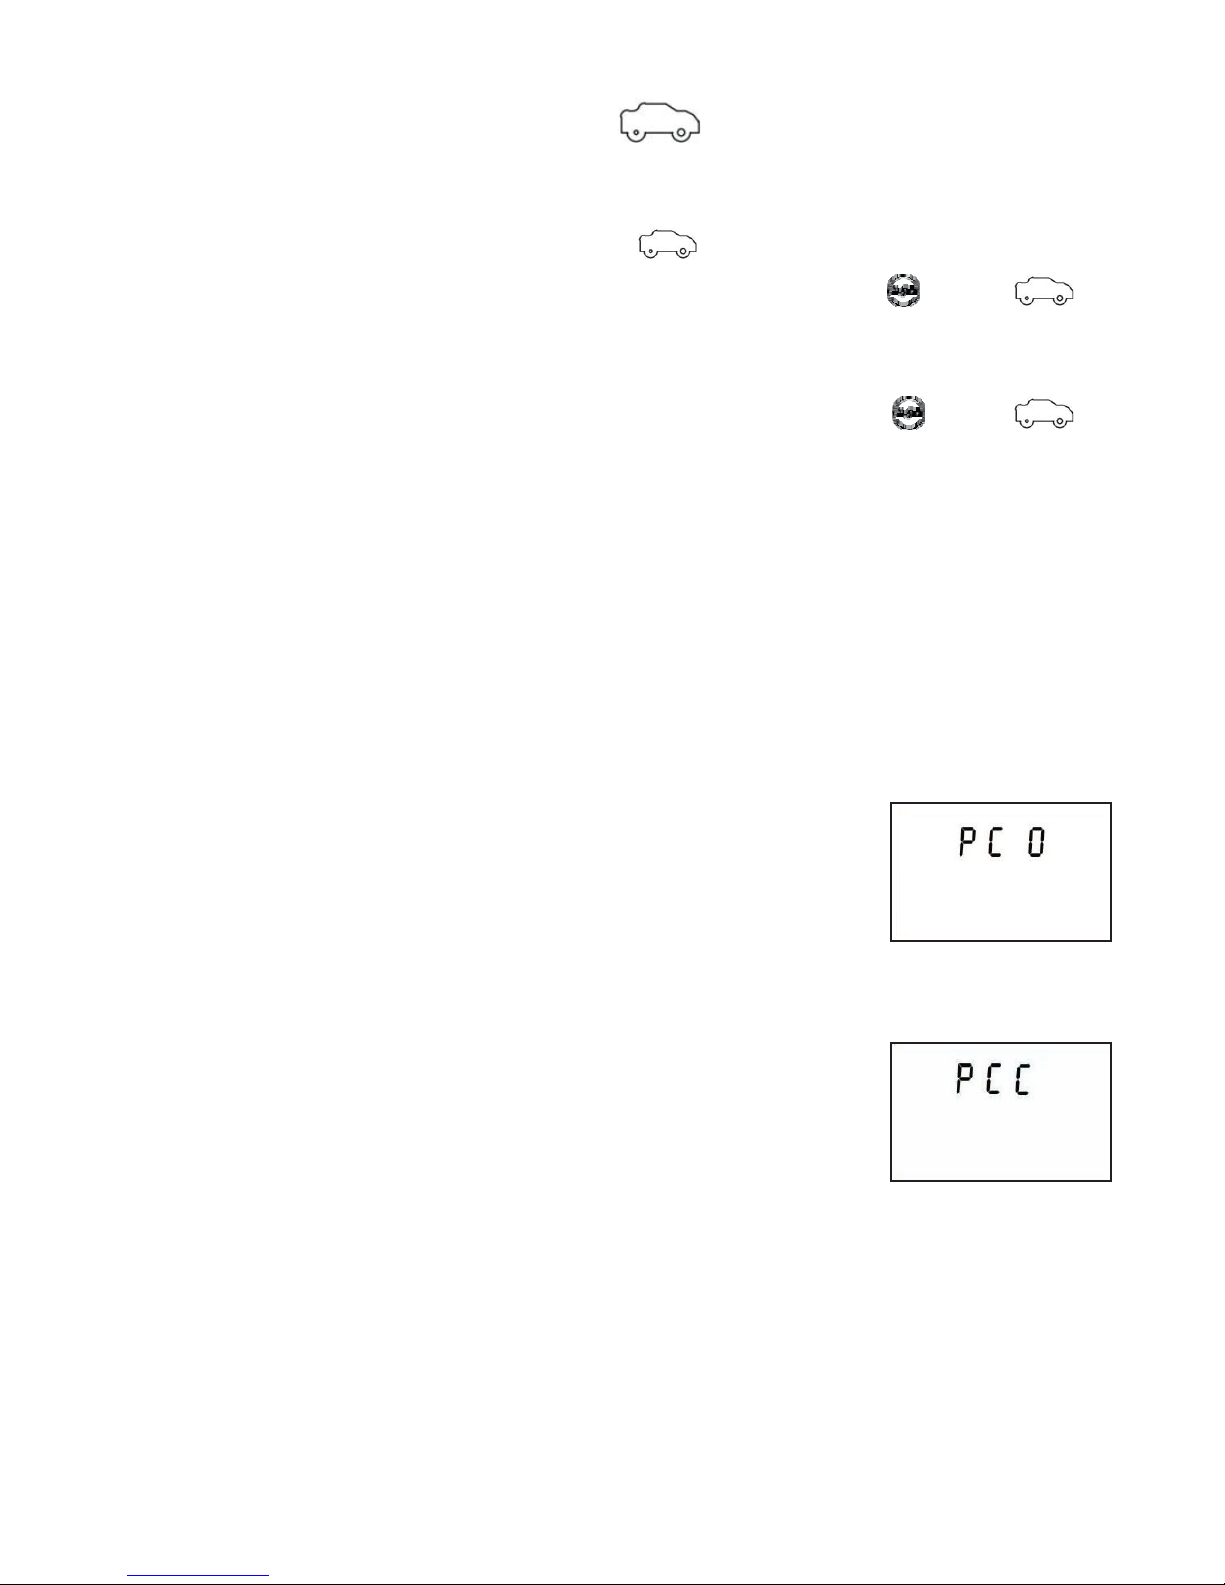
4. Connecting to PC
Turn on the DV and connect it to the USB port
of the PC via the attached USB cable.
The DV will enter U-disk mode and the LCD will
display [PCO] after connection:
Now you can view the photos or videos taken
by DV on PC.
In U-disk mode (PCO mode), press the Shutter
button to switch to web cam mode (PCC mode),
and the LCD will display [PCC].
Now you can start the web cam through application.
To return to U-disk mode (PCO mode), press
the button again.
NOTE:
Driver is not required for web cam mode (PCC mode) on Windows XP(SP3)
version or above.
9
Page 11

10
DE
SICHERHEIT
Schutz und Pflege der Ausrüstung
Schützen Sie Ihr Gerät und Zubehör von Begleit Wasser und Feuchtigkeit.
Dämpfung der elektrischen Ausrüstung können die schweren verursachen
Schäden können auch eine Gefahr für den Benutzer (Risiko Stromschlag).
Schützen Sie das Gerät vor starken Erschütterungen, Stürzen, Vibrationen.
Schützen Sie das Gerät vor hohen und niedrigen Temperaturen.
Stürze vermeiden, das Gerät nicht werfen, Punktion das Gehäuse.
Das Gerät nicht verbiegen.
Verwenden Sie nicht das Zubehör unbekannter Herkunft kann zu
Beschädigungen Gerät ein und aus der Herstellergarantie.
Wichtige Sicherheitshinweise
Beachten Sie unbedingt die folgenden Regeln. Bezeichnen sie als ältere
Kinder, die dieVorrichtung verwenden kann.
In Krankenhäusern und anderen medizinischen Einrichtungen kann
untersagt werden Verwendung von elektronischen Geräten. Befolgen Sie
immer diese Verbote.
Schalten Sie Ihr Gerät im Flugzeug für die Dauer des Fluges oder bei Start
und Landung, wzależności von Anweisungen des Service-Ebene
ausgestellt.
Schalten Sie das Gerät in der Nähe wichtig für elektronische Geräte, die
den Betrieb stören könnten jegliche Einmischung.
Versuchen Sie nicht, zu zerlegen, zu modifizieren oder zu reparieren das
Gerät. Immer solche Aufgaben zu betrauen autorisierten Fach.
Schützen Sie das Gerät vor starken Magnetstrahlung. Ein solches Feld kann
magnetische Datenträger beschädigen.
Das Gerät an Orten verwenden, nicht mit extrem hohen Temperaturen
oder in besonders gefährdeten Gebieten von Brand oder Explosion, zum
Beispiel an Tankstellen.
Überwachen die Verwendung der Geräte von den Kindern, lassen Sie sich
nicht mit dem Gerät spielen.
Page 12

Aussehen und Tasten
1. Auslöser
2. LCD-Display
3. Power-Taste
4. Linse
5. Ladekontrollleuchte (rot)
6. Mikrofon
7. Arbeitskontrolleuchte (blau)
8. Modusschalter
9. Mikro-USB-Anschluss
10. Mikro-SD-Kartenslot
11. Reset-Taste
11
Page 13

LCD-Display
Schalten Sie die DV an; das LCD-Display wird folgende Status-Informationen
und Einstellungen zeigen:
1. Kamera-Modus
2. Videoaufnahme-Modus
3. Fahrzeugmodus
4. TF-Karte-Symbol (gezeigt wenn aufgeladen)
5. Auösung-Symbol
Im Kamera-Modus steht HI für 3,1 Megapixel (2048×1536), und in
Videoaufnahme- und Fahrzeugmodus steht es für 720P (1280x720,30fps);
Im Kamera-Modus steht LO für 1,3 Megapixel (1280x1024), und in
Videoaufnahme- und Fahrzeugmodus steht es für VGA (640x480,60fps);
6. Batterie-Symbol: aktueller Batterieladezustand der Kamera
7. Zähler, zeigt bis zu 9999.
8. Timer, zeigt Minuten und Sekunden.
ACHTUNG!
Die oben beschriebenen Symbole können nach dem Stand der DV variieren.
12
Page 14
Arbeitsmodus Flow Chart
Wenn Sie die DV zum ersten Mal benutzen, bitte:
Legen Sie eine Mikro-SD oder Mikro SDHC-Karte ein, wie in der folgenden
Abbildung dargestellt.
Video-Vorschau-Modus Video-Vorschau-Modus
Kamera-Modus
Video-Vorschau-Modus Video-Vorschau-Modus
Kamera-Modus
Modus-
Schalter
Power-
Taste
Power-
Taste
Power-
Taste
Modus-
Schalter
Modus-
Schalter
Nach dem Einschalten der DV, können Sie die Power-Taste / Modus-Schalter
drücken, um zwischen den folgenden Modi zu wechseln:
Im Videoaufnahme- und im Fahrzeugmodus drücken Sie den Auslöser, um die
Aufnahme zu starten; Arbeitskontrollleuchte blinken; und drücken Sie ihn
erneut, um zu stoppen.
Im Kamera-Modus, drücken Sie den Auslöser, um Fotos zu machen.
microSD-Karte
High-Speed-Karte, mindestens Klasse 4, empfohlen.
Schalten Sie die DV aus vor dem Einlegen oder Entfernen der Karte.
13
Page 15
Die DV nutzt eingebaute wiederauadbare Lithium-Batterie.
Wenn die DV ausgeschaltet ist, schließen Sie sie an den PC über USB-Kabel
und die DV wird eingeschaltet. Bitte schalten Sie die DV aus, und die
Ladekontrollleuchte leuchtet auf. Während der Auadung leuchtet die
Ladekontrollleuchte auf, und wenn der Ladevorgang beendet wird, wird
die Ladekontrollleuchte ausgeschaltet.
ACHTUNG:
Wenn die DV eingeschaltet ist, wird das Auaden nicht nach dem Anschließen
an den PC starten. Das Auaden ndet erst nach dem Ausschalten der DV statt.
Ein-/Ausschalten
2. Ausschalten:
Drücken und 3 Sekunden halten ,
LCD-Display zeigt “OFF” .
1. Einschalten:
Drücken und 3 Sekunden halten ,
LCD-Display zeigt “ON”
ACHTUNG!
Die DV wird automatisch nach
5 Minuten ohne Tätigkeit ausgeschaltet.
Auaden der Batterie
14
Page 16
Benutzung
1. Videoaufnahme-Modus
Um ein Video aufzunehmen, überprüfen Sie bitte, ob die DV im Video-Modus
ist. Das Symbol wird auf dem LCD-Display gezeigt.
Aufnahme starten: Die Taste drücken und loslassen, das Symbol
und [:] auf dem LCD-Display blinken. Zur gleichen Zeit blinkt die blaue
Kontrollleuchte auch, was bedeutet, die Aufnahme läuft.
Aufnahme stoppen: Die Taste drücken und loslassen, das Symbol
und [:] auf dem LCD-Display hören auf zu blinken. Zur gleichen Zeit hört die
blaue Kontrollleuchte auf zu blinken, was bedeutet, die Aufnahme wird
gestoppt.
Wenn die TF-Karte voll ist oder die Batterie leer ist, wird die Aufnahme
automatisch gestoppt, und das aufgenommene Video wird gespeichert vor
Ausschalten der DV.
2. Kamera-Modus
Um ein Foto zu machen, überprüfen Sie bitte, ob die DV im Kamera-Modus ist.
Das Symbol wird auf dem LCD-Display gezeigt.
Die Taste drücken und loslassen, die blaue Kontrollleuchte blinkt, was
bedeutet, ein Foto wird gemacht. (Wenn Sie mehr als 9999 Fotos machen,
zeigt das LCD-Display nur 9999).
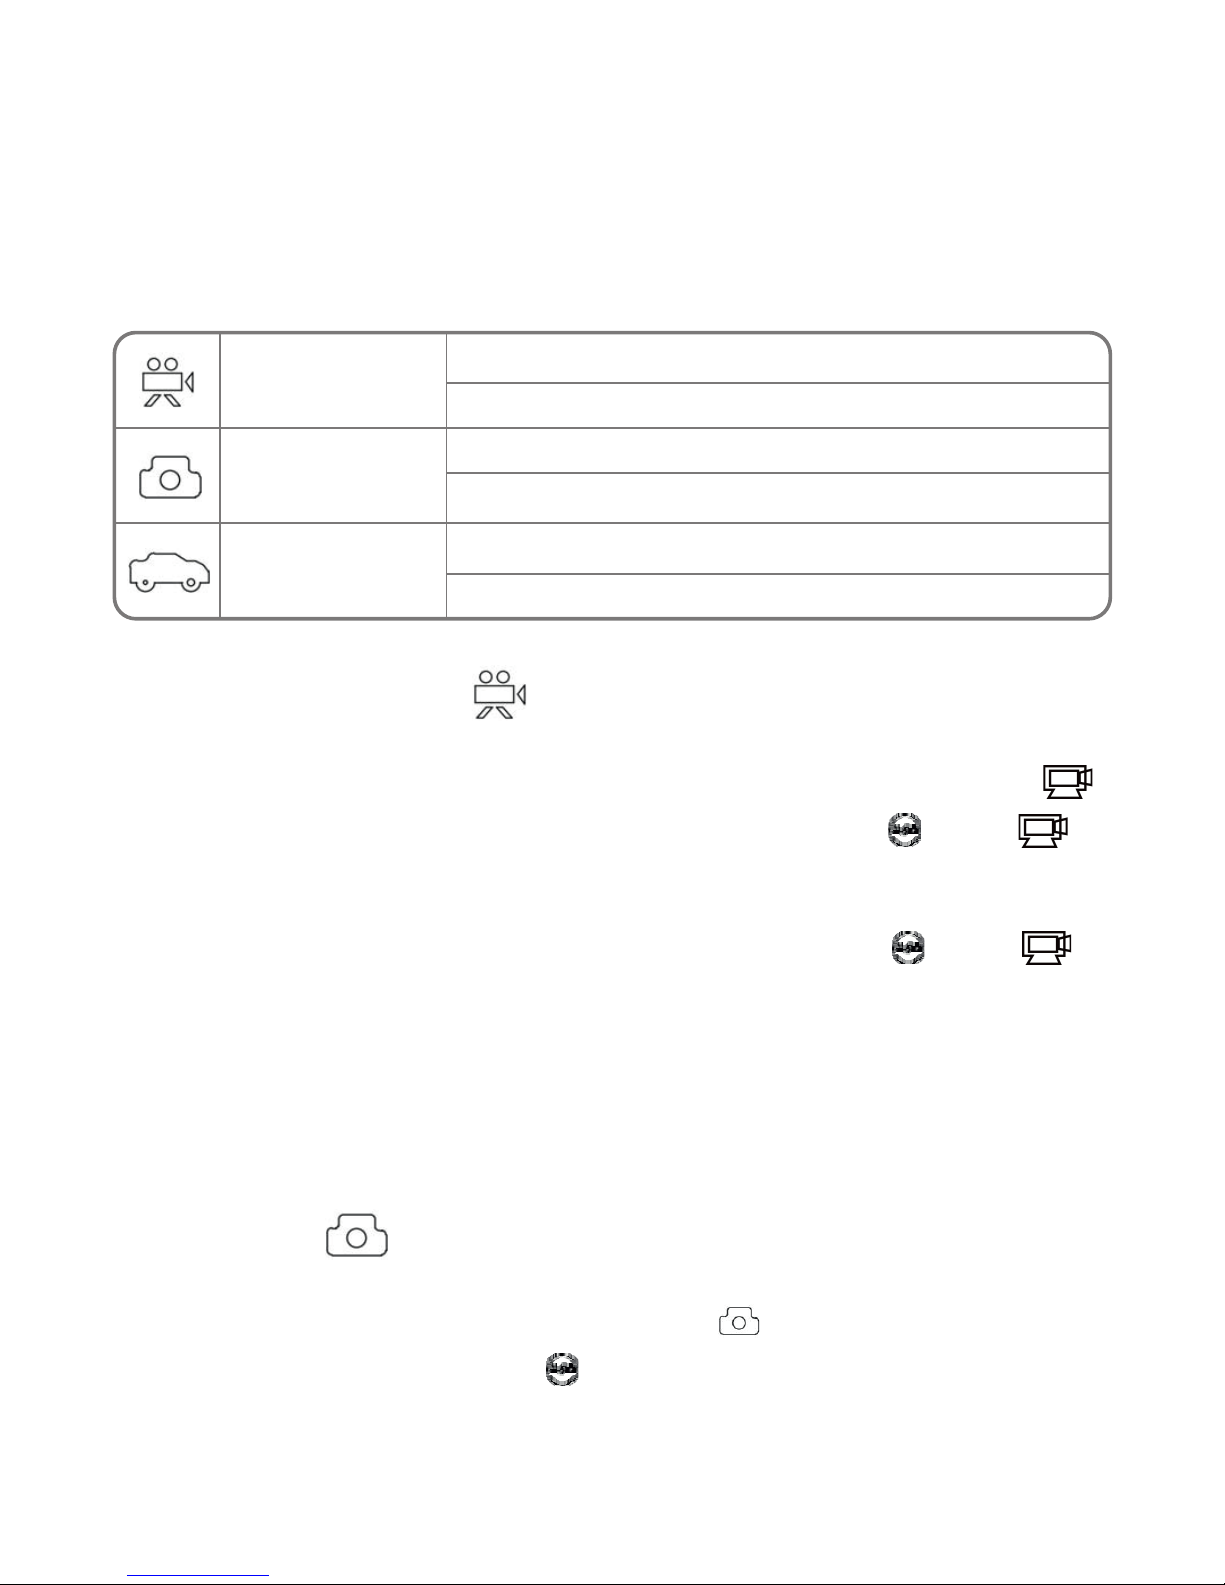
Die DV bietet verschiedene Aufnahmemodi. Umstellen ist über die ModusSchalter nach Starten möglich:
Fahrzeug
-Modus
Videoaufnahme
-Modus
Fotos
-Modus
HI steht für 720P (1280x720, 30 fps) Video
LO steht für VGA (640x480, 60 fps) Video
HI steht für (2048×1536) Auösung
LO steht für (1280×1024) Auösung
HI steht für 720P (1280x720, 30 fps) Video
LO steht für VGA (640x480, 60 fps) Video
15
Page 17

3. Fahrzeugmodus
Um ein Video aufzunehmen, überprüfen Sie bitte, ob die DV
im Fahrzeugmodus ist.
Das Symbol wird gezeigt.
Aufnahme starten: Die Taste drücken und loslassen, das Symbol
und [:] auf dem LCD-Display blinken. Zur gleichen Zeit blinkt die blaue
Kontrollleuchte auch, was bedeutet, die Aufnahme läuft.
Aufnahme stoppen: Die Taste drücken und loslassen, das Symbol
und [:] auf dem LCD-Display hören auf zu blinken. Zur gleichen Zeit hört die
blaue Kontrollleuchte auf zu blinken, was bedeutet, die Aufnahme wird
gestoppt.
Drücken Sie den Auslöser einmal im Vorschau um die Aufnahme zu starten,
speichern Sie ein Segment der Aufnahme alle 3 Minuten, dann starten Sie das
nächste Segment der Video aufzunehmen. Wenn die Speicherkarte voll ist, wird
der früheste Videosegment gelöscht, um den entsprechenden Raum für das
kontinuierliche Aufnehmen freizugeben.
4. Anschluss an PC
Schalten Sie die DV ein und schließen Sie sie an den
USB-Anschluss des PC über das USB-Kabel
(angeschlossen).
Die DV wird ins U-Disk-Modus eingehen und das
LCD-Display wird nach dem Anschluss folgendes [PCO]
Jetzt können Sie die Fotos oder Videos von der DV
auf dem PC anschauen.
In U-Disk-Modus (PCO-Modus), drücken Sie den
Auslöser um in den Web-Cam-Modus (PCC-Modus)
zu wechseln, und das LCD-Display wird [PCC]:
Jetzt können Sie die Web-Cam durch die App starten.
Um nach U-Disk-Modus (PCO-Modus) zurückzukehren, drücken Sie die Taste
wieder.
ACHTUNG!
Treiber ist nicht für die Web-Cam-Modus (PCC-Modus) auf Windows XP (SP3)
oder höher erforderlich.
16
Page 18

17
CS
BEZPEČNOST
Ochrana a údržba zařízení
Chraňte zařízení a příslušenství před vodou a vlhkostí.
Při styku elektrického zařízení s vodou může dojít nejen k jeho
závažnému poškození, ale vzniká také riziko pro uživatele (riziko úrazu
elektrickým proudem).
Chraňte zařízení před silnými otřesy, pádem, vibracemi.
Chraňte zařízení před vysokými a nízkými teplotami.
Dávejte pozor, aby zařízení neupadlo, neházejte s ním, neprorážejte kryt.
Neohýbejte zařízení.
Nepoužívejte příslušenství neznámého původu, které může způsobit
poškození zařízení, na něž se nevztahuje záruka výrobce.
Důležité bezpečnostní pokyny
Seznamte s nimi také starší dětí, které mohou zařízení používat.
V nemocnicích a jiných zdravotnických zařízeních může platit zákaz
používání elektronických zařízení.
Vypínejte zařízení v letadle po celou dobu trvání letu nebo při startu
a přistání, v závislosti na pokynech obsluhy letadla.
Vypínejte zařízení v blízkosti důležitých elektronických zařízení, jejichž
provoz by mohl být rušen případnými interferencemi.
Nepokoušejte se rozšroubovávat, pozměňovat ani samostatně opravovat
zařízení. Tyto činnosti vždy svěřte autorizovanému servisu.
Chraňte zařízení před silným magnetickým zářením.Takovéto pole může
poškodit magnetické paměťové nosiče.
Nepoužívejte zařízení v místech s velmi vysokou teplotou nebo
v oblastech s vysokým rizikem požáru nebo výbuchu, apříklad
na benzínových stanicích.
Používají-li zařízení děti, mějte je pod dohledem a nenechte je hrát si
s zařízení o samotě.
Page 19
Vzhled a tlačítka
1. Tlačítko spouště
2. Wyświetlacz LCD
3. Tlačítko napájení
4. Objektiv
5. Indikator (dioda) nabíjení (rudý)
6. Mikrofon
7. Indikator (dioda) práce Kamery DV (modrá)
8. Přepínač režimů
9. micro-USB konektor
10. Slot MicroSD karet
11. Tlačítko Reset
18
Page 20

LCD obrazovka
Po zapnutí Dv kamery na displeji se zobrazí nasledující stav a možnosti
nastavení:
1. Režim fotoaparatu
2. Režim video nahravání
3. Režim auto rekordéru
4. Ikona microSD karty (jen, když je karta uvnítř)
5. Ikona rozlišení:
V režimu fotoaparatu ikona HI znamena rozlišení 3,1 megapixelů
(2048×1536), v režimu video nahravání a v režimu autorekordéru znamena
rozlišení 720p (1280x720, 30 snímků/s).
V režimu fotoaparatu ikona LO znamena rozlišení 1,3 megapixelů
(1280x1024), v režimu video nahravaní a v režimu autorekorderu znamena
rozlišení 720P (VGA (640x480, 60 snímků/s).
6. Ikona baterie: aktuální stav nabití baterie videokamery
7. Počítadlo, zobrazí hodnoty až do 9999.
8. Hodin, zobrazuje minuty a sekundy.
POZOR!
Tyto ikony se mohou lišit v závislosti na stavu váše DV kamery.
19
Page 21

Režimy DV videokamery
Při prvním použití DV kamery:
Vložte micro SD nebo micro SDHC kartu, jak je znazorněno na obrázku.
Režim auto rekordér Režim auto rekordér
Režim fotoaparatu
Režim nahrávání Režim nahrávání
Režim fotoaparatu
Přepínač
režimů
Tlačítko
napájení
Tlačítko
napájení
Tlačítko
napájení
Přepínač
režimů
Přepínač
režimů
Zapnuli-jste kameru, můžete si zvolit nasledující režimy stisknutim tlačitek
POWER/MODE:
V režimu nahrávání nebo autorekorederu stiskněte tlačitko spouště pro
zahájení nahrávání, LED bude blikát, pro zastavení nahrávání stiskněte tlačítko
znovu.
Chcete-li udělat snímek, stiskněte tlačitko spouště v režimu fotoaparatu.
Jak vložte a microSD kartu?
Doporučujeme kartu s přenosovou rychlostí aspon 4 třídy.
Před vložením karty vypněte DV kameru.
20
Page 22
DV kamera FreeAction je vybavena vestavěnou dobíjecí lithiovou baterií.
Pokud je DV vypnutá, připojte jej k počítači pomocí USB kabelu, kamera
se zapne.
Vypněte kameru, rozesvíti se dioda nabijení. Během nabíjení dioda svítí,
vypne se, když bude nabíjení dokončeno.
POZOR!
Baterie se nabíje, pokud při připojení kamery k počítačí bude zapnuta.
Nabijení začne po vypnutí DV kamery.
Zapnutí/vypnutí
2. Vypnutí:
Stiskněte a podržte tkačítko
po dobu asi 3 sekund, na displeji
se zobrazí OFF.
POZOR!
DV kamera se automaticky vypne,
ne bude-li se použivat po dobu 5 minut.
1. Zapnutí:
Stiskněte a podržte tkačítko
po dobu asi 3 sekund, na displeji
se zobrazí ON.
Nabíjení baterie
21
Page 23

Používání
1. Režim nahrávání
Chcete-li připravít video, ujistěte se, že je zařízení v režimu nahrávání.
Na displeji se zobrazí ikona .
Zahajení nahrávání: Stiskněte a uvolněte tlačítko , ikona a [:]
zobrazena na LCD displeji začne blikat, což znamena že je nahrávání zahajeno.
Konec nahrávání: Stiskněte a uvolněte tlačitko , ikona a [:] zobrazena
na LCD displeji přestane blikat, což znamena konec nahrávání.
Když je microSD karta plná nebo je baterie vybitá, nahrávání se automaticky
výpne a video se automaticky uloži před vypnutím.
2. Režim fotoaparatu
Chcete-li udělat snímek, ujistěte se, že je zařízení v režimu fotoaparátu. Na
displejí se zobrazí ikona .
Stiskněte a uvolněte tlačítko , modra dioda začne blikat, což znamena
udělaní snímku. Pokud uložite víc než 9999 snímků, čítač zobrazí jen hodnotu
9999.
DV kamera nabízí různé režimy snímání. Nastavení přepnete pomocí přepinače
režimů:
Režim
autorekorderu
Režim
video nahrávání
Režim
fotoaparatu
HI znamena nahrávání v režimu 720P (1280x720, snímků/s)
LO znamena nahrávání v režimu VGA (640x480, snímků/s)
HI znamena 3,1 megapixelů (2048×1536)
LO znamena 1,3 megapixelů (1280x1024)
HI znamena nahrávání v režimu 720P (1280x720, 30 snímků/s)
LO znamena nahrávání v režimu VGA (640x480, 60 snímků/s)
22
Page 24
3. Režim autorekorderu
Chcete.li nahrávat video, ujistěte se, že DV kamera je v režimu autorekorderu.
Na displeji se zobrazi ikona .
Zahajení nahrávání: Stiskněte a uvolněte tlačitko , zobrazená na LCD
displeji ikona a [:] začne blikát. Současně začne blikat modrá dioda, což
znamena nahrávání.
Konec nahrávání: Stiskněte a uvolněte tlačitko , zobrazená na LCD displeji
ikona a modrá dioda přestane blikat, což znamena konec nahrávání.
V režimu přehrávání stiskněte jednou tlačitko spouště pro spuštění nahrávání.
Kamera bude nahrávat časti videa o délce 3 minuty, pak začne nahrávát další
část videa. Když je pamětová karta plná, nejstarší kousek nahrávky je
odstraněný, aby se uvolnil prostor pro nepřetržité nahrávání.
4. Připojení k počitači
Zapnete kametu a pomocí USB kabelu připojte
jej k USB konektoru na počítači.
Kamera se přepne k režimu velkokapacitní paměti.
Objeví se obrazovka [PCO]
Ted´můžete si přehrávát na počitači snímky nebo
video soubory.
V režimu velkokapacitní paměti (PCO) stiskutim
tlačitka spouště přepnete se do režimu webové
kamery (PCC).
Objeví se obrazovka [PCC].
Ted´je možné použít unkci webové kamery pomocí
příslušné aplikaci. Chcete-li se vrátit do režimu
velkokapacitní paměti (PCO), je třeba stisknout
znovu tlačitko spouště.
POZOR!
Chcete-li použit webovou kameru (PCC režim) v systému Windows XP (SP)
nebo novější, nemusite mít nainstalovaný ovladač kamery.
23
Page 25

24
SK
BEZPEČNOSŤ
Ochrana a údržba zariadenia
Zariadenie a jeho príslušenstvo chráňte pred vodou a vlhkosťou.
Zamočenie elektrického zariadenia spôsobí nielen vážne poškodenie
prístroja, ale predstavuje aj nebezpečenstvo pre používateľa
(nebezpečenstvo zásahu elektrickým prúdom).
Zariadenie chráňte pred silnými nárazmi, pádmi, vibráciami.
Zariadenie chráňte pred vysokými aj nízkymi teplotami.
Zariadenie chráňte pred pádom, nehádžte ním, neprepichujte kryt.
Zariadenie neohýbajte.
Nepoužívajte príslušenstvo neznámeho pôvodu, môže poškodiť zariadenie
a anuluje záruku výrobcu.
Dôležité informácie o bezpečnosti
Oboznámte s nimi aj staršie deti, ktoré môžu používať zariadenie.
V nemocniciach a iných zdravotníckych zariadeniach môže platiť zákaz
používania elektronických zariadení.
V lietadle majte zariadení vypnutý po celú dobu letu alebo počas vzletu
a pristátia podľa pokynov vydaných posádkou lietadla.
Zariadenie vypínajte v blízkosti dôležitých elektronických zariadení,
ktorých činnosť by mohlo ovplyvniť prípadné rušenie.
Zariadenie sa nepokúšajte rozoberať, upravovať ani samostatne opravovať.
Takéto úlohy vždy zverte autorizovaným servisom.
Zariadenie chráňte pred silným magnetickým žiarením.Takéto pole môže
poškodiť magnetické pamäťové nosiče.
Zariadenie nepoužívajte na miestach s veľmi vysokou teplotou ani
v oblastiach s vysokým rizikom požiaru alebo výbuchu, napríklad na
čerpacích staniciach.
Dohliadajte na deti používajúce zariadenie, nedovoľte im hrať sa samým
s zariadení.
Page 26

Vzhľad a tlačidlá
1. Spúšť
2. LCD displej
3. Tlačidlo ON/OFF
4. Obiektyw
5. Indikátor (dióda) nabíjania (červená)
6. Mikrofon
7. Indikátor (dióda) práce (modrý)
8. Prepínanie režimov
9. micro-USB konektor
10. Vstup pre Micro SD kartu
11. Tlačidlo Reset
25
Page 27
LCD displej
Po zapnutí DV kamery sa na displeji zobrazia nasledujúce symboly:
1. Režim fotoaparátu
2. Režim nahrávania videa
3. Režim záznamovej kamery vo vozidle
4. Symbol microSD karty (zobrazuje sa, keď je vložená karta)
5. Symbol rozlíšenia:
V režime fotoaparátu znamená symbol HI rozlíšenie 3,1 megapixlov
(2048×1536), v režime nahrávania videa a v režime záznamovej kamery
vo vozidle znamená rozlíšenie 720p (1280 x 720, 30 fps);
V režime fotoaparátu znamená symbol LO rozlíšenie 1,3 megapixlov
(1280x1024), v režime nahrávania videa a v režime záznamovej kamery
vo vozidle znamená rozlíšenie VGA (640 x 480, 60 fps);
6. Symbol batérie: aktuálny stav nabitia batérie kamery
7. Počítadlo, zobrazuje hodnoty maximálne do 9999.
8. Hodiny, zobrazujú minúty a sekundy.
Upozornenie!
Uvedené symboly sa môžu líšiť v závislosti od stavu DV kamery.
26
Page 28

Pracovného módu
Pri prvom použití DV kamery:
Vložte micro SD kartu alebo micro SDHC kartu podľa nasledujúceho obrázku.
Režim auto rekordér Režim auto rekordér
Režim fotoaparátu
Režim nahrávania videa Režim nahrávania videa
Režim fotoaparátu
Prepínanie
režimov
Tlačidlo
On/Off
Tlačidlo
On/Off
Tlačidlo
On/Off
Prepínanie
režimov
Prepínanie
režimov
Po zapnutí kamery si môžete zvoliť nasledujúce režimy postupným stláčaním
tlačidla ON/OFF / Prepínania režimov:
Pri zapnutom režime nahrávania videa alebo režime záznamovej kamery vo
vozidle stlačte tlačidlo spúšte, aby ste spustili nahrávanie, kontrolná dióda
začne blikať, pre ukončenie nahrávania stlačte tlačidlo znovu; v režime
fotoaparátu stlačením spúšte vyhotovíte fotograu.
Ako vložte kartu microSD?
Odporúčame Vám, aby ste používali kartu s prenosovou rýchlosťou
minimálne s triedou 4; Pred vybratím alebo vložením karty vypnite
DV kameru.
27
Page 29
FreeAction Kamera je vybavená vstavanou lítiovou batériou. Keď je DV
kamera vypnutá, pripojte ju k počítaču USB káblom a kamera są zapne.
Následne kameru vypnite a rozsvieti sa kontrolka nabíjania. Počas nabíjania
bude táto kontrolka svietiť a po nabití batérie zhasne.
UPOZORNENIE!
Batériu nie je možné nabíjať, keď je v momente pripájania k počítaču kamera
zapnutá.
Zapínanie/vypínanie
2. Vypínanie:
Stlačte a podržte tlačidlo
na cca 3 sekundy a na displeji
sa zobrazí nápis„OFF”.
Upozornenie!
DV kamera sa automaticky vypne,
ak nie je aktívna po dobu 5 minút.
1. Zapínanie:
Stlačte a podržte tlačidlo
na cca 3 sekundy a na displeji
sa zobrazí nápis„ON”.
Nabíjanie batérie.
28
Page 30
Použitie DV kamery
1. Režim nahrávania videa
Ak chcete pracovať v režime nahrávania videa, presvedčte sa, či je zariadenie
nastavené v režime nahrávania videa. Na displeji sa zobrazí symbol .
Začiatok nahrávania: stlačte tlačidlo a pustite tlačidlo , symbol a [:]
zobrazené na LCD displeji začnú blikať. Súčasne začne blikať modrá dióda,
čo znamená, že prebieha nahrávanie.
Ukončenie nahrávania: stlačte tlačidlo a pustite tlačidlo , symbol a [:]
zobrazené na LCD displeji prestanú blikať. Súčasne prestane blikať modrá
dióda, čo znamená, že sa nahrávanie skončilo.
Po zaplnení microSD karty alebo po vybití batérie sa nahrávanie automaticky
ukončí a nahrávaný záznam bude automaticky uložený pred vypnutím
zariadenia.
2. Režim fotoaparátu
Ak chcete vyhotovovať fotograe, presvedčte sa, či je zariadenie nastavené
v režime fotoaparátu. Na displeji sa zobrazí symbol .
Stlačte tlačidlo a pustite tlačidlo , modrá dióda začne blikať, čím signalizuje
zhotovenie fotograe. V prípade uloženia viac ako 9999 bude počítadlo na LCD
displeji zobrazovať len hodnotu 9999.
DV kamera ponúka rôzne režimy pre fotografovanie. Nastavenia môžete zmeniť
pomocou prepínania režimov:
Režim
auto kamery
Režim
nahrávania videa
Režim
fotoaparátu
HI znamená nahrávanie v režime 720P (1280x720, 30 fps)
LO znamená nahrávanie v režime VGA (640x480, 60 fps)
HI znamená 3,1 megapixlov (2048×1536)
LO znamená 1,3 megapixlov (1280x1024)
HI znamená nahrávanie v režime 720P (1280x720, 30 fps)
LO znamená nahrávanie v režime VGA (640x480, 60 fps)
29
Page 31
3. Režim záznamovej kamery vo vozidle
Ak chcete vyhotovovať videozáznam, skontrolujte, či je DV kamera
nastavená v režime záznamovej kamery pre vozidlo.
Na displeji sa zobrazí symbol .
Začiatok nahrávania: stlačte tlačidlo a pustite tlačidlo , symbol a [:]
zobrazené na LCD displeji začnú blikať. Zároveň začne blikať modrá dióda, čo
znamená že prebieha nahrávanie.
Ukončenie nahrávania: stlačte tlačidlo a pustite tlačidlo , symbol a [:]
zobrazené na LCD displeji prestanú blikať. Zároveň prestane blikať modrá
dióda, čo znamená že sa nahrávanie skončilo.
Stlačte raz tlačidlo spúšte v režime náhľadu, aby ste začali nahrávať. Zariadenie
bude zhotovovať segment záznamu dĺžky 3 minút, následne začne
vyhotovovať ďalší segment videa. Po naplnení pamäťovej karty sa najstarší
záznam vymaže kvôli vytvoreniu voľného mieste pre nepretržité nahrávanie.
4. Pripojenie k počítaču
Zapnite DV kameru a zapojte ju pomocou USB kábla
do USB vstupu v počítači.
Kamera prejde do režimu veľkokapacitného
pamäťového zariadenia.
Na displeji sa zobrazí symbol [PCO].
Teraz si môžete na počítači prezerať fotograe
alebo videá, ktoré ste zaznamenali na kamere.
V režime veľkokapacitného pamäťového zariadenia
(známy tiež ako režim PCO) stlačením spúšte zapnete
režim internetovej kamery (režim PCC).
Na displeji sa zobrazí symbol [PCC].
Teraz je možné využiť funkciu internetovej kamery
pomocou príslušnej aplikácie. Ak sa chcete vrátiť do
režimu veľkokapacitného pamäťového zariadenia (režim PCO), znovu stlačte
spúšť
UPOZORNENIE!
Pre používanie internetovej kamery (režim PCC) v operačnom systéme
Windows XP (SP3) alebo novší nie je potrebný ovládač pre kameru.
30
Page 32

31
PL
BEZPIECZEŃSTWO
Ochrona i konserwacja urządzenia
Chroń urządzenie i towarzyszące mu akcesoria przed wodą i wilgocią.
Zamoczenie urządzenia elektrycznego nie tylko powoduje jego poważne
uszkodzenie, ale stanowi także zagrożenie dla użytkownika (ryzyko
porażenia prądem).
Chroń urządzenie przed silnymi wstrząsami, upadkiem, wibracjami.
Chroń urządzenie przed wysokimi i niskimi temperaturami.
Unikaj upadków, nie rzucaj urządzeniem, nie przebijaj obudowy.
Nie zginaj urządzenia.
Nie używaj akcesoriów nieznanego pochodzenia, mogą one uszkodzić
urządzenie i wyłączają gwarancję producenta.
Ważne wskazówki dotyczące bezpieczeństwa
Zawsze przestrzegaj poniższych zasad. Zapoznaj z nimi także starsze
dzieci, które mogą używać urządzenie.
W szpitalach i innych placówkach medycznych może obowiązywać zakaz
używania urządzeń elektronicznych. Zawsze stosuj się do takich zakazów.
Wyłączaj urządzenie w samolocie przez cały czas trwania lotu lub podczas
startu i lądowania,wzależności od instrukcji wydanych przez obsługę
samolotu.
Wyłączaj urządzenie w pobliżu ważnych urządzeń elektronicznych, których
działanie mogłyby zakłócić ewentualne interferencje.
Nie próbuj rozkręcać, modyfikować ani samodzielnie naprawiać
urządzenie. Zawsze powierzaj takie zadania autoryzowanym serwisom.
Chroń urządzenie przed silnym promieniowaniem magnetycznym.
Pole takie może uszkodzić magnetyczne nośniki pamięci.
Nie używaj urządzenie w miejscach o bardzo wysokiej temperaturze lub
w obszarach szczególnie zagrożonych pożarem lub wybuchem, na
przykład na stacjach benzynowych.
Nadzoruj korzystanie z urządzenia przez dzieci, nie dopuszczaj do
samodzielnej zabawy urządzeniem.
Page 33

Wygląd i przyciski
1. Przycisk migawki
2. Wyświetlacz LCD
3. Przycisk zasilania
4. Obiektyw
5. Wskaźnik (dioda) ładowania (czerwony)
6. Mikrofon
7. Dioda sygnalizująca tryb pracy kamery (niebieska)
8. Przełącznik trybu
9. Złącze micro-USB
10. Gniazdo karty Micro SD
11. Przycisk Reset
32
Page 34

Wyświetlacz LCD
Po włączeniu kamery na wyświetlaczu pokaże się następujący stan i ustawienia:
1. Tryb aparatu
2. Tryb nagrywania wideo
3. Tryb rejestratora samochodowego
4. Ikona karty microSD (wyświetla się, gdy karta jest włożona)
5. Ikona rozdzielczości:
W trybie aparatu fotogracznego ikona HI oznacza rozdzielczość 3,1 Mpx
(2048×1536), natomiast w trybie nagrywania oraz w trybie rejestratora
samochodowego oznacza ona rozdzielczość 720p (1280x720, 30 kl./s);
W trybie aparatu fotogracznego ikona LO oznacza rozdzielczość 1,3 Mpx
(1280x1024), natomiast w trybie nagrywania oraz w trybie rejestratora
samochodowego oznacza ona rozdzielczość VGA (640x480, 60 kl./s).
6. Ikona baterii: aktualny stan naładowania baterii kamery
7. Licznik, wyświetla wartości maksymalnie do 9999.
8. Zegar, wyświetla minuty i sekundy.
UWAGA!
Powyższe ikony mogą różnić się w zależności od wersji kamery.
33
Page 35

Tryby pracy kamery
Przy pierwszym użyciu kamery należy:
Włożyć kartę micro SD albo micro SDHC jak pokazano na poniższej ilustracji.
Tryb rejestratora samochodowego Tryb rejestratora samochodowego
Tryb aparatu fotogracznego
Tryb nagrywania wideo Tryb nagrywania wideo
Tryb aparatu fotogracznego
Przełącznik
trybu
Przycisk
zasilania
Przycisk
zasilania
Przycisk
zasilania
Przełącznik
trybu
Przełącznik
trybu
Po włączeniu kamery można wybrać następujące tryby naciskając kolejno
przycisk zasilania/wyboru trybu:
Przy włączonym trybie nagrywania wideo lub trybie rejestratora
samochodowego naciśnij przycisk migawki, aby rozpocząć nagrywanie.
Lampka kontrolna pracy zacznie migać, naciśnij przycisk ponownie, aby
zakończyć nagrywanie.
Przy włączonym trybie aparatu fotogracznego naciśnij przycisk migawki, aby
zrobić zdjęcie.
Jak włożyć kartę microSD?
Zalecana jest karta o szybkości transferu co najmniej klasy 4.
Przed wyjęciem lub włożeniem karty należy wyłączyć kamerę DV.
34
Page 36

Kamera FreeAction jest wyposażona we wbudowany akumulator litowy.
Kiedy kamera jest wyłączona, należy podłączyć ją do komputera kablem
USB, kamera włączy się.
Należy wyłączyć kamerę, zaświeci się lampka ładowania. Podczas ładowania
lampka ładowania będzie zapalona, zgaśnie ona, gdy ładowanie się
zakończy.
UWAGA!
Bateria nie będzie ładowana, jeśli w momencie podłączenia kamery
do komputera będzie ona włączona. Ładowanie rozpocznie się dopiero
po wyłączeniu kamery.
Włączanie/wyłączanie
2. Wyłączanie:
Naciśnij i przytrzymaj przycisk
przez około 3 sekundy, na wyświetlaczu
pojawi się napis„OFF.
1. Włączanie:
Naciśnij i przytrzymaj przycisk
przez około 3 sekundy, na wyświetlaczu
pojawi się napis„ON”.
UWAGA!
Kamera wyłączy się automatycznie
w razie braku aktywności przez 5 minut.
Ładowanie akumulatora
35
Page 37
Obsługa urządzenia
1. Tryb nagrywania wideo
W celu zarejestrowania nagrania wideo należy upewnić się, że urządzenie
jest w trybie nagrywania wideo. Na ekranie zostanie wyświetlona ikona .
Rozpoczęcie nagrywania: należy nacisnąć i zwolnić przycisk , ikona
oraz [:] wyświetlona na ekranie LCD zacznie migać. Jednocześnie zacznie migać
niebieska dioda, co oznacza nagrywanie w toku.
Zakończenie nagrywania: należy nacisnąć i zwolnić przycisk , ikona
oraz [:] wyświetlona na ekranie LCD przestanie migać. Jednocześnie niebieska
dioda przestanie migać, co oznacza zakończenie nagrywania.
Po zapełnieniu karty microSD albo wyczerpania się akumulatora, nagrywanie
zostanie automatycznie zakończone, a nagrywany lm zostanie automatycznie
zapisany przed wyłączeniem się urządzenia.
2. Tryb aparatu
W celu wykonania zdjęcia należy upewnić się, że urządzenie jest w trybie
aparatu. Na ekranie zostanie wyświetlona ikona .
Należy nacisnąć i zwolnić przycisk , niebieska dioda zacznie migać
oznaczając wykonanie zdjęcia. W razie zapisania powyżej 9999 zdjęć licznik
zdjęć na ekranie LCD będzie pokazywał tylko wartość 9999.
Kamera oferuje różne tryby działania. Zmiana ustawienia jest możliwa po
włączeniu za pomocą przełącznika trybu:
Tryb rejestratora
samochodowego
Rozdzielczość
wideo
Tryb aparatu
fotogracznego
HI oznacza nagrywanie w trybie 720P (1280x720, 30 kl./s)
LO oznacza nagrywanie w trybie VGA (640x480, 60 kl./s)
HI oznacza 3.1 megapikseli (2048×1536)
LO oznacza 1.3 megapikseli (1280x1024)
HI oznacza nagrywanie w trybie 720P (1280x720, 30 kl./s)
LO oznacza nagrywanie w trybie VGA (640x480, 60 kl./s)
36
Page 38
3. Tryb rejestratora samochodowego
W celu zarejestrowania nagrania wideo należy upewnić się, że urządzenie
jest w trybie rejestratora samochodowego.
Na ekranie zostanie wyświetlona ikona .
Rozpoczęcie nagrywania: proszę nacisnąć i zwolnić przycisk , ikona
oraz [:] wyświetlona na ekranie LCD zacznie migać. Jednocześnie zacznie migać
niebieska dioda, co oznacza nagrywanie w toku.
Zakończenie nagrywania: proszę nacisnąć i zwolnić przycisk , ikona
oraz [:] wyświetlona na ekranie LCD przestanie migać. Jednocześnie niebieska
dioda przestanie migać, co oznacza zakończenie nagrywania.
Należy nacisnąć raz przycisk migawki w trybie podglądu, aby rozpocząć
nagrywanie. Urządzenie będzie rejestrować segment nagrania o długości
3 minut, następnie rozpoczynać rejestrację kolejnego segmentu wideo.
Po zapełnieniu karty pamięci najstarszy segment nagrania zostanie usunięty
w celu zwolnienia miejsca i umożliwienia ciągłego nagrywania.
4. Podłączanie do komputera
Należy włączyć kamerę i podłączyć ją do złącza USB
komputera za pomocą dołączonego kabla USB.
Kamera przejdzie do trybu pamięci masowej.
Na ekranie pojawi się ikona [PCO]
Teraz możliwe jest oglądanie na komputerze zdjęć
lub nagrań wykonanych kamerą.
W trybie pamięci masowej (zwanym też trybem PCO)
naciśnięcie przycisku migawki spowoduje włączenie
trybu kamery internetowej (trybu PCC).
Na ekranie pojawi się ikona [PCC]
Teraz możliwe jest korzystanie z funkcji kamery
internetowej za pomocą odpowiedniej aplikacji.
W celu powrotu do trybu pamięci masowej (trybu PCO) należy ponownie
nacisnąć przycisk migawki.
UWAGA!
Do skorzystania z kamery internetowej (tryb PCC) w systemie Windows XP
(SP3) lub nowszym nie jest wymagany sterownik kamery.
37
Page 39

DE SPEZIFIKATION
Video-Format: AVI / Auösung: HD (1280 x 720px, 30fps), VGA (640 x 480px, 60fps)
Fotos: max. 3.1 Mpx / Bildformat: JPEG
Speicher:: microSD 32GB tun
Anschlüsse: mini USB
Stromversorgung: Lithium-Ionen-Batterie
Was ist in der Box?
Kamera, USB-Kabel, Wasserdichtes Gehäuse, Montage auf Glas, Anbringen der Helm, Fahrradträger
CS SPECIFIKACE
Formát videa: AVI / Rozlíšenie: HD (1280 x 720px, 30fps), VGA (640 x 480px, 60fps)
Fotky: max. 3.1 Mpx / Formát obrazu: JPEG
Pamäť: microSD až 32 GB
Konektory: mini USB
Nabíjateľná lítium-iónová batéria
Čo je v krabici ?
Kamera, USB kábel, Vodotesné puzdro, Montáž na skle, Pripojenie helmu, Nosič bicyklov
PL SPECYFIKACJA
Format wideo: AVI / Rozdzielczość: HD (1280 x 720px, 30fps), VGA (640 x 480px, 60fps)
Zdjęcia: max. 3.1 megapikseli / Format zdjęć: JPEG
Pamięć: microSD do 32GB
Złącza: mini USB
Zasilanie: Akumulator litowo- jonowy
Co jest w pudełku?
Kamera, Kabel USB, Wodoszczelna obudowa, Mocowanie na szybę, Mocowanie na kask, Mocowanie rowerowe
SK ŠPECIFIKÁCIA
Formát videa: AVI / Rozlíšenie: HD (1280 x 720px, 30fps), VGA (640 x 480px, 60fps)
Fotky: max 3.1 Mpx / Formát obrazu: JPEG
Pamäť: microSD až 32GB
Konektory: mini USB
Nabíjateľná lítium-iónová batéria
Čo je v krabici?
Kamera, USB kábel, Vodotesné puzdro, Montáž na skle, Pripojenie helmu, Nosič bicyklov
EN SPECIFICATION
Video Format: AVI / Resolution: HD (1280 x 720px, 30fps), VGA (640 x 480px, 60fps)
Photo: max. 3.1 Megapixel / Photo Format: JPEG
Storage: microSD up to 32GB
Output: mini USB
Power: Rechargeable Lithium-ion Battery
What's in the box?
Camera, USB cable, Waterproof case, Suction cup mount, Helmet mount, Bicycle rack
38
Page 40

© Lark Europe S.A.
No part of this manual can be reproduced, copied, transmitted without the written consent of Lark Europe Inc.
Vervielfältigung im Ganzen oder Teil dieses Handbuchs ist ohne die vorherige schriftliche Zustimmung des
Urheberrechtsinhabers verboten.
Kopírování návodu v plném nebo částečném rozsahu bez předchozího písemného souhlasu majitele autorských práv je
zakázáno.
Reprodukcia celku alebo časti tohto návodu bez predchádzajúceho písomného súhlasu držiteľa autorských práv je zakázané.
Kopiowanie ca o ci lub cz ci instrukcji jest zabronione bez wcze niejszej pisemnej .ł ś ęś ś zgody właściciela praw autorskich
Distributed by:
Lark Europe Inc.
Matuszewska 14
03-876 Warsaw
e-mail: device_support@lark.com.pl
www.lark-electronics.eu
www. .com.pllark
Declaration of conformity with the standards contained in the directives specific
to the device together with the description, can be found at www.lark.com.pl
Deklaracja zgodności z normami zawartymi w właściwych dla urządzenia dyrektywach
wraz z ich wyszczególnieniem znajduje się na stronie www.lark.com.pl
 Loading...