

Page 1

SNV65i3D
OWNER’S MANUAL
MODEL NO.: SNV65i3D
www.lanzar.com
6.5 ” Doubl e DIN In- Dash Touch Slide Control Screen T FT/LC D Monitor w/ DVD/C D/MP3/MP 4/USB /
SD/ AM-FM /RDS/ 3D UI/B lueto oth & Scr een Dia l Pad Bui lt-In G PS/
TTS w U SA/Ca nada & Me xico Ma ps
Page 2

Thank you for selecting our products! Hope this user's manual facilitate your
understanding of product operating method. Before use, please be sure to read it
carefully for safe operation and better entertainment.
Special statement:
1. The product appearance showed on this manual may be different from the
physical one. Please prevail in kind.
2. This manual has detailed descriptions of our products as much as possible. Our
company is committed to continuously improve product performance. If there is any
appearance, color, and function discrepancy between the product showed on user's
manual and the physical one, please prevail in kind. Product improvement and
update are subject to change without prior notice. Please understand. Our company
has the right to make final description of the user's manual of this product.
Features:
● GPS multimedia entertainment system, with standard fitted installation size.
● High definition digital screen.
● Stylish and compact interface, easy operation, more humanization design
● With built-in DVD player and automative DVD mechanism
● With built-in GPS navigation system(optional)
● With bluetooth function, support hands free cell phone calls(optional)
● Full-automatic or fixed panel, a variety of models to choose from
● Built-i n iPOD/SD /U SB/AUX IN . Enjoy a vari ety of audio and vide o
entertainment.
● With built-in AM/FM receiver; RDS available
● Built-in 50W x 4 amplifier output, 4.1 channel line output
● Full-function touch control operation
● With built-in Analog TV (optional)
● Rearview camera input, automatically change to rearview when reversing (A
camera is needed)
● With touch-screen which can be switched off when not in use to save energy
and avoid interference of night driving
Page 3
Attention: Before installation, please carefully read all the instructions.
Car audio professional vendors' guidance are recommended for the installation.
This model fits automobile 12V power supply system( ground wire
should be connected). Please do not install it directly in truck or bus
with 24V power supply, otherwise will cause machine damage.
Original disc is required. Please do not use non-standard or inferior
disc, otherwise may cause machine malfunction or serious impact
on its service life.
Replace of power fuse without professional instruction is prohibited.
The improper use of fuse will cause machine damage or a fire.
Machine operation is prohibited when driving, otherwise it may affect
the safety of driving and cause an accident. The driver shall not
watch the programe and operate the machine when driving so as to
avoid traffic violation and t raff ic accident(unless caused by
passenger watching the programe through the monitor of back area)
For safety and proper use of the product, please send this machine to
professional person for installation. Self-disassembling or repairing the
machine is forbidden to avoid machine damage and accident. For the
details, please contact local professional car audio dealer.
Do not place the unit in moist and humid conditions to avoid electric
shock, damage and fire caused by short circuit.
The drive parts of the display screen are precise transmission
components. Do not hand a strong push, pull and turn the machine,
or strike the TFT display screen, to avoid machine damage.
Do not touch the screen with hard objects to avoid touch screen
damage.
Attention: To avoid short circuit, please stall the car and disconnect ACC and
the connection with B+.
Page 4

Table of contents
Basic operation ••••.•••••••.••••.••••••..•••.•••••.•••••••.•.•••.•.••
S.artiog
up
PilWer
off
Main interface
FuoctiOt1
mode selection .
Volume & sound adjustment .. ···••····•••···•·•·•·•·•·•·•••·····•· .. ···••··· ·••··•• .. ···•••·•·•·•·····•·•·•·•·•
~ef3ting
SfStem setting '" ..
S.,-stem
P~nel
Remote
f un
l.
area
leset
key operation
control operation ..
ctio
n operation ......
Play disc···· ........... ......
Insert disc, ., ........ , ........ , ........ , ........ , ........ , ........ , ........ , .... · .. ,· .... ··
Eject disc· .... ··
Restart
OVD
OVD
Sealching play ...... · ... , ................. .
Play
.............. . ...................•....................................... ·················3
.....................................................
....................................
of
touch screen n.
...........................
..................................................................
••
.... ••• ....
•••
......
·•••
.................................................................
..
· .... ·· .. , .. · .... ·· .... ·· .... · .. · .. , .. · .. · .. · .. " ....
the
disc toading· .... ·····•· .. ··
play touch
play inf
JPEG
SCl'een
ormatiot1
me·
....
··
............................
.
, ... ,
..........
, ........... , ...... ,
••
.. ·•••·•••• .. •·•·•••·•·•• .. •·•••• .. ••·• ....
.. • ..
•·•
..
··············"
..
•··· .... ···, .. · .. • .. · ..
contlO key · .. ·····1 1
veo play touch screen contlot key .. '· .... • .. ··· .. ·· .. •
CDlMP3IWMA play touch screen contlol key· .... · .. · .. " .... • .. ···, .. ·· .... ·· .... ·· .... ·· .. • .. · .... ·I:1
.
2 Play Radio ......
RDS· .. · .... ,
3 Play SDlUSB
.
A Play IPOD ..
.
.
5
lV··
.... · ....
.
6 AUX IN··
.
7
CarTlOra
.
II
Blu.tooh
Pairing ..... , .................. ,
••••
....
••
....
•••
..
·••
....
•••
.. ••·•••••·•••••·••••·•••• ....
...........
, ............... ,
...............................................................
···
..
······
..
···· ....
··
....
··
....
···
..
··
....
···
..
··••
..
·•·•••
....
••
..
••••
....
••
....
••
.... • ....
·•••••••·•
.. · .. • ....
·•
..
••
.. •·•• ..
•••••
.. ·••••••••• ..
....
·•••
.. ··•• .. •••·• .. ·•·•••·•·•••••·• ....
••
..
••••
....
••
....
•••
..
·•
.......... ·•·••• ..
............................... " .........................
···················································3
. . .....................................
··· .. ·····
. ...................................
··
··················
·······5
....................................
• ..
•••••·
••·
..
•••
..
..
•••·
.. •••·• .. ••·•·· ..
..
......................... , .......... , ..........
, .............................. ,
..
........ , ....... , ........... , .................
....
···
.... ····
.. · .. · ..
....
·••• .. ·••• .. ·••••
•••••
••
....
•••••
•·
.. ··,
..
· .. • .. ·· .... ·· .... ·· .... ,· ....
··,,·····
.. ··· .... · .. • .. ·· .... · .. ·· ....
···
....
.....
·· .... ·· .... ·· .... , .. • .. ·· ···, .. • .. • .. ·· .... ·1:\
••
....
•••
.. ···• .. ·•·•••••·••• ..
••••
....
••
....
•••
····
..
·····
..
···
..
••
....
·••
·•••
....
••
....
••
....
•••
.... • .... • ....
••
.... ·•·• ..
..
..
··
,.
.. ·•·• .. ·•·• .. ······,· 16
.... · .... ····
....
,· .... ·· .... ·· ....
" .........
••
.. • .... • .. • ..
·•
.... ••·•••••·• .. ,,···7
•••
·•·••• ..
....
.
..................
.. ·•••· .. •·• .... ···21
••••
.. •••·•••• ..
· .. · .. · .. ··
···,·
.. · ....
•·•
..
·•·•• ..
....
·••
..
••••
....
· .. ·· ....
..
····
••
....
••
•·
··
·······21
·•·
.. ··:1
..
···3
...
..
···4
·5
.. ···5
······8
.. • .. 8
..
· .. 8
··
..
··
..
.... ·12
• .. ·12
.. ' ..
13
••
..
14
·I
19
....
19
••••
..
22
··"
24
. ,
~
11
11
.~
Page 5

Make a call
..
· .. ··
...............................
·· .. •· .... · .. • .. · .. ··
.... ····
.. ·
..
··
....
· .. ·· .... ··
.... · .. ·14
Play phone's music
9 GPS
..........................................................................
.
GPS operation
GPS
Main functioo
Toud! screen···
.......
ONIOFF'"
....
..
..
......
·
.................
.....................
SO memory card .. •
Detailed instructions
Touch
GPS nalligat
Audio player .. · .. · .. · .. · .. · .. ···
Vedio player'
Ebook· .... ·· .... · .. ·•
Picture Viewer'
Basic settings .. ·· .. •
S~te
m
setti
ng
EQ
sett
ing
1.
2.
Syst
T
roubleshooti
S~tem
Au
dio
.............................................................................
em
setti
General setting··· .. ·· .... ·· .... ·· .... · .. · .. · .. · .. ·· .. ··· .. ·· .... ·· .... ·· .... ·· .... ·· .... ··
User setting .. ·· .... ·· .... ·· .... ··
Vedio setting .. · .. · .. · .. •· .... ·
Aud;o
Bluetooth setling· .... · .. •·
ng
Par
amet
and
Video knowledge
of
GPS operaton·
screen
correction
ion
....
........................................................................... • ....
ng
.............................................................................
set~ng·
.. · .... ·· .... · .. · .. ··
....................................................................
er
........
................
setting
· ..
..................................
....
·· .... · .. · .. ·· .... · ..
....
··
..................................................................
....
••
....
•••• ..
••
........
..
.................................
..................................
.
· .. · .. · .. • .. ··
·····
....
• .. ···
......................................................
............................................................................. ';(1
...................................................
··
..................................................................
.. •••••• .. · .. • .. • ..
••••
.. • .. • .. • .. • .. •• .. · .. •
••••
..
••
..
•••
....
•••• ..
.. · ..
••
....
..
....................
.
••
....
••
....
• ..
.
...................
• .. • .. • ..
••
....
••••
......
····
.. · .. · .. ·· .. ·
··
.. · .... ··
•
.............................
· .. ·· .... ···.;
....
·· .. · .. · .. • .. · .. · .. · .... ·· .... ·36
·· .... ·· .. · .... ·:\9
••
..
•••
.. • ..
••
••••
.. ••••••• .. • .. •••• .. • .. •
••
....
••
....
..
··· .. ··
··
.... · .. ···· .. · .. · .. ·• ...
· .. • .. • ..
••
....
••••••••
••
....
· .. • .. • .. • .. • ..
••••
..
••
....
••••
••
..
••
..
.. •••••• ..
. · ....
••
....
· .. ·· ....
.. • ..
.......
• ....
....
• .. •
••
....
....
·· .. · ..
........
· .. ·
....
•••• .. ·55
•••
.. · ..
••••
..
·25
..
......
.. • ..
ZS
..
..
····48
..
..
••
..
••
..
·21
24
l·~
26
26
~(;
26
:1()
13
:\11
·41
·41
1~
~l
52
·.~:
I
51
58
Page 6
Basic operation
◆ Starting up
Insert car keys to turn on ACC, then the system will automatically enter into the
status before ACC close.
Under the state of system off, short press of key or other keys can turn on.
◆ Power off
Pull out the car keys, the system will automatically turn off. If it is switching
mechanism, it will automatically withdraw.
Long press (more than 2 seconds) of key in the panel, the system will turn off.
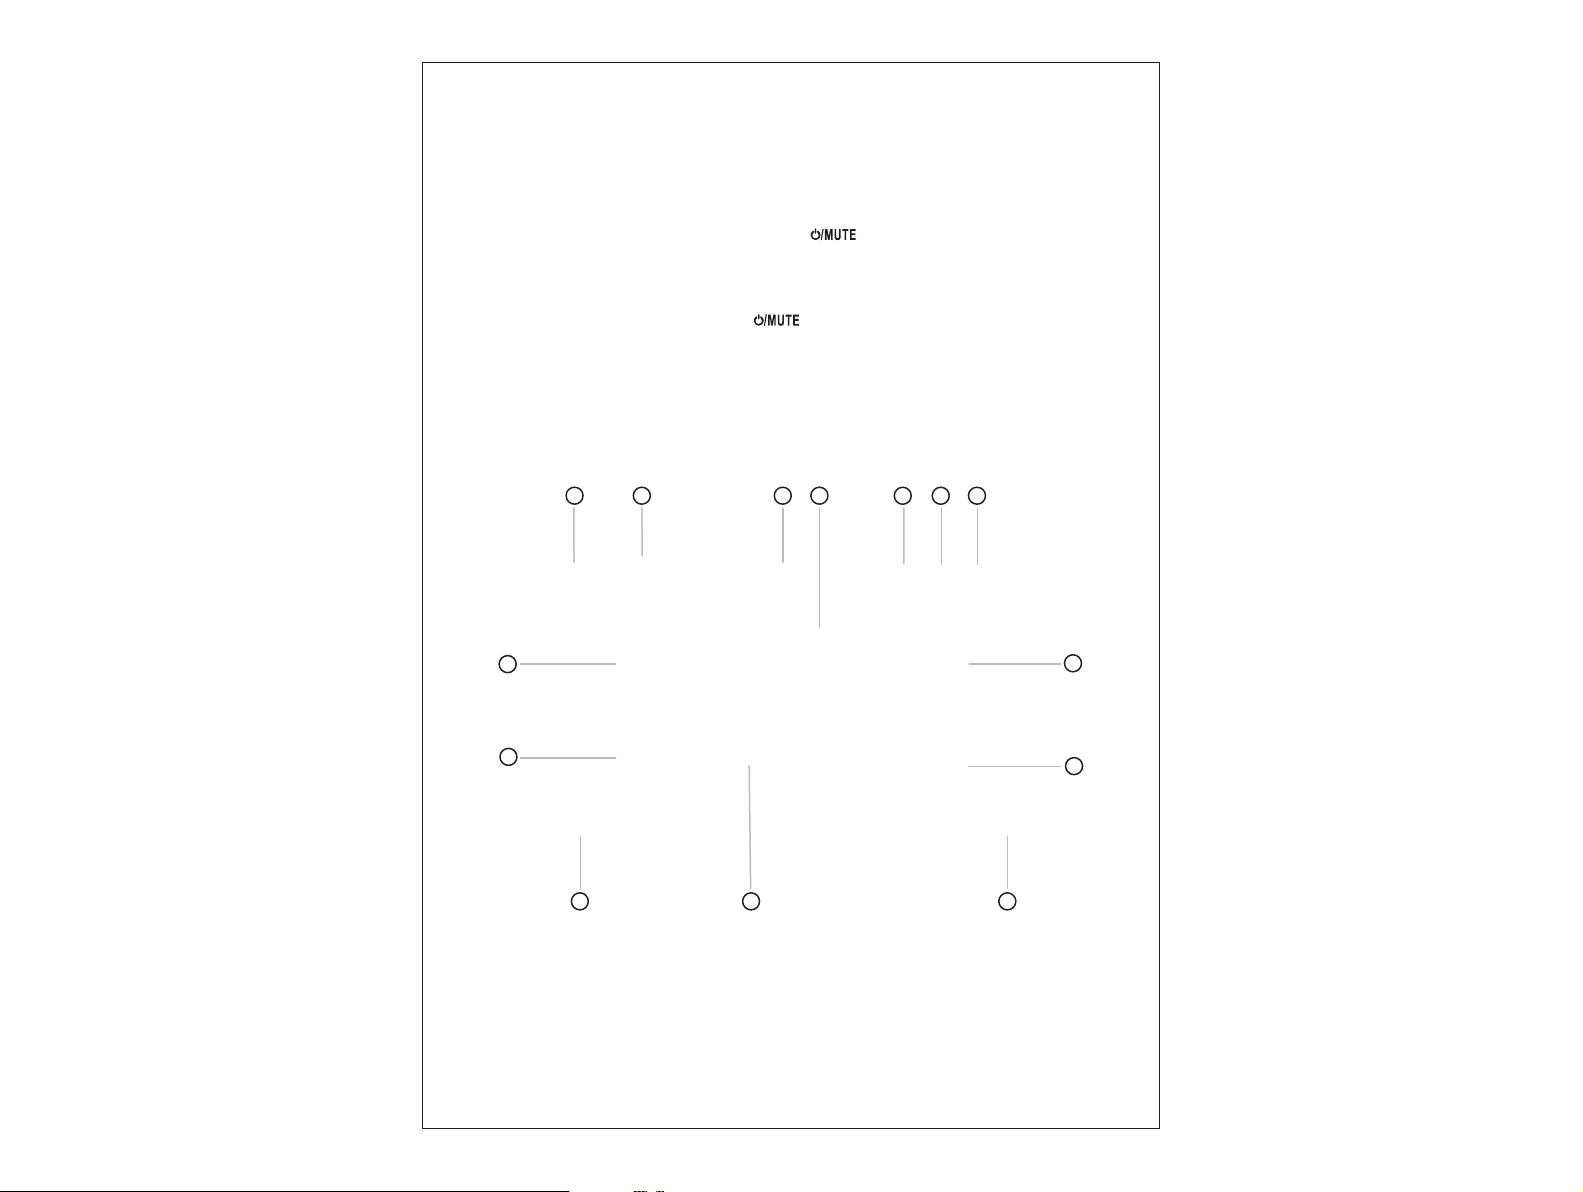
◆ Main interface
In the status of ON, touch the top left of the screen to enter intomain interface.
The system provides functions of DVD, Radio, SD card, USB jack, Bluetooth, TV,
GPS, Ipod, Aux in, Rearview camera input. Touch the icons in the main interface to
enter into the relavent function.
1 2 3
8
9
5 6
74
10
11
Pic (1)
12 1413
3
Page 7
3
1
2
4
Pic (2)
Note: some functions above are optional. If there is no input source of the above
function or no such function, a prompt box “No input source” will pop when
touching the related icon
◆ Function mode selection
Touching the function icon of main interface, you will enter into corresponding function
mode.
◆ Volume & sound adjustment
4
Page 8
The volume can be adjusted from 0-40 through VOL+/VOL- or VOLUME key. The initial
value of volume is 10. Under audio play mode, sound adjustment menu will come out by
touching EQ key on the screen. Rock, rap, dance, latin, rave, urban, vocal and personal
sound are available for choice. In personal sound status, users can adjust it according
to their favor.
◆ Operating area of touch screen
Under mode of playing DVD and VCD, touch areas are shown as below:
Area A: enter system main menu
Area B: enter display of play information
Area C: enter and select previous section (item)
Area D: enter function and state control key
Area E: enter and selectnext section (item)
Area F: turn off display screen. A light touch anywhere
in the screen will turn on the screen again.
◆ System setting
Under audio play mode, a light touch of key to enter system menu setting interface,
including language setting, video setting, general setting and so on. Users can set the
modes according to their own preference.
◆ System reset
When there comes crashes or other abnormal working phenomena caused by illegal
operation, a light touch of RES key with round tapered object will restart the system and
it will resume normal operation.
A B F
C D E
D
5
Page 9
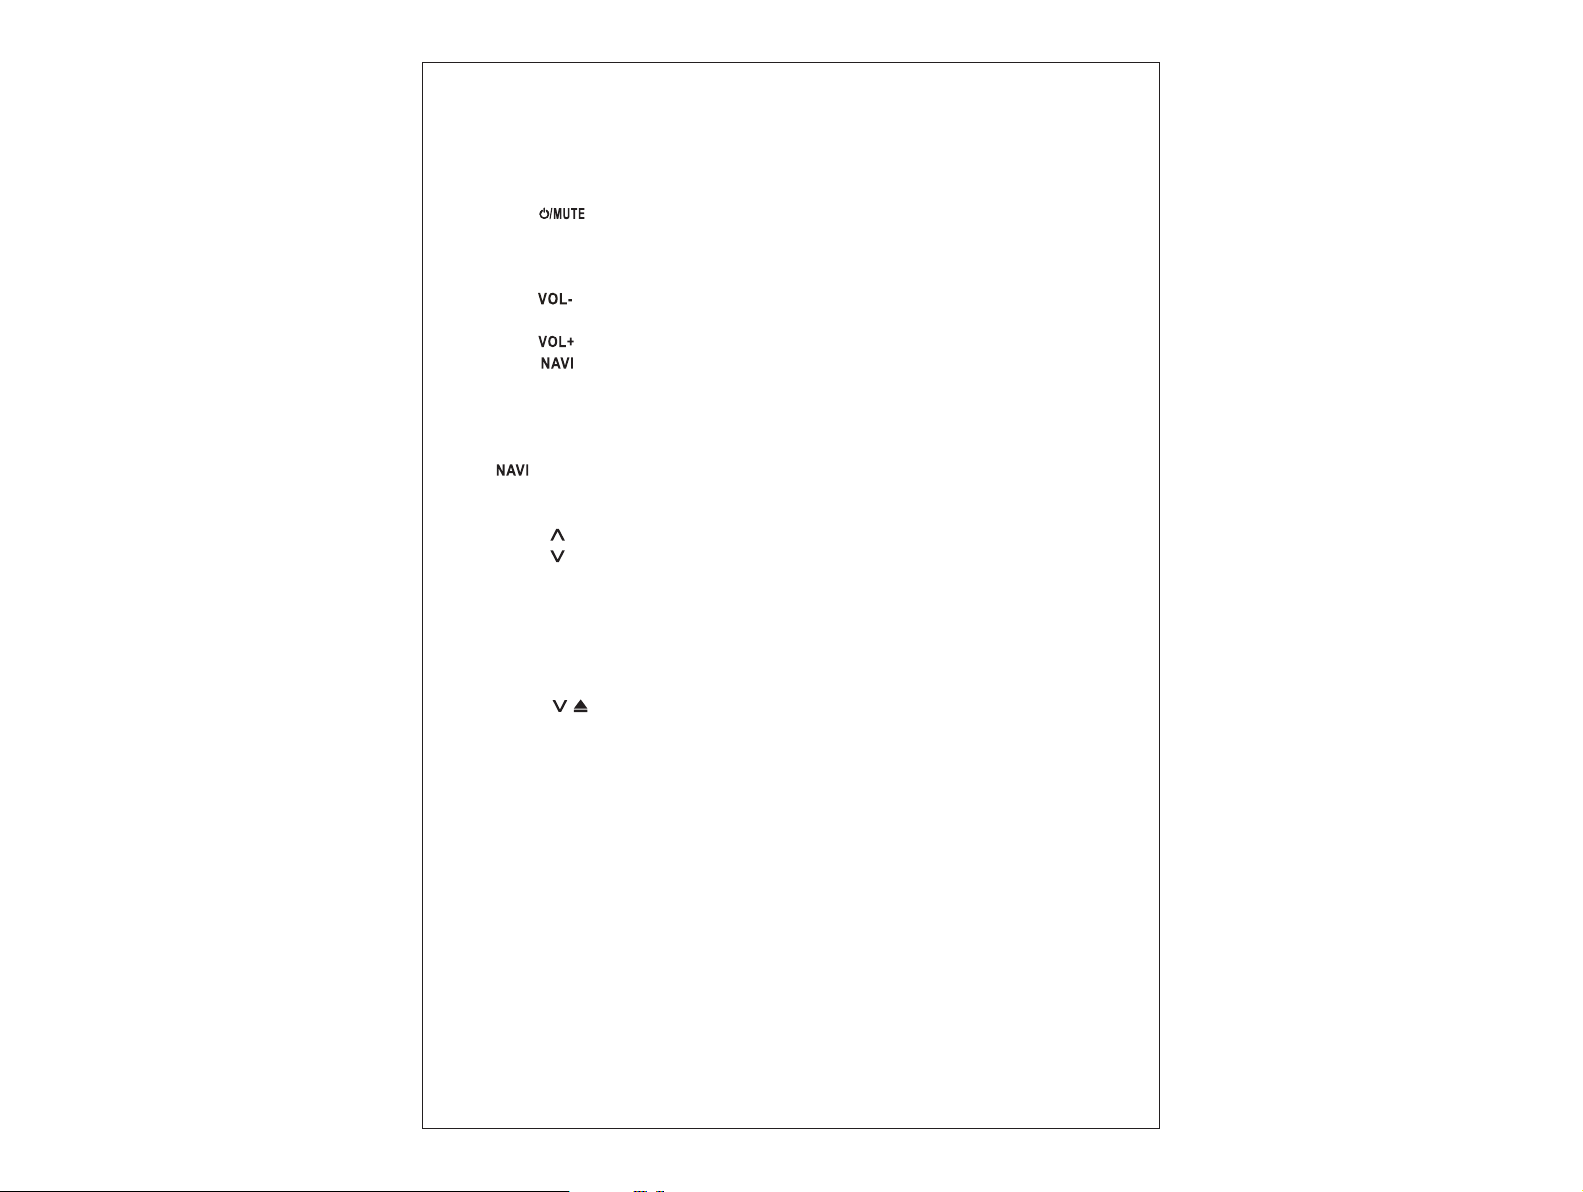
Panel key operation
【1】…IR Infrared window for remote control
【2】… short press for mute; long press for power on/off.
In the standby status, short press to start the system.
In the turned on status, long press to shut down the system.
In the turned on status, short press to close/ open the volume.
【3】… Volume decrease
【4】…MIC Microphone window
【5】… Volume increase
【6】… GPS
Short press: Switch between current play status and GPS.
Long press: Display picture in picture. PIP position can be dragged. Click the PIP, the
display ratio will be enlarged; Click again, PIP will be closed. (Without video input
source, there will be no PIP displayed. )
… /P Conversion between GPS and PIP display.
【7】… Insert/eject a disc
【8】…RES Reset key
【9】…
【10】…
【11】…USB port
【12】…PIP display under GPS mode
【13】…MMC MMC port
【14】…AUX IN jack
【15】…HOME (MENU) Back to main interface
【16】…DIM Color display adjustment
【17】… / Short press to slide down; long press to eject disc (apply to slide down
DVD only)
【18】…BT Bluetooth interface
【19】…TV interface
【20】…RADIO Radio interface
Remarks:
1. Long press(3 seconds) of any icon in the main interface, then the icons can be
dragged and rearranged at will.
2. Under the main interface, slide the touch screen from left to right to switch to main
interface page up; slide the touch screen from right to left to switch to main interface
page down.
3. Under any interface, press the touch screen lightly and rotate clockwise to increase
volume; rotate counter clockwisly to decrease volume.
6
Page 10

Remote
control
CautIOn:
1 Service life
te contrail
1.
If
the remote control is
taken
out
to prevent liquid
2. Avoid dropping
3.
Do
not
disassemble
metal articles.
the
4 Place
battery
from swallowing
please
bring
Key
m.me
MODE Mode conversion
EJE
OPEN Key
0
1
.2.3
.4 .5.6.
YOL
... YOL·
MUTE M
U
PON
SETUP
INFO
M
FNtJ
R
AN
SCAN Scan play
.....
SRC>
ZOOM Under OVD mode, key for Image zoom
SLOW
operation
of
battery
cannot
be operated
out
the
remote
the battery,
of
remote control in a
the
battery.
himfher
to
CT
7 .
8.
9.0 Numeric
c:::
OK
is
about 6 months
normally
of
service
for
leakage
that
controll to prevent
or
pu1
If
the child
see
doctor
immediately.
Key
tor
ejeclInglsuctlonlng disc
tor
opening and closing screen
POW"
er
switCh
oo/off key
k.ey
I
naeasel
decrease volume
ule k.ey
Screen angle adjustment
Enter system setting menu
OVO informatIon. GPS shortcut key
Repeat singlelfolder
Randon:!.Play"sWltch
Ief\Inghtlupidown to select a
controll
astlnext
S. "
">1M
" "
SlOW"
down from 1
under
. battery shall be replaced in
a long time, the battery shall
can
damage
damage.
battery into fire to place with
safer
place
to
swallows
the
nd
/2
to
In
normal conditions.
be
the
remote control.
other
prevent the children
battery
by
accident,
Fu
nctio
n
confinn
lMlen plaYi
ng
If
time
disc.
th
lefl/nght is to
7
Page 11

The system can read DVD/ VCD/CD/ MP3/MP4/WMA/J PEG/MPEG, etc . It on ly sup ports 12CM stand
8
Page 12
Attention:
1. Please use standard and genuine discs and keep discs clean. Proper
usage can assure normal service life of this system.
2. If children lock is activated, system will require password before
reading the disc.
3. Disc cannot be inserted when the device is power off. Before inserting
a disc, please check if there is already a disc in the device
9
Page 13

• DVD initialization interface
I'ie
(7;'
[1]
..
External source type instruction, disc inserted.
[2]
..
In
DVD menu, control the cursor
[3]
..
In
DVD menu, control the cursor move left.
[4]
..
In
DVD menu, control the cursor move down.
[5]
Click
to
select next section(item)
[6]
..
Click
to
select previous section(item).
[7]
..
Fast backward(for each click, it will fast backward at 2,4,8
[8]
..
Fast forward(for each click, it will fast forward at 2,4,8 and 20x).
[9]
..
Play/pause
[10]
... Stop key( Click
[11]
... Disc play window. Double
[12]
... Play/pause.
[13]
...
In
DVD menu, control the cursor to move right.
to
stop playing; click play key again,
to
move up.
dick
the frame, the disc will
and
20x).
it
will play the disc from the first item).
be
played
in
full screen.
10
Page 14

•
DVD
play louch conlrol key
playi"{l
When
pictures.
[ ::: ) ... Searchingn play. Press this key. a small search interface Shown
Users can choose any item they want, then system will directly turn to that item
[O l ...
systemsetting
[
,;:)
I ... Exitfunctionmenu.
[ lito 1 .. . Fast forward(for each
[
..
] ... Fast forward(for each click, it
[
....
] ... Previous section
[
Mol
] ... Next section.
, ..
1111 ...
Play/pause.
[ . ] ... Stop.
@1f,o!]
... Page tuming.
[
[
M€N
U) . . Click the key to
setting.
[ AUDIO I ... Language selection.
( t:;J ) ...
[ A-81
...
10
select end point B. the system will repeat and play
of
function
DVD. touch area D. the system will pop
I'ic (
8)
.
clicl<
. it will fast forward
wiliiasl
forward al 2,4,8 and 20x).
enter
primary
menu
of
Repeal
section!
tiHe. or
click
10
close repeal play.
Repeat and play section(Click for first time to
repeat and play section will be turned off.)
at
2.4,8 and 20x).
the disc. (
selec1
Sec1ion
up
a play cootrol
I'
ic
(9)
as
ea
I
...
Click the key to enter sound
starting point A, click for second time
between A and B. Click
( SUB) ... Sublitles selection.
menu
shown
as
Pic (10) will pop up.
and
play.
lor
thid time.
below
11
Page 15

(
TITlE
I ... Click the
@212
) ... Page turning.
(
(
INFO
1 ... Click the key
• Seardhing play
Search keyboard
( Track) ···Search
( Exit ) ···Exit numerical keyboard menu.
(_1
. ·Delete tile number entered.
( OK ) ···Confirmation
key
file
dis~ay
to
enter tilte menu.
to
display current play inlonnatiOfl.
0fI
order
( 1.2.3.4.5.6.7.8.9.0 ) ···Numeric key
• DVD play information
Light touch
of
050
key.
DVD
play information wilt
Track
1 2 3
4 5
7 8 9
0
Pic\lO)
be
displayed
··365
•
+-
on
the top screen.
[<I
0<
( DVD l .
..
Display current play source
( T:) ... Display title.
title.
( C:) ... Display
section.
315
shows that tile disc totally has 5 mles. and currently ~ is
sedkln. 118
(00:09:28 1 ... Disc playing time
shows that
Pic
(J
\ )
playing
the
current title has 8 sections. afld it is playing the first
12
the
third
Page 16

[ghi]
the third one-Chinese subtille.
• Play JPEG file
[
[ 0 ] .. system setting.
[ .;:)] ... Exit function menu.
[ u ]
degrees, 180 degress, 270 degress
[
[ ..... ]
[
[ .... ]
and
[ _ ]
[C~]
[
..
Current subtitle status. 3/4 shows that the disc totally has 4 subtitles,
Pi
!:!
] Searchingn
..
Rotate picture (Click the key continuous, the picture will
.... ] ..
..
"'h
l]
..
..
. Increase/decrease picture size. Light touch of this key
3 times, then
..
..
INFO] ...
play.
Press this
Previous picture.
Next picture.
Play/pause.
to
decrease it
Stop.
Repeat play
Key
to display the information of current picture.
key,
a small search intertace Shown
and
0 degree
to
1/2, 3/4 of the original size
and
current
it
is
in
i.."
(12)
as
in
turn.)
Pic (10) will
be
rotated clockwisely
to
increase picture size
pop
to
4/3, 3/2,
up.
in
90
2,
•
VCO
play touch screen control
The touch control keys
PBC function is only valid for VC02.0 disc.
• CO/MP3/WMA play touch control key
of
VCO
key
play operation
is
the same with those of
13
OVO
disc play menu.
Page 17

2.
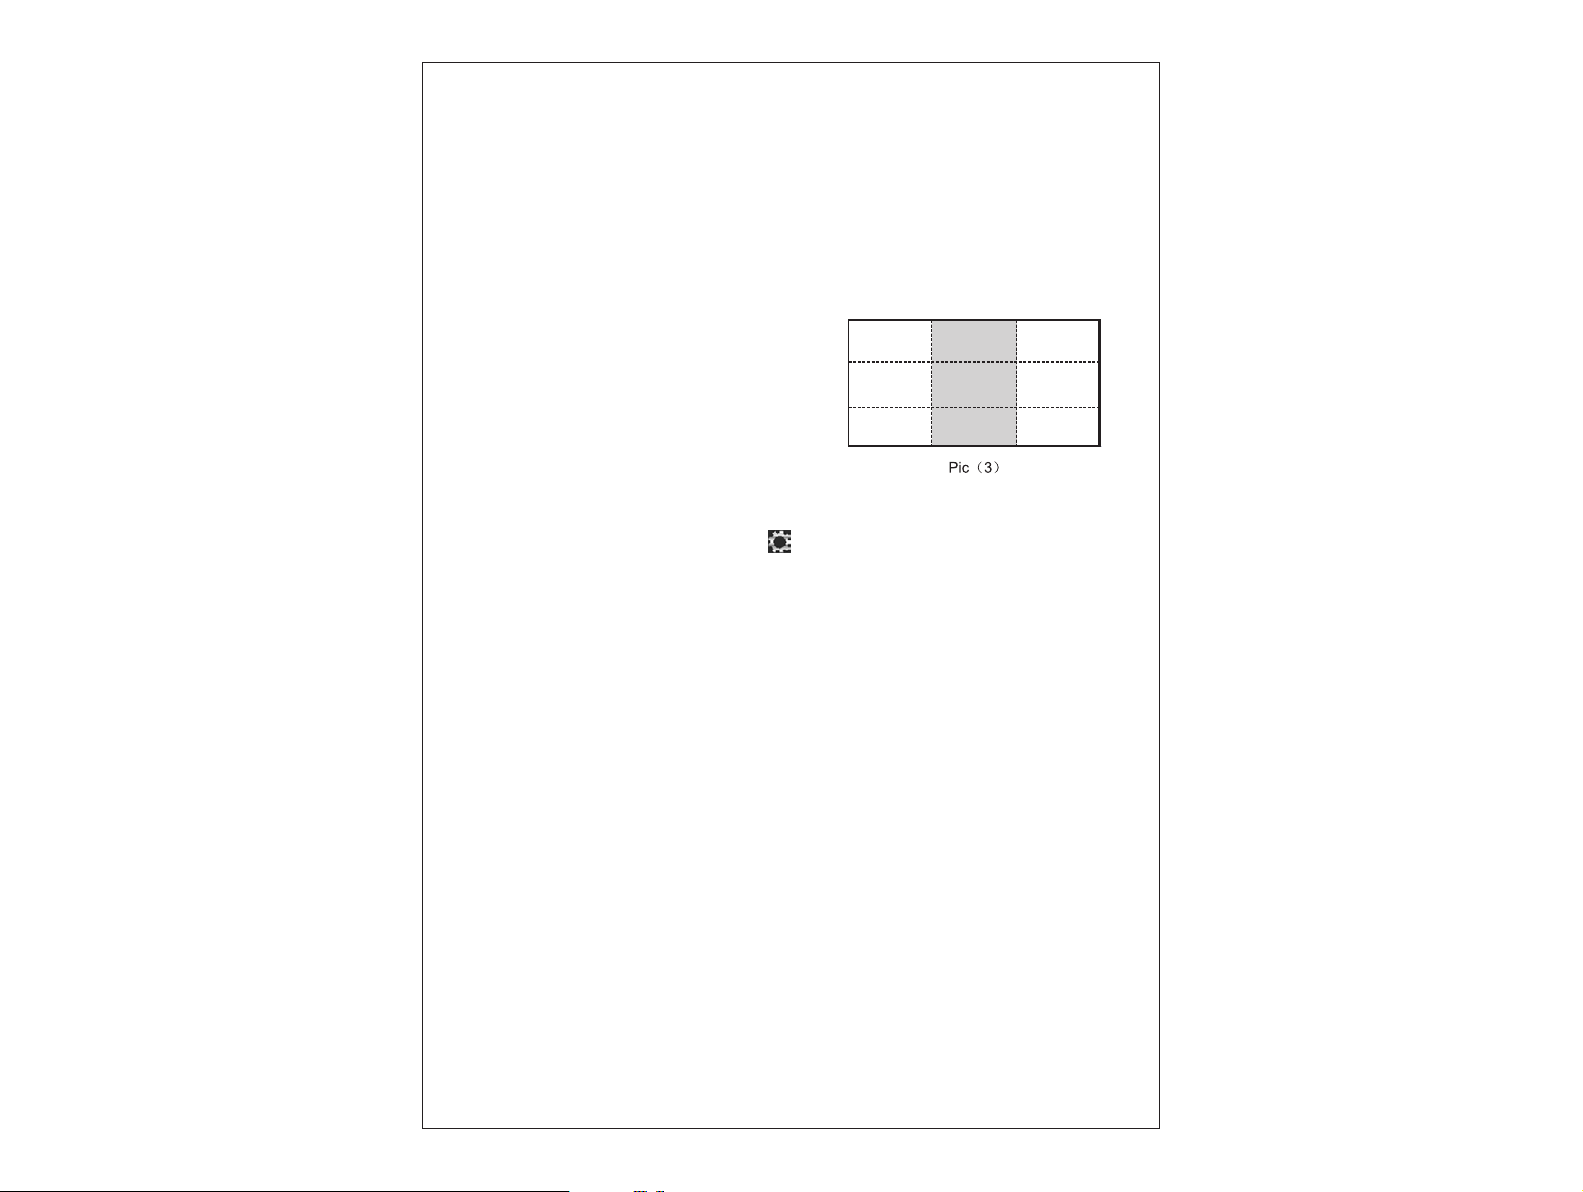
Ptay radio
rad~
fund~n
screen
tast
Alter enter
~me
.
Or
louchlhe
pic(13).
• Enter
con
in
Touch Radio i
main interface
• Exit
Seled
or
automatically enter into other play mode.
mode.
the
system will automatically
tighUy
to setect prestore slabon
Of
presee MODE
key
in
p~y
10
ptay. The
remole control
the
radio station
operat~ns
to
switch
are shown
to
radio mode .
e~isted
as
"
Pic
(3)
( 1] ... Area for displaying current
sta~on
informa~on
( 2] ... Area for displaying current station frequer.cy
( 3] ... STILDC. It is
valid
only when STILDC function
( 4] ... FM frequency range
( 5] ... AM frequency range
ROS
( 6] ...
key. Press this key.
ROS
interface will popped up. showen us Pic(14).
14
.
is
opened.
Page 18

( 71 ...
Key
for prestore radio stationl programe type
io
( 81 ... Press the key to swrtch rad
bafld.
( 91 ... Key for automatic searching stalion
10
) ... Last valid radio station
(
11
1 ... Next vatid radio slalion
(
( 12) ... Frequency trimming upward
( 13) ... Frequency trimming downward
( 14) ... LOC short-dfstance radio station receilling buttion. Press this bullon , then the local
Si9nats
wilt
be
broadcaslin9 radio with stron9
searched and received
in
pliolity.
( 11 ... AFfTA compund button. Long press for
optimizin9 frequency
broadcasting rad
signal of
the
can
au
tomatically
of
current channel. If there is brea k
io
station, t
he
system will automatically switch to another requency point with fine
same radio station.) Short press for
sw~ch
to current radio channel under any mode if
traffic news.)
AF
function (this function aims at automatically
of
some frequency point
TA
fuction (This function aims at that the system
the
system detects emergency
0(
15
pOO(
Si9nal
of
Page 19

( 21 ...
PTY
bl.llton. long press to change the default programme
type and search;
and the searching interface is show as
( 3 ) ... ROS button
[ 4 1 .
..
ROS message
Shon
press to search default programme type
Pic(t5)
.
!>ox
. displaying radio test
Pic
(Iii)
3. Play USBISD
by
Format supported
files.
When playing MP3JWMA format, functions of the operating menu are similar
CO/MP3rWMA play.
When playing information in JPEG format. functions of the operating menu are similar to those of
JPEG file play.
When playing information in MPEG format. function
OVO
disc play.
\Mlen
rea<ling
picture
to
enter into single USB/SO readi
er
• En t
Touch SO/USB icon in main interface or presee MODE key in remote contralto switch
When the device is under running state, the system will automatically switch to USB/SO
after connecting
• Exit
Select or automatically enter into other function mode play.
USB/SO: WMAlMP3/MPEGlJPEG video
of
the operating menu are similar to those of
USB/SO. the right display window can oocome
ng
interface shown as Pic(16).
10
USBlSD_
pic1l.lre
in picture effects. Click the
to
to
ra<lio
those
p!;Jy
of
mode.
mode
16
Page 20

I'i
<:
(It;)
[ 1) ... Last.
t 2 ) . .
(3) ..
{o4)
( 5 ) . . When enter into DVD playlist.
W"hen ent
W"hen
Next. When enter into DVD playlist. the cursor will
...
Pause/play
er
into DVD playlist. the cursor will move up.
enter into DVD playlist.
the
cursor will move left.
the
cursor will move right.
move
down.
[ 6 ] ... Play windo. Click the play interface. system will enter into full screen mode Shown as Pic (17).
Under full screen mode.
l71
. . Last
( 8 )
...
Next
( 9 ) ... Fasts backward
( 10) ... Fast forward
(11)
.. . Pause
( 12) ... Play
in
slide down mode. dk;k to retum
to
small window playback mode.
17
Page 21

I I ) ... Back
(2
) . . The name
( 3 ) ... The attribute of current file. sud1 as file type,
( 4 ) .. Quick Search. Pressing this key. a keypad for quick seard1 willi pop up. enter a number.
system will skip to the corresponding file and play it.
I 5) . . System setting . Pressi
( 6 ) . .
other personalized settings .
( 7 ) ... Disptay area for the conteflt of pl
( 8 ) ... Display area for the related information
( 9 ) . . Last
I 10) ... Fast backward(for ead1
(
11
( 12) ... Play/pause
(13)
( 14) ... DIR+ . When there are several files in USBJSD card, press this key
different folders.
to
USB interface
of
current file.
ng
this key. it will skip
eo
selling. Pressing this key. it will skip to
dick
) . . Fast forward(for ead1 dick.
...
Next
fi
le order.
to
system setting interface.
eo
selling interface for sound quality. audio and
ayt
ist file
of
play file.
. it will fast backward
it
will fast forward at 2.4.8 and 20x).
at
2.4.8 and 20x)
to
switch between
18
Page 22

[151 .. _Key for page turning_ Press this key to turn
[t6] ... DIR+. When there are several files
different folders.
in
USBISD card, press this key to switch between
to
next page, shown as
Pic(181_
11,1"3
-
n
Tanl
n
Every
r.
Only
r.
E:
T
r.:
Blue
n
Mean
K"py
to
other play mode.
ROOT
..
20>6
4
rnornenl
love
P~"Y
to
the device that is not under !\Inning state, it shall click iPOD icon
in
remote control
~io
000'00
01
hIe
Pic (
IS)
playing.
•
I
•
in
the
system menu to
to
switch pl
:;;
i =
,'I
... e
CO
4t)r
i)l"
ay
source to iPDD play mode .
t,;:
USB
,
['a
3
,
,
,
A,,,,,
[t7]
...
Random play.
[
18
1 .. _Cycle play.
t9
] ... Pagetuming
{
4. Ptay tPOD
This system supports iPOO audio and
• Enter
When the device is under running state, the system will automatically
ller
connecting to iPOD. (Note: It must set iPOD
a
state_)
When iPOD is connected
in
main interface/dick MODE key
• Exit
Select or automatically tum
The playing mode and initial mode are similar to those of USB intertace.
~
0
.,
SW~ch
to iPOD play mode
be
automatic connection
<I}
..
5.
TV (If
equipped)
19
Page 23

The system
syslemS.
• Enter
Cli
ck
shown as Pic(19).
• Exit
Select or automatically tum
TV icon
is
built-
in
TV function(optional). It supports
in
main interface/press MODE key
to
other play mode.
TV
signal inputs of
in
remote controll
all
colour and sound
to
switch and enter TV mode
Attention:
pop
( 11 ... Stored list
( 21 ... Click the key. the syslem will search valid TV channel toward low-end frequency and stop
unm
channel
( 31 ... Click the
until chaflr.el is searched.
( 41 ...
last
valid
II
!here is
up
TV
operation
of
val
is
searched.
key.
the system will search valid
TV
channel
id
TV channel.
menu.
no
TV
lignal.
Pic
(9)
H
wII
be
TV
channel towa
blue
1CtHfl.
UghI
touc:h
rd
high-end frequency and stop
20
Page 24

( 5 ) . . Next valid
( 6 )
...
Click key 10 enter AS function. ~ wi
{71 . . Click the key. the system will scan channels w
chann~s
full
( 8 ) ... TV display window. Click the picture. it will switch to full screen display Under ful l screen
display, slide down \he picture, it will return to small window display interface.
6.
AU
The
system
sources to connect to the system,
(controled
Under AUX in
interface; Click area
interface.
• Enter
Click AUX icon in main
remote control to switch play source to AUX
• Exit
Select
or
7.
Camera
Under this function mode. Camera should
then setlnback-<lra
miscalculation
• Ente r
CAMERA
Click
v;ew
rear
tum to rear view
TV
channel
ll
automatically search and pre-store channels.
rt
h stronger signals for 10s respectively within
.
X In
(Auxiliary device
has
2 audio inputs and t vedio AUX
by remote control) etc. Input without Auxiliary device displays shown
pl
ay mode, dick area A
F to
automatically
Input
dose the
In
terface/press
tum
to
other
)
au~iliary
input.
AUX
in enables external media
li
ke camera . video game. walkman . external navigation box
attop-left
display; Click area D to display system setti
MODE
play mode.
key In
in
play
comer
of the touch screen to return to the main
mode
.
I'k
be
connected to the camera vedio input jack firs!. and
ft
display
mode
to avoid display Image reversed around which will lead to driver'S
icon in main interface/press
mode. Or
put the car in reverse
mode
.
MODE
key in remote control to switch play source to
gear
and connect \he REVERSE wire.
( 20)
as
ng
it will
Pic(20).
and
EQ
setting
automatically
• Exit
21
Page 25

Select or automatically turn
8.
Bluetooth ( if
This device has blueloolh
point-to-point connection with this device
on
Note:
the screen.
1.
Thi
achieveable
2.\f\,ben
wil
aulomatiCally
• Enter
Click Bluetooth icon
screen/press MODE key
bluetooth of mobile
free mode if a call
• Exit
Select or automatically turn
to
other play mode; Exit reverse gear.
equipped)
and
hand free function. If your mobile has bluetoolh function, il
mobile
musl
support
Ole
device
is
under
SWiICh
10
in
main inlertace/click the small icon for
in
remote control
is
connected with the system.
is
in.
to
other play mode.
To
make
bluetoolh
bluetooth
A20P agreemenllO
running
slate. regardleSs
and
to
switch to bluelooth
it
Or
hang up the phone.
and
receive calls
as
play
of
any
presenl
hand
free
mode
if
a cal is
BT
in
the top right corner of the
and
hand free mode. When the
will automatically switch
well
as
play music are
muSIC.
mode.
the
in
to
bluetooth and hand
can
syStem
sel
up
Bluetooth interiace function division
Pic
(21)
22
Page 26

[1]
... Area for mobile music play
[2]
... Area for mobile information display
[3]
... Area for mobile pairing function
[4]
... Area for dialing
[5]
... Area for number dialed display
~)ic
(22)
[1]
... Touch this key to play Bluetooth music when bluetooth
[2]
... Touch this key to stop Bluetooth music when bluetooth
[3]
... Touch this key to automatically search the last item of bluetooth music when bluetooth is
is
connected.
is
connected.
connected.
[4]
... Touch this key to automatically search the next item of bluetooth music when bluetooth
connected.
[5]
... Pair
key.
Touch this key to connect or disconnect the paired bluetoothof this device with the
mobile.
[6]
... Mobile and bluetooth witch
key.
Touch this
key,
phone call will turn to mobile. Touch again,
phone call will return to bluetooth.
[7]
... Answer the
[8]
... Hang
calli
make a call. Light touch of this key to openthe current call.
up.
Touch this key to end the current call.
is
23
Page 27

( 9) ...
TOI.ICh
this key
to
relum
to
previous menu.
( 10) ... Delete. Touch this
• Pairin9
Enter into bluetooth interface. then touch
phone's bluelooth device. and search for new pairing. When phone search out
that is
the
name of native bluetooth device. select this device and connect i\. Input a
password( default password
the bluetooth sign is not nashing.
try
it again
tin
it
actually connects.
• Make
a call
Enter the phone number
call. Or
se
lect the phone number from missed calls. received calls. dialed
diai ng key to make a call.
• Answer a call
VVhen
this device is on. if a
free mode interface.
answer a call al.llomalically.
Click hang up key
• Play phone·s mllSic
Click
( 6 ] key
to
switch
in
the
Note
Due
the
: 1
MuIIc:
10
phone
phone .
cIfJnnl
or
restored
......
r ! "
ke
y to delete the wrong number dialed.
( 5 )
ke
y, ·Phone Pairin9" will come out. lNhilst open the
0000), the phone will Pair with the device automatically. After pairing,
If
the
bluetoolh sign keeps ftashing. wich indicates disconnection.
by
the
rK.lmber
key· press
ca
l is
in
. the
If
bluetoolh setting of system menu
If
setting is Manual Answer Mode,
to
end the call. IM1ile calling. users can dick
10
music play interface.
play
function
II
only
types
of
phones.
c:IIcklng
Play key
in
bIu8toolh
in
bluetooth interface. Click dialing key
sys
tem will automatically
Chck
ac:hievabIe
muaic
when the
can
be played elthef
....-race
sw~ch
is
Auto Answer Mode. the system will
dick
dialing key '0 answer a call.
hang up key
play keys to
phone
~ay
supportS
by
the device bluetooth.
to
cal
ls list and then
to bluetooth and hands
to
end the call.
different music formals
A2DP
egreement
chooIing
Music
Play
make a
dick
on
9.
GPS
• Enter
Cli
ck
NAVI
icon in main interface/press MODE key
24
in
remote control/press NAVI key
in
panel
to
Page 28

enter GPS mode.
• Exit
Select or automatically
r
I~~
e:
1.
Oisplay inlerface differs
~ I ~
.
TOUCh
ween
inSIruCtiCInS.
GPS
1.
GPS ON/OFF
Insert the car ignition input interface (or other
GPS icon in DVD main interface, system will enter an interface with LOGO and progress cursor.
About
2. Main function
A.
software is inserted
B. Audio play.
cycle play. It can display detailed information
c.
/MOV/AVI/3GP/3G2/K3G/M4V/MQVMlM/OIVX/MKV/OGMMYXI
adding/deleting, schedule adjustment, time display, pause, full-screen play, etc.
D. Ebook:
E. Picture Viewer.
slideshow, etc.
F.
Setting. For navigation,
and time, volume settings and system information setting.
G.
Bluetooth. This function is valid only when
H.
In the
operation
7 seconds later, the system will automatically
GPS
navigation. This fun cion is valid only
Video play. It supports formats
TXT
CMMB
digital TV. This function is only valid with
tum
to other play mode. Press NAVI
from
module
10
module,
needs
10
be
corrected
conSOle
interface.
It
supports formats
format text reading. Support page input
It
supports formats
of
GPS
monitor, language, skin, transitions, touch screen calibration, date
In
firsI use of navigation.
cliCk
~
TOUd'I
screen
12V
when
MP3M1MAfWAV. It can be switched between random play and
of
audio file.
of
bmp, jpg. gif, png. It supports picture zoom, rotation and
user's
k.ey
in panel to enter other modes.
bullheir
fucIion
operalion
Please
~
10 enler
10UCh
screen
power supply) into the DC plug seat, then click
enter
GPS
master
console interface
SO card with parameter matched navigation
of
MP4/MPEG/MPG/ASFMlMV
MLV/MPV. It supports file
mobile support bluetooth function.
CMMB
signal coverage.
is
similar.
foIow
the on·saeen
correCtiOn.
25
Page 29

3.
Touch
screen
A. Click:
B DoubleC. Drag: Hold down a point, then drag
Note: T
4.
This device is with built-in SD memory card slot. The software or mutimed ia files can
SD card
A. Insert the SD memory card into the slot properly
B When removing
C. The device should
D. When the
Detailed instructions of GPS
1.
• Turn
click.
the screen
click.:
he
screen may
SD memory card
and
displayed
indicates that the card
SD
Touch
screen correction
on
the device and enter GPS main interface shown
quickly click screen twice
be
the
card
scratched
in
the device.
SD
be
is
by
any sharp
is
inserted.
memory card , please push the card, then it will automatically
in
OFF status when inserting/removing the
in
use, please do not remove it
or
rough objects.
and
push the card
to
in.
When hearing a cli
SD
card.
avoid data error or lost.
as
below picture:
be
stored
ck,
pop up.
in
it
Navigation
Console
26
Setup
Entertainment
~
12:58
Page 30

-
..
to
enter system setting interface shown as
below
picture:
~
Setup
Navigate Setup GPS Monitor Usual Setup Touch Screen
System
• Click " • icon
Press
mo...ed
the central
to
up-left
A.
corner and cursor
B. If correcHon fails. it will automatica
C. If
correction
touch screen to save corredion and
D. After touch screen
is
shut
down
been
finished well while leaving factory.
to
enter touch screen correction interface,
part
of
the
C>Jrsor
according
corner
. and then correct
al
up-right
comer
in
lly enter re-correction interface.
is
finished successfully, ·OK" will displayed in the screen. Click
exil
is
corrected. the system will memorize the correction result.
.
it
is
unnecessary
to correct the screen
to
picture hint until
the
aJrsof
tum.
correction pidure.
the
at low-left
whHe
comer
ele1::lrifying because correction
cursor is corrected
, the
aJrsof
at low-right
any
place in the
If
power supply
and
has
Note: If touch screen has been correc ted. this correction step
27
can
be
omitted.
Page 31

2. GPS navigation setting
A. Navigation software installation instruction
• Insert
• After system start operation. enter syst
SO
card with parameter matched navigation software.
em
setting interface shown as below picture:
'::'1
Navigate Setup GPS Monitor
Screen
•
Click navigati
be
low pictu
on
re
:
setting icon
Setup
Usual Setup Touch Screen
System
to enter navigation path setting interface shown
as
28
Page 32

c?J
Navigation software path:
Navigation
Setting
I \StorageCard\ScreenCapture.e
Run navigation
ID:
A739-90090S12-285810-484E04-1C367F46
VER
: 816D-8184-600S-{)9()Sl9(WiOOows@a: 5.0)
Click icon, then select the navigati
•
•
•
• Navigation software running
• Click
ng
to
accordi
In
the interface shown
startup".
After selecting navigation softwa
interface.
access path
in
icon
of
navigation software.
as
above picture, select "Run navigati
the console interface
xe
softwar
e automatically at startup
on
process( usually a file with EXE extention)
re file
, click
f:t
to
enter navigation interface.
icon to exit
on
software automatically
and
return
to
the console
at
29
Page 33

Note: For operation of map softwar
3.
Audio player
e,
please refer to operating instruction
of
map software.
Click
•
picture:
W
icon
in
the navigat
ion
interface to enter ente
Entertainment
Music
E-book
"
.Cli
ck icon to enter music player shown as below picture:
rta
inment ma
Movie
Picture
in
interface shown as below
30
Page 34

con
in
music player interface
as bel
i
ow:
• Click
interiace
\StorageCard\NWD\Music
[
..
]
judas.mp3
coming
home.mp3
smile.mp3
I
can.mp3
run
the
world.mp3
to
select access path
of
the audio files
and
enter the
summer
A. Select a single music file
• Click
CliCk. icon
•
and
rain.mp3
select
an
or double click t
audio file
to
play.
he
file
to
enter music play interiace shown
31
as
below picture:
Page 35

icon of
• Click
picture:
a) Select all music files
the music
play
interface, music file details will
32
be
displayl!d, shown as below
Page 36

•
4.
•
Click
picture
Click
Vedio
II
:
iean
lind
player
icon
in
entertainment main int
select
alii
music
files. shown
erface
to
as
enter
below
vedio
picture
player
:
interface.
shown
as
below
33
Page 37

• Click D icon in vedio player interface to select access path
interface as below:
\StorageCard\NWD\Movle
[
..
]
Ufe.is.Beautiful.Sample-320X240.wvx
T
heAlamo
.wmv
Big Fish.mqv
Cold Mountain.ogm
The Last Samurai.mpv
Master and Commander.MPG
~
.
Select a single vedio file
• Click
and
select a vedio file
\0
play. shown as below picture:
34
01
the vedio files and enter the
Page 38

• Click
icon
or
double
click
lhe file to play, shown as below pic1ure:
35
Page 39

5.
Ebook
• Click
below piclure:
in
entertainment main interface
icon
10
enter Ebook reading interface, shown as
!""'--
• Click icon
to
selecl
the
text
\StorageCard\NWD\E-book
i i
Tale
of
Two Cities. txt
Short History
k]
of
Nearly Everything.txt
E
file,
book
shown
as
below pictlJfe'
:..
.
Old Man and the Sea.txt
Potier
and the Sorcerer's Stone.txt
Devil's Spectacles. txt
36
Page 40

•
Click
picture
II
:
icon
or
double
click
the
text file
to
return
to
Ebook
reading
interface, shown
as
below
~
CHAPTER
THE
and
Mr.
that they were perfectly normal, thank you very much.
people you'd
because they
Mr. Dursley was
drills. He was a big,
a very large mustache. Mrs. Dursley was thin and blonde
twice the usual amount
so much
The Dursleys had a small son called Dudley and
was
no
finer
~
•
Click
..
the
lISer.
shown
Harry
Potier
and
the
ONE
BOY
WHO
Mrs. Dursley,
of
her time craning over garden fences , spying on the neighbors.
LIVED
of
number
four. Privet Drive. were proud to say
expect
to be involved in anyth ing strange
just
didn't hold with such nonsense.
the
director
beefy
of
boy
anywhere
r 1/21
icon, users
3S
betow
can
pidure'
of
man with hardly any
neck, which came in very useful as she spent
.
enter a
a firm called
page
nec
number. then
Grunnings
k, although
in
their opinion there
system
They
were the last
or
mysterious,
, which made
and
)'
will
jump
he
did have
had nearly
10
lhe
page
enlered
by
37
Page 41

Picture
Picture browser
38
Page 42

con
to
• Click
• Click
• Click
• Click
• Click
7.
Basic
seUings
Setting intertace indudes navigation setting, GPS monitor, common settings, touch screen
correction, screen setting, volume setting, time setting
1)
Setting intertace, shown
play picture slides.
to
rotate the picture.
icon
icon
to
reduce picture size: Click
in
icon to view the picture
icon
to
select the last picture; Click icon
as
full screen.
below picture:
to
enlarge picture size
to
select the next picture.
and
system setting.
39
Page 43

,......
~,
Setup
C<
:
~
Navigate Setup
Screen
2)
GPS
monitor
«
.
Click
~
:-;
icon
GPS
in sett
reset
GPS
MOnitor
Volume Time
ing
interface
to enter
GPS
mOnitor
Satellitic
Data
Usual
Setup Touch Screen
(3
GPS
mon
itor
interface, shown
Satellitic
Amount
and Signal Strength •
Longitude , Lat
System
as
below picture
Data Stream •
itude
, Time
:
~
•
Click "Satellite
data
flow"
to
view s
at
ellite
data
40
fl
ow
received
,
Page 44

• Click "Number
received.
• Click "longitude, latitude, time"
3)
Common sellings
• Click
picture;
__
of
salelliles
Icon
and
in
selling interface to enter common settings interface, shown as below
signal strength" to view the number of satellites
can
view
the
corresponding situation.
and
signal value
~
~,
Language:
Switch
effect:
Usual
setup
English
NO'
Cl
ick _ or _ key under "Language" to swrtch over
A.
Available languages are: Simplified Chinese, Traditional
Dutch. Hungarian. Czech, Danish, Norwegian, Swedish, Portuguese
Click _ or _ key under "Select
B.
switching.
rotating
4) Screen selling
Ava
ilable switching effects are:
and
random.
swi
tching effect" to
No
choice, clock, door, cross, shutters, erasion,
the
language of navigator.
Ch
inese, German, French, Spanish,
and
English.
sw~ch
over the effect of
• Click
icon in selling interface
to enter screen selling interface, shown as below
41
Page 45

picture:
'"""
.d
•
Ctick
,....,
~,
Brightness:
Screen
Brightn ess
icon to enter brightness & color selli
Brightness
Adjust
color
position
ng
interface,
Size setting
shown
as
below
picture:
Contrast:
A Click _ or .
key
to
set
related
parame
ters tor brightness & oontrastness adjustment
42
Page 46

8. Click • key
•
Clicl<
A.
Cliclt _ or
its position.
8.
Click.
icon to enter screen
size
key
to
restore default settings: Cliclt Q key to exit
sQe
adjustment setting interface . shown as below picture:
adjustment
to
exit screen size setting interface.
setting
to set the horizontal
key
:
sQe
and vertical size
the
of
interface .
the
image according
to
•
Clicl<
icon to enter screen position adjustment setting interface. shown
43
as
below picture:
Page 47

A.
Click _ , • . _ , . key to adjust current image position.
B. Click . key to
5) Volume setting
• Click icon in setti
eJdt
~
System Volume:
Key-Stroke Volume:
screen position setting interface.
ng
interface to enter volume selling interface. shown as below picture:
Volume
Mule
44
Page 48

A. For system votume,
volume. Mute is also available for
8. For key tone.
6)
Time and date settings
.Y
•
Qick
picture:
dick
_ key
dick
_ and . key
icon in setting interface to enter time and date setting interface. shown as below
cMite
to
decrease the votume: Ctick • key
.
to switch the key tone among "no, soft. loud"
Beijing,
..
to
increase the
A. The upper li
B. The lower line is for time zone setting by d icking _
7) System setting
Click icon in setting interface to enter system setting interface, shown
ne
is
for month. date. year. hoor and minute sett
ings.
and.
key.
45
as
below picture:
Page 49

~
10:
A739-90090s12-2SsB10-'fS4EM-IC367F'f6
VER:
S16D-SlS'f-6005-090s19(Windows@CE 5.0)
System
Initial setup
icon
to
restore
58968 KB
Memory Storage:
Available Memory: 39980 KB
A.
Click icon for initial setting. Shut
te
m. such as volume. language
sys
B.
Click
the
r:lown
al'ld
retlootthe
anr:l
skin . will restore the inillal stale.
system
file
.
Document repair
r:levice. some settings of the
46
Page 50

System setting
1,
EQ setting
Click the icon EO
in
the menu,
or
click the"
II
, to enter EO setting
"
SCU~:..::::
ED
~ ~ ~
USER
\1tJ'.J
LOUD
'H
On
Tj
..
-
•
...
(:jO)
adjustment
for
to
realize it
PI
front sound track, click the right
R R
~ ~
BASS
SETTING OPTIONS SPECIFICATION
User User
Rock Rock
Hlp Hop Hlp Hop
ED
LOUD Loud Loud
BASS
MID
TREB
SUB
FAD-BAL
Dance Dance
Latin Latin
Rave Rave
Urban Urban
Acoustic Acoustic
-14-+14
-14-+14
-14-+14
-14-0
[11
F
R
~
MID TRES
Bass settinq
Middle settinq
Treble setting
Subwoofer
Balance setiing
coordinate
"
SUB
~)ic
*
~"J
~
"j
D
II
III
47
Page 51

[2]
[3]
[4]
R
L
Balance set1ing for rear sound
coordinate to realize
Balance
set1ing
for left sound track, click the right
coordinate to realize
R
Balance set1ing for right sound track, click the right
coordinate to realize
1rack,
click the right
it
it
it
2. System Setting
Under Main User inteliace, click the "set up" icons or"O ",or enter into the system seting menu by
other
UI,
which can set up or revise the clock mode, the area
of
the clock,TV and Radio and so on.
• General setting:
Function Area:
[1]
... First botton, Set
[2]
... Second Botton, SUb-botton
[3]
...
AII
options for the second botton
N,m<;
Set up options Functions description
Video Area America/Europe/Japan/ eastern Select the Video system according to the
TV system
['ie
up
the Common parameter
of
the first Botton
europe fChina
NTSCIPAL _ B _ GIPAL
_If
PAL _ OK
48
ell)
end- User' s
Select the TV system accordingly
Area
Page 52

Genera Wheel Turn on/off
Date Turn on/off
Correct TS Turn on/off
Steering Wheel Control
When
turn
on. the wheel key
with
the system, can finish the pair of the
wheel operation by learning
show
(32),
When trun on,
setting up, can set
manual,
When turn
correction user interface.
will enter into the system time
up
as
picture show
on,
will enter into the touch screen
is
it As picture
and adjust to time
(33)
,
as
picture
connected
by
(34),
0
8
III
U
III
[
1]
",Mode,
[2]
[3]
'"
[4]
'"
[5]
Time and
Mode
*1
I~
VOL+
Next item
Previous item
Increase Volume.
Clear AIL
Da1e
~
~
~
a
a
a
ClearAti
VOL-
Mute
NAVI
~II
(32)
I'
i c
[6]
'"
decrease volume.
[7]
Muteo
[8]
'"
Naviga1ion ,
[9]
",Pause,
[10]
a
~
a
~
a
~
a
Save&Exil
Save&Exito
®
CD
®
®
®
49
Page 53

Correct touch screen
In
the interface of correcting touch screen,click
The icons"+",
automatically enter into the system setting
interiace, if the position
bias, with this function,can correct the touch
area automatically .
• User setting
if
touch screen
is
corrected, will
of
the touch screen
[1]
..
Time
in
Zones,
[2]
..
seUing
up the time by
dick
them
[3]
..
hours or
[4]
..
[5]
..
[6]
...
cursor
Clock mode,
24
hours.
Save&ExiL
Cancle.
Calender
can
move by hand
Can
choose
in
zones, orange
12
is
ric
(:·\1 )
Pic (35)
50
Page 54

NAME SET
User Russia/Thai
setting
UP
OSD
Language se/ArabidGermanf shows
Wall Page P1/P2/P3 Select the background picture for the
Load
Factory automatically return back
Sys Info On/Off When select"on", will pop
Car Logo On/Off
OPTIONS SPECIFICATION
Englishfchinese/Japane Select the Language
UI
Main
Yes/No When select
factory
software version information,
When select"on"will enter into
logo interface,
as
the screen
"yes", system selling will
to
the load
up
the
the
car
as
picture
(36).
Car Logo selectable
Users can select his favorate car logo
remarked with underline.
""'-',
.,.~
R!JV!"
,
•
~
<~-::-)
UI
i~"
(7)
0:~~
i
~
E3J
®
=,
-~-./
!".VO
'/
.:~
-.......
D
Pic
C3iJ)
[1]
... next page, Circulation
[2]
Save&Exit
of
the
page.
as
his opening picture. The selected car logo will
(r;~r;
"'
9
~
Canc"
@
)
C~J
®
)
f.:~-;>,
1
!II
51
@
.rI..
..
"
§'
~
R
E}
Pic
(Q)
1;.
r,
"
-l
®
/
-
.,j;6
~~
(:37)
be
"1<ii\'
©
S
~
~
c;;;;;;;;;-
@
D
!II
Page 55

[3]
... Cancel
• Vedio setting
Botton Name Set up options specifications
Camera
Vedio mirror mirror images
Driving Permit/prohibit When driving, the video
video
ON/OFF select
"on"
when reverse parking,will display
in
the rear mirror, when tum off, will
display the captured images
is
open/not.
• Audio setting
52
Page 56

~
cl'
~.,
..
"
!J
• \ j
*
Botton
Name
Regular
• Bluetooth
General P.vOL
Customer
Video
'A:U'd7O
Source
Beep
SUB
~
C2
C2
C2
L4
Radio
On
On
Blueloolh
Set
UP
Preset L 1/L2/L3/L4/L5/L6/L7 Users can preset
Volume
Player
sources
Key
The
setting(lf
Radio/DVD/SDfUSB/iPodl
BluetoothfTV/Navi/AUX
tone On/Off Turn on/off the key tone
Bass On/Off Turn on/off the
Equipped)
Options Specification
to
their
habits
a variety
IN machine, select the priority for the
sources.
of
~
LI
L2
~
~
L3
L4
L5
~
...
the
volume
the devices access
subwoofer
according
to
the
Pi c
Un)
53
Page 57

Name Setting Options Specification
Auto Answer ON/OFF Can
Bluetooth will receive automatically or not
Connection ON/OFF If have paired records,can/not pair automatically
type
Bluetooth ON/OFF Turn on/off the bluetooth
be connected with phone,when a telephone call,
54
Page 58

~
Phenomenon
Reasons
Solutions
o
C"
if
~
o
"
&
,
No
.....
1
Fuse
of
machine power supply and auto vehicle
hattery
is
Not operating Voltage of power supply
Remote control doesn't work
55
No
or low sound Big deviation of volume balance setting
Automatic protection system avoids fault due to
Battery
Battery is not pleaced correctly
Disconncetion;
Volume setting is low volume;
Loudspeaker fault;
Earthing
burnt;
illegal operation
is
out of power;
in
loudspeaker conection
is
overloaded
Change for fuse
Adjust voltage;
Reset the system by pressing the
Reset key
Change new battery
Reinstall battery;
Check the connection;
Check the setting, increase volume
Adjust the volume balance setting to
middle place;
Change for a new loudspeaker
Keep insulation of loudspeaker
connection
of
the correct types;
Inferior disc
of
Inferior quality
Distortion of sound
Machine reset by itself when it is
shut down
Poorfunciton
Poor function of panel key The keys on the panel sometimes get stuck
sound;
of
touch screen Touch screen has't been corrected,
Poor quality audio source
Loudspeaker does not match impedance
machine
Speaker fault
Connection of
is
used;
ACe
and
B+
of
is
not
correct
DIsplay
the
Use genuine discs;
Don't use high compressed audio
source to play;
Change a matched loudspeaker;
Change a loudspeaker.
Check and reconnect ACC and
Enter system setting interface and
correct the touch screen,
Check the panel key (Handled by the
dealer when necessary, )
B+
Page 59

Phenomenon Reasons Solutioins
No image
Connection
Not braking state.
of
brake wire
is
not correct;
Connect brake wire with cathode of power supply
corereclly;
Keep braking state after the car
is
placed safely.
Unstable output of image system video setting;
Wrong information
on the panel information
is
shown The screen cannot display all the
DVD does not correspond with the present
Video signal line
is
not connected correctly.
Adjust systerm video setting;
Check and replace video signal line
Radio
56
Weak signal completely
DIoICord
Break-down during playing
Disc does not play Lock function:
SD card readable by
unreadable by the device under the system. Panasonic, Apacer, etc.
R.
odlng
PC
Auto antenna does not reach out
LOC function
Disc
Documents or records are damaged. Replace the disc or choose stored file.
The disc level surpasses the level setting of
The area code
Due to compatibility reasons of
but brand, not all
The mismatching of
is
under working state
is
stained or scratched; Clean or replace the disc;
of
the disc
is
incompatible
SD
of
the SD card can be read card brands: SanDisk, KingMAX, Kingston,
SO
card format.
card The present system mainly support the following SD
Connect auto antenna line correctly
Close LCC function
of
in
FAT
format.
Lock feature;
Adjust the level setting
Use a compatible disc.
SO
card shall
be
Page 60

System Parameter
DVDICD Player
Compatible formats: DVD-R,DVD-RW,DVD+R,
DVD+RW,CD-R,CD-RW,CD-DA,MP3,WMA,HDVD
SVCD,VCD,MPEG,JPEG
Display Screen
Screen type: TFT
Response time: up=30millisecond, down=50millisecond
Display panel pixel: 384,000 pixel
Angle range, depression angle=65°, elevation .angle=40". left vision=65°,
Right vision=65
Q
Video
Standards: NTSC,
Output: 1V
Input: 1V
p•p
C 750hm)
p_p
(750hm)
PAL
(Auto recognition)
57
Page 61

DVD
VIDEO
VCD
DISC
58
 Loading...