

Page 1
Read this manual carefully before you use this machine and keep
it handy for future reference. For safe and correct use, be sure to
read the Safety Information in "Read This First" before using the
machine.
For information not in this manual, refer to
the HTML/PDF files on the supplied
CD-ROM.
Appendix
Troubleshooting
Adding Paper and Ink
Web Image Monitor
Document Server
Scan
Print
Copy
Getting Started
What You Can Do with This Machine
User Guide
Page 2

Page 3

TABLE OF CONTENTS
How to Read the Manuals.................................................................................................................................5
Symbols Used in the Manuals.......................................................................................................................5
Model-Specific Information............................................................................................................................... 6
Names of Major Features..................................................................................................................................7
1. What You Can Do with This Machine
Saving Paper.......................................................................................................................................................9
Converting Documents to Electronic Formats Easily......................................................................................10
Registering Destinations...................................................................................................................................11
Operating the Machine More Effectively...................................................................................................... 12
Customizing the [Home] Screen as You Like................................................................................................. 13
Making Copies Using Various Functions........................................................................................................14
Printing Data Using Various Functions............................................................................................................15
Utilizing Stored Documents............................................................................................................................. 16
Using the Scanner in a Network Environment............................................................................................... 17
Preventing Information Leakage (Security Functions)....................................................................................18
Monitoring and Setting the Machine Using a Computer..............................................................................19
Preventing an Unauthorized Copy................................................................................................................. 20
2. Getting Started
Guide to Names and Functions of Components............................................................................................21
Guide to Functions of the Machine's Options................................................................................................24
Guide to Functions of the Machine's External Options.............................................................................24
Guide to the Names and Functions of the Machine's Control Panel........................................................... 25
How to Use the [Home] Screen...................................................................................................................... 28
Adding Icons to the [Home] Screen........................................................................................................... 29
Registering Functions in a Program.................................................................................................................33
Example of Programs...................................................................................................................................35
Turning On/Off the Power..............................................................................................................................37
Turning On the Main Power........................................................................................................................37
Turning Off the Main Power........................................................................................................................37
When the Authentication Screen is Displayed...............................................................................................39
User Code Authentication Using the Control Panel.................................................................................. 39
Logging In Using the Control Panel............................................................................................................39
Logging Out Using the Control Panel.........................................................................................................40
1
Page 4

Placing Originals..............................................................................................................................................41
Placing Originals on the Original Table.................................................................................................... 41
Scanning an Original Using a Carrier Sheet.............................................................................................42
Placing Rolled Originals..............................................................................................................................43
3. Copy
Basic Procedure................................................................................................................................................45
Reducing or Enlarging Originals.....................................................................................................................47
Preset Reduce / Enlarge............................................................................................................................. 47
Zoom.............................................................................................................................................................48
Auto Reduce / Enlarge............................................................................................................................... 49
User Auto Reduce / Enlarge...................................................................................................................... 50
Combined Copying......................................................................................................................................... 53
Specifying the Length of Copy Paper Cut...................................................................................................... 55
Synchro Cut..................................................................................................................................................55
Preset Cut......................................................................................................................................................55
Variable Cut................................................................................................................................................. 57
Copying from the Paper Bypass Location...................................................................................................... 59
Copying onto Regular Size Paper from the Paper Bypass Location........................................................59
Copying onto Custom Size Paper from the Paper Bypass Location........................................................ 60
Storing Data in the Document Server............................................................................................................. 62
4. Print
Installing the Printer Driver for a Network Connection..................................................................................63
Installing the Printer Driver for the Selected Port........................................................................................63
Using Windows Print Server as a Network Printer....................................................................................68
Installing the Printer Driver for USB Connection............................................................................................ 69
Windows XP, Windows Server 2003/2003 R2..................................................................................... 69
Windows Vista, Windows Server 2008....................................................................................................70
Windows 7, Windows Server 2008 R2....................................................................................................70
Displaying the Printer Driver Properties.......................................................................................................... 72
Standard Printing..............................................................................................................................................73
Locked Print.......................................................................................................................................................74
Sending a Locked Print File......................................................................................................................... 74
Printing a Locked Print File Using the Control Panel..................................................................................74
2
Page 5

Hold Print.......................................................................................................................................................... 76
Sending a Hold Print File.............................................................................................................................76
Printing a Hold Print File Using the Control Panel..................................................................................... 76
Stored Print........................................................................................................................................................78
Sending a Stored Print File..........................................................................................................................78
Printing a Stored Print File Using the Control Panel...................................................................................78
5. Scan
Basic Procedure When Using Scan to Folder................................................................................................81
Creating a Shared Folder on a Computer Running Windows/Confirming a Computer's Information.....
.......................................................................................................................................................................82
Registering an SMB Folder......................................................................................................................... 84
Deleting an SMB Registered Folder........................................................................................................... 87
Entering the Path to the Destination Manually...........................................................................................88
Basic Procedure for Sending Scan Files by E-mail........................................................................................89
Registering an E-mail Destination............................................................................................................... 90
Deleting an E-mail Destination....................................................................................................................91
Entering an E-mail Address Manually........................................................................................................92
Basic Procedure for Storing Scan Files...........................................................................................................93
Checking a Stored File Selected from the List............................................................................................94
Specifying the File Type...................................................................................................................................95
Specifying Scan Settings................................................................................................................................. 96
6. Document Server
Storing Data......................................................................................................................................................97
Printing Stored Documents...............................................................................................................................99
7. Web Image Monitor
Displaying Top Page..................................................................................................................................... 101
8. Adding Paper and Ink
Precautions for Loading Paper......................................................................................................................103
Loading Paper into the Paper Input Location...............................................................................................105
Printing from the Paper Input Location Using the Printer Function......................................................... 117
Loading Paper into the Paper Bypass Location...........................................................................................119
Printing from the Paper Bypass Location Using the Printer Function......................................................122
Recommended Paper Sizes and Types........................................................................................................126
3
Page 6

Paper Roll...................................................................................................................................................139
Cut Paper................................................................................................................................................... 140
Translucent Paper...................................................................................................................................... 140
Adding Ink......................................................................................................................................................141
Sending Scanned Documents When Ink Has Run Out.......................................................................... 143
Ink............................................................................................................................................................... 143
Replacing an Ink Collector Unit....................................................................................................................146
9. Troubleshooting
Indicators........................................................................................................................................................149
When an Indicator for the [Check Status] Key Is Lit....................................................................................150
Panel Tone......................................................................................................................................................152
When You Have Problems Operating the Machine...................................................................................153
When Print Results Are Not Satisfactory......................................................................................................161
Checking Whether the Print-heads Scratch the Paper........................................................................... 161
Checking Whether a Nozzle is Clogged................................................................................................161
Maintenance..................................................................................................................................................163
Print Nozzle Check Pattern.......................................................................................................................163
Clean Print-heads...................................................................................................................................... 165
Flush Print-heads........................................................................................................................................166
Adjustment..................................................................................................................................................167
When Messages Are Displayed on the Control Panel...............................................................................177
Messages Displayed When Using the Copy/Document Server Function........................................... 177
Messages Displayed When Using the Printer Function..........................................................................180
Messages Displayed When Using the Scanner Function...................................................................... 191
When Messages Are Displayed on Your Computer Screen..................................................................... 205
Messages Displayed When Using the Scanner Function...................................................................... 205
10. Appendix
Trademarks.....................................................................................................................................................211
INDEX...........................................................................................................................................................213
4
Page 7
How to Read the Manuals
Symbols Used in the Manuals
This manual uses the following symbols:
Indicates points to pay attention to when using the machine, and explanations of likely causes of paper
misfeeds, damage to originals, or loss of data. Be sure to read these explanations.
Indicates supplementary explanations of the machine's functions, and instructions on resolving user
errors.
This symbol is located at the end of sections. It indicates where you can find further relevant information.
[ ]
Indicates the names of keys on the machine's display or control panels.
Indicates instructions stored in a file on a provided CD-ROM.
(mainly Europe)
(mainly North America)
Differences in the functions of Region A and Region B models are indicated by two symbols. Read the
information indicated by the symbol that corresponds to the region of the model you are using. For
details about which symbol corresponds to the model you are using, see p.6 "Model-Specific
Information".
5
Page 8
Model-Specific Information
CPL004
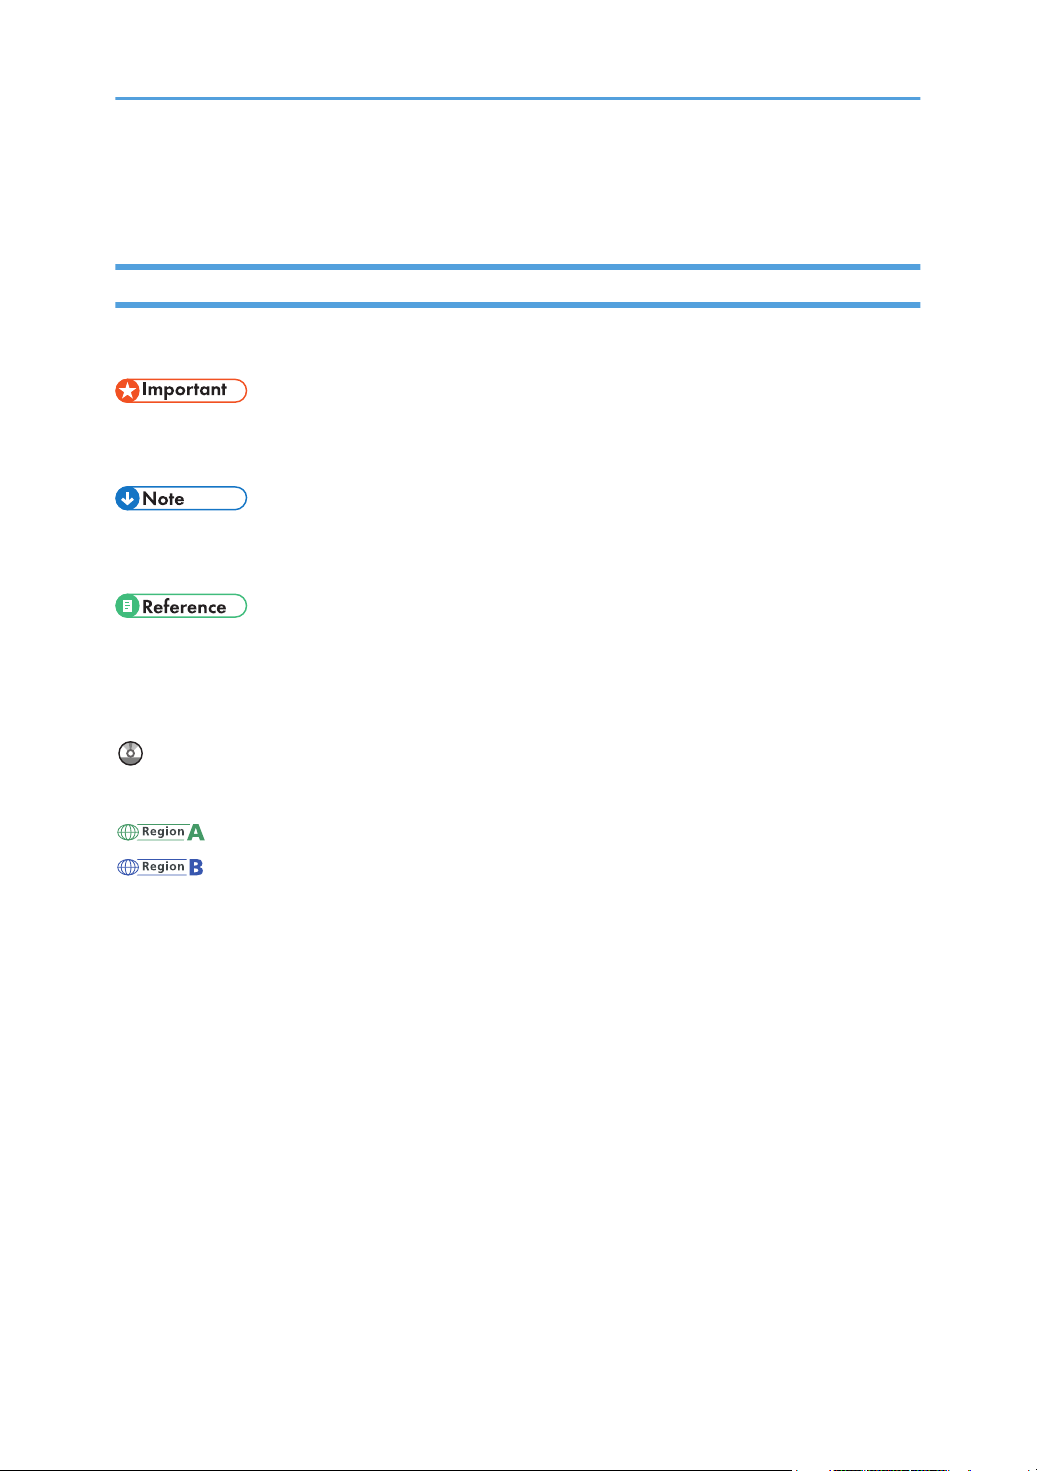
This section explains how you can identify the region your machine belongs to.
There is a label on the rear of the machine, located in the position shown below. The label contains
details that identify the region your machine belongs to. Read the label.
The following information is region-specific. Read the information under the symbol that corresponds to
the region of your machine.
(mainly Europe)
If the label contains the following, your machine is a region A model:
• CODE XXXX -27
• 220–240 V
(mainly North America)
If the label contains the following, your machine is a region B model:
• CODE XXXX -17
• 120–127 V
• Dimensions in this manual are given in two units of measure: metric and inch. If your machine is a
Region A model, refer to the metric units. If your machine is a Region B model, refer to the inch
units.
6
Page 9

Names of Major Features
In this manual, major features of the machine are referred to as follows:
• Roll Unit RU6520 Paper Input Location 2
7
Page 10

8
Page 11
1. What You Can Do with This Machine
BRL059S
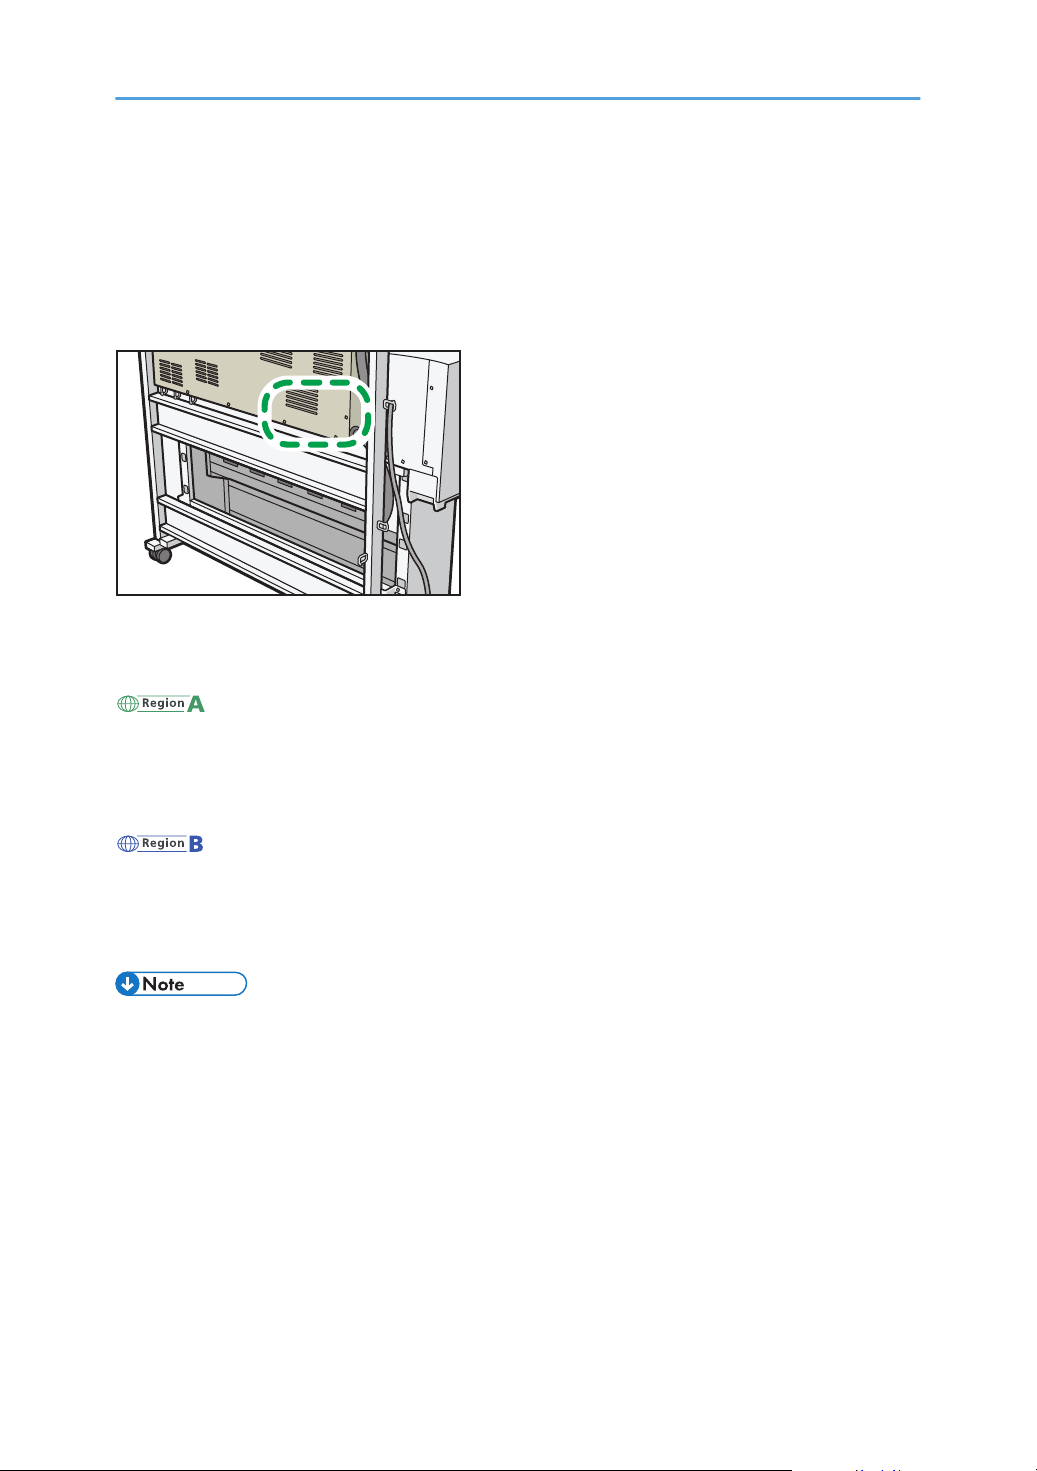
You can search for a description by what you want to do.
Saving Paper
Printing multi-page documents on a single sheet (Combine)
See "Combined Copying", Copy/ Document Server .
Conserving ink when printing (Ink Save function)
See "Enabling the Ink Save Function", Print .
9
Page 12

CQH100
1. What You Can Do with This Machine
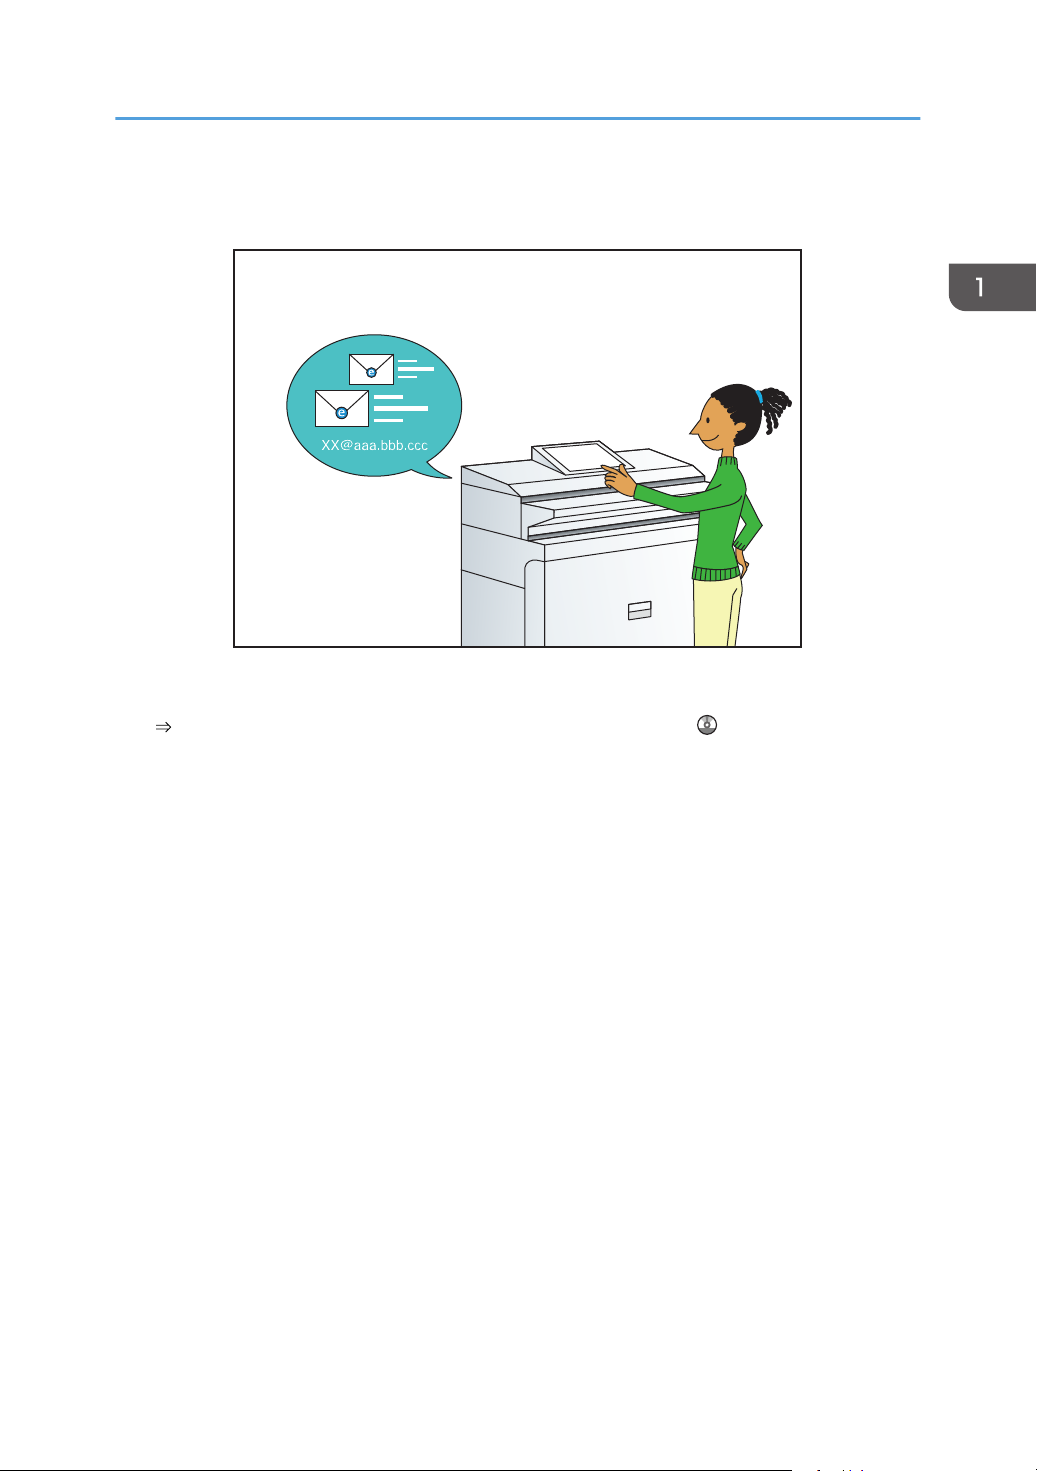
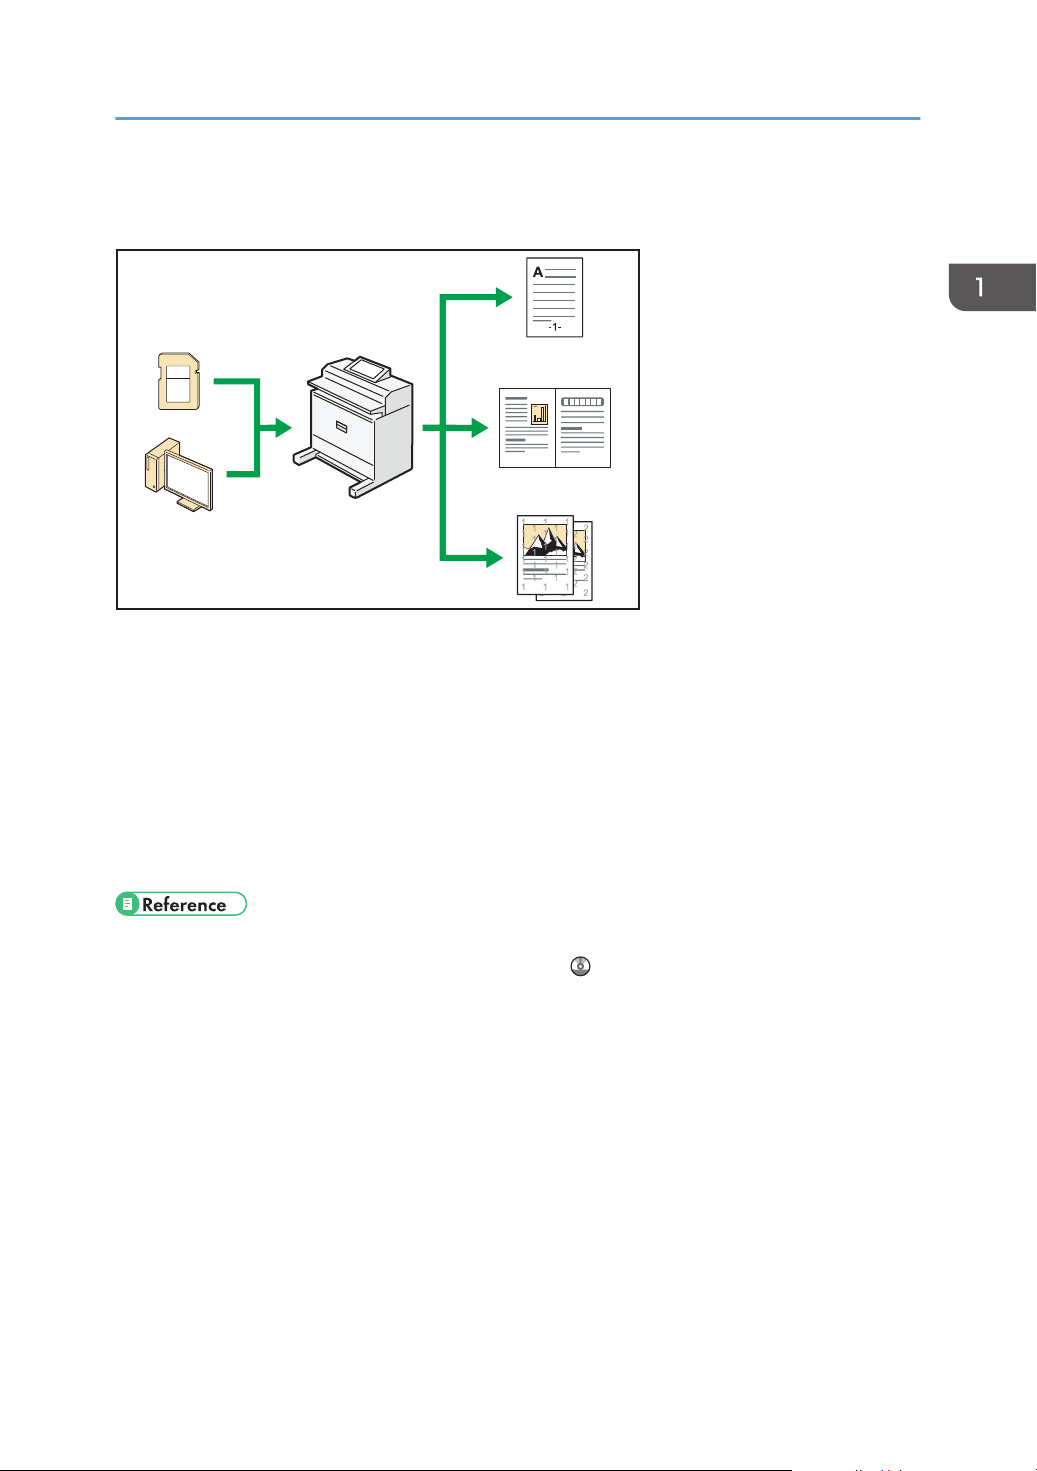
Converting Documents to Electronic Formats Easily
Sending scan files
See "Basic Procedure for Sending Scan Files by E-mail", Scan .
Sending the URL of the folder in which scan files are stored
See "Sending the URL by E-mail", Scan .
Storing scan files in a shared folder
See "Basic Procedure When Using Scan to Folder", Scan .
Storing scan files on media
See "Basic Procedure for Saving Scan Files on a Removable Memory Device", Scan .
Managing and using documents converted to electronic formats (Document Server)
See "Relationship between Document Server and Other Functions", Copy/ Document Server .
Reducing the document size of scanned data (Reduce / Enlarge)
See "Edit", Scan .
Reducing the file size of scanned data while maintaining the text legibility (PDF (JPEG 2000))
See "Specifying the File Type", Scan .
10
Page 13
Registering Destinations
CQH101
Registering Destinations
Using the control panel to register destinations in the Address Book
See "Registering a destination in the address book manually", Scan .
11
Page 14
CQH102
1. What You Can Do with This Machine
Operating the Machine More Effectively
Registering and using frequently-used settings (Program)
See "Registering Functions in a Program", Convenient Functions .
Registering frequently-used settings as initial settings (Program as Defaults (Copier/Document
Server/Scanner))
See "Changing the Default Functions of the Initial Screen", Convenient Functions .
Registering frequently-used printing settings to the printer driver
See "Using One Click Presets", Print .
Changing the initial settings of the printer driver to frequently-used printing settings
See "Displaying the Printing Preferences Dialog Box", Print .
Adding shortcuts to frequently used programs or Web pages
See "Adding Icons to the [Home] Screen", Convenient Functions .
Changing the order of the function and shortcut icons
See "Changing the Order of Icons on the [Home] Screen", Convenient Functions .
12
Page 15
CQH001
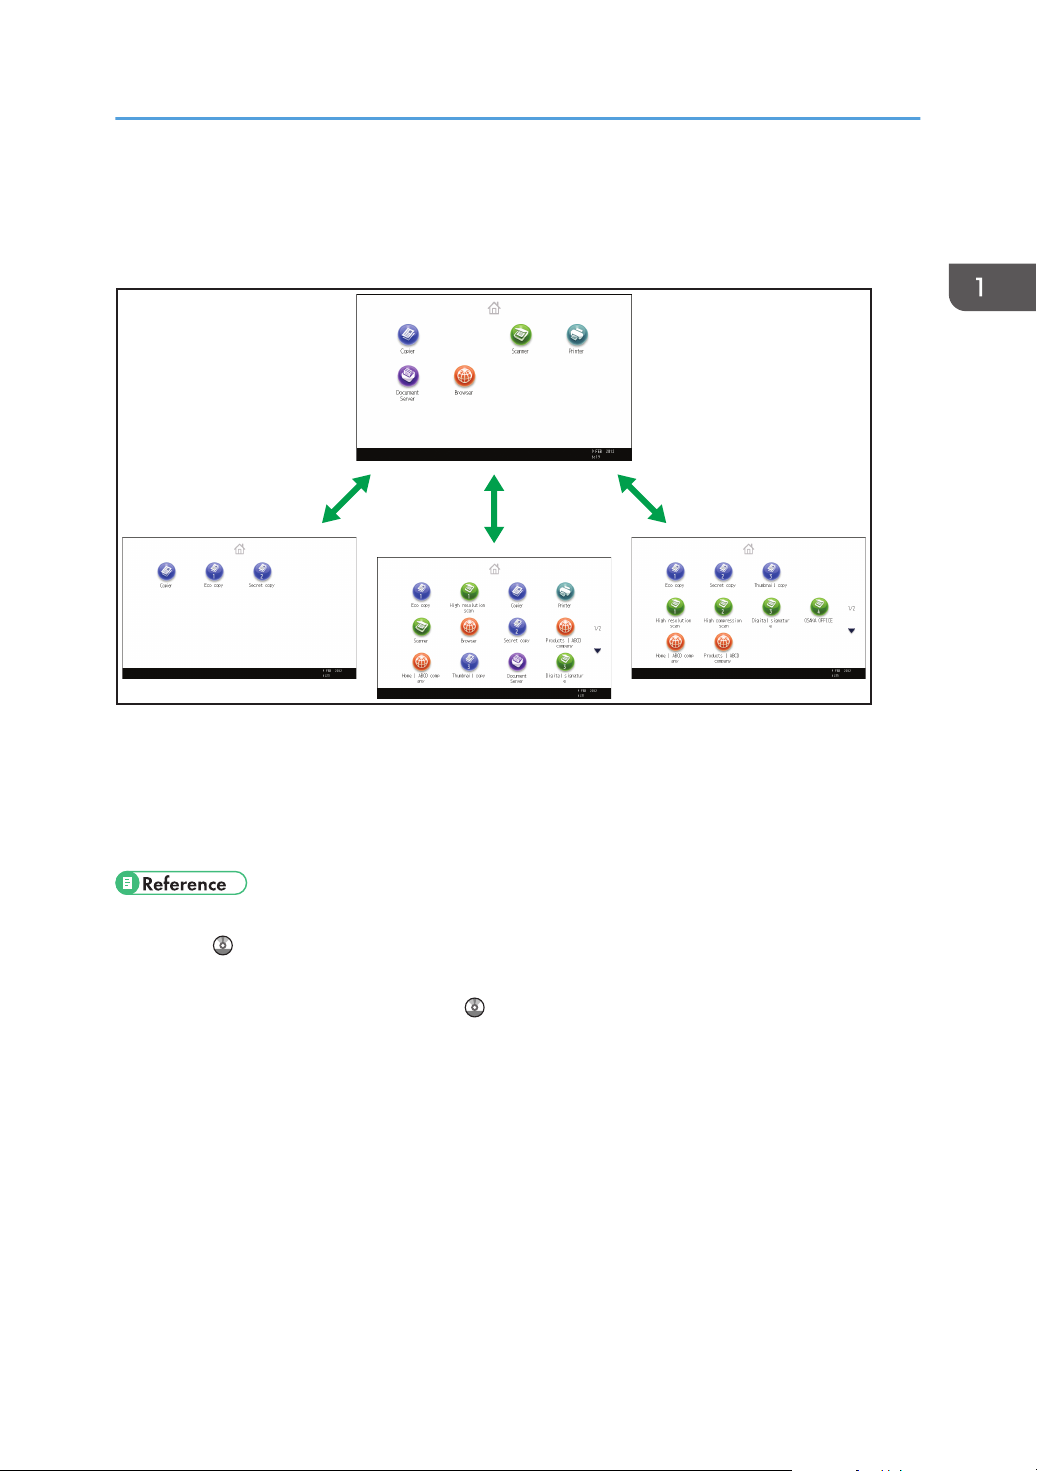
Customizing the [Home] Screen as You Like
Customizing the [Home] Screen as You Like
The icons of each function are displayed on the [Home] screen.
• You can add shortcuts to often used programs or Web pages to the [Home] screen. The programs
or Web pages can be recalled easily by pressing the shortcut icons.
• You can display only the icons of functions and shortcuts that you use.
• You can change the order of the function and shortcut icons.
• For details about the features on the [Home] screen, see "How to Use the [Home] Screen", Getting
Started .
• For details about how to customize the [Home] screen, see "Types of [Home] Screens and How to
Customize Them", Convenient Functions .
13
Page 16
CQH002
1. What You Can Do with This Machine
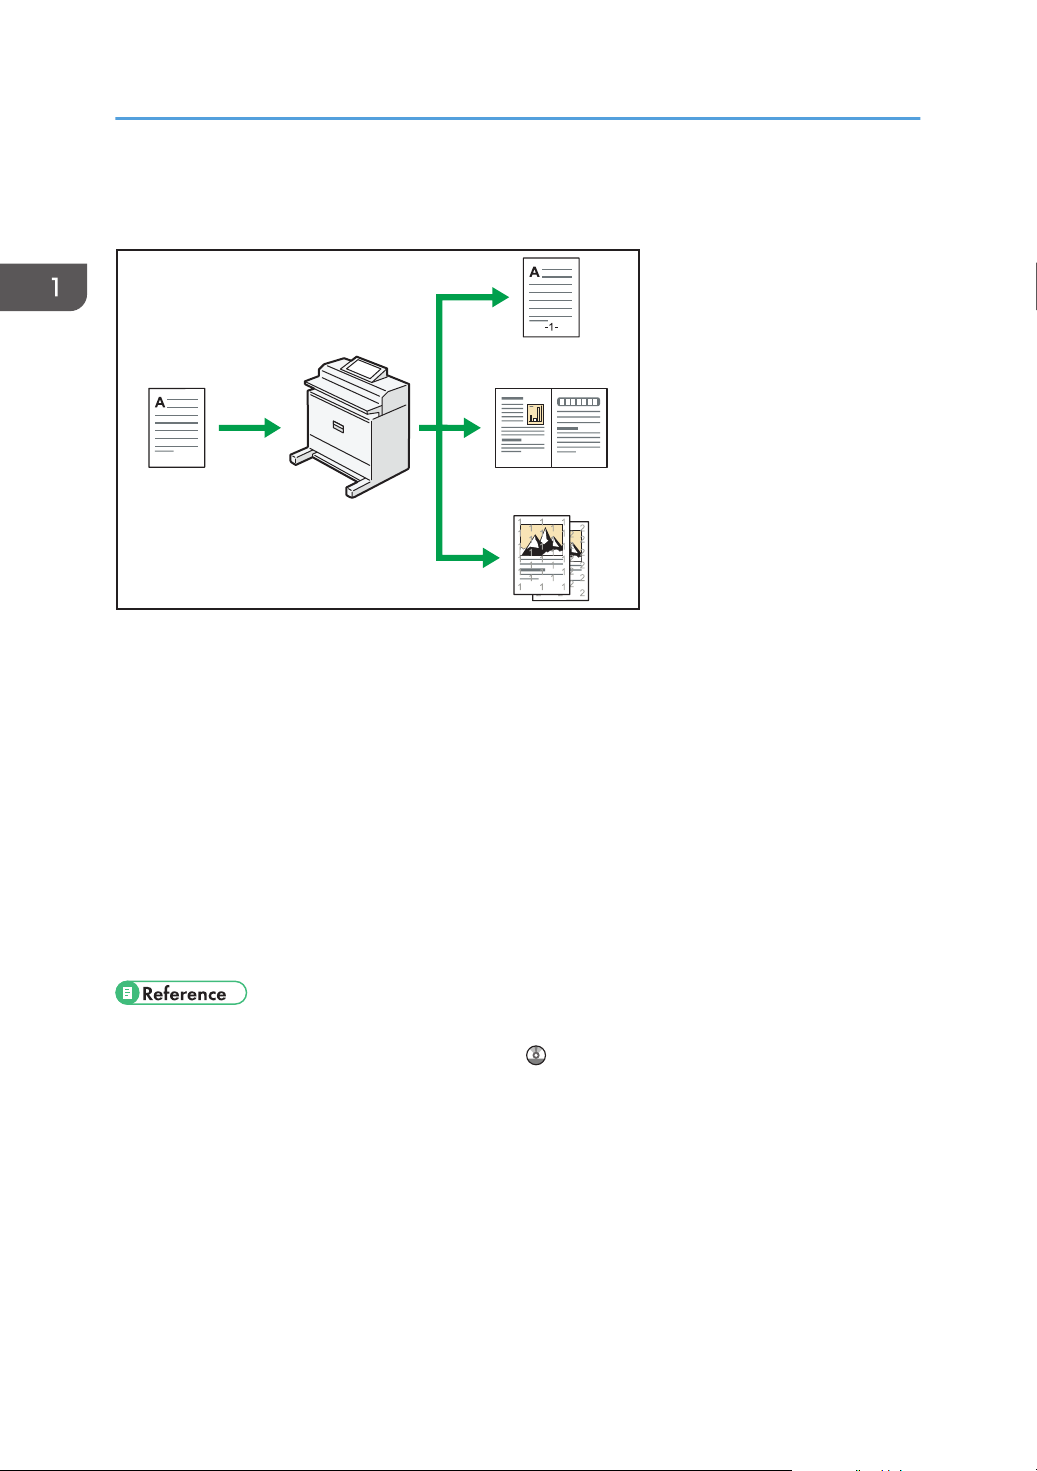
Making Copies Using Various Functions
• You can make copies in full color. You can switch the color copy mode depending on the type of
originals used and the desired finish.
• You can print stamps on copies. Stamps can include background numbers, scanned images, dates,
and page numbers.
• You can adjust the color tones and image quality of your copies.
• You can reduce or enlarge the copy image. With the Auto Reduce / Enlarge function, the machine
automatically detects the original size, and then selects an appropriate reproduction ratio based
on the paper size you select. If the orientation in which your original is placed is different from that
of the paper you are copying onto, the machine rotates the original image by 90 degrees and fits it
on the copy paper.
• You can use the "Combine" function to save paper by printing multiple pages on a single sheet.
• See "Copying in Color", "Stamps", "Adjusting Color", "Reducing or Enlarging Originals", and
"Combined Copying", Copy/ Document Server .
14
Page 17
CQH003
Printing Data Using Various Functions
Printing Data Using Various Functions
• This machine supports network and local connections.
• You can send PDF files directly to the machine for printing, without having to open a PDF
application.
• You can print or delete print jobs stored on the machine's hard disk, which have been previously
sent from computers using the printer driver. The following types of print jobs can be selected:
Sample Print, Locked Print, Hold Print, and Stored Print.
• You can print files stored on a removable memory device and specify print conditions such as print
quality and print size.
• See "Printing a File Directly", "Storing Documents in the Hard Disk Drive and Printing them", and
"Direct Printing from a Memory Storage Device", Print .
15
Page 18
CQH004
1. What You Can Do with This Machine
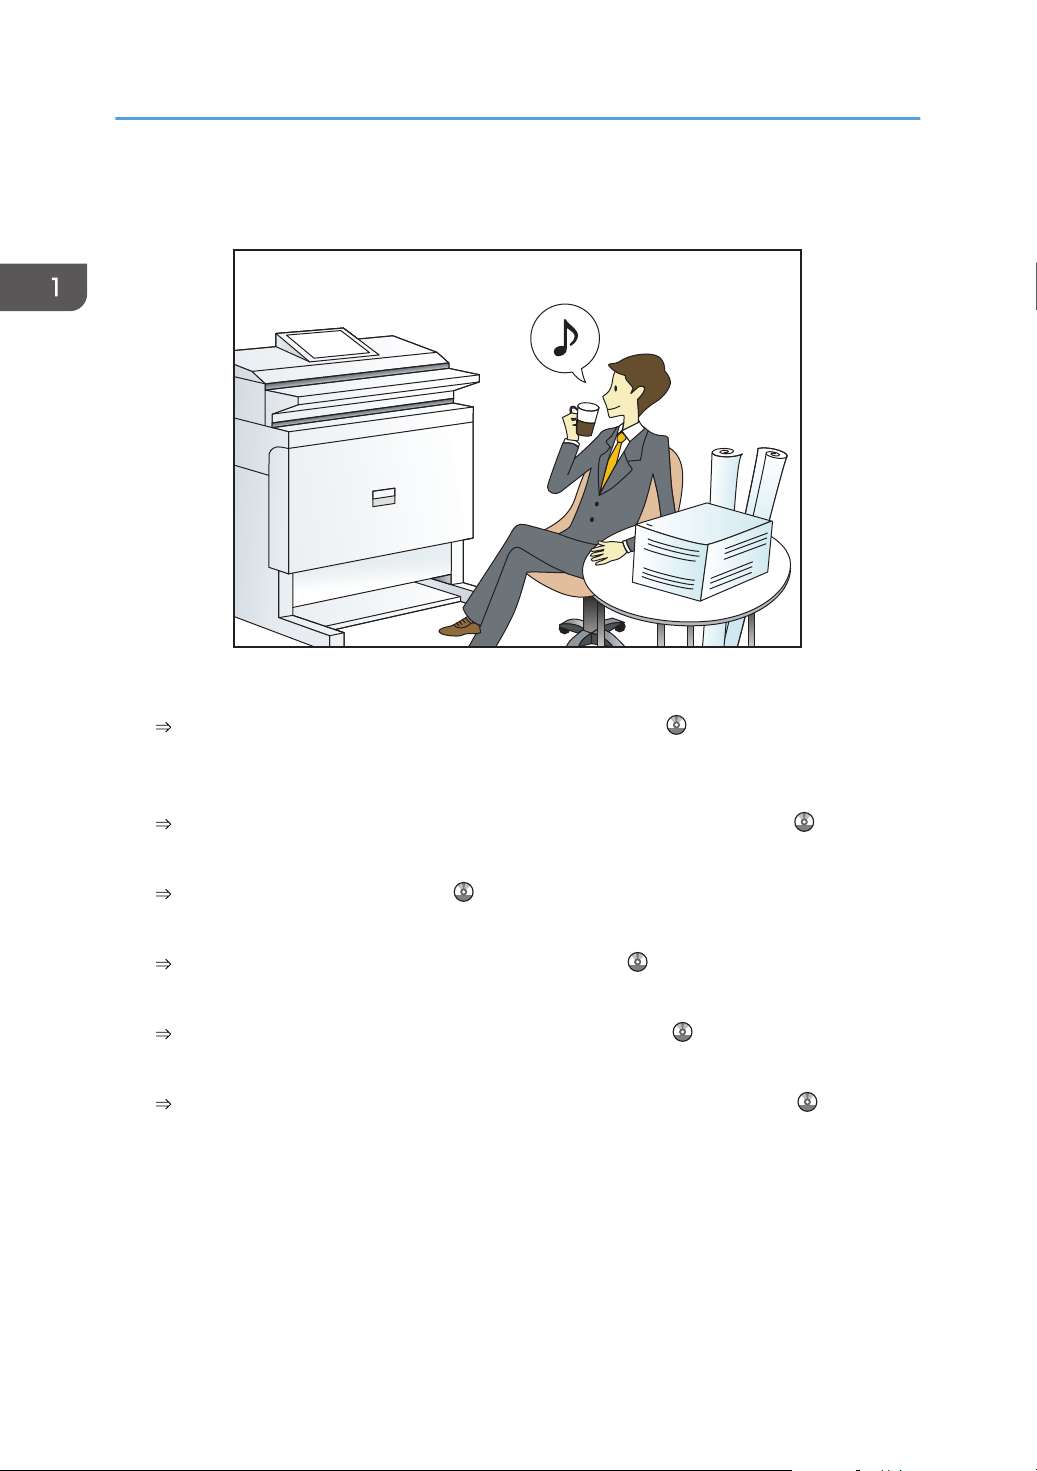
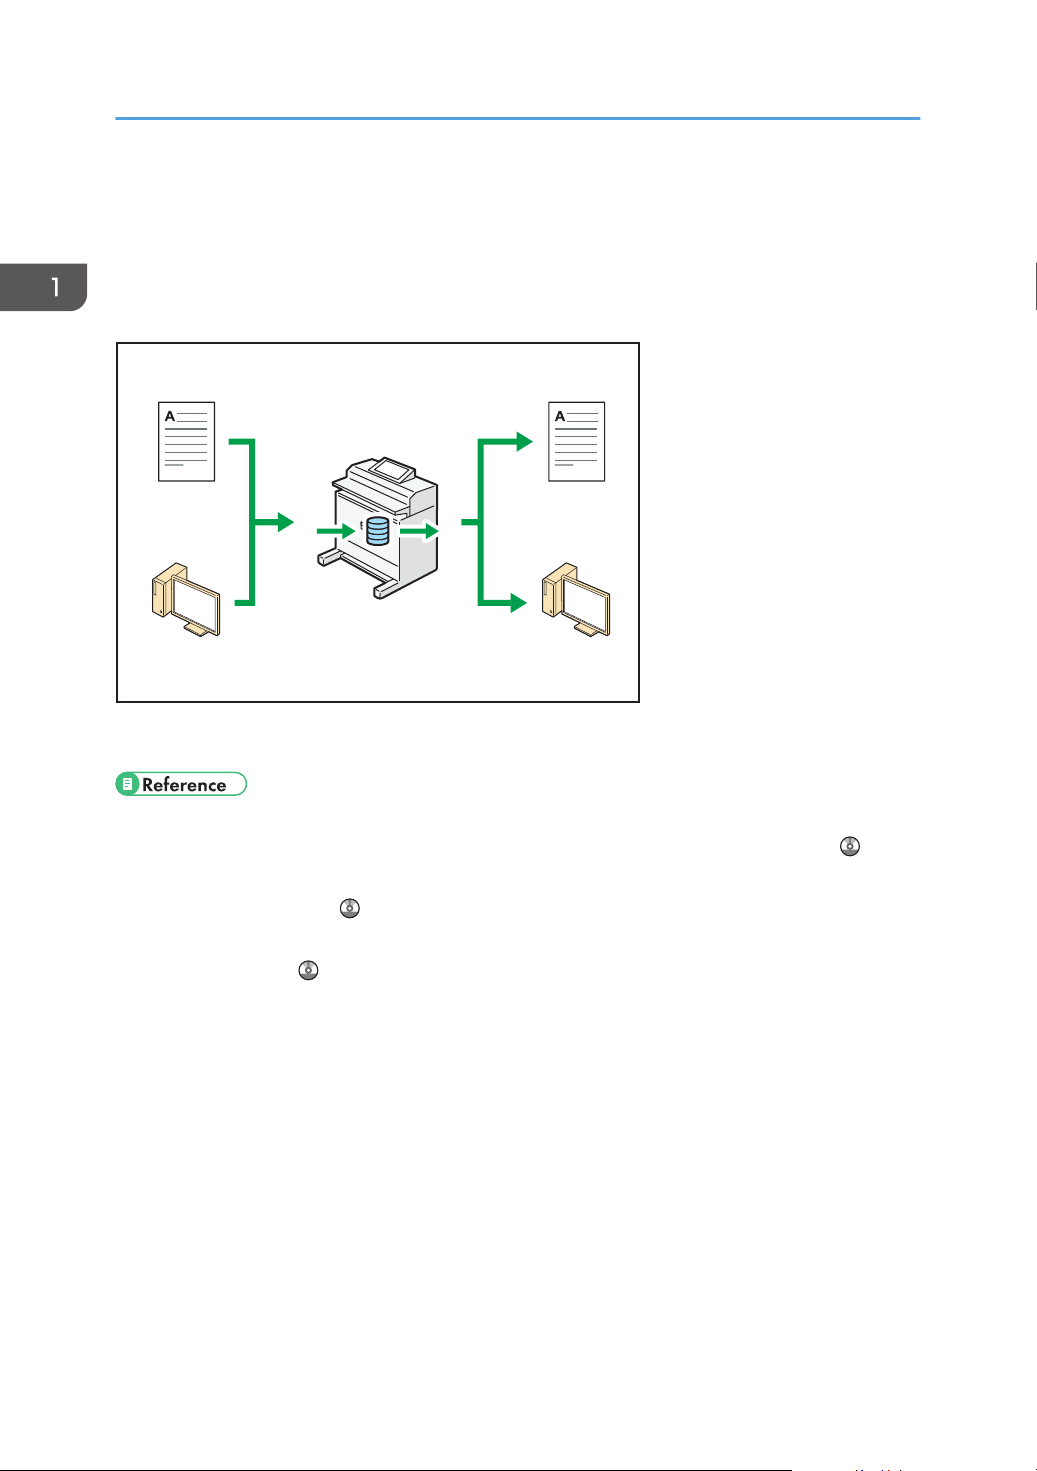
Utilizing Stored Documents
You can store files scanned in copier, printer, or scanner mode on the machine's hard disk. With Web
Image Monitor, you can use your computer to search for, view, print, delete, and send stored files via
the network. You can also change print settings and print multiple documents (Document Server).
• Using the file format converter, you can download stored documents to your computer.
• For details about the Document Server in copier mode and how to use the Document Server, see
"Storing Data in the Document Server" and "Document Server", Copy/ Document Server .
• For details about the Document Server in printer mode, see "Saving and Printing Using the
Document Server", Print .
• For details about the Document Server in scanner mode, see "Storing and Saving the Scanned
Documents", Scan .
16
Page 19
CQK103
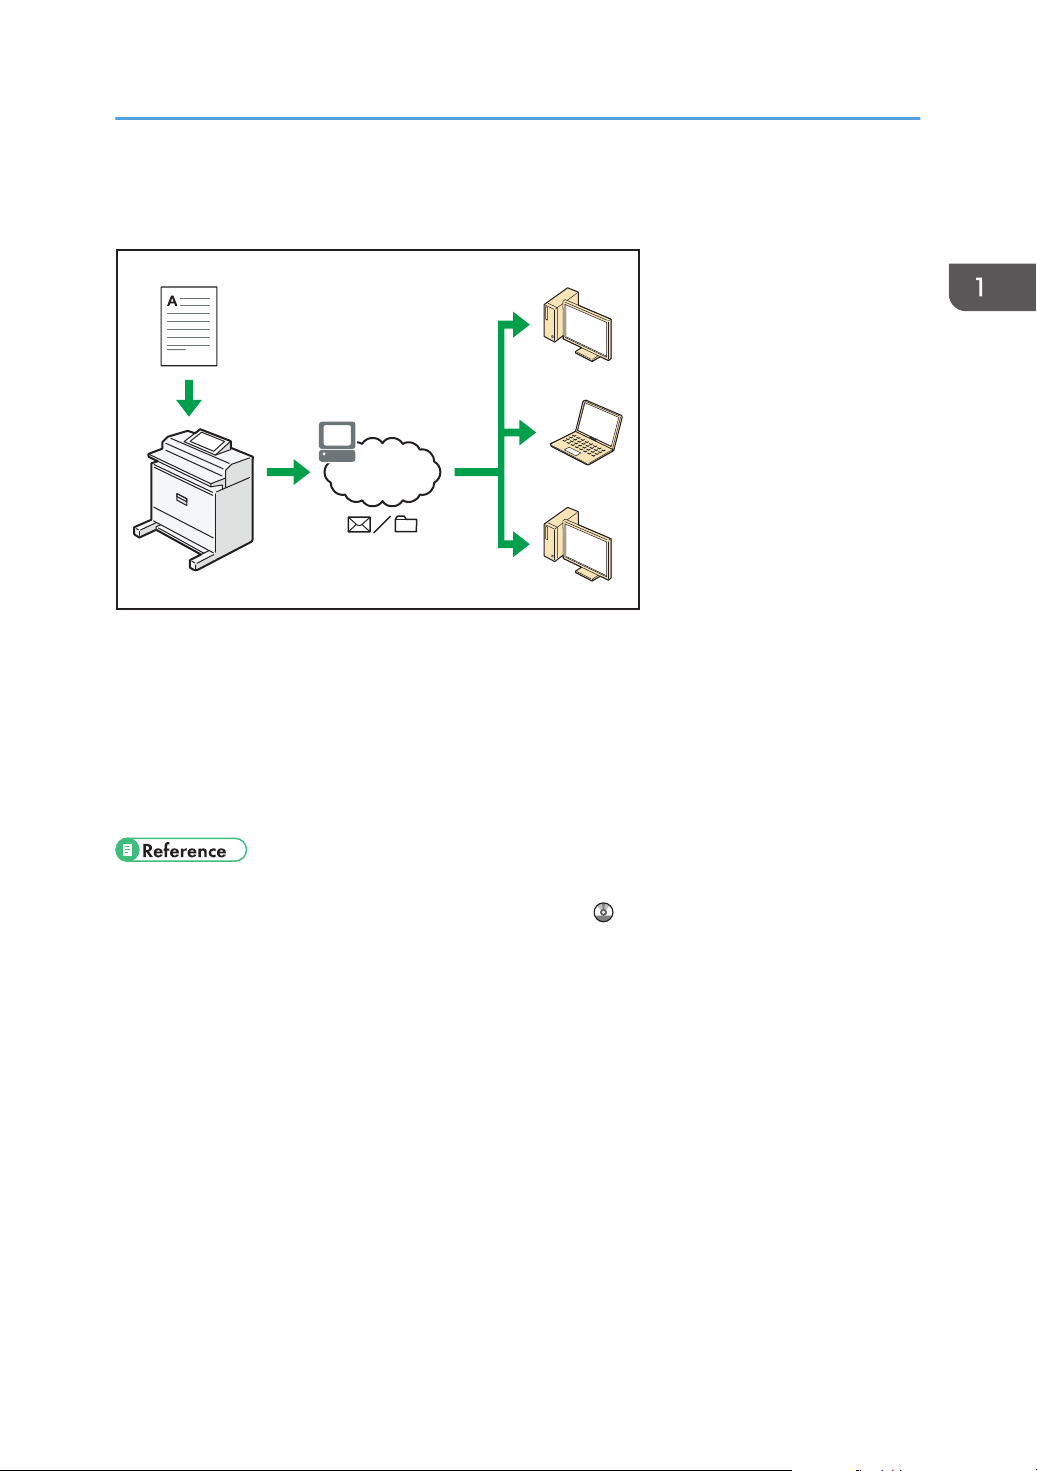
Using the Scanner in a Network Environment
Using the Scanner in a Network Environment
• You can send scan files to a specified destination using e-mail (Sending scan files by e-mail).
• You can send scan files directly to folders (Sending scan files by Scan to Folder).
• You can use this machine as a delivery scanner for the ScanRouter delivery software*1 (Network
delivery scanner). You can save scan files in the delivery server or send them to a folder in a
computer on the same network.
The ScanRouter delivery software is no longer available for sale.
*1
• See "Basic Procedure for Sending Scan Files by E-mail", "Basic Procedure When Using Scan to
Folder", and "Basic Procedure for Delivering Files", Scan .
17
Page 20
CQK104
1. What You Can Do with This Machine
Preventing Information Leakage (Security Functions)
• You can protect documents from unauthorized access and stop them from being copied without
permission.
• You can control the use of the machine, as well as prevent machine settings from being changed
without authorization.
• By setting passwords, you can prevent unauthorized access via the network.
• You can erase or encrypt the data on the hard disk to minimize the risk of information leakage.
• You can limit the usage of functions for each user.
• See Security Guide .
18
Page 21
CQH005
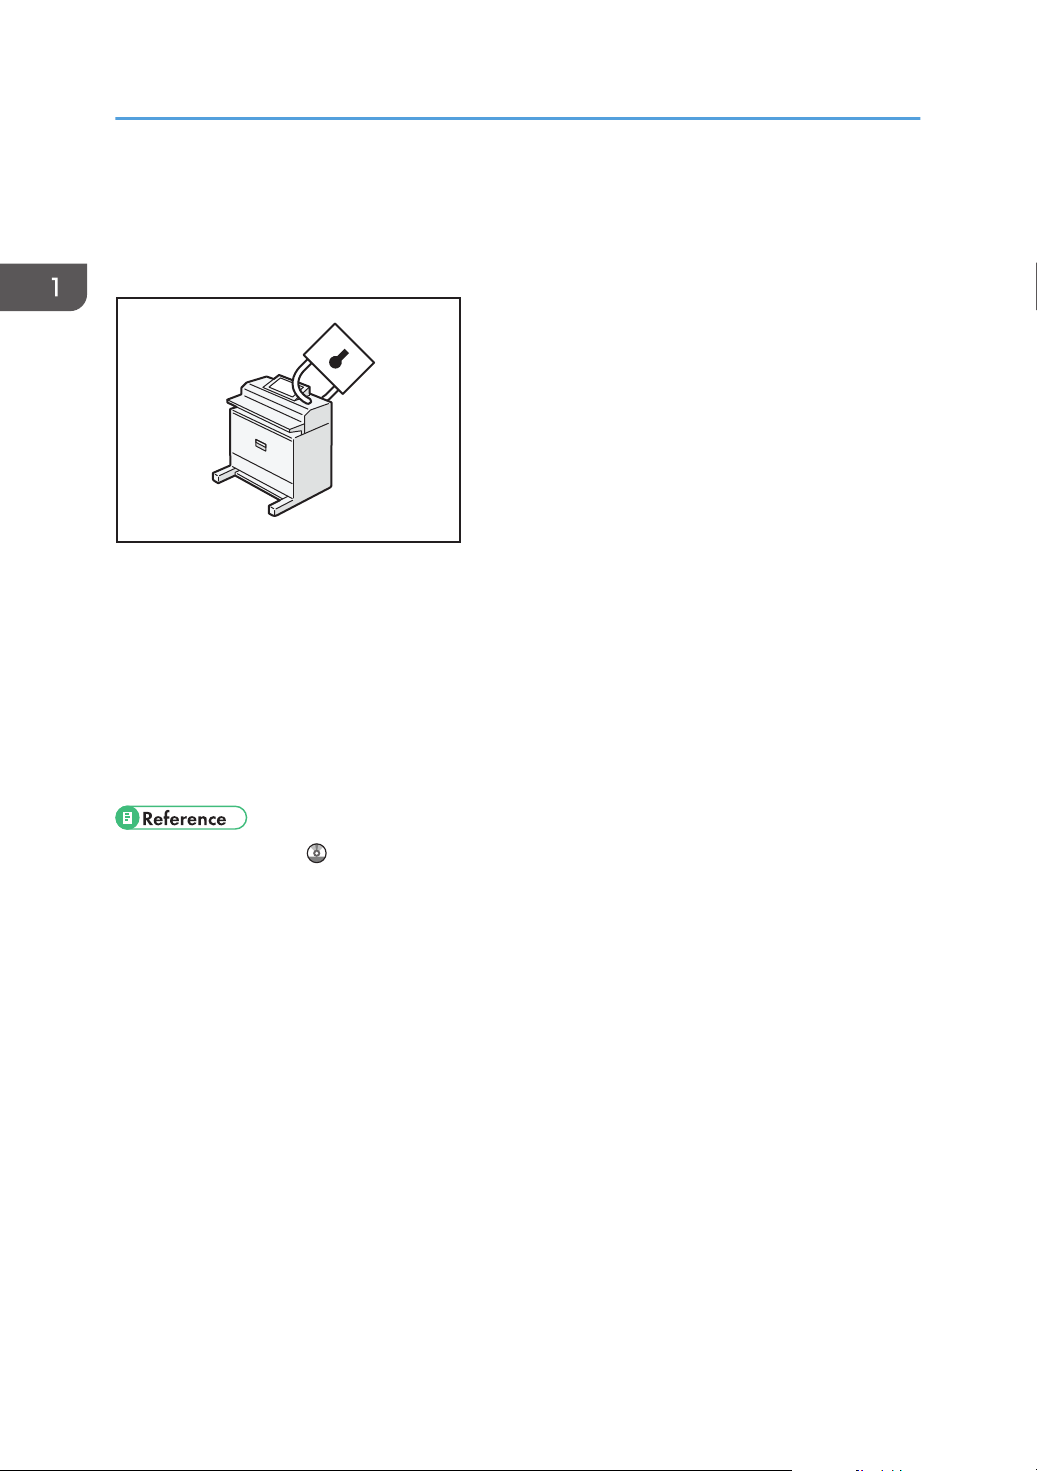
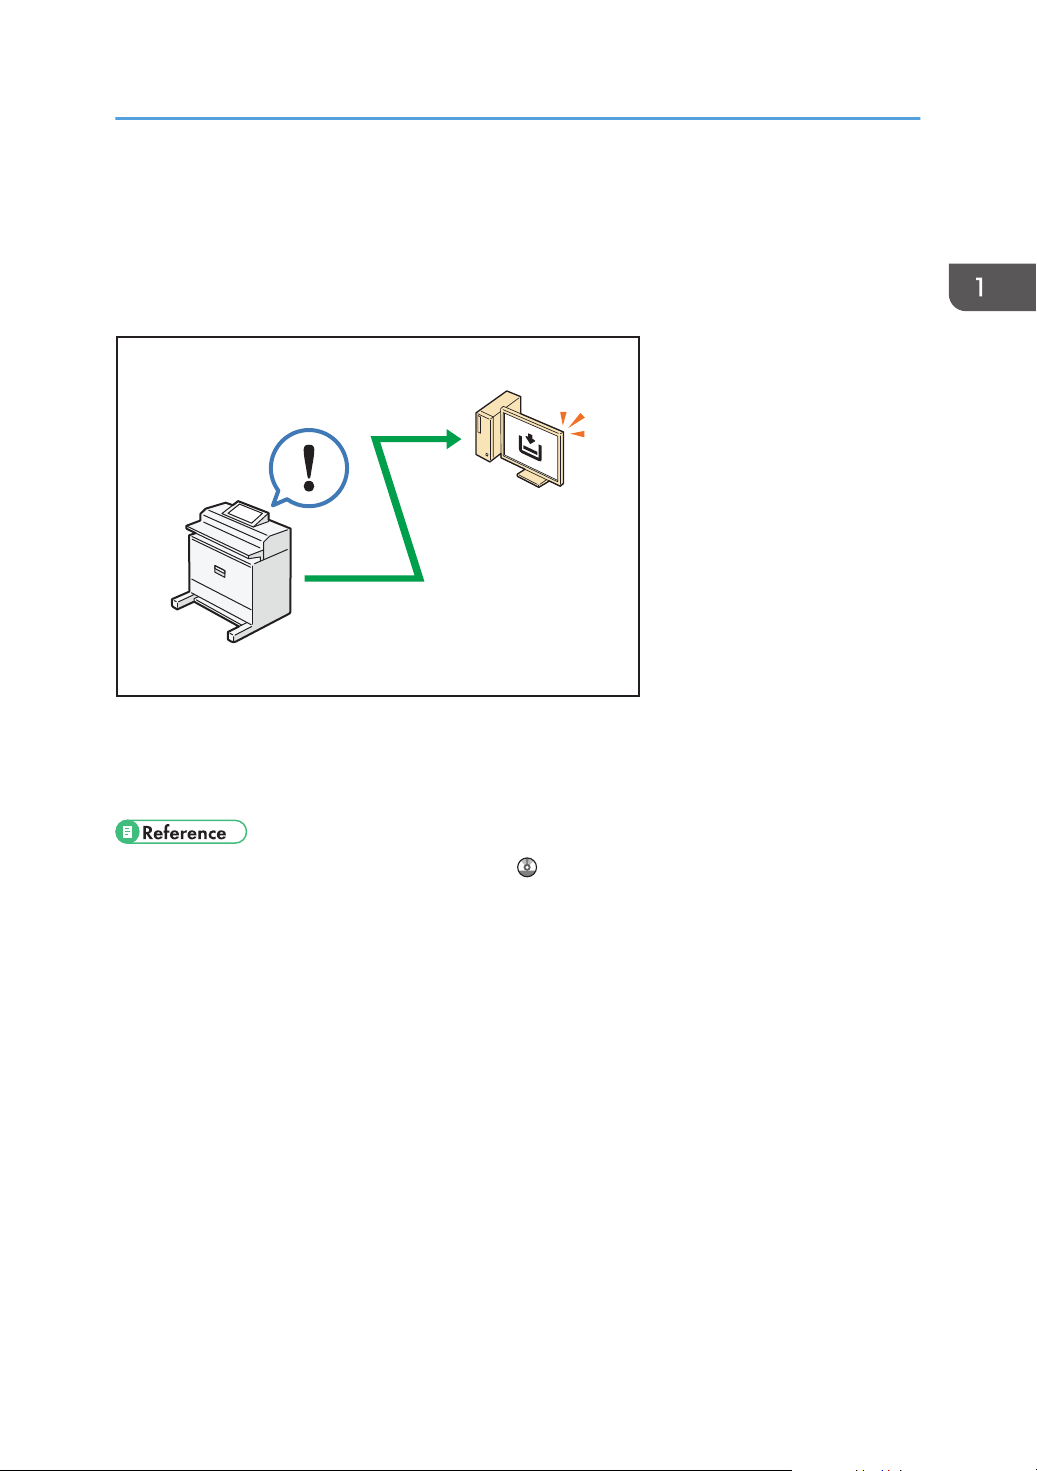
Monitoring and Setting the Machine Using a Computer
Monitoring and Setting the Machine Using a
Computer
Using Web Image Monitor, you can check the machine's status and change the settings.
You can check which paper input location is running out of paper, register information in the Address
Book, specify the network settings, configure and change the system settings, manage jobs, print the job
history, and configure the authentication settings.
• See Connecting the Machine/ System Settings or Web Image Monitor Help.
19
Page 22
CQH103
1. What You Can Do with This Machine
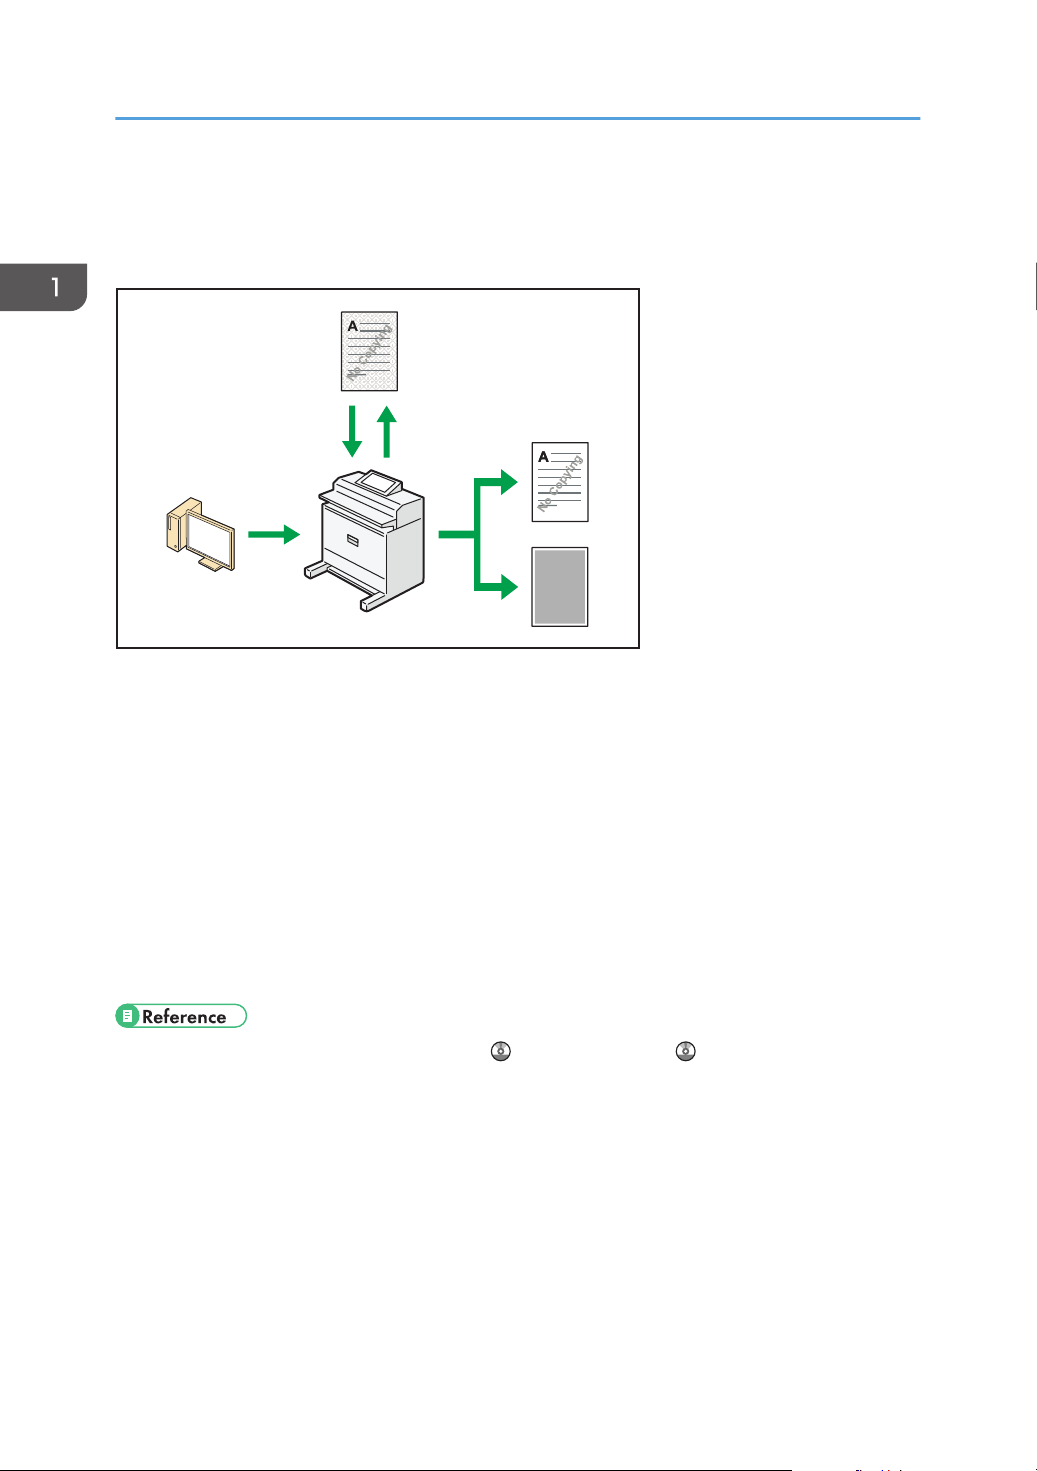
Preventing an Unauthorized Copy
You can print embedded pattern on paper to prevent them from being copied.
• Using the printer driver, you can embed a pattern in the printed document. If the document is
copied on a machine with the Copy Data Security unit, protected pages are grayed out in the
copy. This can minimize the risk of confidential information being copied. If a document protected
by unauthorized copy guard is copied on a machine that is equipped with the Copy Data Security
unit, the machine beeps to notify users that unauthorized copying is being attempted.
If the document is copied on a machine without the Copy Data Security Unit, the hidden text
becomes conspicuous in the copy, showing that the copy is unauthorized.
• Using the printer driver, you can embed text in the printed document for unauthorized copy
prevention. If the document is copied, scanned, or stored in a Document Server by a copier or
multifunction printer, the embedded text appears conspicuous in the copy, discouraging such
unauthorized copying.
• For details, see the printer driver Help, Print , and Security Guide .
20
Page 23
2. Getting Started
CPL001
1
2
3
4
6
7
5
8
9
1112
18
14
15
13
16
10
17
This chapter describes how to start using this machine.
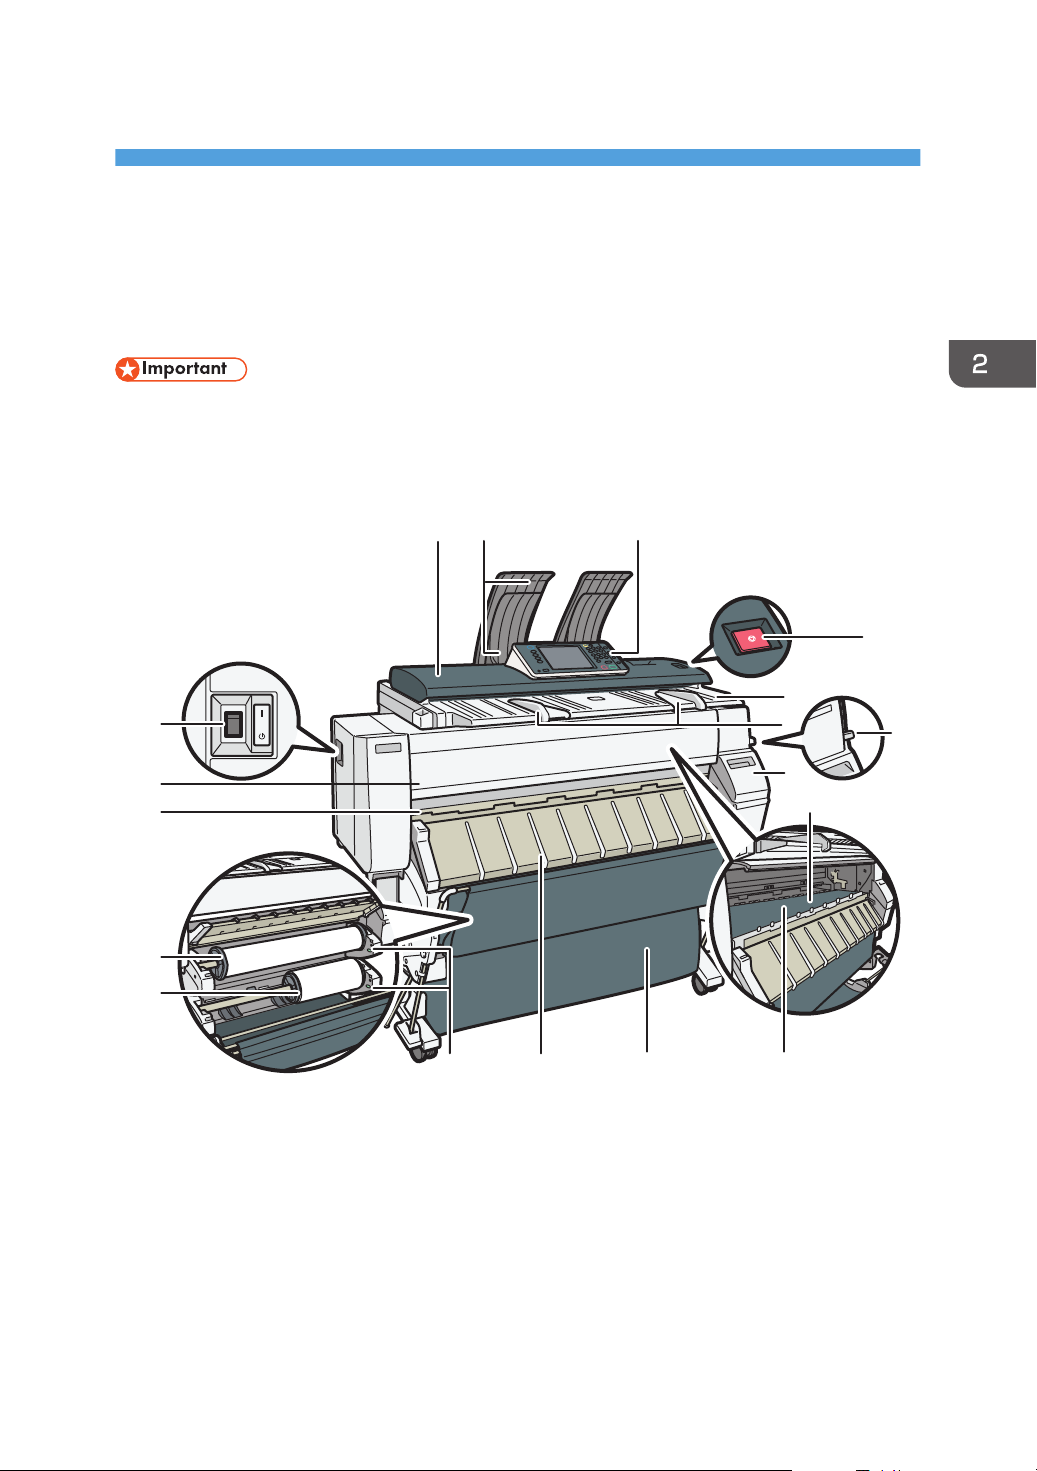
Guide to Names and Functions of Components
• Do not obstruct the ventilation holes by placing objects near them or leaning things against them. If
the machine overheats, a failure might occur.
Front
1. Original cover
Open to clear jammed originals.
2. Original stacker
Originals are stacked here.
3. Control panel
See p.25 "Guide to the Names and Functions of the Machine's Control Panel".
21
Page 24

2. Getting Started
4. [Scanner Stop] key
Use if originals are feeding in slanted, or to cancel scanning while an original is feeding in.
5. Original table
Place originals here scanning side down.
6. Original guide
Set to the width of your originals.
7. Paper holding lever
This lever holds paper that is inserted into the paper input location or the paper bypass location. Use this lever
to copy or print from the bypass location, or to remove misfed paper.
8. Cartridge cover
Open to replace print cartridges.
9. Platen
Paper is sucked down and prevented from floating. Clean this area if the back of the printouts becomes dirty.
See "Cleaning the Platen", Maintenance and Specifications .
10. Paper bypass location
Load paper here when you copy or print from the paper bypass location. Load paper print side up.
11. Output basket
The delivered paper is stacked here. Change the mode of the basket according to the size of the paper.
12. Paper input location cover
Open to load the paper roll onto the paper input location or to remove misfed paper.
13. Rewind button
Press this button to load the paper roll or to remove misfed paper.
14. Paper Input Location 1
Load a paper roll here.
15. Paper Input Location 2
Load a paper roll here.
16. Paper output location
The printouts are delivered here.
17. Front cover
This is the cover of the paper bypass location. Open this cover to copy or print from the paper bypass
location, to remove misfed paper, or to clean the platen.
18. Main power switch
To operate the machine, the main power switch must be on. If it is off, turn the switch on.
22
Page 25

Rear
CPL002
1
3
2
4
Guide to Names and Functions of Components
1. Original exit
Originals are delivered here.
2. Ventilation holes
Prevent overheating.
3. Ink collector unit cover
Open this cover to replace the ink collector unit. Ink used for maintenance collects in the ink collector unit.
4. Original output guide
Stacks originals delivered to the rear output.
23
Page 26
CPL003
2
1
2. Getting Started
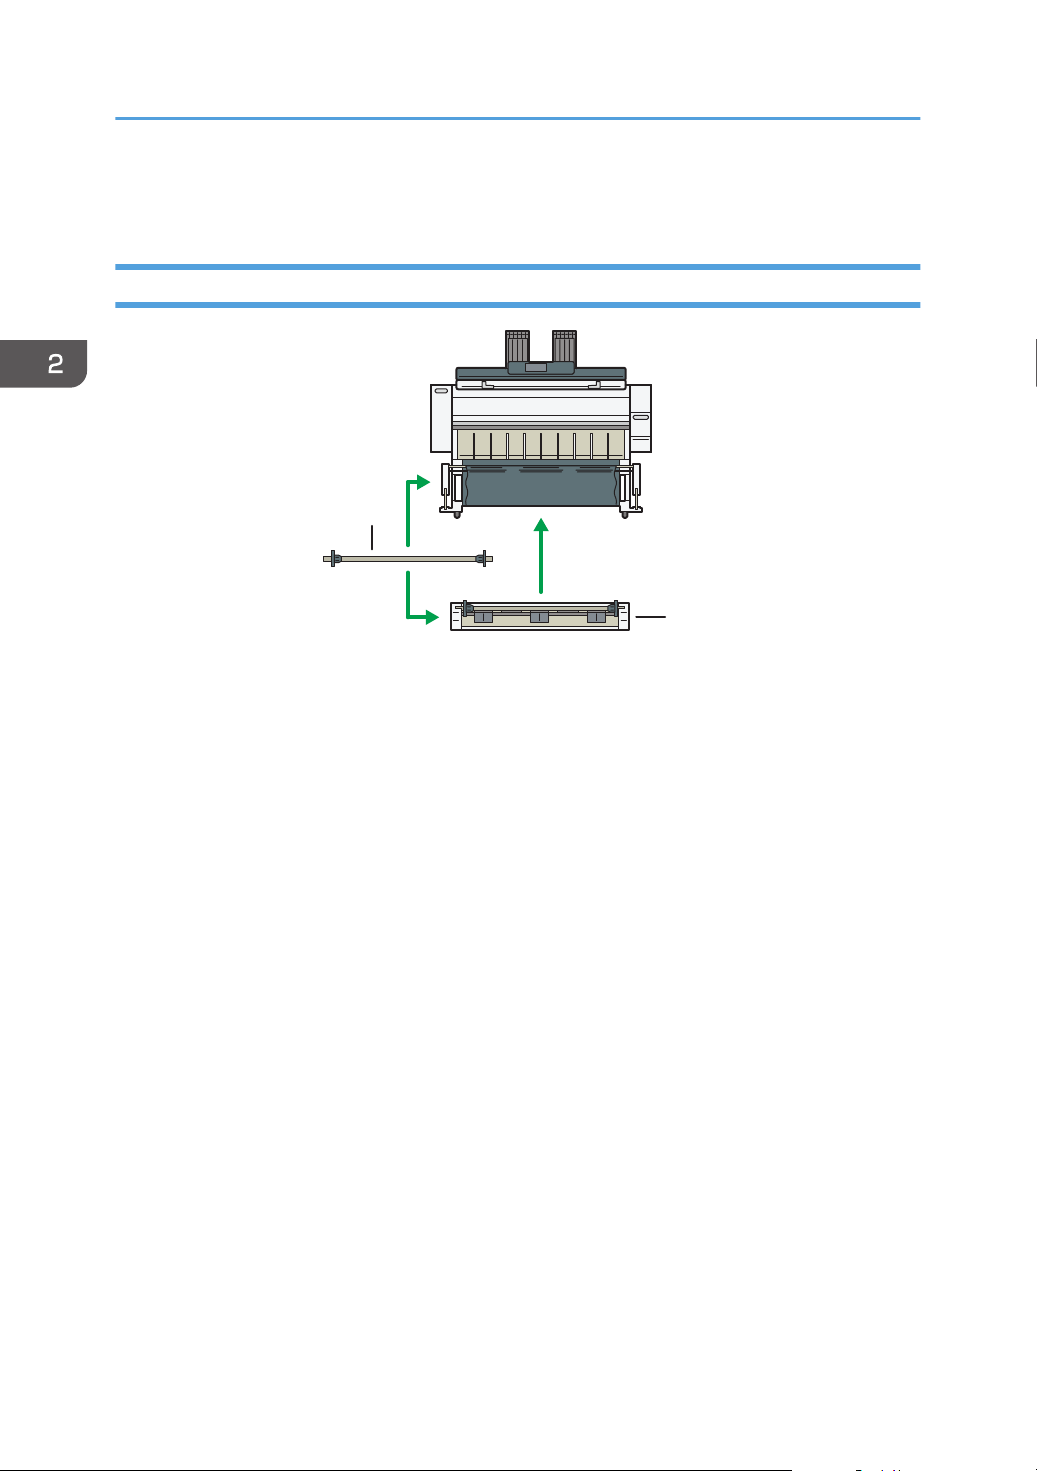
Guide to Functions of the Machine's Options
Guide to Functions of the Machine's External Options
1. Paper holder
Use to set a paper roll onto the paper input location.
This is useful to change quickly to a different size paper roll from the paper holder.
2. Paper Input Location 2
Load a paper roll onto this unit.
24
Page 27
CPL005
1
4 5 632
7
8
9
10
1112131415161718
19
20
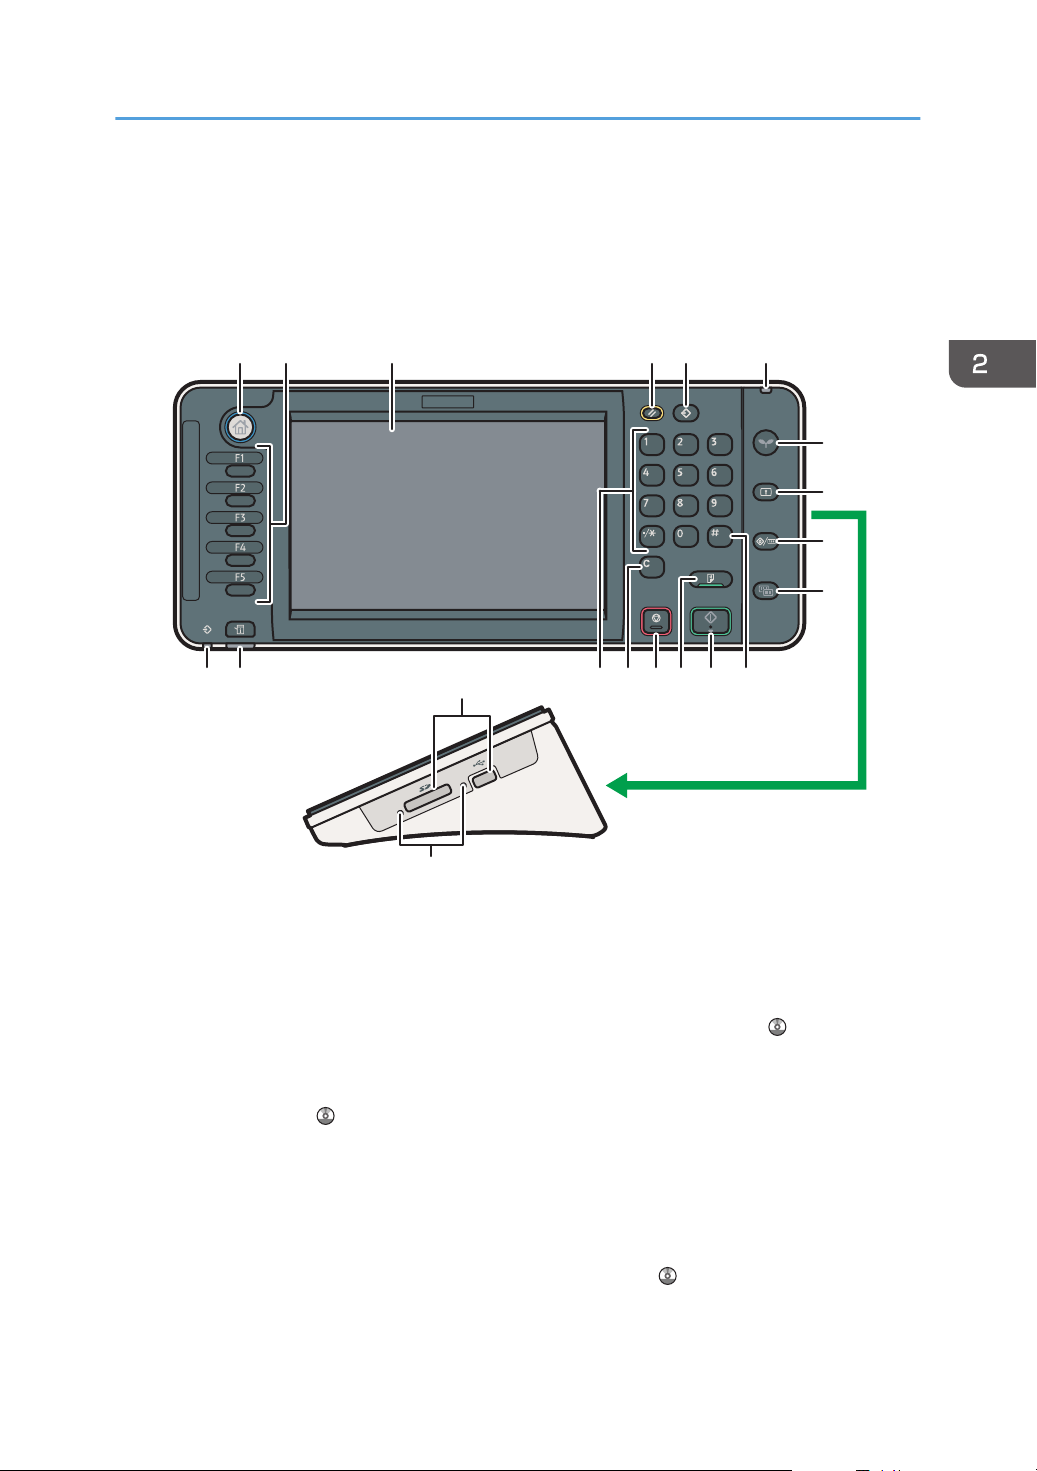
Guide to the Names and Functions of the Machine's Control Panel
Guide to the Names and Functions of the
Machine's Control Panel
This illustration shows the control panel of the machine with options fully installed.
1. [Home] key
Press to display the [Home] screen. For details, see p.28 "How to Use the [Home] Screen".
2. Function keys
No functions are registered to the function keys as a factory default. You can register often used functions,
programs, and Web pages. For details, see "Configuring function keys", Getting Started .
3. Display panel
Displays keys for each function, operation status, or messages. See "How to Use the Screens on the Control
Panel", Getting Started .
4. [Reset] key
Press to clear the current settings.
5. [Program] key (copier, Document Server, and scanner mode)
• Press to register frequently used settings, or to recall registered settings.
See "Registering Frequently Used Functions", Convenient Functions .
• Press to program defaults for the initial display when modes are cleared or reset, or immediately after
the main power switch is turned on.
25
Page 28

2. Getting Started
See "Changing the Default Functions of the Initial Screen", Convenient Functions .
6. Main power indicator
The main power indicator goes on when you turn on the main power switch.
7. [Energy Saver] key
Press to switch to and from Low Power mode or Sleep mode. See "Saving Energy", Getting Started .
When the machine is in Low Power mode, the [Energy Saver] key is lit. In Sleep mode, the [Energy Saver] key
flashes slowly.
8. [Login/Logout] key
Press to log in or log out.
9. [User Tools/Counter] key
• User Tools
Press to change the default settings to meet your requirements. See "Accessing User Tools", Connecting
the Machine/ System Settings .
• Counter
Press to check or print the counter value. See "Counter", Maintenance and Specifications .
You can find out where to order expendable supplies and where to call when a malfunction occurs. You can
also print these details. See "Checking Enquiry Using the User Tools", Maintenance and Specifications .
10. [Simple Screen] key
Press to switch to the simple screen. See "Switching Screen Patterns", Getting Started .
11. [ ] key (Enter key)
Press to confirm values entered or items specified.
12. [Start] key
Press to start copying, printing, scanning, or sending.
13. [Sample Copy] key
Press to make a single set of copies or prints to check print quality before making multiple sets. See "Sample
Copy", Copy/ Document Server .
14. [Stop] key
Press to stop scanning originals or to delete preset jobs. However, a print job in progress cannot be stopped.
15. [Clear] key
Press to delete a number entered.
16. Number keys
Use to enter the numbers for copies, and data for the selected function.
17. [Check Status] key
Press to check the machine's system status, operational status of each function, and current jobs. You can also
display the job history and the machine's maintenance information.
18. Data In indicator (printer mode)
Flashes when the machine is receiving print jobs from a computer. See Print .
26
Page 29

Guide to the Names and Functions of the Machine's Control Panel
19. Media slots
Use to insert an SD card or a USB flash memory device.
20. Media access lamp
Lights up when a memory storage device is inserted in the media slot or accessed.
27
Page 30
CPL015
1 2 3
678
4
5
2. Getting Started
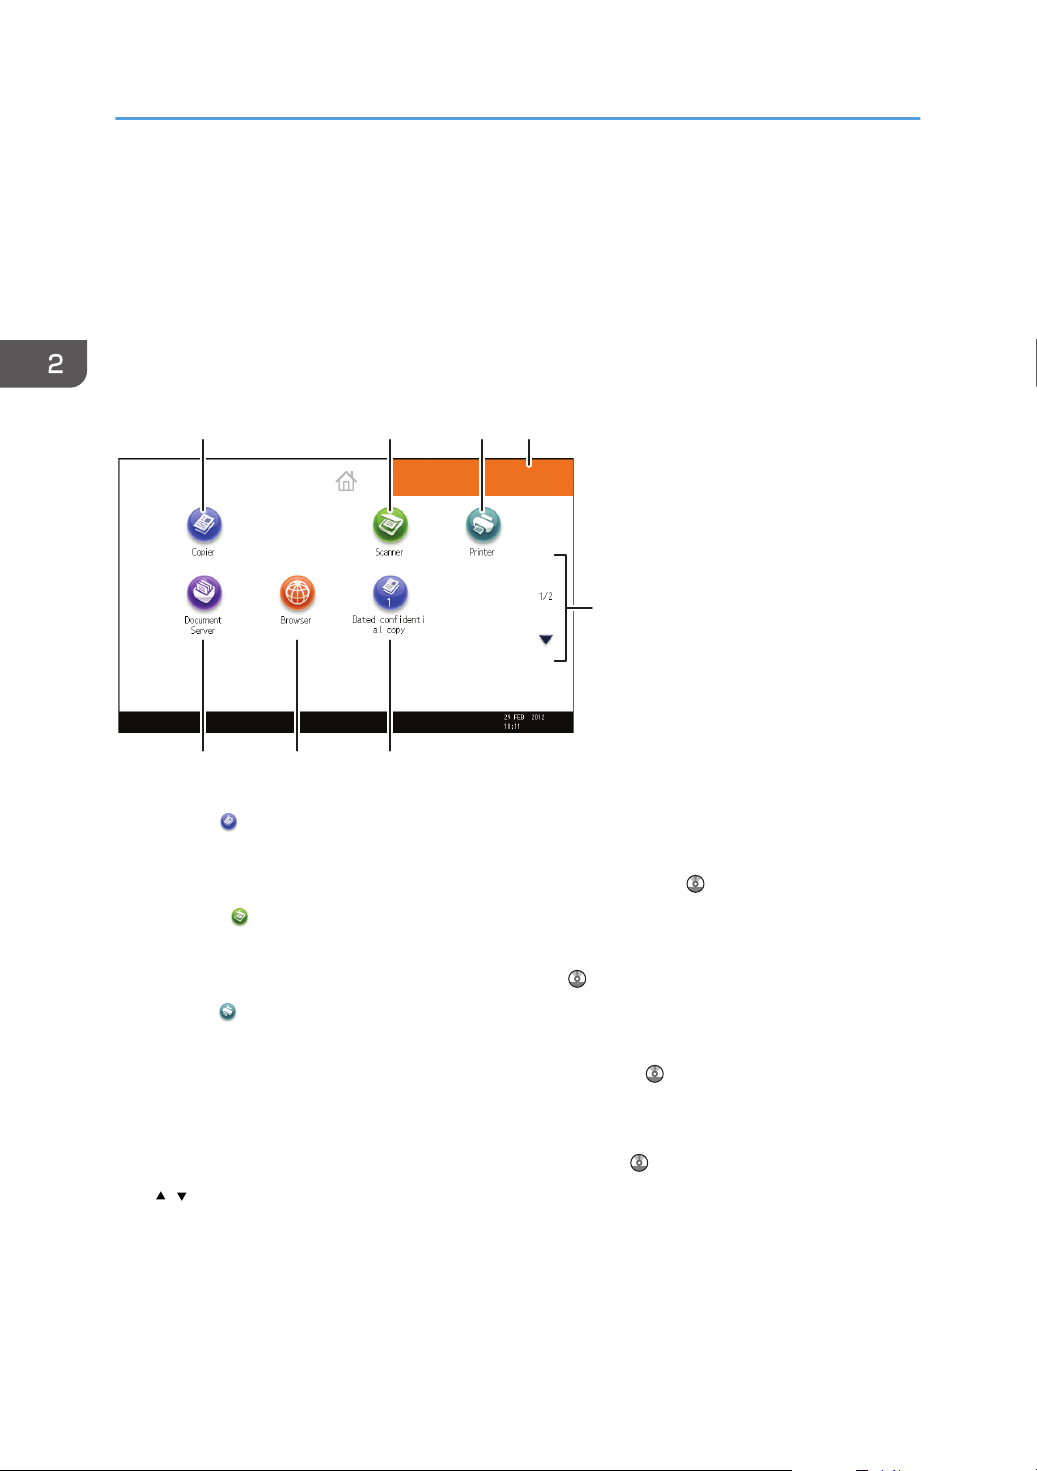
How to Use the [Home] Screen
The icons of each function are displayed on the [Home] screen.
You can add shortcuts to frequently used programs or Web pages to the [Home] screen. The icons of
added shortcuts appear on the [Home] screen. The programs or Web pages can be recalled easily by
pressing the shortcut icons.
To display the [Home] screen, press the [Home] key.
1. [Copier]
Press to make copies.
For details about how to use the copy function, see Copy/ Document Server .
2. [Scanner]
Press to scan originals and save images as files.
For details about how to use the scanner function, see Scan .
3. [Printer]
Press to make settings for using the machine as a printer.
For details about how to make settings for the printer function, see Print .
4. Home screen image
You can display an image on the [Home] screen, such as a corporate logo. To change the image, see
"Displaying the Image on the [Home] Screen", Convenient Functions .
5. /
Press to switch pages when the icons are not displayed on one page.
28
Page 31

How to Use the [Home] Screen
6. Shortcut icon
You can add shortcuts to programs or Web pages to the [Home] screen. For details about how to register
shortcuts, see p.29 "Adding Icons to the [Home] Screen". The program number appears on the bottom of
the shortcut icon.
7. [Browser]
Press to display Web pages.
For details about how to use the browser function, see Convenient Functions .
8. [Document Server]
Press to store or print documents on the machine's hard disk.
For details about how to use the Document Server function, see Copy/ Document Server .
Adding Icons to the [Home] Screen
You can add shortcuts to programs stored in copier or scanner mode, or Web pages registered in
Favorites using the browser function.
You can also review icons of functions and embedded software applications that you deleted from the
[Home] screen.
• Shortcuts to programs stored in Document Server mode cannot be registered to the [Home] screen.
• Shortcut names of up to 32 characters can be displayed in a standard screen. If the name of the
shortcut is longer than 32 characters, the 32nd character is replaced with "...". Only 30 characters
can be displayed in a simple screen. If the name of the shortcut is longer than 30 characters, the
30th character is replaced with "...".
• For details about how to make a program, see p.33 "Registering Functions in a Program".
• For details about the procedure for registering Web pages to Favorites, see "Specifying the
Settings for Favorites", Convenient Functions .
• Shortcuts to Web pages that are registered to Favorites by User cannot be registered to the [Home]
screen. To register the shortcuts, register Web pages to Common Favorites. For details about kinds
of Favorites, see "Specifying the Settings for Favorites", Convenient Functions .
• For details about the procedure for registering a shortcut using the [Program] screen, see
"Registering a Shortcut to a Program to the [Home] Screen", Convenient Functions .
• You can register up to 72 function and shortcut icons. Delete unused icons if the limit is reached. For
details see "Deleting an Icon on the [Home] Screen", Convenient Functions .
• You can change the position of icons. For details, see "Changing the Order of Icons on the [Home]
Screen", Convenient Functions .
29
Page 32

CJS039
2. Getting Started
Adding icons to the [Home] screen using Web Image Monitor
1. Start Web Image Monitor.
For details, see "Using Web Image Monitor", Connecting the Machine/ System Settings .
2. Log in to Web Image Monitor as an administrator.
For details, see Security Guide .
3. Point to [Device Management], and then click [Device Home Management].
4. Click [Edit Icons].
5. Point to [ Icon can be added.] of the position that you want to add, and then click [
Add].
6. Select the function or shortcut icon you want to add.
7. Click [OK] four times.
Adding icons to the [Home] screen using the User Tools
In the following procedure, a shortcut to a copier program is registered to the [Home] screen.
1. Register a program.
2. Press the [User Tools/Counter] key.
3. Press [Edit Home].
30
Page 33

4. Press [Add Icon].
5. Press the [Program] tab.
How to Use the [Home] Screen
6. Make sure that [Copier Program] is selected.
7. Select the program you want to add.
31
Page 34

2. Getting Started
8. Specify the position where [Blank] is displayed.
9. Press [OK].
10. Press the [User Tools/Counter] key.
• Press [ ] on the upper-right corner of the screen to check the position on the simple screen.
32
Page 35

CPL011
Registering Functions in a Program
Registering Functions in a Program
You can register up to 25 programs each for the copier, Document Server, and scanner functions.
The following settings can be registered to programs:
Copier:
High Speed Copy, color mode, original type, density, Special Original, paper input location/
paper bypass location, Store File (except for User Name and Password), Synchro Cut, Variable
Cut, Auto Reduce / Enlarge, User Auto R/E, Finishing, Adjust Print Position, Edit / Colour,
Combine, Reduce / Enlarge, number of copies
Document Server (on the initial document print screen):
Auto Reduce / Enlarge, Finishing, Adjust Print Position, Stamp, Reduce / Enlarge, number of prints
Scanner:
Scan Settings, density, Next Original Wait, Original Feed Type, Send File Type / Name (except
for Security Settings), Store File (except for User Name and Password), Preview, Text, Subject,
Security, Recept. Notice
This section explains how to register functions in a program using copier function as an example.
1. Press the [Home] key on the top left of the control panel, and press the [Copier] icon on
the [Home] screen.
2. Edit the copy settings so all functions you want to store in a program are selected.
33
Page 36

CQJ005
2. Getting Started
3. Press the [Program] key.
4. Press [Program].
5. Press the program number you want to register.
34
6. Enter the program name.
7. Press [OK].
8. Press [Exit].
• You can enter up to 34 characters for a program name.
• When a specified program is registered as the default, its values become the default settings, which
are displayed without pressing the [Program] key, when modes are cleared or reset, and after the
machine is turned on. See "Changing the Default Functions of the Initial Screen", Convenient
Functions .
• If the paper input location you specified in a program runs out of paper and an another paper
input location is configured with the same size of paper, the paper input location will automatically
switch to the other.
• Programs are not deleted by turning the power off or by pressing the [Reset] key unless the
program is deleted or overwritten.
• Program numbers with next to them already have settings made for them.
Page 37

Registering Functions in a Program
• Programs can be registered to the [Home] screen, and can be recalled easily. For details, see
"Registering a Shortcut to a Program to the [Home] Screen", Convenient Functions and p.29
"Adding Icons to the [Home] Screen". Shortcuts to programs stored in Document Server mode
cannot be registered to the [Home] screen.
Example of Programs
Copier mode
Program name Program description Effect
Dated confidential
copy
Stamping
corporate name
copy
Unified-size copy Specify [Auto Reduce / Enlarge]. You can print various size copies
Thumbnail copy Specify [Combine]. You can copy up to eight pages
Scanner mode
Program name Program description Effect
In [Edit / Colour], specify
[CONFIDENTIAL] under [Preset
Stamp], and [Date Stamp].
Specify [User Stamp] in [Edit /
Colour].
You can increase security
awareness by printing
"CONFIDENTIAL" and the date on
copies.
You can stamp the name of your
company on copies of working or
architectural drawings. Your
company name needs to be preregistered in the machine.
onto one size of paper, so they are
easier to manage.
onto a sheet, so that you can save
paper.
Easy PDF scan Select [Full Colour: Text / Photo] in
[Scan Settings]. In [Send File Type /
Name], select [PDF] under [File
Type] and enter the business details
such as "London branch: daily
report" under [File Name].
High compression
PDF scan
Select [Full Colour: Text / Photo] in
[Scan Settings] and [PDF (JPEG
2000)] in [Send File Type / Name].
You can scan documents efficiently.
You can compress the data size of
scanned documents, so that you can
send and store them.
35
Page 38

2. Getting Started
Program name Program description Effect
Long-term storage
scan
Select [PDF/A] in [Send File Type /
Name].
You can easily digitize documents
to "PDF/A" file format, which is
suitable for long-term storage.
Unified-size scan In [Scan Settings], select [Reduce /
Enlarge] under [Edit], and then
specify the reproduction ratio or
You can skip the procedure to unify
the print size when reprinting
scanned data.
finished size of scanned data for
each page of the original.
Digital signature
scan
High resolution
scan
In [Send File Type / Name], specify
[PDF], [PDF (JPEG 2000)], or
[PDF/A] in [File Type], and also
specify [Digital Signature].
Specify settings to save scanned
data in TIFF format. Also, specify a
higher resolution in [Scan Settings].
You can add a digital signature to
an important document such as a
contract, so that any data tampering
can be detected.
Scanned documents maintain much
of the detail of the originals, but the
size of the data may be quite large.
• Depending on the options installed, some functions cannot be registered. For details, see "Functions
Requiring Optional Configurations", Getting Started .
36
• The names of programs given above are just examples. You can assign any name to a program
according to your objectives.
• Depending on your business details or the type of documents to be scanned, registering a program
cannot be recommended.
Page 39

CPL026
Turning On/Off the Power
Turning On/Off the Power
The main power switch is on the left side of the machine. Turning off this switch makes the main power
indicator on the right side of the control panel go off. When this is done, machine power is off. Use this
switch only when necessary.
Turning On the Main Power
• Do not turn off the main power switch until the "Please wait." message disappears from the display.
Doing so may result in damage to the hard disk or memory or nozzle clogging due to dried head,
leading to malfunctions.
1. Make sure the power cord is firmly plugged into the wall outlet.
2. Turn on the main power switch.
The main power indicator goes on.
Turning Off the Main Power
• When disconnecting the power cord from the wall outlet, always pull the plug, not the cord.
Pulling the cord can damage the power cord. Use of damaged power cords could result in fire
or electric shock.
• After turning the machine's power off, wait at least a few seconds before turning it back on. If the
message "Turn main Power Switch Off" appears, turn the machine's power off, and wait until the
main power switch indicator turns off. After the main power switch indicator is turned off, wait 10
37
Page 40

2. Getting Started
seconds or more before, and then turn it on again. Never turn the power back on immediately after
turning it off.
• Before unplugging the power cord plug, turn off the main power switch and make sure the main
power switch indicator turns off. Not doing so may result in damage to the hard disk or memory,
leading to malfunctions.
• Do not turn off the power while the machine is in operation. Doing so may result in damage to the
hard disk or memory or nozzle clogging due to dried head, leading to malfunctions.
1. Turn off the main power switch.
The main power indicator goes out.
38
Page 41

When the Authentication Screen is Displayed
When the Authentication Screen is Displayed
If Basic Authentication, Windows Authentication, LDAP Authentication, or Integration Server
Authentication is active, the authentication screen appears on the display. The machine only becomes
operable after entering your own Login User Name and Login Password. If User Code Authentication is
active, you cannot use the machine until you enter the User Code.
If you can use the machine, you can say that you are logged in. When you go out of the operable state,
you can say that you are logged out. After logging in the machine, be sure to log out of it to prevent
unauthorized usage.
• Ask the user administrator for the Login User Name, Login Password, and User Code. For details
about user authentication, see Security Guide .
• User Code to enter on User Code Authentication is the numerical value registered in the Address
Book as "User Code".
User Code Authentication Using the Control Panel
This section explains the procedure for logging in to the machine using the control panel while User
Code Authentication is active.
If User Code Authentication is active, a screen prompting you to enter a User Code appears.
1. Enter a User Code (up to eight digits), and then press [OK].
Logging In Using the Control Panel
This section explains the procedure for logging in to the machine when Basic Authentication, Windows
Authentication, LDAP Authentication, or Integration Server Authentication is set.
39
Page 42

CPL027
2. Getting Started
1. Press [Login].
2. Enter a Login User Name, and then press [OK].
3. Enter a Login Password, and then press [OK].
When the user is authenticated, the screen for the function you are using appears.
Logging Out Using the Control Panel
This section explains the procedure for logging out the machine when Basic Authentication, Windows
Authentication, LDAP Authentication, or Integration Server Authentication is set.
• To prevent use of the machine by unauthorized persons, always log out when you have finished
using the machine.
1. Press the [Login/Logout] key.
2. Press [Yes].
40
Page 43

CPT006
Placing Originals
Placing Originals
• Place one original at a time on the original table.
• When inserting an original, push it lightly against the rollers. Pushing it with force may cause an
original jam.
• Once an original start to feed in, do not push or pull it. This may damage the original.
• If the original's front or rear edge is badly curled, smooth it out with both hands before scanning. If
the original is inserted as is, it may be damaged.
• When the machine is printing on paper that requires a long time for the ink to dry, such as
translucent (vellum) paper, wait until each job has finished printing before loading the next original.
If you load the next original while the machine is printing, the original might touch the printout and
be stained with ink.
Placing Originals on the Original Table
1. Make sure that "Ready" appears on the screen.
2. Adjust the original guides to the original size.
Adjust the original guides so they are the same distance from the center of the original table.
Make sure that the original guides are flush against the original. Do not push the original guide side
fences with force.
3. Using both hands, carefully insert the original between the original guides, scan side
down.
Push the original so that it makes light contact with the feed rollers.
Support the original with your hands until it feeds in.
41
Page 44

CPT007
CPT008
2. Getting Started
Stopping originals from feeding in
If the originals are feeding in slanted, or jamming, etc., press the [Scanner Stop] key to stop them
feeding in.
Scanning an Original Using a Carrier Sheet
Use the carrier sheet when scanning originals such as originals drawn in pencil, and pasted originals.
For details, see "Originals That Should Be Scanned Using the Carrier Sheet", Paper Specifications and
Adding Paper .
• When using the carrier sheet, originals should be ejected onto the original output guides. If the
original is ejected onto the original stackers, it might be damaged. For details about how to eject
originals onto the original output guides, see "Ejecting originals onto the original output guides",
Paper Specifications and Adding Paper .
1. Open the carrier sheet with the transparent sheet face up, and then insert the original also
face up.
Align the original with the fold of the carrier sheet.
42
Page 45

CBA051
CPT009
CPL032
Placing Originals
2. Adjust the original guides to the size of the carrier sheet.
3. Using both hands, hold the carrier sheet face down, and carefully insert the folded edge
of the carrier sheet between the original guides.
Placing Rolled Originals
When placing rolled originals, you can make copies using the output basket.
1. Check that the output basket is in basic mode.
2. Adjust the original guides to the original size.
3. Place the trailing edge of the rolled original on the output basket.
43
Page 46

CPT035
2. Getting Started
4. Pull the leading edge of the original up to the original table with the side to be scanned
facing down.
5. Using both hands, carefully insert the original between the original guides.
44
Page 47

3. Copy
CPL011
This chapter describes frequently used copier functions and operations. For the information not included
in this chapter, see Copy/ Document Server on the supplied CD-ROM.
Basic Procedure
For details about how to place originals on the original table, see p.41 "Placing Originals on the
Original Table".
For details about how to specify output locations for originals, see "Specifying Output Locations for
Original", Paper Specifications and Adding Paper .
To copy onto paper other than plain paper, specify the paper type in User Tools according to the weight
of the paper you are using. For details, see "Input Paper Settings", Connecting the Machine/ System
Settings .
For details about how to get the output basket ready, see "Setting the Output Basket", Getting Started
.
1. Press the [Home] key on the top left of the control panel, and press the [Copier] icon on
the [Home] screen.
2. Make sure that no previous settings remain.
When there are previous settings remaining, press the [Reset] key.
3. Specify the output location for originals.
If the rear original stackers are installed, originals are ejected onto the original stackers. If the rear
original stackers are not installed, originals are ejected onto the original output guides.
4. Select an original orientation that matches the orientation of your originals.
5. Make desired settings.
6. Enter the number of copies with the number keys.
The maximum copy quantity that can be entered is 99.
45
Page 48

3. Copy
7. Place the original on the original table.
The original feeds into the machine automatically, and copying starts.
If [Press Start Key] is selected for [Feed Start Method], copying starts after you press the [Start] key.
8. When the copy job is finished, press the [Reset] key to clear the settings.
46
Page 49

CPH016
CKN004
Reducing or Enlarging Originals
Reducing or Enlarging Originals
This section describes methods of reducing or enlarging images by specifying a reproduction ratio, or a
paper size.
Base Point
The upper right corner is the base point.
In addition to the functions described in this section, advanced reduce/enlarge copy functions are also
available. For details about these functions, see "Advanced Reduce/Enlarge Copying", Copy/
Document Server .
Preset Reduce / Enlarge
This function allows you to reduce or enlarge images by selecting a preset ratio.
You can register up to three frequently used reproduction ratios other than the preset reduce/enlarge
ratios.
47
Page 50

CKN007
3. Copy
1. Press [Reduce / Enlarge].
2. Select a ratio, and then press [OK].
3. Place the original, and start scanning.
Zoom
You can specify the reproduction ratio in increments of 0.1%.
To specify a reproduction ratio, enter the ratio using the number keys or specify the ratio with [ ] or
[ ].
This section describes how to enter the ratio using the number keys.
48
Page 51

1. Press [Reduce / Enlarge].
CKN008
2. Press [Number keys].
3. Enter the desired ratio with the number keys, and then press [ ].
Reducing or Enlarging Originals
4. Press [OK] twice.
5. Place the original, and start scanning.
Auto Reduce / Enlarge
The machine automatically detects the original size and then selects an appropriate reproduction ratio
based on the paper size you select.
• You cannot use the paper bypass location with this function.
49
Page 52

3. Copy
This is useful to copy different size originals to the same size paper.
To ensure the print result you require is produced, specify the original orientation before using Auto
Reduce / Enlarge. Make sure that the original orientation setting matches the actual orientation of your
original. For details, see "Original Orientation", Copy/ Document Server .
The original sizes and orientations you can use with this function are as follows:
(mainly Europe)
A0 , A1 , A2 , A3 , A4 , B1 JIS , B2 JIS , B3 JIS , B4 JIS
(mainly North America)
• Engineering
E (34 × 44) , D (22 × 34) , C (17 × 22) , B (11 × 17) , A (81/2 × 11)
• Architecture
E (36 × 48) , D (24 × 36) , C (18 × 24) , B (12 × 18) , A (9 × 12)
• Others
30 × 21 , 30 × 42
1. Press [Auto Reduce / Enlarge].
2. Select the paper size.
3. Place the original, and start scanning.
User Auto Reduce / Enlarge
When the original is placed, the machine automatically enlarges or reduces the image to fit the paper
size specified in advance.
• You cannot use the paper bypass location with this function.
Using User Tools allows you to specify how much each original is enlarged or reduced.
You can select the following combinations:
50
Page 53

Reducing or Enlarging Originals
(mainly Europe)
Original size Copy size
A0 A0, A1, A2, A3, A4, B1 JIS, B2 JIS, B3
JIS, B4 JIS
A1
A2
A3
A4
B1 JIS
B2 JIS
B3 JIS
B4 JIS
(mainly North America)
Original size Copy size
Engineering E (34 × 44) E (34 × 44), D (22 × 34), C (17 × 22),
B (11 × 17), A (81/2 × 11), E (36 ×
D (22 × 34)
C (17 × 22)
48), D (24 × 36), C (18 × 24), B (12 ×
18), A (9 × 12)
B (11 × 17)
A (81/2 × 11)
Architecture E (36 × 48)
D (24 × 36)
C (18 × 24)
B (12 × 18)
A (9 × 12)
51
Page 54

3. Copy
1. Press [User Auto R/E].
2. Check that the combination selected for User Auto Reduce / Enlarge is the one you want.
3. Place the original, and start scanning.
52
Page 55

CKN014
CKN015
Combined Copying
Combined Copying
This mode can be used to select a reproduction ratio automatically and copy the originals onto a single
sheet of copy paper.
The machine selects a reproduction ratio between 25.0 and 400.0%. If the orientation of the original is
different from that of the copy paper, the machine will automatically rotate the image by 90 degrees to
make copies properly.
• You cannot use the paper bypass location with this function.
There are three types of One-Sided Combine.
1 Sided 2 Originals
Combine 1 Side
Copies two 1-sided originals to one side of a sheet.
1 Sided 4 Originals Combine 1 Side
Copies four 1-sided originals to one side of a sheet.
1 Sided 8 Originals Combine 1 Side
Copies eight 1-sided originals to one side of a sheet.
Orientation of the original and image position of Combine
The image position of Combine differs according to original orientation and the number of originals
to be combined.
• Portrait (
) originals
• Landscape ( ) originals
53
Page 56

CKN016
3. Copy
1. Press [Combine].
2. Select the number of originals to combine.
3. Press [OK].
4. Select the paper size.
5. Place the original, and start scanning.
54
Page 57

Specifying the Length of Copy Paper Cut
Specifying the Length of Copy Paper Cut
Specify the length to cut the paper loaded in the paper input location.
• You cannot cut the paper in the paper bypass location.
The following paper cut methods are available:
Synchro Cut
Cuts the paper at the same length as the original. If the copy is enlarged or reduced, the machine
calculates the appropriate length for the reduce/enlarge ratio and cuts the paper.
Preset Cut
Cuts the paper at a preset size, regardless of the size of the original. You can use this method to
copy different sized originals to the same size.
Variable Cut
Cuts the paper to the size entered.
Synchro Cut
Cuts the paper at the same length as the original. If the copy is enlarged or reduced, the machine
calculates the appropriate length for the reduce/enlarge ratio and cuts the paper.
1. Press [Synchro Cut].
2. Select Paper Input Location 1 or 2.
3. Place the original, and start scanning.
Preset Cut
Cuts the paper at a preset size, regardless of the size of the original. You can use this method to copy
different sized originals to the same size.
55
Page 58

3. Copy
1. Select a preset cut size of the Paper Input Location 1 or 2.
2. Place the original, and start scanning.
The preset cut size differs depending on the paper roll width. It is cut in the following sizes.
(mainly Europe)
Paper roll width Portrait Landscape
841 mm A0 A1
594 mm A1 A2
420 mm A2 A3
297 mm A3 A4
728 mm B1 JIS B2 JIS
515 mm B2 JIS B3 JIS
364 mm B3 JIS B4 JIS
880 mm 1189 mm 594 mm
800 mm 1189 mm 594 mm
707 mm 1000 mm 500 mm
660 mm 841 mm 420 mm
625 mm 880 mm 440 mm
(mainly North America)
• Engineering
56
Page 59

Specifying the Length of Copy Paper Cut
Paper roll width Portrait Landscape
34 inch 34 × 44 22 × 34
22 inch 22 × 34 17 × 22
17 inch 17 × 22 11 × 17
11 inch 11 × 17 81/2 × 11
• Architecture
Paper roll width Portrait Landscape
36 inch 36 × 48 24 × 36
24 inch 24 × 36 18 × 24
18 inch 18 × 24 12 × 18
12 inch 12 × 18 9 × 12
• Other
Paper roll width Portrait Landscape
30 inch 30 × 42 21 × 30
Variable Cut
Cuts the paper to the size entered.
1. Press [Variable Cut].
57
Page 60

3. Copy
2. Enter the length with the number keys, and then press [ ].
3. Press [OK].
4. Select Paper Input Location 1 or 2.
5. Place the original, and start scanning.
58
Page 61

Copying from the Paper Bypass Location
Copying from the Paper Bypass Location
Use the paper bypass location to copy onto paper sizes that cannot be loaded on the paper input
locations.
For details about how to load paper in the paper bypass location, see p.119 "Loading Paper into the
Paper Bypass Location".
If cables are hanging from the back of the machine or objects are near the back of the machine, paper
may bump against them and cause a paper jam or wrinkle the paper. Check that there are no objects on
the back of the machine before you start copying.
1. Open the front cover, and then pull up the paper holding lever.
2. Insert the paper copy side up into the paper bypass location.
3. Lower the paper holding lever, and then close the front cover.
4. Specify the type of the paper as necessary.
5. Make sure that the paper bypass location ( ) is selected, and then press the [ ] key.
6. Press [Paper Size].
7. Specify the size of the paper, and then press [OK] twice.
8. Enter the number of copies with the number keys.
9. Place the original, and start scanning.
Copying starts automatically.
10. When copying the originals onto two or more sheets of paper, repeat steps 1 to 4 for as
many copies as you are making.
In step 4, select [Matches].
11. When the copy job is finished, press the [Reset] key to clear the settings.
• You can change the paper type and thickness settings in [Input Paper Settings] in User Tools. For
details, see "Input Paper Settings", Connecting the Machine/System Settings.
Copying onto Regular Size Paper from the Paper Bypass Location
1. Open the front cover, and then pull up the paper holding lever.
2. Insert the paper copy side up into the paper bypass location.
3. Lower the paper holding lever, and then close the front cover.
4. Specify the type of the paper as necessary.
5. Make sure that the paper bypass location ( ) is selected, and then press the [ ] key.
6. Press [Paper Size].
59
Page 62

3. Copy
7. Select the paper size.
8. Press [OK] twice.
9. Place the original, and start scanning.
Copying starts automatically.
Copying onto Custom Size Paper from the Paper Bypass Location
Paper that has a horizontal length of 279.4–914.4 mm (11.00–36.00 inches) and a vertical length of
210.0–2000.0 mm (8.27–78.74 inches) can be fed in from the paper bypass location.
1. Open the front cover, and then pull up the paper holding lever.
2. Insert the paper copy side up into the paper bypass location.
3. Lower the paper holding lever, and then close the front cover.
4. Specify the type of the paper as necessary.
5. Make sure that the paper bypass location ( ) is selected, and then press the [ ] key.
6. Press [Paper Size].
7. Press [Custom Size].
8. Enter the horizontal size with the number keys, and then press [ ].
60
9. Enter the vertical size with the number keys, and then press [ ].
Page 63

10. Press [OK] twice.
11. Place the original, and start scanning.
Copying starts automatically.
Copying from the Paper Bypass Location
61
Page 64

3. Copy
Storing Data in the Document Server
The Document Server enables you to store documents being read with the copy feature on the hard disk
of this machine. Thus you can print them later applying necessary conditions.
You can check the stored documents from the Document Server screen. For details about the Document
Server, see p.97 "Storing Data".
• You cannot use the paper bypass location with this function.
1. Press [Store File].
2. Enter a file name, user name, or password if necessary.
3. Press [OK].
4. Make the scanning settings for the original.
5. Place the original, and start scanning.
The original feeds into the machine automatically, and copying starts. The scanned data is also
stored in the memory. If you want to store another document, do so after copying is complete.
62
Page 65

4. Print
This chapter describes frequently used printer functions and operations. For the information not included
in this chapter, see Print on the supplied CD-ROM.
Installing the Printer Driver for a Network Connection
This section describes the installation procedure of the printer driver for network connection.
• Manage Printers permission is required to install the driver. Log on as an Administrators group
member.
Installing the Printer Driver for the Selected Port
Describes the driver installation procedure for each printer port. See the installation procedure for the
printer port you are using.
• To use the SmartDeviceMonitor for Client port, you must first download SmartDeviceMonitor for
Client from the manufacturer's Web site and install it on your computer. Contact your local dealer
for information on downloading SmartDeviceMonitor for Client. For details about
SmartDeviceMonitor for Client, see "Software that You Can Download", Getting Started .
Port Type Reference
Standard TCP/IP port p.63 "Using the Standard TCP/IP port"
IPP port p.64 "Using the IPP port"
LPR port p.65 "Using the LPR port"
SmartDeviceMonitor for Client port p.66 "Using the SmartDeviceMonitor for Client port"
Using the Standard TCP/IP port
1. Quit all applications. (Do not close this manual.)
2. Insert the provided CD-ROM into the computer's CD-ROM drive.
If the [AutoPlay] dialog box appears, click [Run AUTORUN.EXE].
3. Select an interface language, and then click [OK].
63
Page 66

4. Print
4. Click [PostScript 3 Printer Driver].
5. The software license agreement appears in the [License Agreement] dialog box. After
reading the agreement, click [I accept the agreement.], and then click [Next].
6. Select the check box of the manufacturer and machine model you want to use.
7. Double-click the machine name to display the printer settings.
8. Click [Port :], and then click [Add] in the [Change settings for 'Port'] box.
9. Click [Standard TCP/IP Port], and then click [OK].
If [Standard TCP/IP Port] does not appear, see Windows Help, and then configure the settings.
10. Click [Next].
11. Enter the machine name or IP address, and then click [Next].
When the device type selection appears, select "RICOH Network Printer C model".
12. Click [Finish].
13. Check that the port of the selected printer is displayed in [Port :].
14. Configure the user code, default printer, and shared printer as necessary.
15. Click [Continue].
The installation starts.
16. Click [Finish].
Select one of the options to restart the computer either now or later, and then click [Finish].
Using the IPP port
• To print via IPP-SSL, use the SmartDeviceMonitor for Client port.
• Installation of the certificate is especially necessary for users who want to print via IPP-SSL from
Windows Vista/7 or Windows Server 2008/2008 R2. For details, consult your administrator.
• If a certificate authority issues a certificate that must be authenticated by an intermediate certificate
authority, and the certificate is installed on this machine, an intermediate certificate must be
installed on the client computer. Otherwise, validation by the certificate authority will not be
performed correctly.
• If validation cannot be performed properly, a warning message informing you that installation is
not possible might appear when you try to add a printer using IPP-SSL under Windows Vista/7 or
Windows Server 2008/2008 R2. To enable authentication from the client computer, install the
intermediate certificate on the client computer, and then reestablish connection.
• Intermediate certificates cannot be installed on this machine.
64
1. Quit all applications. (Do not close this manual.)
Page 67

Installing the Printer Driver for a Network Connection
2. On the [Start] menu, click [Devices and Printers].
3. Click [Add a printer].
4. Click [Add a network, wireless or Bluetooth printer].
5. Click [The printer that I want isn't listed].
6. In the [Select a shared printer by name] box, enter "http://(machine's IP address or host
name)/printer (or ipp)" as the printer's address, and then click [Next].
7. Click [Have Disk...].
8. Insert the provided CD-ROM into the computer's CD-ROM drive.
If the [AutoPlay] dialog box appears, click [Close].
9. Click [Browse...], and then specify a location for the INF file.
If the CD-ROM drive is D, the source files of the printer driver are stored in the following locations:
32-bit driver D:\X86\DRIVERS\PS\XP_VISTA\MUI\DISK1
64-bit driver D:\X64\DRIVERS\PS\X64\MUI\DISK1
10. Click [Open].
11. Click [OK] to close the [Install From Disk] window.
12. Select the manufacturer and model name of the machine you want to use, and then click
[Next].
The installation starts.
13. Follow the instructions that appear. Modify settings such as printer name and default
printer configuration, as necessary. You can also print a test page.
14. Click [Finish].
If a check box for setting the machine as a default printer appears, configure as necessary.
Using the LPR port
1. Quit all applications. (Do not close this manual.)
2. Insert the provided CD-ROM into the computer's CD-ROM drive.
If the [AutoPlay] dialog box appears, click [Run AUTORUN.EXE].
3. Select an interface language, and then click [OK].
4. Click [PostScript 3 Printer Driver].
5. The software license agreement appears in the [License Agreement] dialog box. After
reading the agreement, click [I accept the agreement.], and then click [Next].
6. Select the check box of the machine model you want to use.
7. Double-click the machine name to display the printer settings.
8. Click [Port :], and then click [Add] in the [Change settings for 'Port'] box.
65
Page 68

4. Print
9. Click [LPR Port], and then click [OK].
If [LPR Port] does not appear, see Windows Help and install it.
10. Enter the machine name or IP address in the [Name or address of server providing lpd:]
box.
11. Enter "lp" in the [Name of printer or print queue on that server:] box, and then click [OK].
12. Check that the port of the selected printer is displayed in [Port :].
13. Configure the user code, default printer, and shared printer as necessary.
14. Click [Continue].
The installation starts.
15. Click [Finish].
Select one of the options to restart the computer either now or later, and then click [Finish].
Using the SmartDeviceMonitor for Client port
To use this function, you must first download SmartDeviceMonitor for Client from the manufacturer's
Web site and install it on your computer. Contact your local dealer for information on downloading
SmartDeviceMonitor for Client.
1. Quit all applications. (Do not close this manual.)
2. Insert the provided CD-ROM into the computer's CD-ROM drive.
If the [AutoPlay] dialog box appears, click [Run AUTORUN.EXE].
3. Select an interface language, and then click [OK].
4. Click [PostScript 3 Printer Driver].
5. The software license agreement appears in the [License Agreement] dialog box. After
reading the agreement, click [I accept the agreement.], and then click [Next].
6. Select the check box of the machine model you want to use.
7. Double-click the machine name to display the printer settings.
8. Click [Port :], and then click [Add] in the [Change settings for 'Port'] box.
9. Click [SmartDeviceMonitor], and then click [OK].
10. To configure port settings using TCP/IP, click [TCP/IP], and then click [Search].
To configure port settings using IPP, proceed to step 13.
11. Select the machine you want to use, and then click [OK].
Only machines that respond to a broadcast from the computer appear. To use a machine not listed
here, click [Specify Address], and then enter the IP address or host name of the machine.
Proceed to step 18.
12. To configure port settings using IPP, click [IPP].
66
Page 69

Installing the Printer Driver for a Network Connection
13. In the [Printer URL] box, enter "http://machine's IP address/printer" as the machine's
address.
If the server authentication is issued, enter "https://machine's IP address/printer" to enable SSL (a
protocol for encrypted communication). Example IP address: 192.168.15.16
http://192.168.15.16/printer
https://192.168.15.16/printer
You can enter "http://machine's IP address/ipp" as the machine's address.
14. Enter a name for identifying the machine in the [IPP Port Name] box. Use a name
different from the one of any existing ports.
If a name is not specified here, the address entered in the [Printer URL] box becomes the IPP port
name.
15. Click [Detailed Settings] Settings to make necessary settings.
For details about the settings, see SmartDeviceMonitor for Client Help.
16. Click [OK].
17. Check that the port of the selected printer is displayed in [Port :].
18. Configure the user code, default printer, and shared printer as necessary.
19. Click [Continue].
The installation starts.
20. Click [Finish].
Select one of the options to restart the computer either now or later, and then click [Finish].
Changing the port settings for SmartDeviceMonitor for Client
Follow the procedure below to change the SmartDeviceMonitor for Client settings, such as TCP/IP
protocol.
Windows XP, Windows Server 2003/2003 R2
1. On the [Start] menu, click [Printers and Faxes].
2. Click the icon of the machine you want to use. On the [File] menu, click [Properties].
3. Click the [Ports] tab, and then click [Configure Port].
The [Port Configuration:] window appears.
Windows Vista, Windows Server 2008:
1. On the [Start] menu, click [Control Panel].
2. Click [Printer].
3. Right-click the icon of the machine you want to use, and then click [Properties].
67
Page 70

4. Print
4. Click the [Ports] tab, and then click [Configure Port].
The [Port Configuration:] window appears.
Windows 7, Windows Server 2008 R2:
1. On the [Start] menu, click [Devices and Printers].
2. Right-click the icon of the machine you want to use, and then click [Printer Properties].
3. Click the [Ports] tab, and then click [Configure Port].
The [Port Configuration:] window appears.
Using Windows Print Server as a Network Printer
Describes the driver installation procedure for Windows print server.
1. Quit all applications. (Do not close this manual.)
2. Insert the provided CD-ROM into the computer's CD-ROM drive.
If the [AutoPlay] dialog box appears, click [Run AUTORUN.EXE].
3. Select an interface language, and then click [OK].
4. Click [PostScript 3 Printer Driver].
5. The software license agreement appears in the [License Agreement] dialog box. After
reading the agreement, click [I accept the agreement.], and then click [Next].
6. Select the check box of the machine model you want to use.
7. Double-click the machine name to display the machine settings.
8. Click [Port :], and then click [Add] in the [Change settings for 'Port'] box.
9. Click [Network Printer], and then click [OK].
10. Double-click the computer name you want to use as a print server in the [Browse for
Printer] window.
11. Select the machine you want to use, and then click [OK].
12. Check that the port of the selected printer is displayed in [Port :].
13. Configure the user code, default printer, and shared printer as necessary.
14. Click [Continue].
The installation starts.
15. Click [Finish].
Select one of the options to restart the computer either now or later, and then click [Finish].
68
Page 71

Installing the Printer Driver for USB Connection
Installing the Printer Driver for USB Connection
This section explains how to install the printer driver using USB. See the installation procedure for the
operating system you are using. Before installing, check that only the operating system is running on the
computer and no print jobs are in progress.
• Manage Printers permission is required to install the driver. Log on as an Administrators group
member.
Windows XP, Windows Server 2003/2003 R2
1. Quit all applications. (Do not close this manual.)
2. Check that the power of the machine is off.
3. Connect the machine and computer using the USB cable.
Connect the USB cable firmly.
4. Turn on the power of the machine.
Found New Hardware Wizard starts, and USB Printing Support is installed automatically.
5. Select [No, not this time], and then click [Next].
6. Click [Install from a list or specific location [Advanced]], and then click [Next].
7. Insert the provided CD-ROM into the computer's CD-ROM drive.
If Auto Run starts, click [Cancel] and then [Exit].
8. Select the [Search removable media (floppy, CD-ROM...)] check box under [Search for
the best driver in these locations.], and then click [Next].
9. Select the name of the machine whose driver you want to install.
Check the location where the source files of the printer driver is stored.
If the CD-ROM drive is D, the source files are stored in the following locations:
32-bit driver D:\X86\DRIVERS\PS\XP_VISTA\MUI\DISK1
64-bit driver D:\X64\DRIVERS\PS\X64\MUI\DISK1
10. Click [Next].
The installation starts.
11. Click [Finish].
If the printer driver has already been installed and plug and play is enabled, the icon of the printer
connected to the "USB001" port is added to the [Printers], [Printers and Faxes], or [Devices and
Printers] window.
The number after "USB" varies depending on the number of printers connected.
69
Page 72

4. Print
Windows Vista, Windows Server 2008
1. Quit all applications. (Do not close this manual.)
2. Check that the power of the machine is off.
3. Connect the machine and computer using a USB cable.
Connect the USB cable firmly.
4. Turn on the power of the machine.
Found New Hardware Wizard starts, and USB Printing Support is installed automatically.
5. In the [Found New Hardware] window, click [Locate and install driver software
(recommended)].
6. Insert the provided CD-ROM into the computer's CD-ROM drive.
If the [AutoPlay] dialog box appears, click [Close].
7. Select the name of the machine whose driver you want to install.
Check the location where the source files of the printer driver is stored.
If the CD-ROM drive is D, the source files are stored in the following locations:
32-bit driver D:\X86\DRIVERS\PS\XP_VISTA\MUI\DISK1
64-bit driver D:\X64\DRIVERS\PS\X64\MUI\DISK1
8. Click [Next].
The installation starts.
9. Click [Close].
If the printer driver has already been installed and plug and play is enabled, the icon of the printer
connected to the "USB001" port is added to the [Printers], [Printers and Faxes], or [Devices and
Printers] window.
The number after "USB" varies depending on the number of printers connected.
Windows 7, Windows Server 2008 R2
1. Quit all applications. (Do not close this manual.)
2. Check that the power of the machine is off.
3. Connect the machine and computer using a USB cable.
Connect the USB cable firmly.
4. Turn on the power of the machine.
Found New Hardware Wizard starts, and USB Printing Support is installed automatically.
70
5. Click [Devices and Printers] from the [Start] menu.
Page 73

Installing the Printer Driver for USB Connection
6. Double-Click the icon of machine you want to use in the [Unspecified] category.
7. Click the [Hardware] tab.
8. Click [Properties].
9. Click the [General] tab.
10. Click [Change settings].
11. Click [Driver] tab.
12. Click [Update Driver...].
13. Click [Browse my computer for driver software].
14. Insert the provided CD-ROM into the computer's CD-ROM drive.
If the [AutoPlay] dialog box appears, click [Close].
15. Click [Browse], and then select the printer driver location.
If the CD-ROM drive is D, the source files of the printer driver are stored in the following locations:
32-bit driver D:\X86\DRIVERS\PS\XP_VISTA\MUI\DISK1
64-bit driver D:\X64\DRIVERS\PS\X64\MUI\DISK1
16. Click [Next].
The installation starts.
17. Click [Close].
If the printer driver has already been installed and plug and play is enabled, the icon of the printer
connected to the "USB001" port is added to the [Printers], [Printers and Faxes], or [Devices and
Printers] window.
The number after "USB" varies depending on the number of printers connected.
71
Page 74

4. Print
Displaying the Printer Driver Properties
This section explains how to open the printer driver properties from [Devices and Printers].
• Manage Printers permission is required to change the printer settings. Log on as an Administrators
group member.
• You cannot change the machine default settings for individual users. Settings made in the printer
properties dialog box are applied to all users.
1. On the [Start] menu, click [Devices and Printers].
2. Right-click the icon of the printer you want to use.
3. Click [Printer properties].
72
Page 75

Standard Printing
Standard Printing
This section explains how to print documents from the printer driver using WordPad in Windows 7 as an
example. The screens displayed may differ depending on the application.
• If you send a print job via USB 2.0 while the machine is in Low Power mode or Sleep mode, an
error message might appear when the print job is complete. In this case, check if the document was
printed.
1. Click the WordPad menu button in the upper left corner of the window, and then click
[Print].
2. In the [Select Printer] list, select the printer you want to use.
3. Click [Preferences].
4. In the "Job Type:" list, select [Normal Print].
5. In the "Document Size:" list, select the size of the original to be printed.
6. In the "Orientation:" list, select [Portrait] or [Landscape] as the orientation of the original.
7. In the "Paper Input Location:" list, select the paper input location that contains the paper
you want to print onto.
If you select [Auto Select Paper Input] in the "Paper Input Location:" list, the paper input location is
automatically selected according to the paper size and type specified.
8. In the "Paper Type:" list, select the type of paper that is loaded in the paper input location.
9. Select [Color] or [Black and White] in the "Color/ Black and White:" list.
10. If you want to print multiple copies, specify a number of sets in the "Copies:" box.
11. Click the [Detailed Settings] tab.
12. In the "Menu:" box, click the [Print Quality] icon.
13. In the "Select Print Quality:" list, select [Speed Priority], [Standard], or [Quality Priority].
14. Click [OK].
15. Start printing from the application's [Print] dialog box.
73
Page 76

CPL011
4. Print
Locked Print
Sending a Locked Print File
1. Click the WordPad menu button in the upper left corner of the window, and then click
[Print].
2. In the "Select Printer" list, select the printer you want to use.
3. Click [Preferences].
4. In the "Job Type:" list, click [Locked Print].
5. Click [Details...].
6. Enter a User ID in the "User ID:" box, and then enter a password in the "Password:" box.
7. Click [OK].
8. Click the [Detailed Settings] tab.
9. In the "Menu:" box, click the [Print Quality] icon.
10. In the "Select Print Quality:" list, select [Speed Priority], [Standard], or [Quality Priority].
11. Change any other print settings if necessary.
12. Click [OK].
13. Start printing from the application's [Print] dialog box.
Printing a Locked Print File Using the Control Panel
• When printing is completed, the stored file will be deleted.
1. Press the [Home] key on the top left of the control panel, and press the [Printer] icon on
the [Home] screen.
74
Page 77

Locked Print
2. Press the [Print Jobs] tab.
3. Press [Locked Print Job].
4. Select the files you want to print.
You can select all the Locked Print files at once by pressing [Select All Jobs] after selecting a file.
5. Press [Print].
6. Enter the password using the number keys, and then press [OK].
7. Enter the number of copies using the number keys if necessary, and then press [Print].
75
Page 78

4. Print
Hold Print
Sending a Hold Print File
1. Click the WordPad menu button in the upper left corner of the window, and then click
[Print].
2. In the "Select Printer" list, select the printer you want to use.
3. Click [Preferences].
4. In the "Job Type:" list, click [Hold Print].
5. Click [Details...].
6. Enter a User ID in the "User ID:" box.
You can optionally set a file name of a Hold Print file.
7. To specify the print time of the document, select the [Set Print Time] check box, and then
specify the time.
You can specify the time in 24-hour format.
8. Click [OK].
9. Click the [Detailed Settings] tab.
10. In the "Menu:" box, click the [Print Quality] icon.
11. In the "Select Print Quality:" list, select [Speed Priority], [Standard], or [Quality Priority].
12. Change any other print settings if necessary.
13. Click [OK].
14. Start printing from the application's [Print] dialog box.
Printing a Hold Print File Using the Control Panel
• When printing is completed, the stored file will be deleted.
76
Page 79

CPL011
Hold Print
1. Press the [Home] key on the top left of the control panel, and press the [Printer] icon on
the [Home] screen.
2. Press the [Print Jobs] tab.
3. Press [Hold Print Job].
4. Select the files you want to print.
You can select all the Hold Print files at once by pressing [Select All Jobs] after selecting a file.
5. Press [Print].
6. Enter the number of copies using the number keys if necessary, and then press [Print].
77
Page 80

4. Print
Stored Print
Sending a Stored Print File
1. Click the WordPad menu button in the upper left corner of the window, and then click
[Print].
2. In the "Select Printer" list, select the printer you want to use.
3. Click [Preferences].
4. In the "Job Type:" list, select the print method to be used for Stored Print files.
You can select two methods of Stored Print:
• Stored Print
Stores the file in the machine and prints it later using the control panel.
• Store and Print
Prints the file at once and also stores the file in the machine.
5. Click [Details...].
6. Enter a User ID in the "User ID:" box.
You can optionally set a file name and a password of a Stored Print file.
7. Click [OK].
8. Click the [Detailed Settings] tab.
9. In the "Menu:" box, click the [Print Quality] icon.
10. In the "Select Print Quality:" list, select [Speed Priority], [Standard], or [Quality Priority].
11. Change any other print settings if necessary.
12. Click [OK].
13. Start printing from the application's [Print] dialog box.
Printing a Stored Print File Using the Control Panel
• The stored documents are not deleted even after the printing has been completed. For the
procedure to delete the documents, "Deleting Stored Print files", Print .
78
Page 81

CPL011
Stored Print
1. Press the [Home] key on the top left of the control panel, and press the [Printer] icon on
the [Home] screen.
2. Press the [Print Jobs] tab.
3. Press [Stored Print Job].
4. Select the files you want to print.
You can select all the Stored Print files at once by pressing [Select All Jobs] after selecting a file.
5. Press [Print].
If you set the password in the printer driver, enter the password.
If multiple print files are selected, and some of these require a password, the machine prints files
that correspond to the entered password and files that do not require a password. The number of
files to be printed is displayed on the confirmation screen.
6. Enter the number of copies using the number keys if necessary, and then press [Print].
79
Page 82

4. Print
80
Page 83

5. Scan
CPL011
This chapter describes frequently used scanner functions and operations. For the information not
included in this chapter, see Scan on the supplied CD-ROM.
Basic Procedure When Using Scan to Folder
• Before performing this procedure, refer to "Preparation for Sending by Scan to Folder", Scan
and confirm the details of the destination computer. Also refer to "Registering Folders", Connecting
the Machine/ System Settings , and register the address of the destination computer to the
address book.
1. Press the [Home] key on the top left of the control panel, and press the [Scanner] icon on
the [Home] screen.
2. Make sure that no previous settings remain.
If a previous setting remains, press the [Reset] key.
3. Press the [Folder] tab.
81
Page 84

5. Scan
4. If necessary, specify the scan settings according to the original.
Example: Scanning the document in color mode, and saving as a PDF file.
• Press [Scan Settings], and then press [Full Colour: Text / Photo] in the [Original Type] tab.
• Press [PDF] under [Send File Type / Name].
5. If necessary, press [Next Original Wait].
6. Specify the destination.
You can specify multiple destinations.
7. Place originals.
If scanning does not start automatically, press the [Start] key.
Creating a Shared Folder on a Computer Running Windows/Confirming a Computer's Information
The following procedures explain how to create a shared folder on a computer running Windows, and
how to confirm the computer's information. In these examples, Windows 7 Ultimate is the operating
system, and the computer is a member in a network domain. Write down the confirmed information.
Step 1: Confirming the user name and computer name
Confirm the user name and the name of the computer you will send scanned documents to.
1. On the [Start] menu, point to [All Programs], then [Accessories], and then click on
[Command Prompt].
2. Enter the command "ipconfig/all", and then press the [Enter] key.
3. Confirm the name of the computer.
The computer's name is displayed under [Host Name].
You can also confirm the IPv4 address. The address displayed under [IP Address] is the IPv4
address of the computer.
82
Page 85

Basic Procedure When Using Scan to Folder
4. Next, enter the command "set user", and then press the [Enter] key. (Be sure to put a
space between "set" and "user".)
5. Confirm the user name.
The user name is displayed under [USERNAME].
Step 2: Creating a shared folder on a computer running Microsoft Windows
Create a shared destination folder in Windows and enable sharing. In the following procedure, a
computer which is running under Windows 7 Ultimate and participating in a domain is used as an
example.
• You must log in as an Administrators group member to create a shared folder.
• If "Everyone" is left selected in step 6, the created shared folder will be accessible by all users. This
is a security risk, so we recommend that you give access rights only to specific users. Use the
following procedure to remove "Everyone" and specify user access rights.
1. Create a folder, just as you would create a normal folder, in a location of your choice on
the computer.
2. Right-click the folder, and then click [Properties].
When using Windows XP, right-click the folder, and then click [Sharing and Security].
3. On the [Sharing] tab, select [Advanced Sharing...].
When using Windows XP, on the [Sharing] tab, select [Share this folder].
Proceed to step 5.
4. Select the [Share this folder] check box.
5. Click [Permissions].
6. In the [Group or user names:] list, select "Everyone", and then click [Remove].
7. Click [Add...].
8. In the [Select Users or Groups] window, click [Advanced...].
9. Specify one or more object types, select a location, and then click [Find Now].
10. From the list of results, select the groups and users you want to grant access to, and then
click [OK].
11. In the [Select Users or Groups] window, click [OK].
12. In the [Groups or user names:] list, select a group or user, and then, in the [Allow] column
of the permissions list, select either the [Full Control] or [Change] check box.
Configure the access permissions for each group and user.
13. Click [OK].
83
Page 86

5. Scan
Step 3: Specifying access privileges for the created shared folder
If you want to specify access privileges for the created folder to allow other users or groups to access
the folder, configure the folder as follows:
1. Right-click the folder created in step 2, and then click [Properties].
2. On the [Security] tab, select [Edit...].
3. Click [Add...].
4. In the [Select Users or Groups] window, click [Advanced...].
5. Specify one or more object types, select a location, and then click [Find Now].
6. From the list of results, select the groups and users you want to grant access to, and then
click [OK].
7. In the [Select Users or Groups] window, click [OK].
8. In the [Groups or user names:] list, select a group or user, and then, in the [Allow] column
of the permissions list, select either the [Full Control] or [Change] check box.
9. Press [OK] twice.
Registering an SMB Folder
1. Press the [User Tools/Counter] key.
2. Press [Address Book Mangmnt].
3. Check that [Program / Change] is selected.
4. Press [New Program].
5. Press [Change] under "Name".
The name entry display appears.
6. Enter the name, and then press [OK].
7. Press the key for the classification you want to use under "Select Title".
84
The keys you can select are as follows:
Page 87

Basic Procedure When Using Scan to Folder
• [Frequent]: Added to the page that is displayed first.
• [AB], [CD], [EF], [GH], [IJK], [LMN], [OPQ], [RST], [UVW], [XYZ], [1] to [10]: Added to the
list of items in the selected title.
You can select [Frequent] and one more key for each title.
8. Press [Auth. Info], and then press [ Next].
9. Press [Specify Other Auth. Info] on the right side of "Folder Authentication".
When [Do not Specify] is selected, the SMB User Name and SMB Password that you have
specified in "Default User Name / Password (Send)" of File Transfer settings are applied.
10. Press [Change] under "Login User Name".
11. Enter the login user name of the destination computer, and then press [OK].
12. Press [Change] under "Login Password".
13. Enter the password of the destination computer, and then press [OK].
14. Enter the password again to confirm, and then press [OK].
15. Press [Folder].
16. Check that [SMB] is selected.
17. Press [Change] or [Browse Network], and then specify the folder.
To specify a folder, you can either enter the path manually or locate the folder by browsing the
network.
18. Press [Connection Test] to check the path is set correctly.
85
Page 88

5. Scan
19. Press [Exit].
If the connection test fails, check the settings, and then try again.
20. Press [OK].
21. Press [Exit].
22. Press the [User Tools/Counter] key.
Locating the SMB folder manually
1. Press [Change] under "Path".
2. Enter the path where the folder is located.
For example: if the name of the destination computer is "User", and the folder name is "Share", the
path will be \\User\Share.
If the network does not allow automatic obtaining of IP addresses, include the destination
computer's IP address in the path. For example: if the IP address of the destination computer is
"192.168.0.191", and the folder name is "Share", the path will be \\192.168.0.191\Share.
3. Press [OK].
If the format of the entered path is not correct, a message appears. Press [Exit], and then enter the
path again.
Locating the SMB folder using Browse Network
1. Press [Browse Network].
The client computers sharing the same network as the machine appear.
Network display only lists client computers you are authorized to access.
2. Select the group that contains the destination computer.
3. Select the computer name of the destination computer.
Shared folders under it appear.
86
Page 89

You can press [Up One Level] to switch between levels.
4. Select the folder you want to register.
5. Press [OK].
Deleting an SMB Registered Folder
1. Press the [User Tools/Counter] key.
Basic Procedure When Using Scan to Folder
2. Press [Address Book Mangmnt].
3. Check that [Program / Change] is selected.
4. Select the name whose folder you want to delete.
Press the name key, or enter the registered number using the number keys.
You can search by the registered name, user code, folder name, or e-mail address.
5. Press [Folder].
6. Press the protocol which is not currently selected.
A confirmation message appears.
7. Press [Yes].
8. Press [OK].
9. Press [Exit].
10. Press the [User Tools/Counter] key.
87
Page 90

5. Scan
Entering the Path to the Destination Manually
1. Press [Manual Entry].
2. Press [SMB].
3. Press [Manual Entry] on the right side of the path field.
4. Enter the path for the folder.
In the following example path, the shared folder name is "user" and the computer name is
"desk01":
\\desk01\user
5. Press [OK].
6. Depending on the destination setting, enter the user name for logging in to the computer.
Press [Manual Entry] to the right of the user name field to display the soft keyboard.
7. Depending on the destination setting, enter the password for logging in to the computer.
Press [Manual Entry] for the password to display the soft keyboard.
8. Press [Connection Test].
A connection test is performed to check whether the specified shared folder exists.
9. Check the connection test result, and then press [Exit].
10. Press [OK].
88
Page 91

CPL011
Basic Procedure for Sending Scan Files by E-mail
Basic Procedure for Sending Scan Files by Email
1. Press the [Home] key on the top left of the control panel, and press the [Scanner] icon on
the [Home] screen.
2. Make sure that no previous settings remain.
If a previous setting remains, press the [Reset] key.
3. Press the [E-mail] tab.
4. If necessary, specify the scan settings according to the original.
Example: Scanning the document in color mode, and saving as a PDF file.
89
Page 92

5. Scan
• Press [Scan Settings], and then press [Full Colour: Text / Photo] in the [Original Type] tab.
• Press [PDF] under [Send File Type / Name].
5. If necessary, press [Next Original Wait].
6. Specify the destination.
You can specify multiple destinations.
7. To specify the e-mail sender, press [Sender Name].
8. To use Message Disposition Notification, press [Recept. Notice].
If you select [Recept. Notice], the selected e-mail sender will receive e-mail notification when the email recipient has opened the e-mail.
9. Place originals.
If scanning does not start automatically, press the [Start] key.
Registering an E-mail Destination
1. Press the [User Tools/Counter] key.
2. Press [Address Book Mangmnt].
3. Check that [Program / Change] is selected.
4. Press [New Program].
5. Press [Change] under "Name".
The name entry display appears.
6. Enter the name, and then press [OK].
7. Press the key for the classification you want to use under "Select Title".
The keys you can select are as follows:
• [Frequent]: Added to the page that is displayed first.
90
• [AB], [CD], [EF], [GH], [IJK], [LMN], [OPQ], [RST], [UVW], [XYZ], [1] to [10]: Added to the
list of items in the selected title.
Page 93

You can select [Frequent] and one more key for each title.
8. Press [E-mail].
9. Press [Change] under "E-mail Address".
10. Enter the e-mail address.
Basic Procedure for Sending Scan Files by E-mail
11. Press [OK].
12. Press [OK].
13. Press [Exit].
14. Press the [User Tools/Counter] key.
Deleting an E-mail Destination
1. Press the [User Tools/Counter] key.
2. Press [Address Book Mangmnt].
3. Check that [Program / Change] is selected.
4. Select the name whose e-mail address you want to delete.
Press the name key, or enter the registered number using the number keys. You can search by the
registered name, user code, folder name, or e-mail address.
5. Press [E-mail].
6. Press [Change] under "E-mail Address".
91
Page 94

5. Scan
7. Press [Delete All], and then press [OK].
8. Press [OK].
9. Press [Exit].
10. Press the [User Tools/Counter] key.
Entering an E-mail Address Manually
1. Press [Manual Entry].
2. Enter the e-mail address.
3. Press [OK].
92
Page 95

CPL011
Basic Procedure for Storing Scan Files
Basic Procedure for Storing Scan Files
• You can specify a password for each stored file. Files that are not password-protected can be
accessed by other users on the same local area network using DeskTopBinder. We recommend
that you protect stored files from unauthorized access by specifying passwords.
• Scan file stored in the machine may be lost if some kind of failure occurs. We advise against using
the hard disk to store important files. The supplier shall not be responsible for any damage that may
result from the loss of files. For long-term storage of files, we recommend the use of DeskTopBinder.
For details, contact your local dealer, or see the documentation for DeskTopBinder.
1. Press the [Home] key on the top left of the control panel, and press the [Scanner] icon on
the [Home] screen.
2. Make sure that no previous settings remain.
If a previous setting remains, press the [Reset] key.
3. Press [Store File].
4. Press [Store to HDD].
5. If necessary, specify file information, such as [User Name], [File Name], and [Password].
• User Name
93
Page 96

5. Scan
Press [User Name], and then select a user name. To specify an unregistered user name, press
[Manual Entry], and then enter the name. After specifying a user name, press [OK].
• File Name
Press [File Name], enter a file name, and then press [OK].
• Password
Press [Password], enter a password, and then press [OK]. Re-enter the password for
confirmation, and then press [OK].
6. Press [OK].
7. If necessary, press [Scan Settings] to specify scanner settings such as resolution and scan
size.
8. If necessary, press [Next Original Wait].
9. Place originals.
If scanning does not start automatically, press the [Start] key.
Checking a Stored File Selected from the List
This section explains how to preview a file selected from the list of stored files.
1. Press [Select Stored File].
2. From the list of stored files, select the file you want to check.
You can select more than one file.
3. Press [Preview].
94
Page 97

Specifying the File Type
Specifying the File Type
This section explains the procedure for specifying the file type of a file you want to send.
File types can be specified when sending files by e-mail or Scan to Folder, sending stored files by e-mail
or Scan to Folder, and saving files on a removable memory device.
You can select one of the following file types:
• Single Page: [TIFF / JPEG], [PDF], [PDF (JPEG 2000)] ,[PDF/A]
If you select a single-page file type when scanning multiple originals, one file is created for each
single page and the number of files sent is the same as the number of pages scanned.
• Multi-page: [TIFF], [PDF], [PDF (JPEG 2000)] ,[PDF/A]
If you select a multi-page file type when scan multiple originals, scanned pages are combined and
sent as a single file.
Selectable file types differ depending on the scan settings and other conditions. For details about
file types, see "Notes About and Limitations of File Types", Scan .
1. Press [Send File Type / Name].
2. Select a file type.
3. Press [OK].
95
Page 98

5. Scan
Specifying Scan Settings
1. Press [Scan Settings].
2. Specify resolution, scan size, and other settings, as required.
96
3. Press [OK].
Page 99

6. Document Server
This chapter describes frequently used Document Server functions and operations. For the information
not included in this chapter, see Copy/ Document Server on the supplied CD-ROM.
Storing Data
This section describes the procedure for storing documents on the Document Server.
• A document accessed with a correct password remains selected even after operations are
complete, and it can be accessed by other users. After the operation, be sure to press the [Reset]
key to cancel the document selection.
• The user name registered to a stored document in the Document Server is to identify the document
creator and type. It is not to protect confidential documents from others.
• When scanning by the scanner, make sure that all other operations are ended.
File Name
A file name such as "COPY0001" and "COPY0002" is automatically attached to the scanned
document. You can change the file name.
User Name
You can register a user name to identify the user or user group that stored the documents. To assign
it, select the user name registered in the Address Book, or enter the name directly. Depending on
the security setting, [Access Privileges] may appear instead of [User Name]. For details about the
Address Book, see "Registering Addresses and Users for Scanner Functions", Connecting the
Machine/ System Settings .
Password
To prevent unauthorized printing, you can specify a password for any stored document. A
protected document can only be accessed if its password is entered. If a password is specified for
the documents, the key icon appears on the left side of the file name.
97
Page 100

CPL011
6. Document Server
1. Press the [Home] key on the top left of the control panel, and press the [Document Server]
icon on the [Home] screen.
2. Press [To Scanning Screen].
3. Press [User Name].
4. Specify a user name, and then press [OK].
The user names shown are names that were registered in the Address Book. To specify a name not
shown in the screen, press [Manual Entry], and then enter a user name.
5. Press [File Name].
6. Enter a file name, and then press [OK].
7. Press [Password].
8. Enter a password with the number keys, and then press [OK].
You can use four to eight digits for the password.
9. For double-check, enter the password again, and then press [OK].
10. Specify the original scanning conditions.
11. Place the original.
The original feeds into the machine automatically.
If [Press Start Key] is selected for [Feed Start Method], scanning starts when you press the [Start]
key.
The original is scanned.
12. Press [Finish Scanning] after all documents are scanned.
The document is saved in the Document Server.
98
 Loading...